webpack_qianfeng
v1.0.0
Published
# 1、安装webpack
Downloads
3

Readme
自定义vue脚手架
1、安装webpack
1.1 全局安装webpack
不建议: 全局安装将锁死webpack


注意:webpack默认入口文件是__dirname/src/index.js
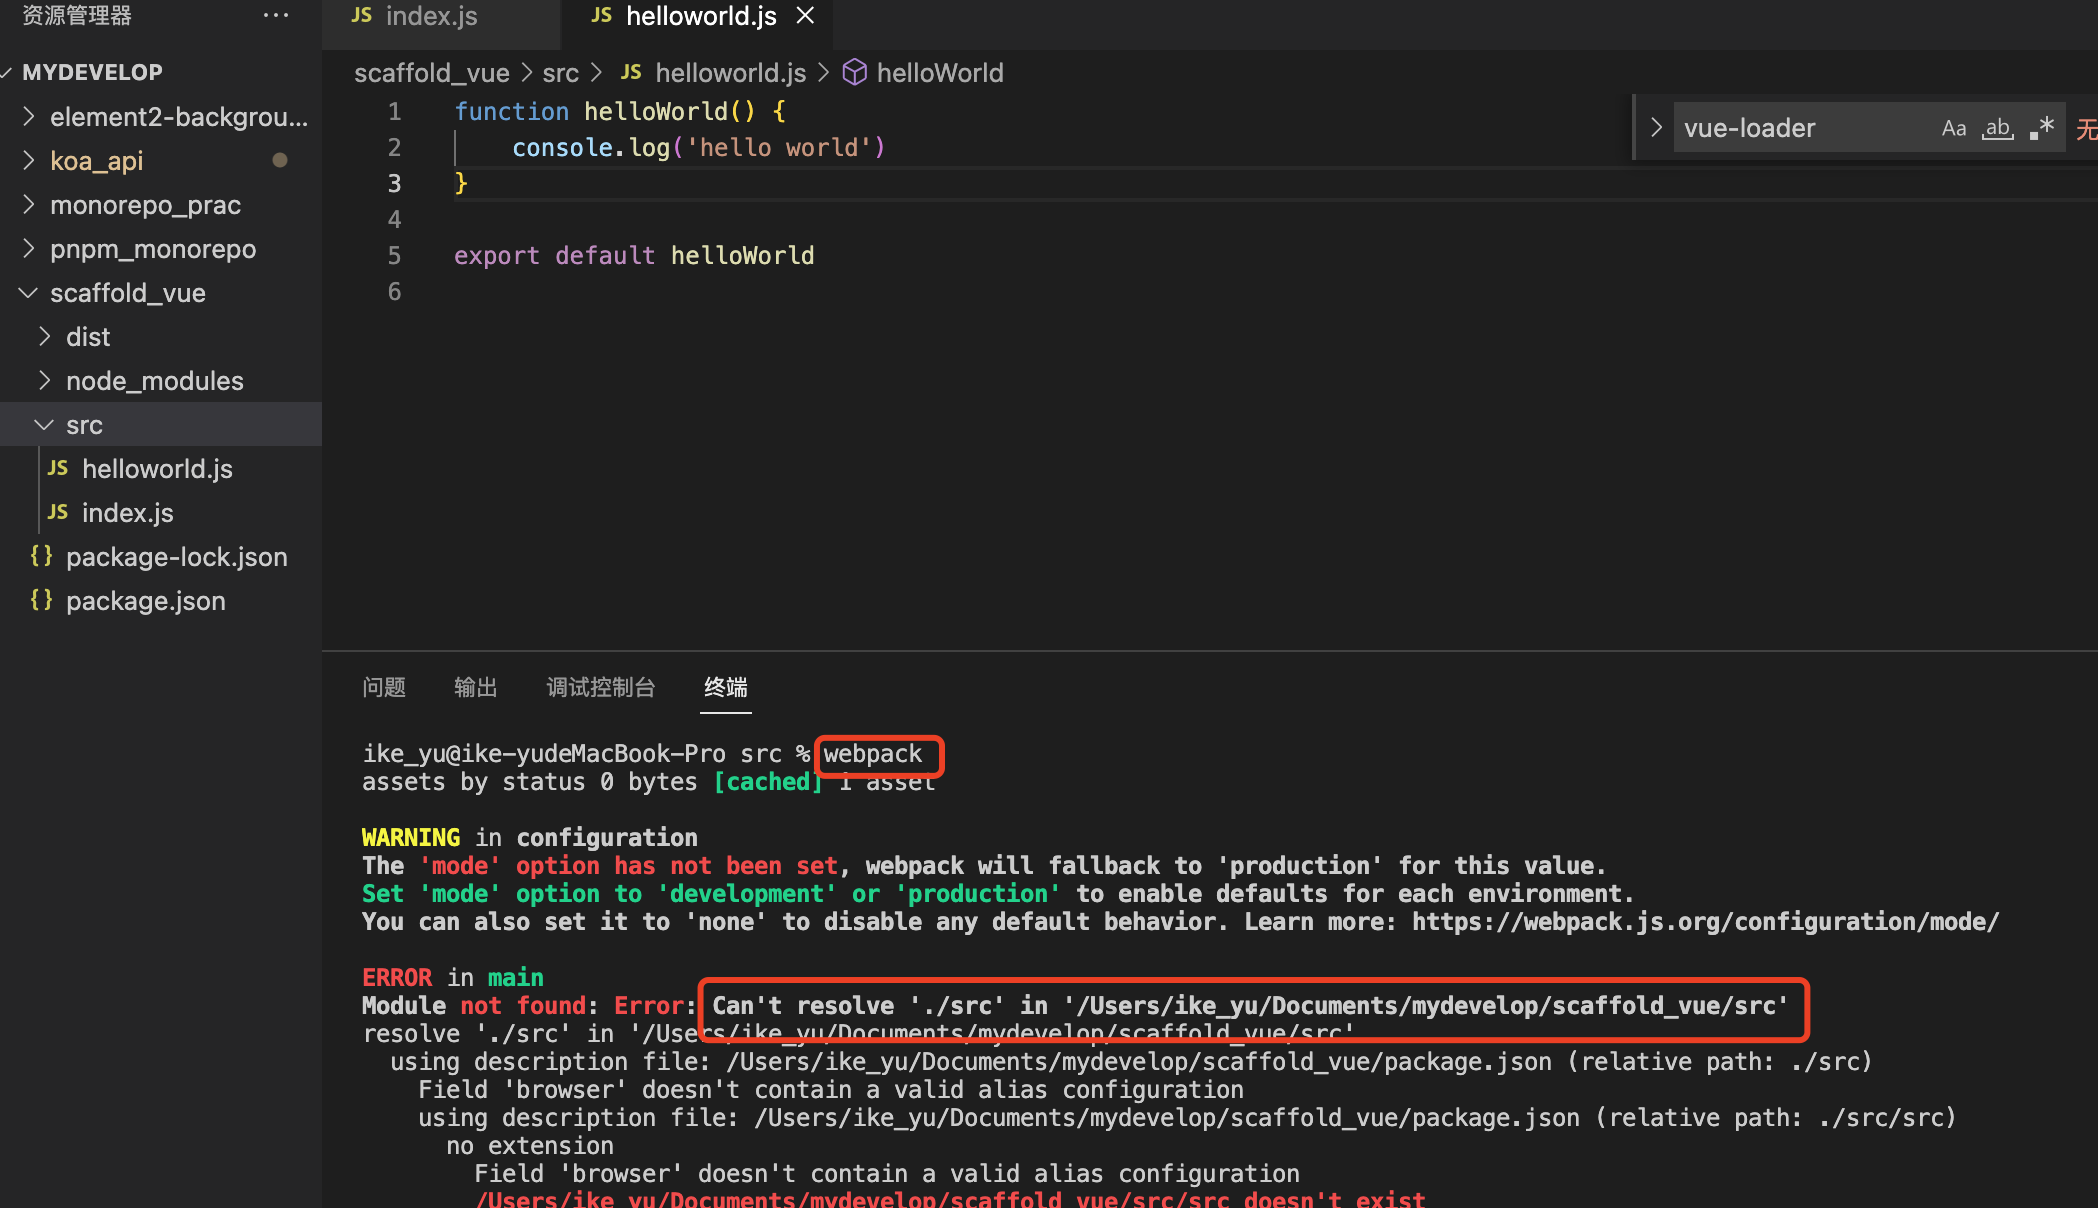
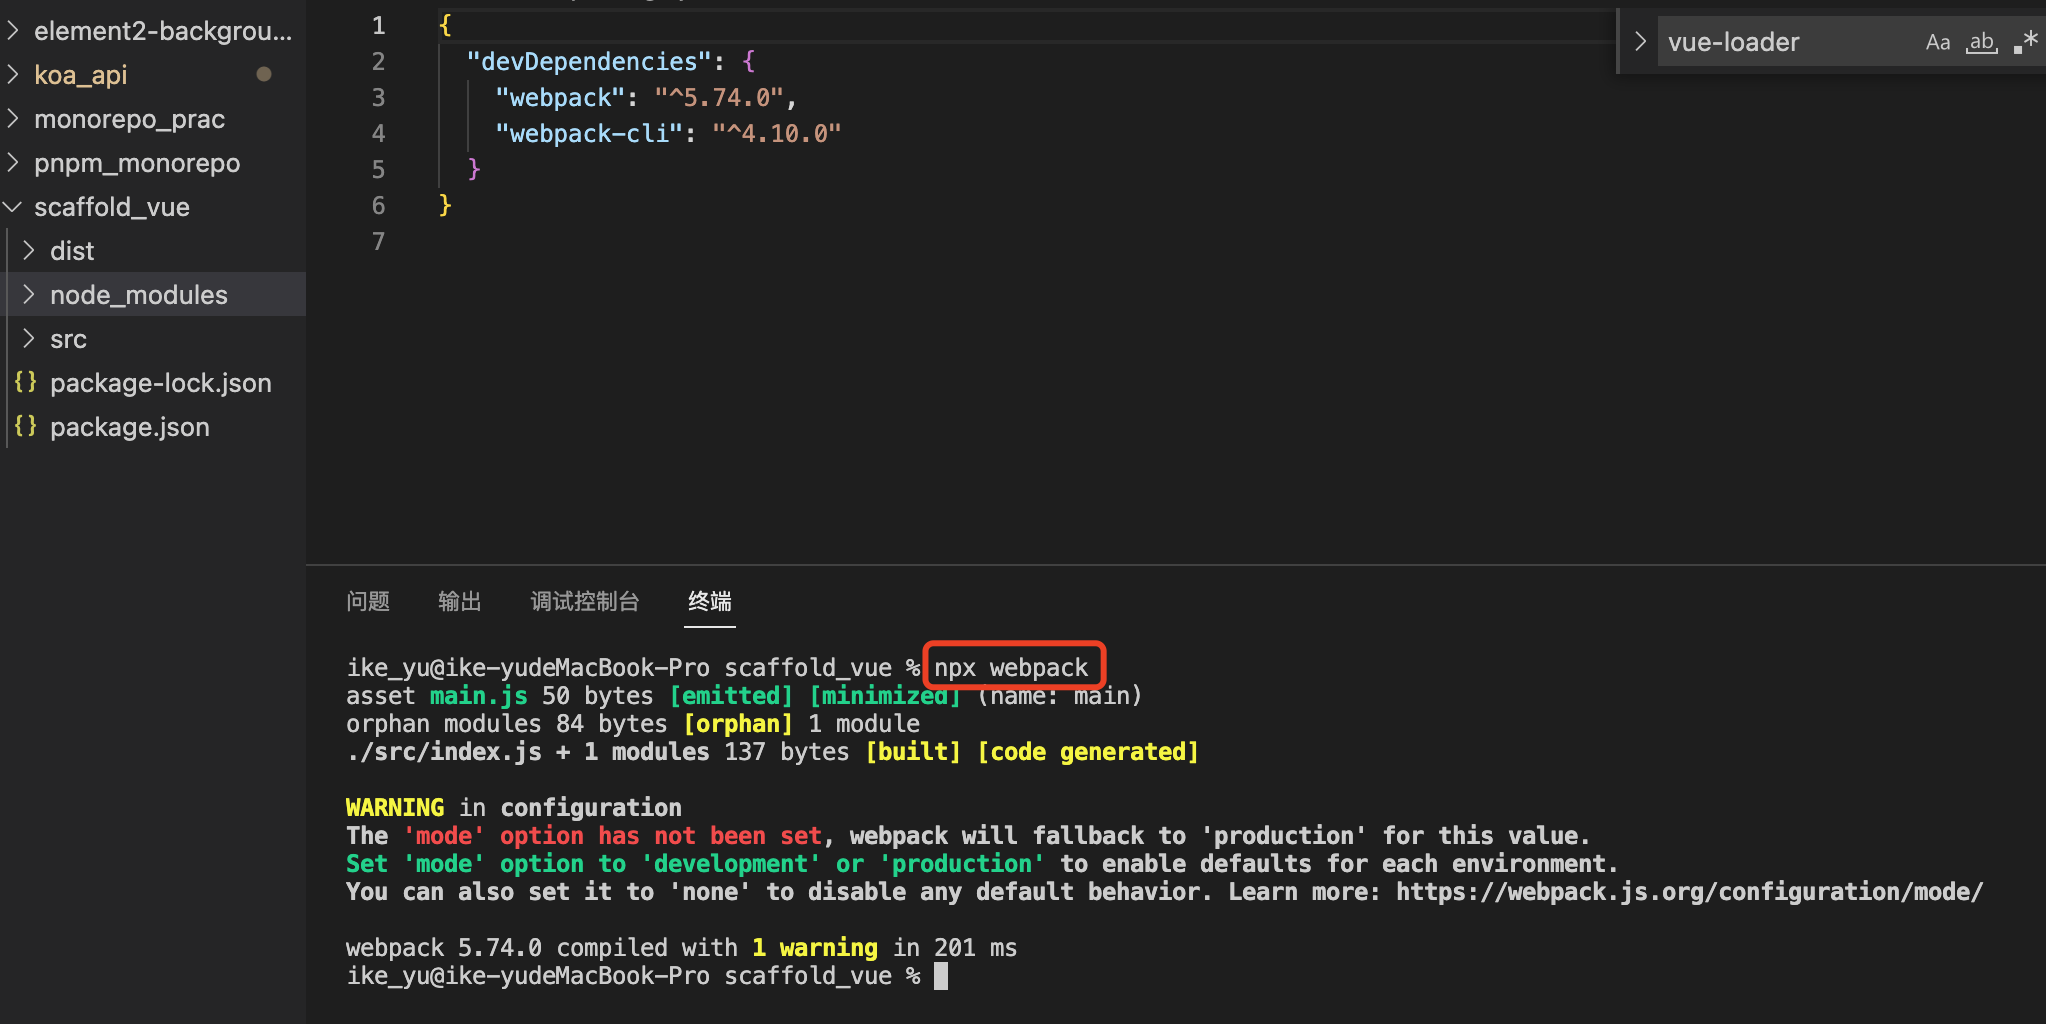
1.2 本地环境安装webpack
默认使用全局的webpack,要使用本地的webpack要用到npx
先从当前文件夹找,找不到再去node_modules里面找
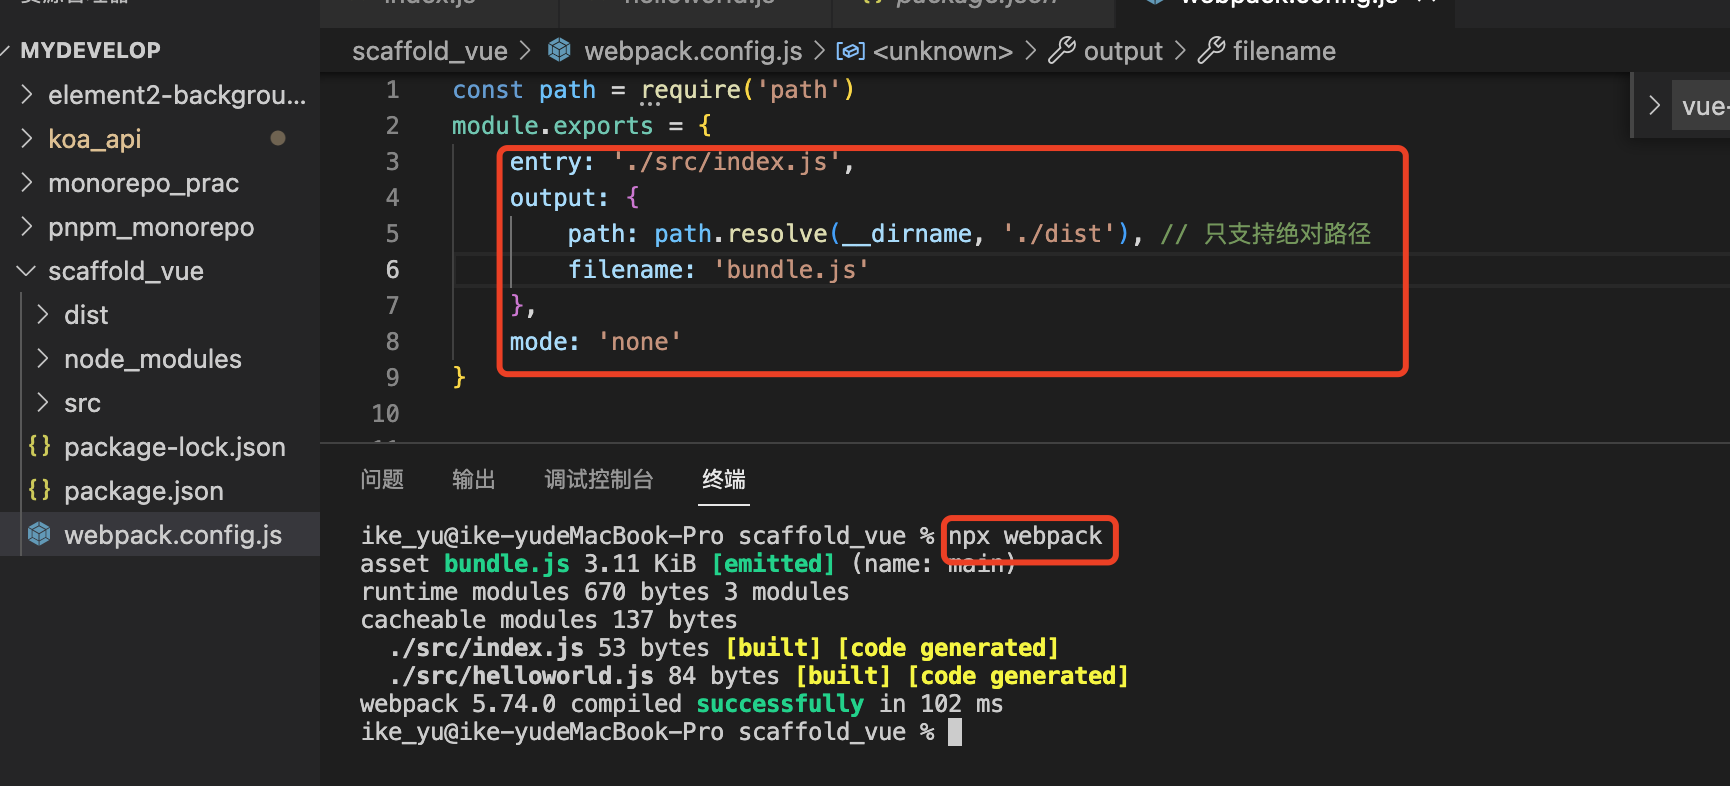
1.3 自定义webpack配置
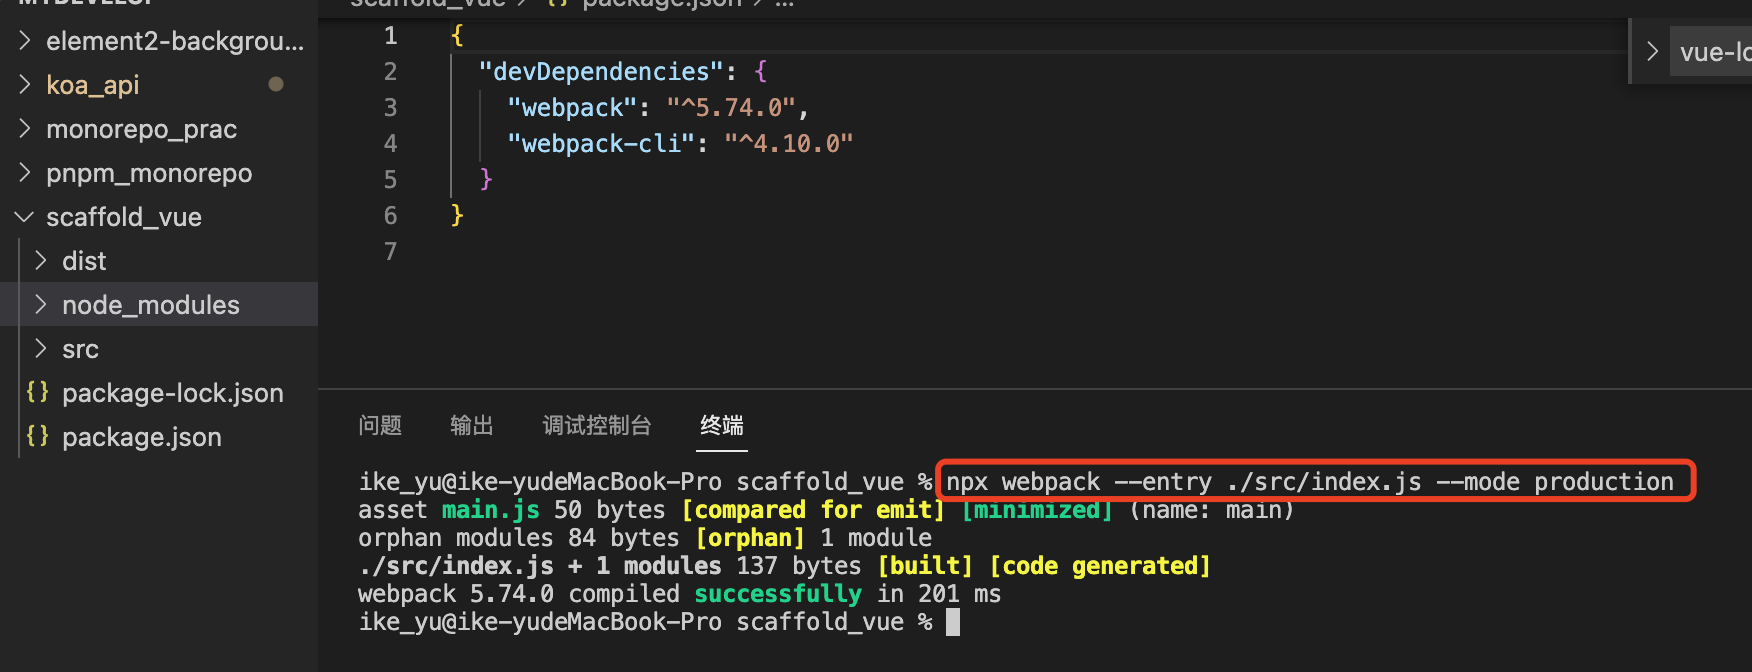
查看所有webpack配置指令
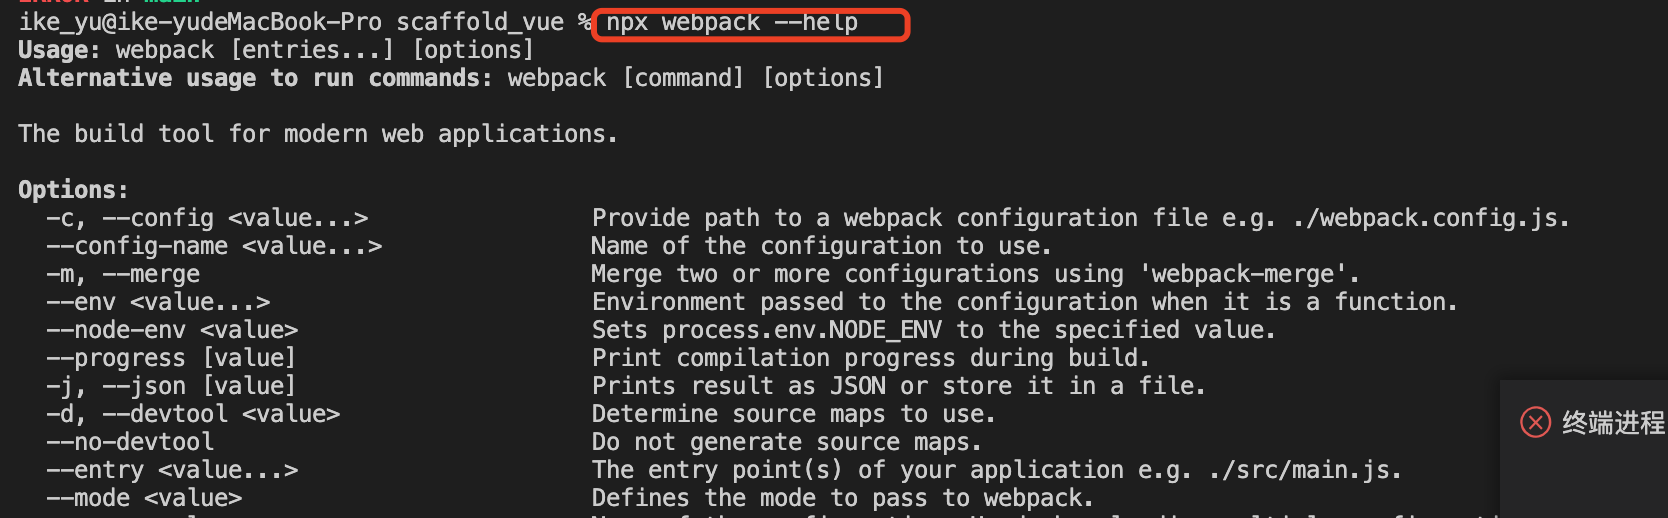
命令行方式:
配置方式:
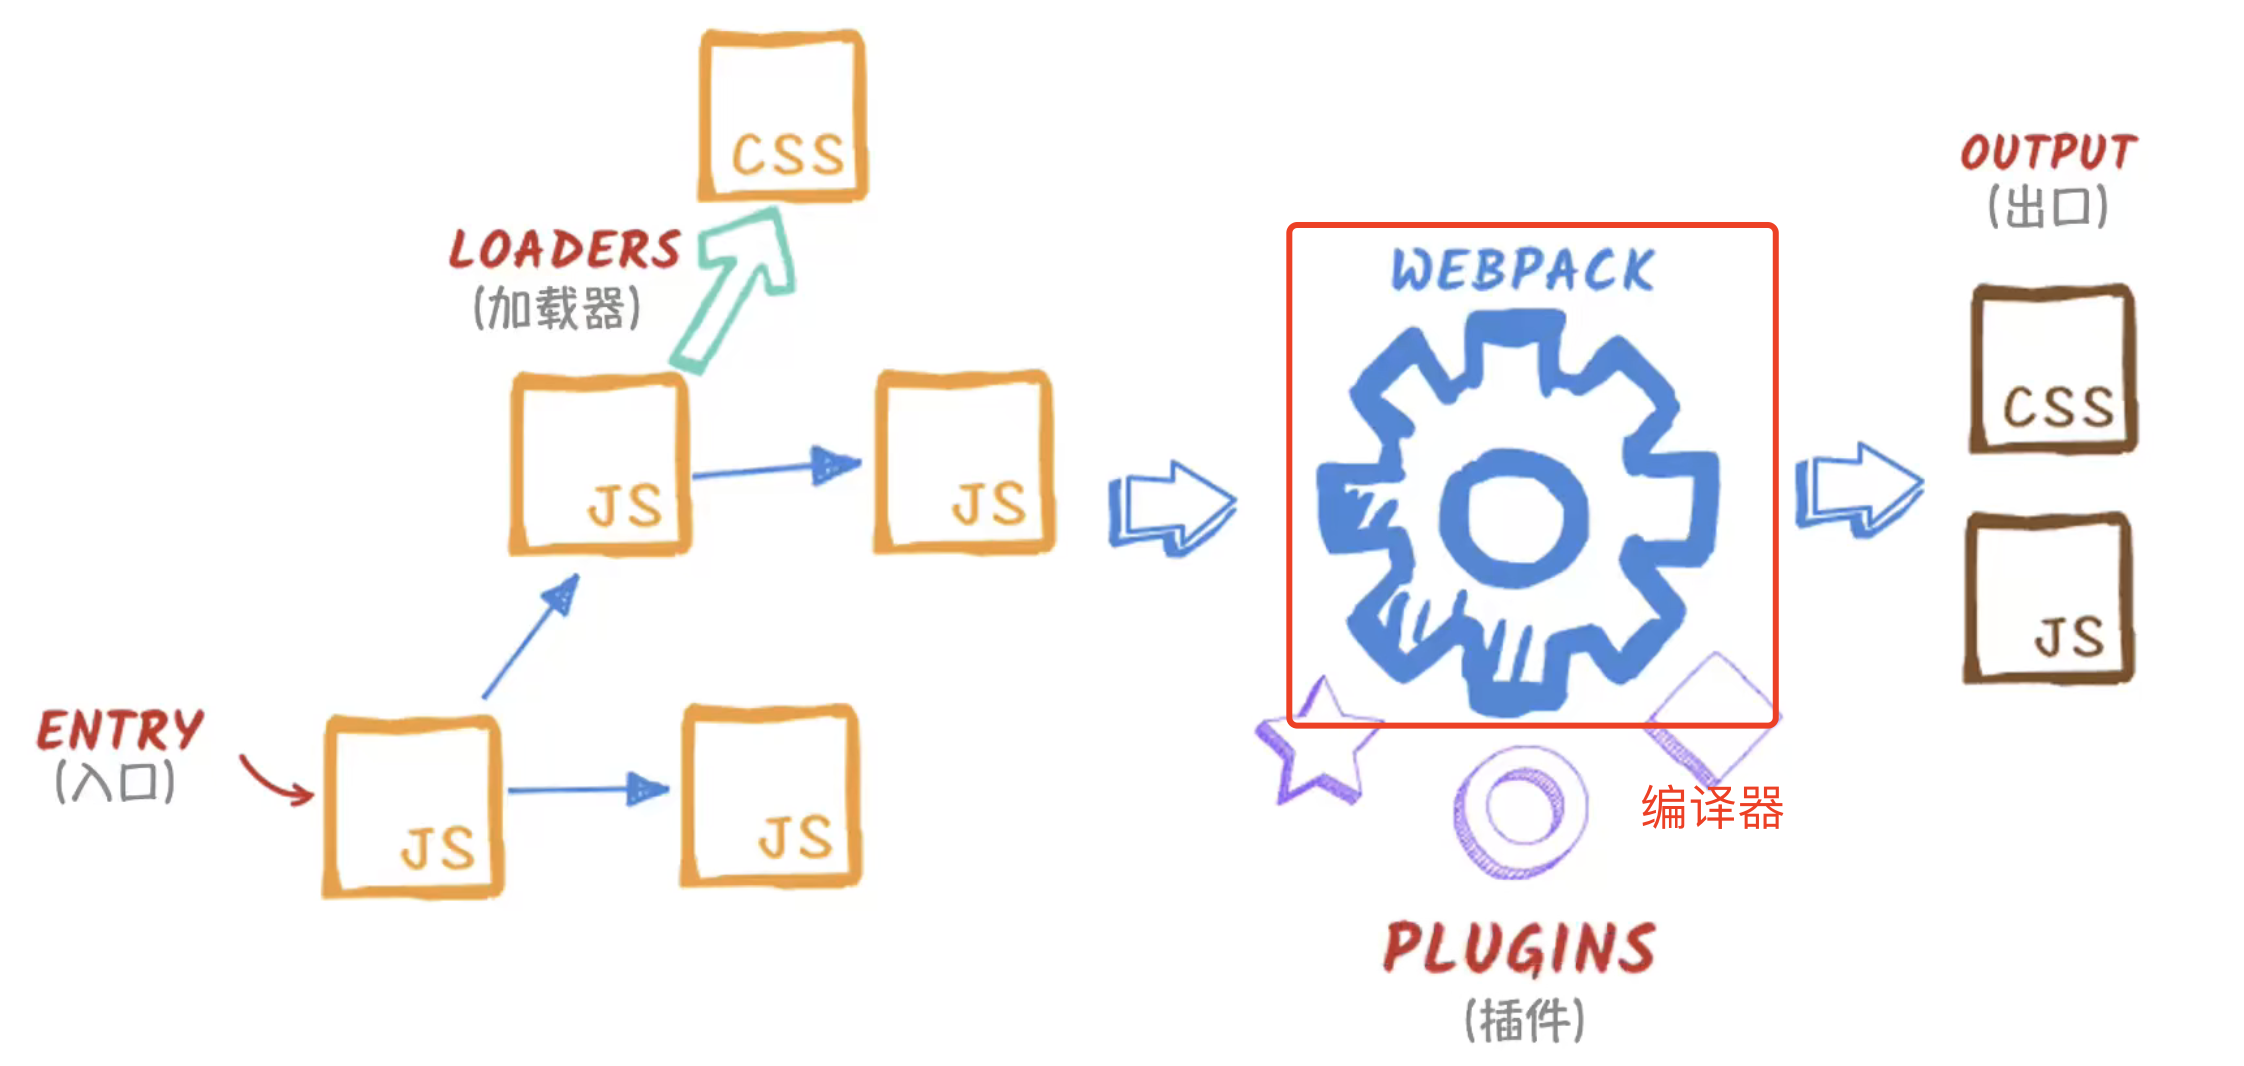
2、webpack插件
作用:打包优化、资源管理
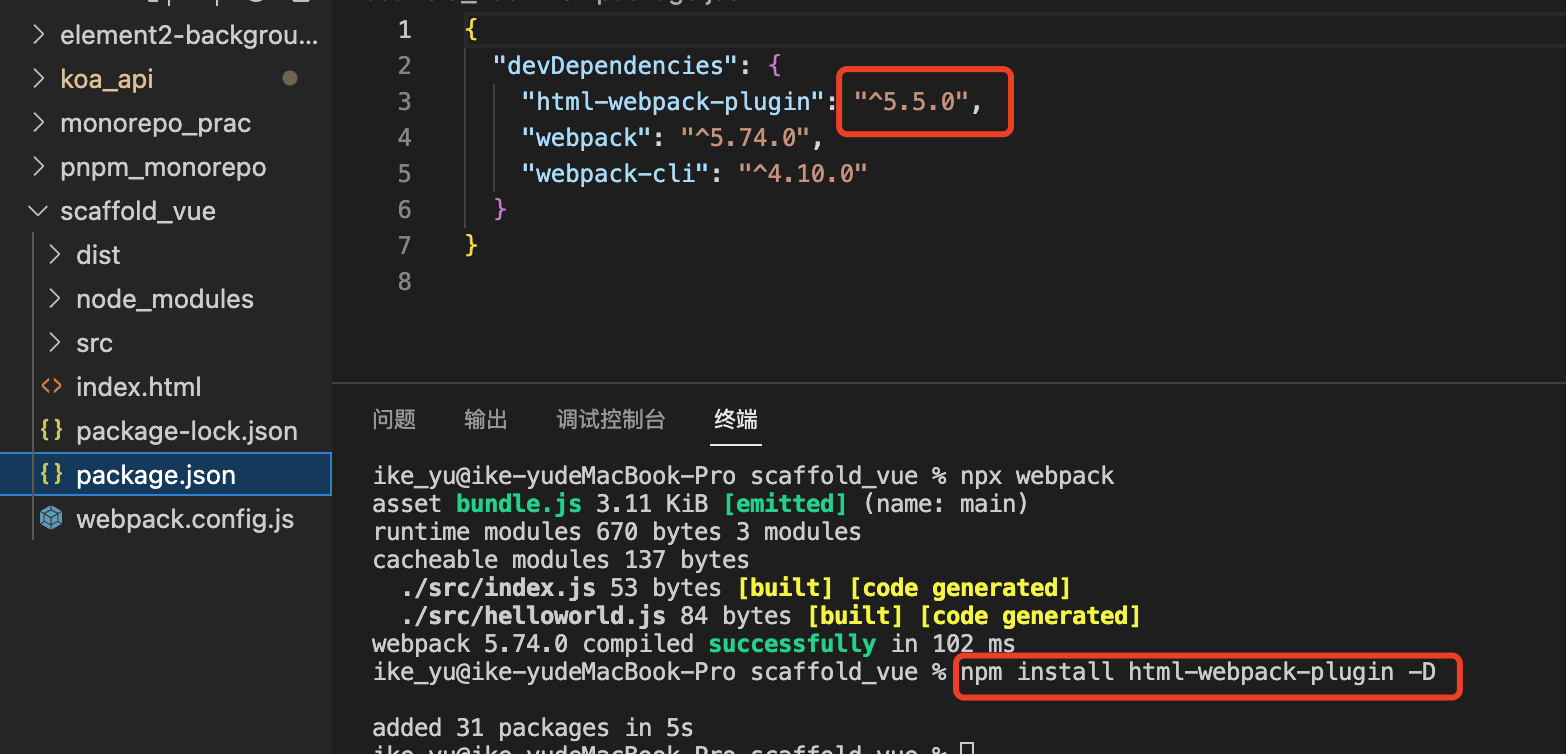
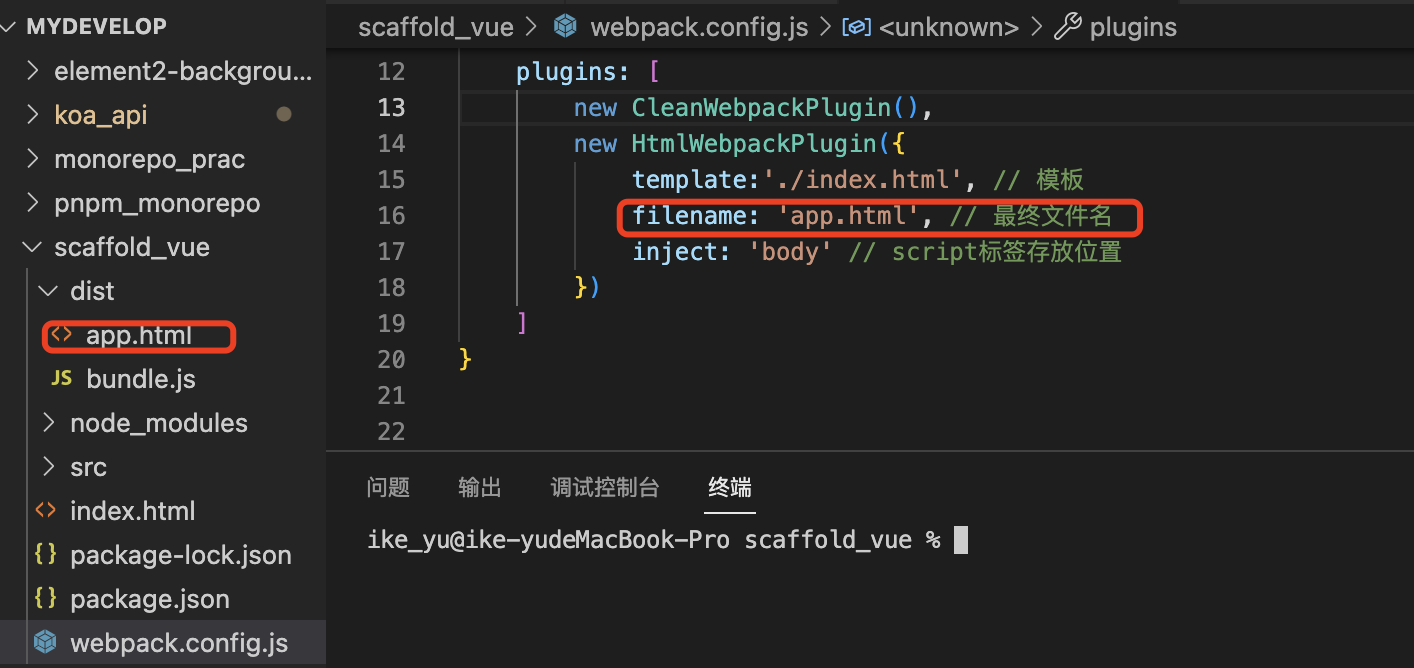
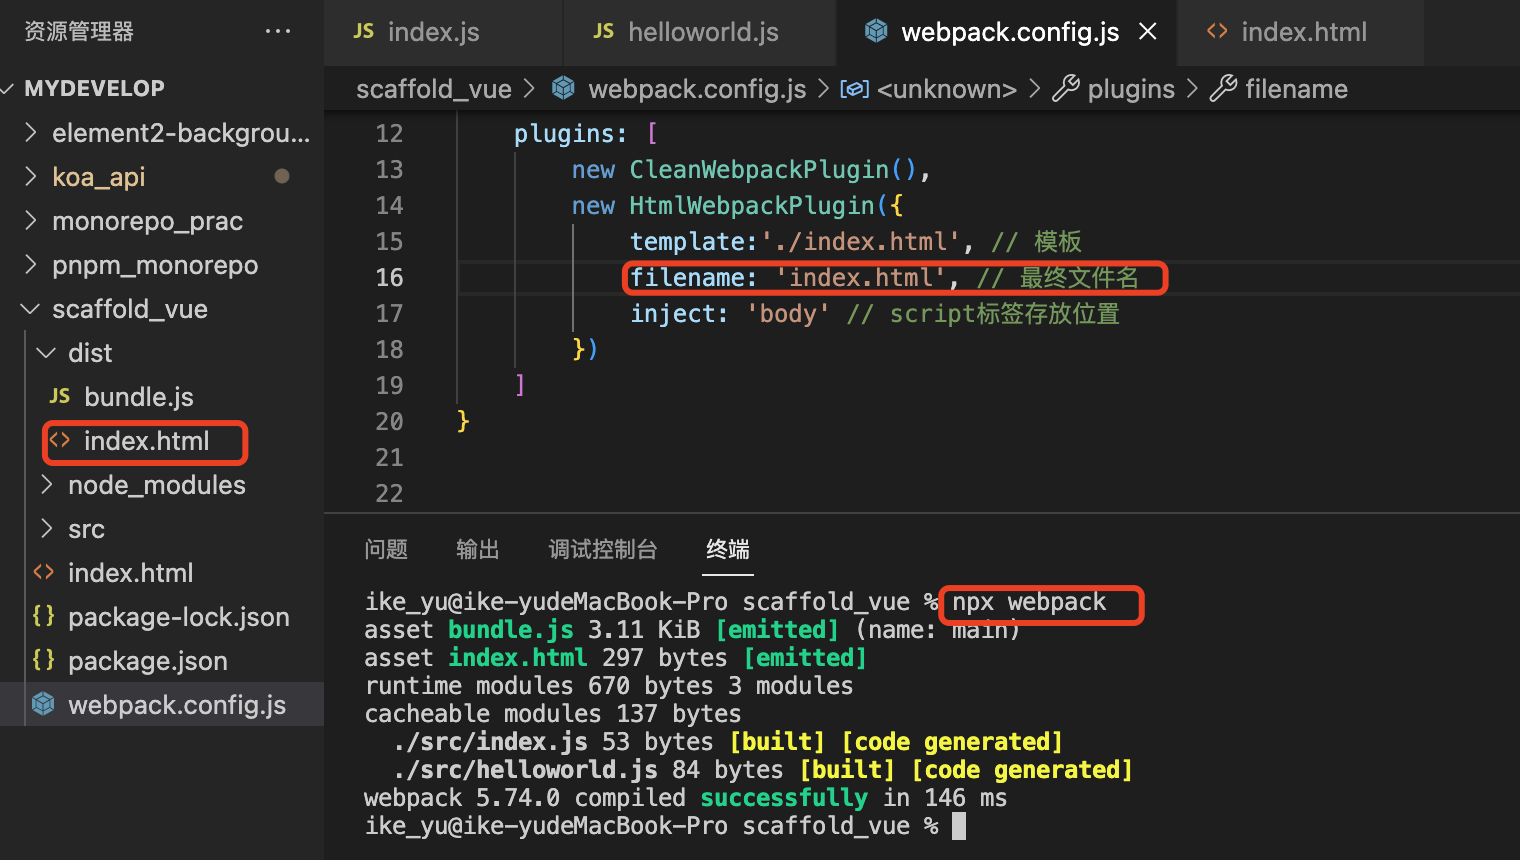
2.1 HtmlWebpackPlugin
作用:根据模板生成打包后的html文件
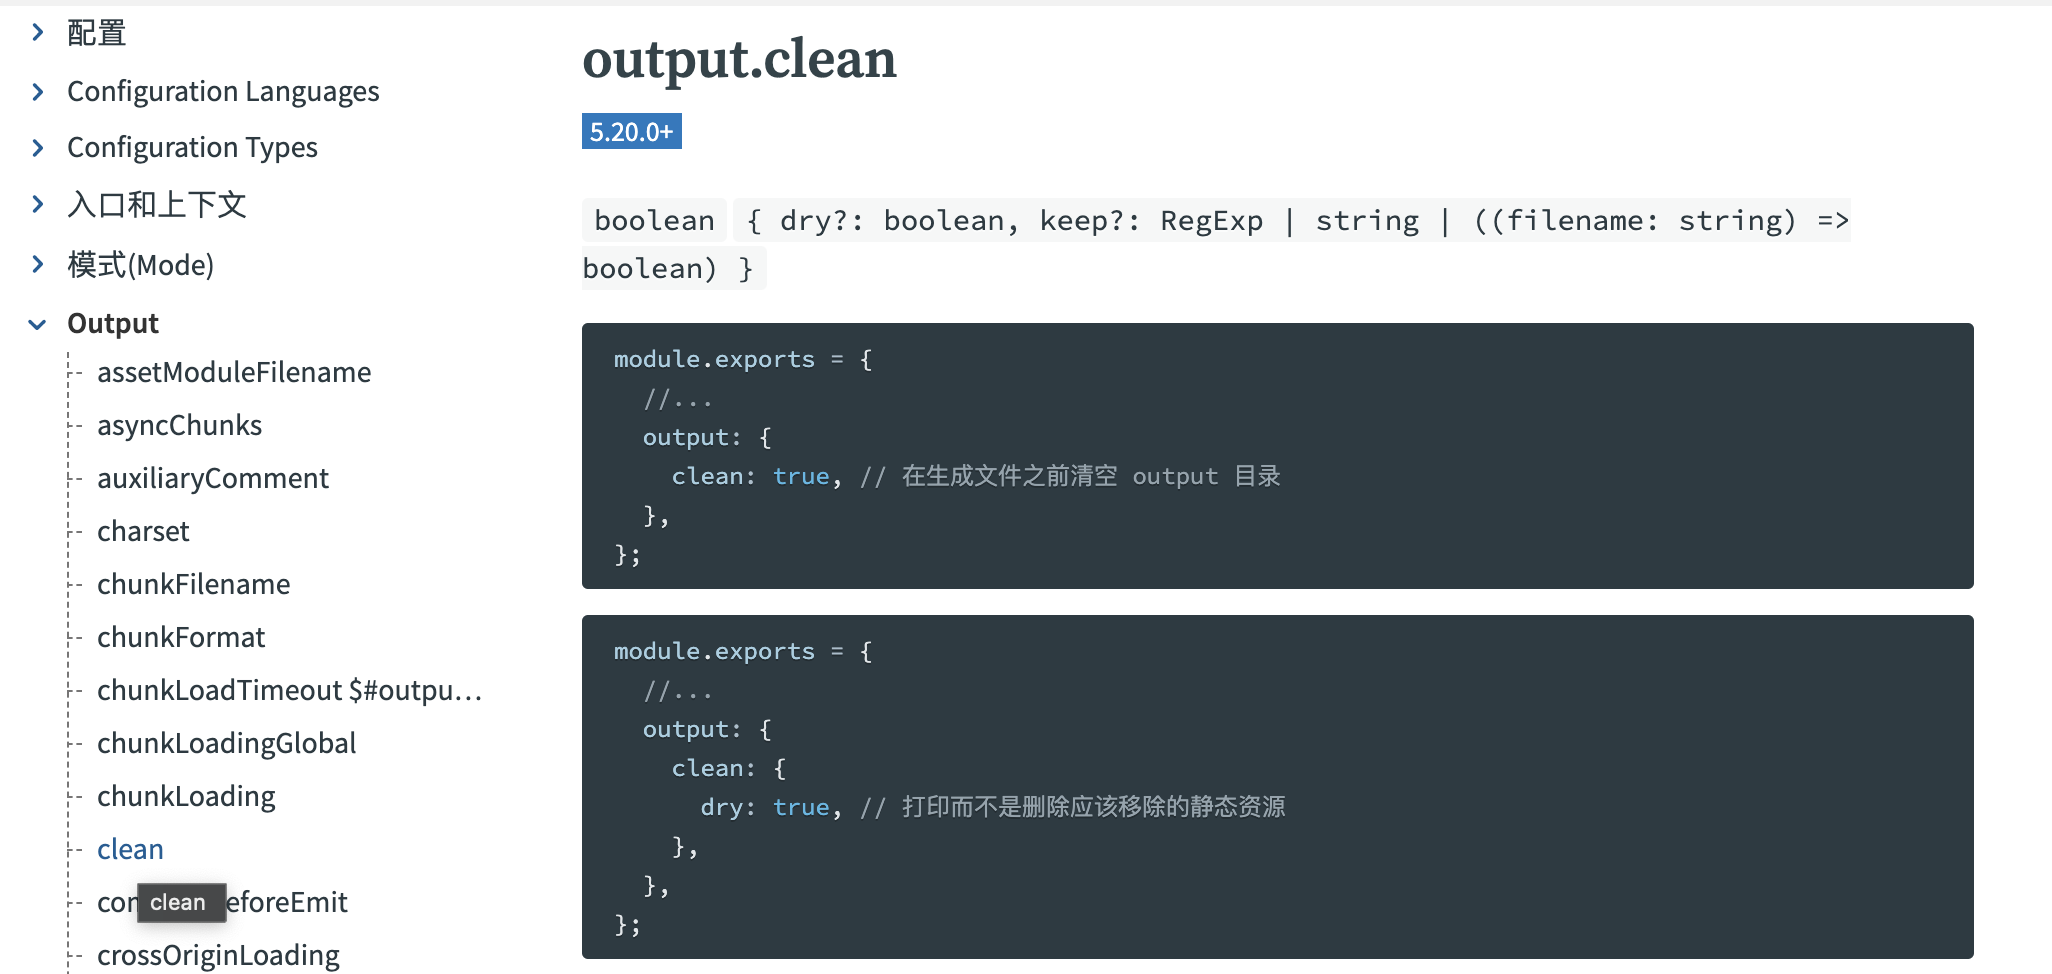
2.2 CleanWebpackPlugin
作用:每次打包前清除本地的dist文件夹
原先情况如上所示
最新版不需要该插件,只需output开启clean属性

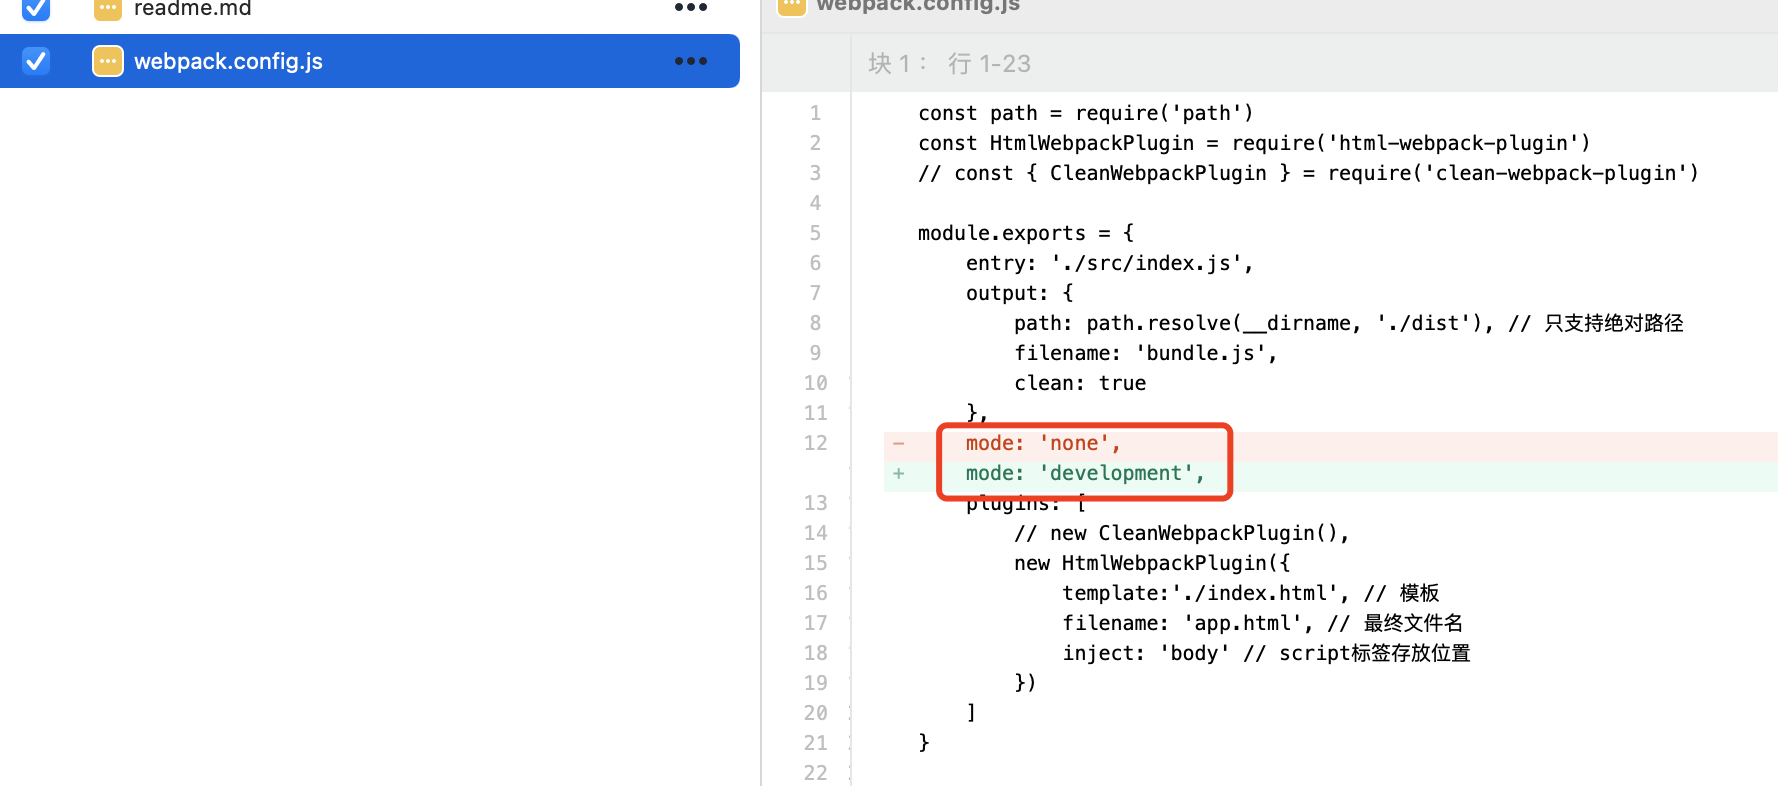
3、搭建开发环境
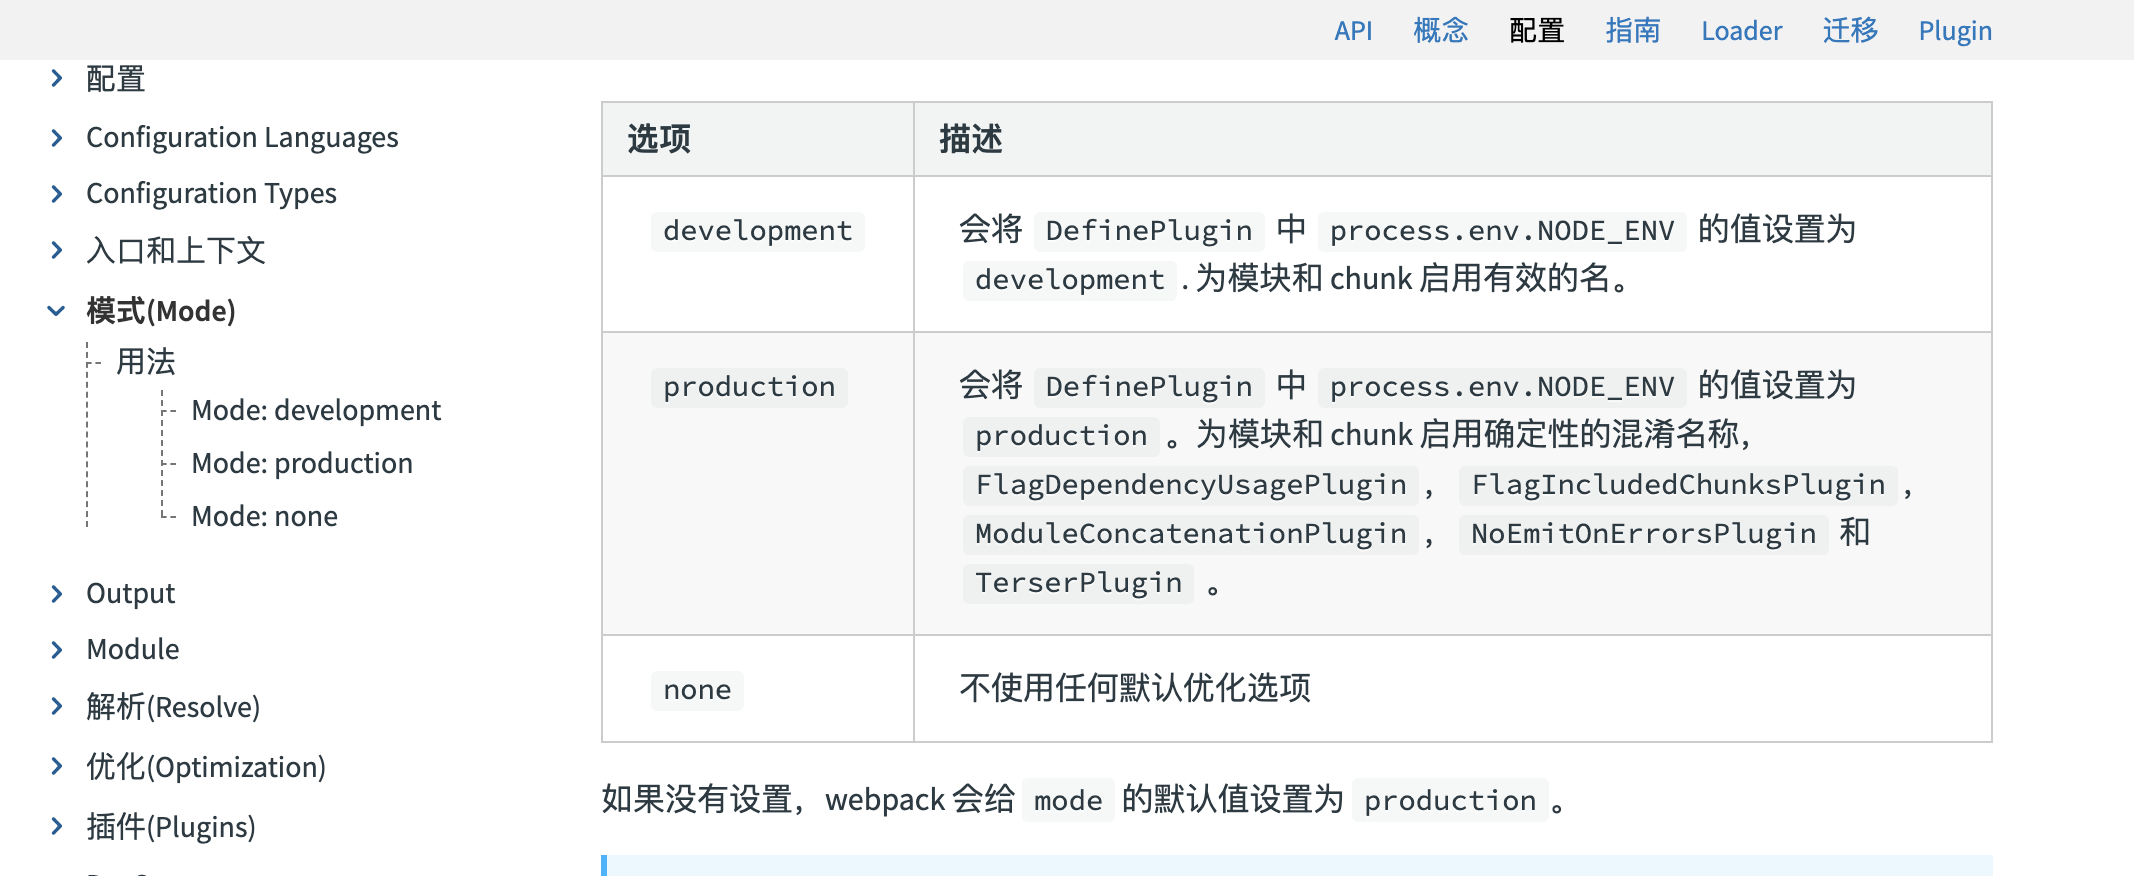
3.1 mode
作用:改变环境变量NODE_ENV的值
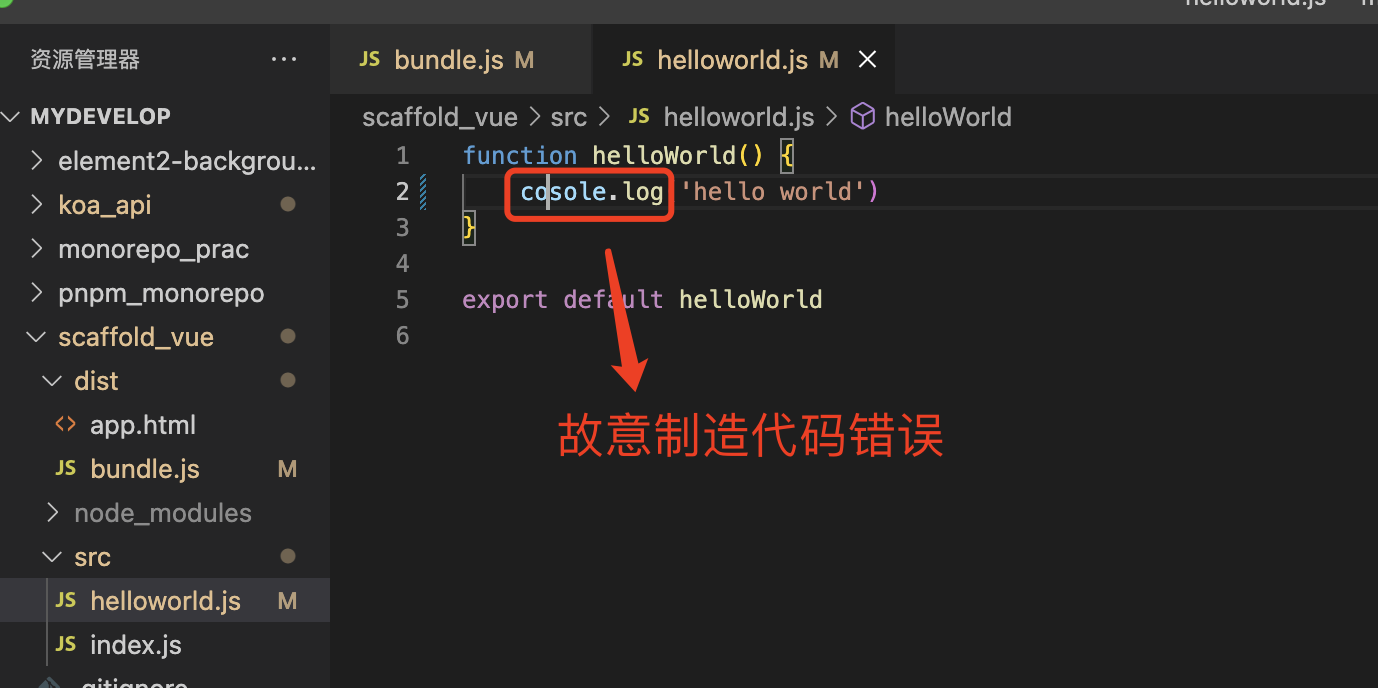
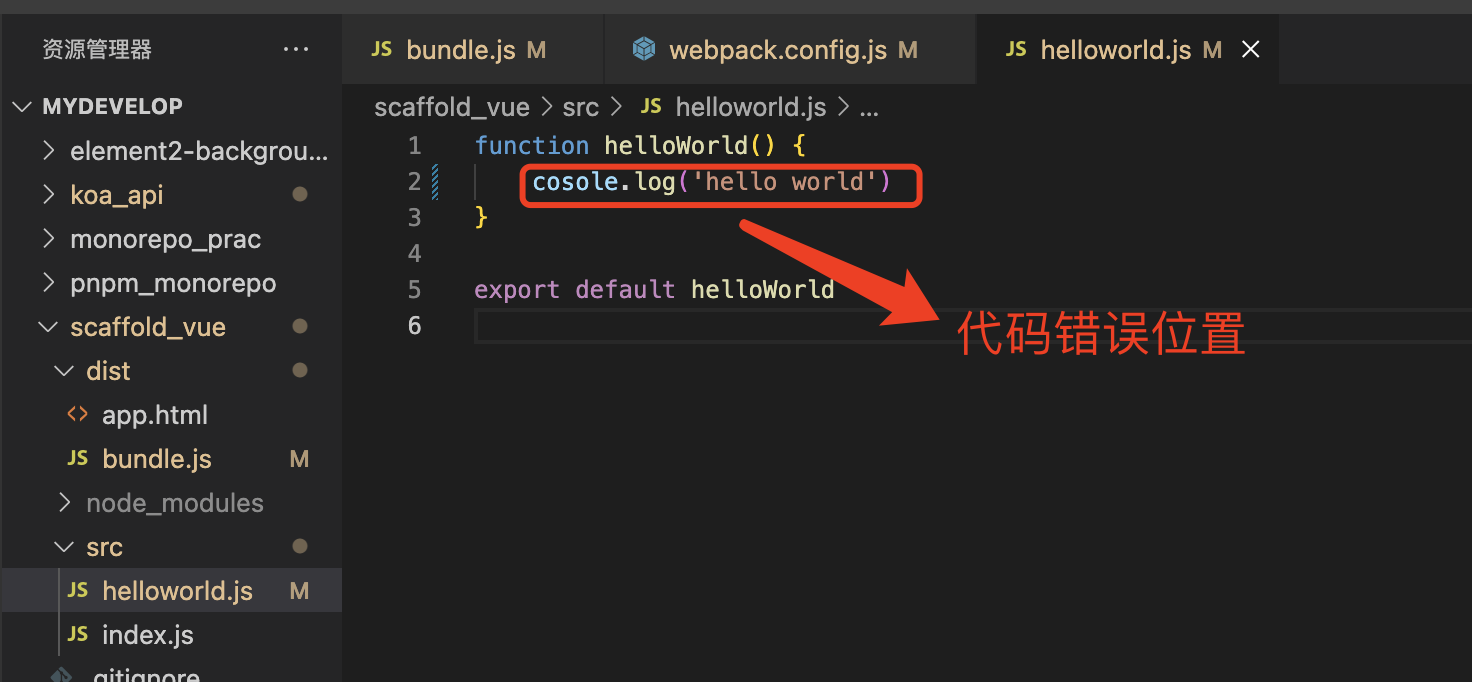
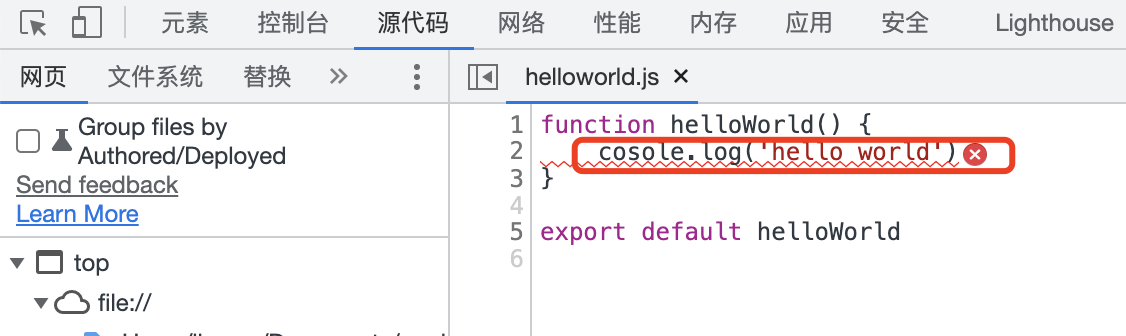
3.2 devtool
作用:代码出错后可以快速识别出错文件区域
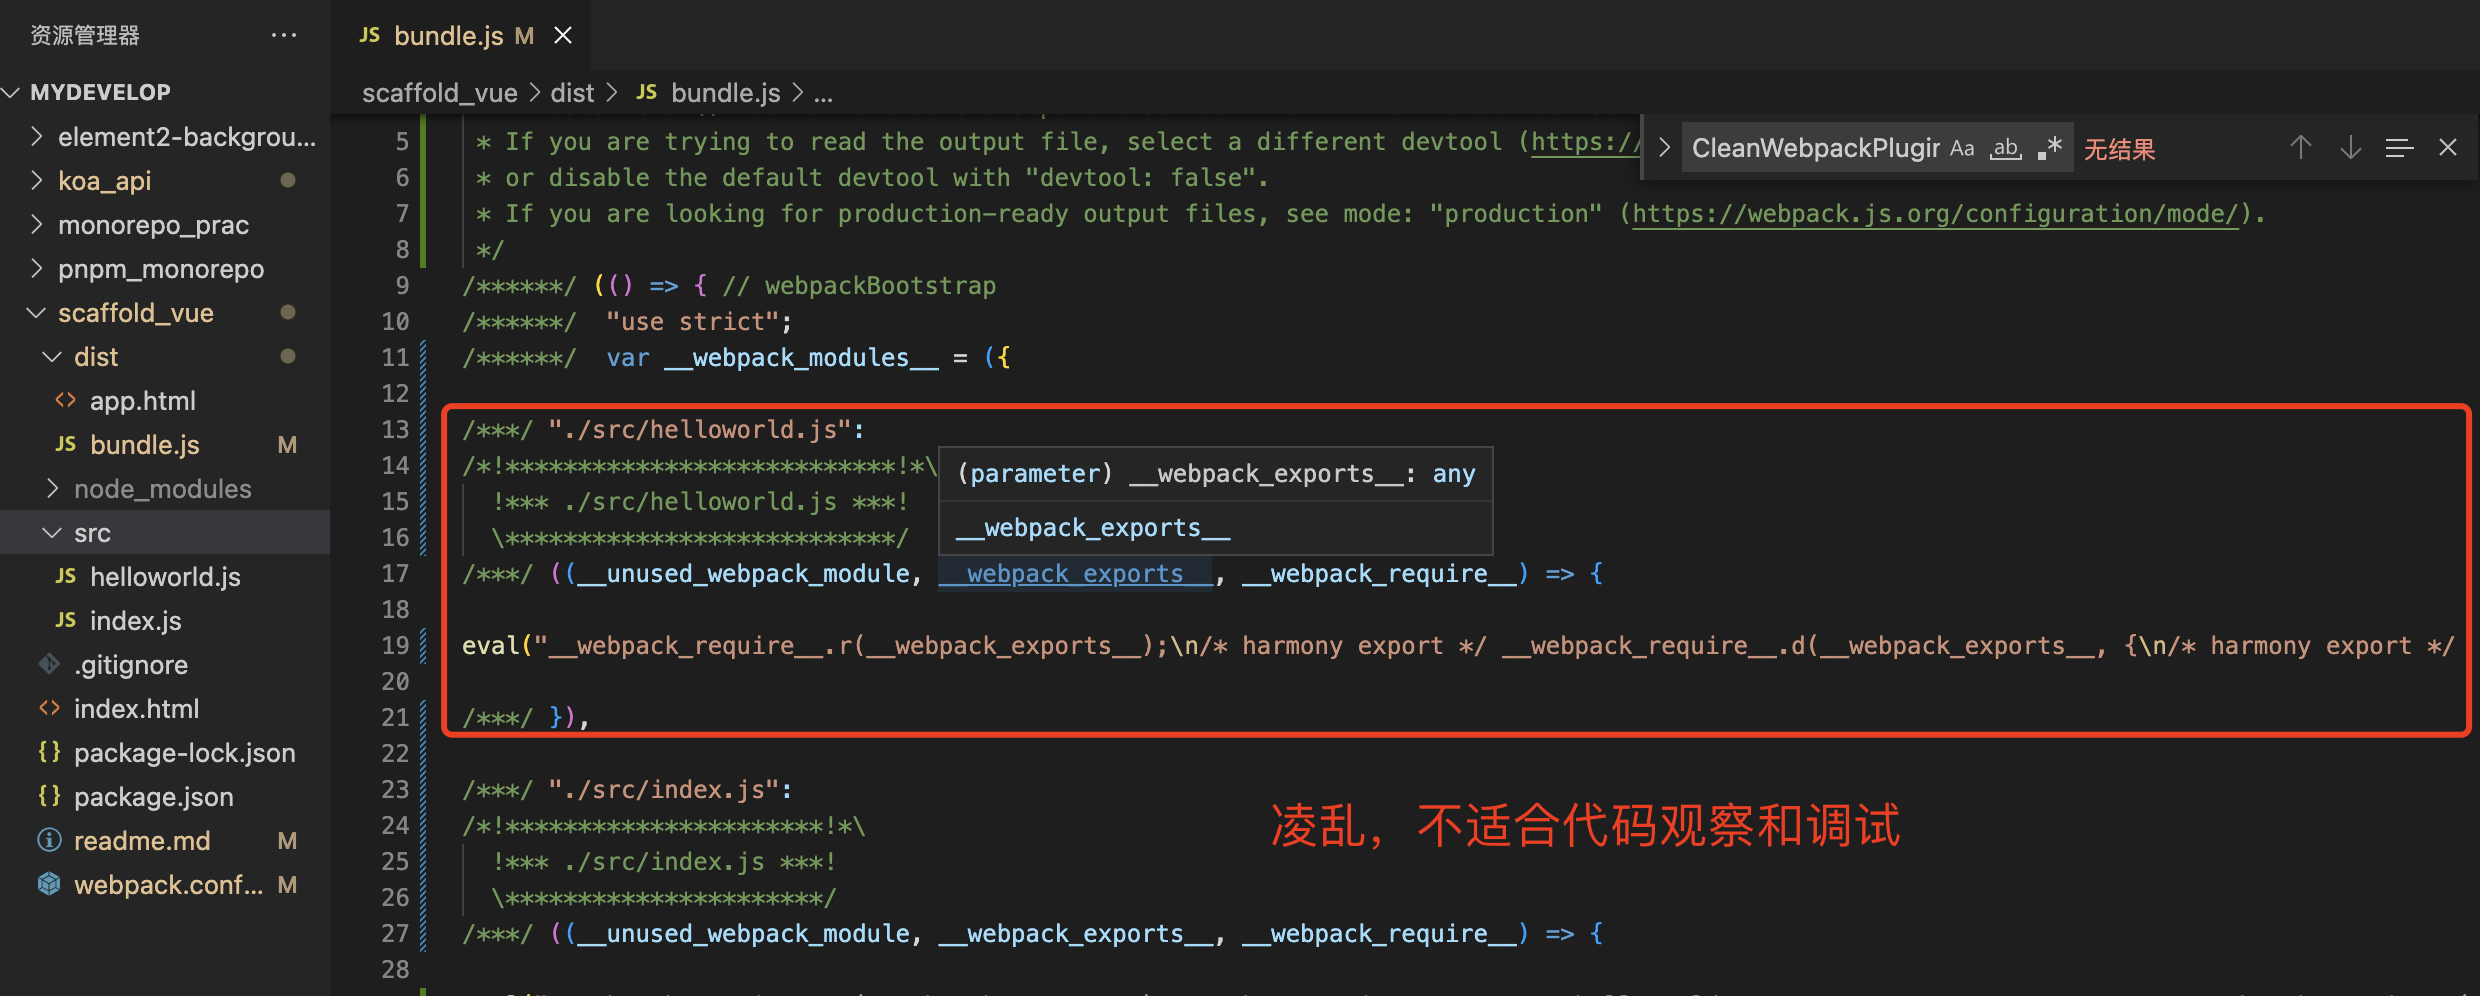

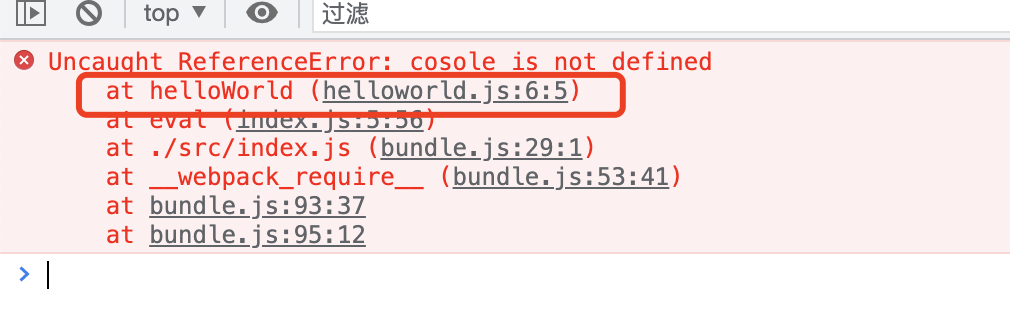
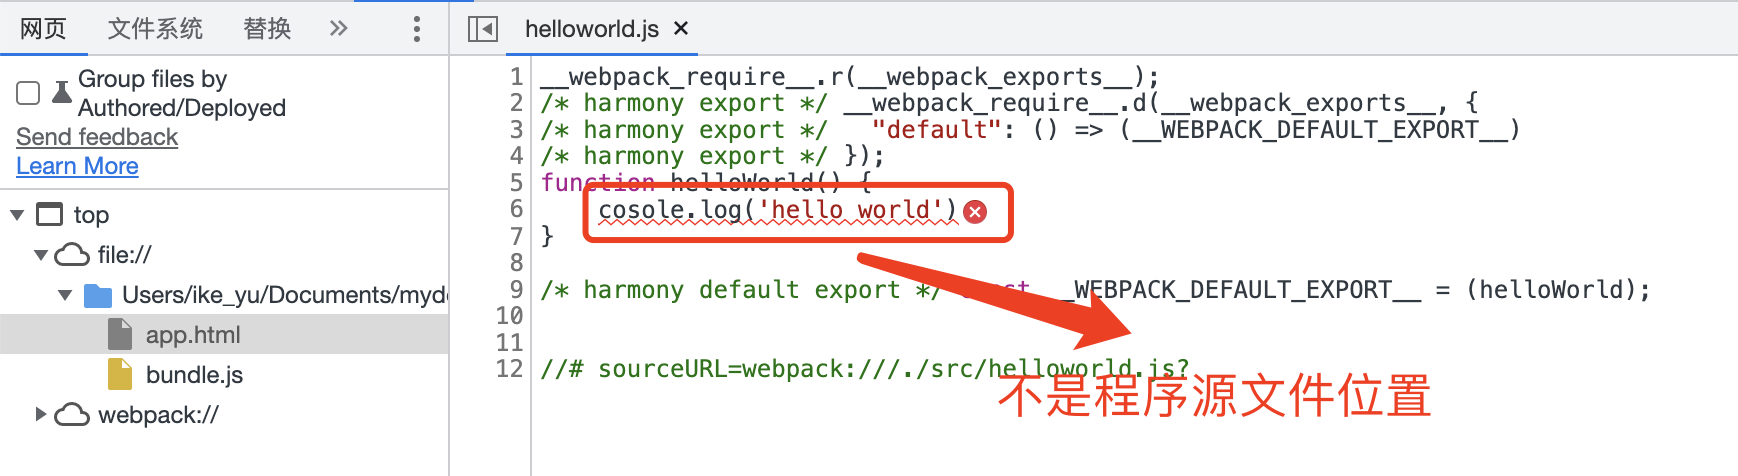
解决办法:使用devtool配置source-map

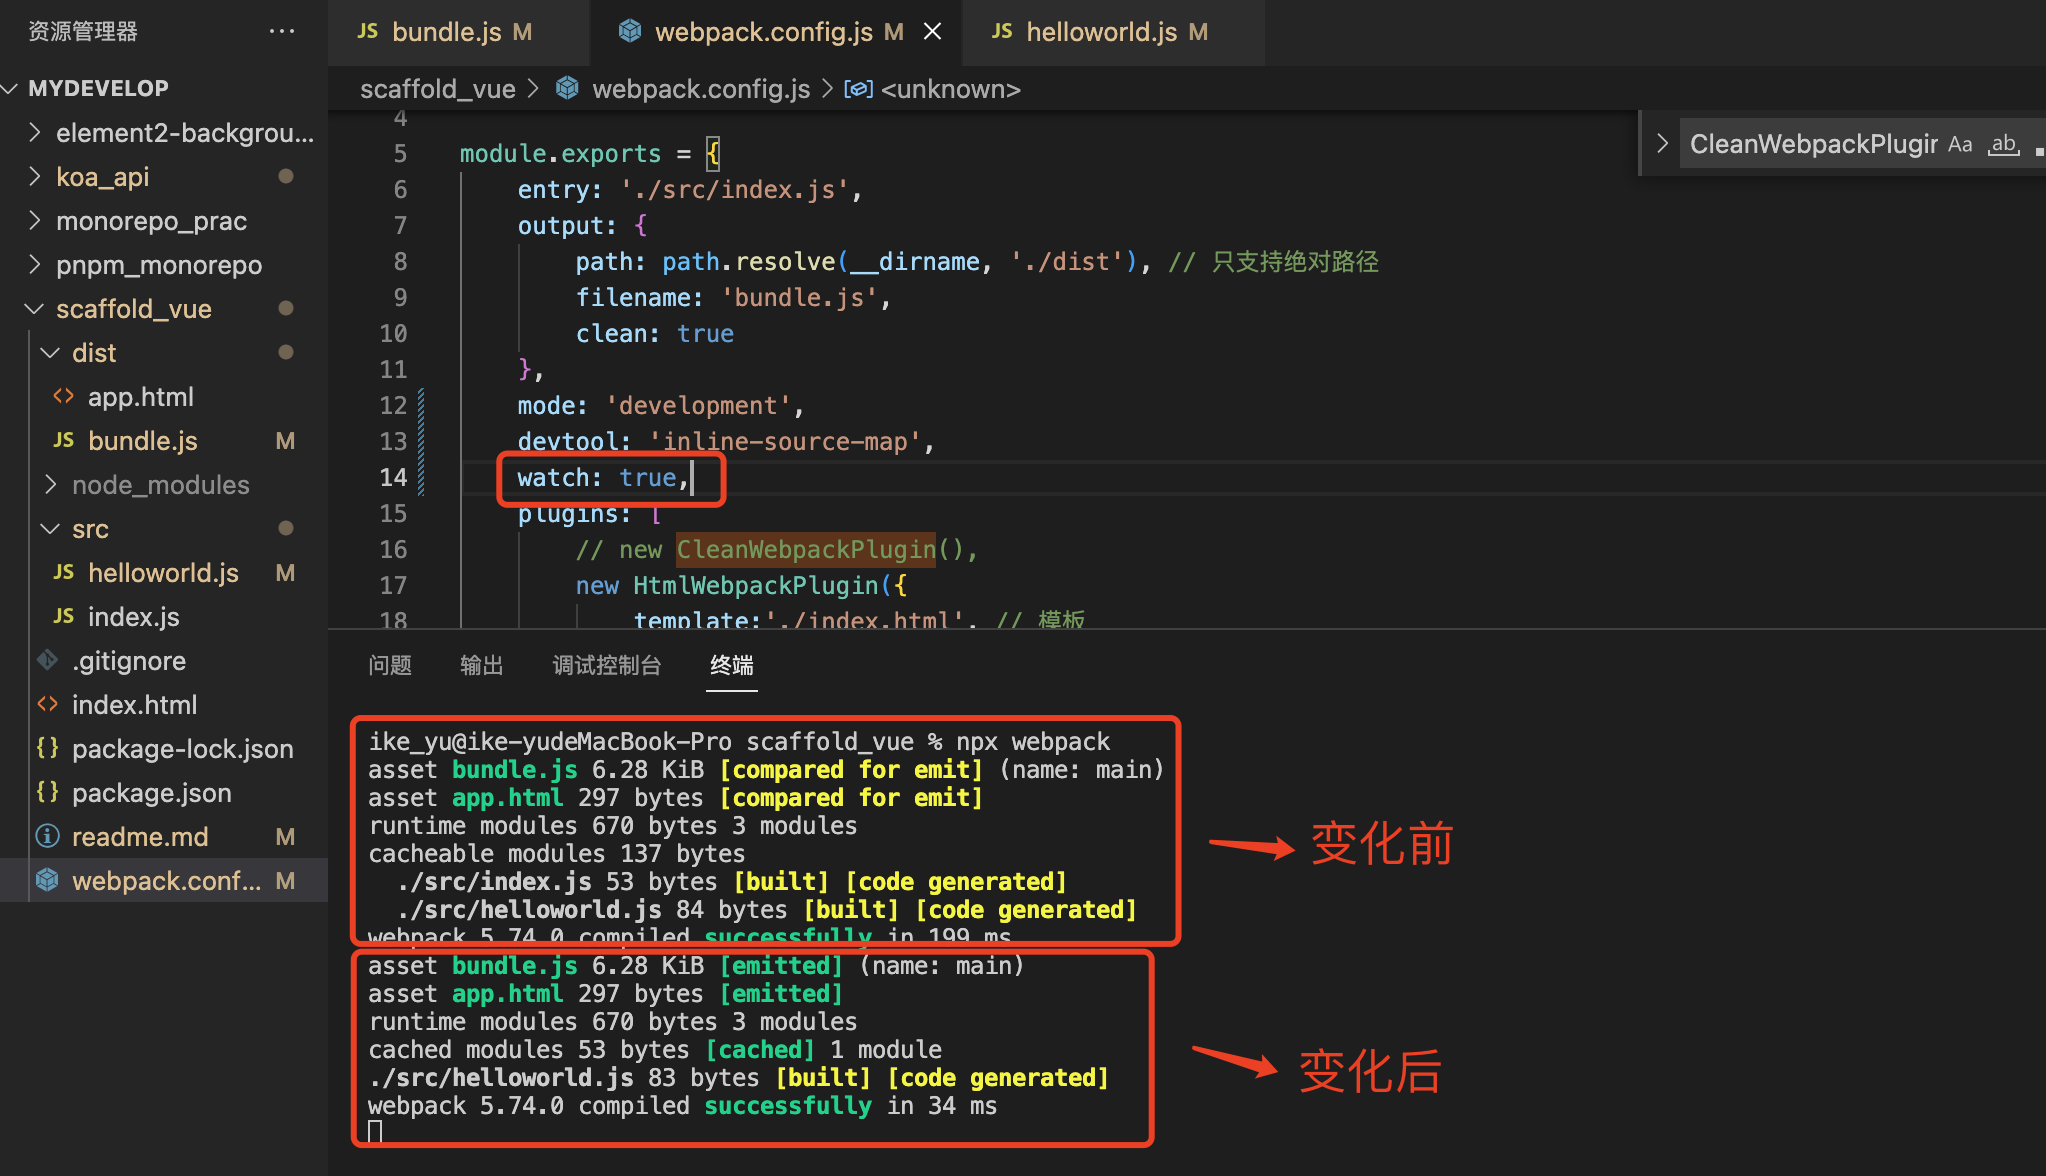
3.3 watch
作用:监听任何已解析文件的更改

使用命令行方式实现监听
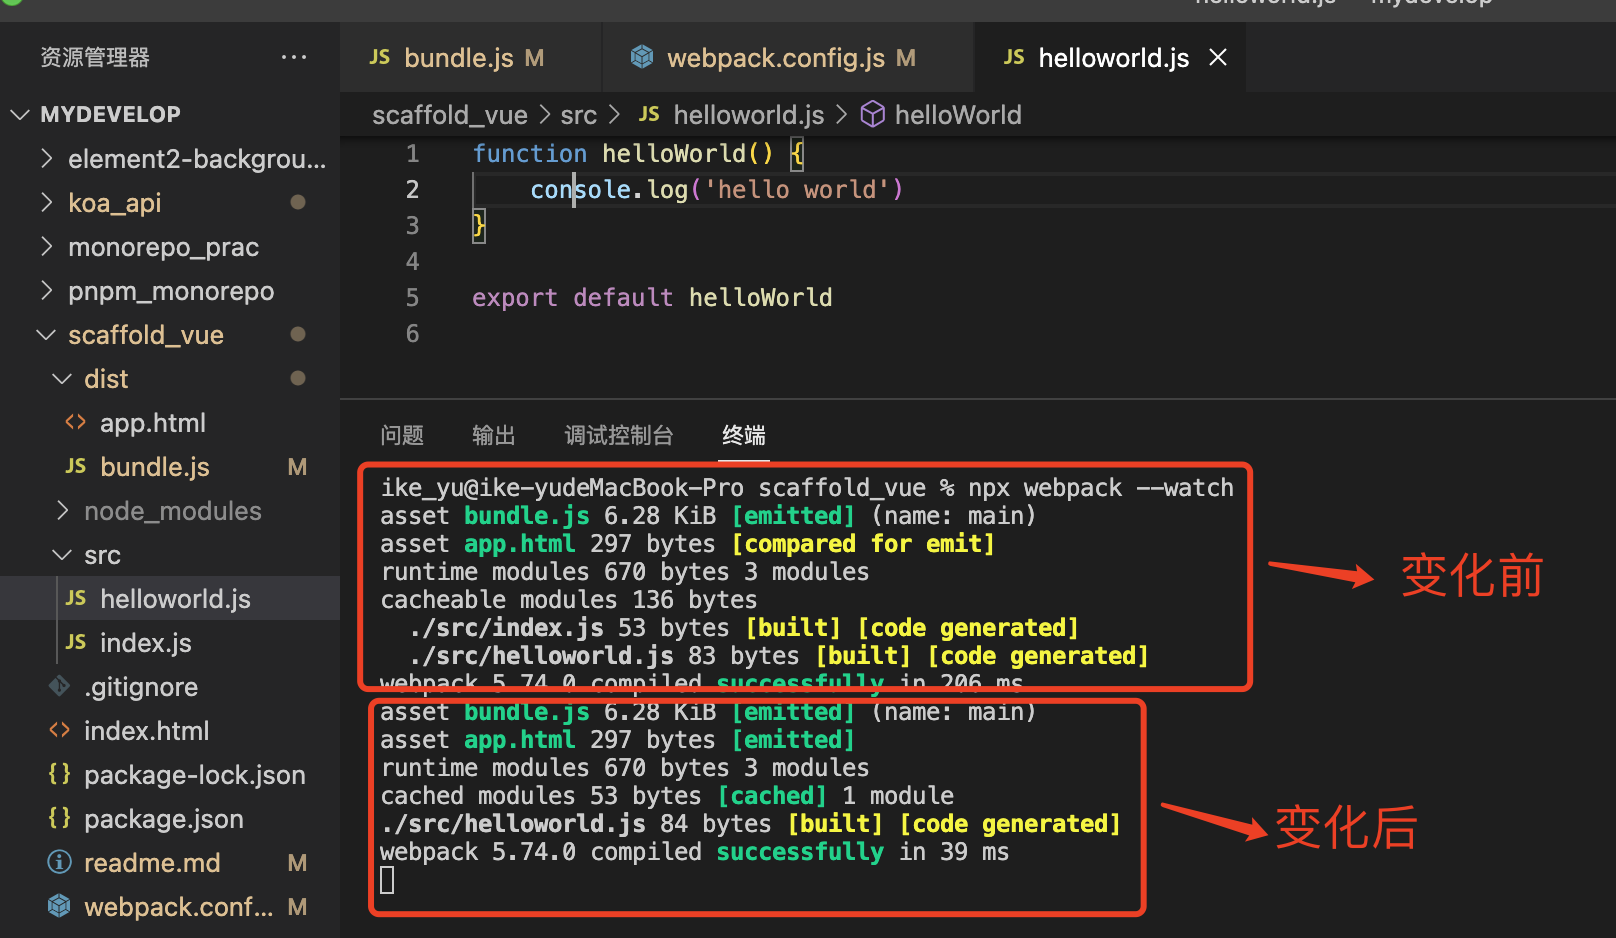
使用配置方式实现监听
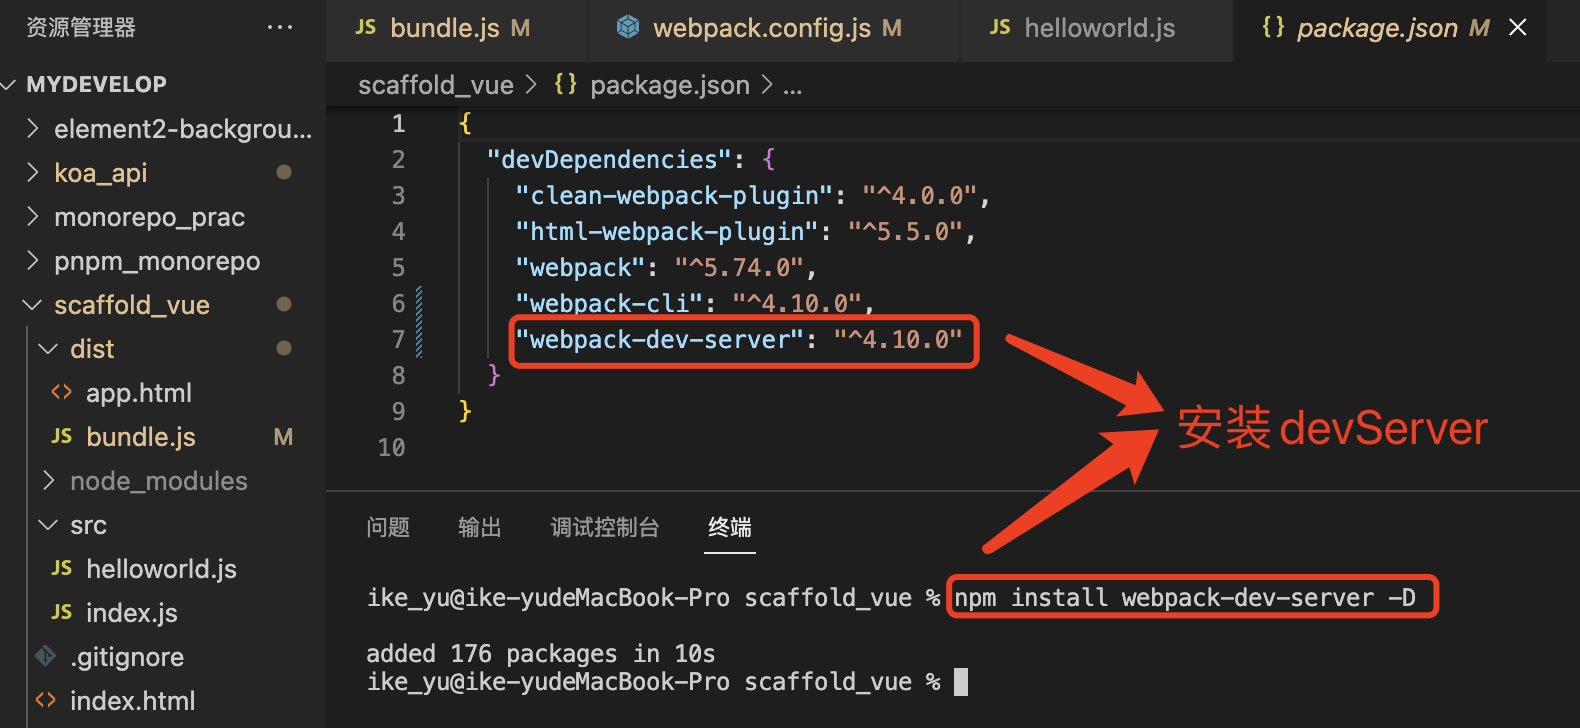
3.4 dev-server
作用:实时加载页面(live reloading)

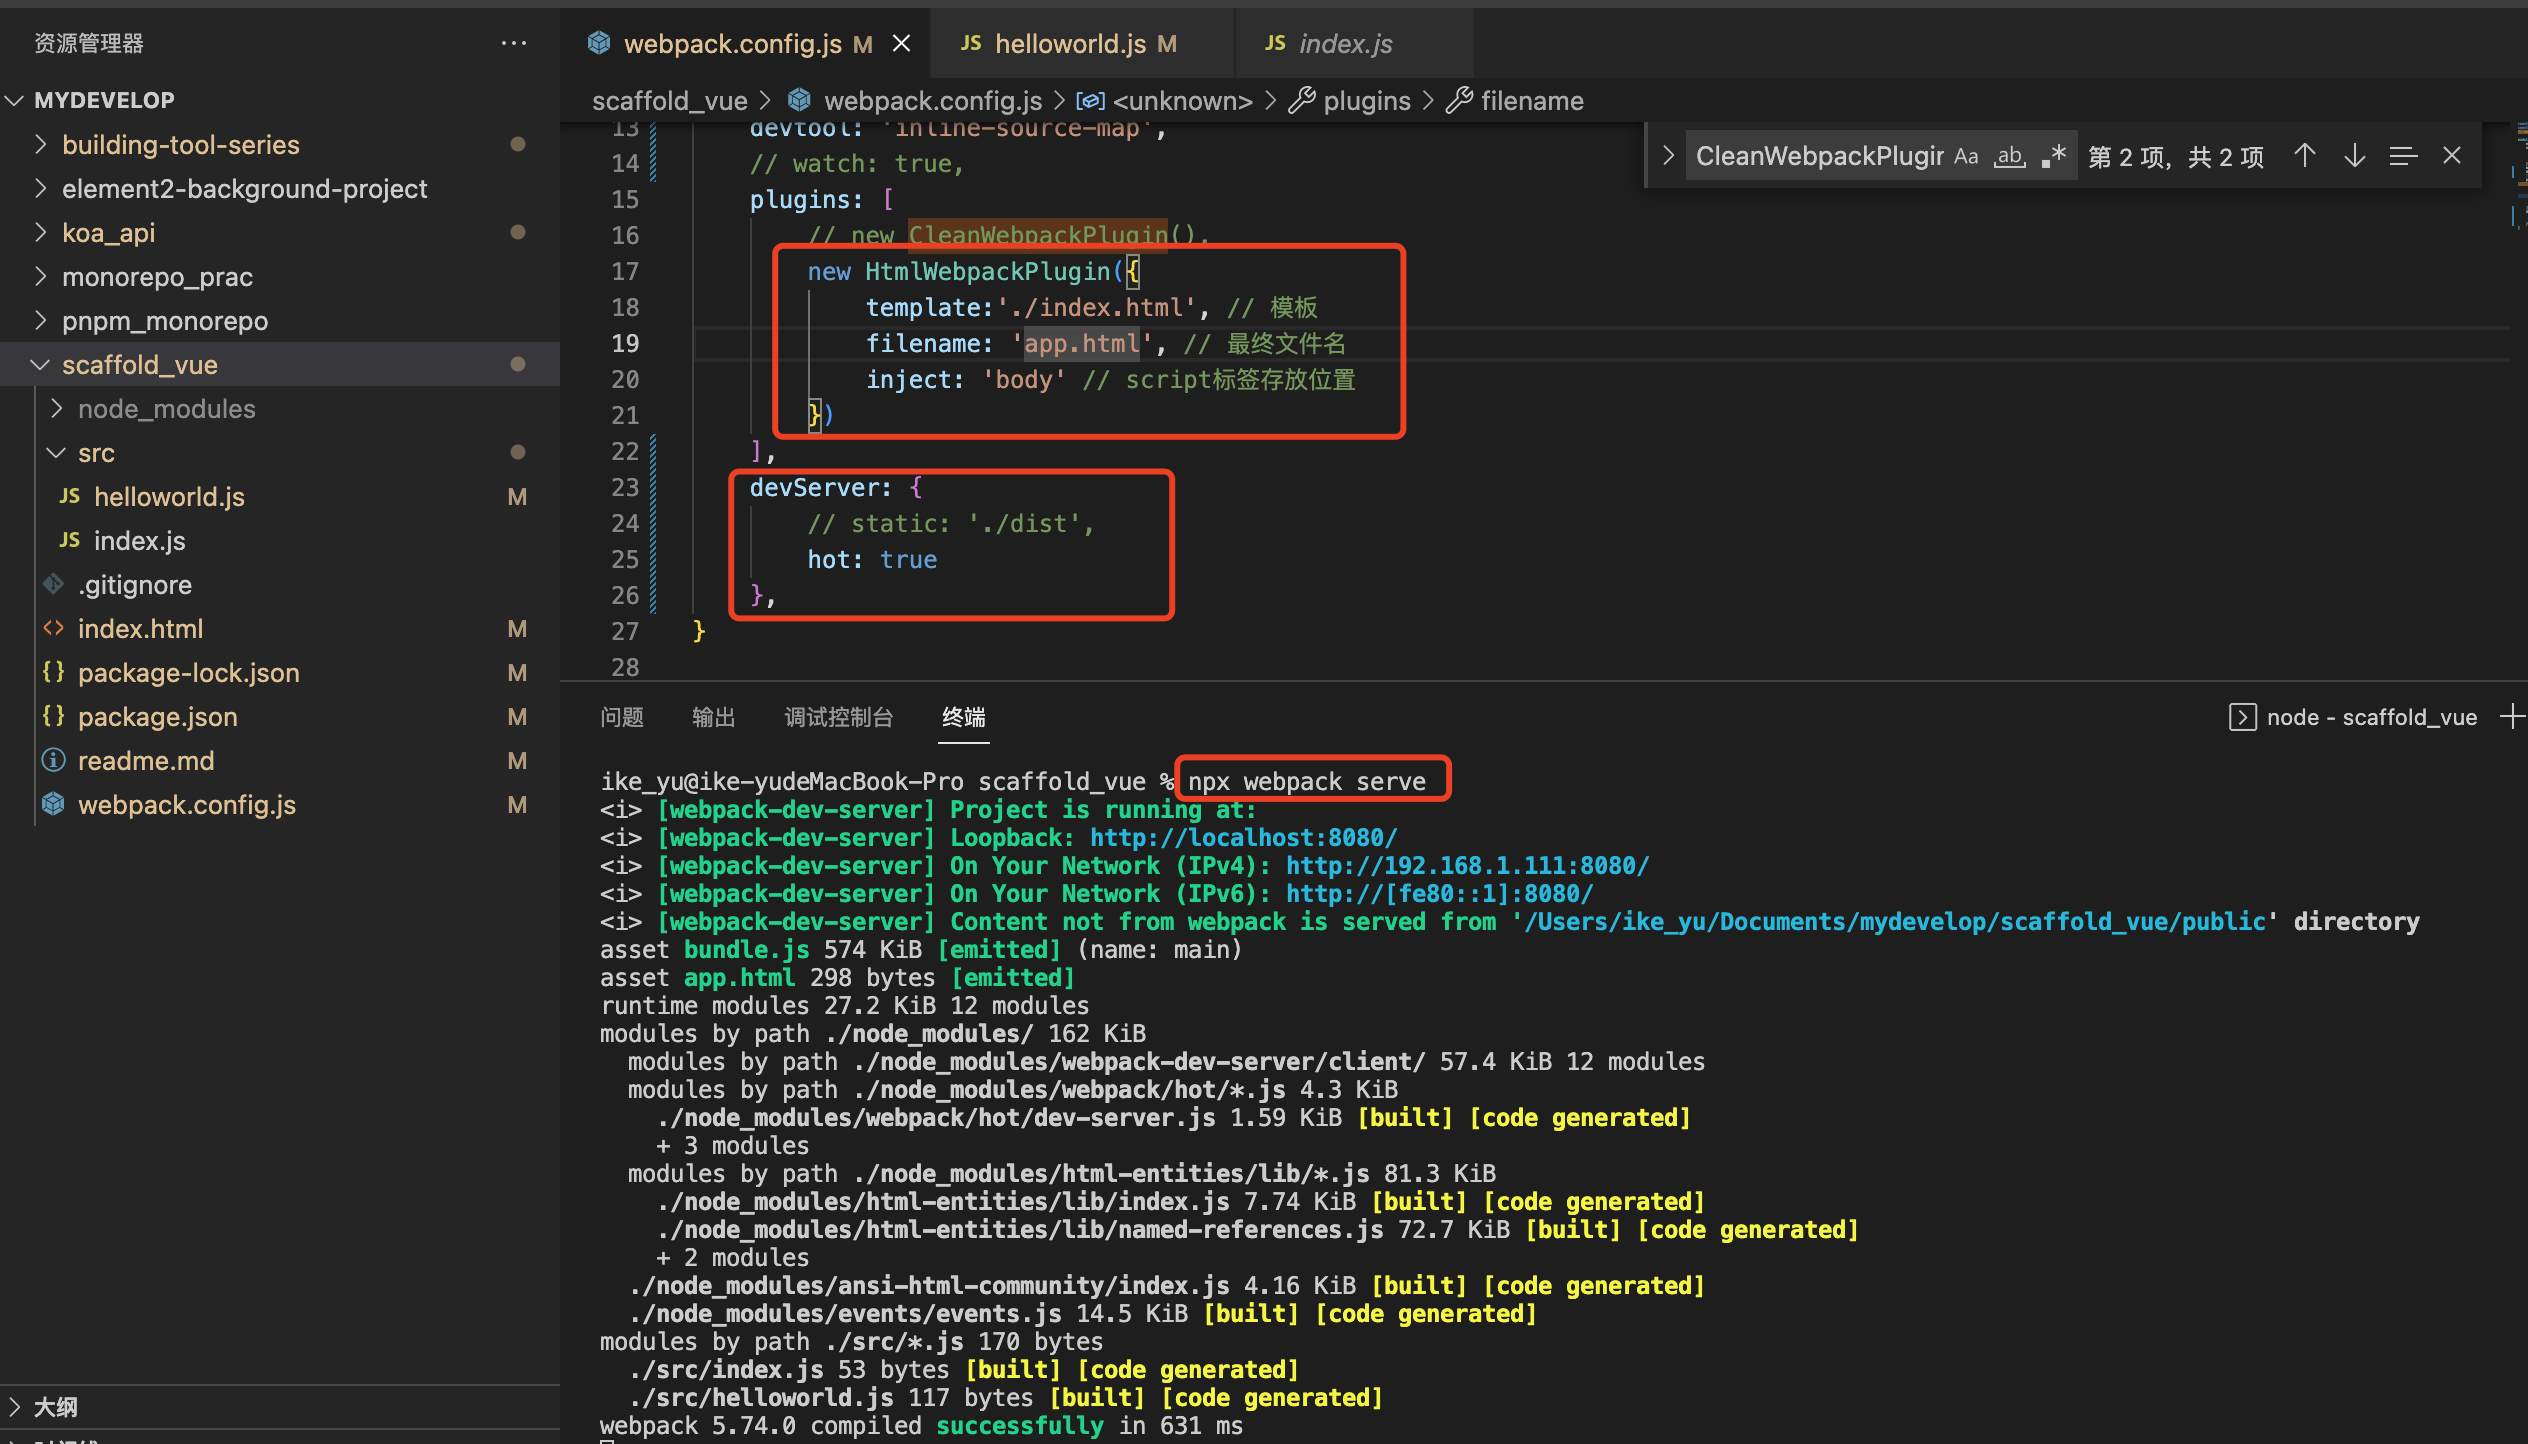
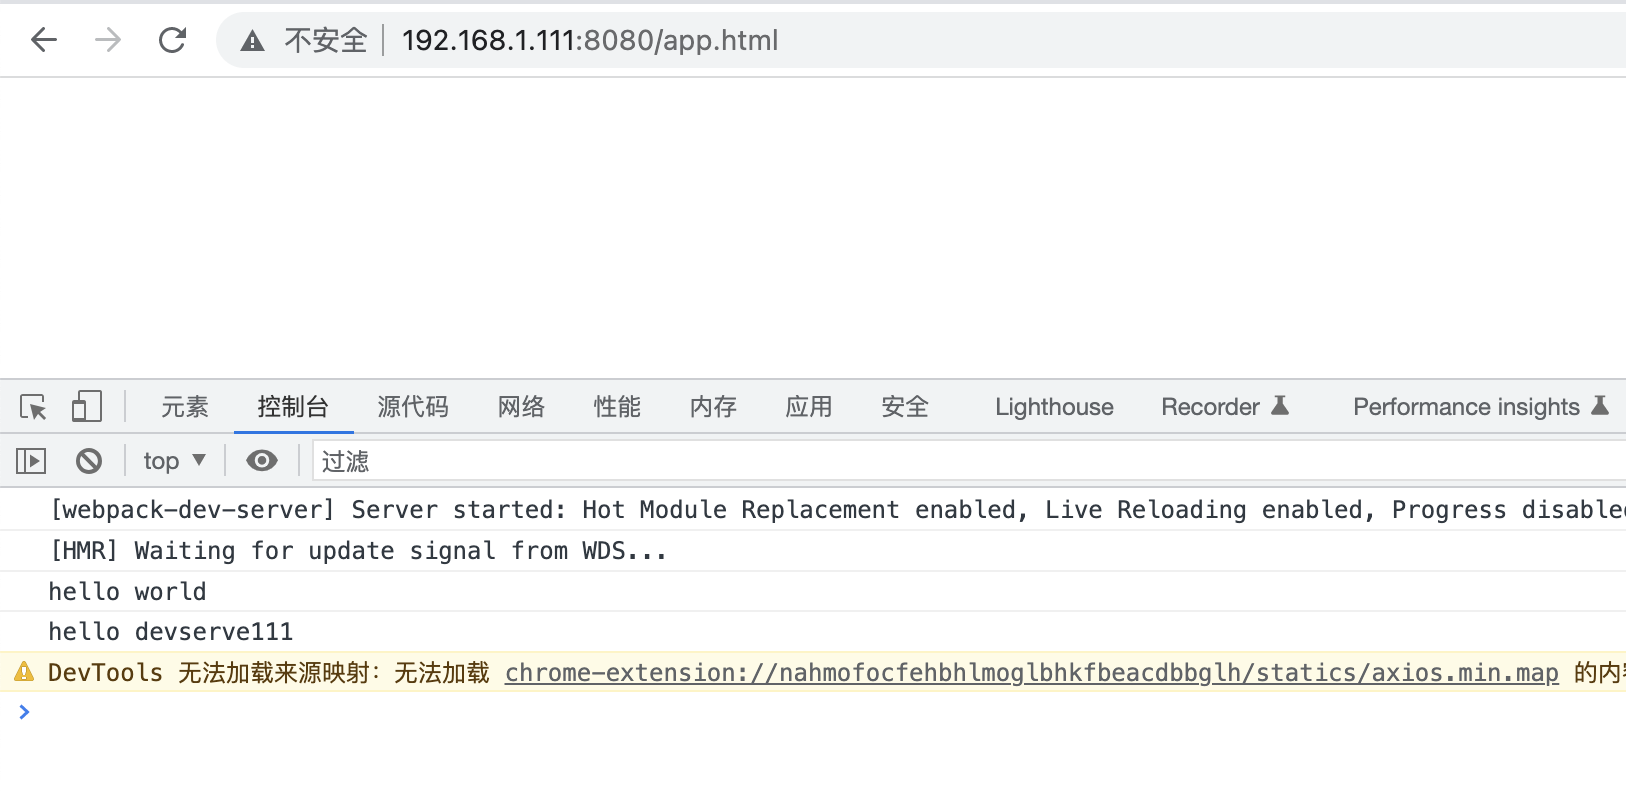
注意:当目标html文件名不是index时,url后缀需要加上文件名
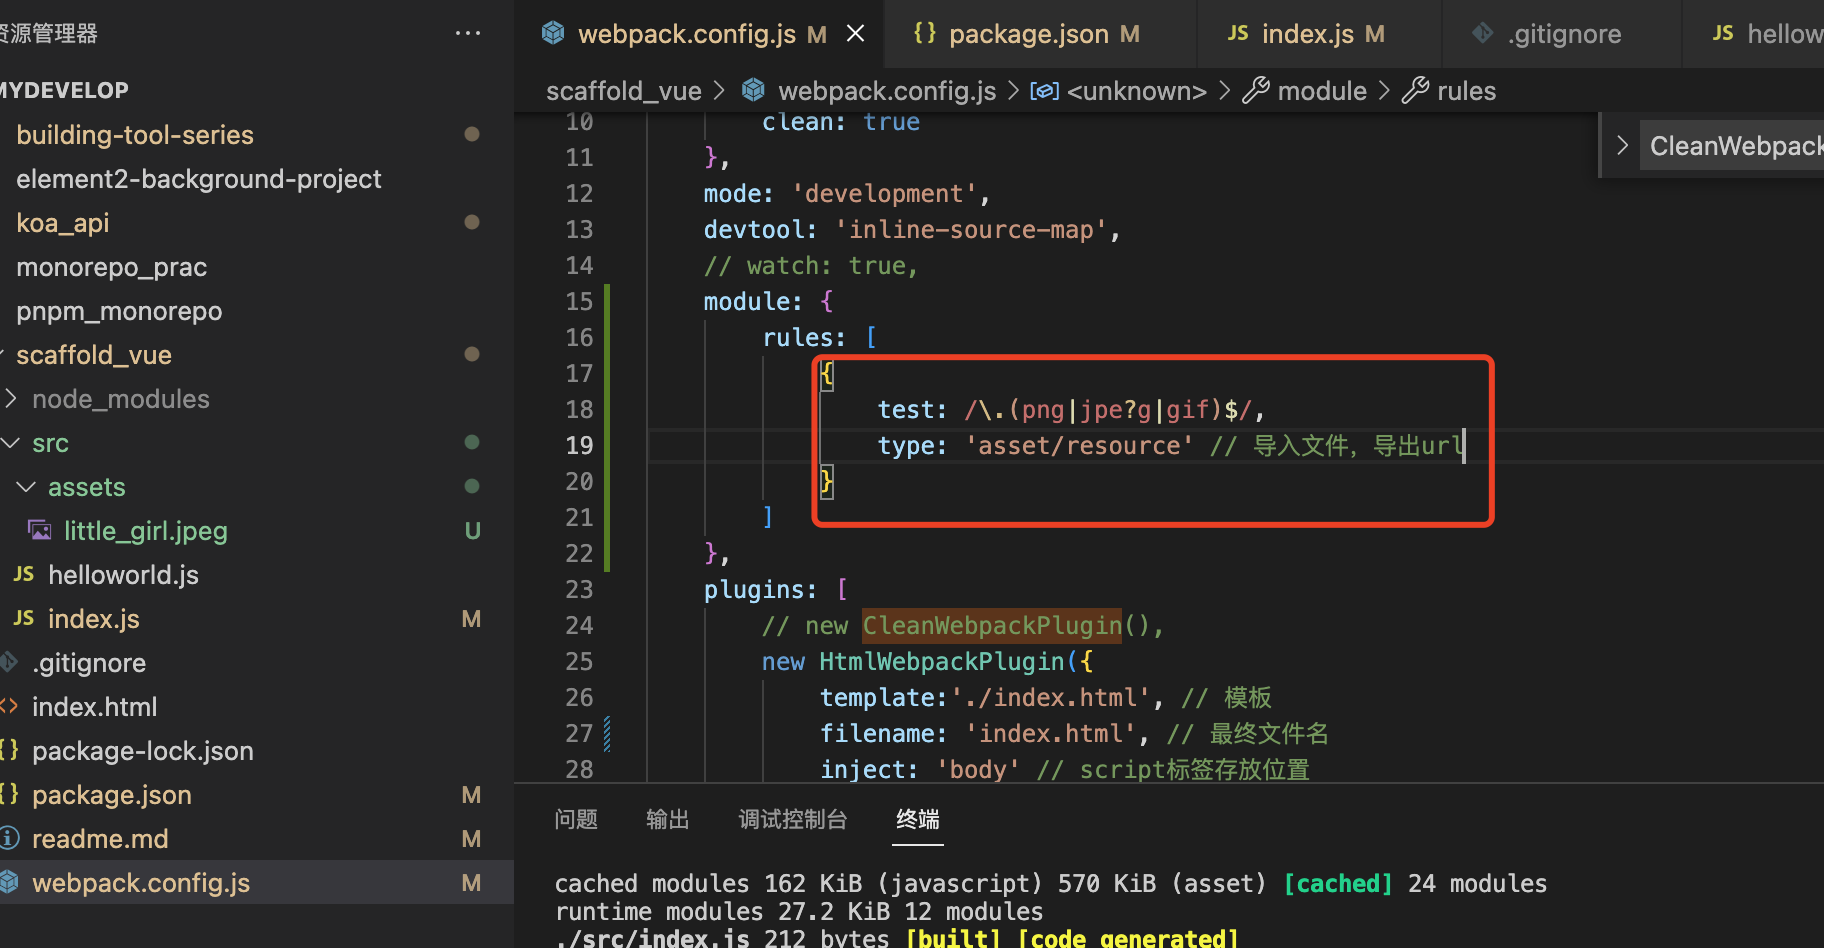
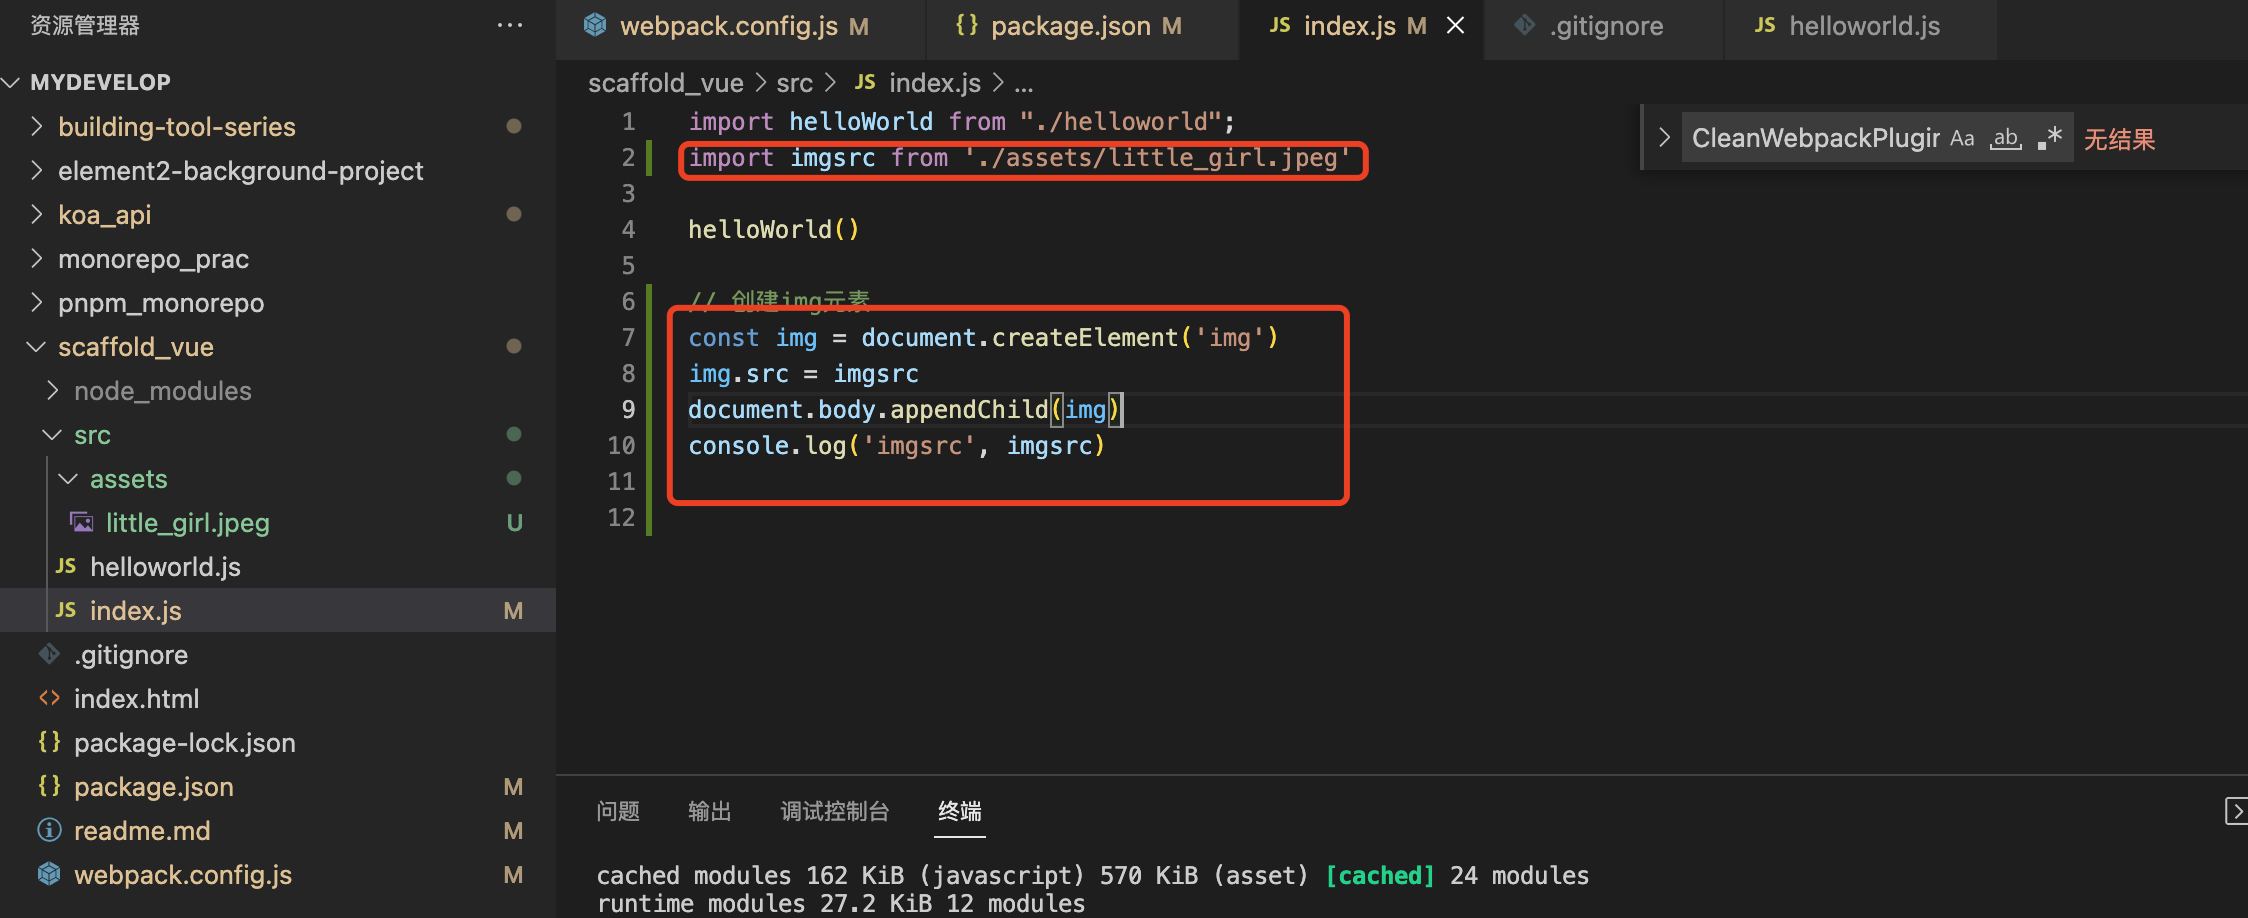
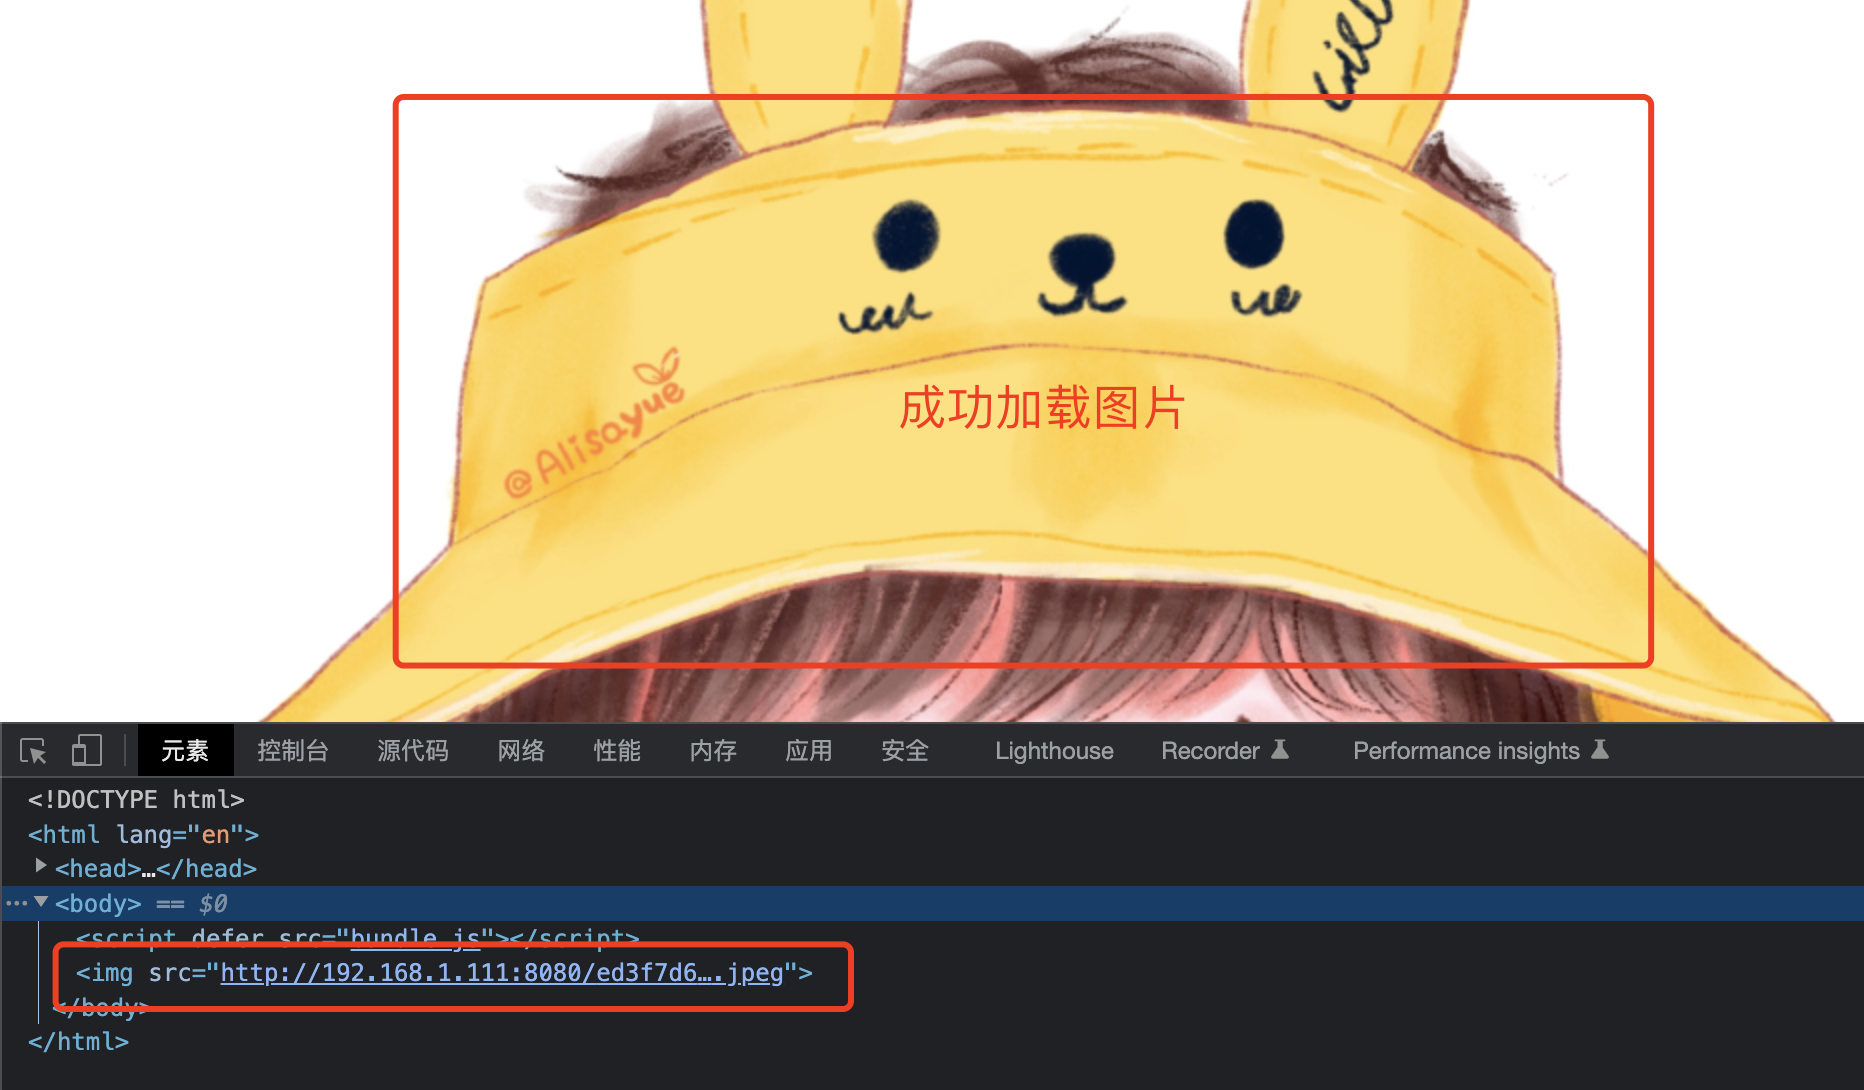
4、资源模块
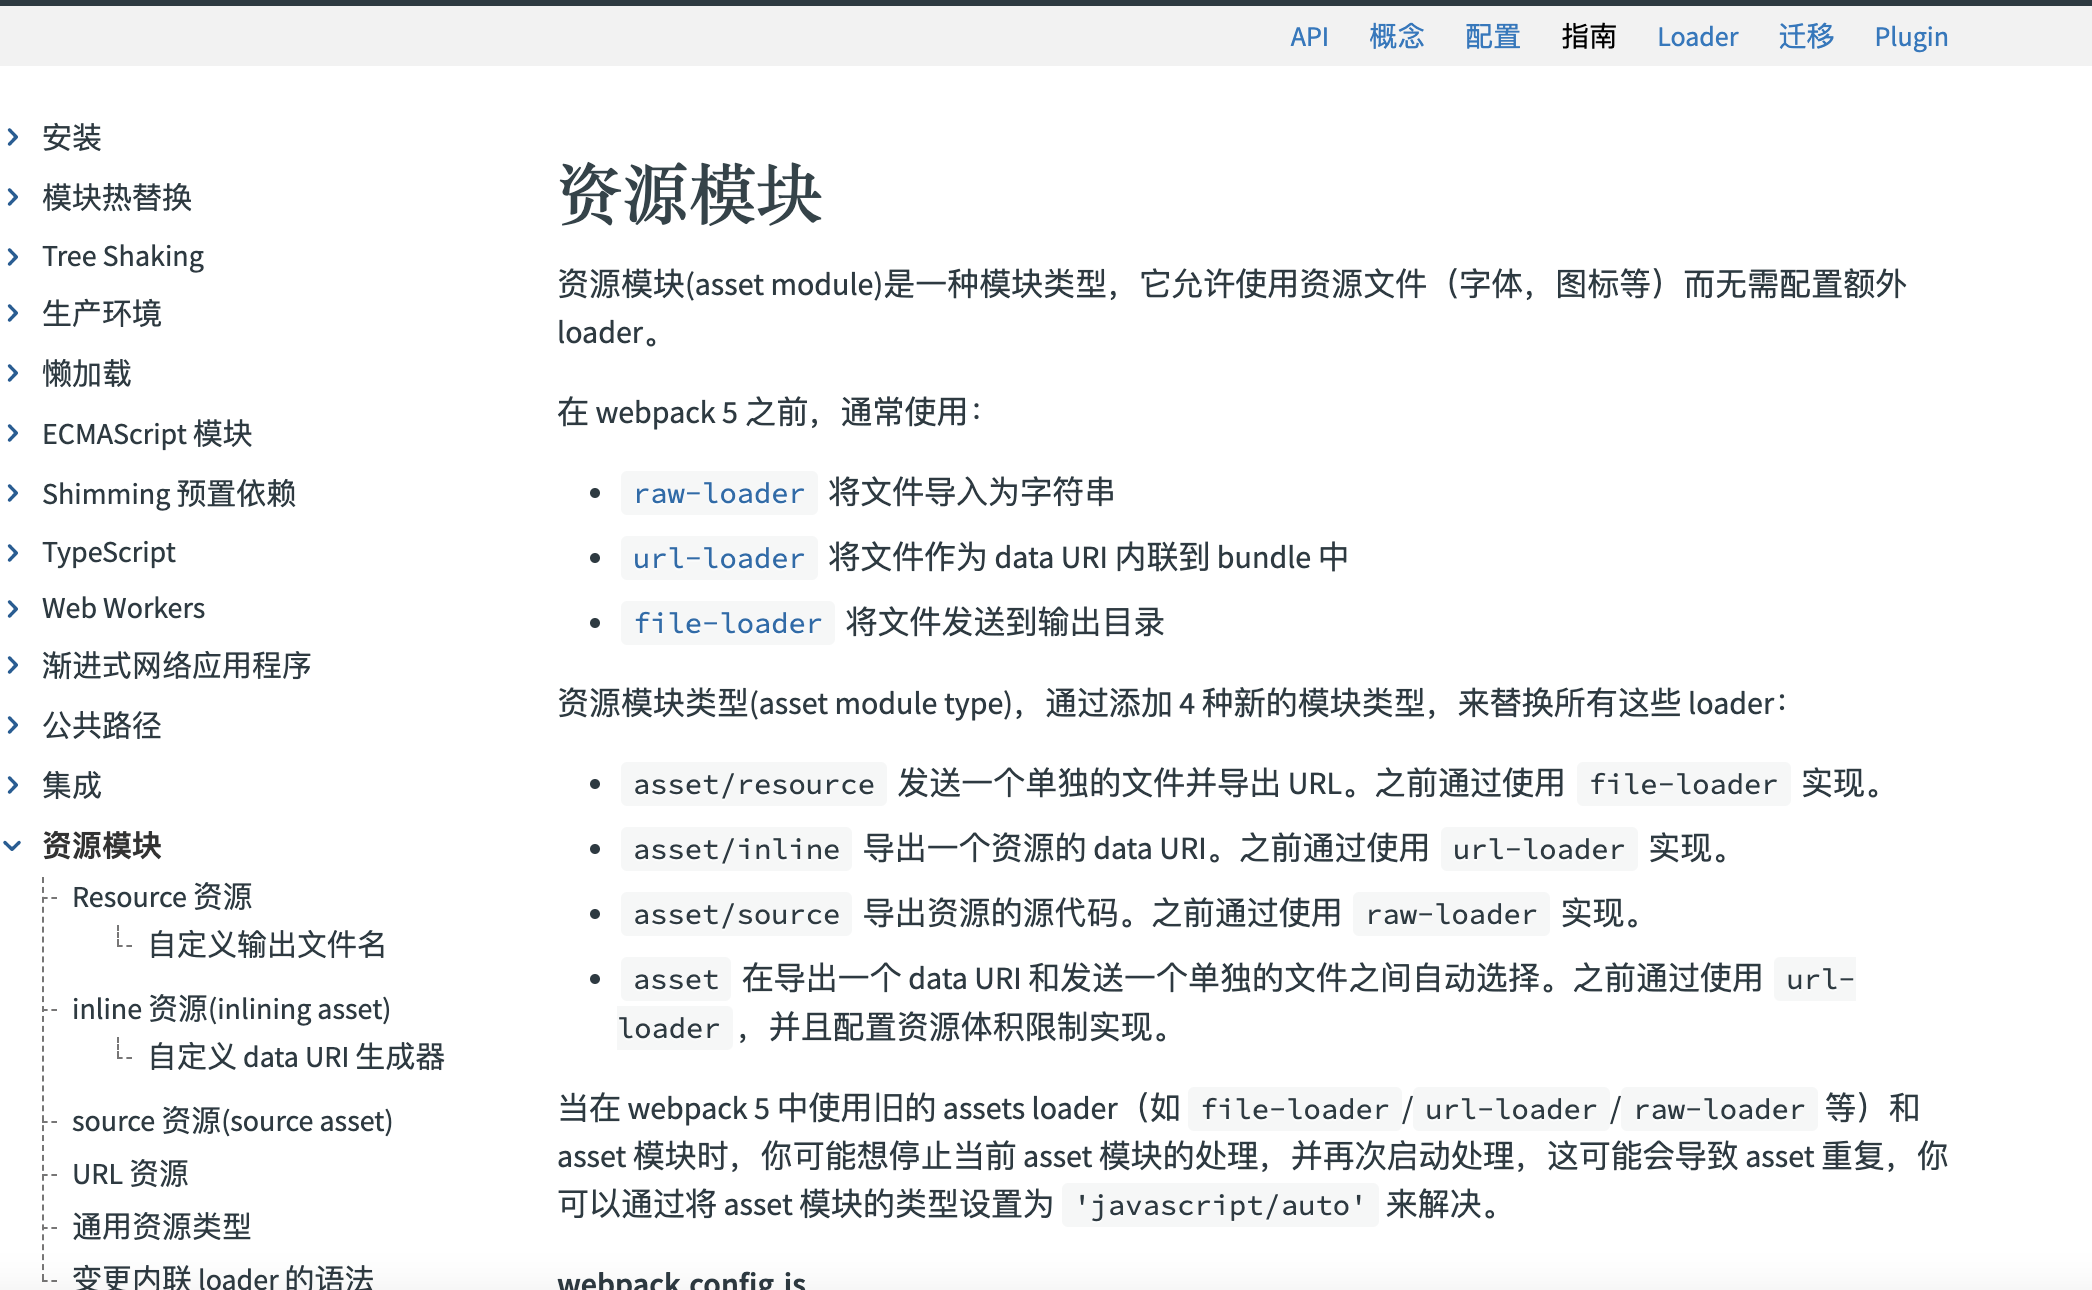
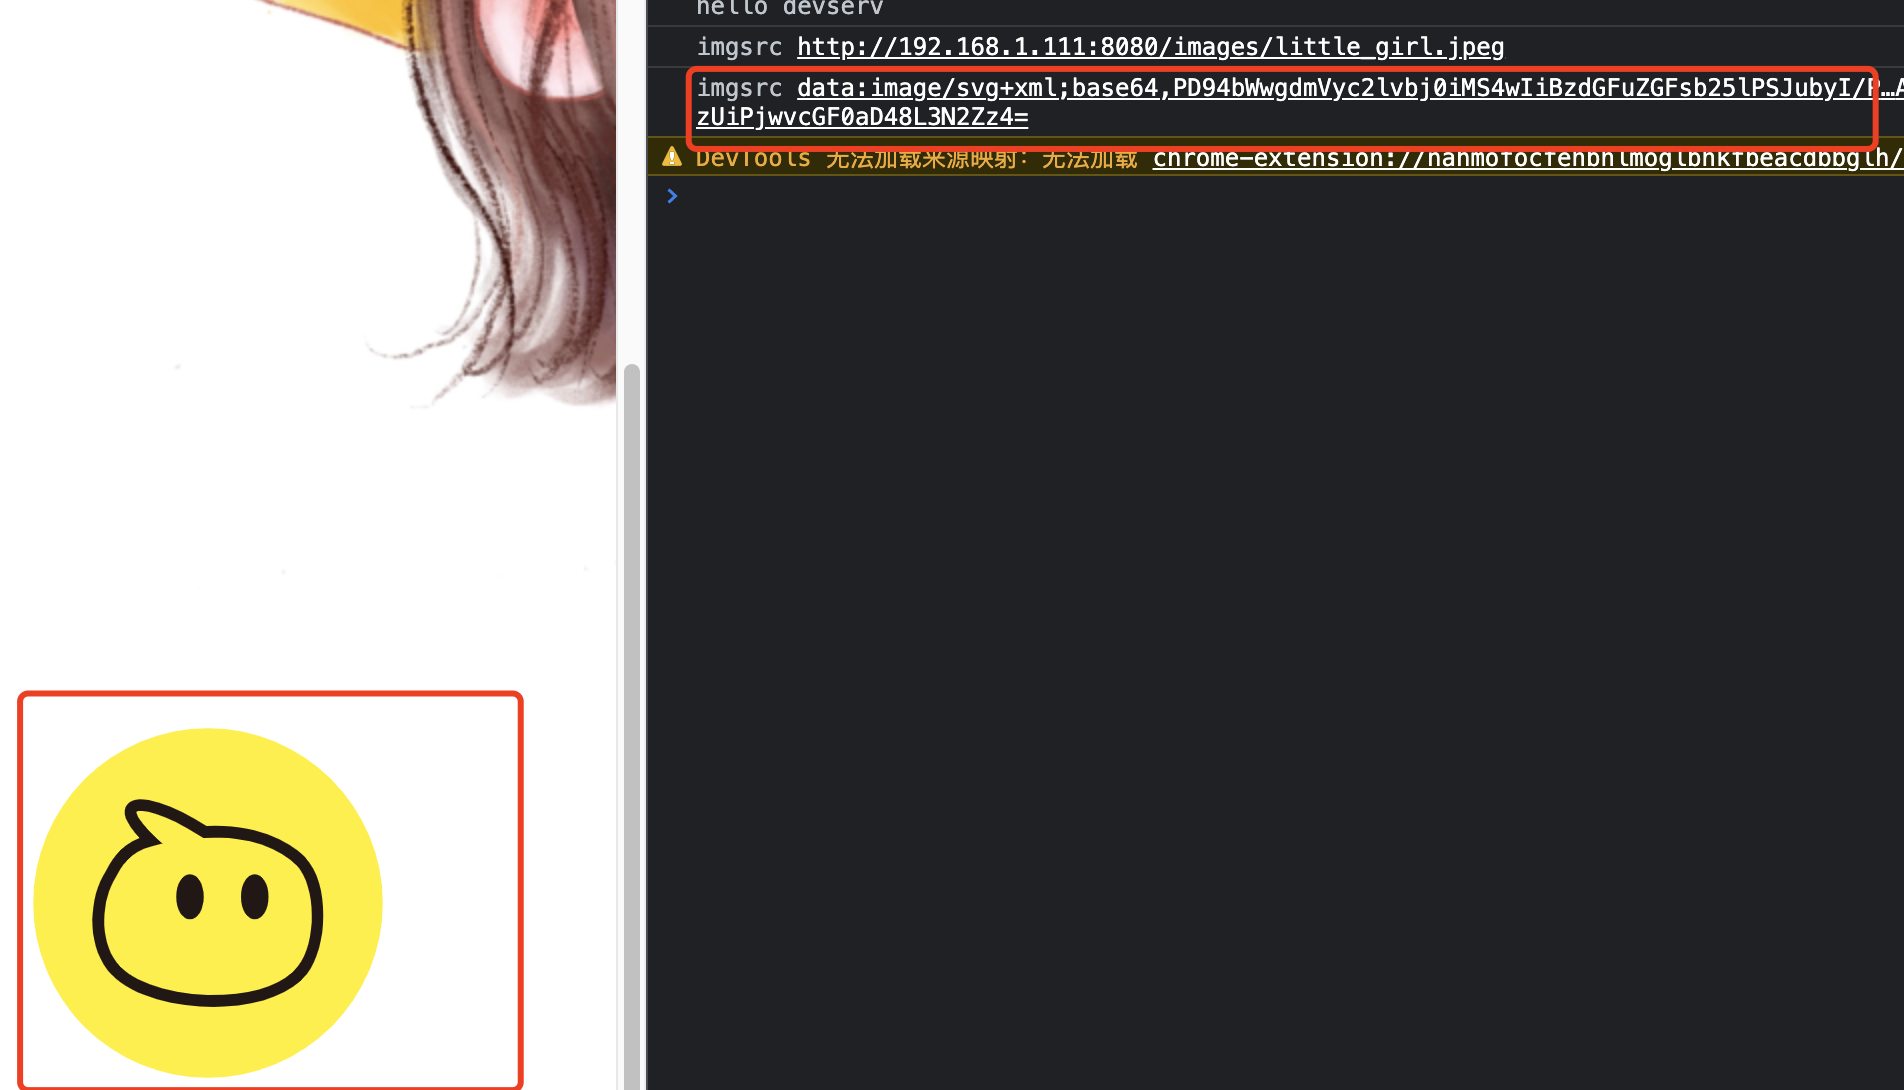
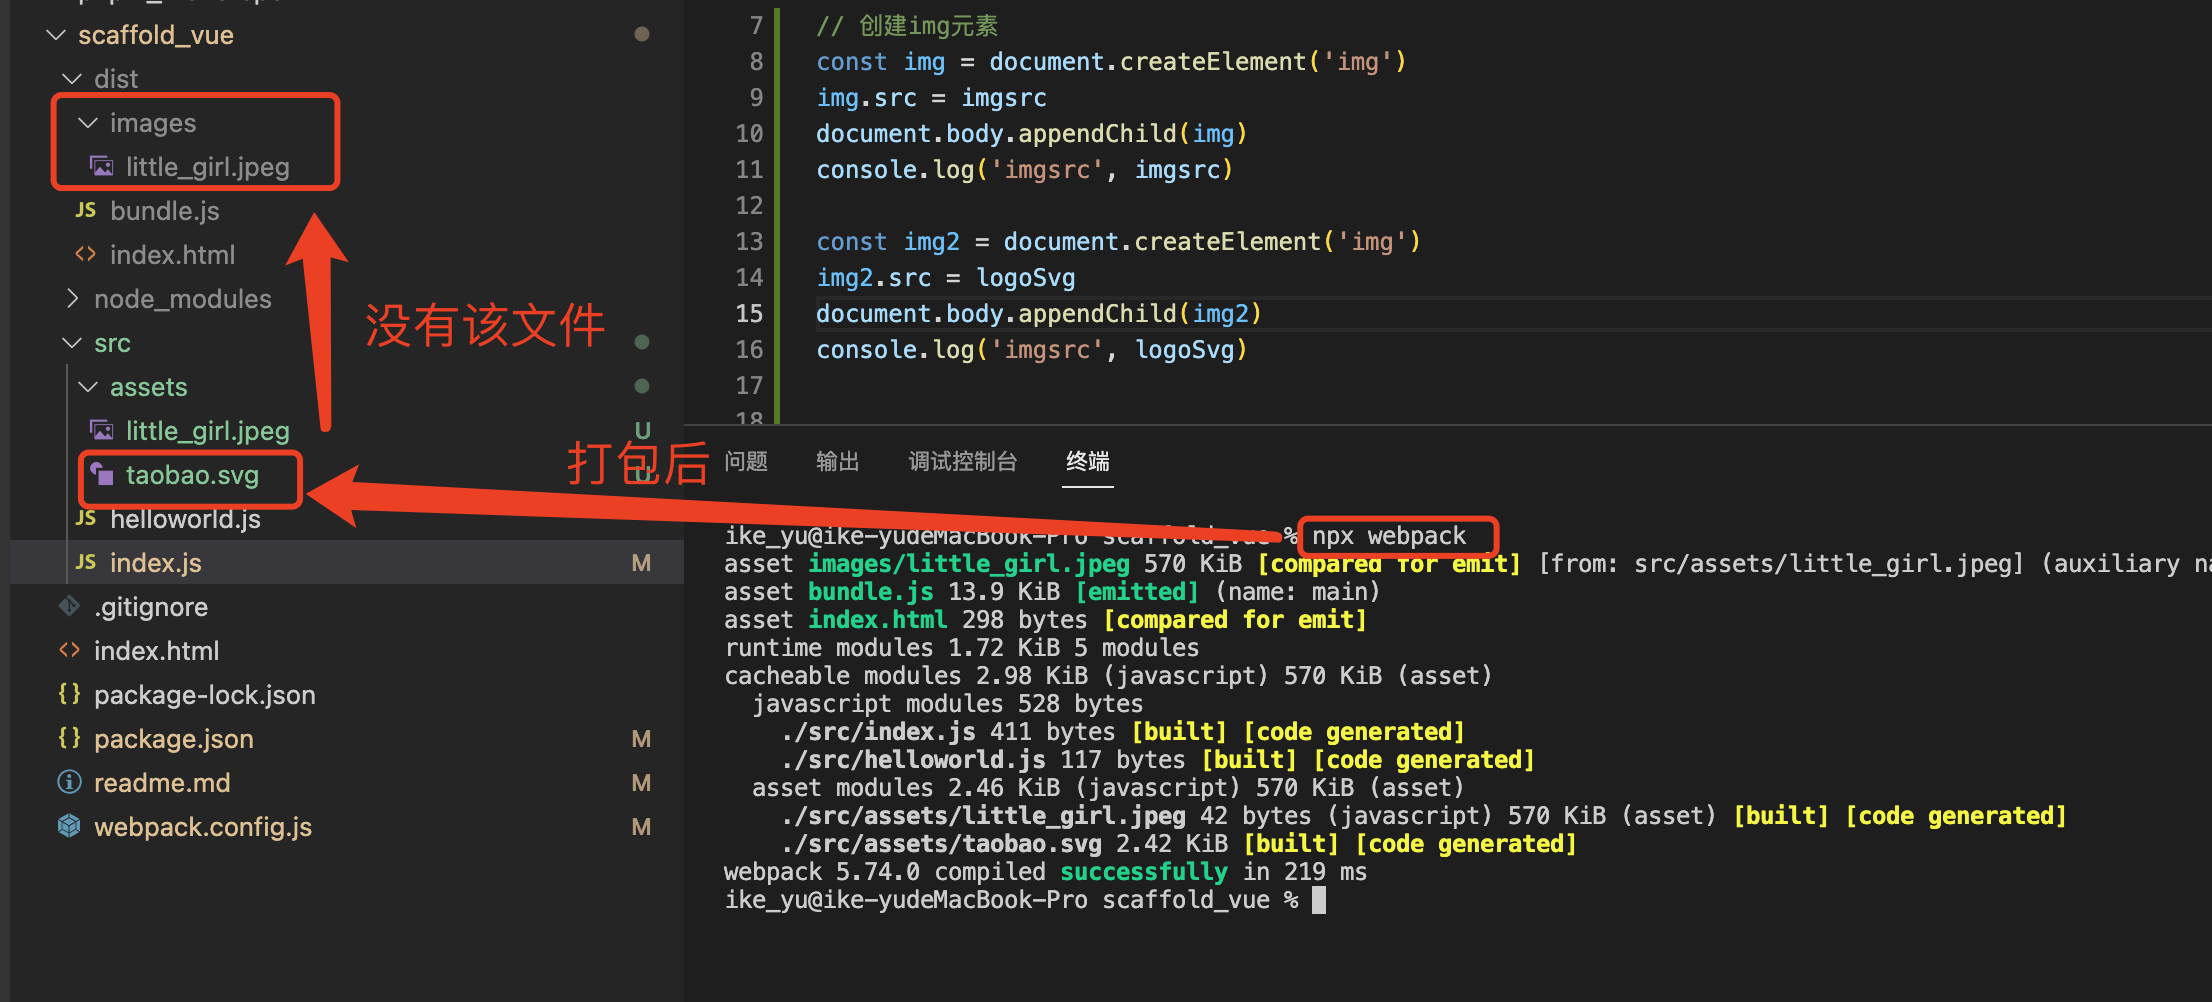
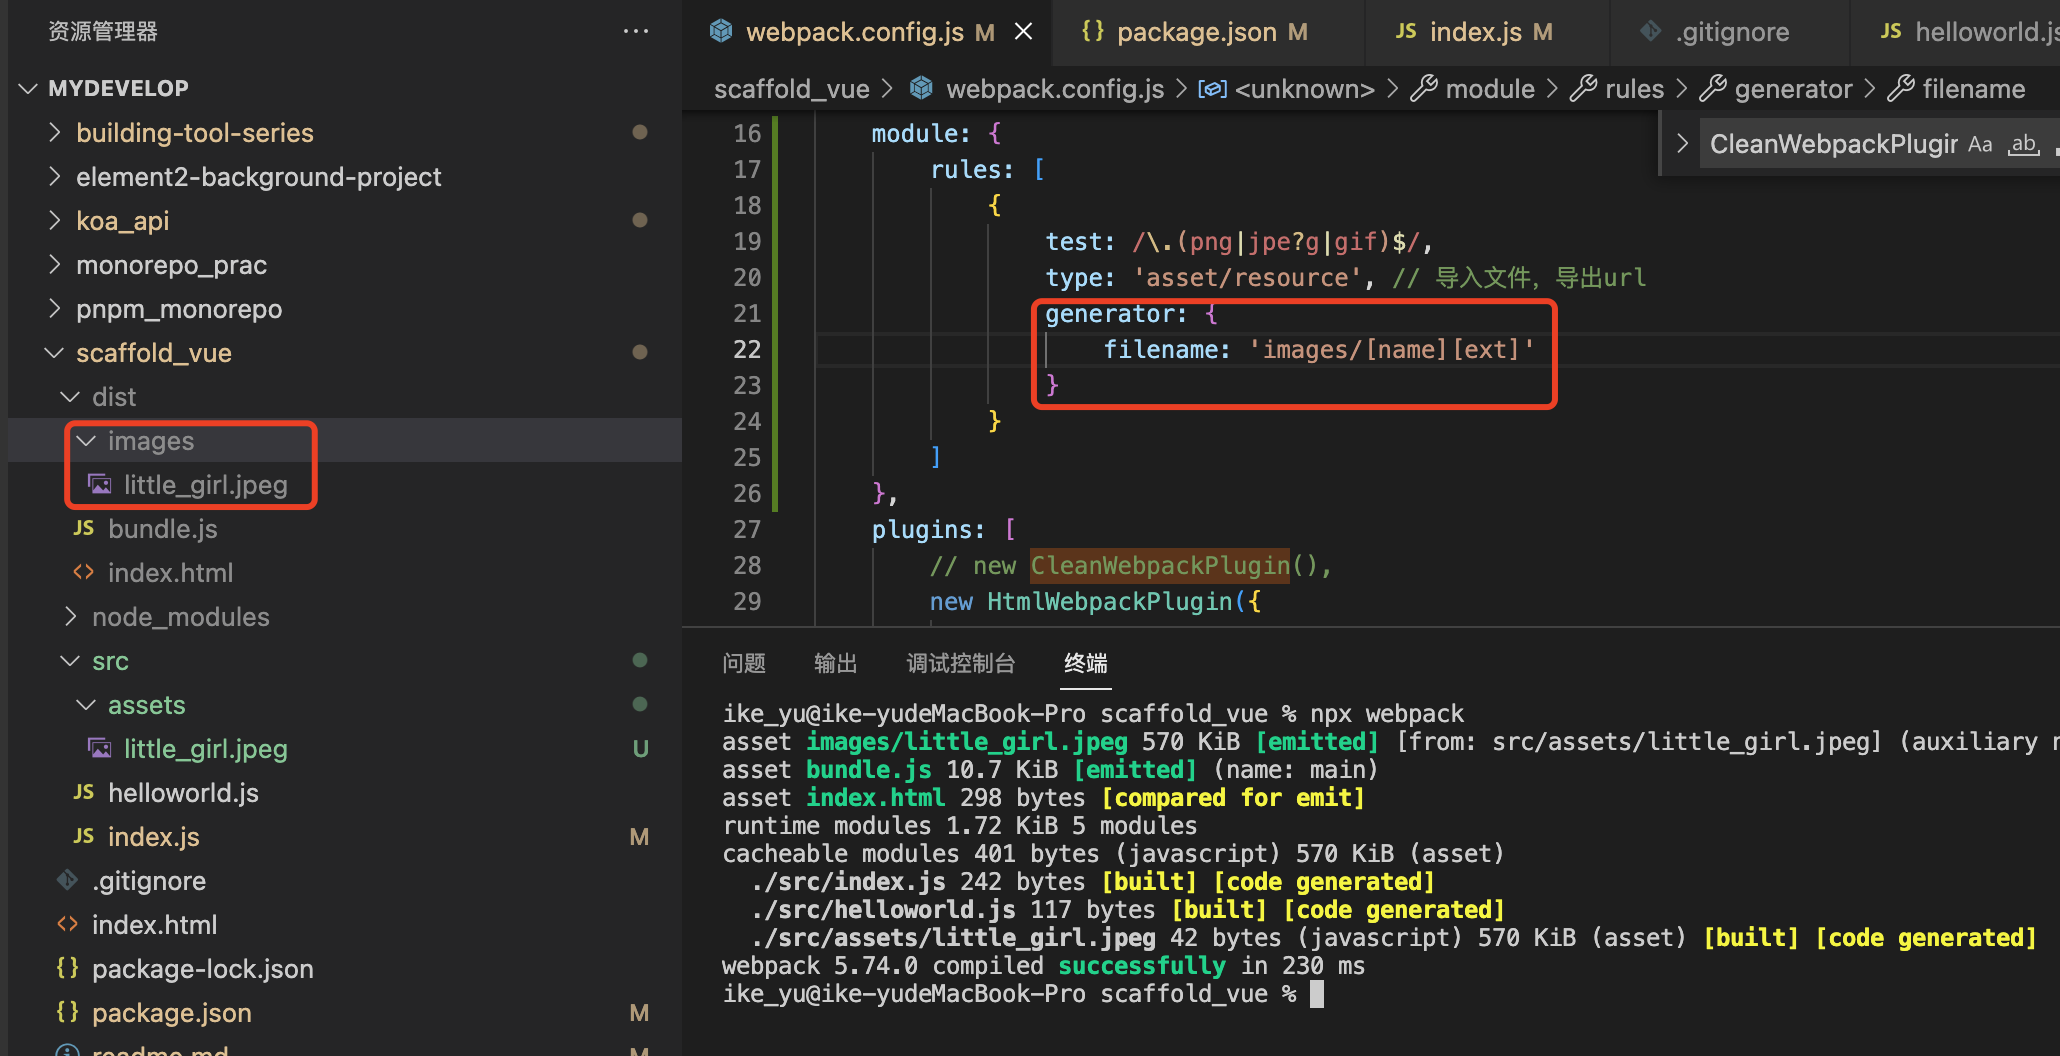
4.1 asset/resource
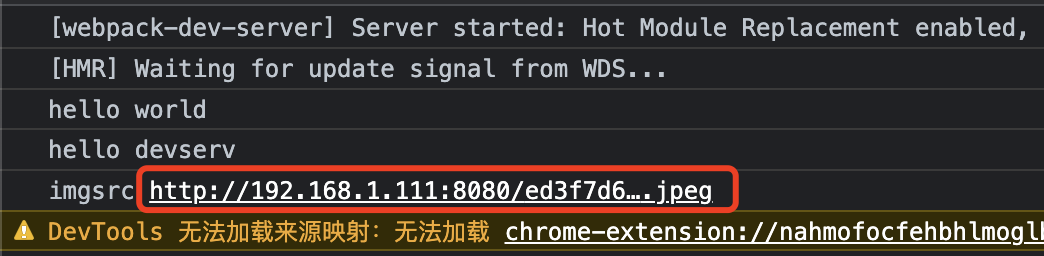
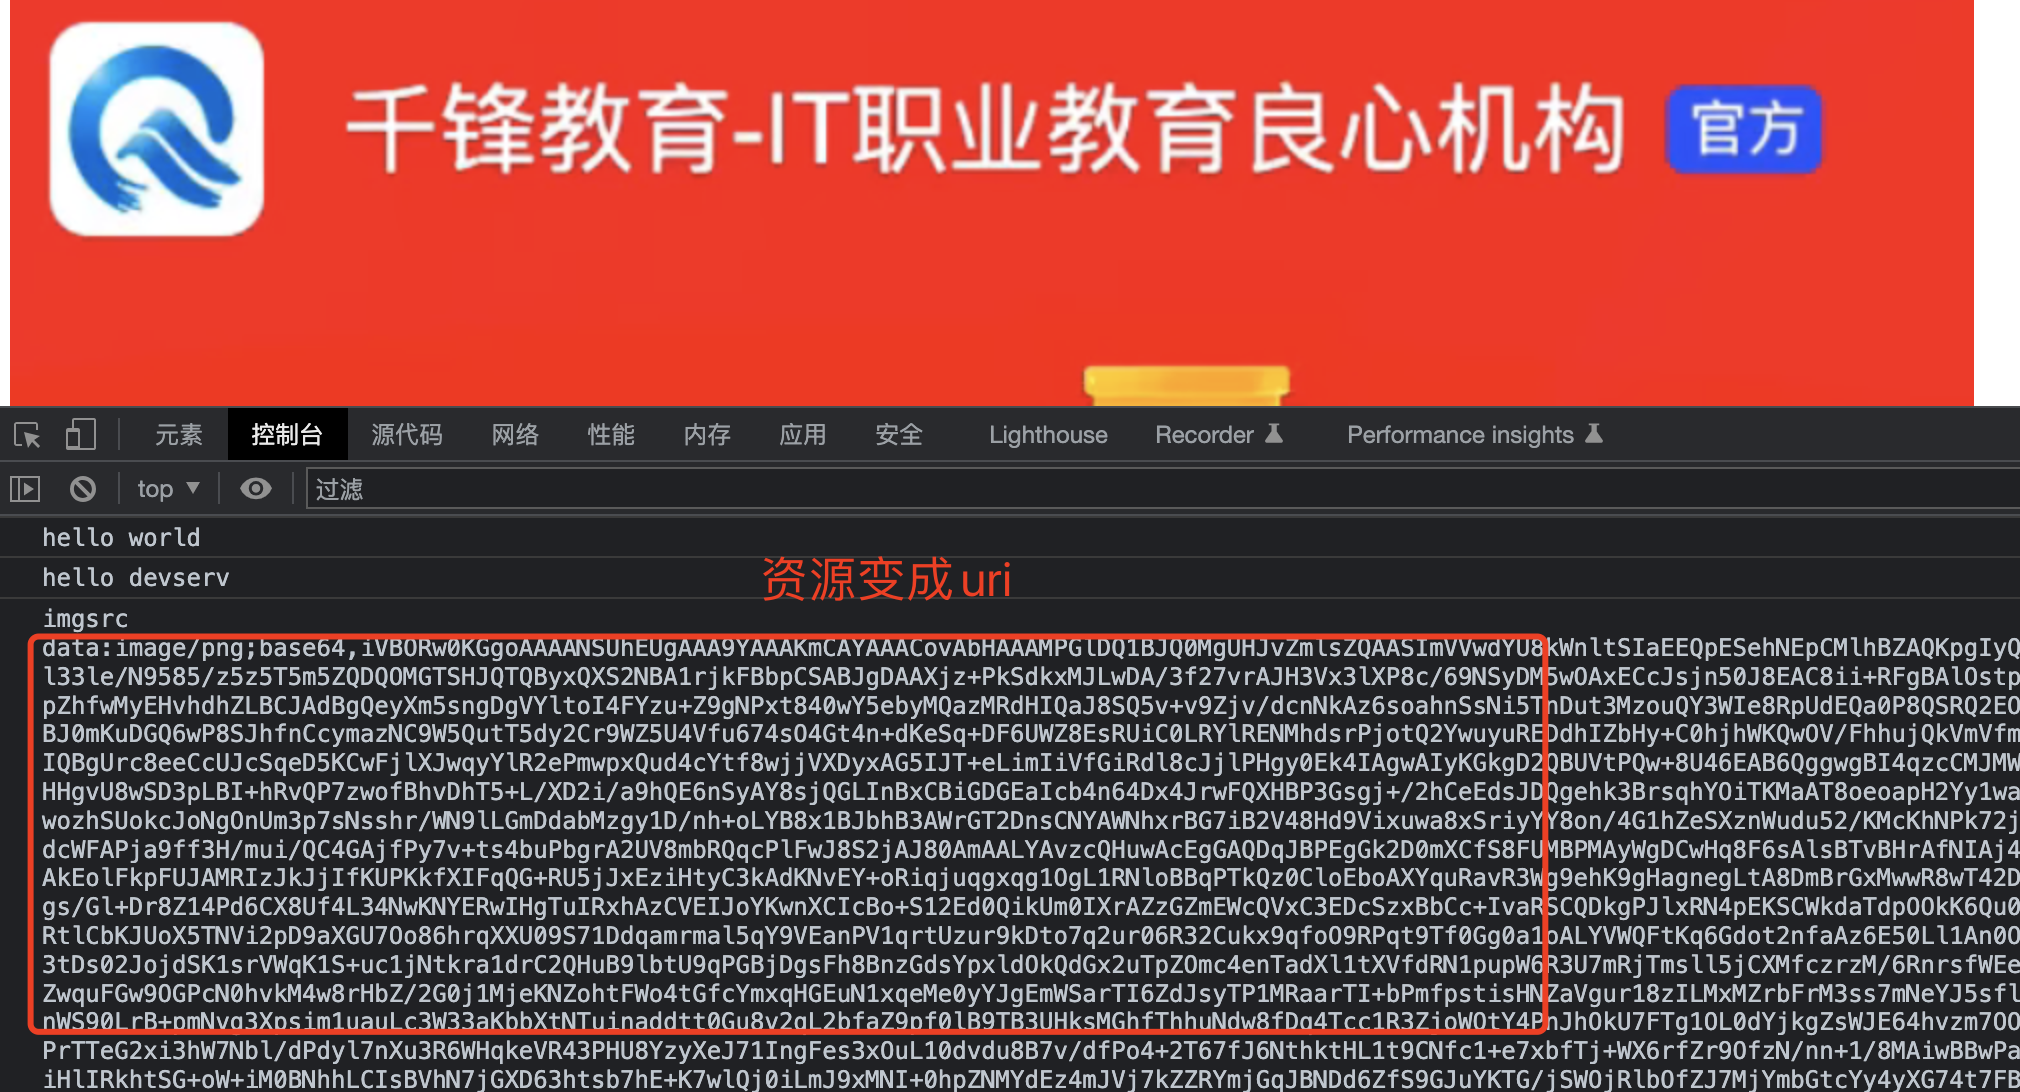
4.2 asset/inline
作用:导入文件,生成uri,打包后文件夹里面看不到文件,uri以base64形式存在
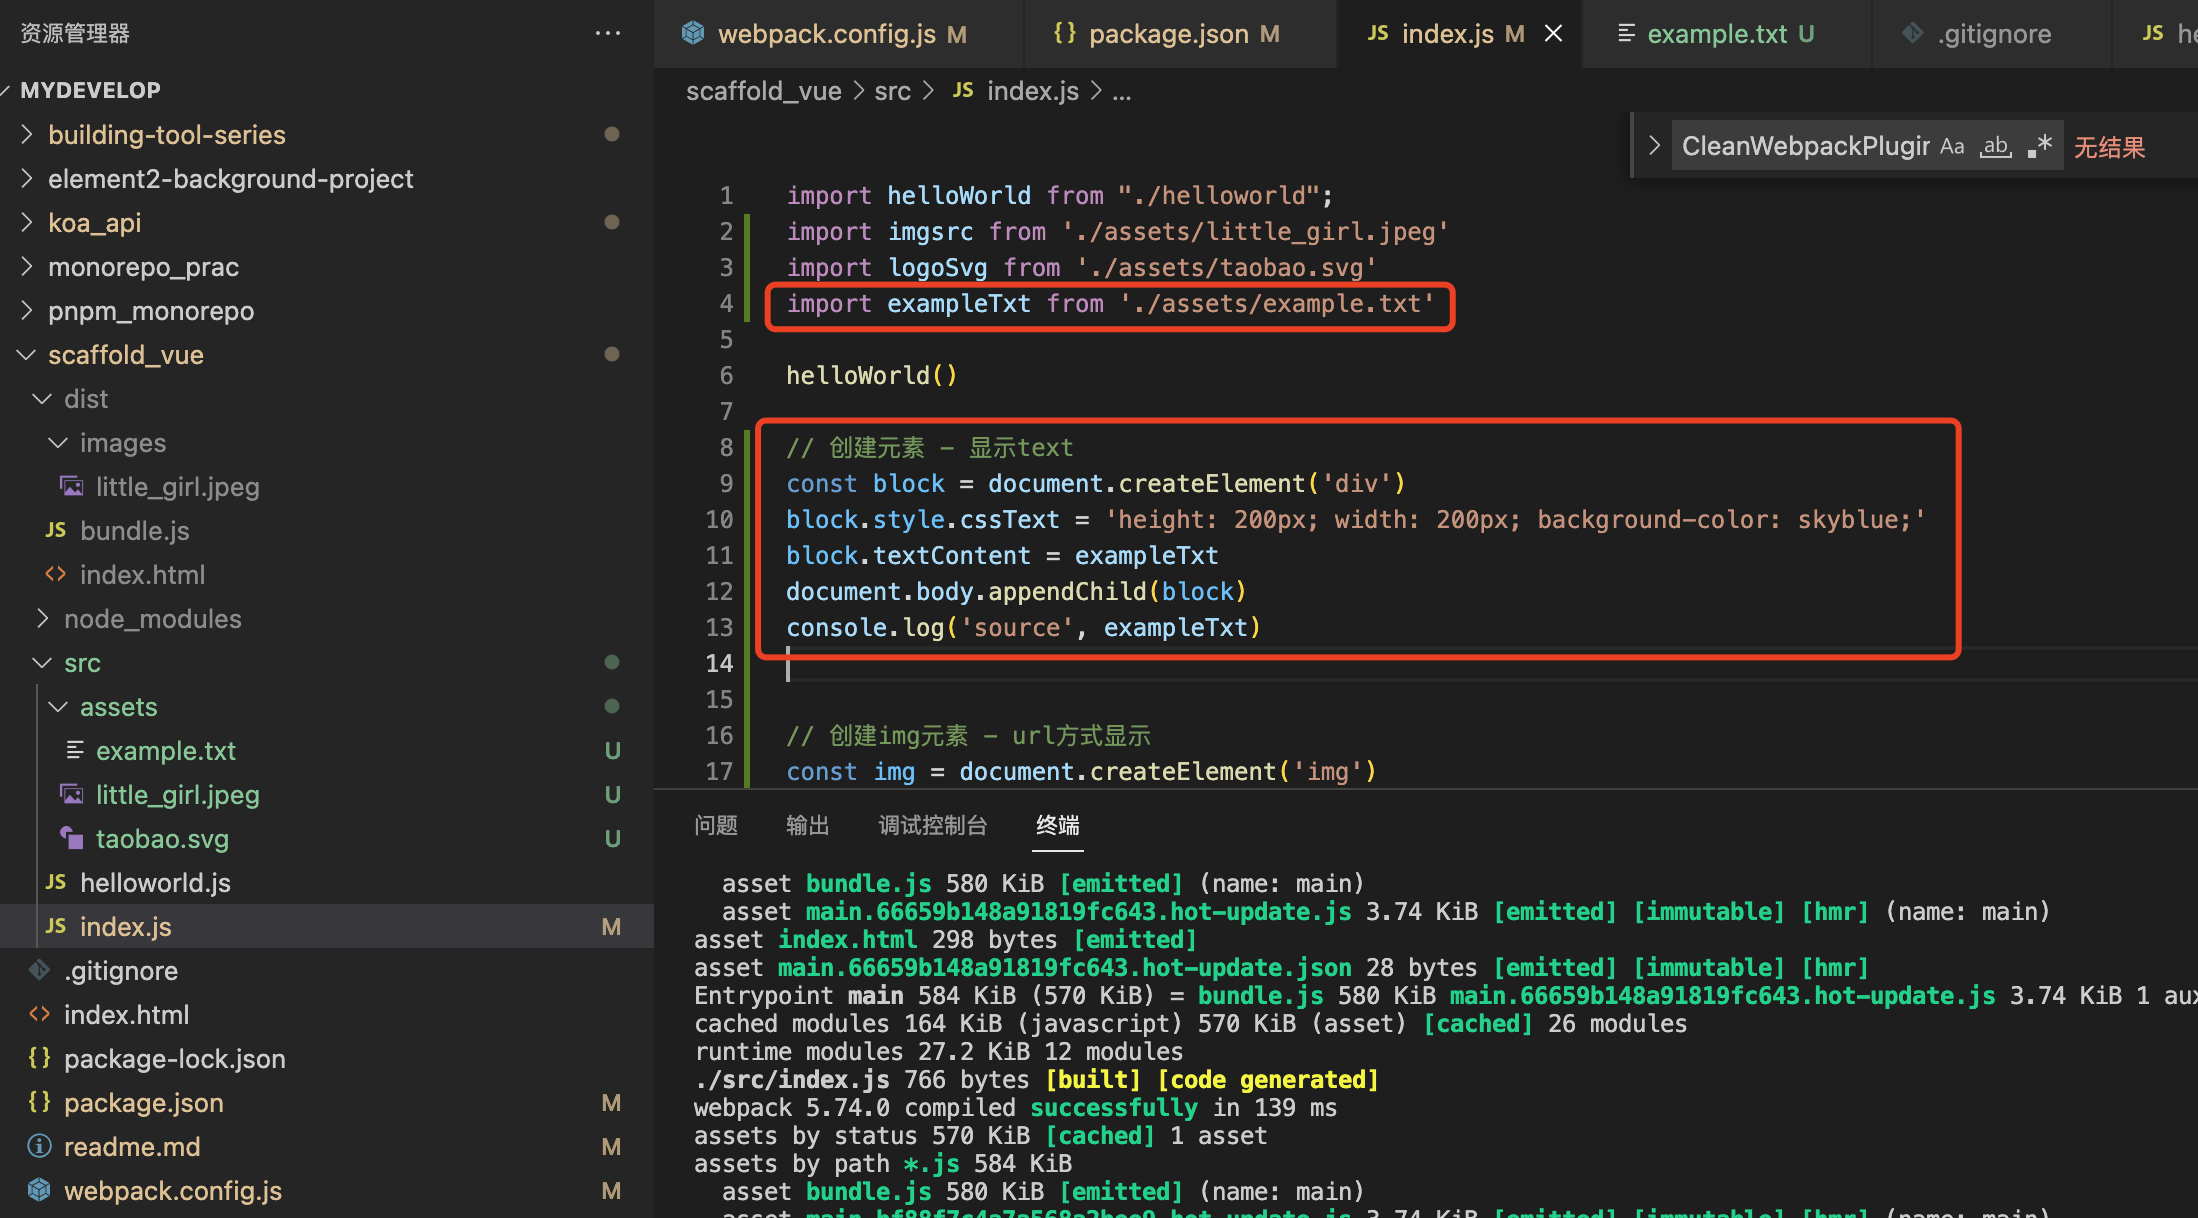
4.3 asset/source
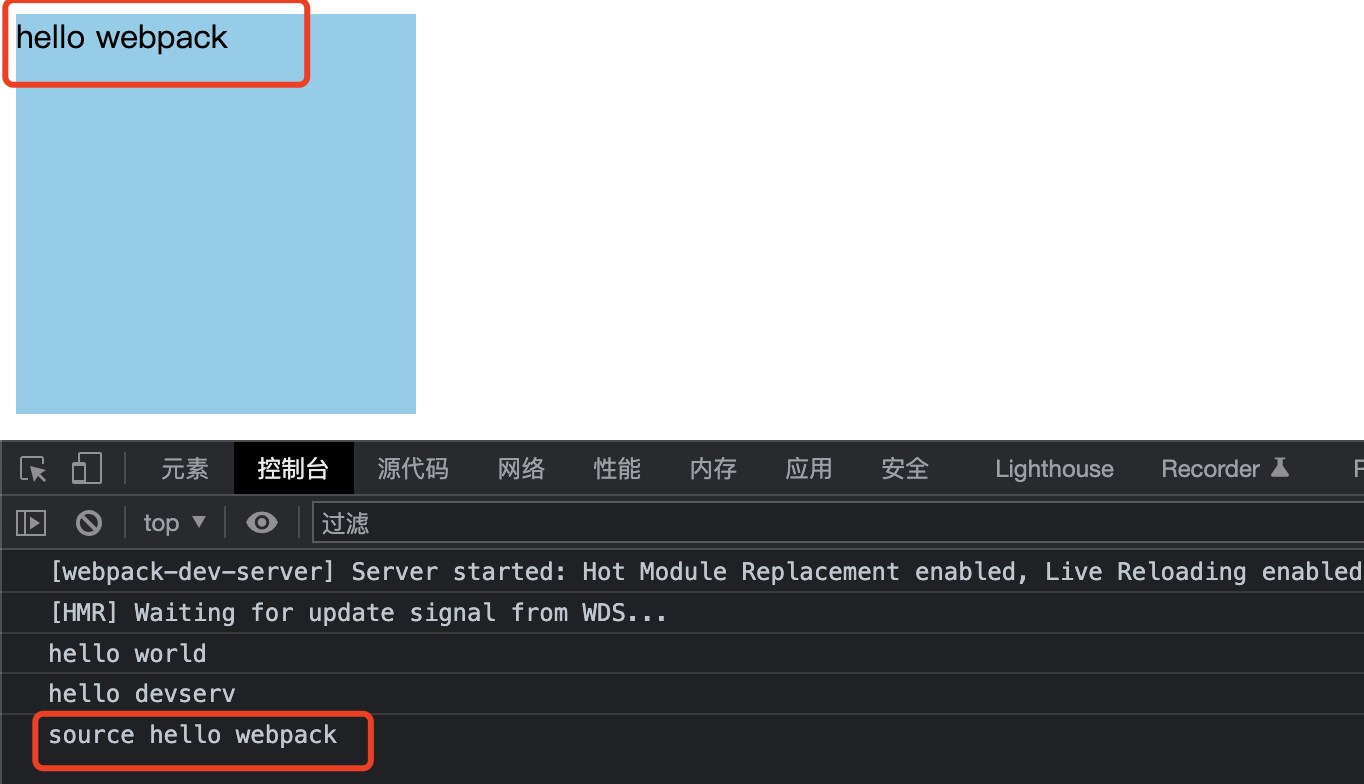
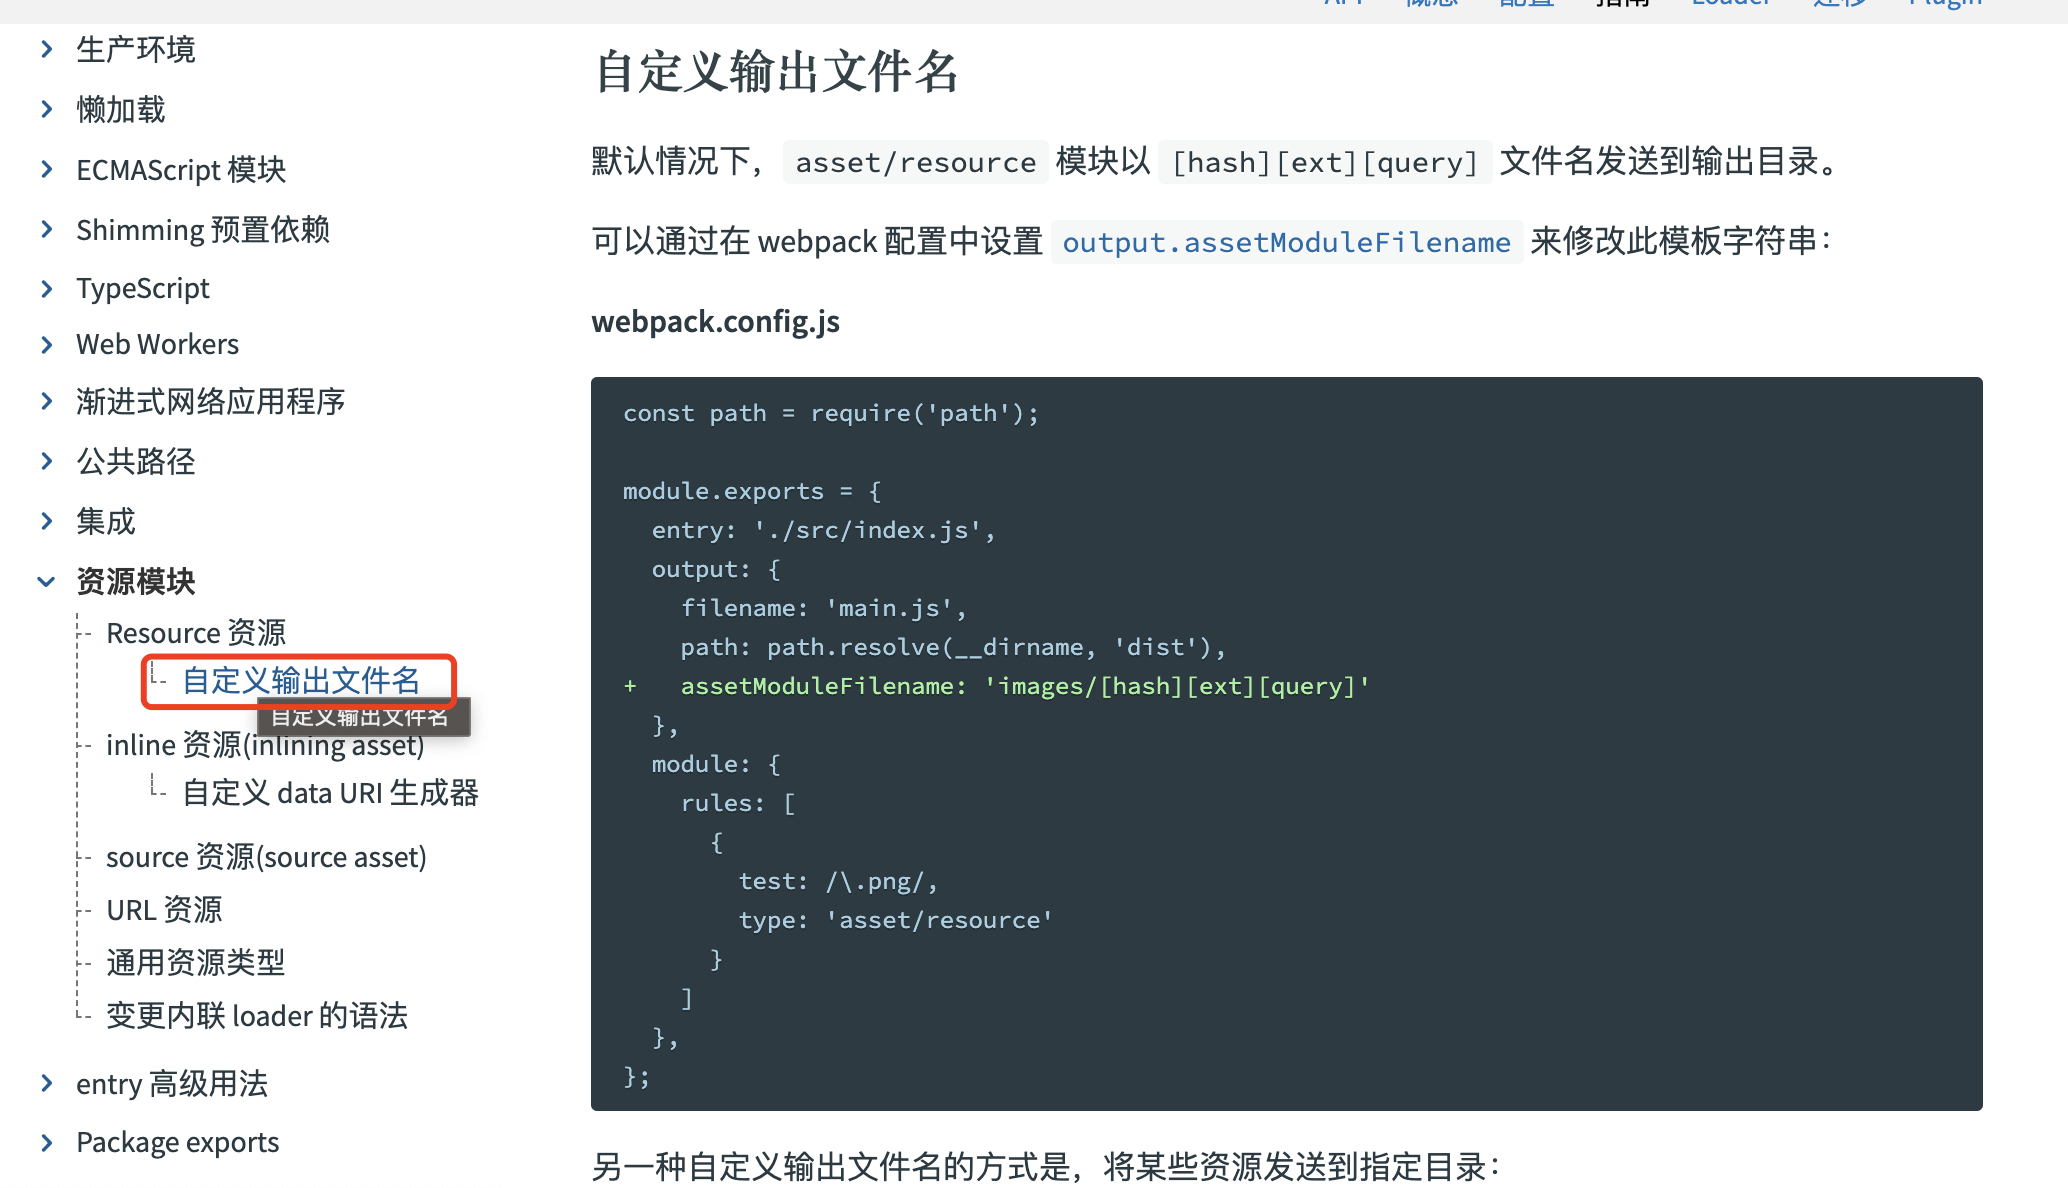
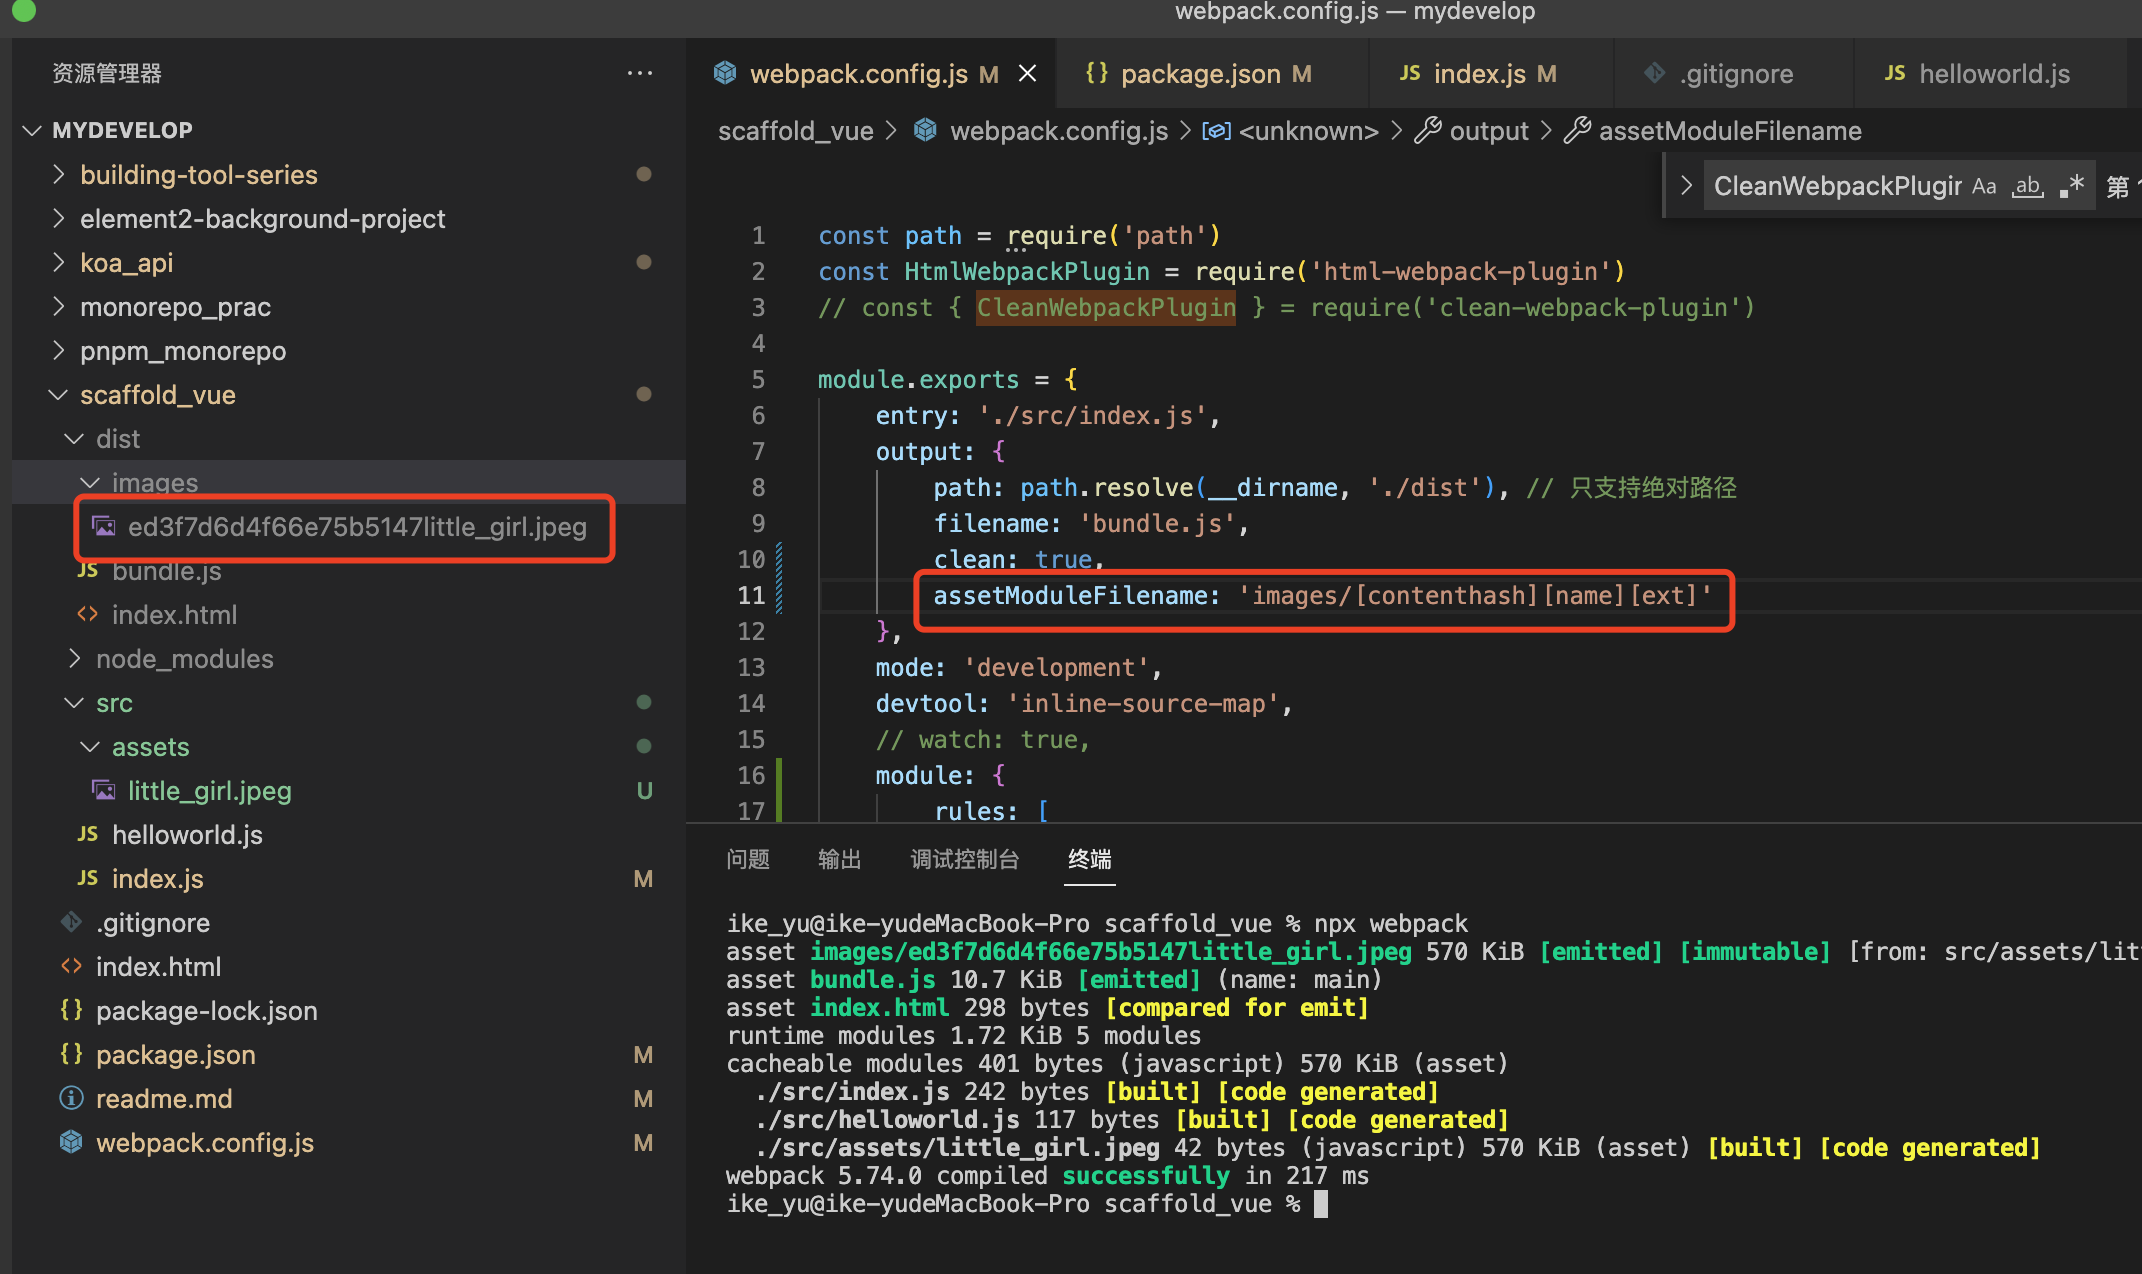
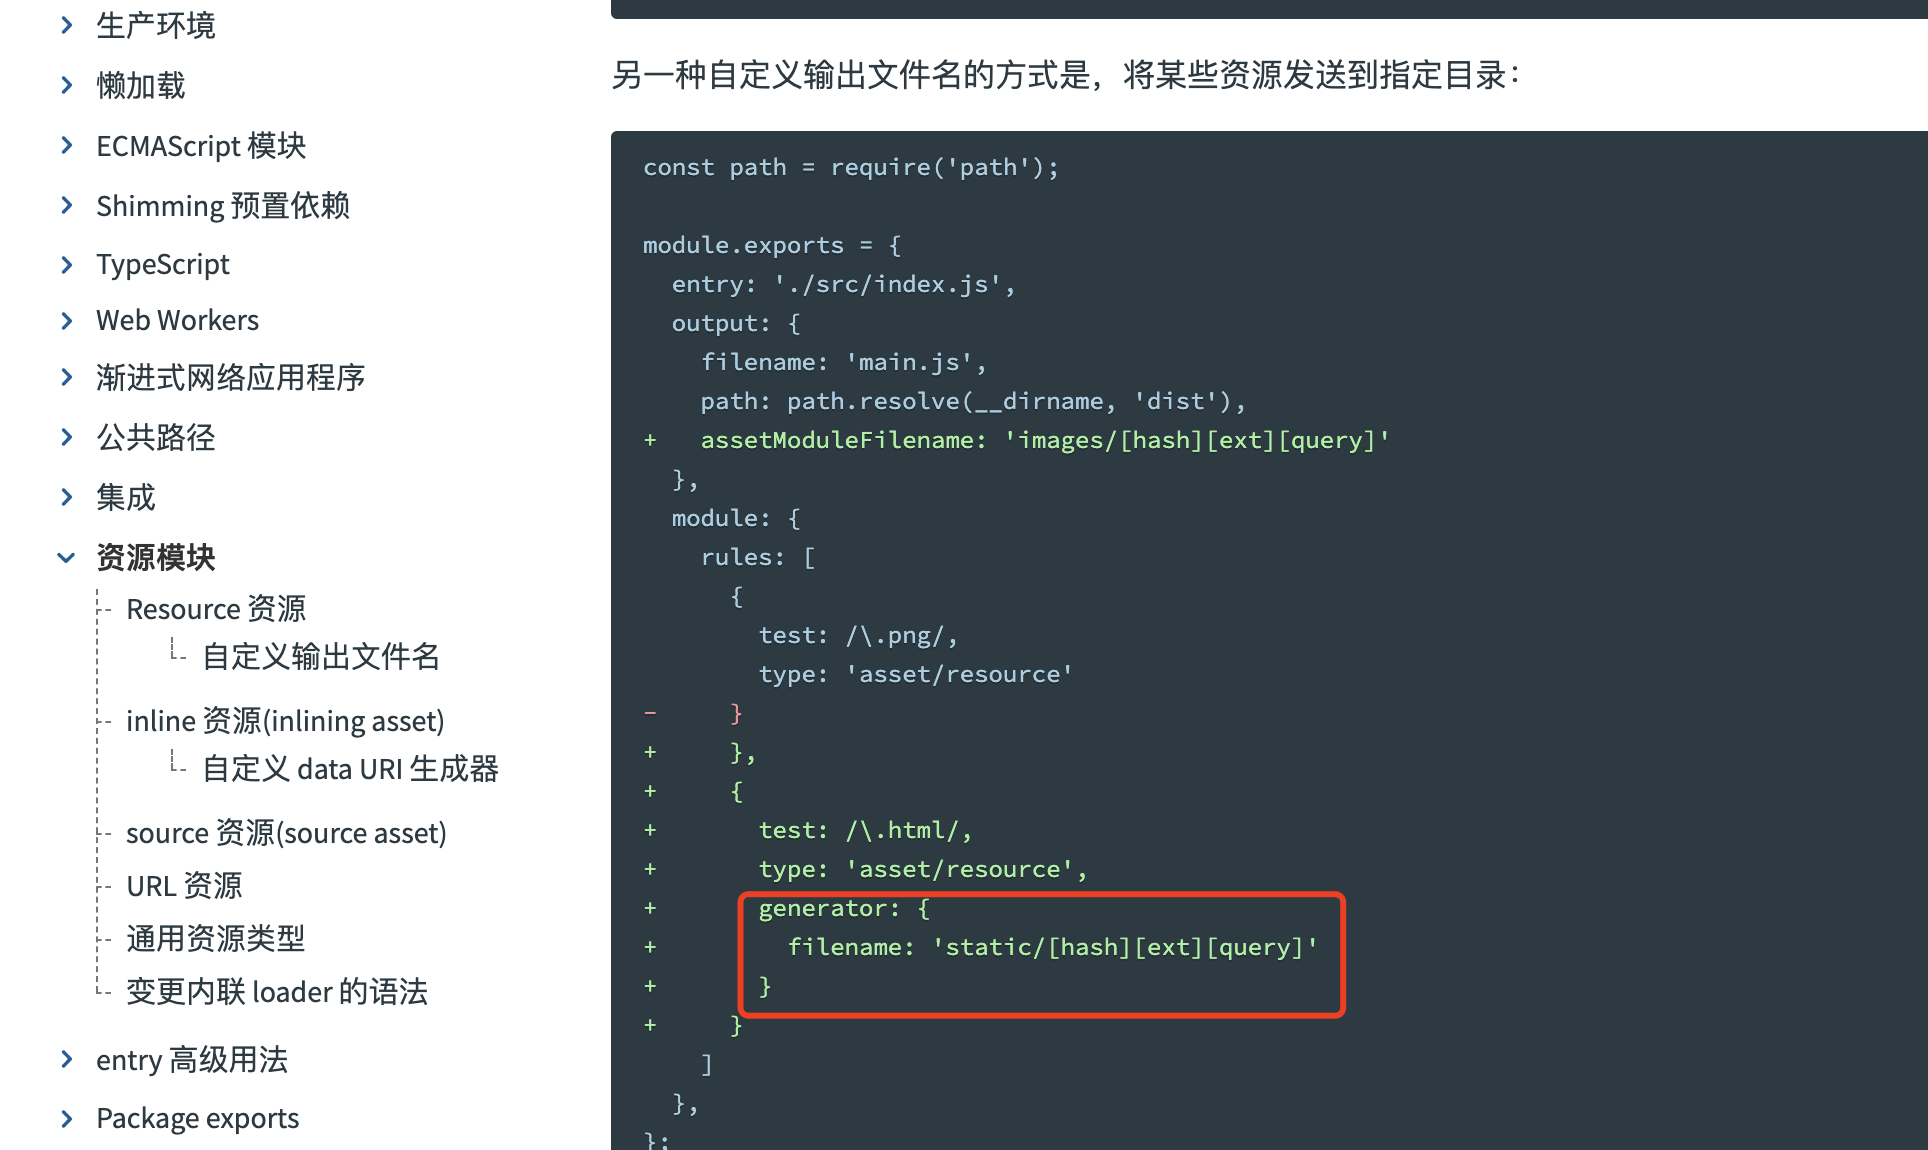
4.4 输出文件名
4.4.1 assetModule
作用:配置打包后文件名规则
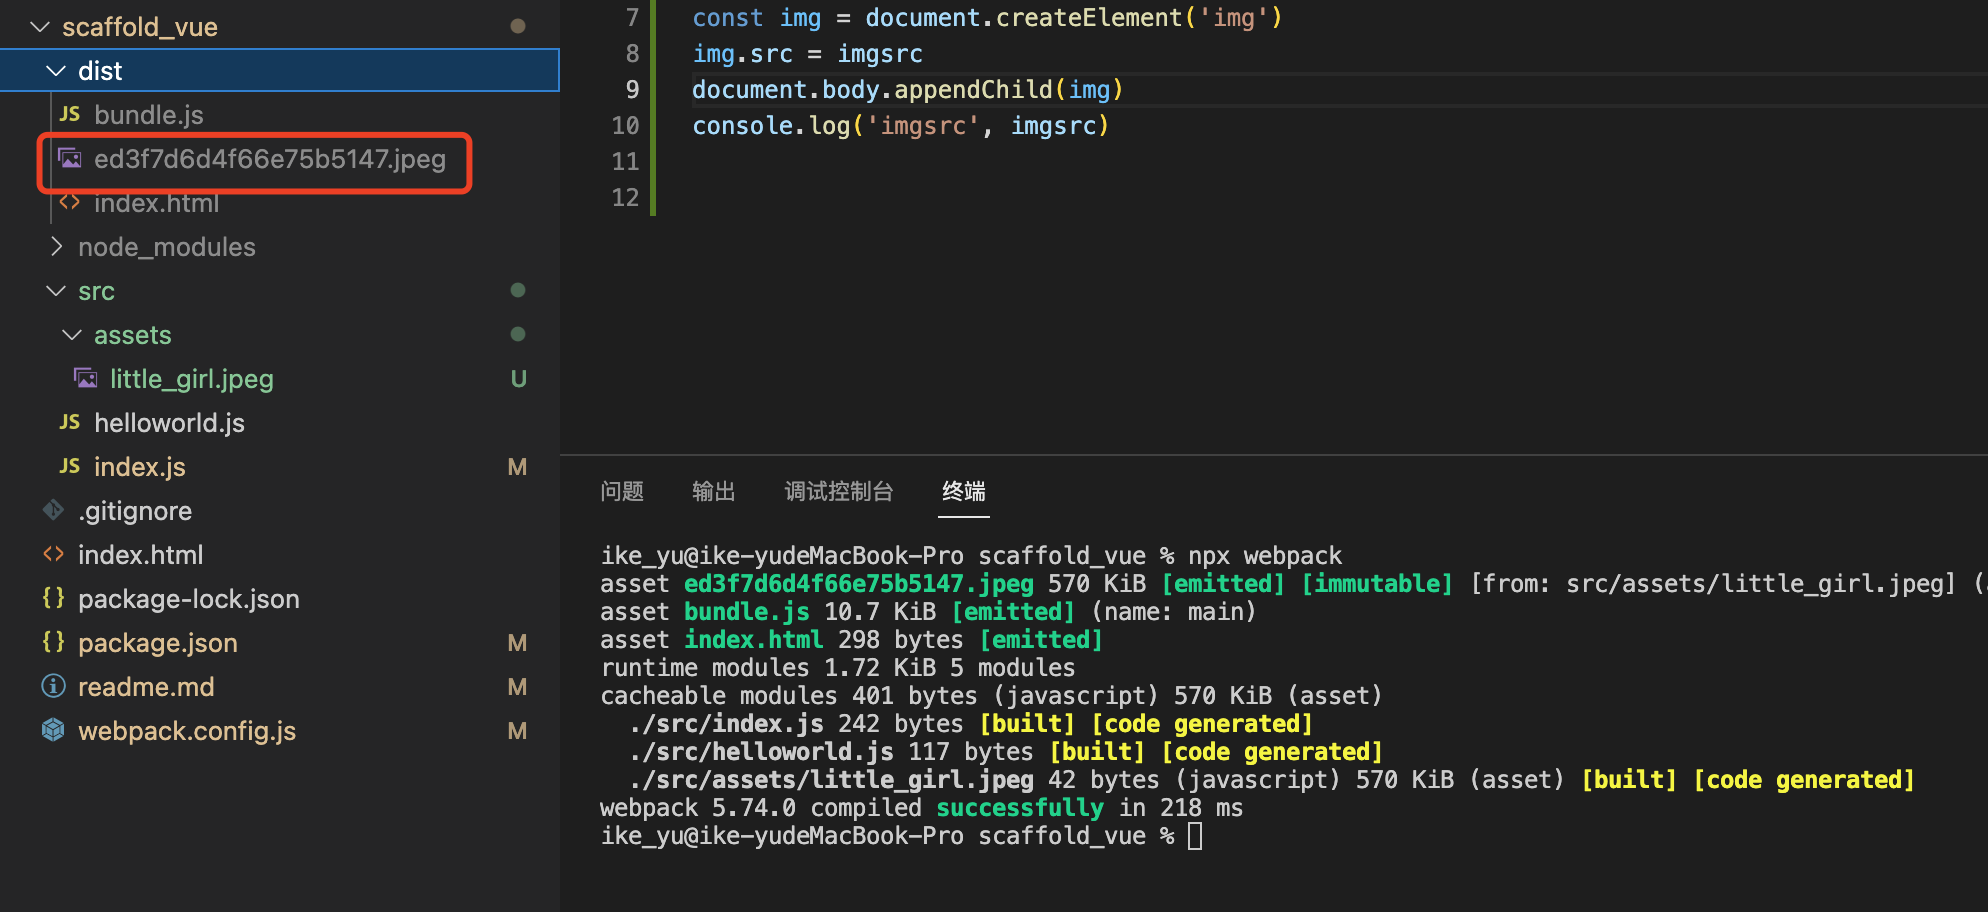
思考:如何自定义打包后的资源文件名
4.4.2 generator
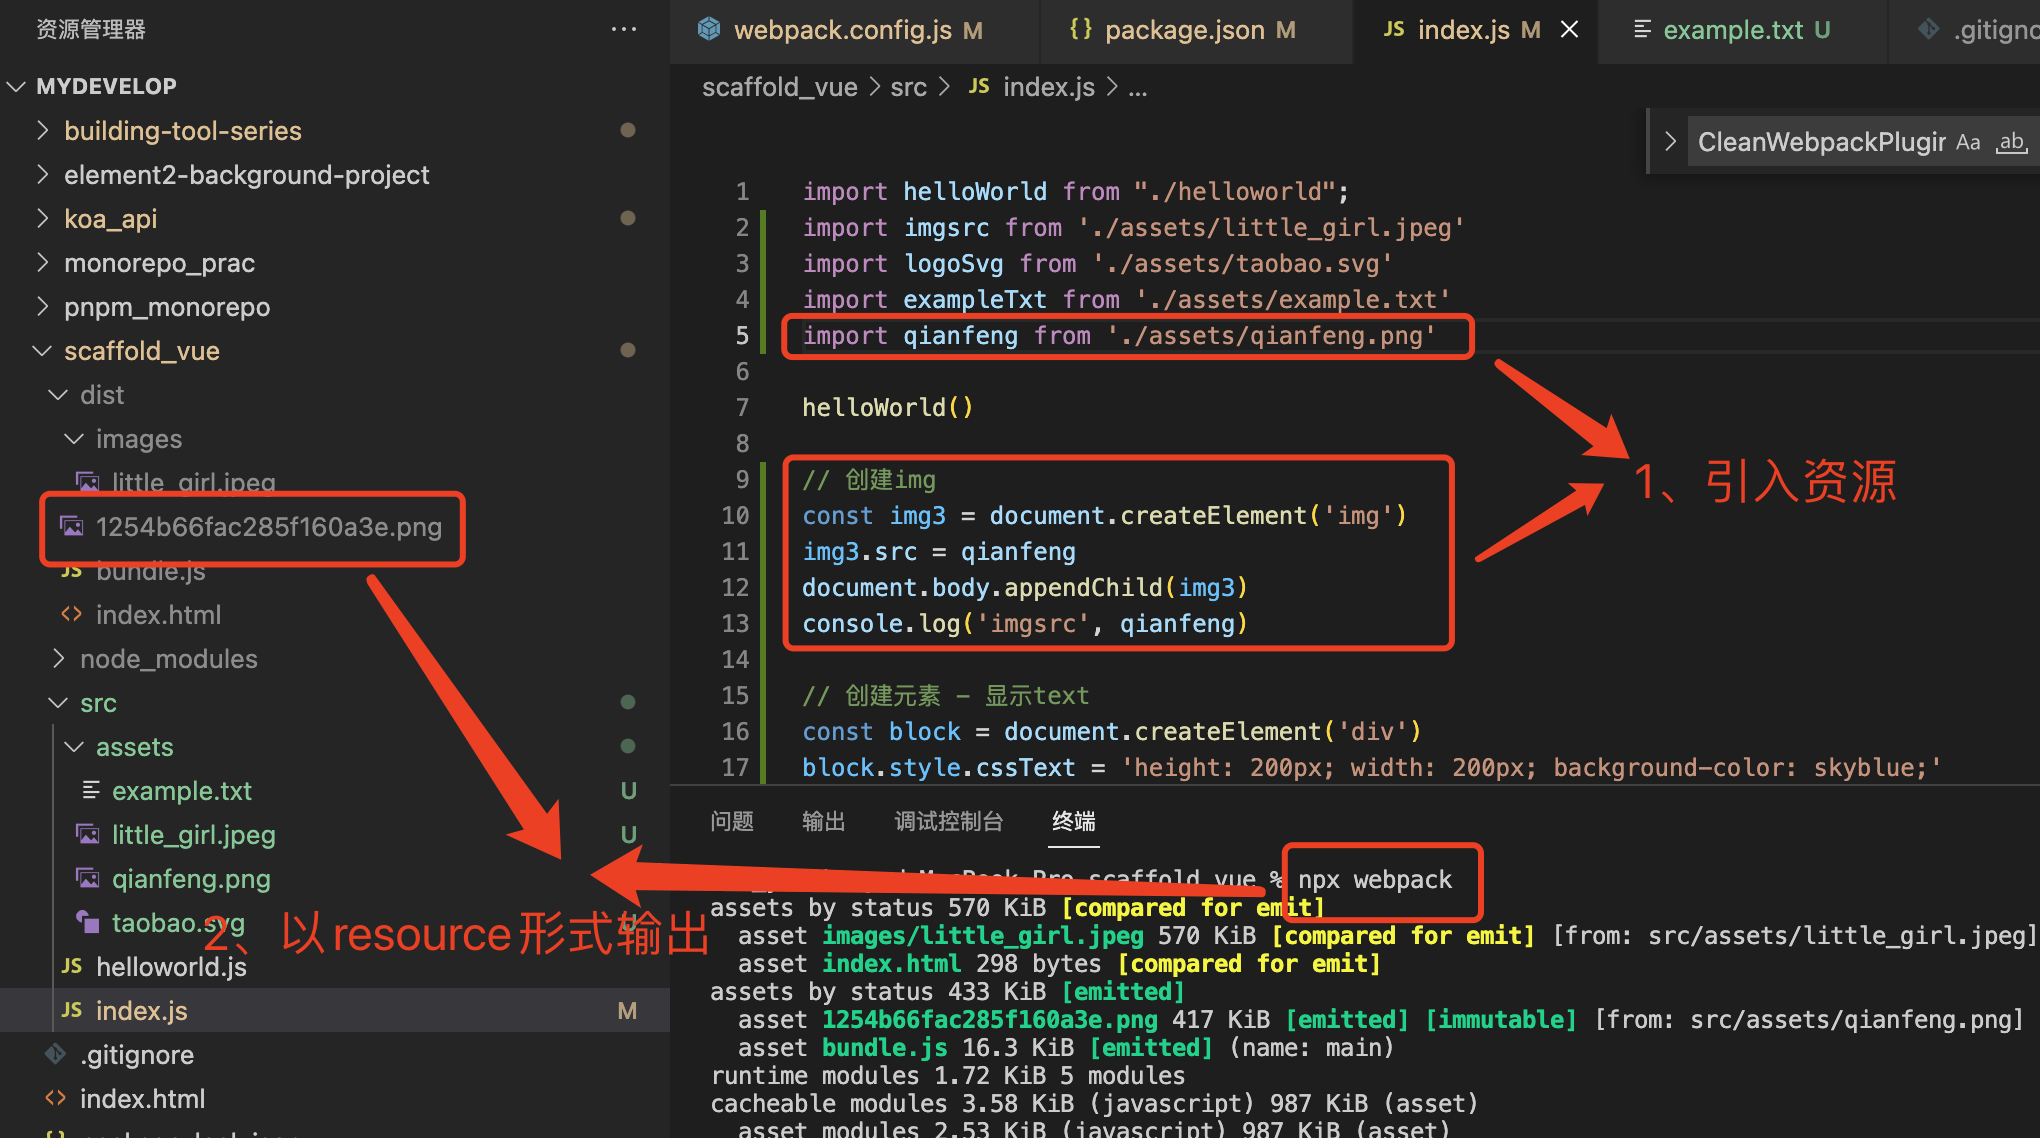
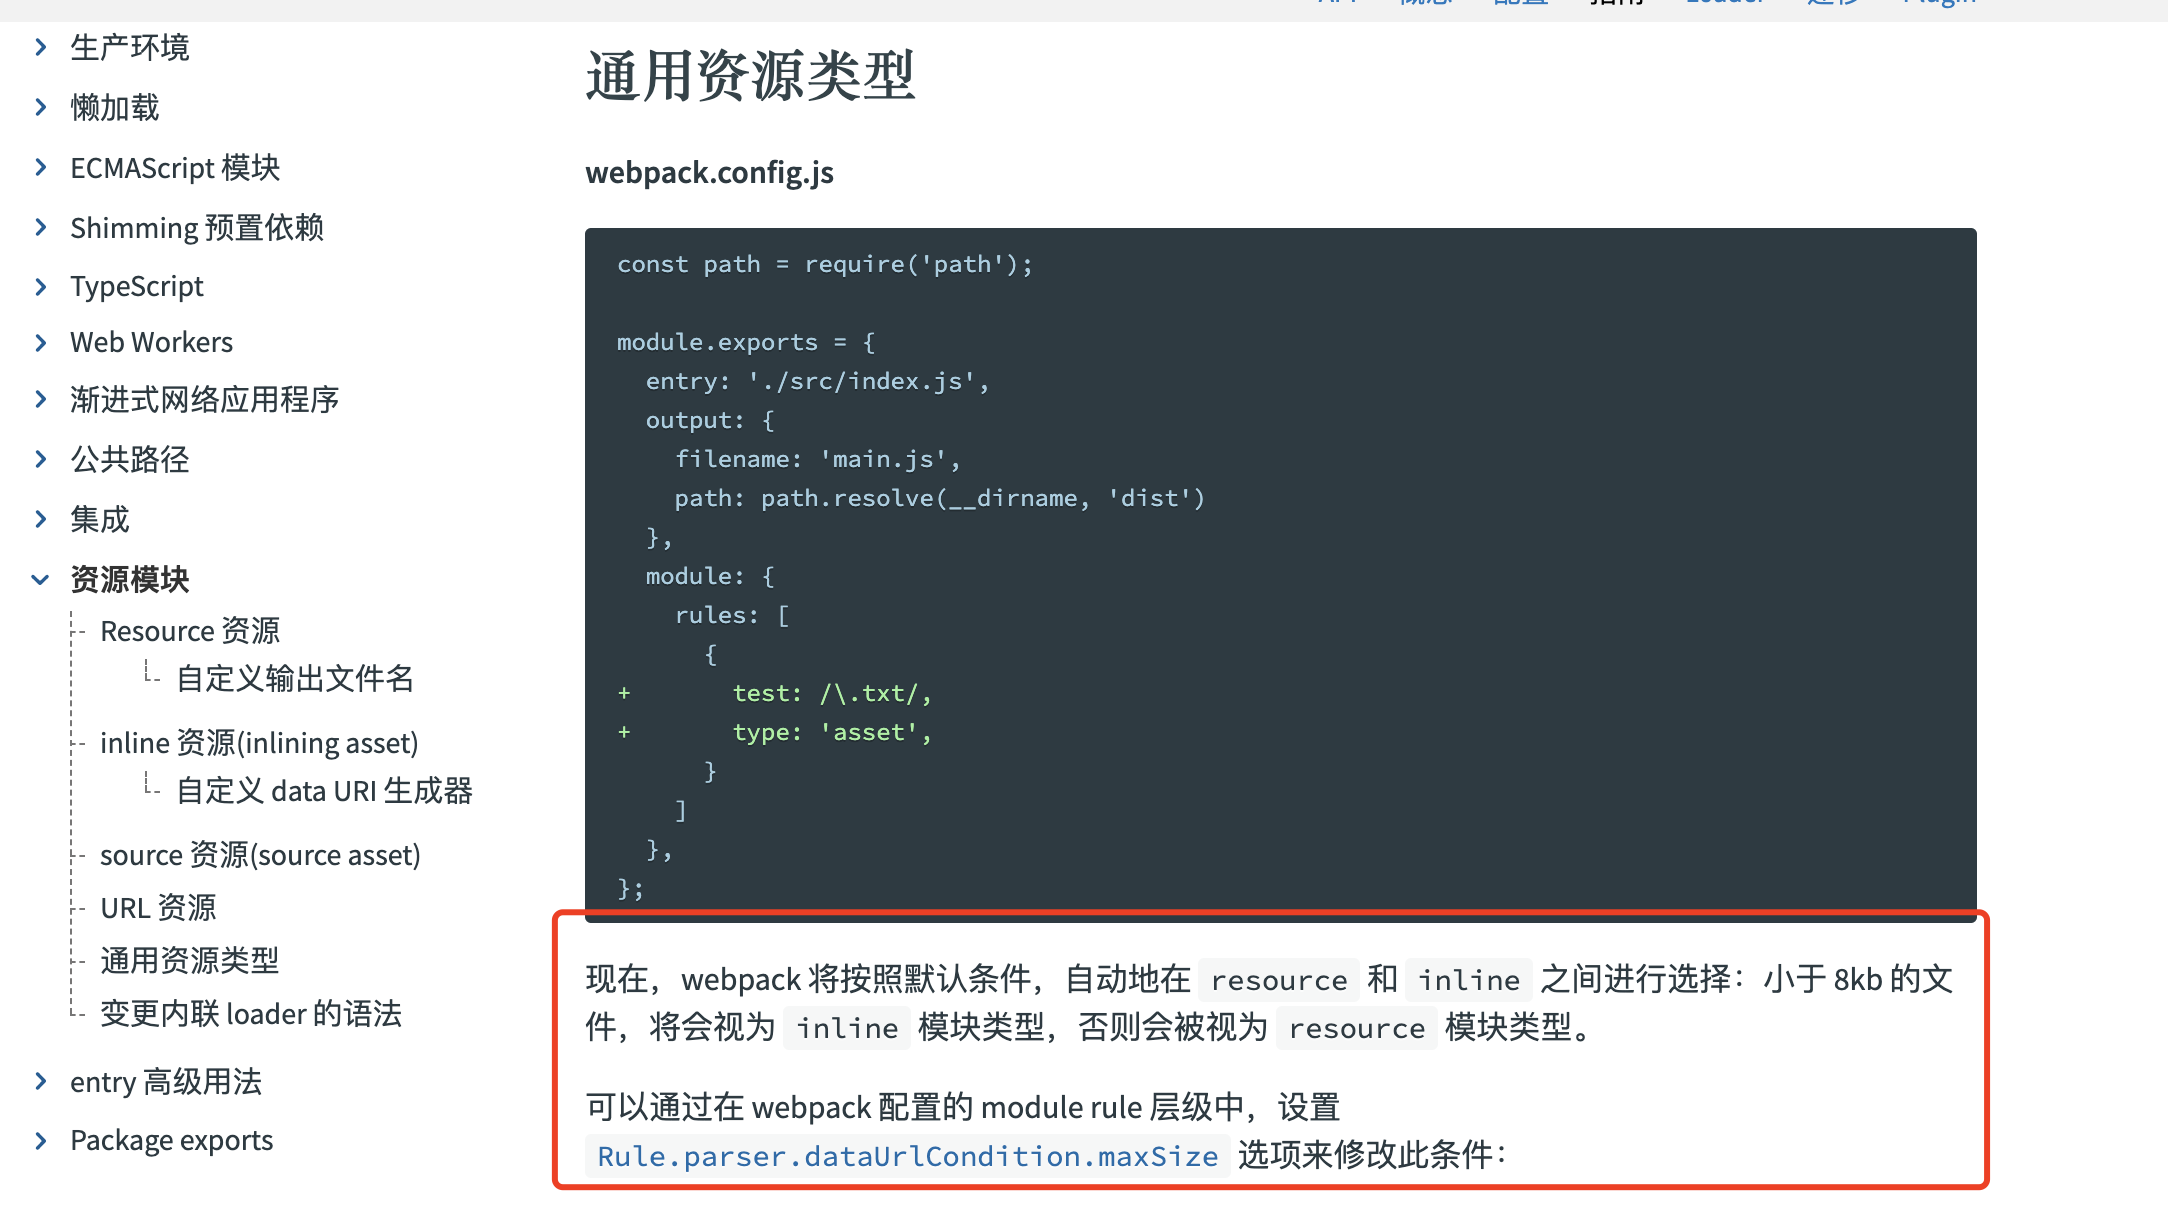
4.5 asset
作用:自动选择asset/resource或者asset/inline资源导入模式
原理:默认情况下,资源体积大于8k会创建一个资源,小于8k会生成inline资源
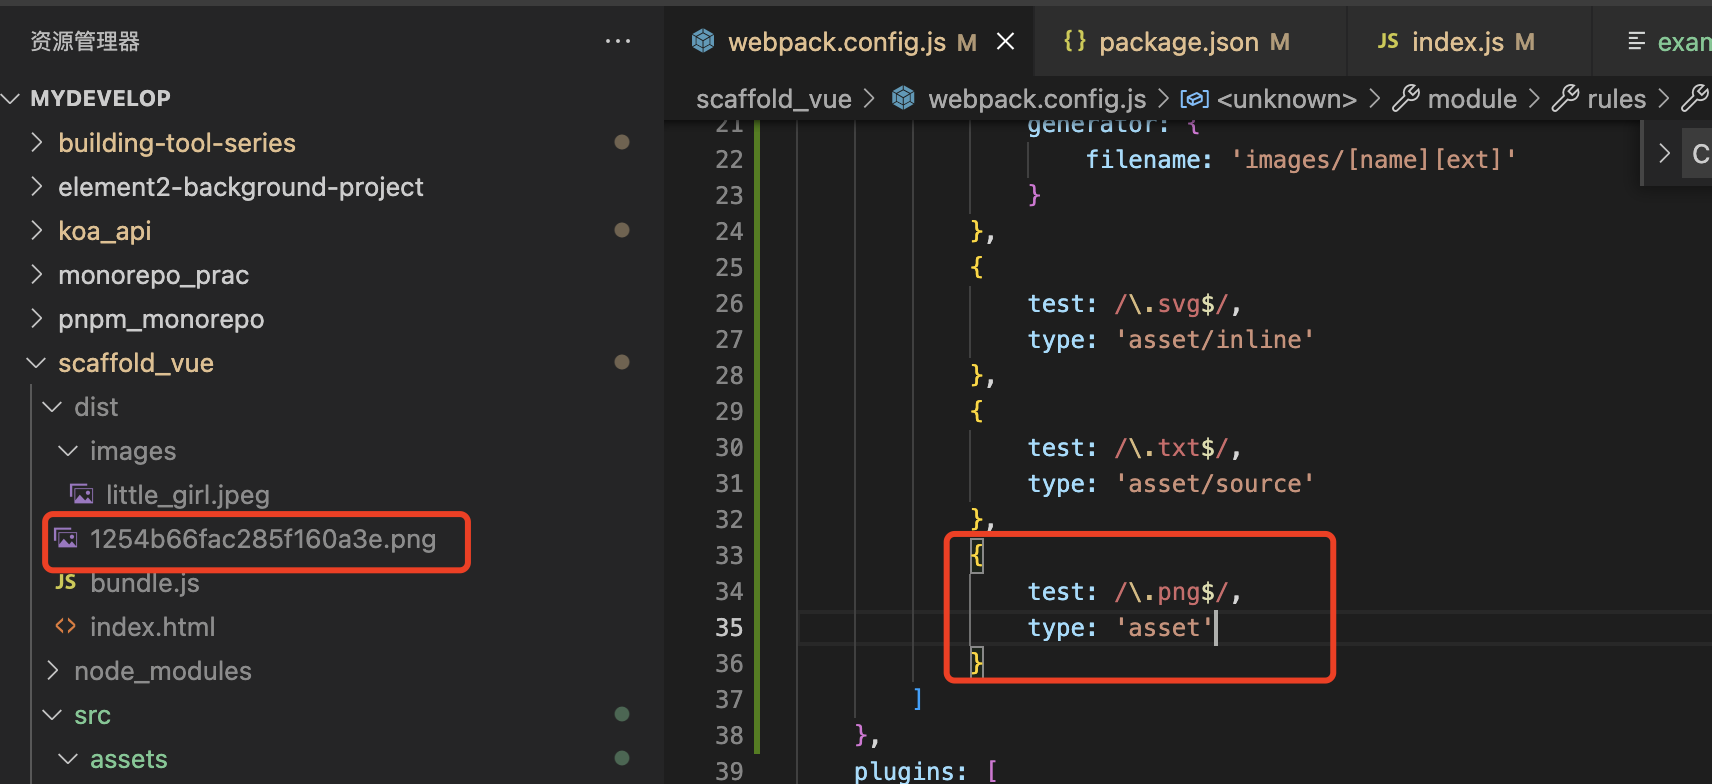
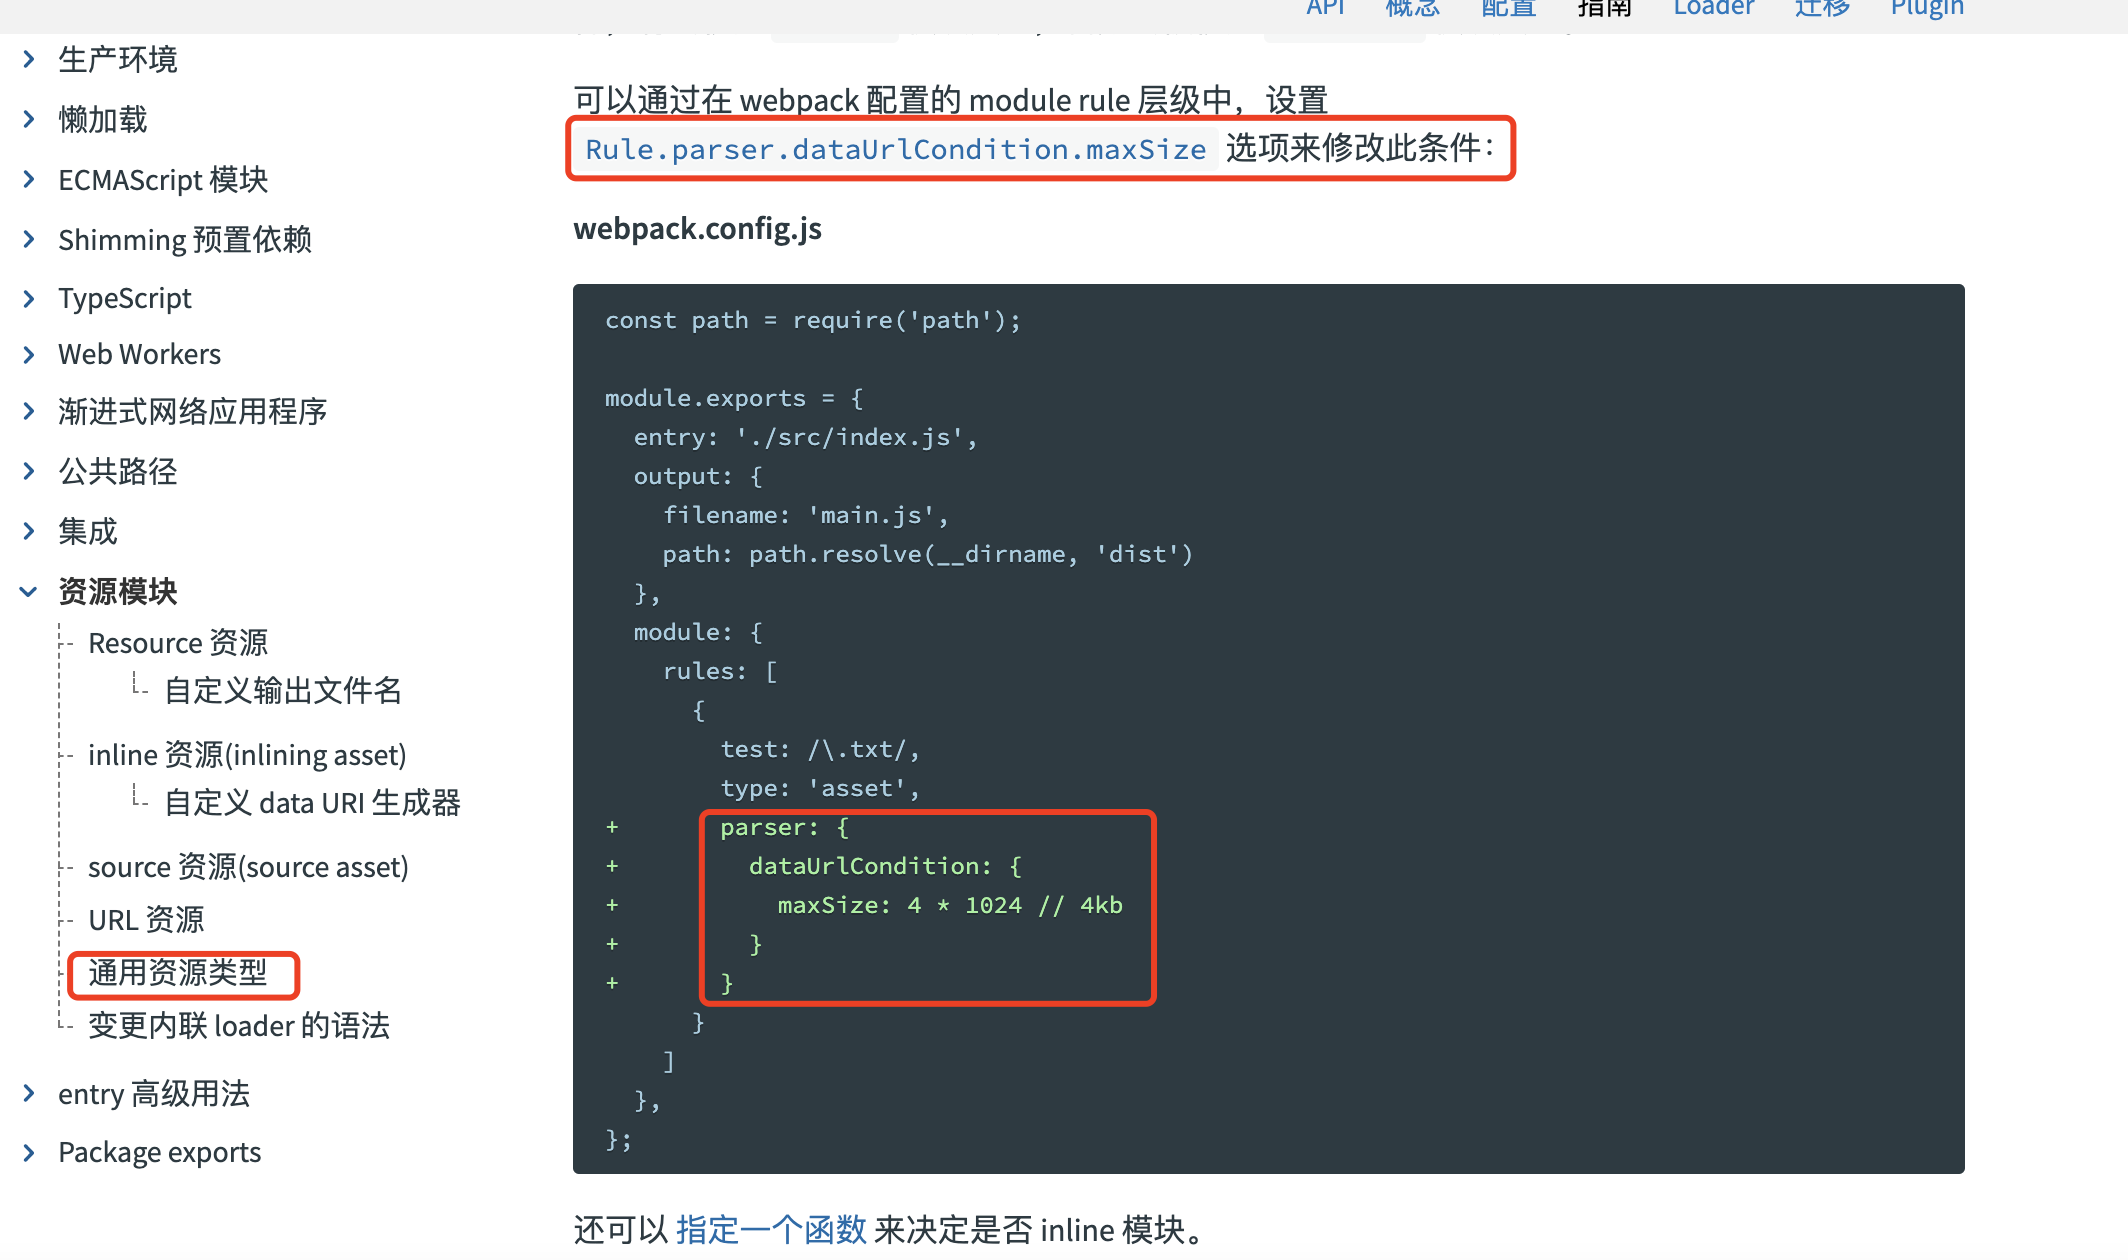
思考:如何修改webpack默认的规则?

5、loader
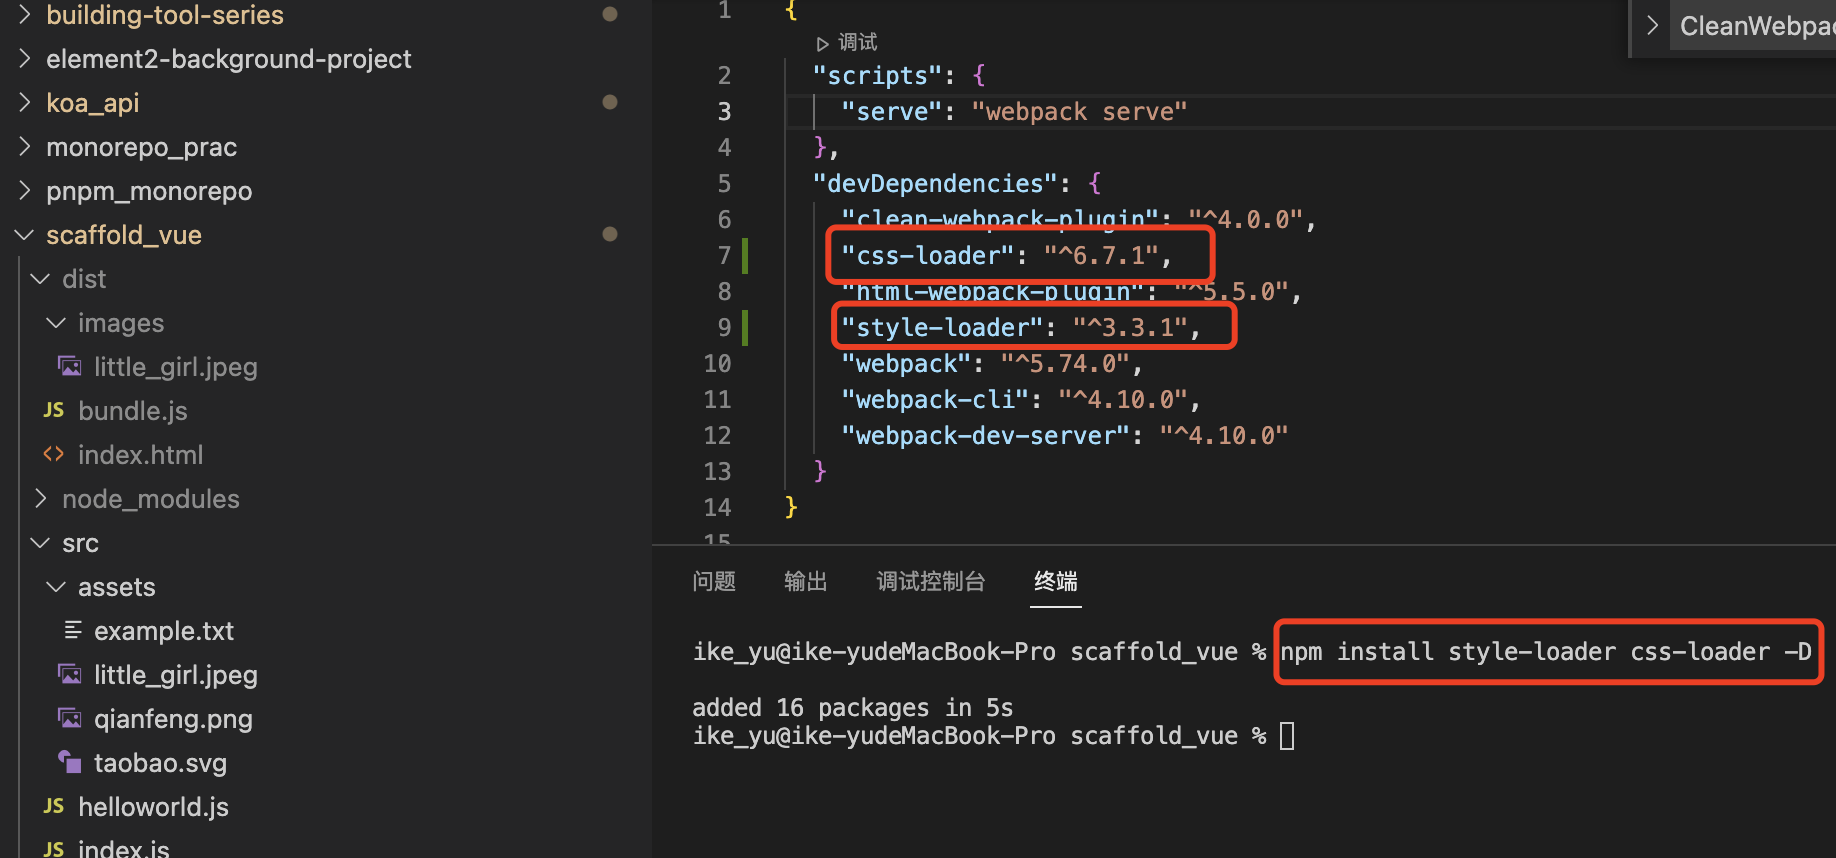
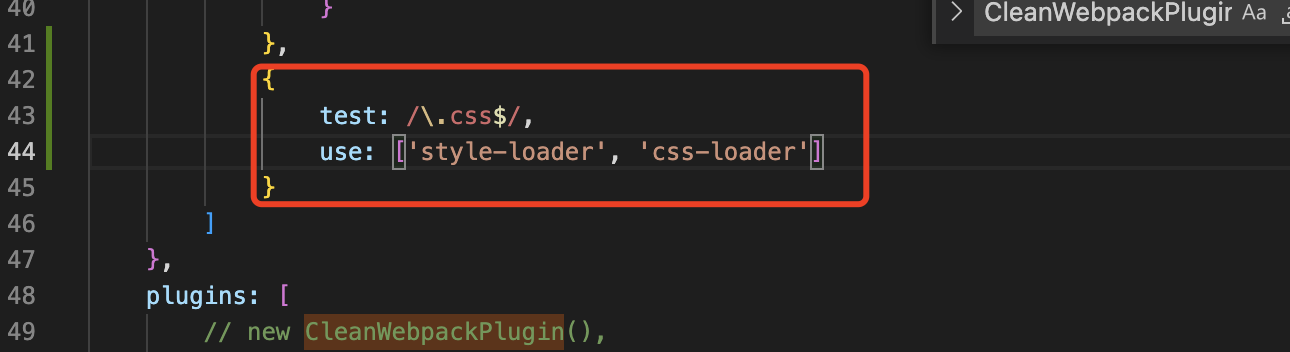
5.1 css相关
需要用到style-loader、css-loader
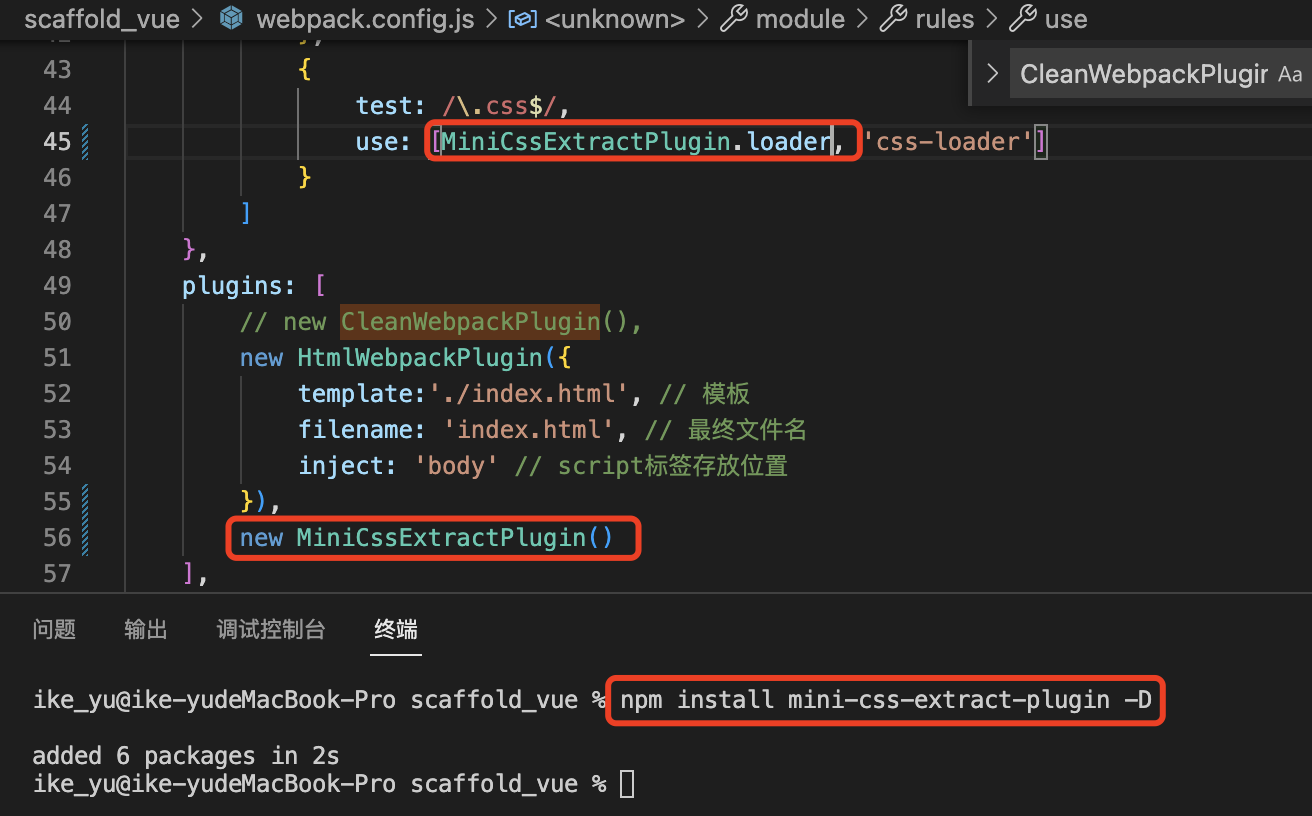
5.1.1 抽离css
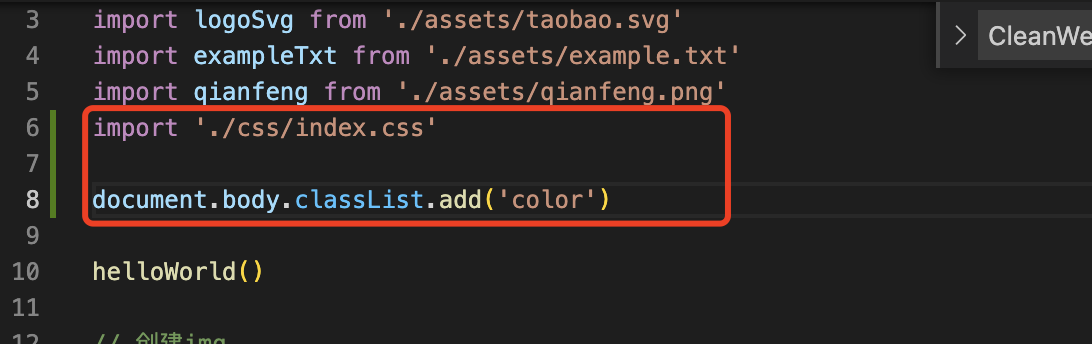
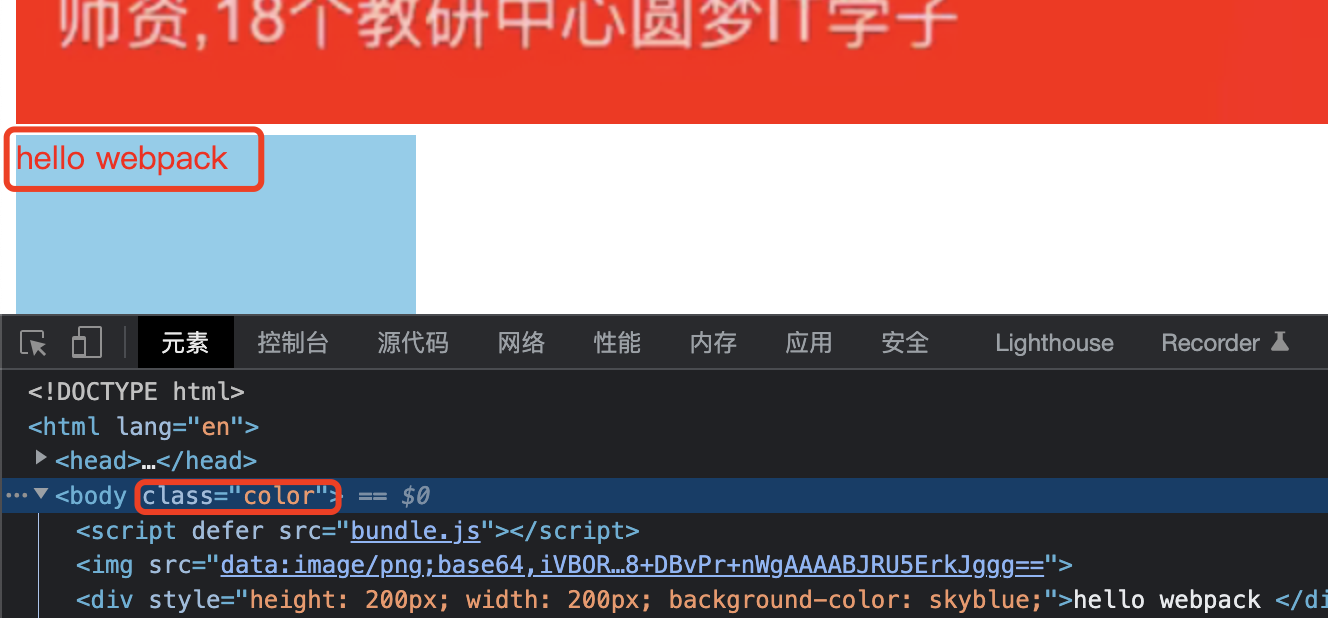
情形:默认情况下,导入的css会转换成js
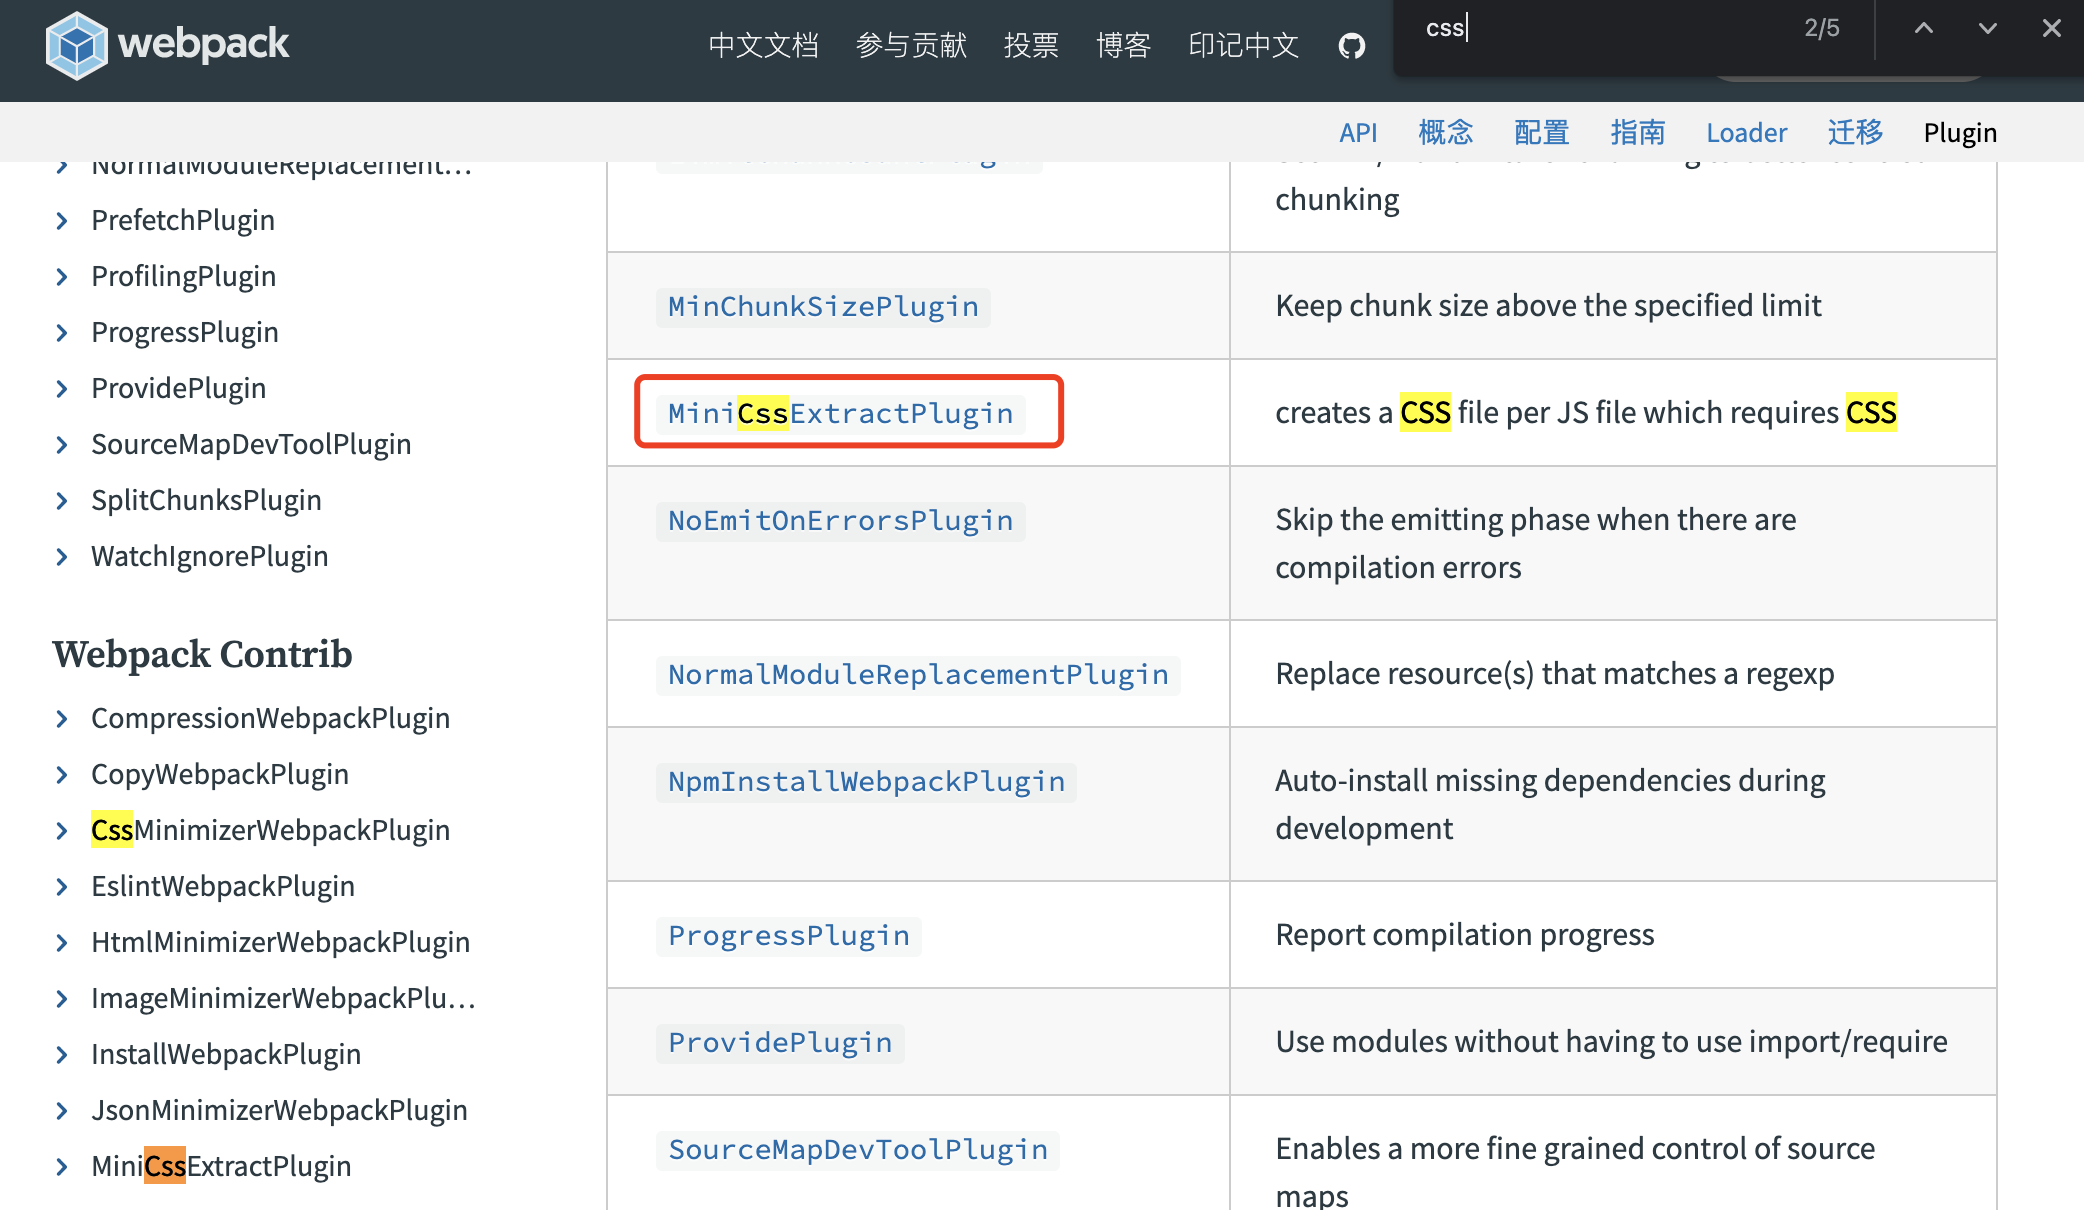
需要抽离css,需要借助mini-css-extract-plugin
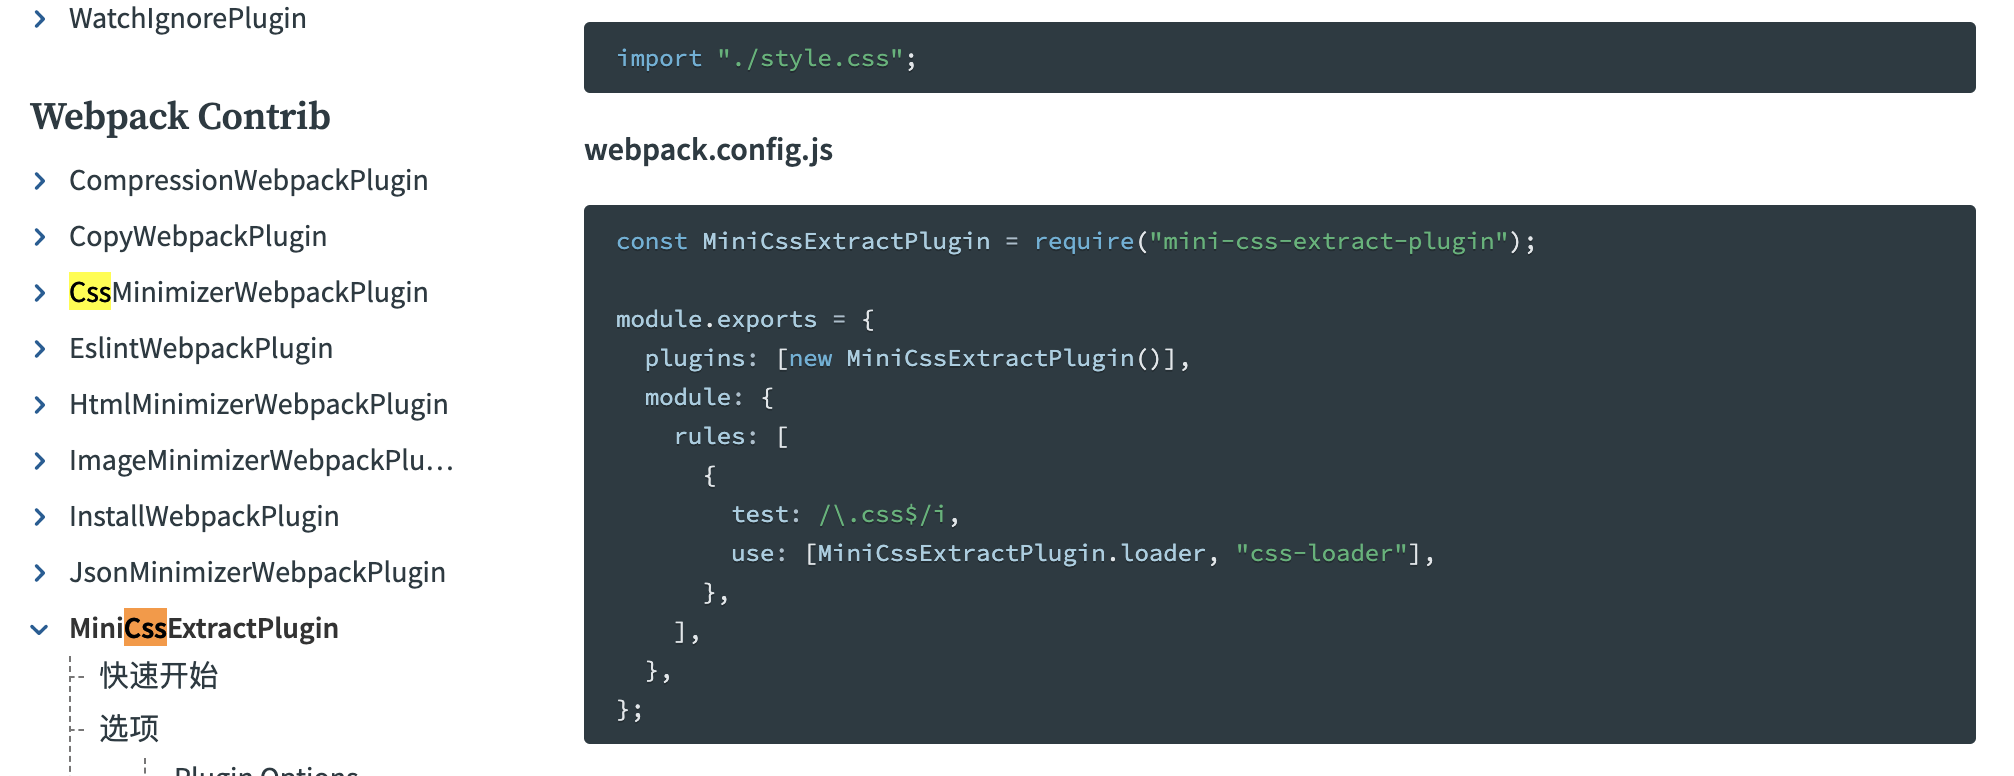
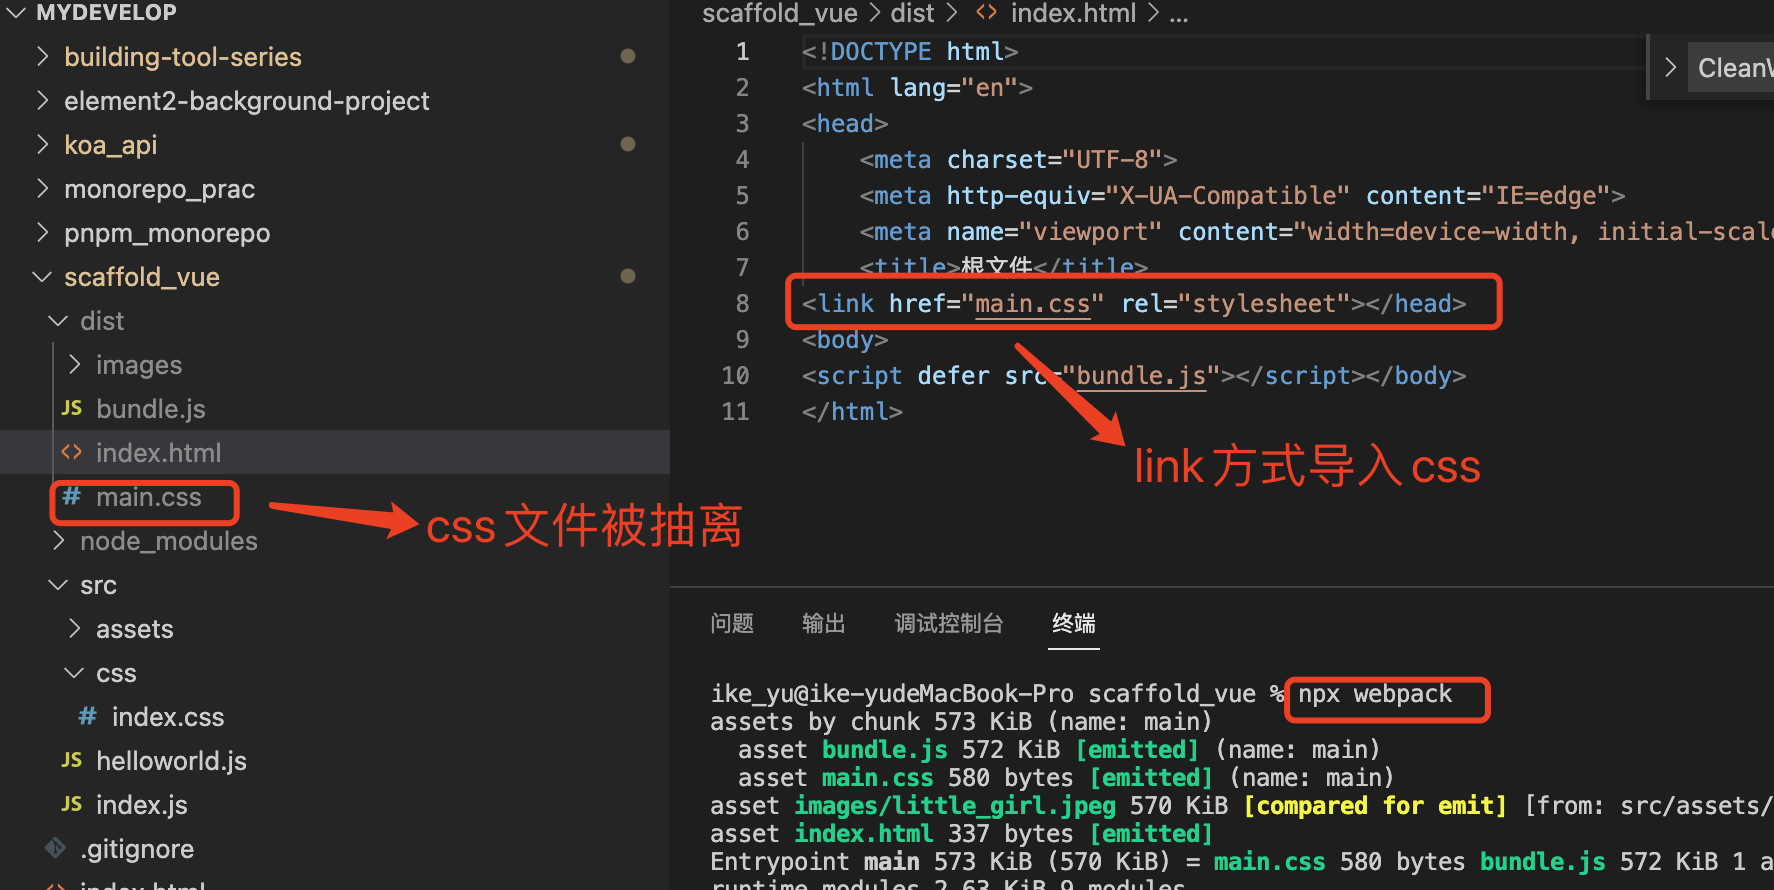
思考:如何指定打包后的css存放文件夹及文件名

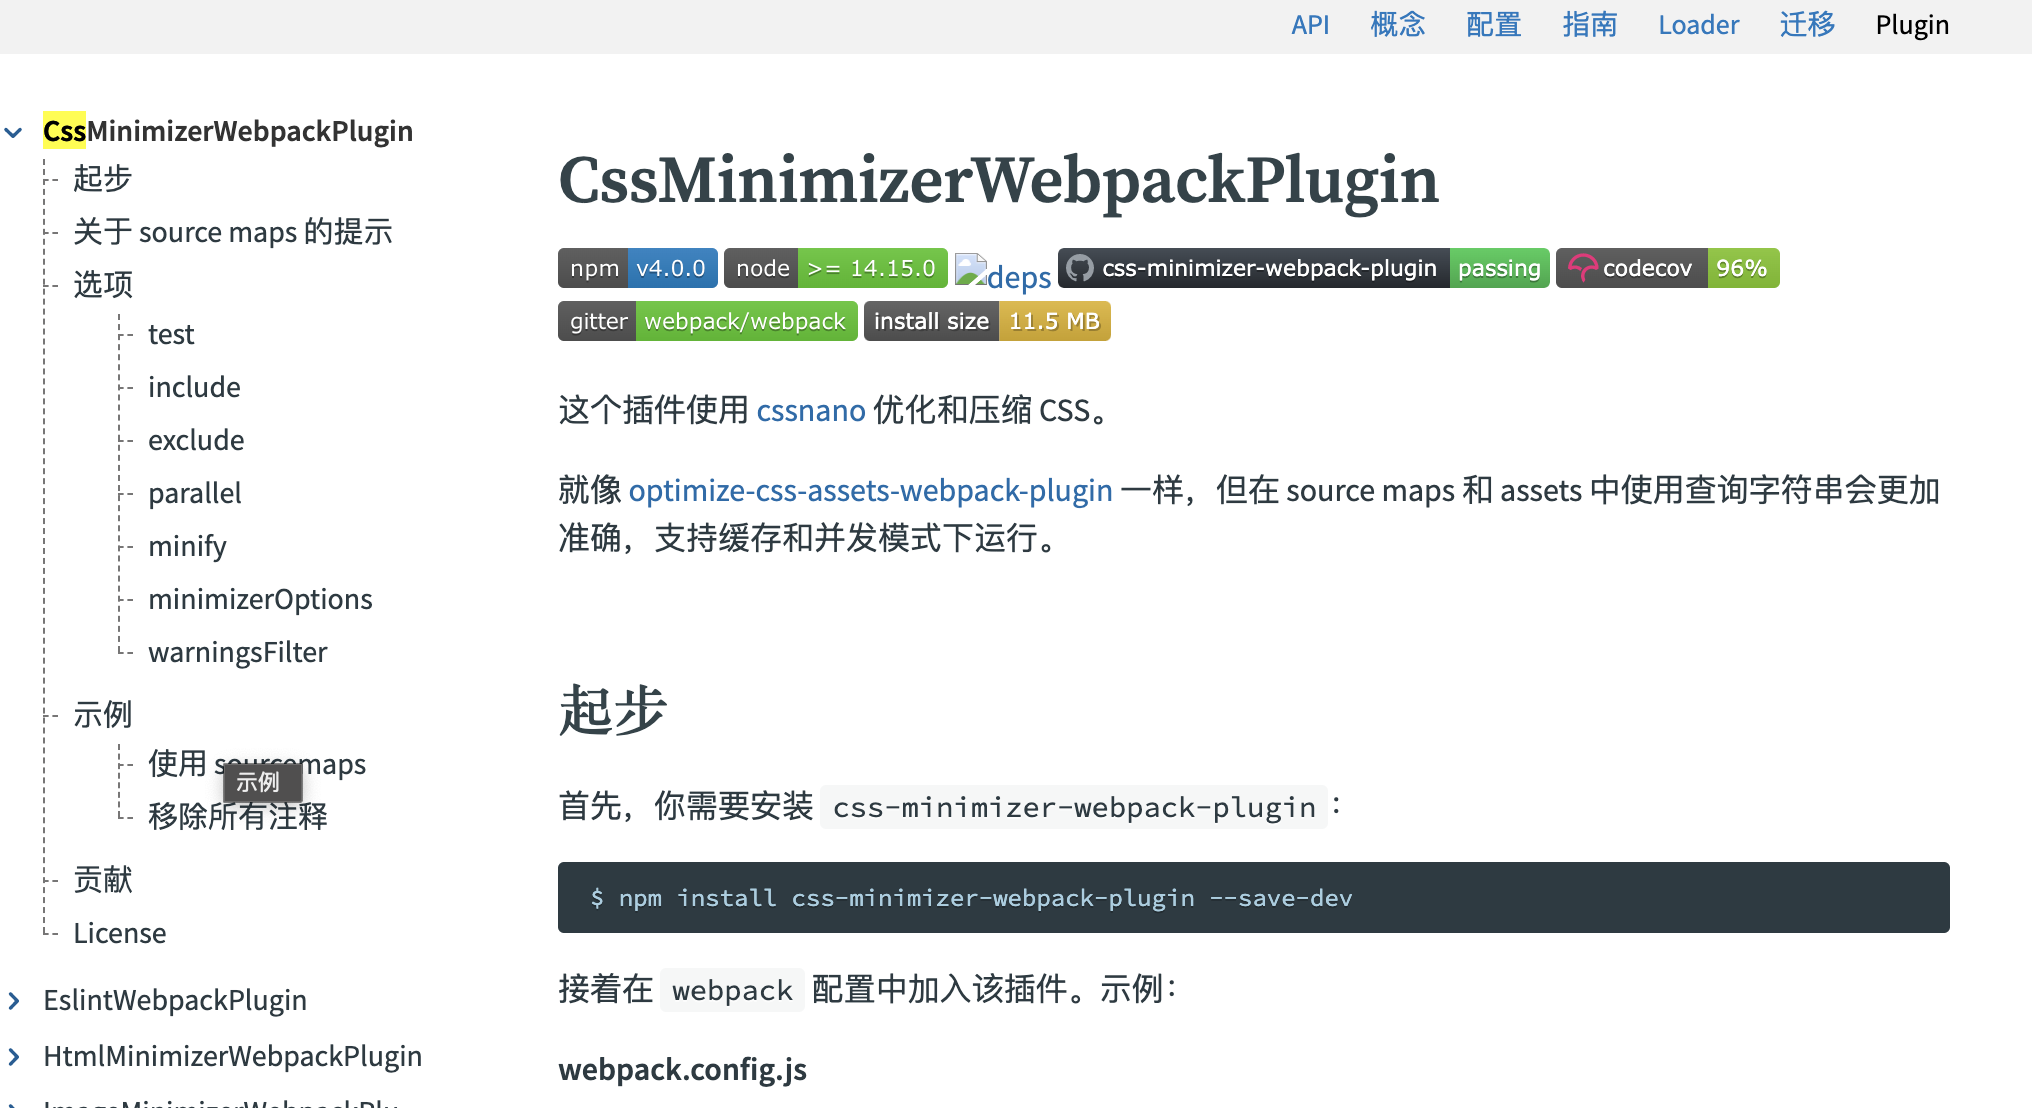
5.1.2 压缩css
压缩css,需要借助css-minimizer-webpack-plugin
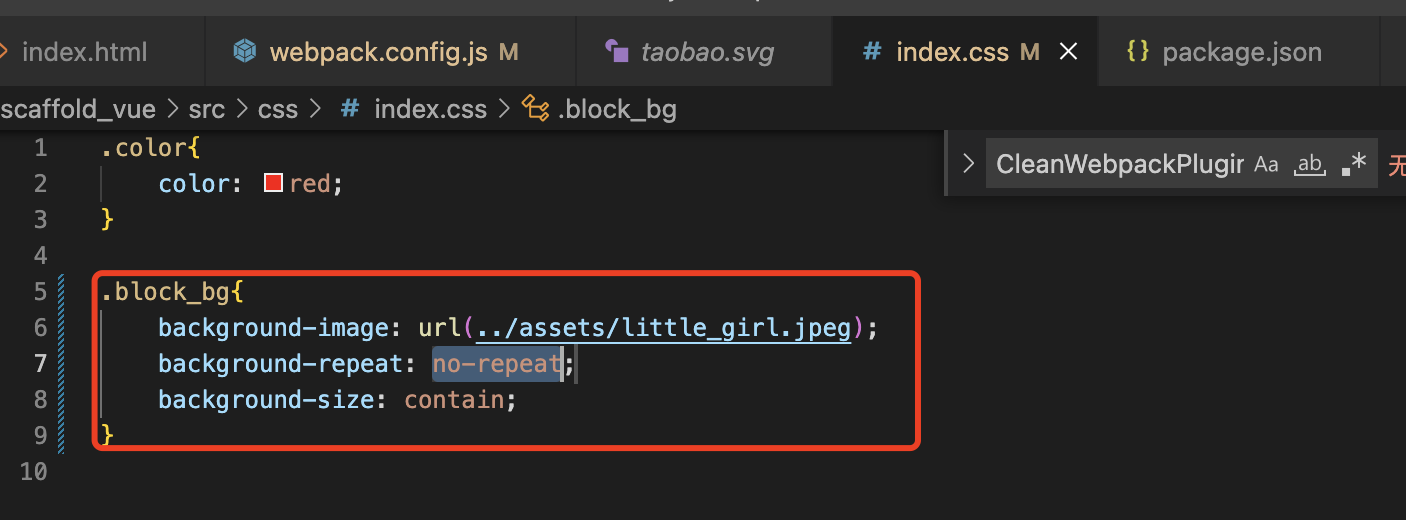
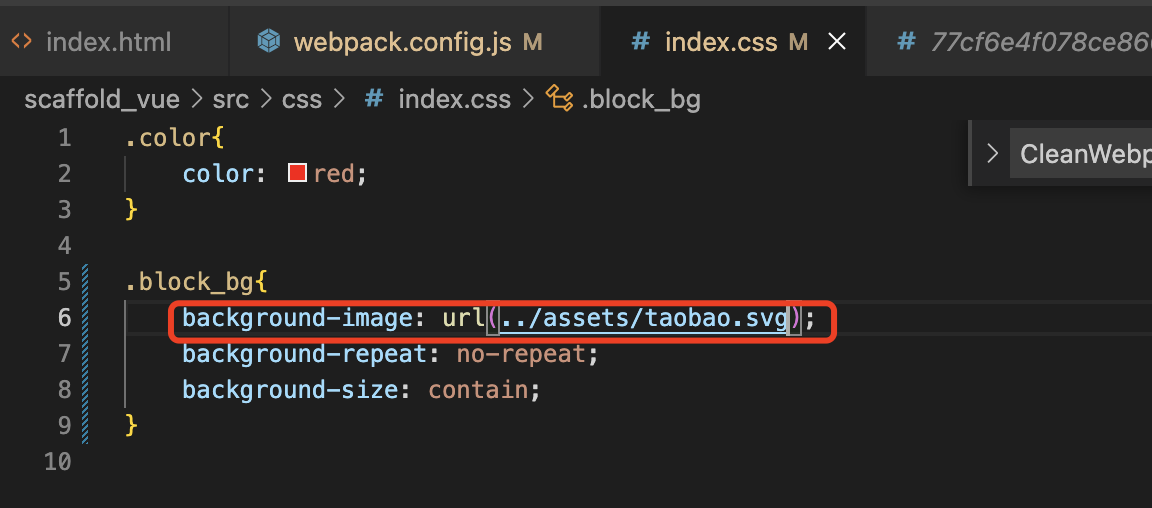
5.1.3 css加载图像
之前已经搞好了style-loader、css-loader不需要额外配置

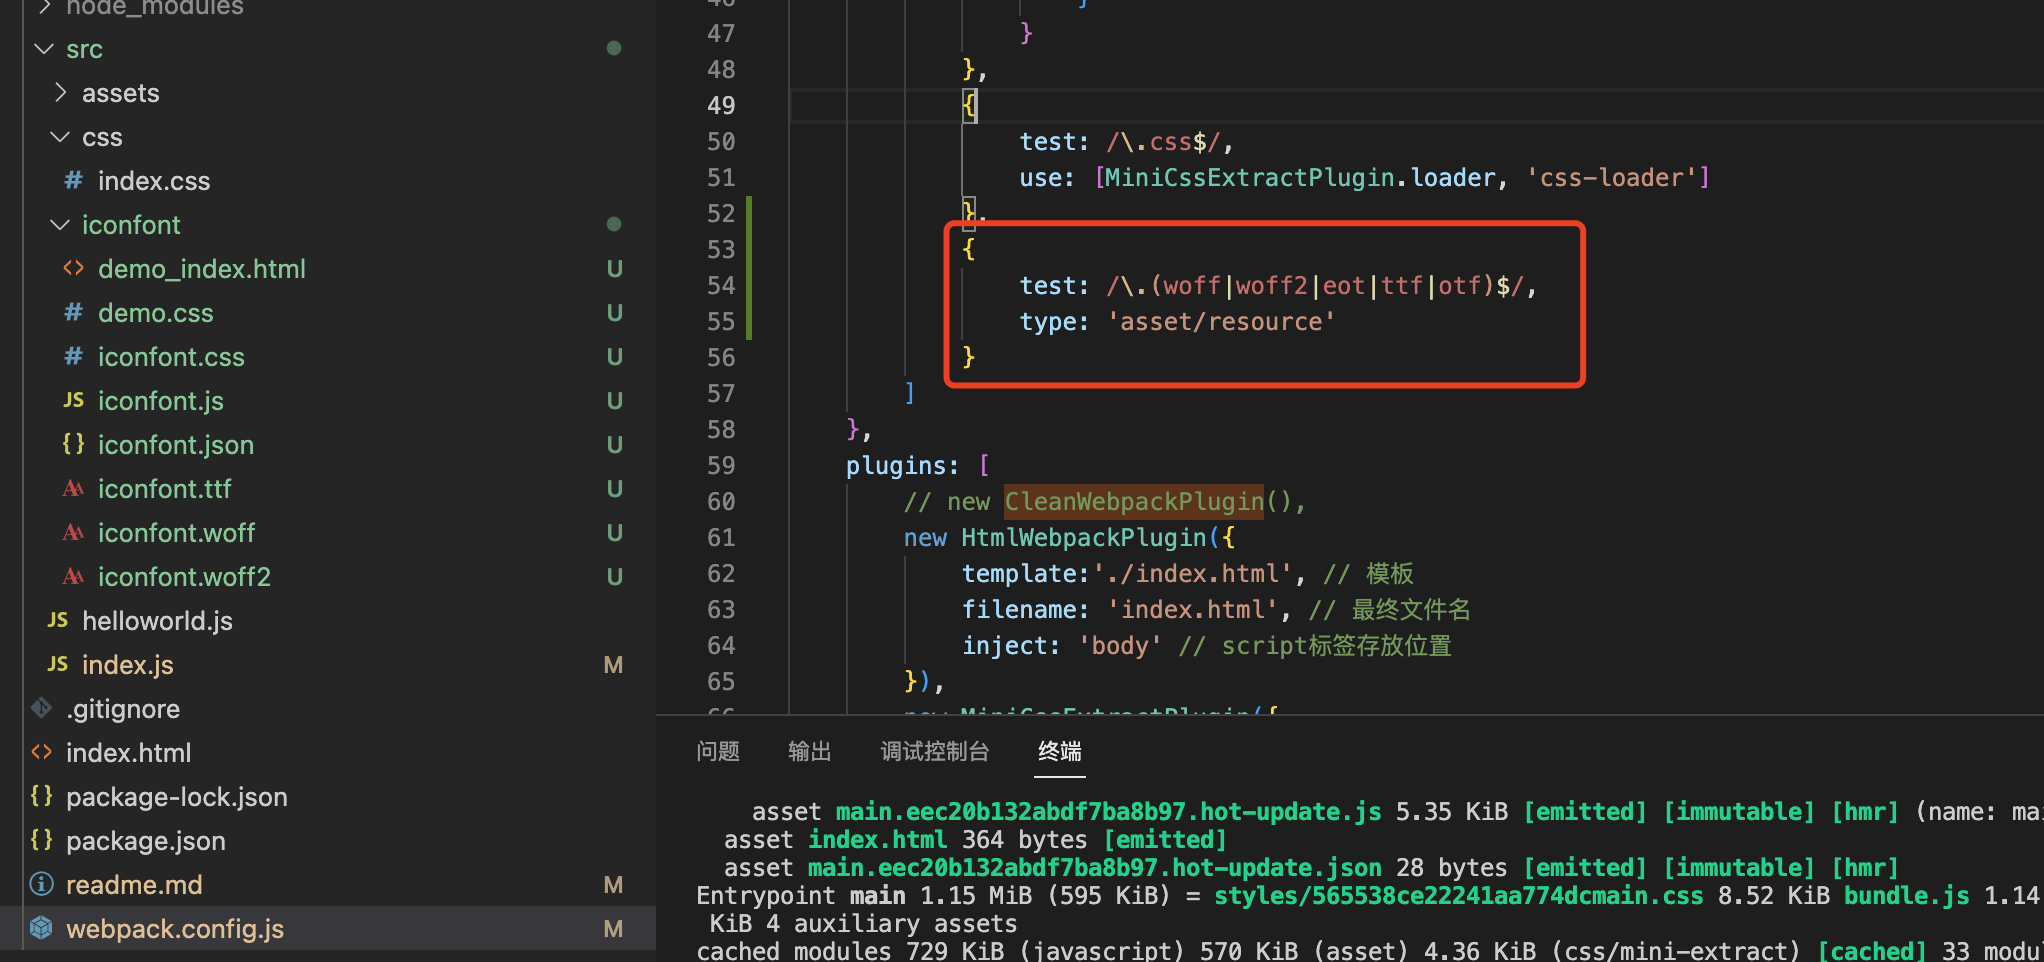
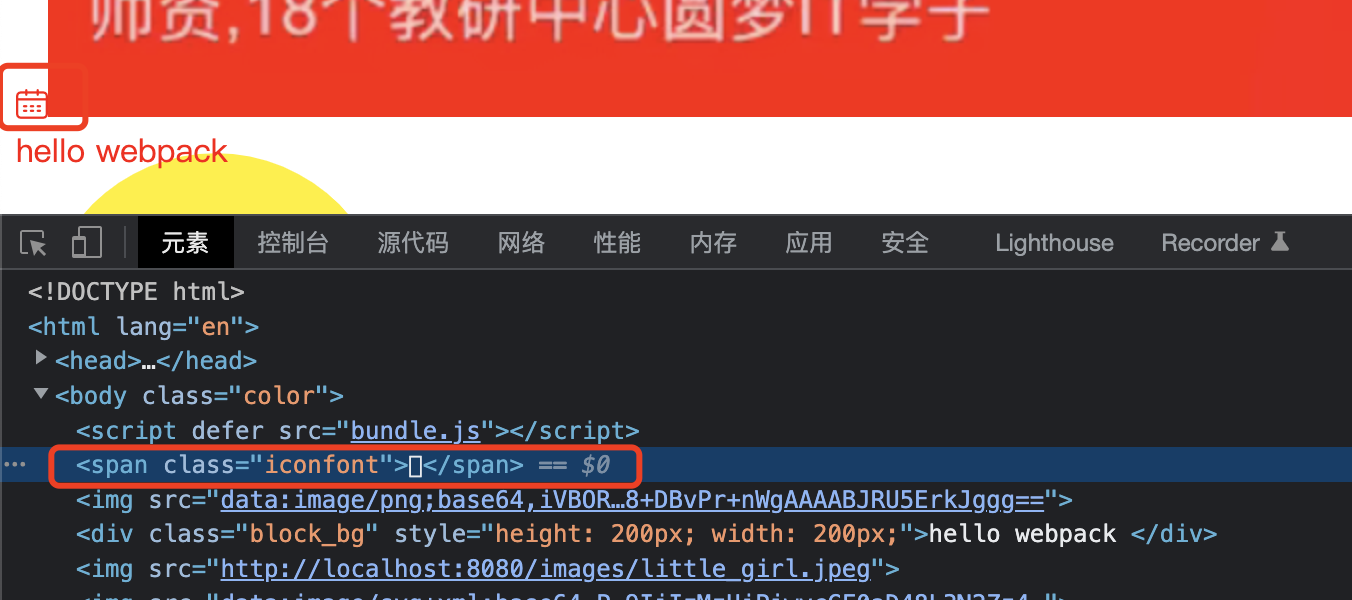
5.1.4 css加载字体
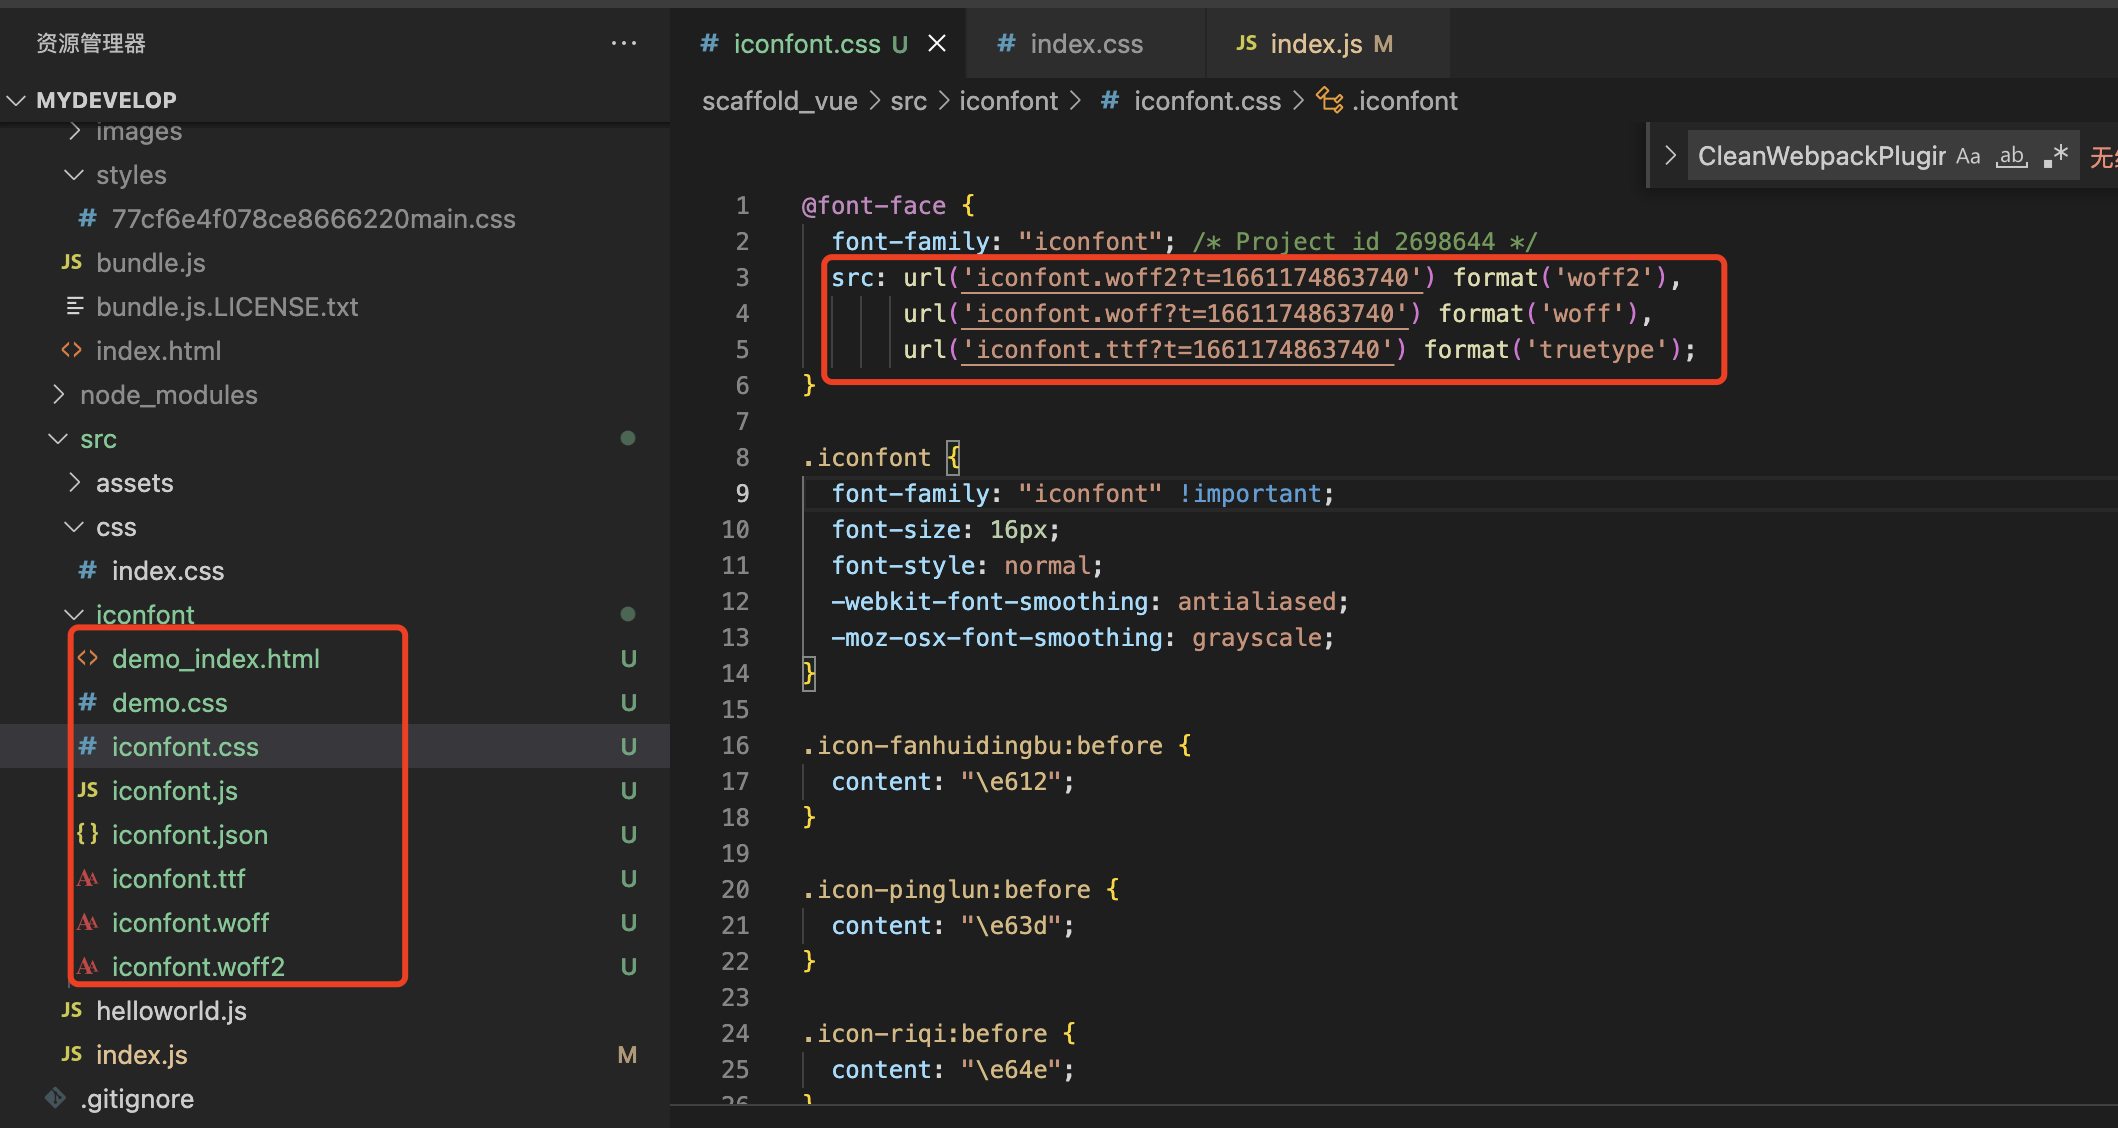
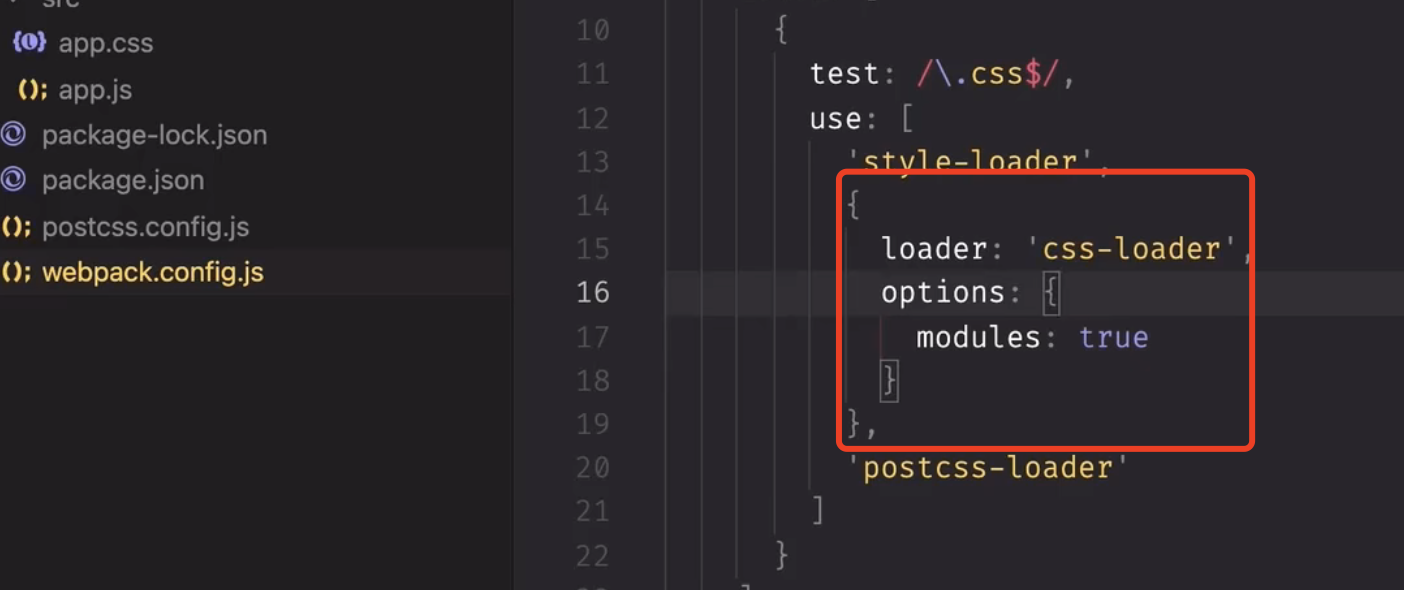
5.1.5 css模块化
5.2 json相关
5.2.1 json
webpack可以直接导入
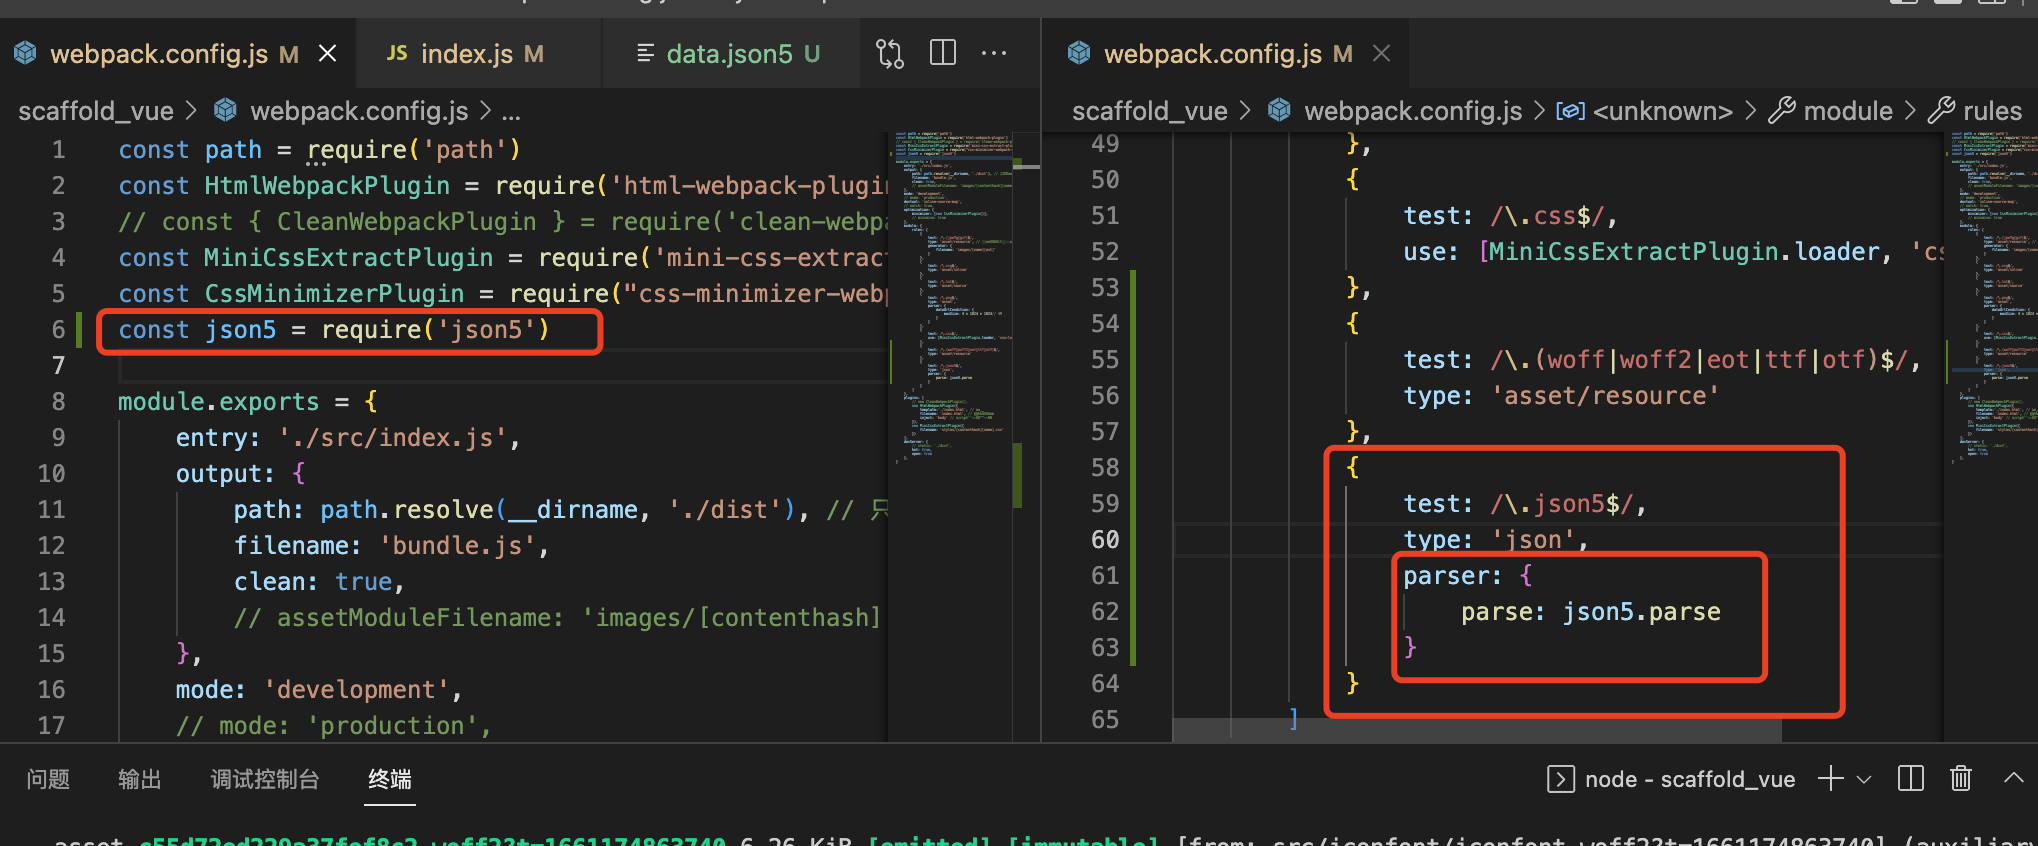
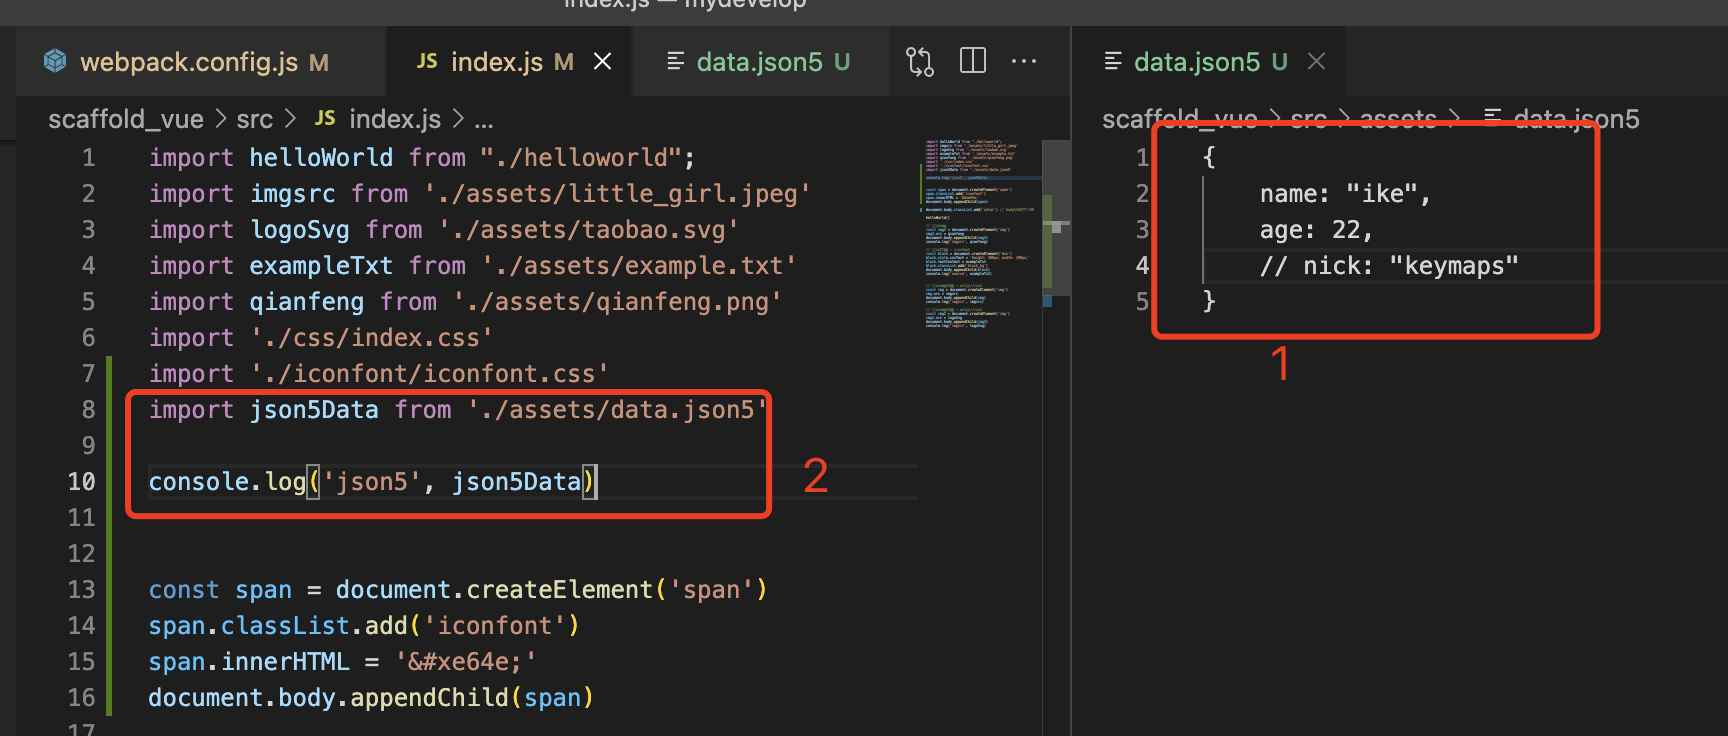
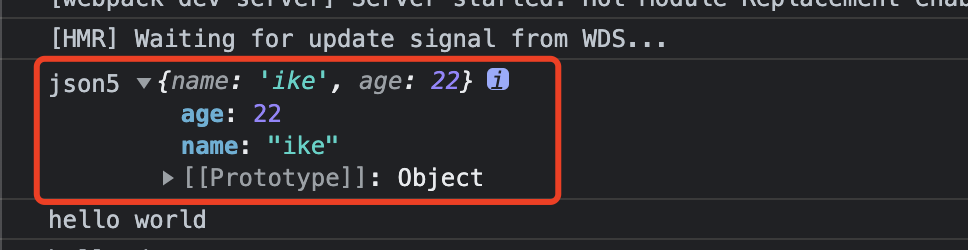
5.2.2 json5
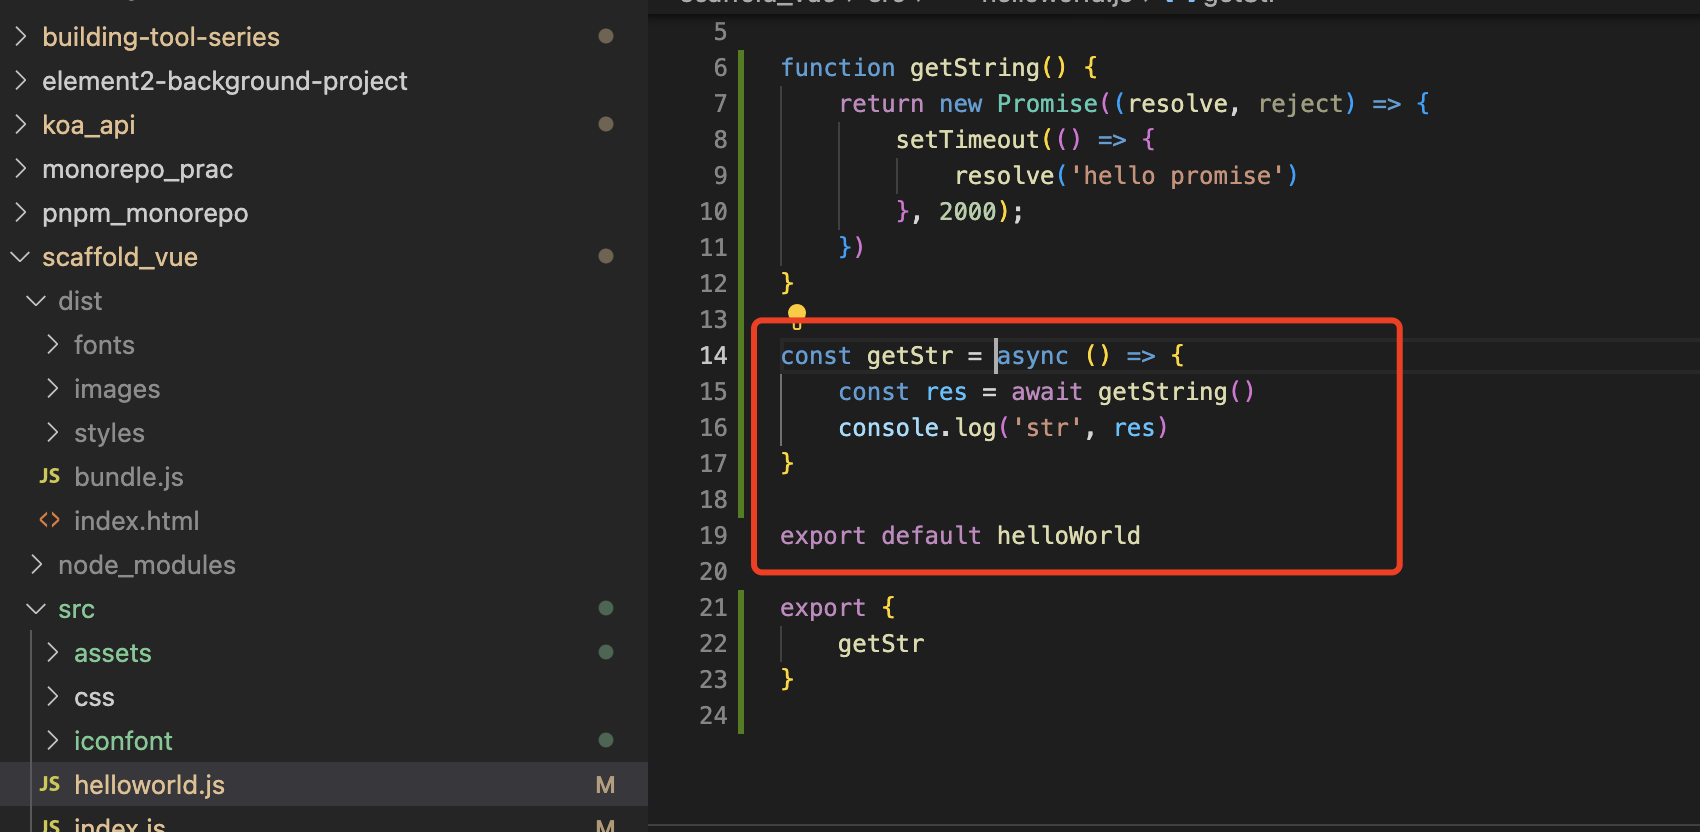
5.3 babel相关
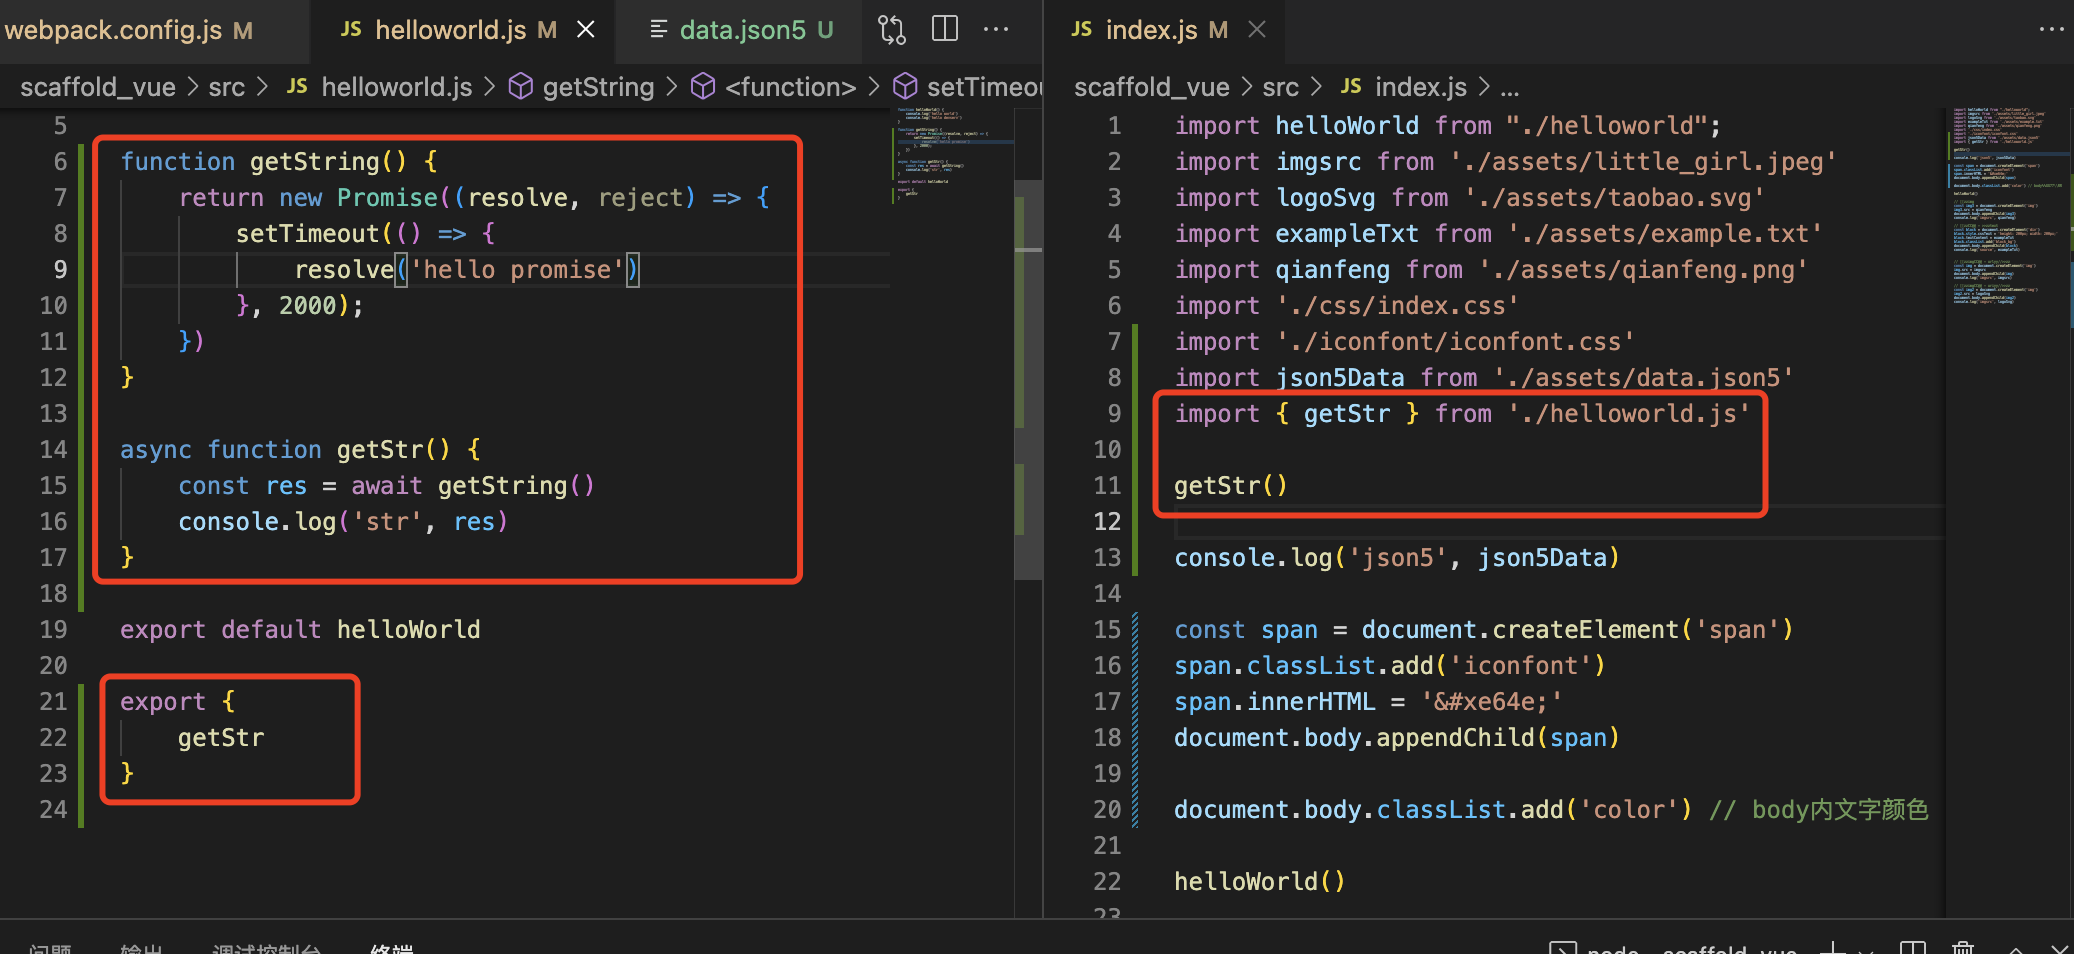
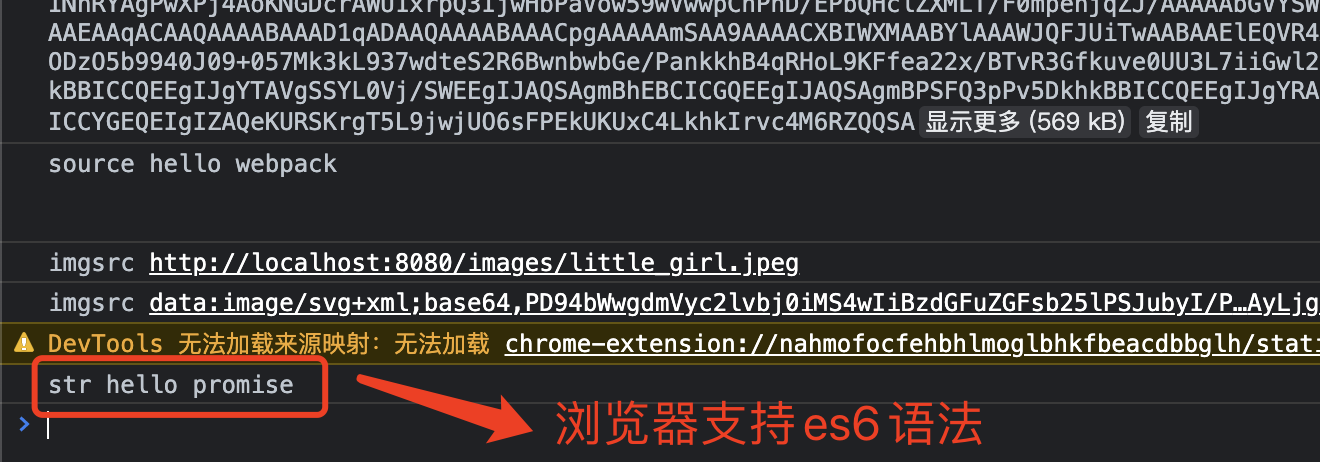
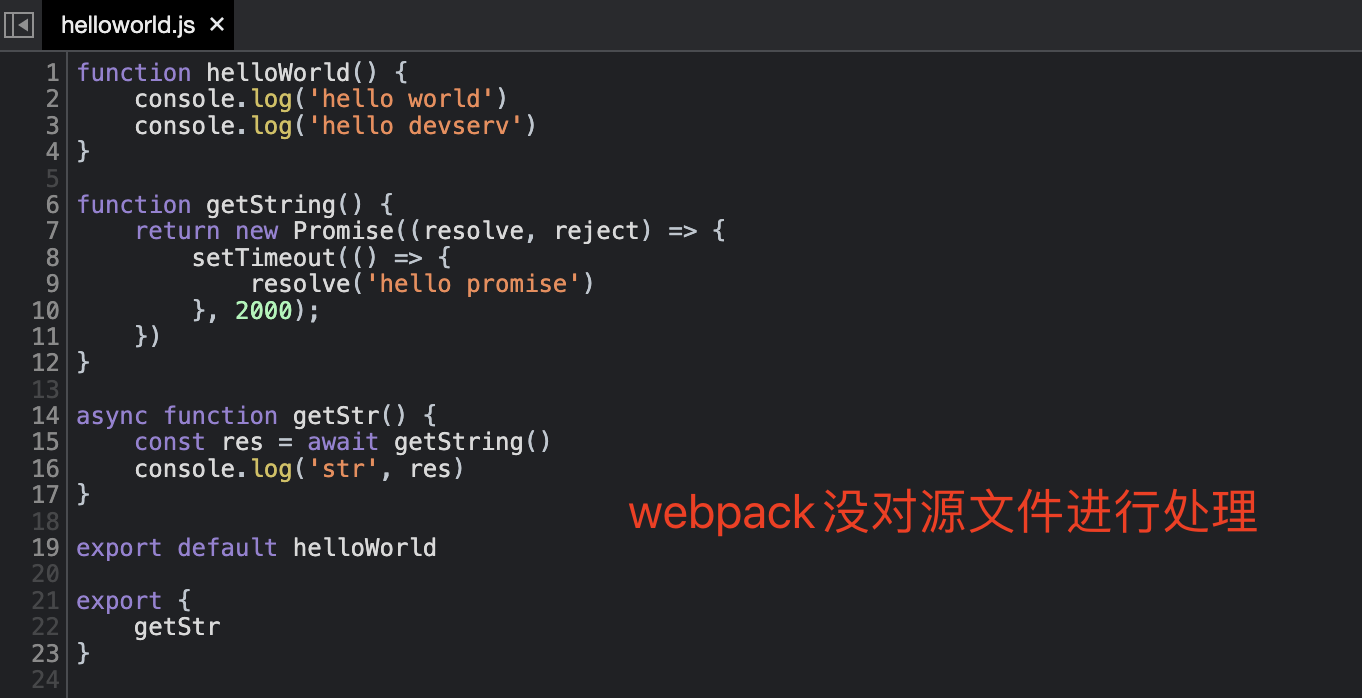
思考:如果浏览器不支持es6代码怎么办?
需要借助babel将es6转换为es5
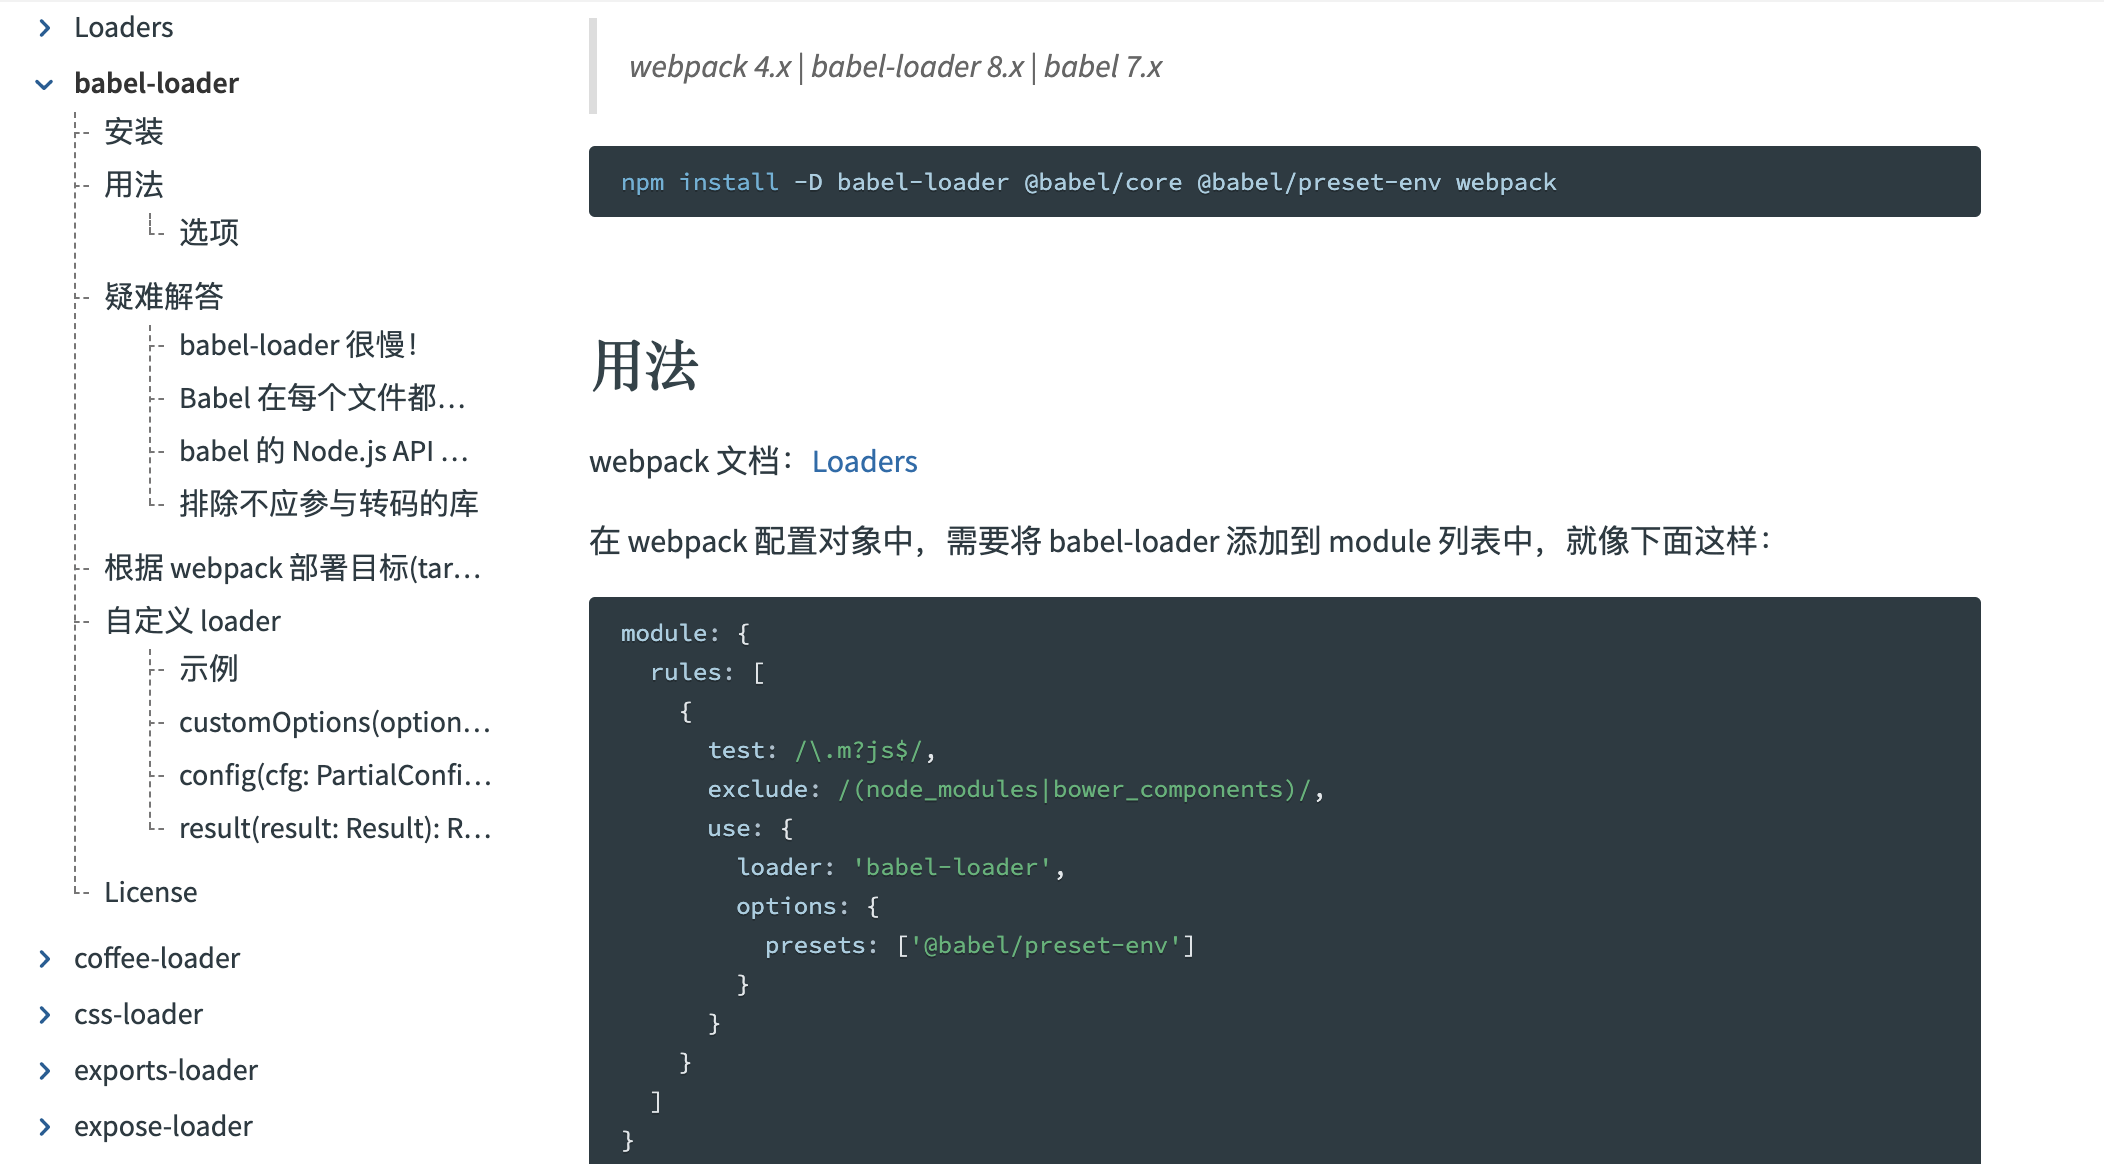
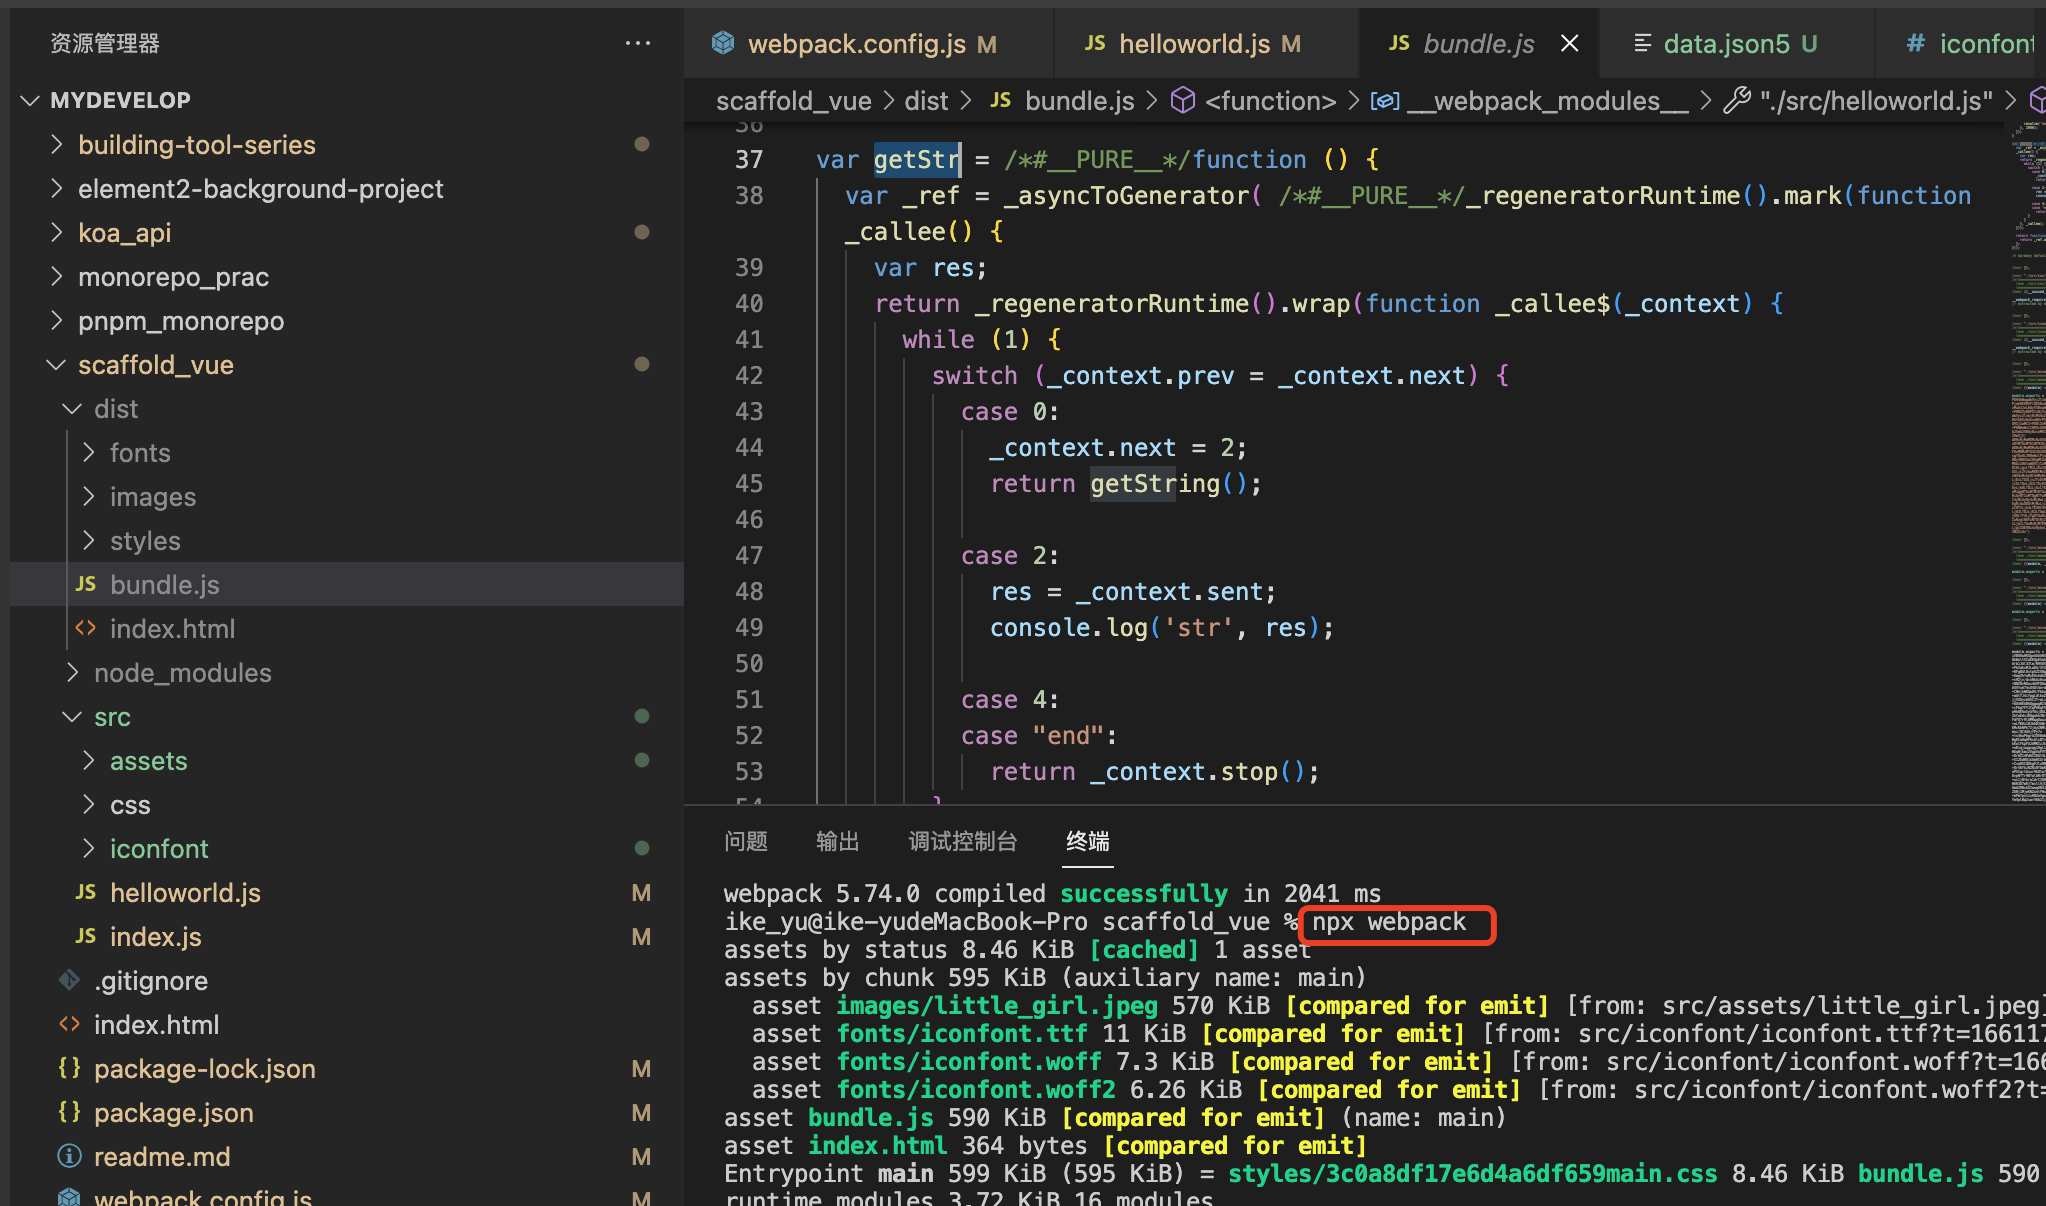
babel三件套:@babel/core、@babel/preset-env、babel-loader
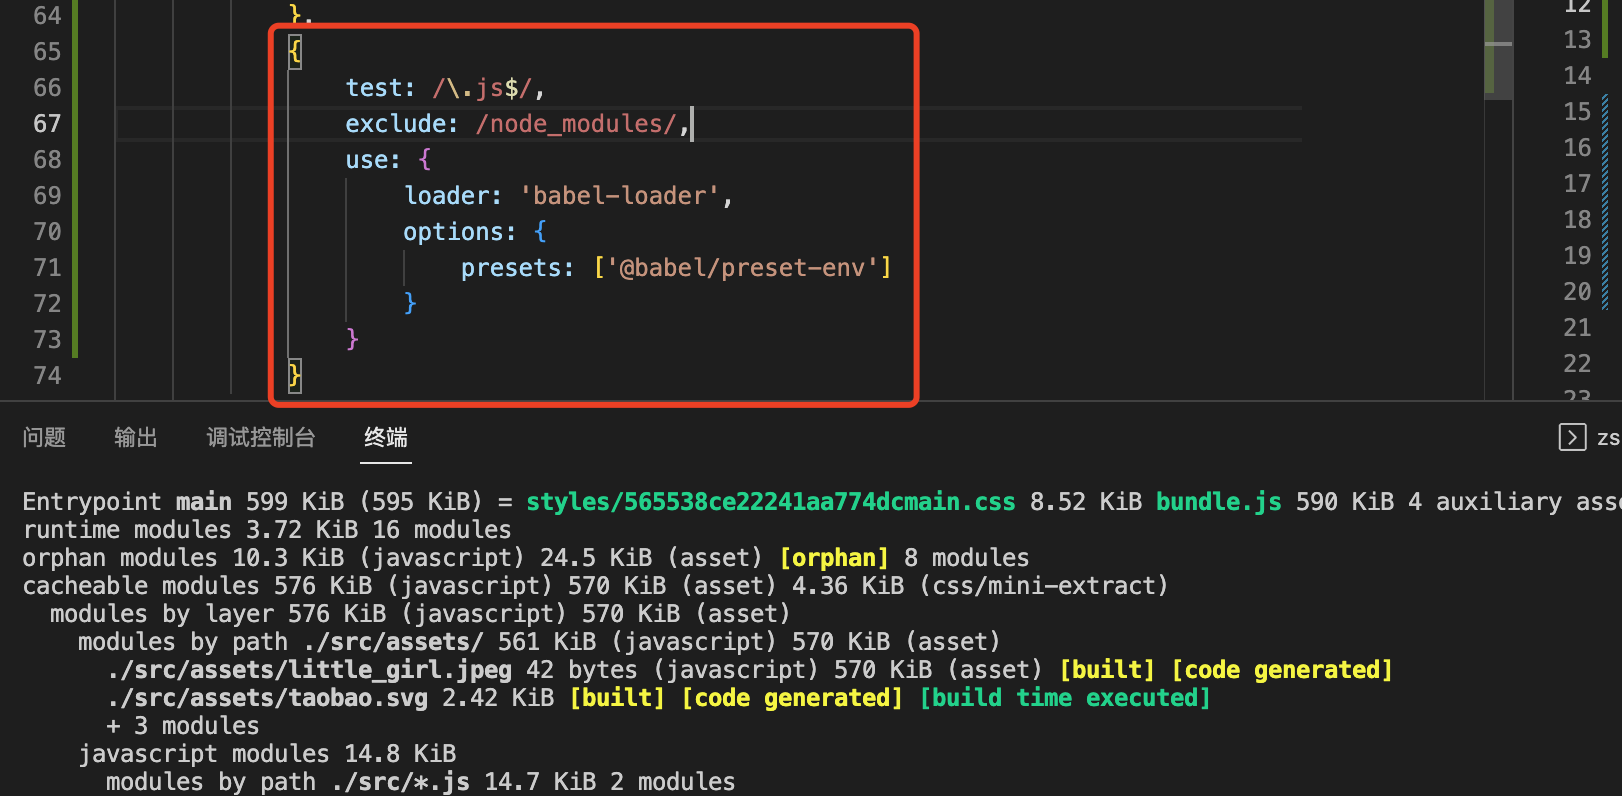
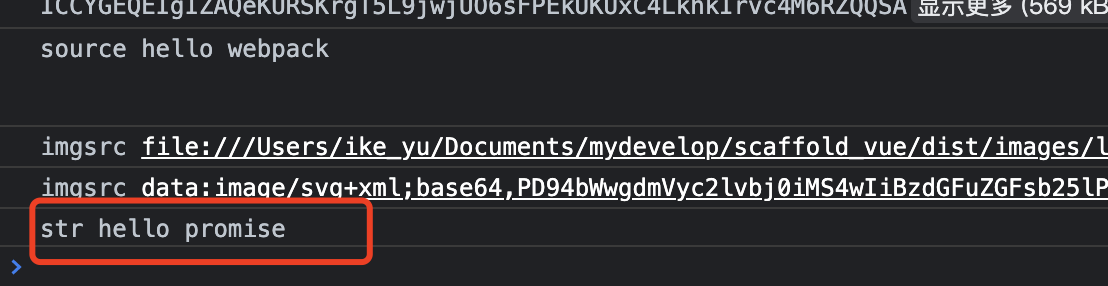
如上所示,浏览器正常运行
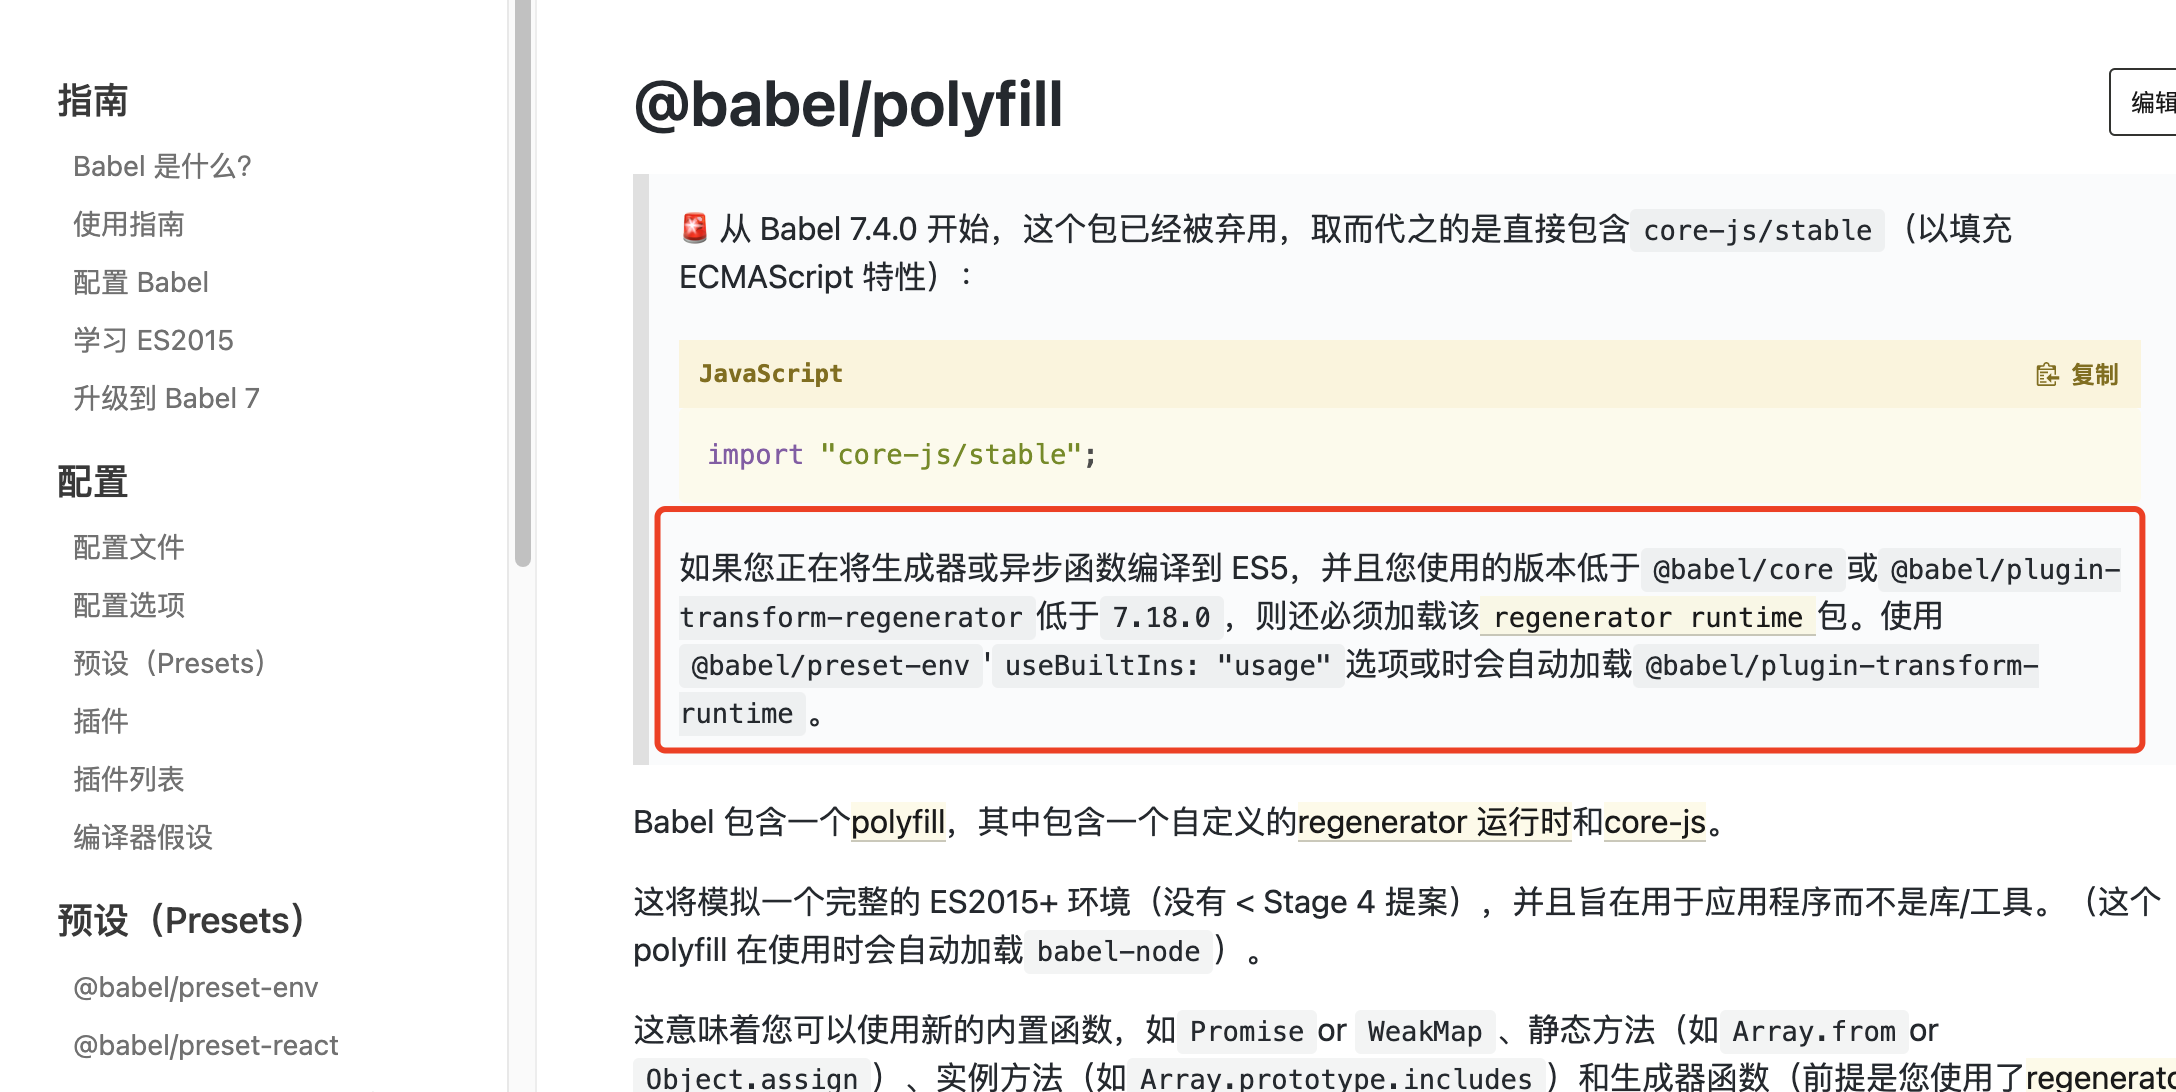
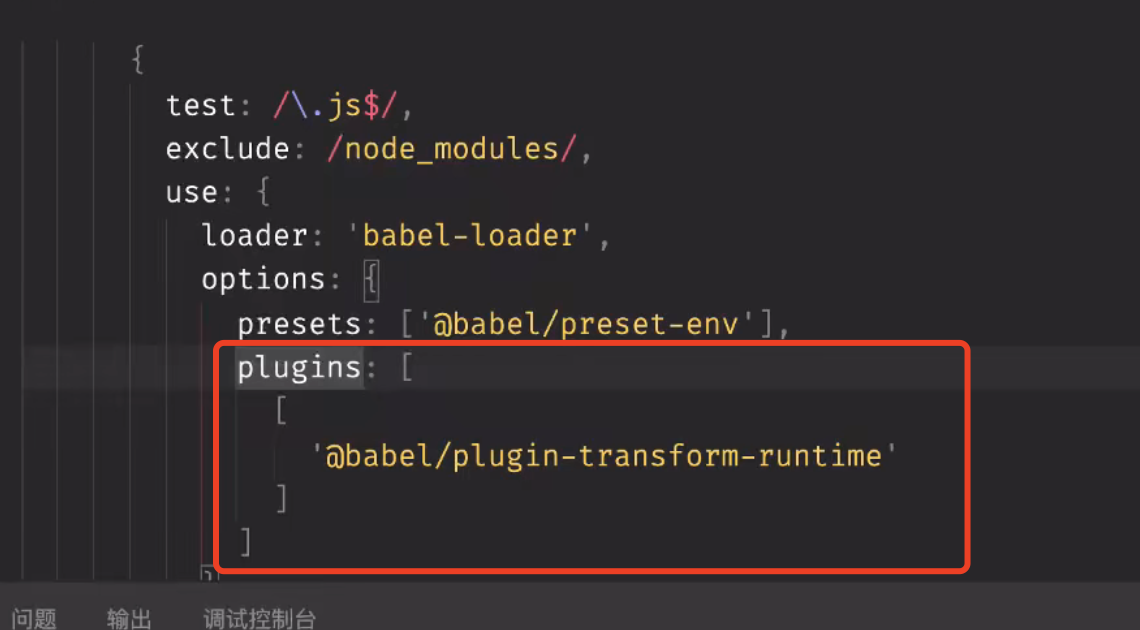
注意:老版本可能会出现没有generatorRuntime的情况
@babel/plugin-transform-runtime、@babel/runtime
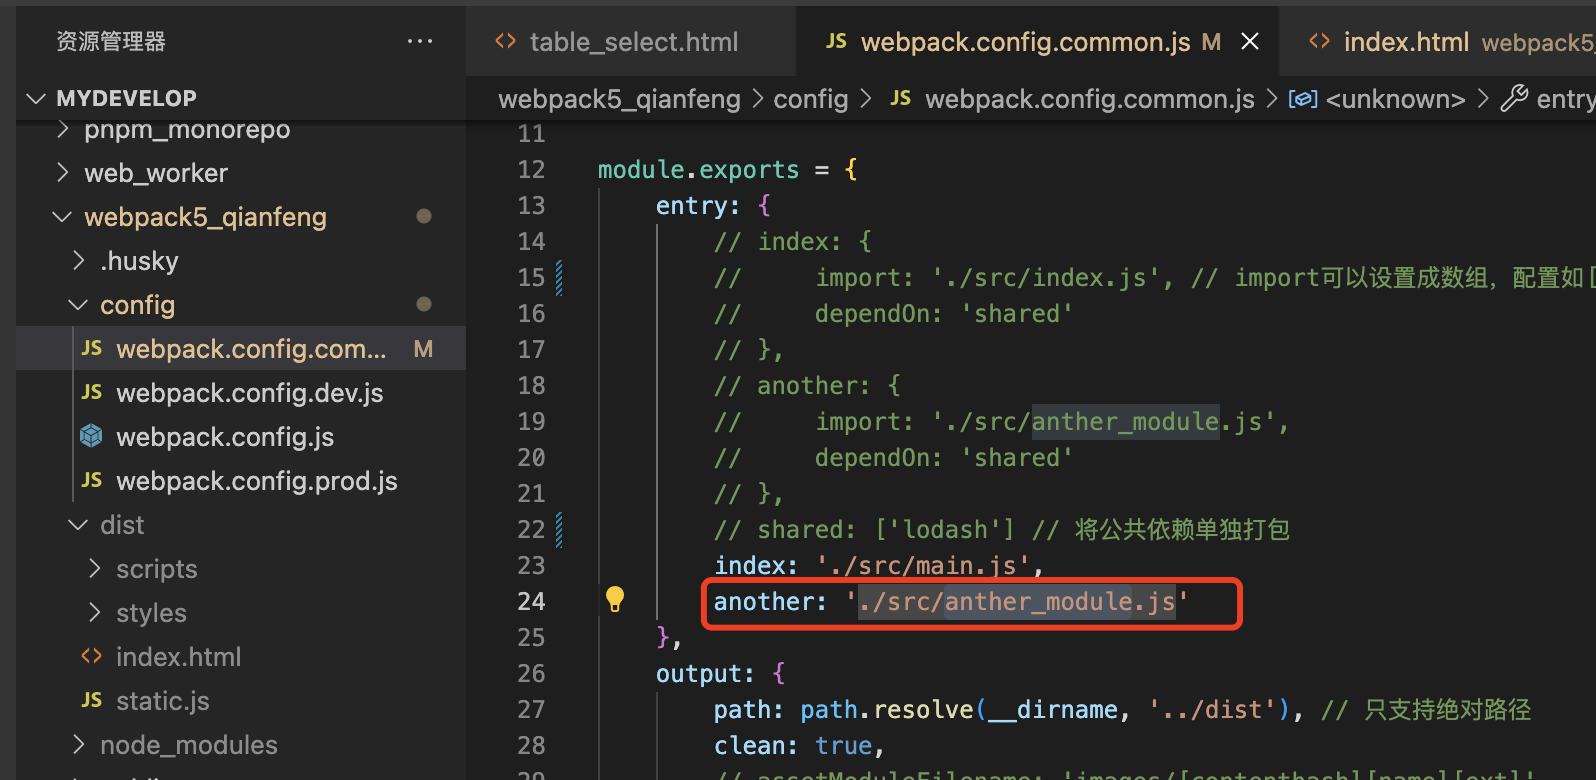
6、代码分离
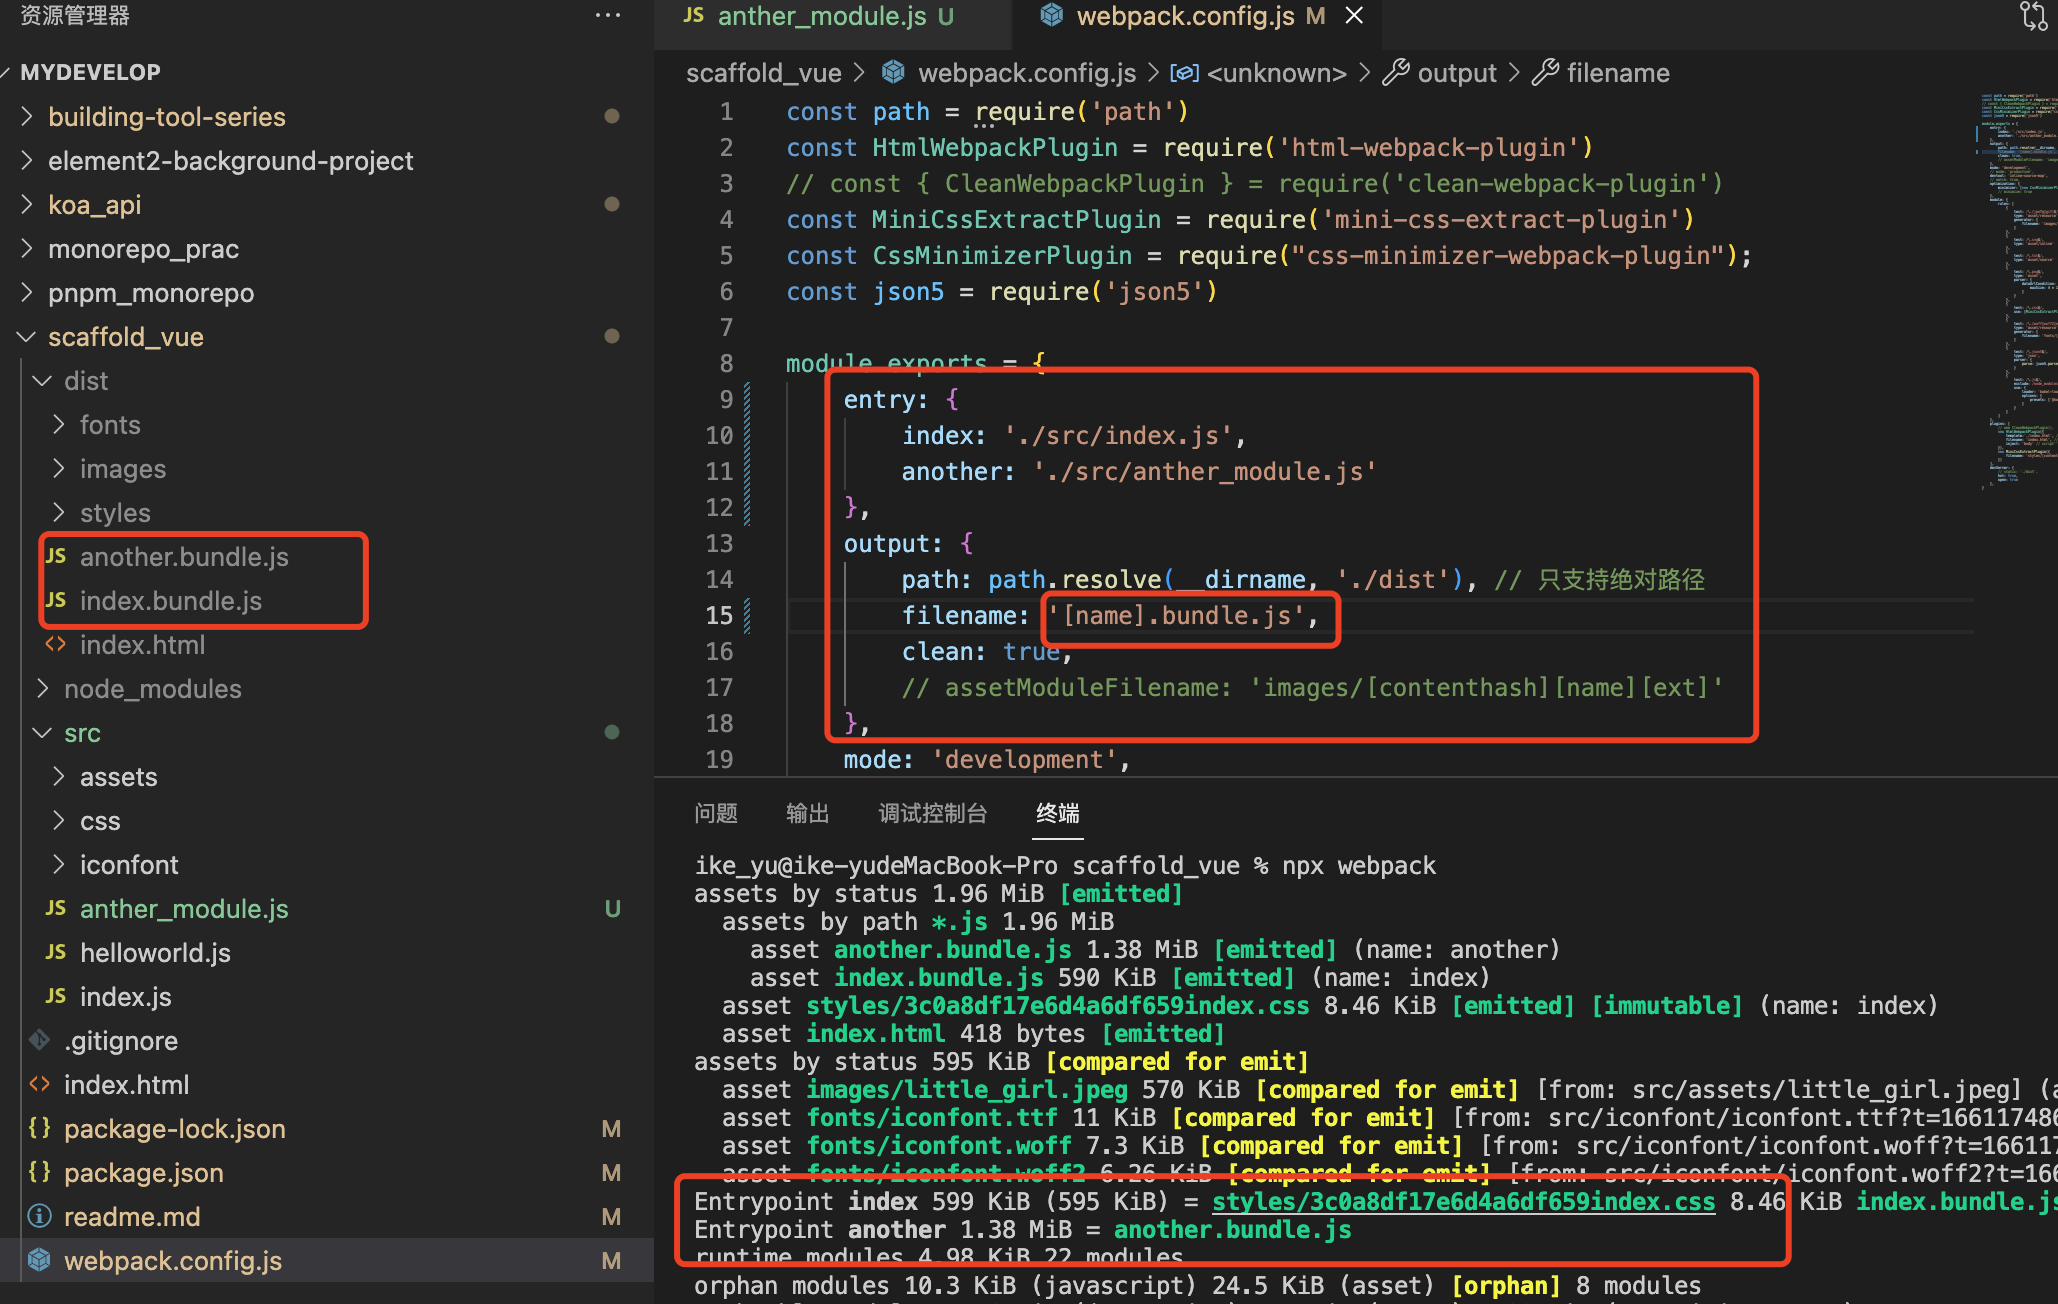
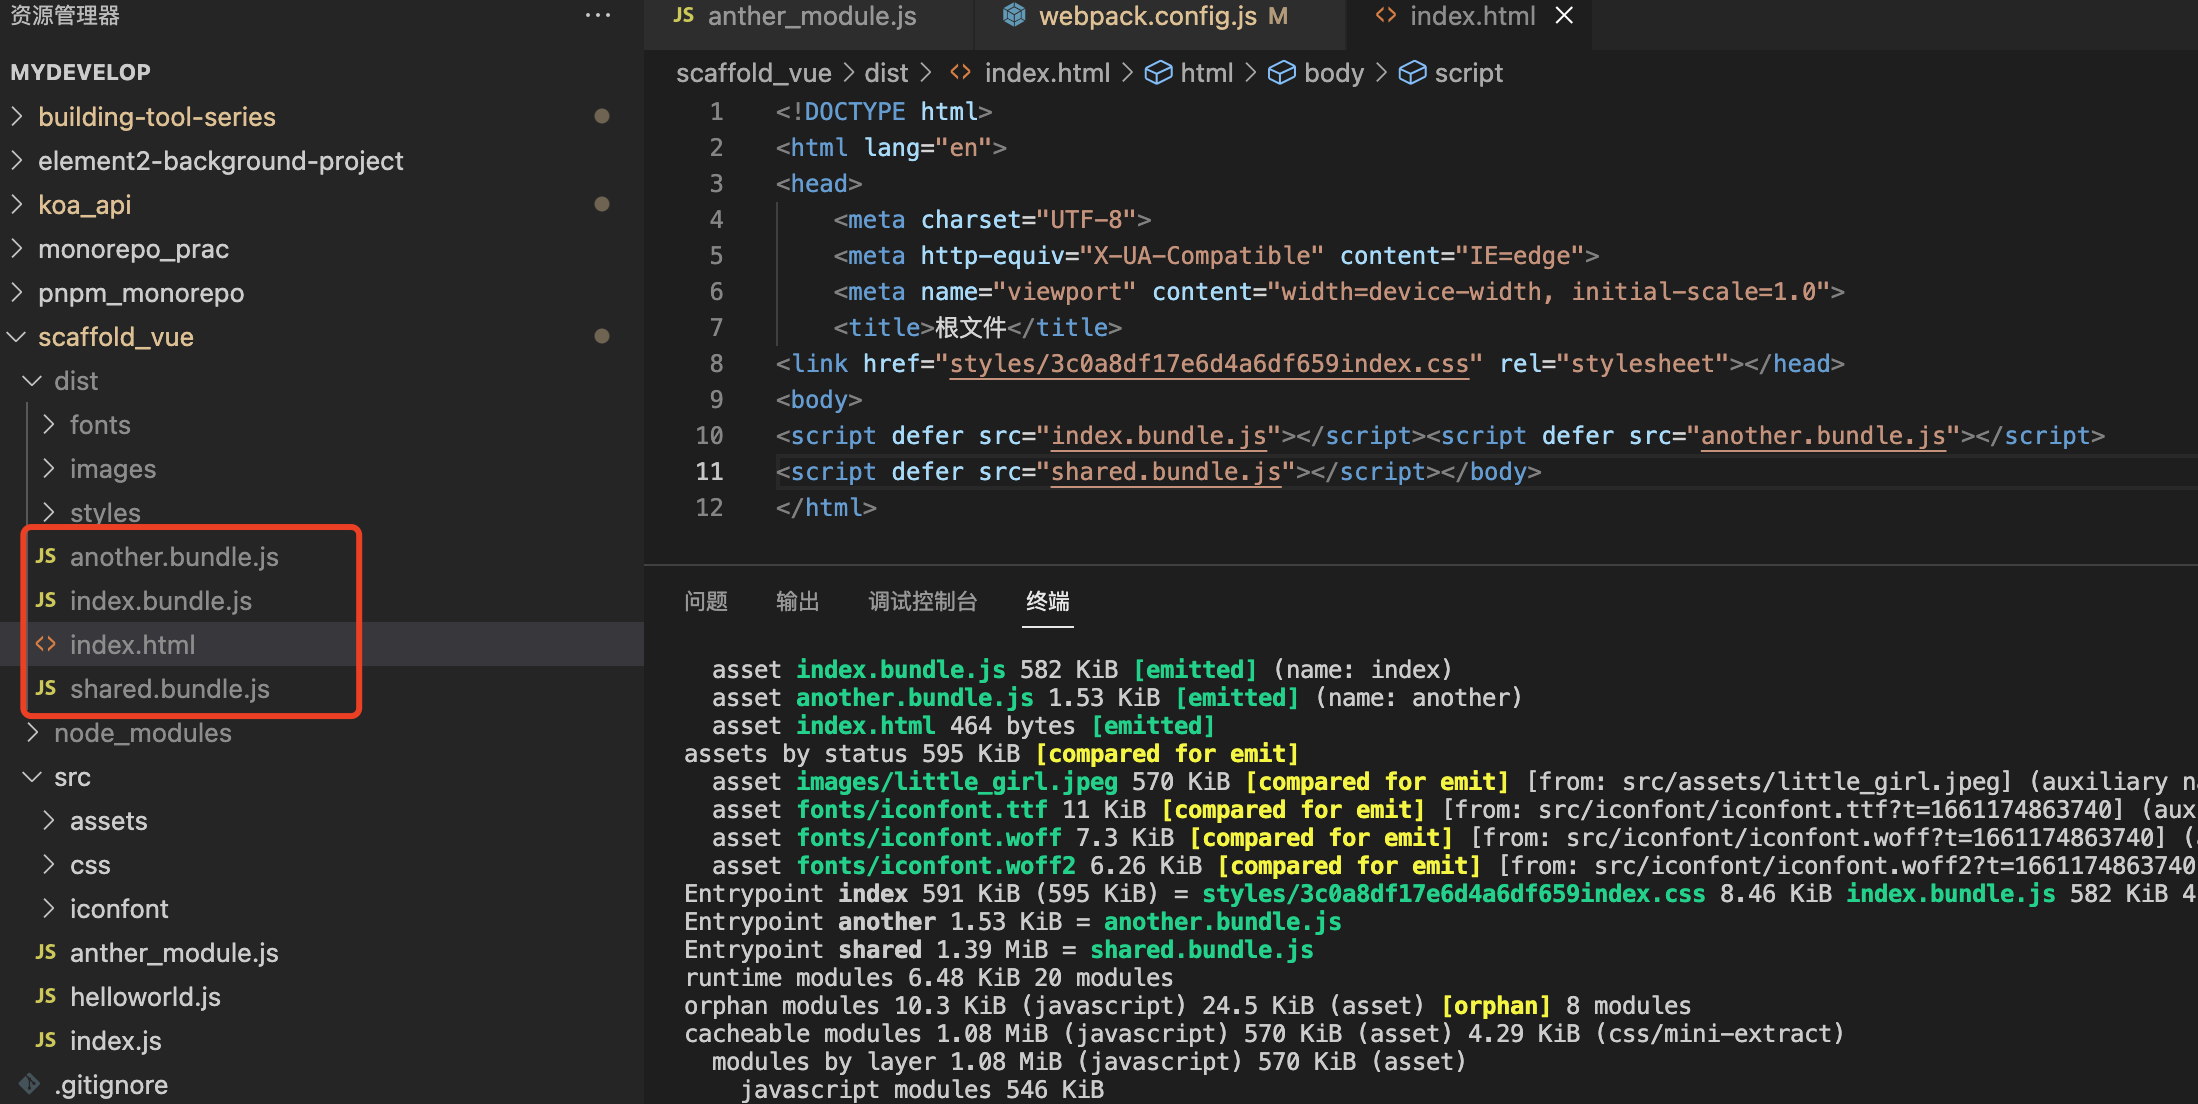
6.1 入口起点
缺点:共享的代码会分别引入到各自的bundle中
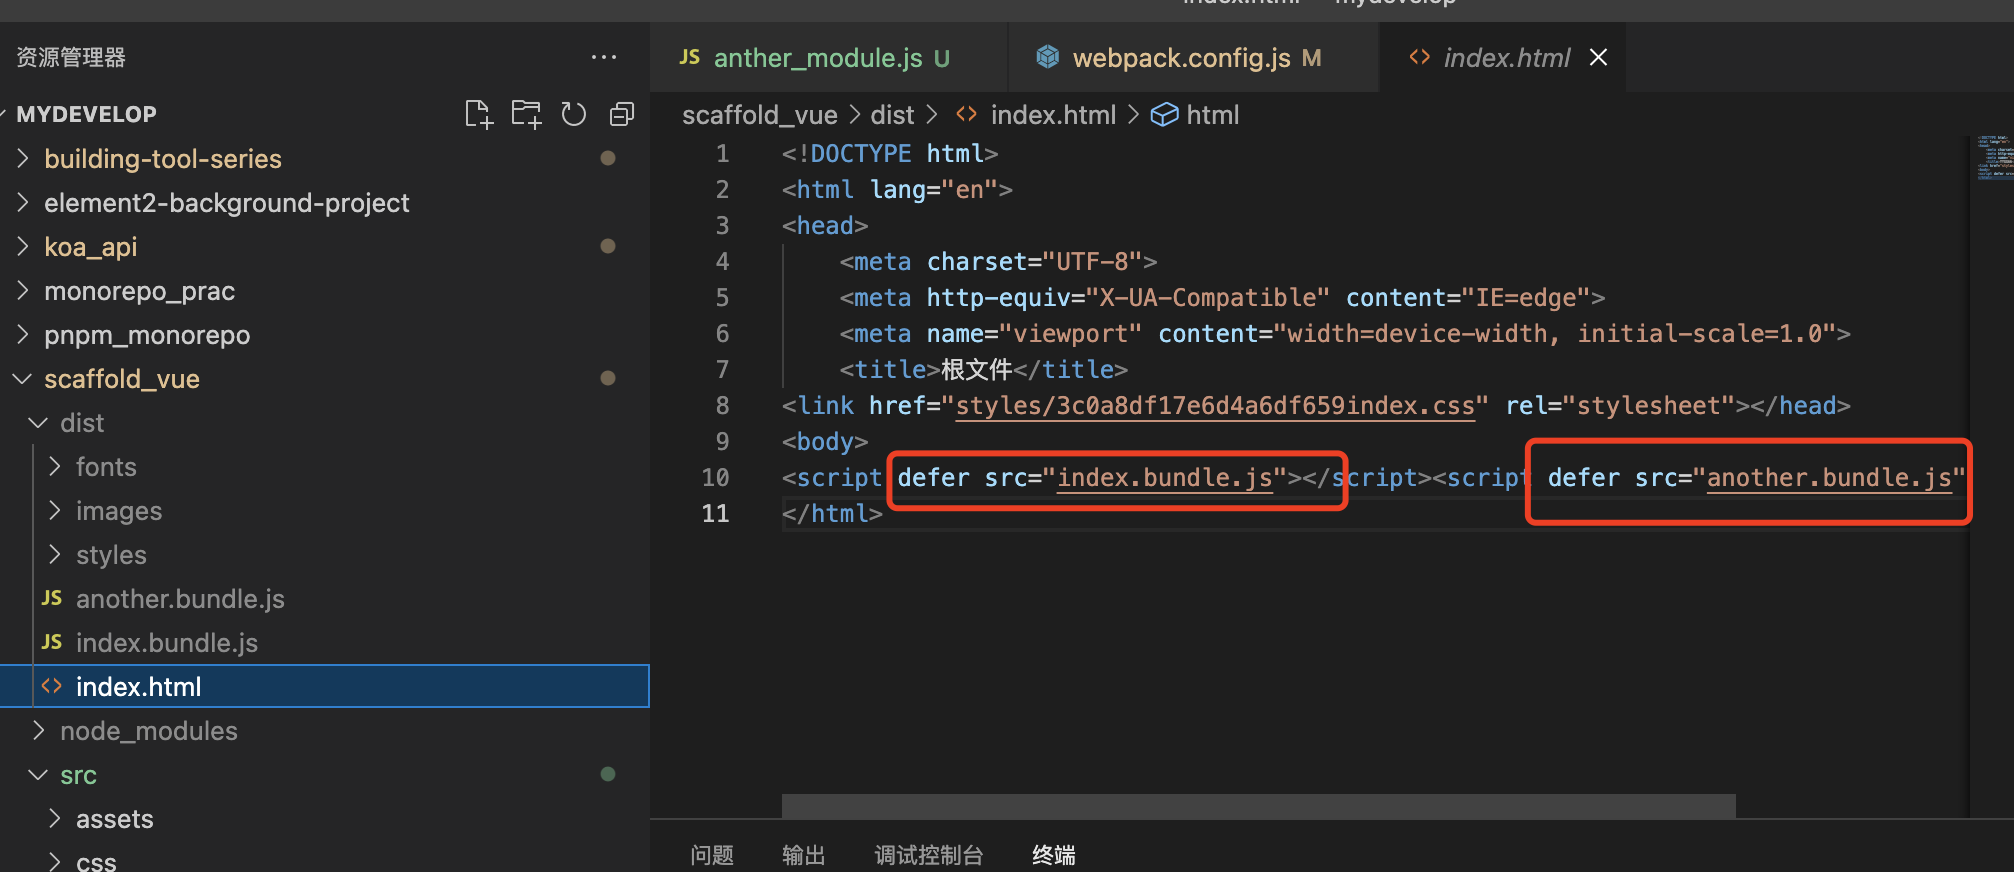
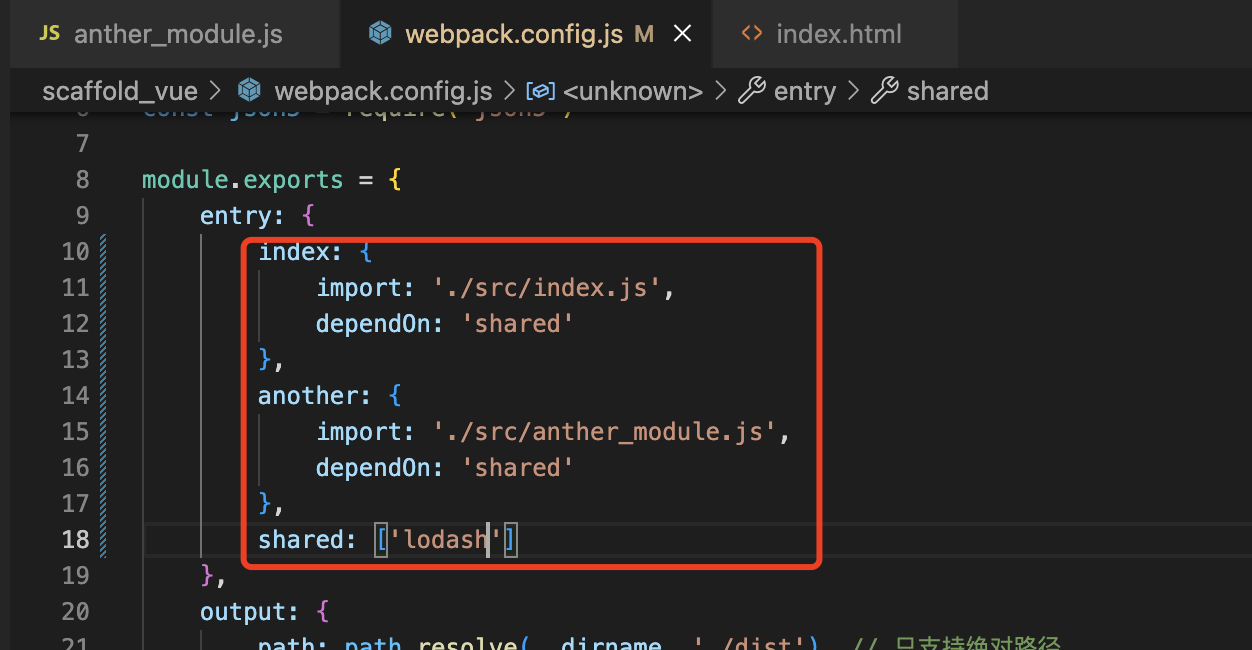
6.2 防止重复
作用:通过配置entry,把公共的代码抽离成单独的chunk
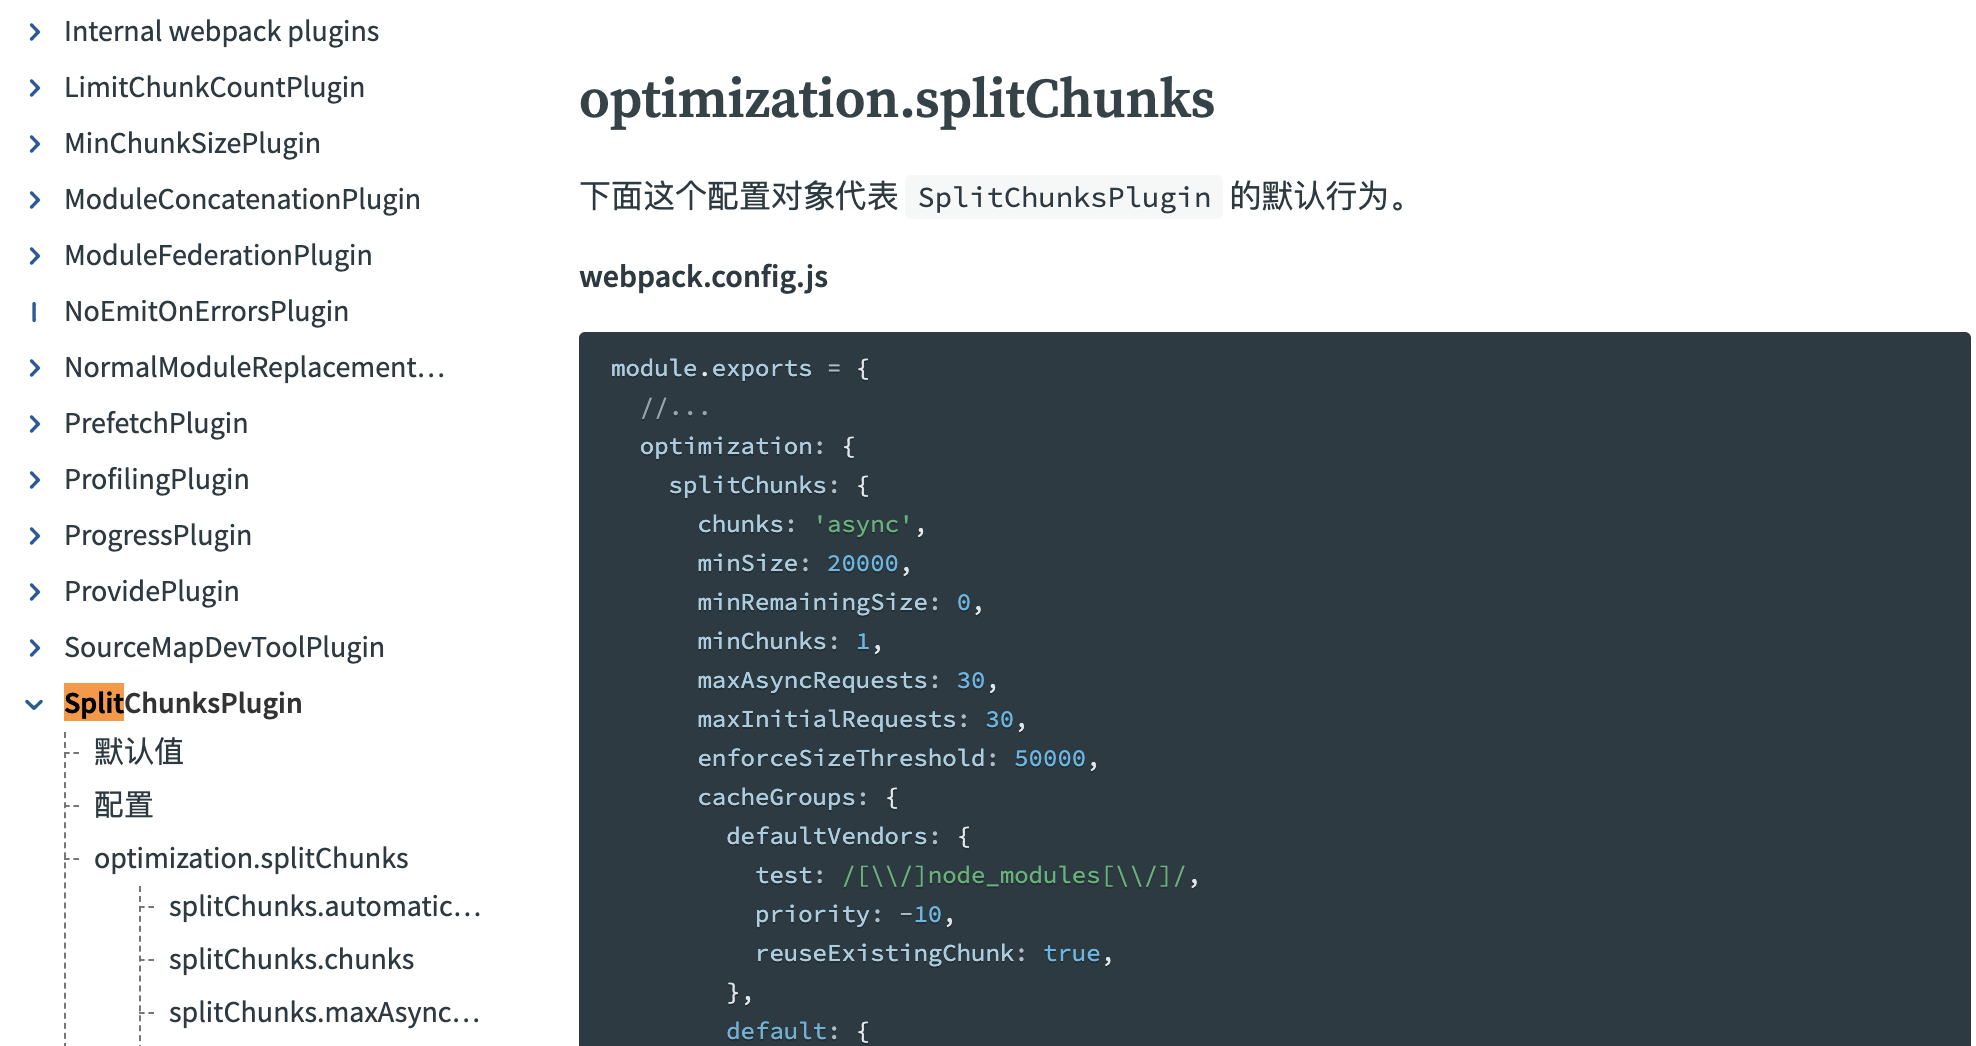
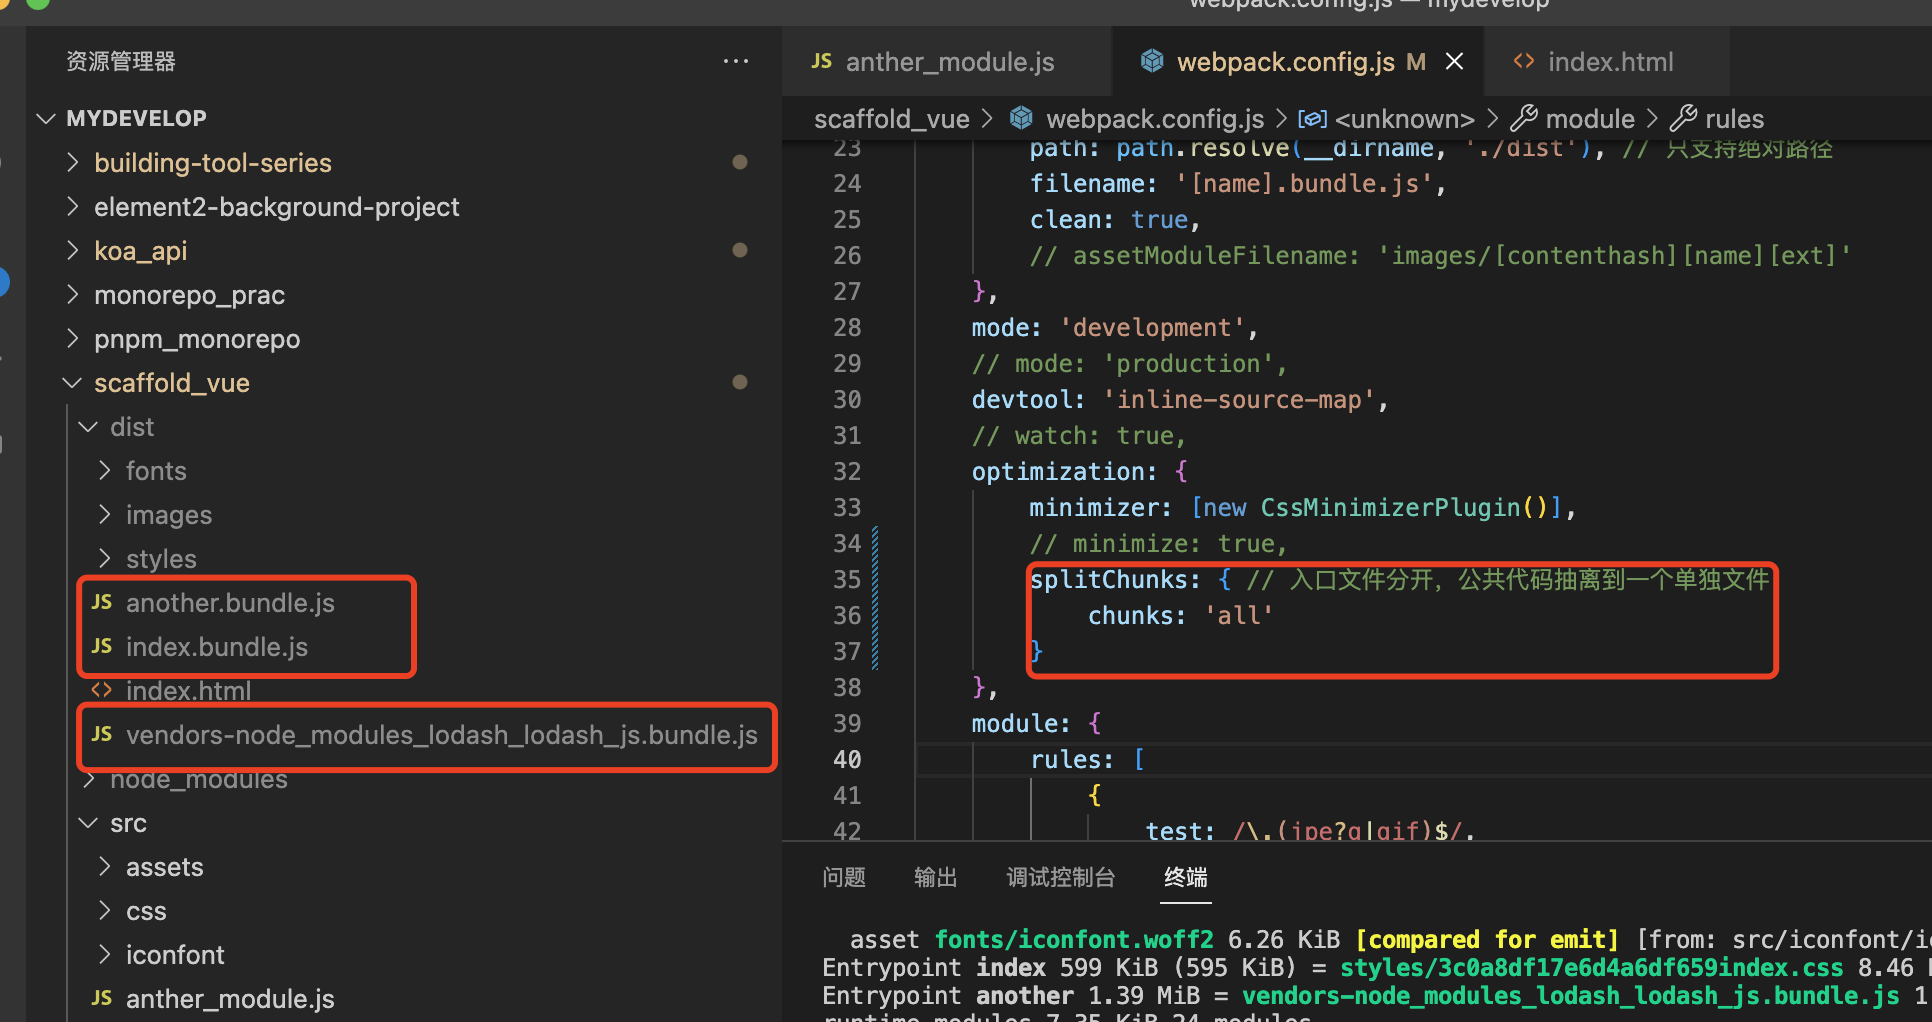
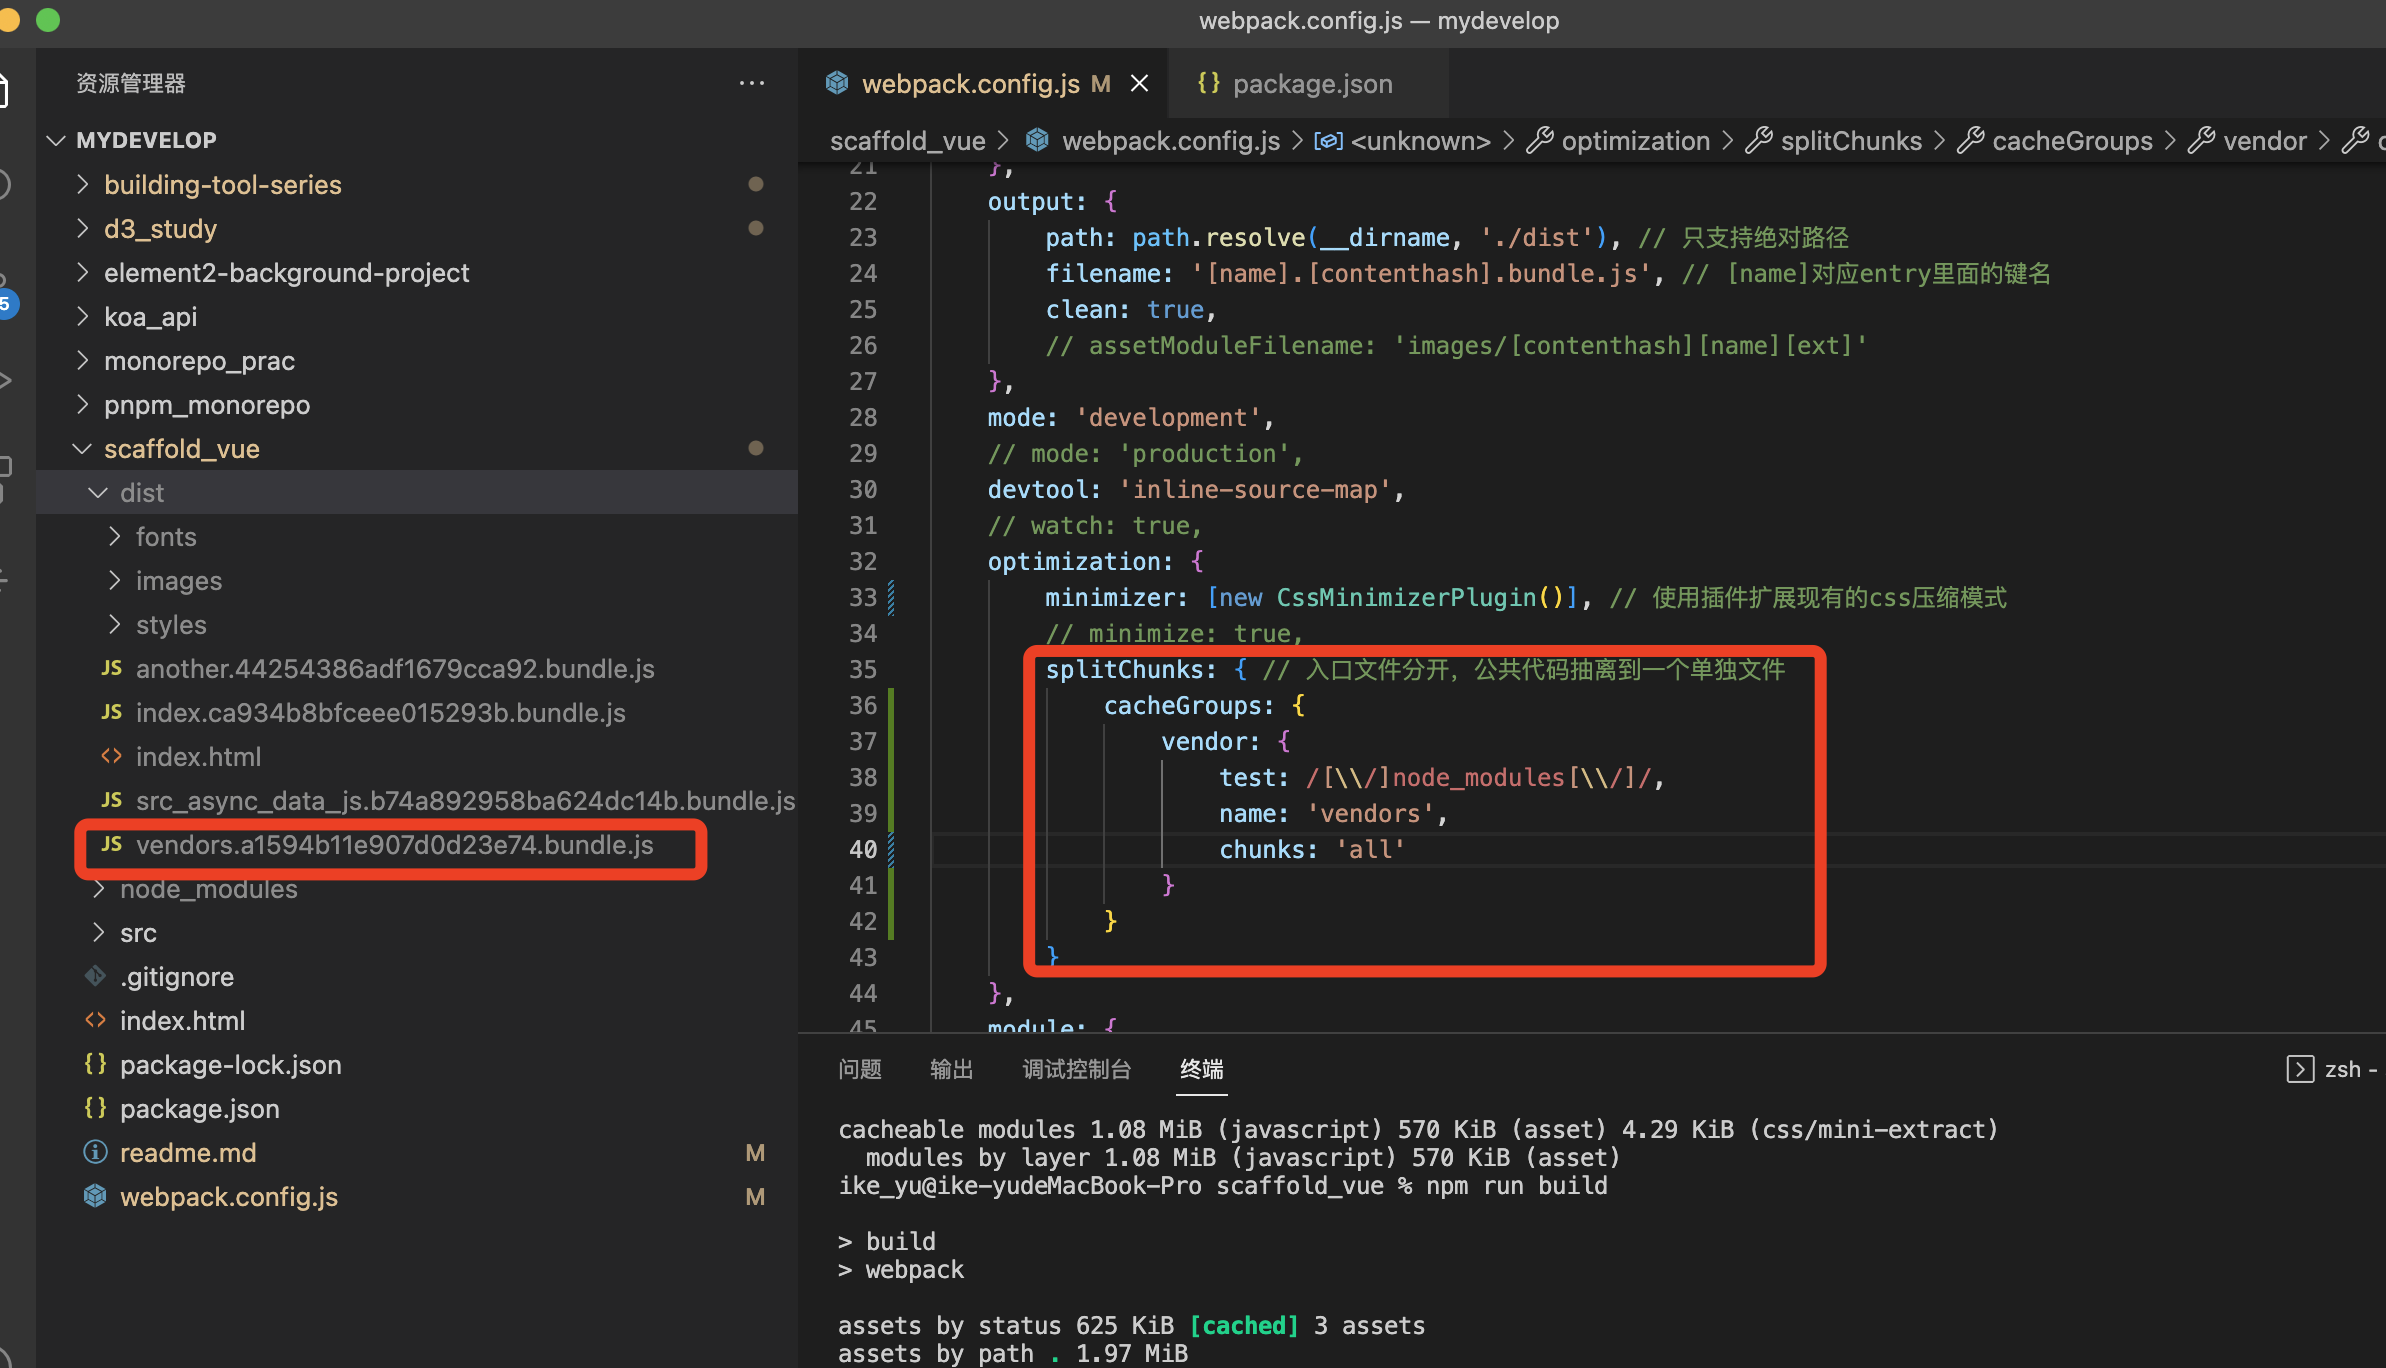
6.3 splitChunk方式
webpack自带splitChunks插件
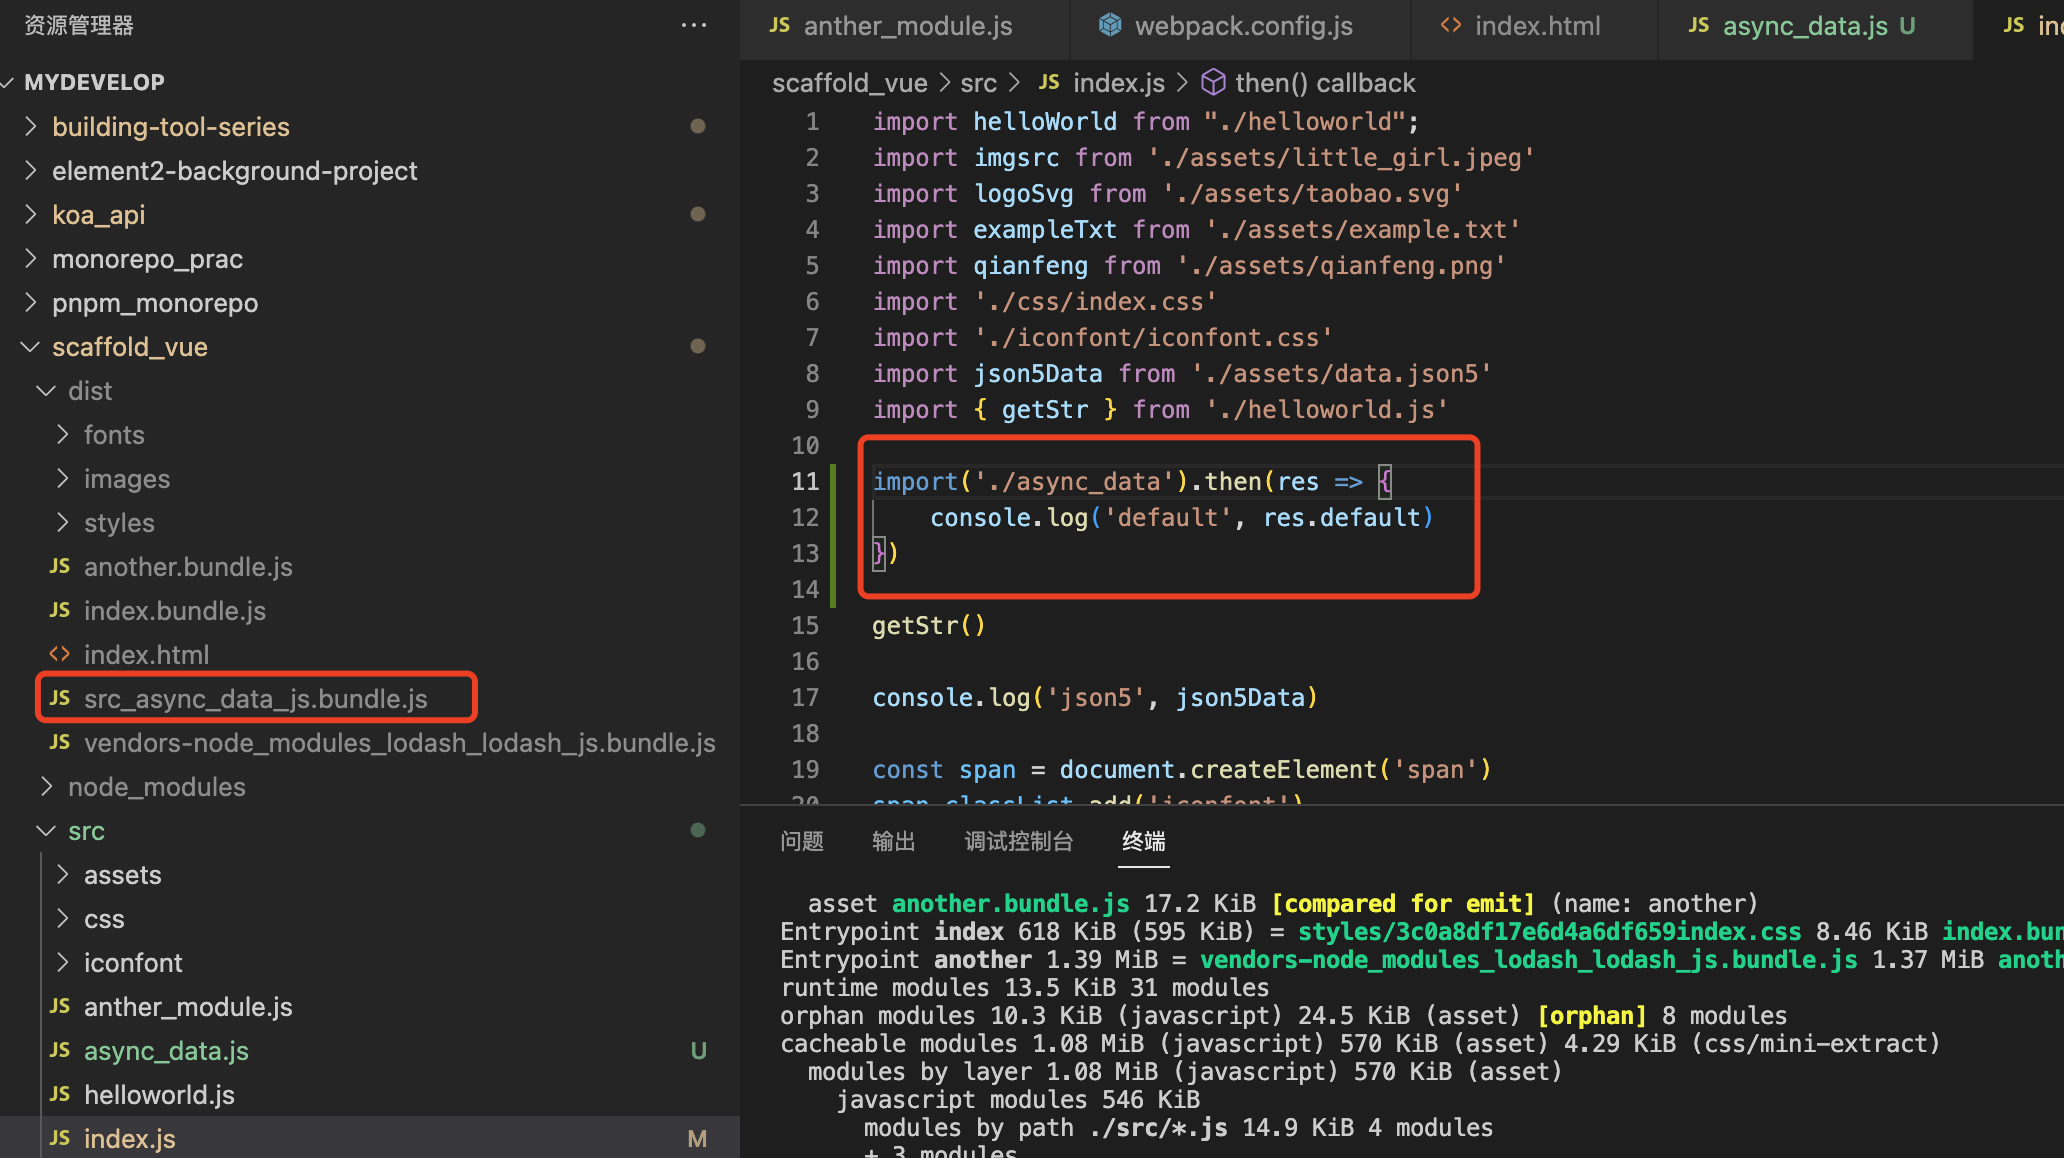
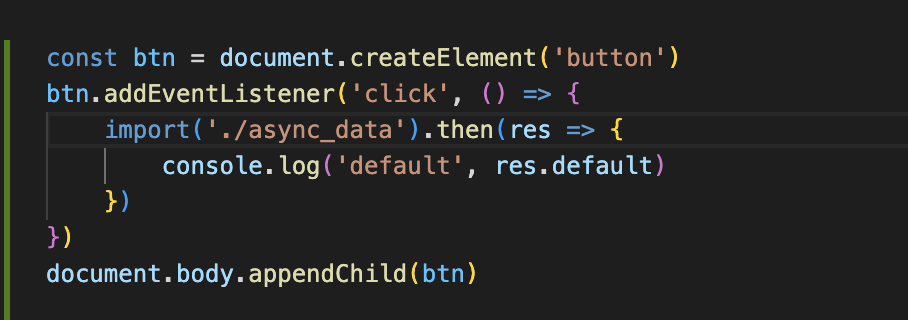
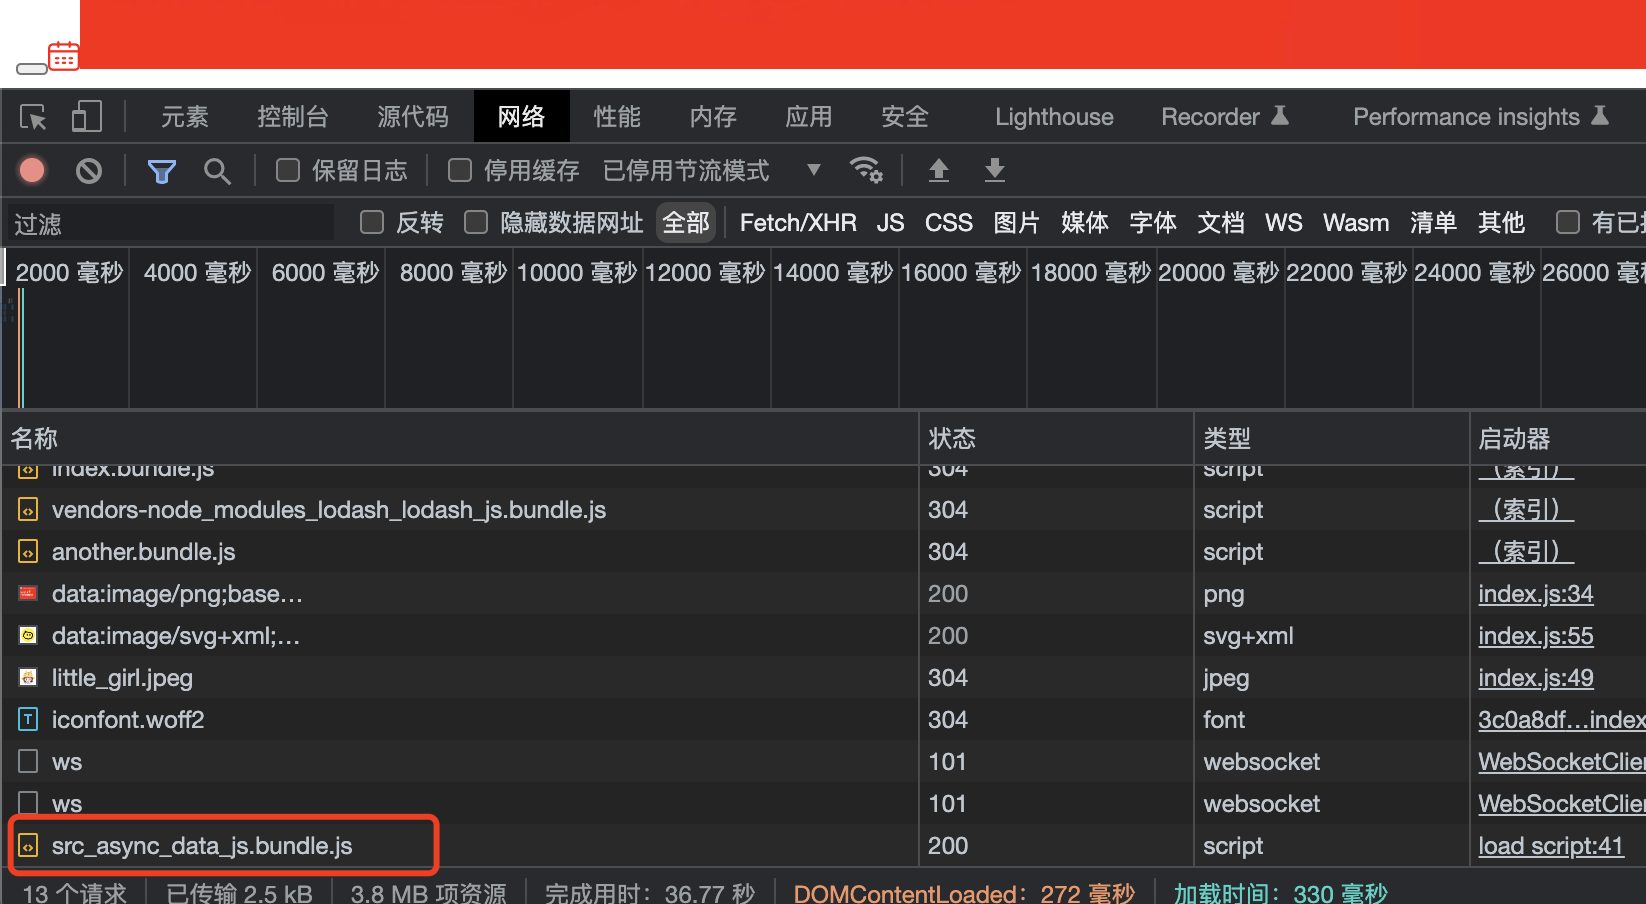
6.4 动态导入
6.5 懒加载
作用:体现在需要某前置条件触发后才加载
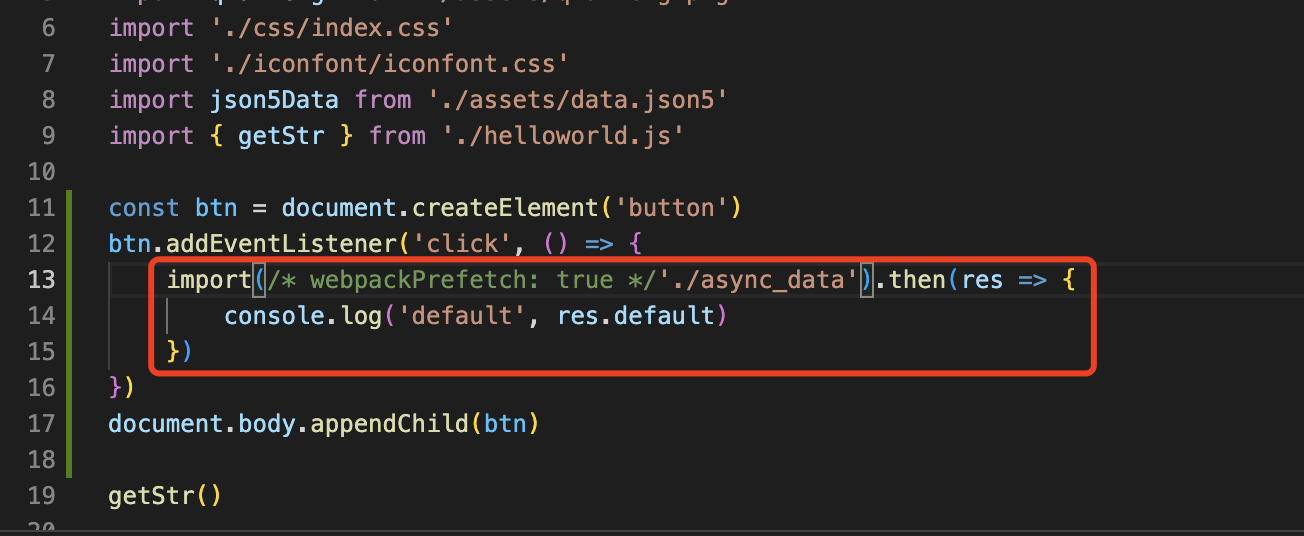
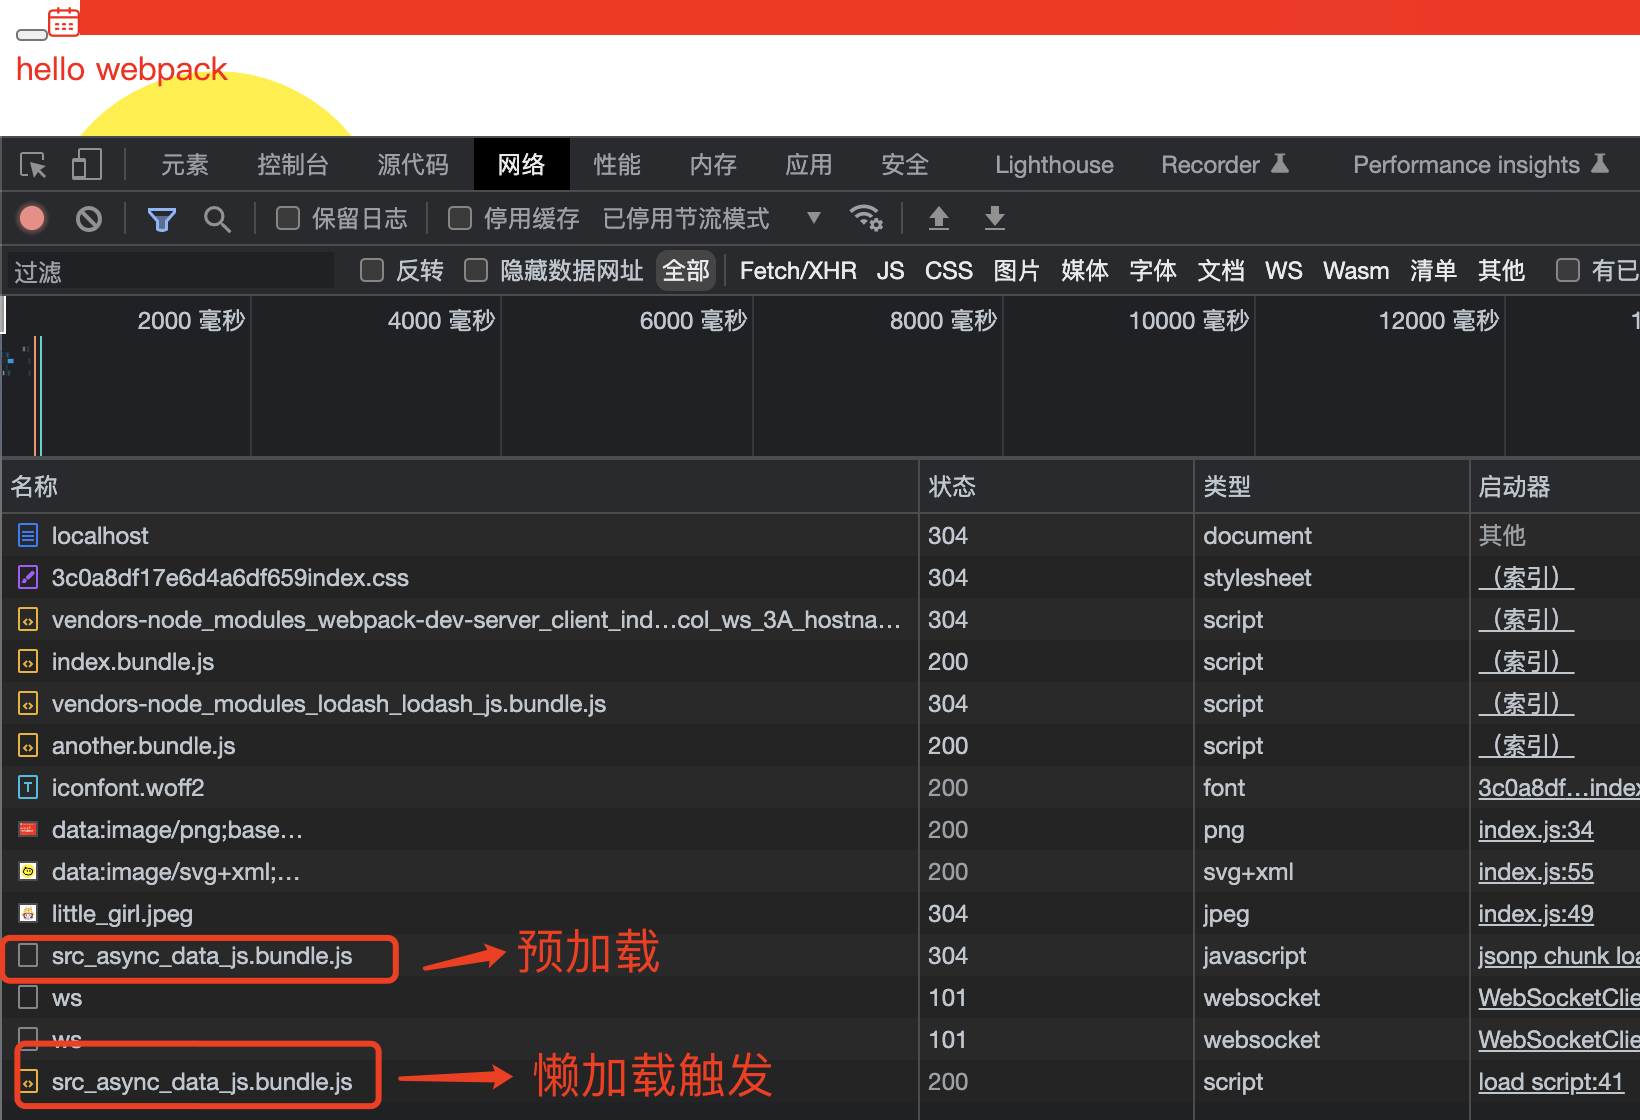
6. 6 预加载
webpackPreload或者webpackPrefetch
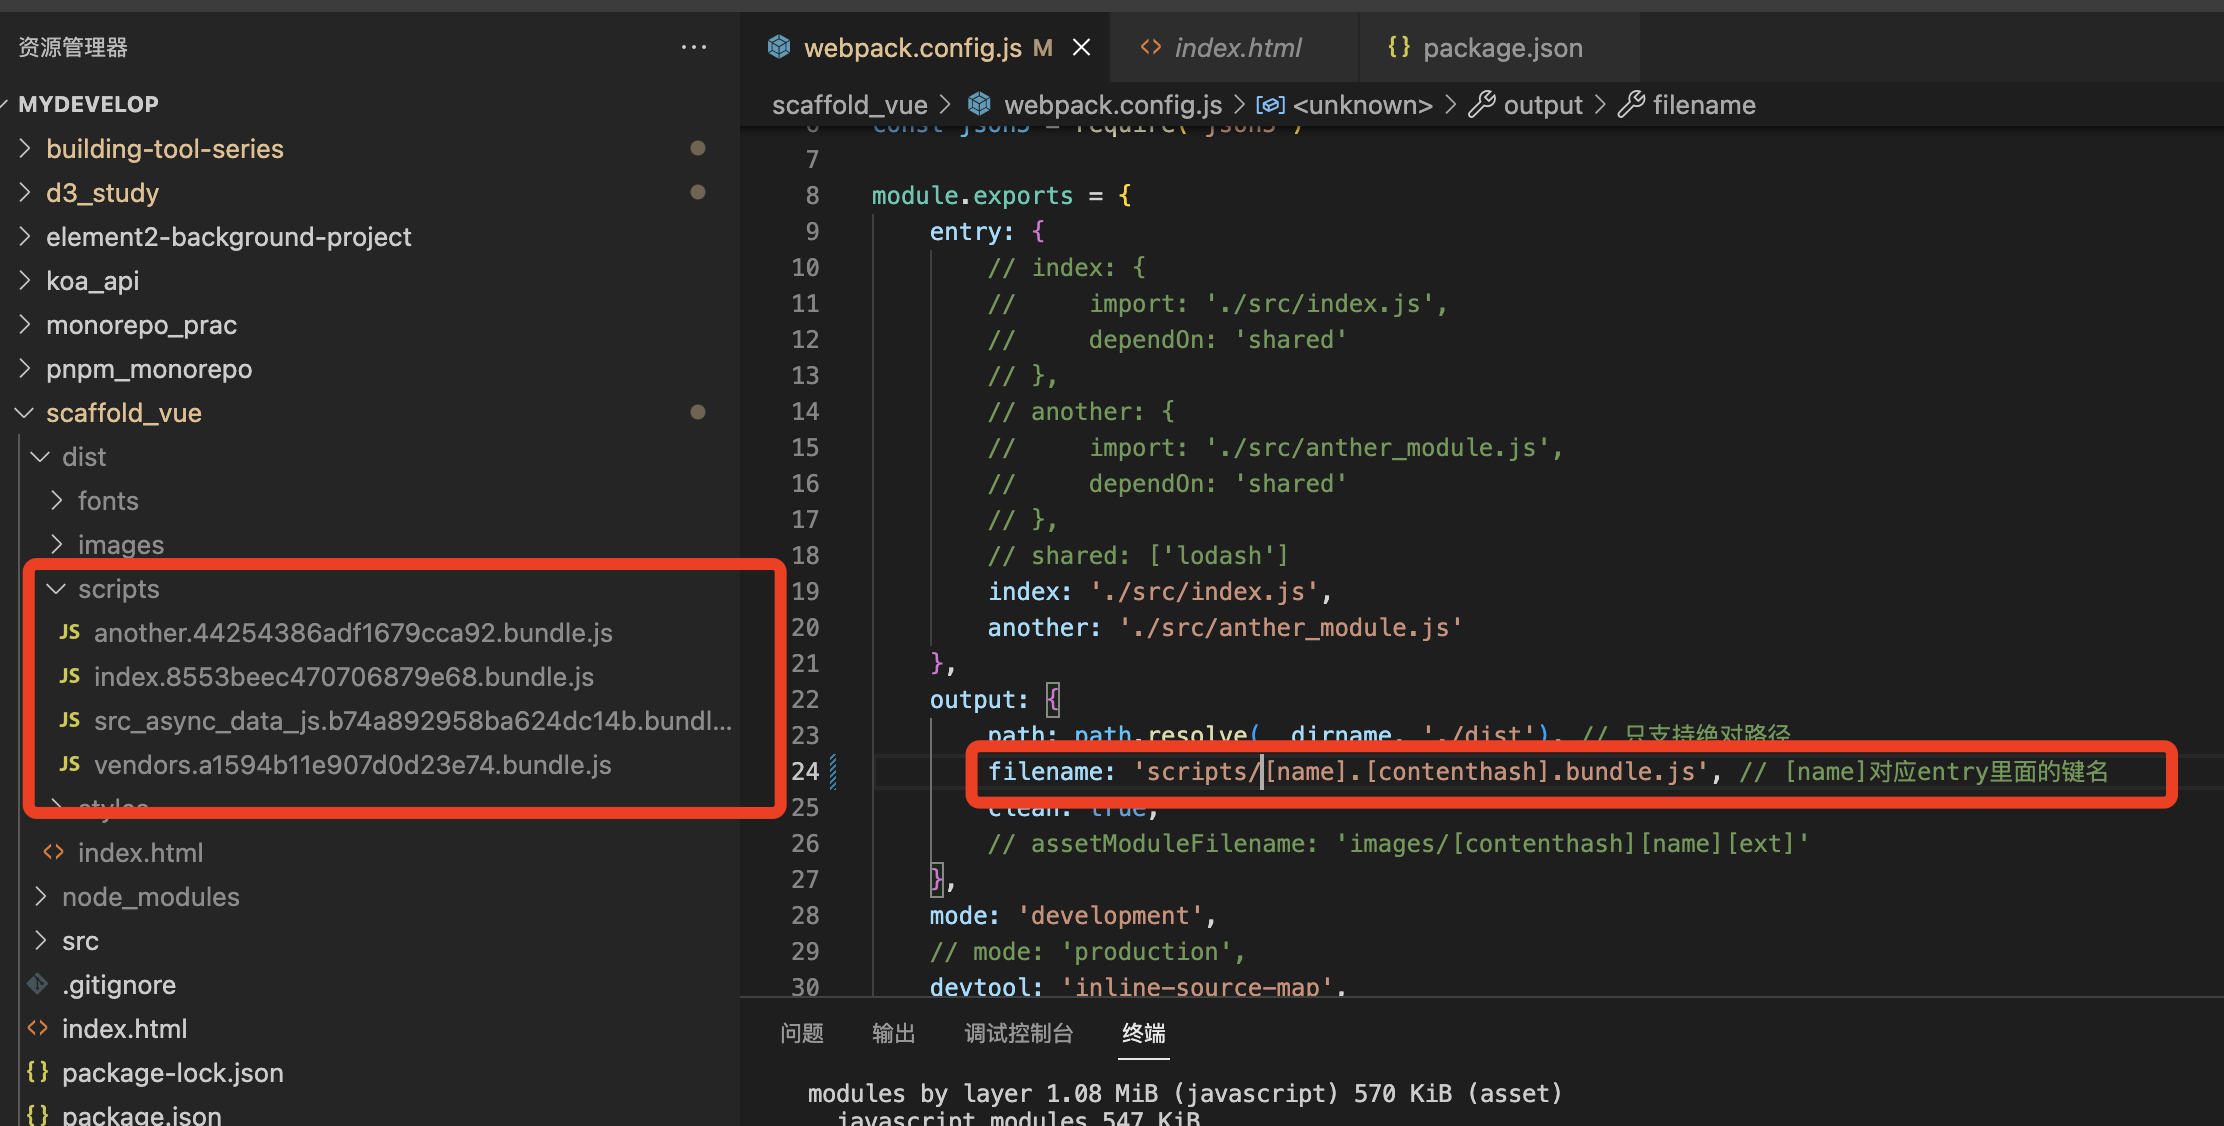
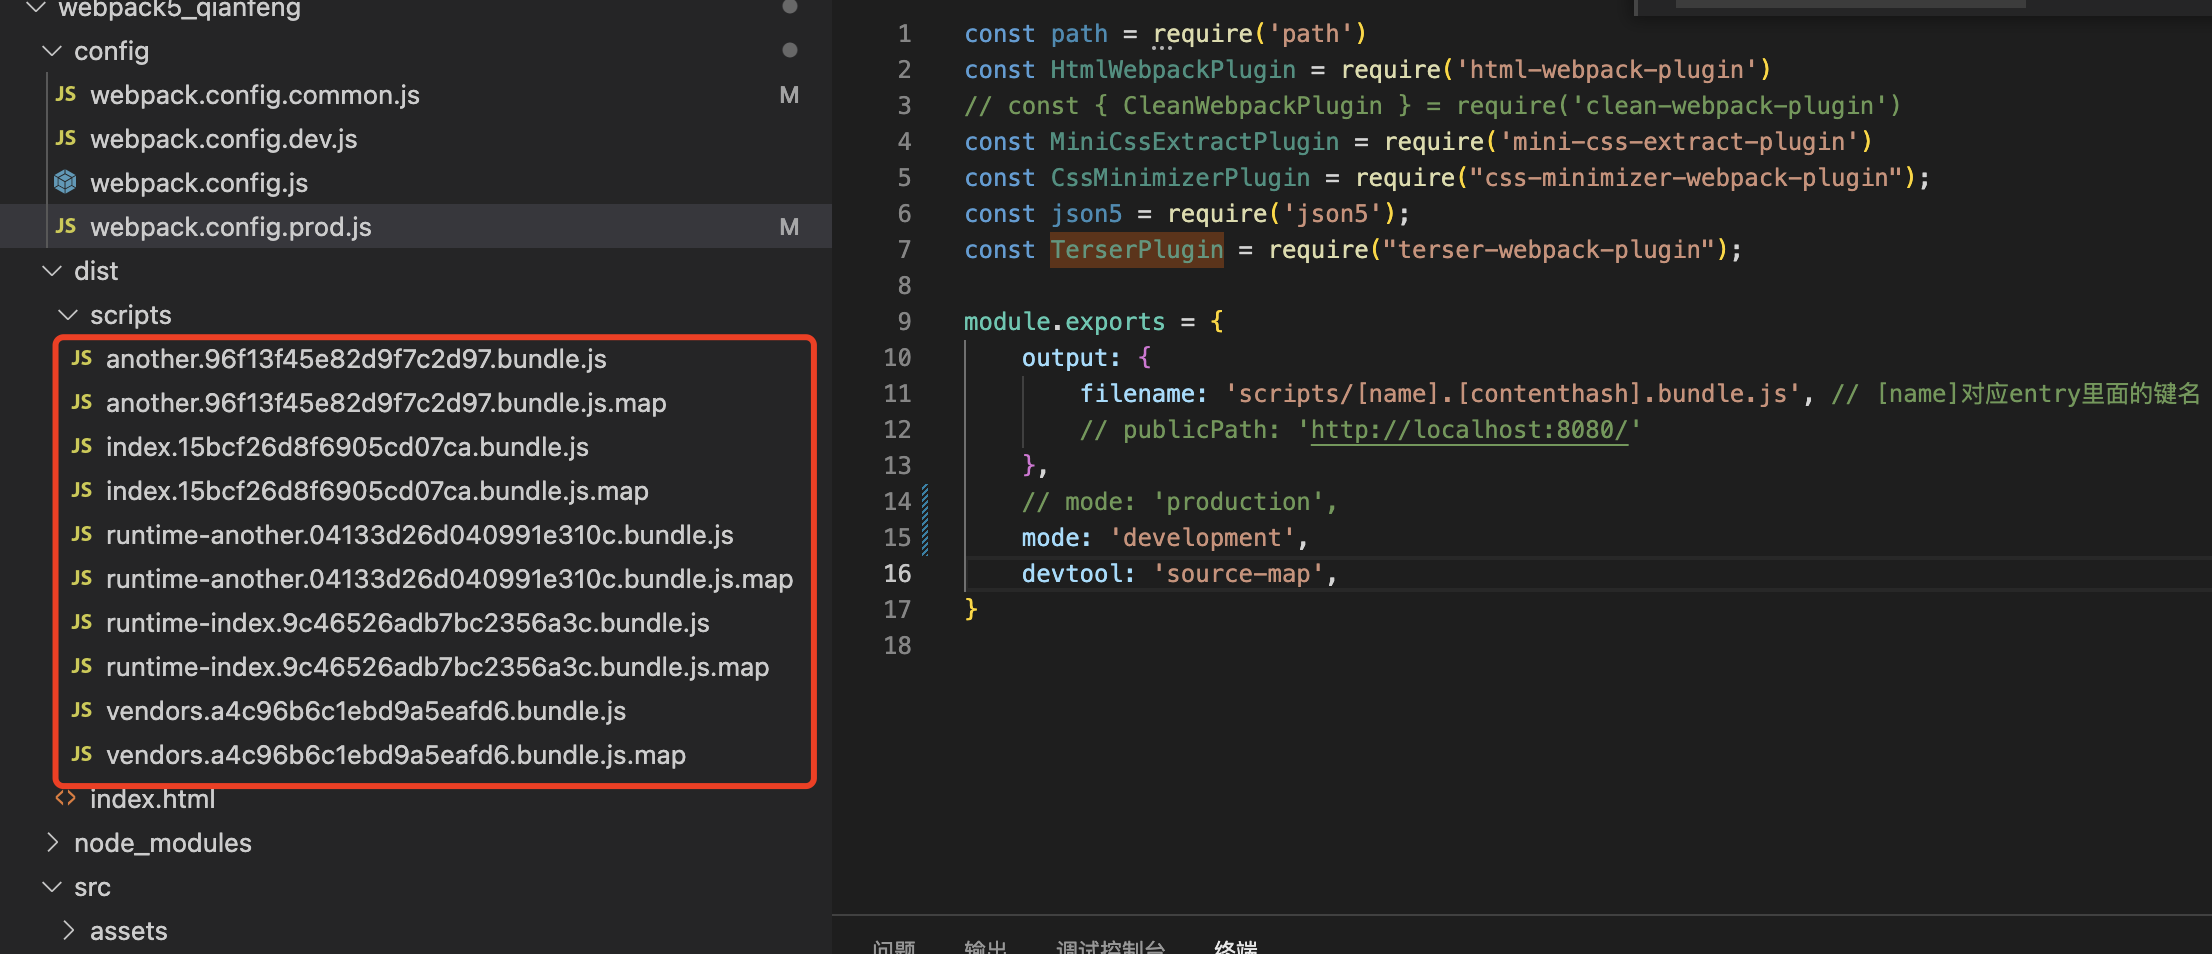
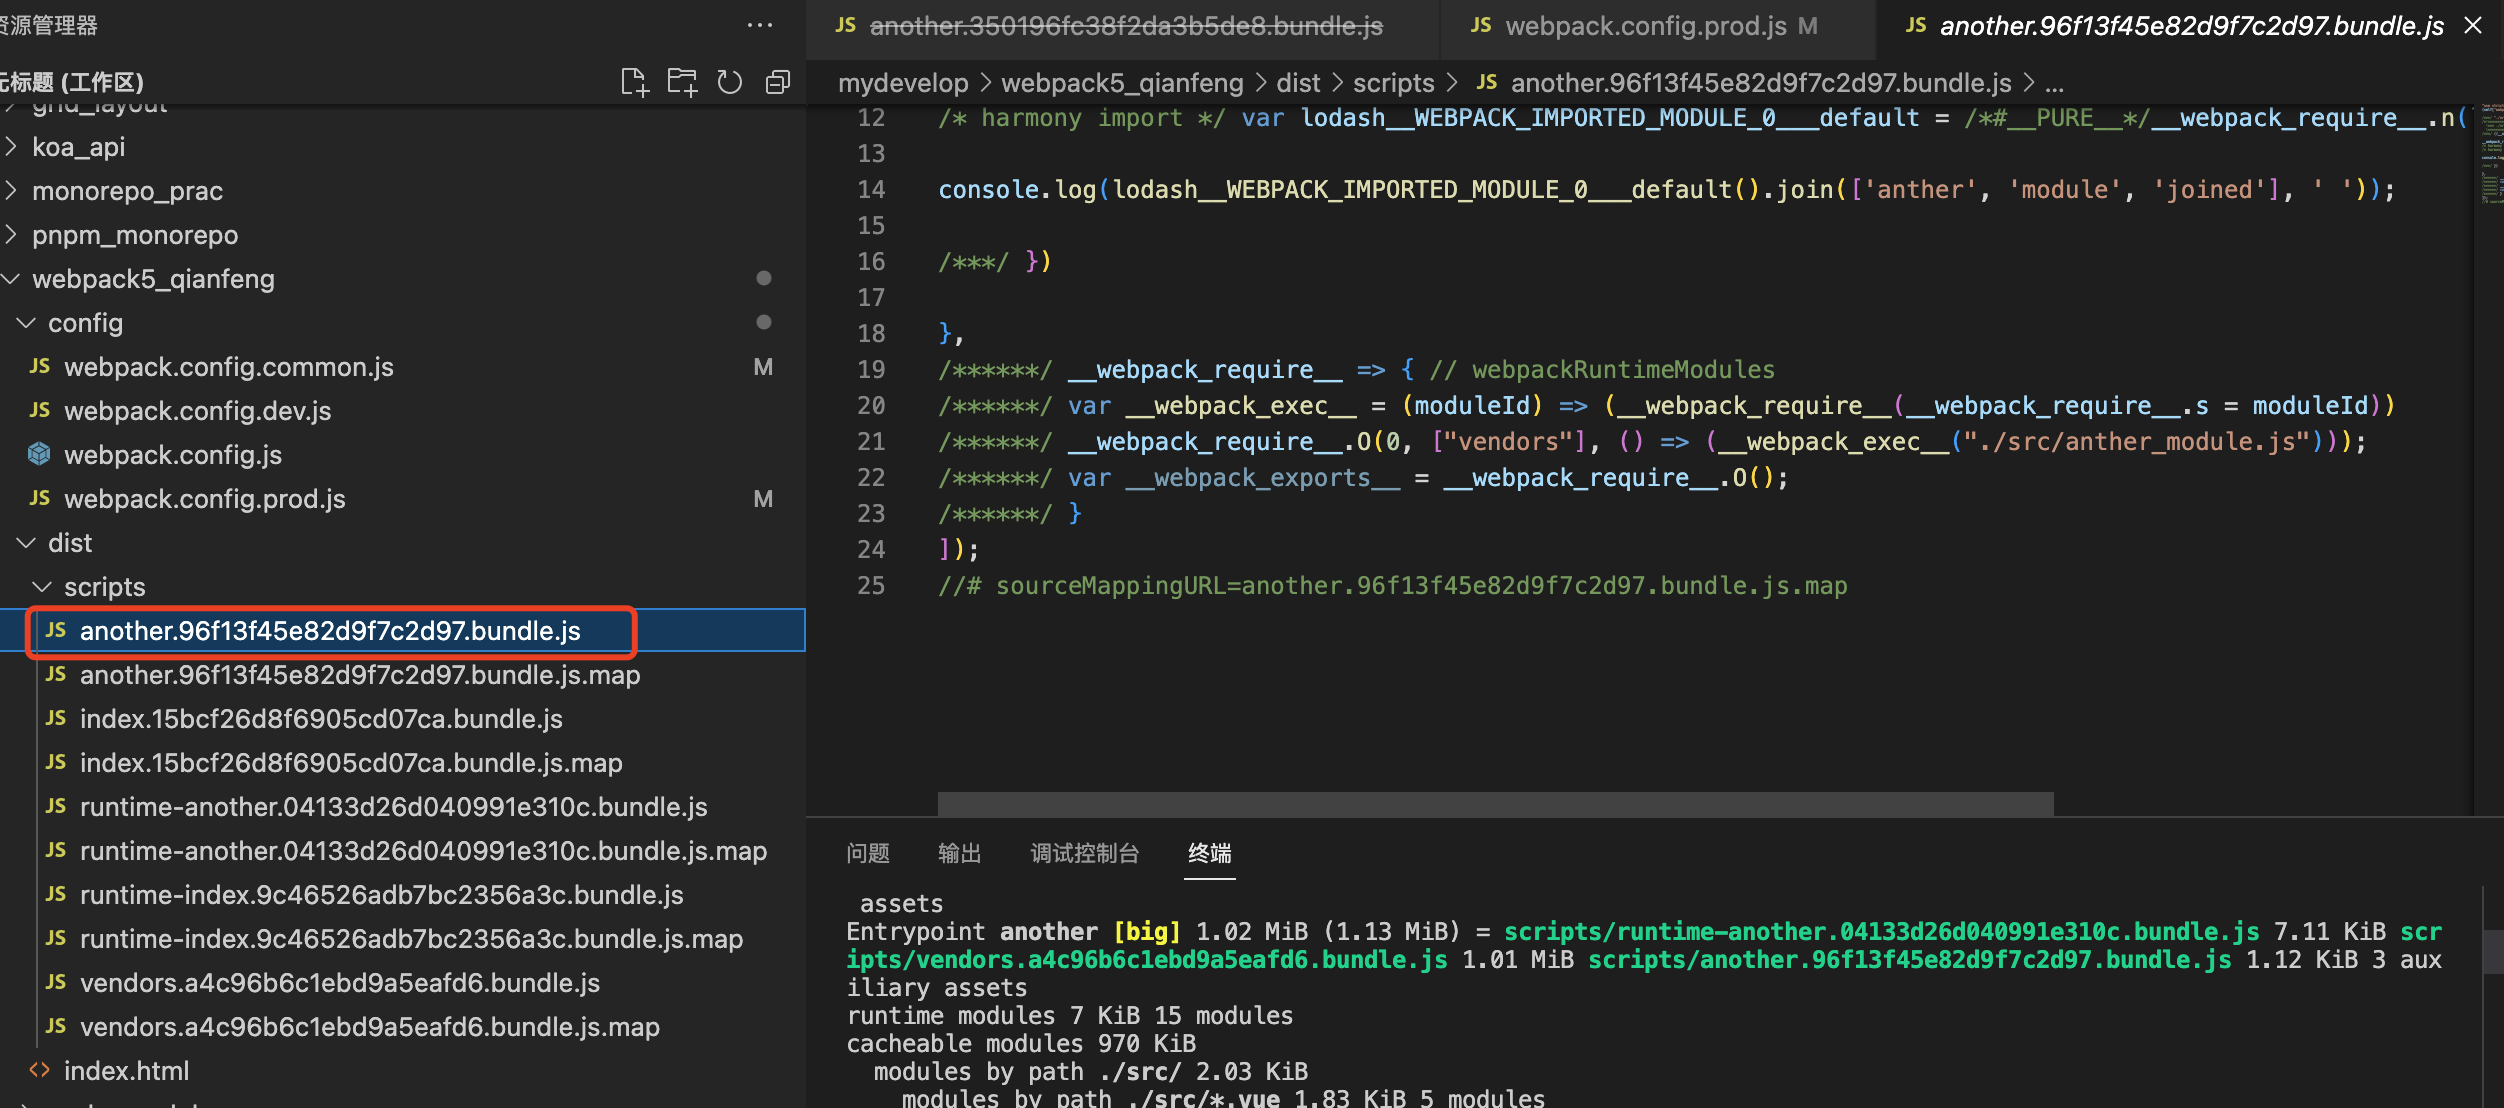
6.7 指定输出文件夹
业务场景:将所有js文件放到scripts文件夹里面
7、缓存
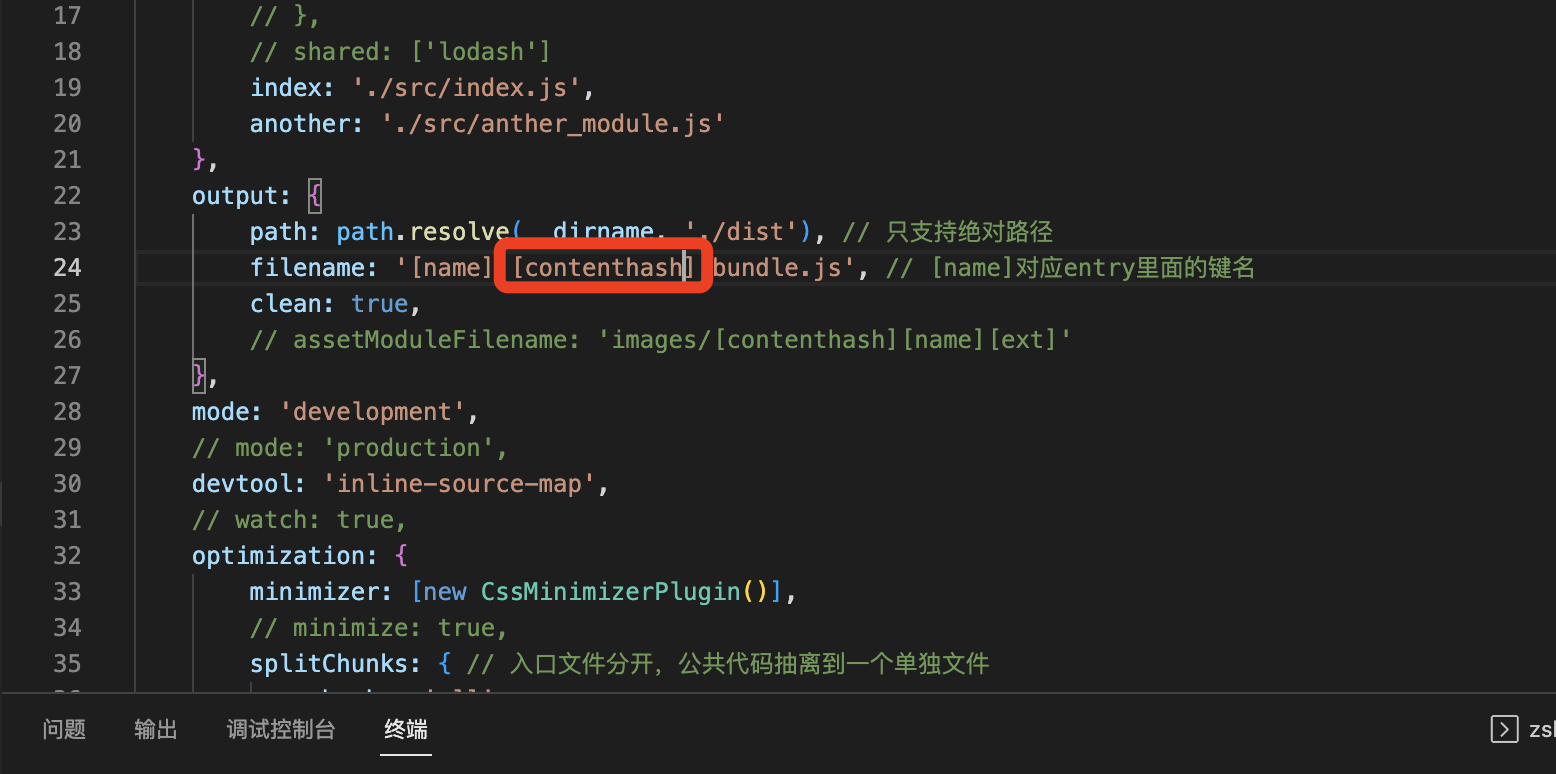
7.1 易变资源-输出文件名
作用:部署新版本时,没有更改资源文件名,浏览器会误认为你没有更新。
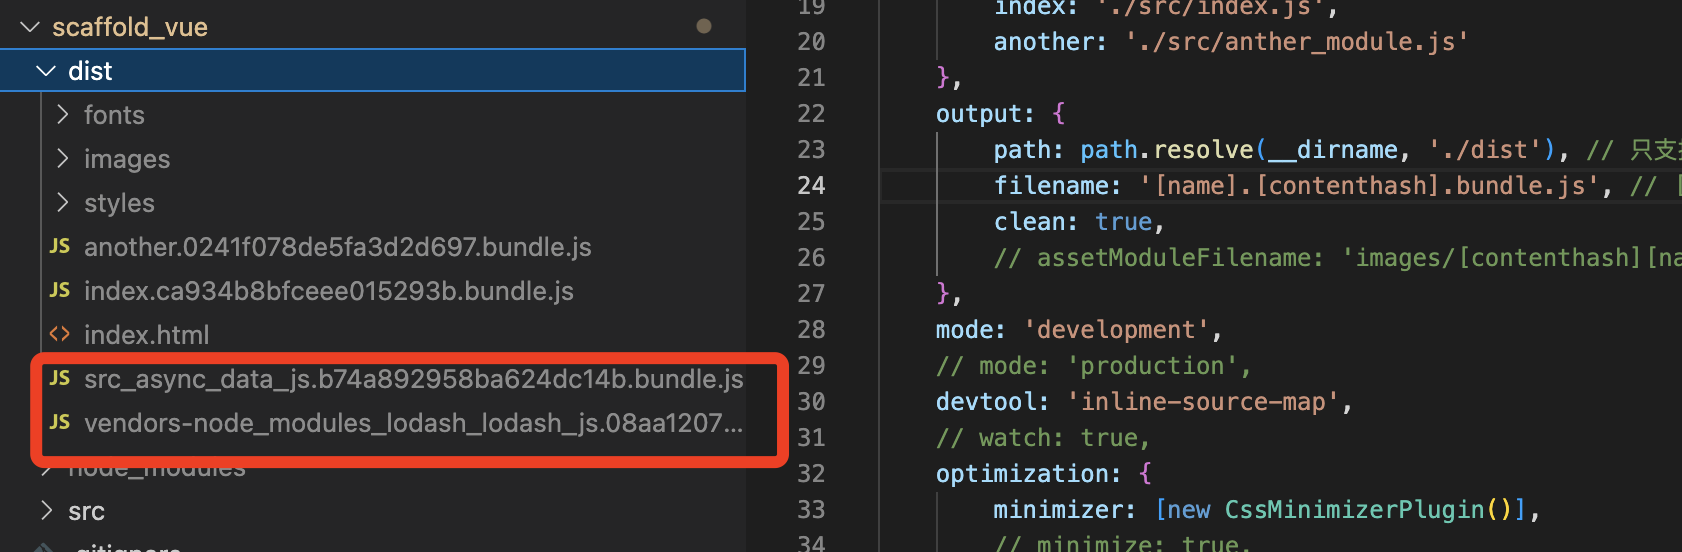
7.2 稳定资源-缓存组
作用:将node_modules中的所有依赖打包到同一个js文件中
8、环境拆分
情形:目前只能手动修改mode来切换环境,开发环境和生产环境有很大区别。
区别:开发环境不需要缓存、生产环境需要设置公共路径等
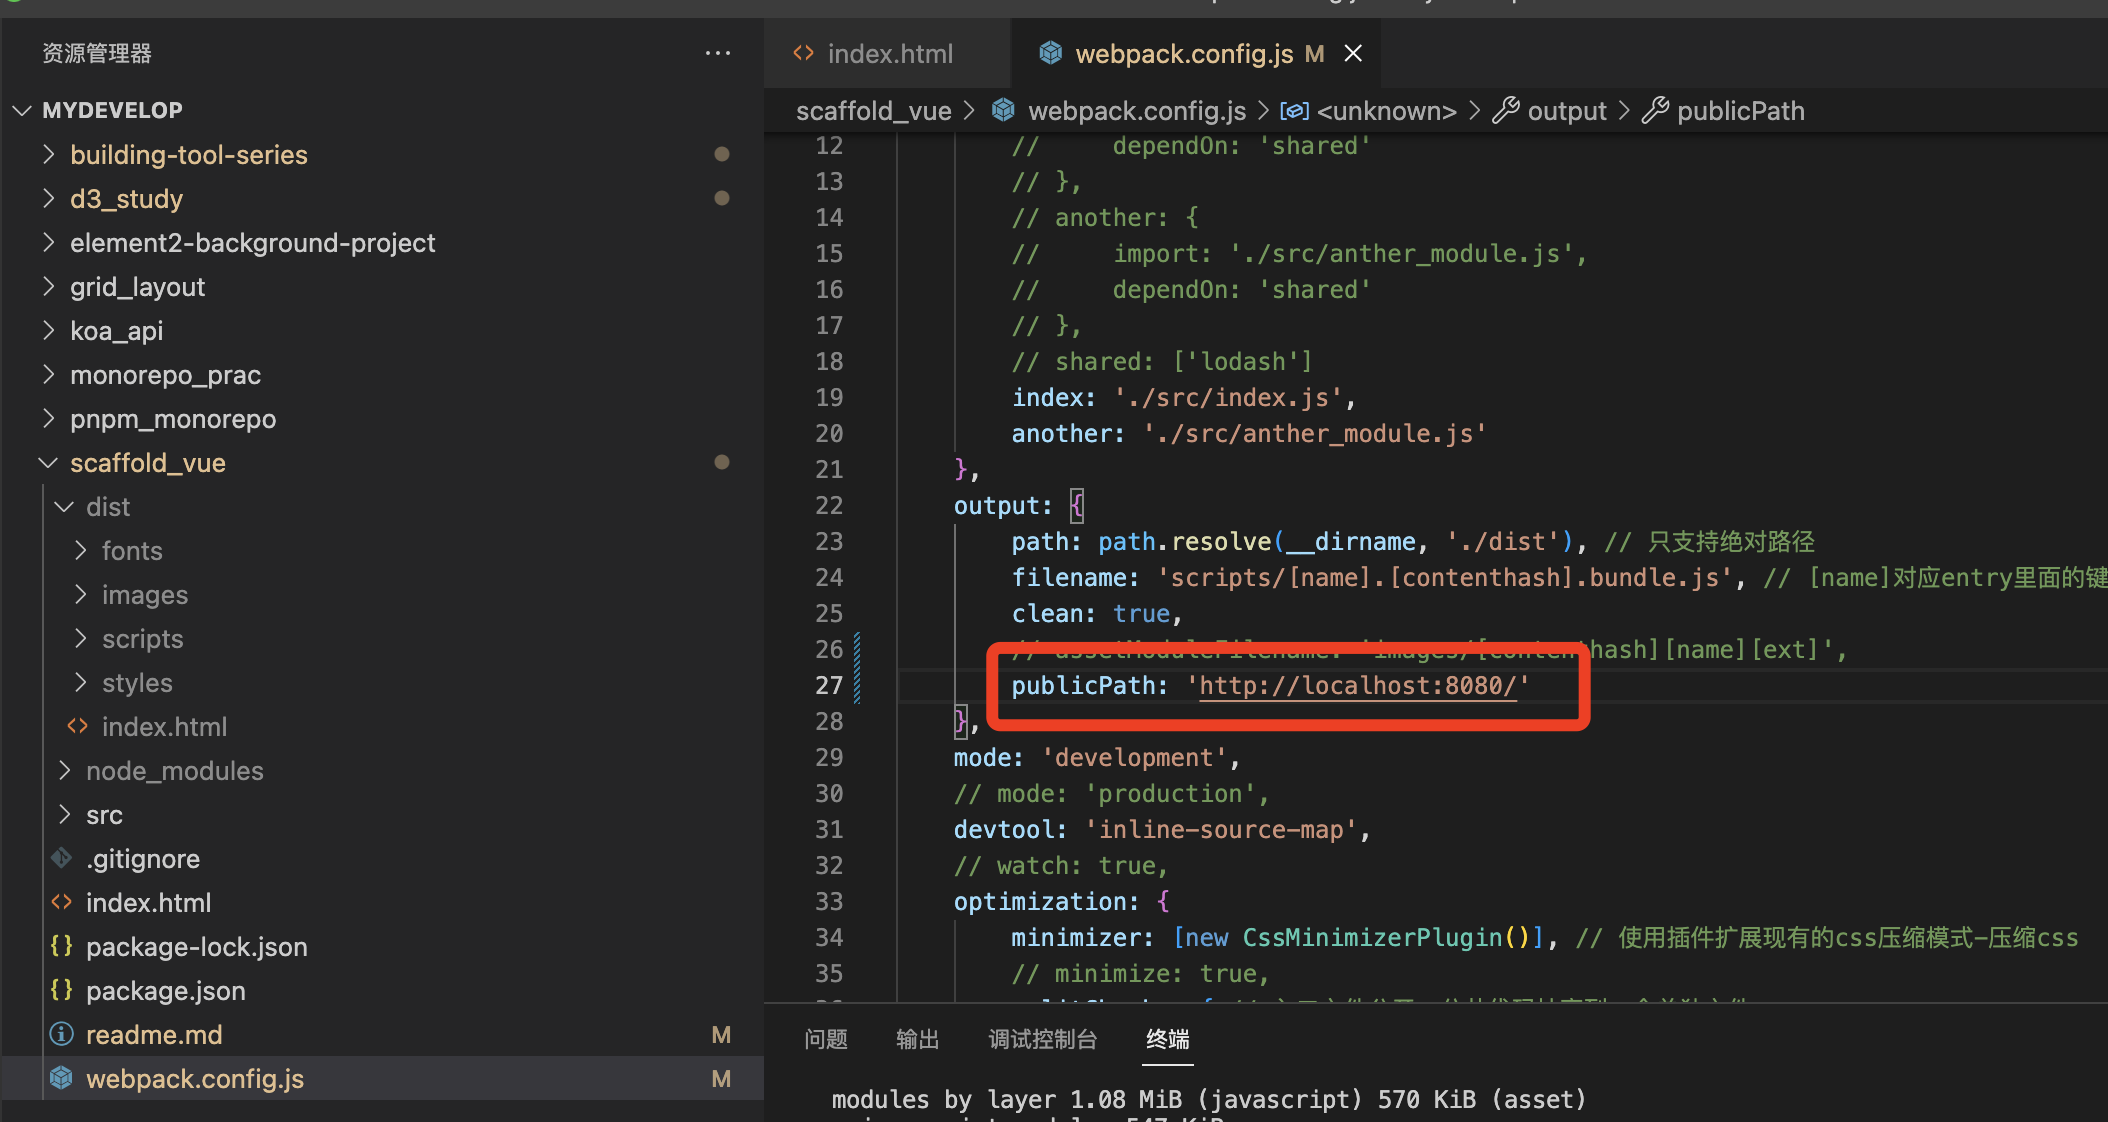
8.1 公共路径
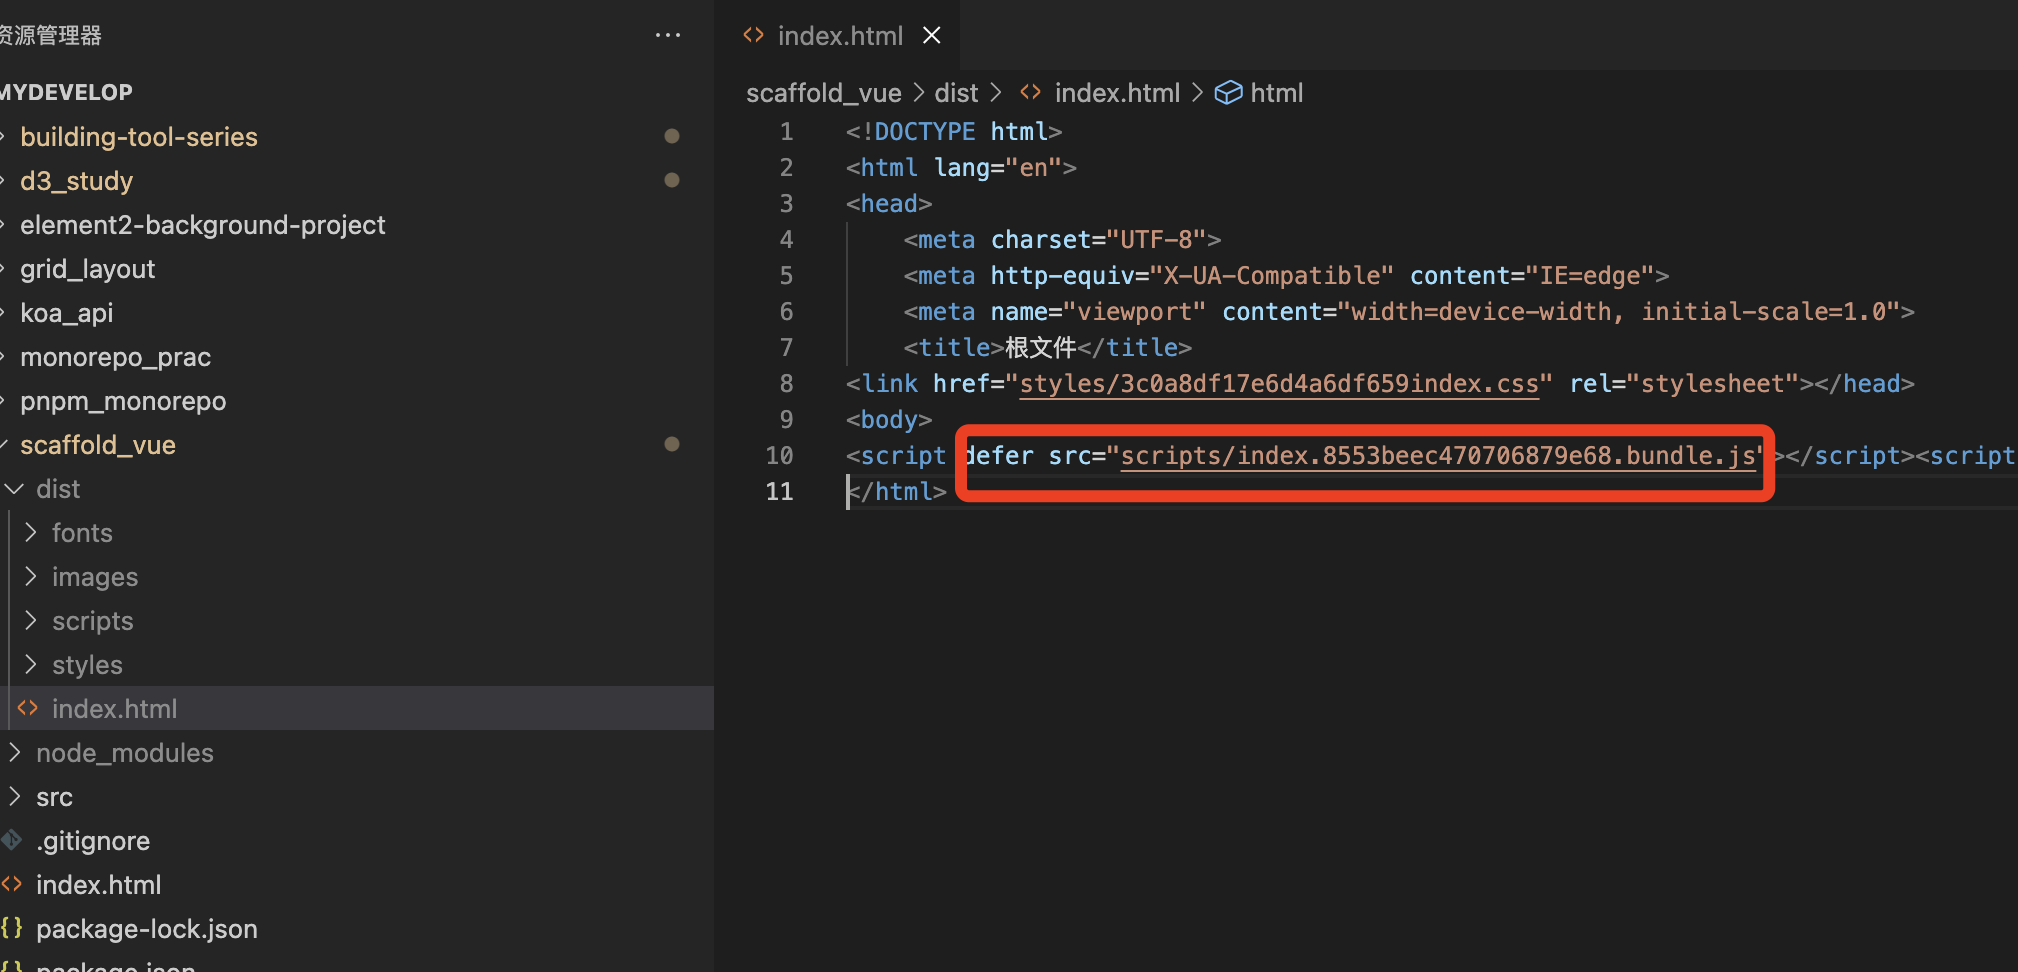
默认使用相对路径
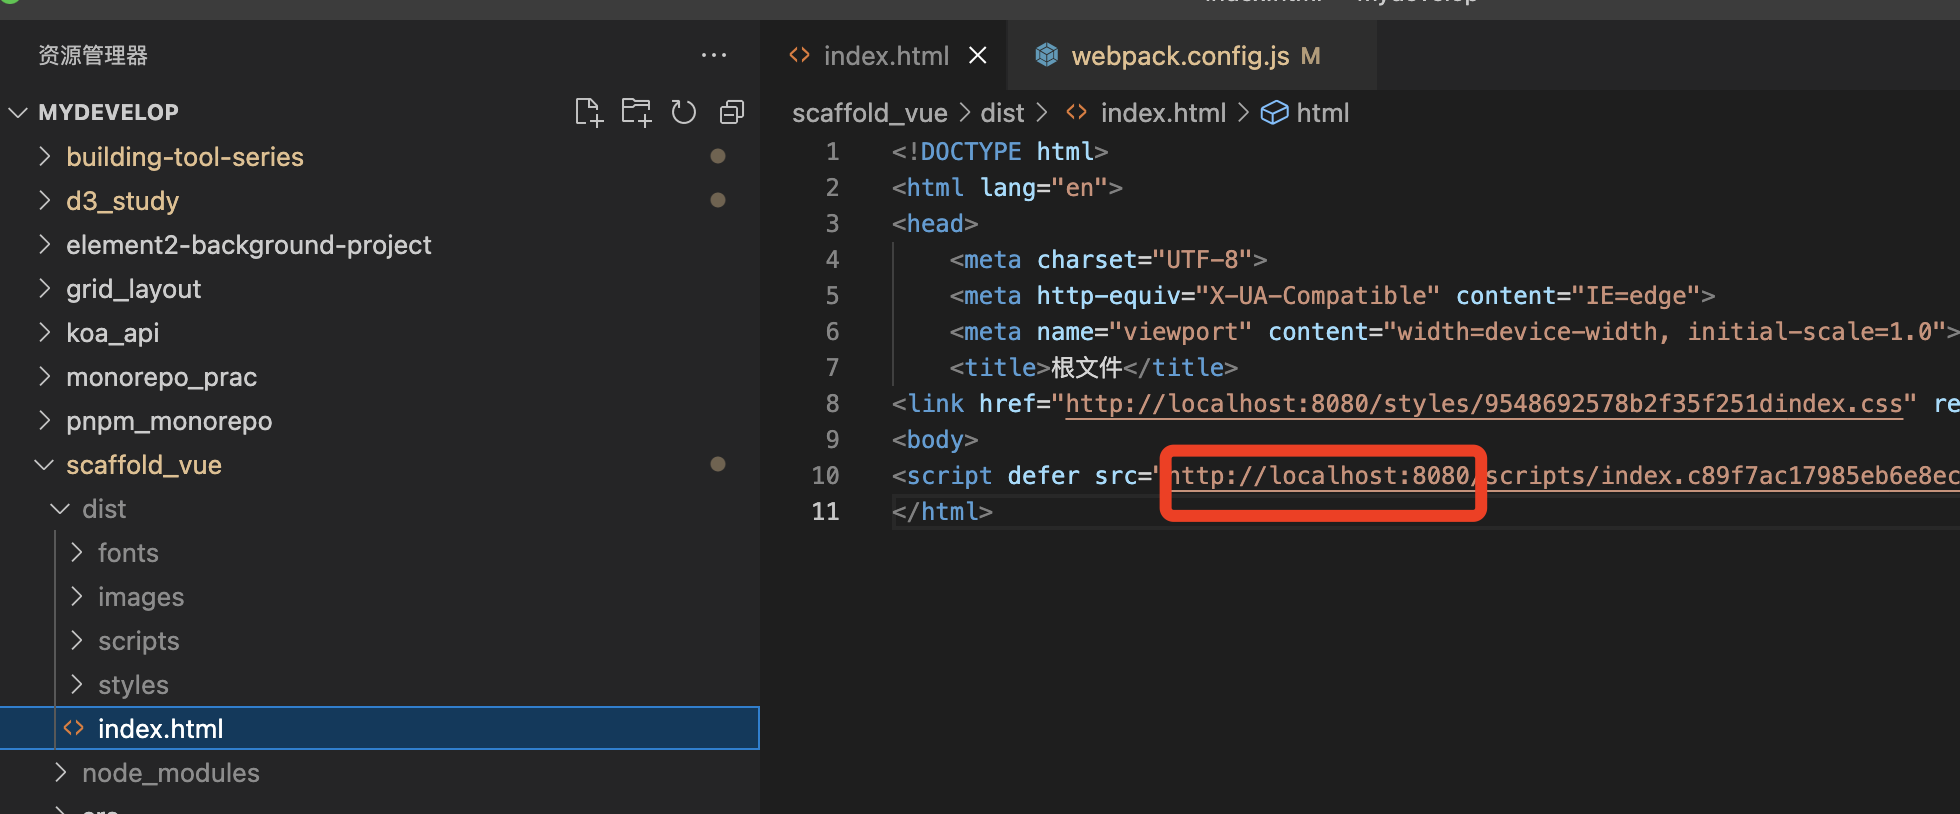
配置publicPath
打包后link加上了公共路径
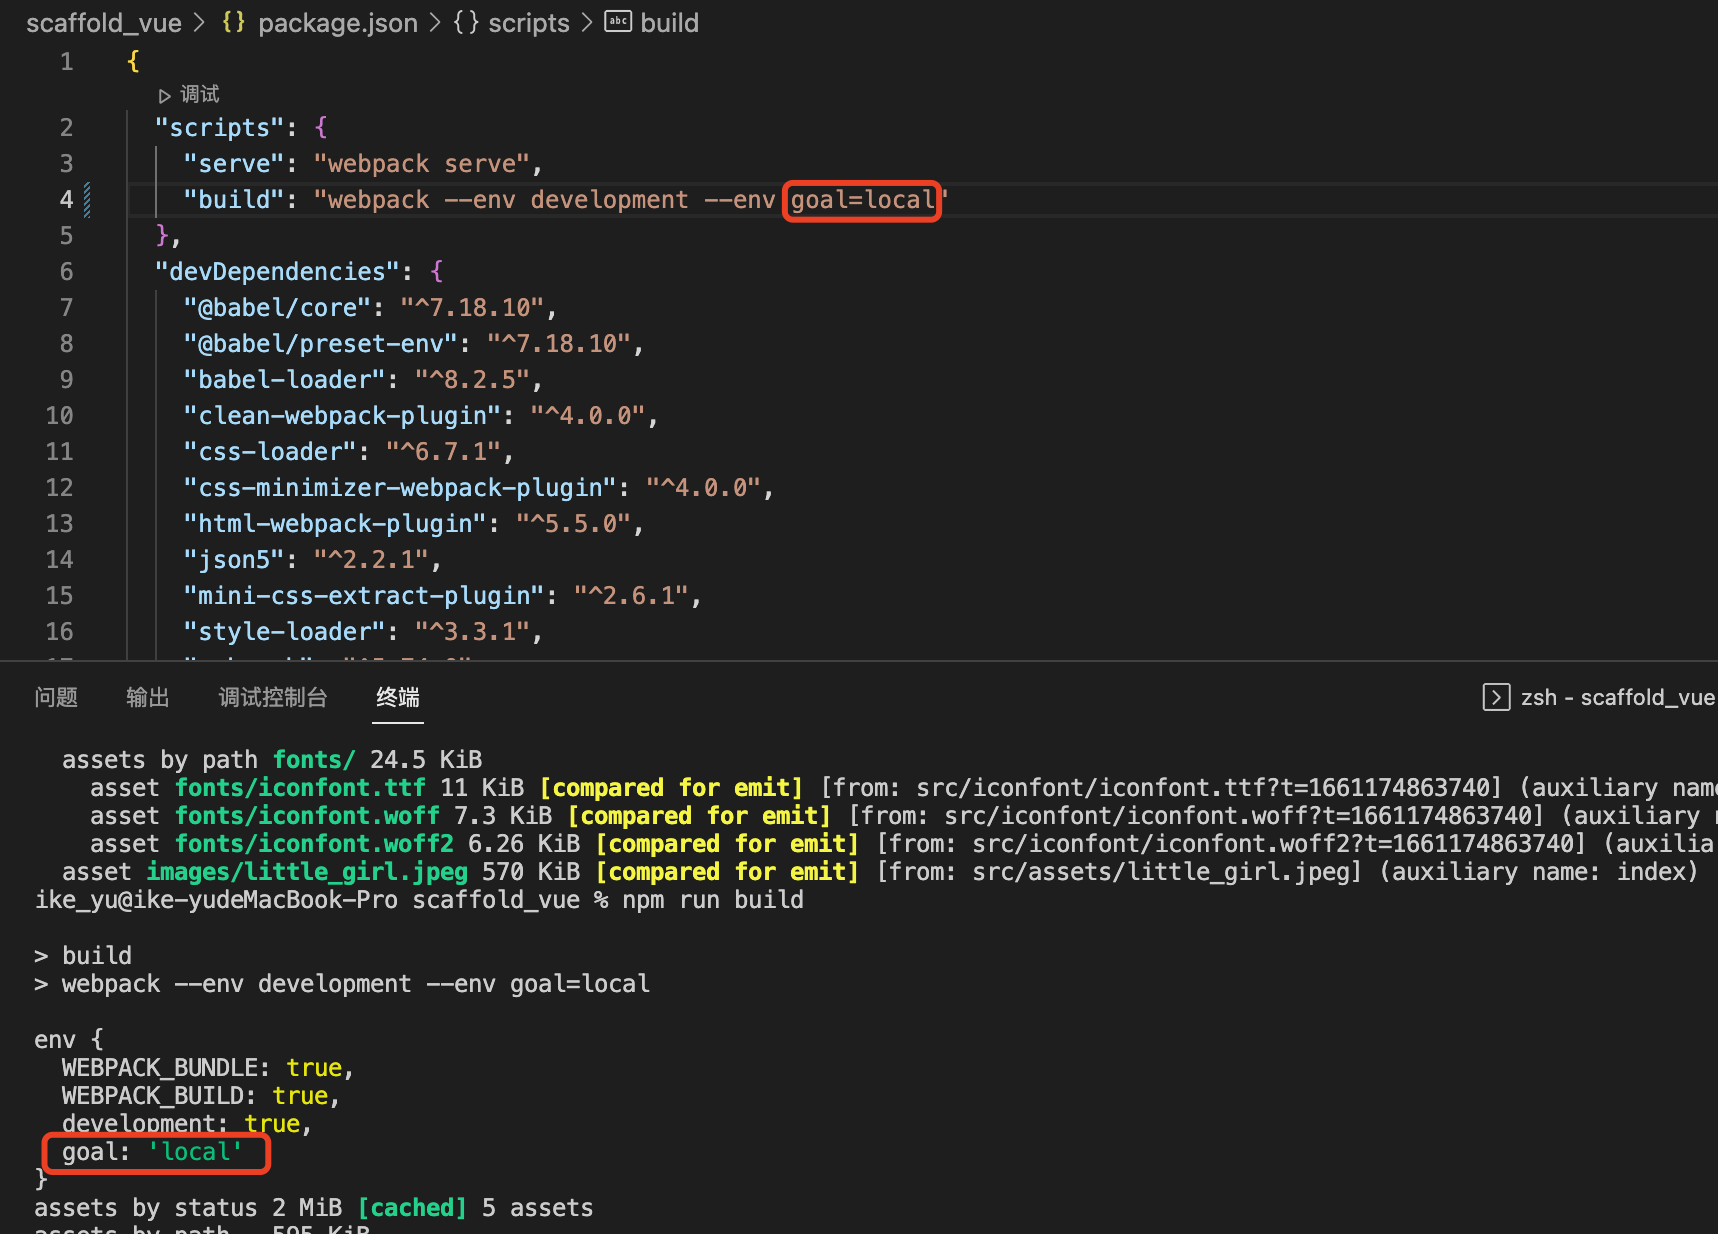
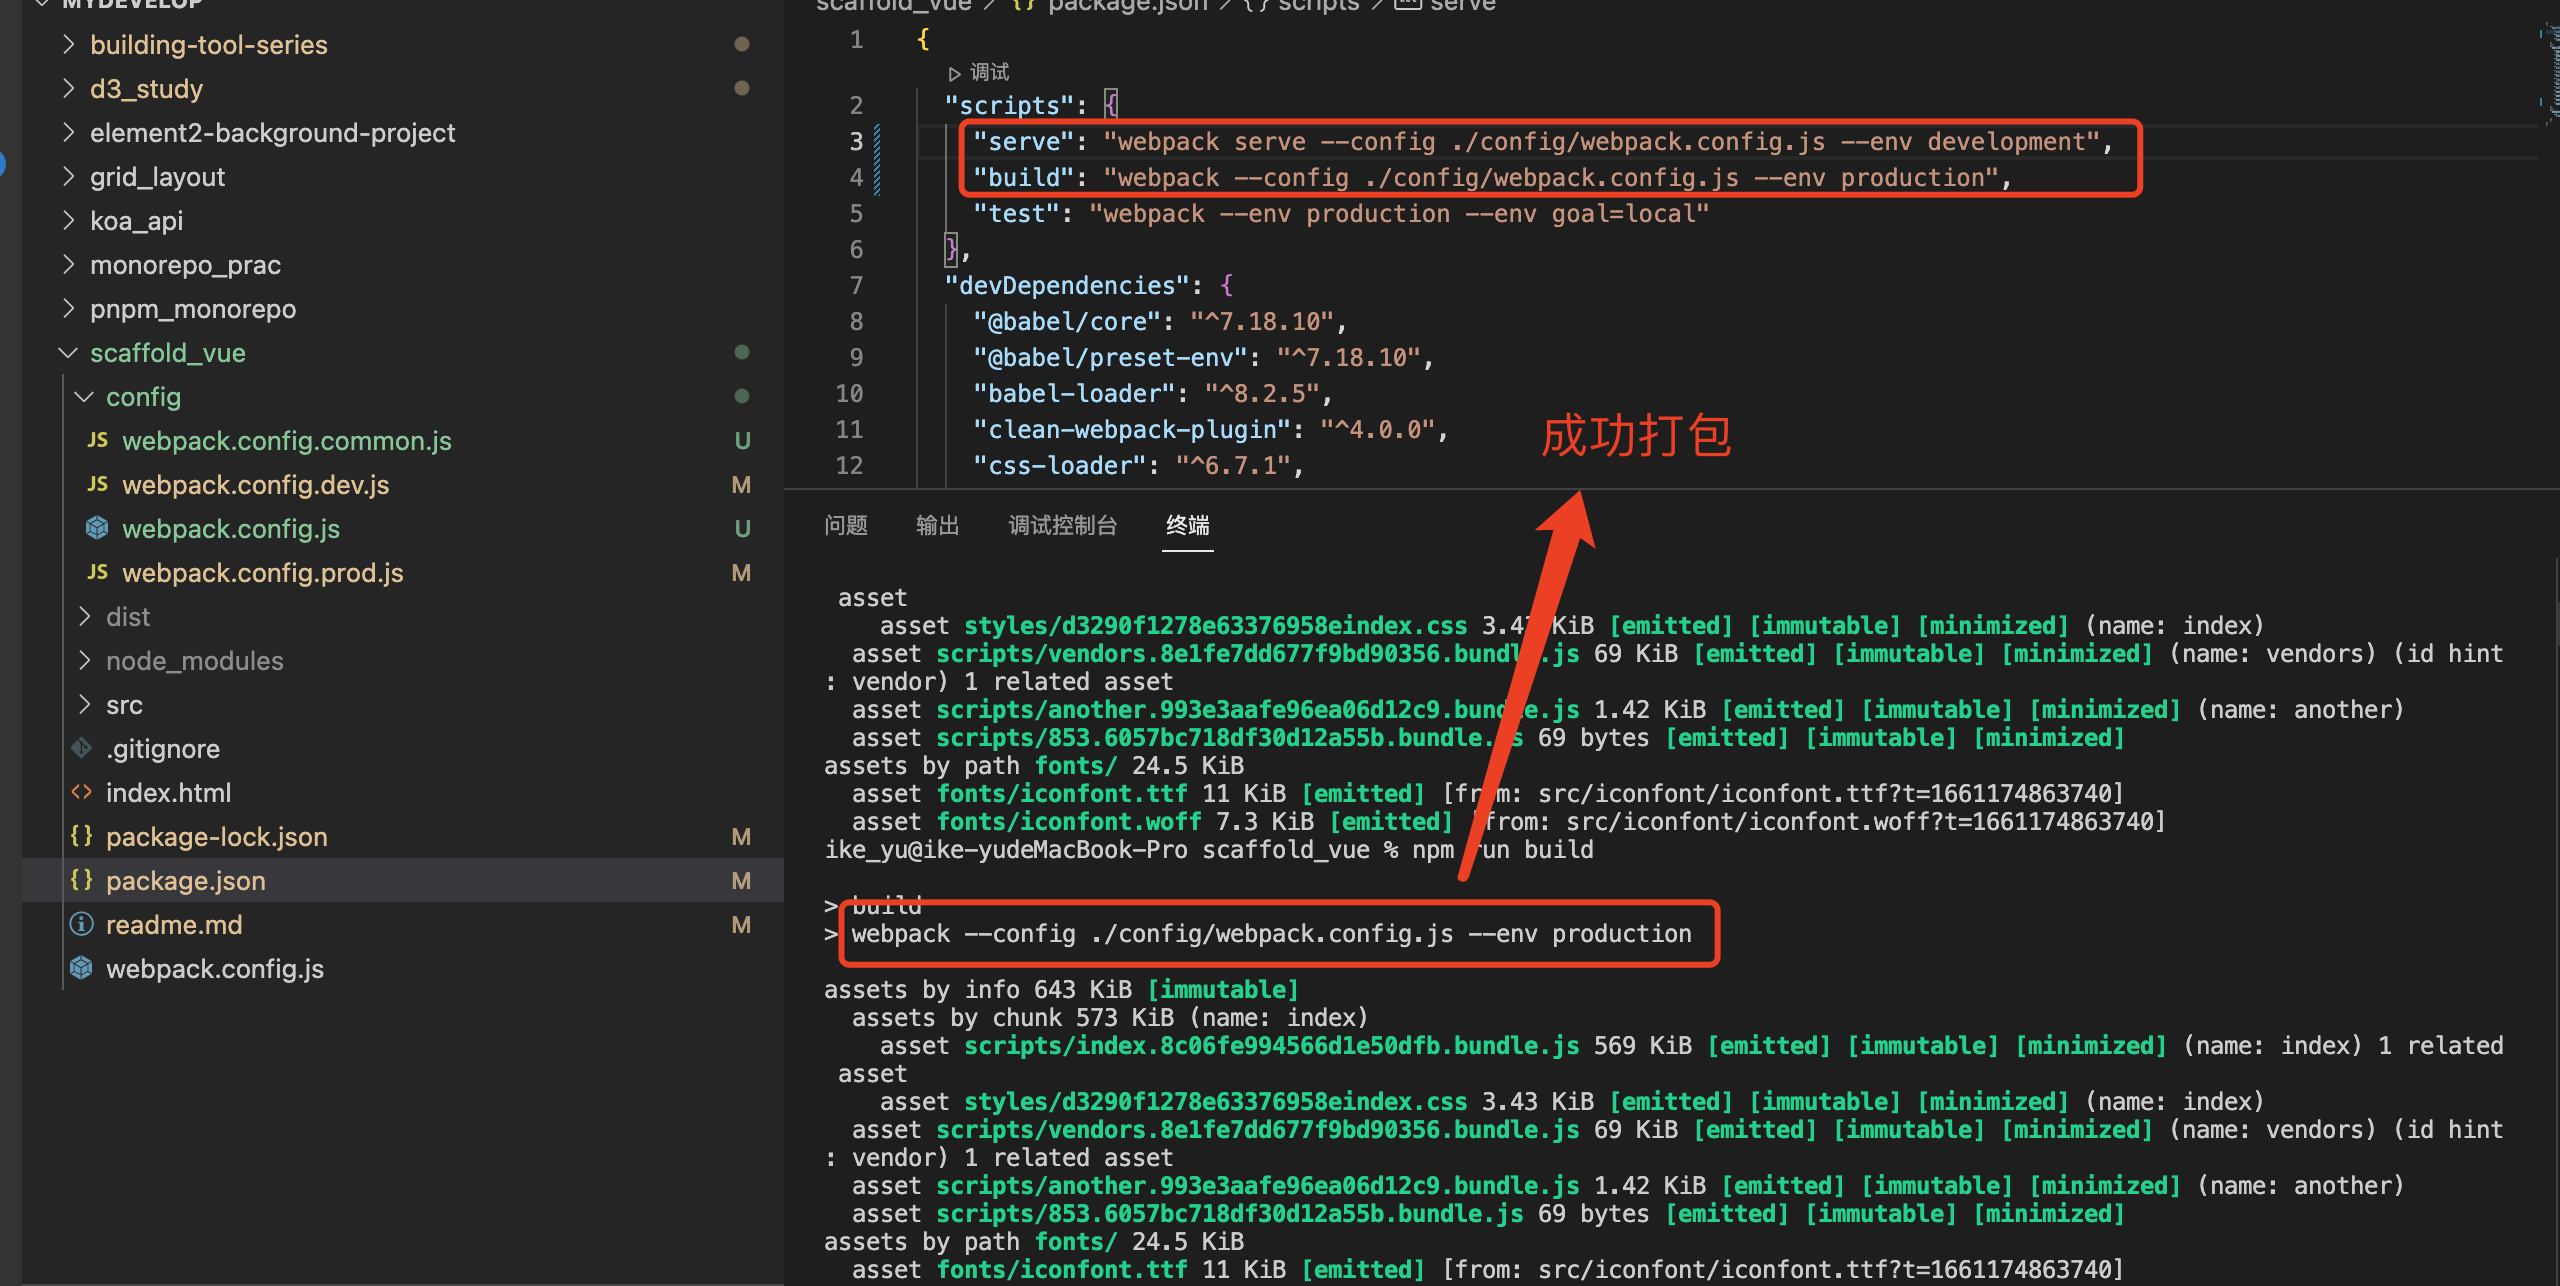
8.2 环境变量
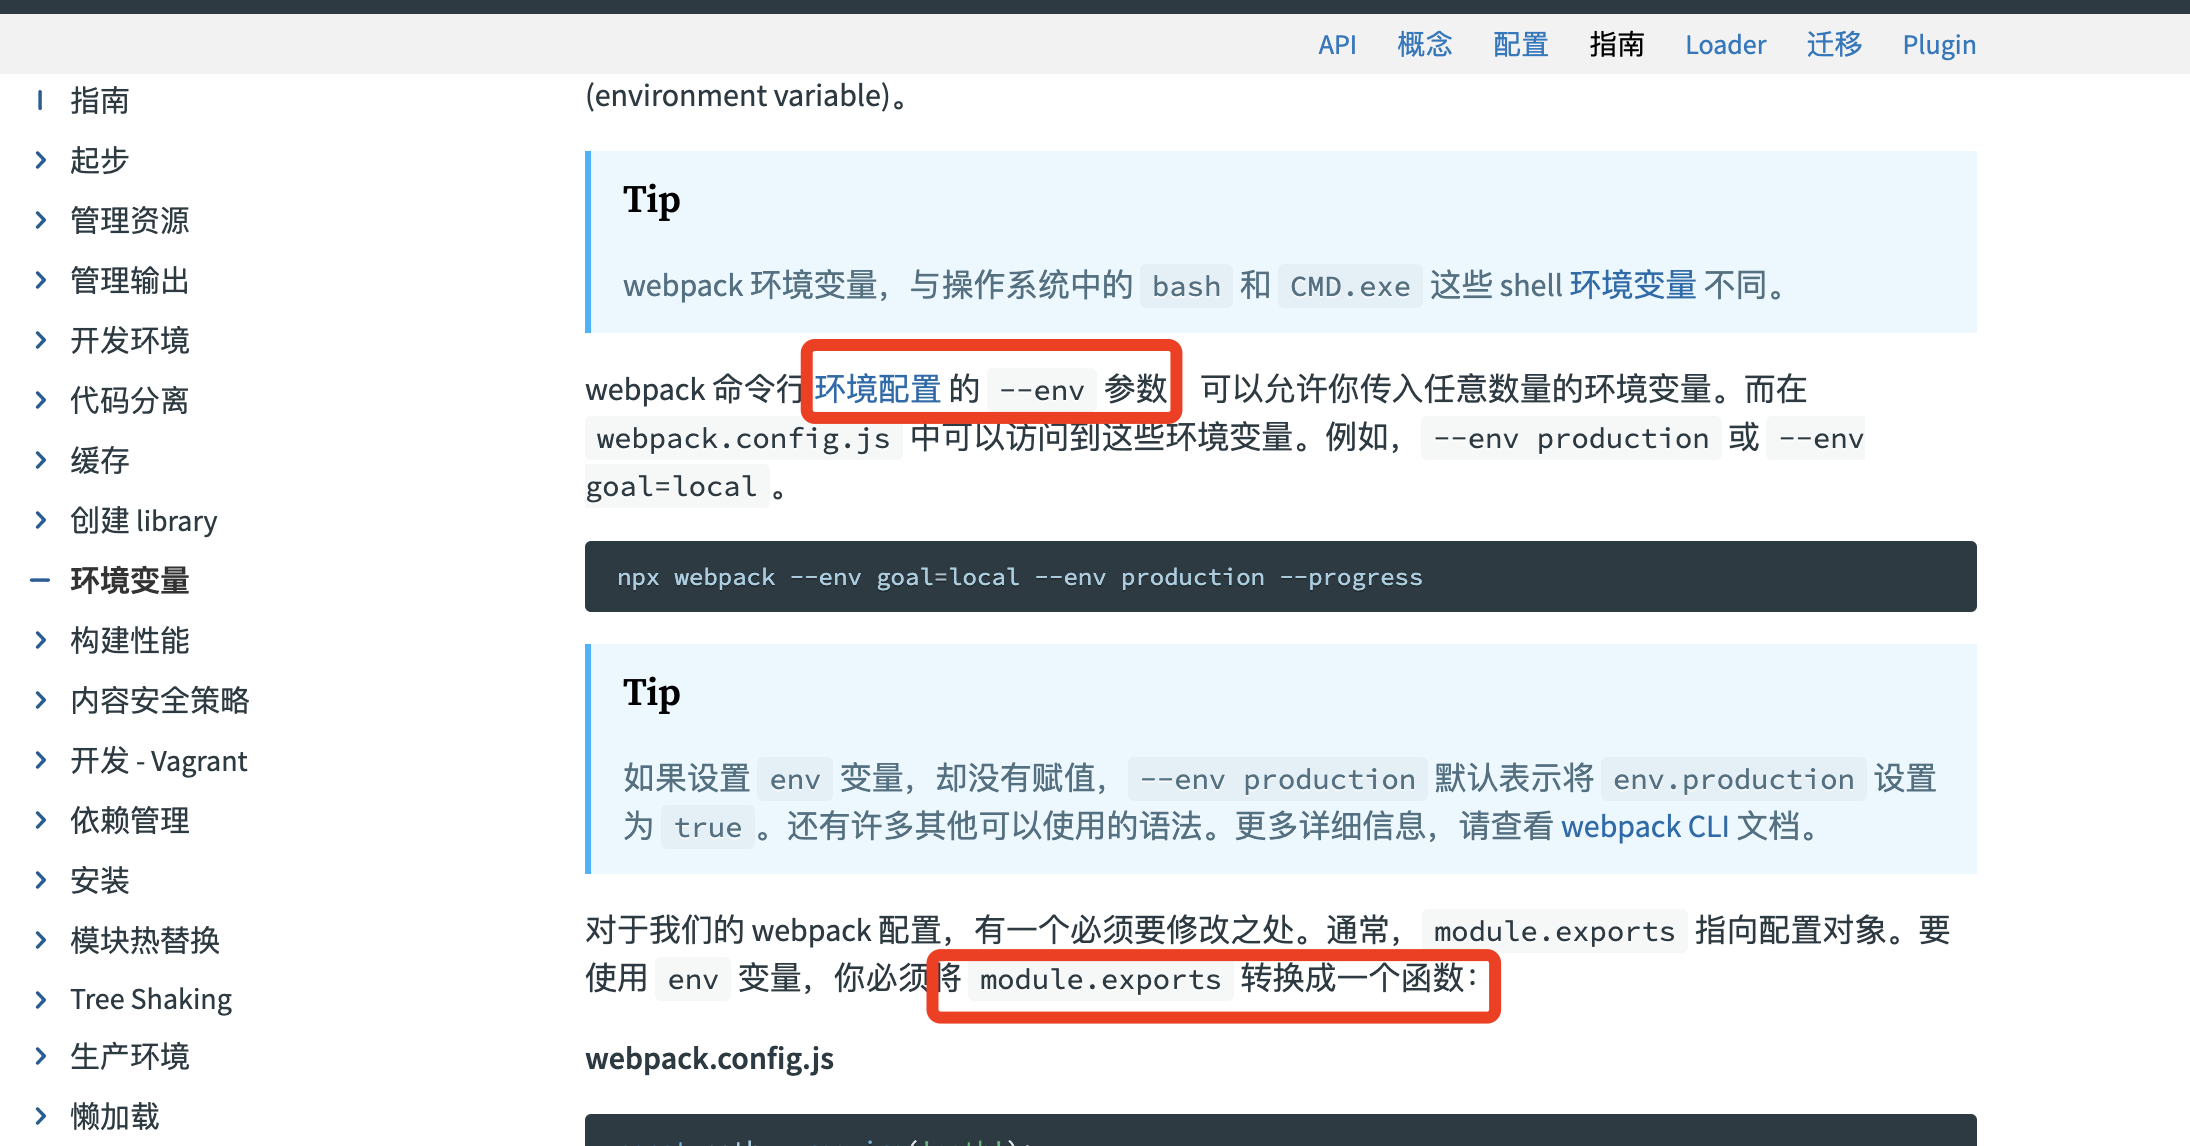
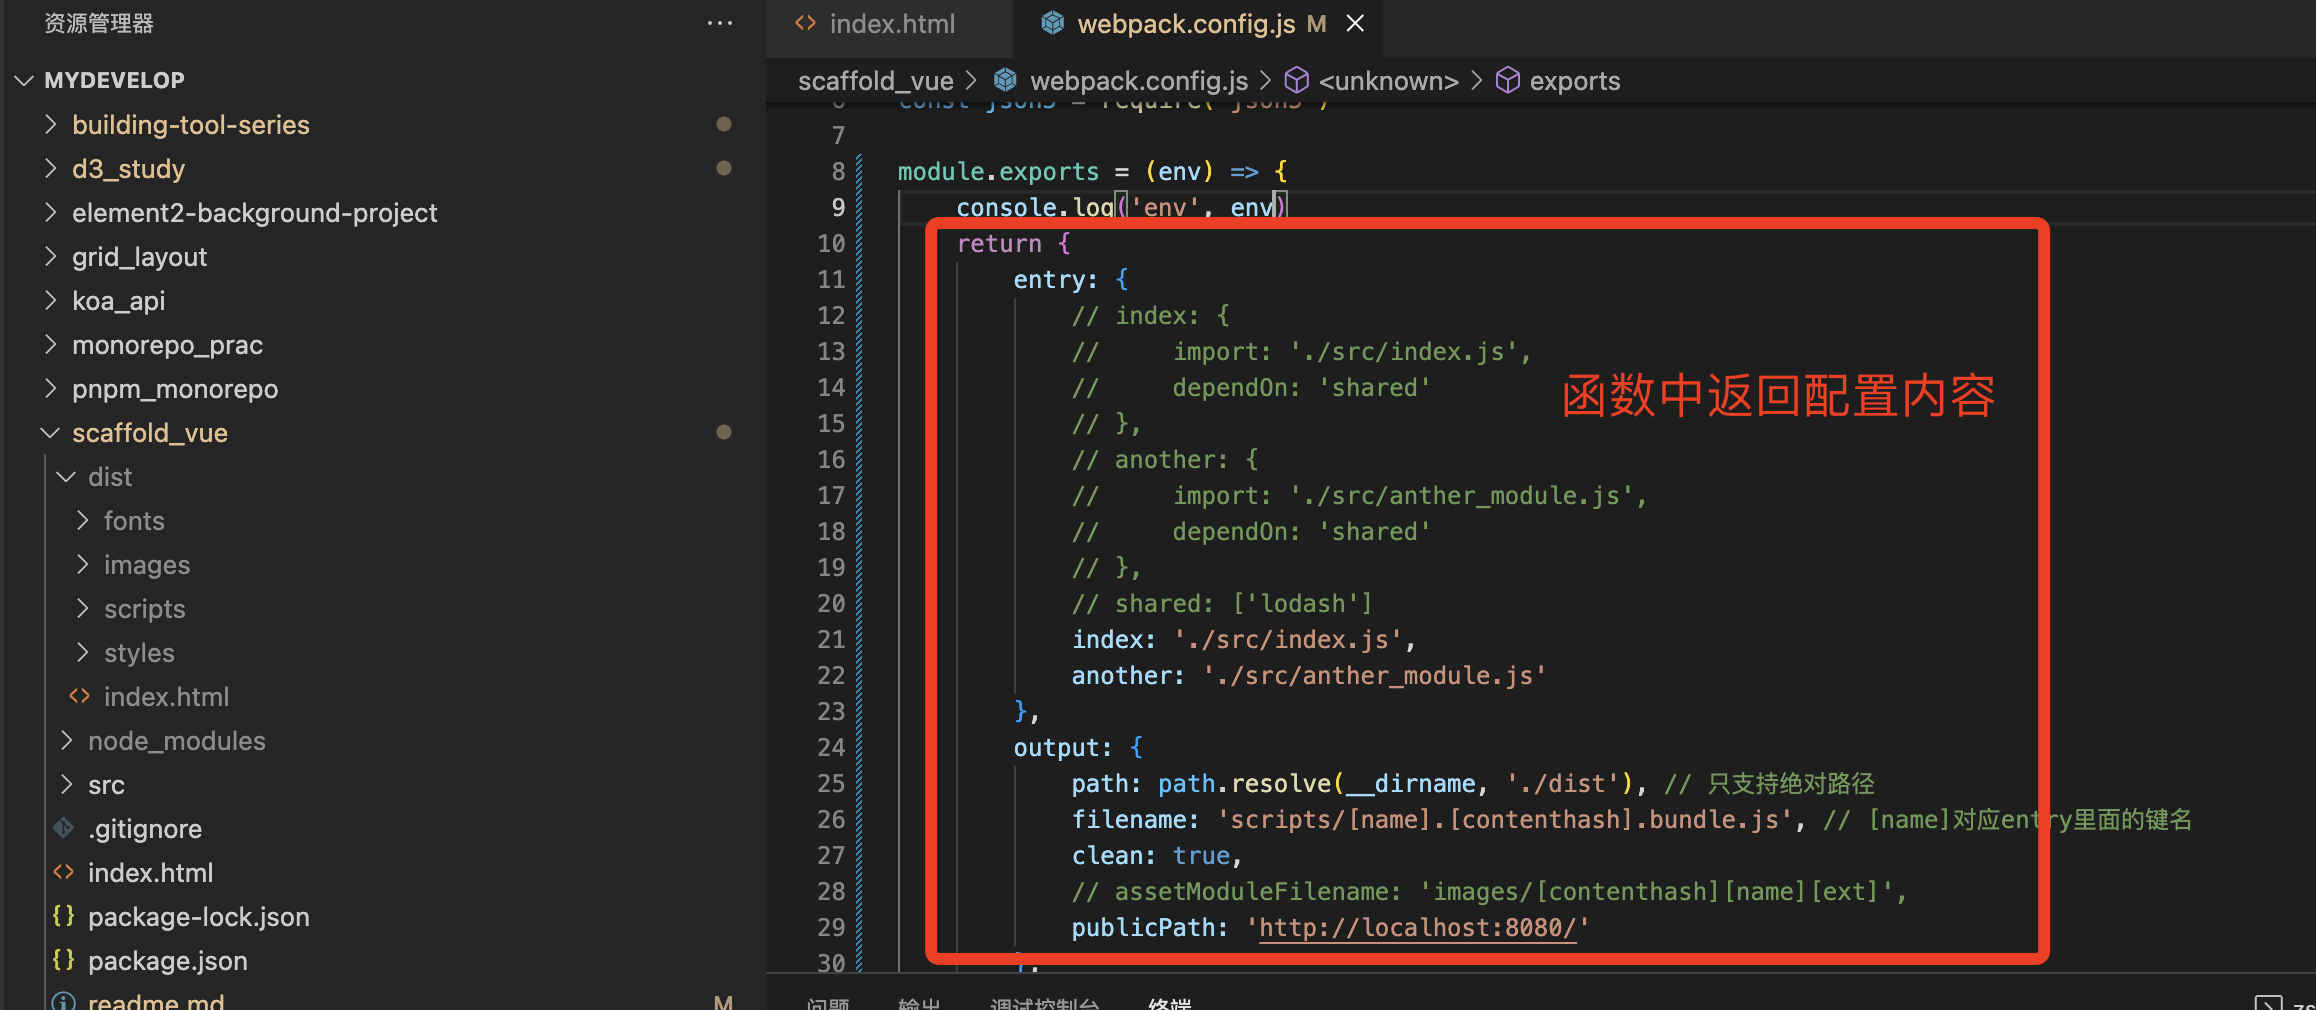
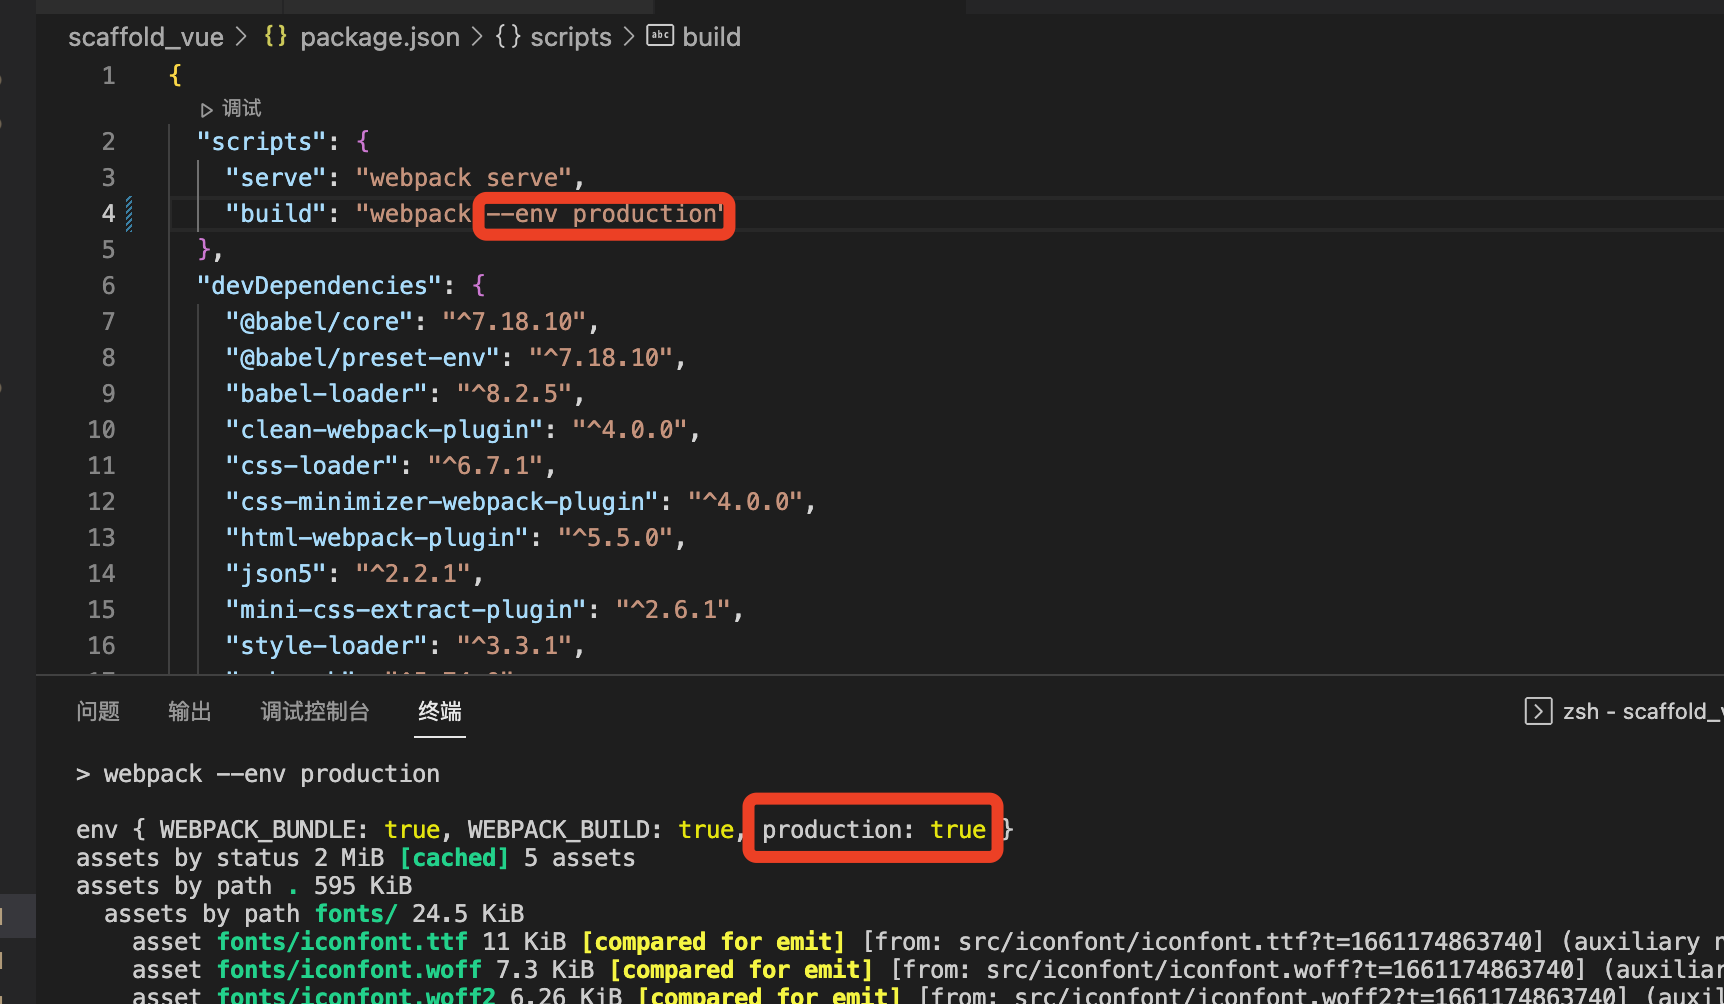
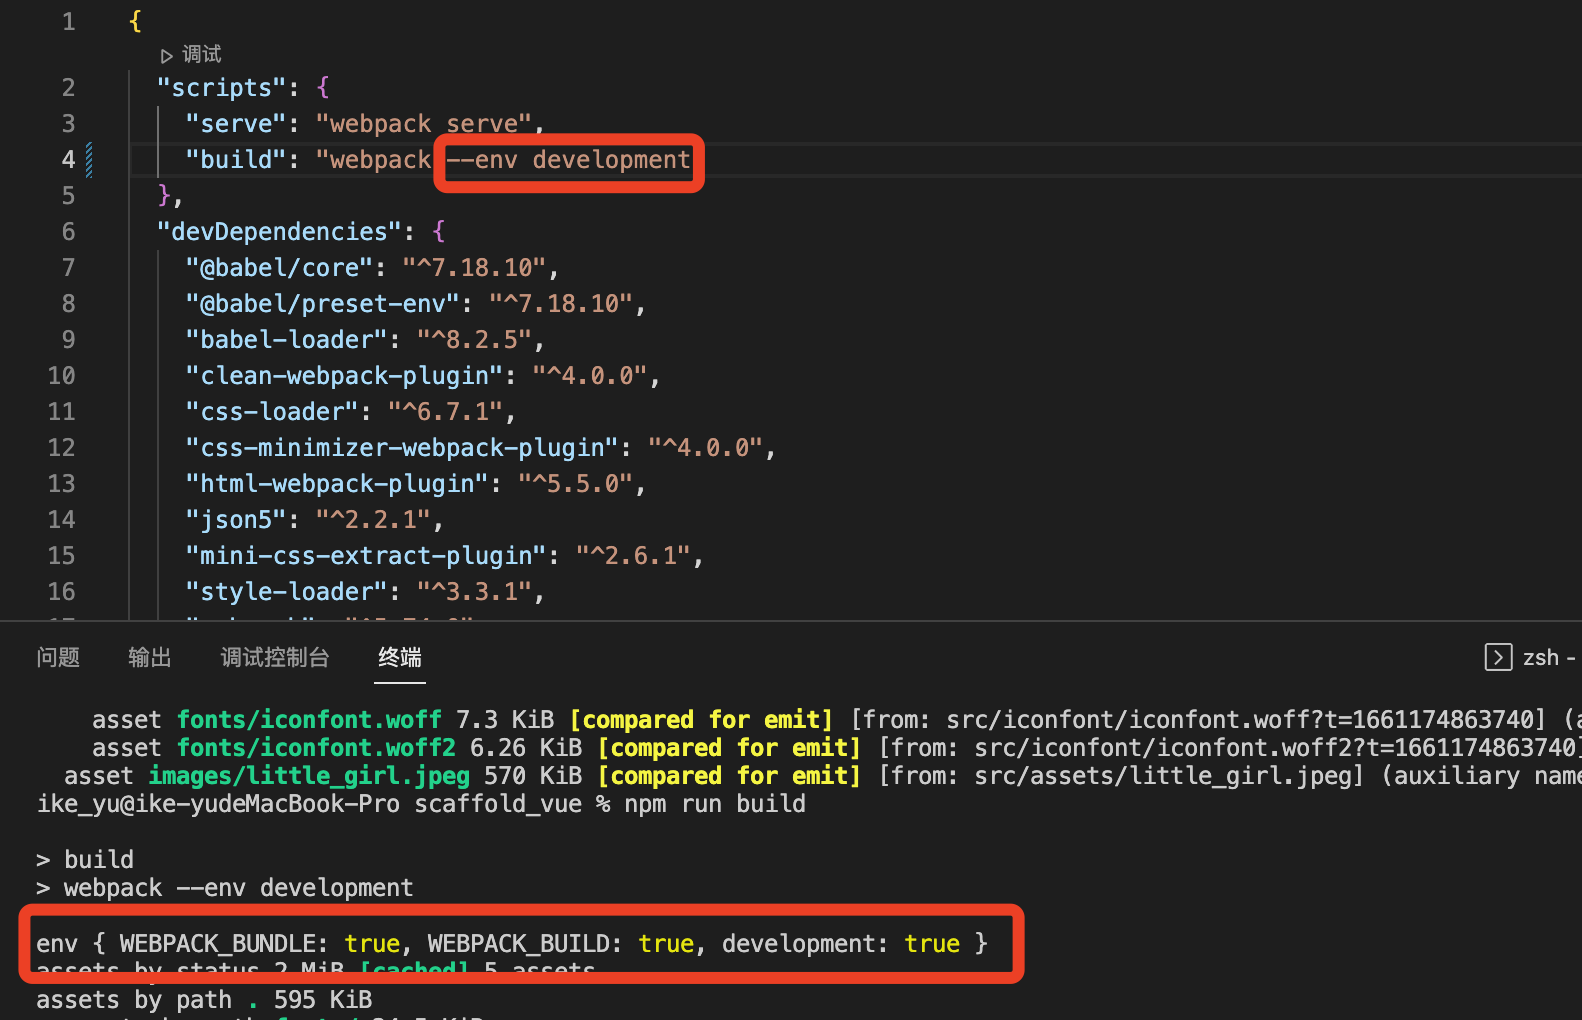

本质:配置--env是往webpack环境变量对象里面添加属性,默认为{WEBPACK_BUNDLE: true, WEBPACK_BUILD: true}, 新增的环境变量属性默认值为true,设置环境变量值如下所示
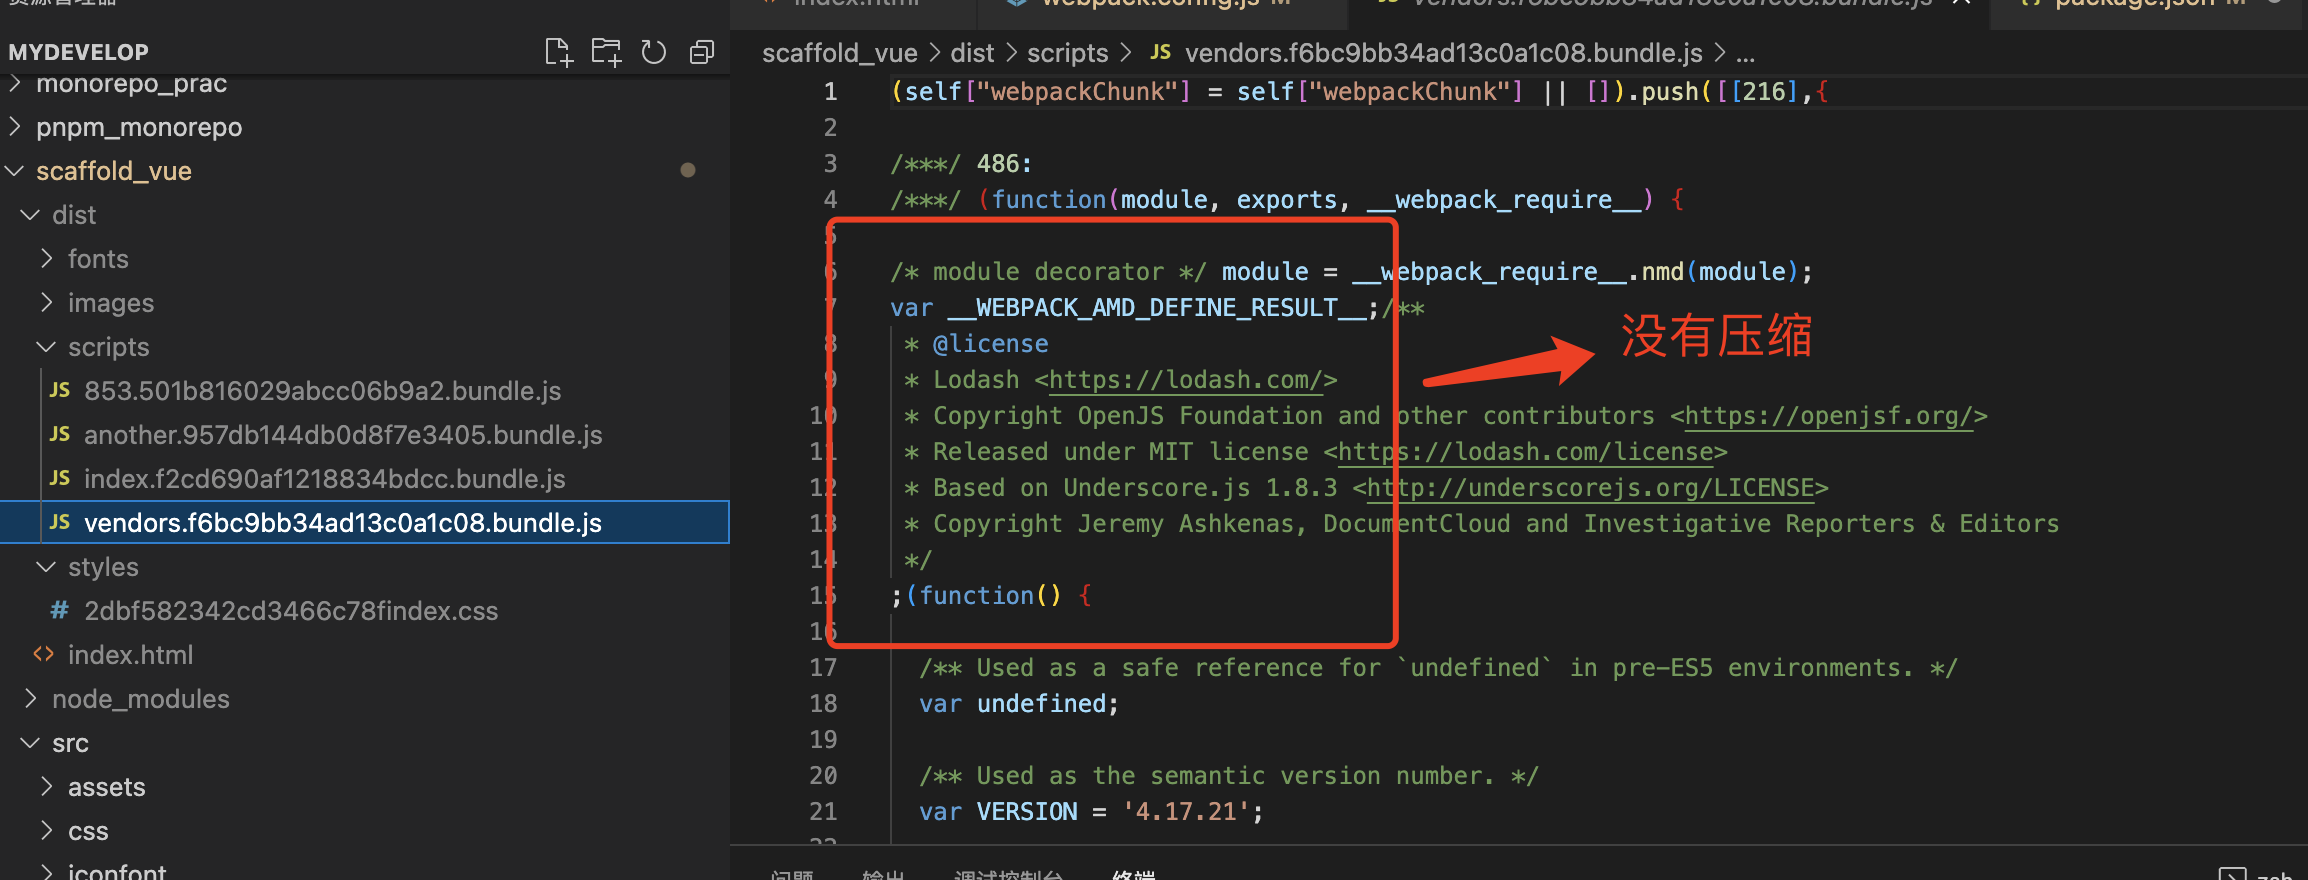
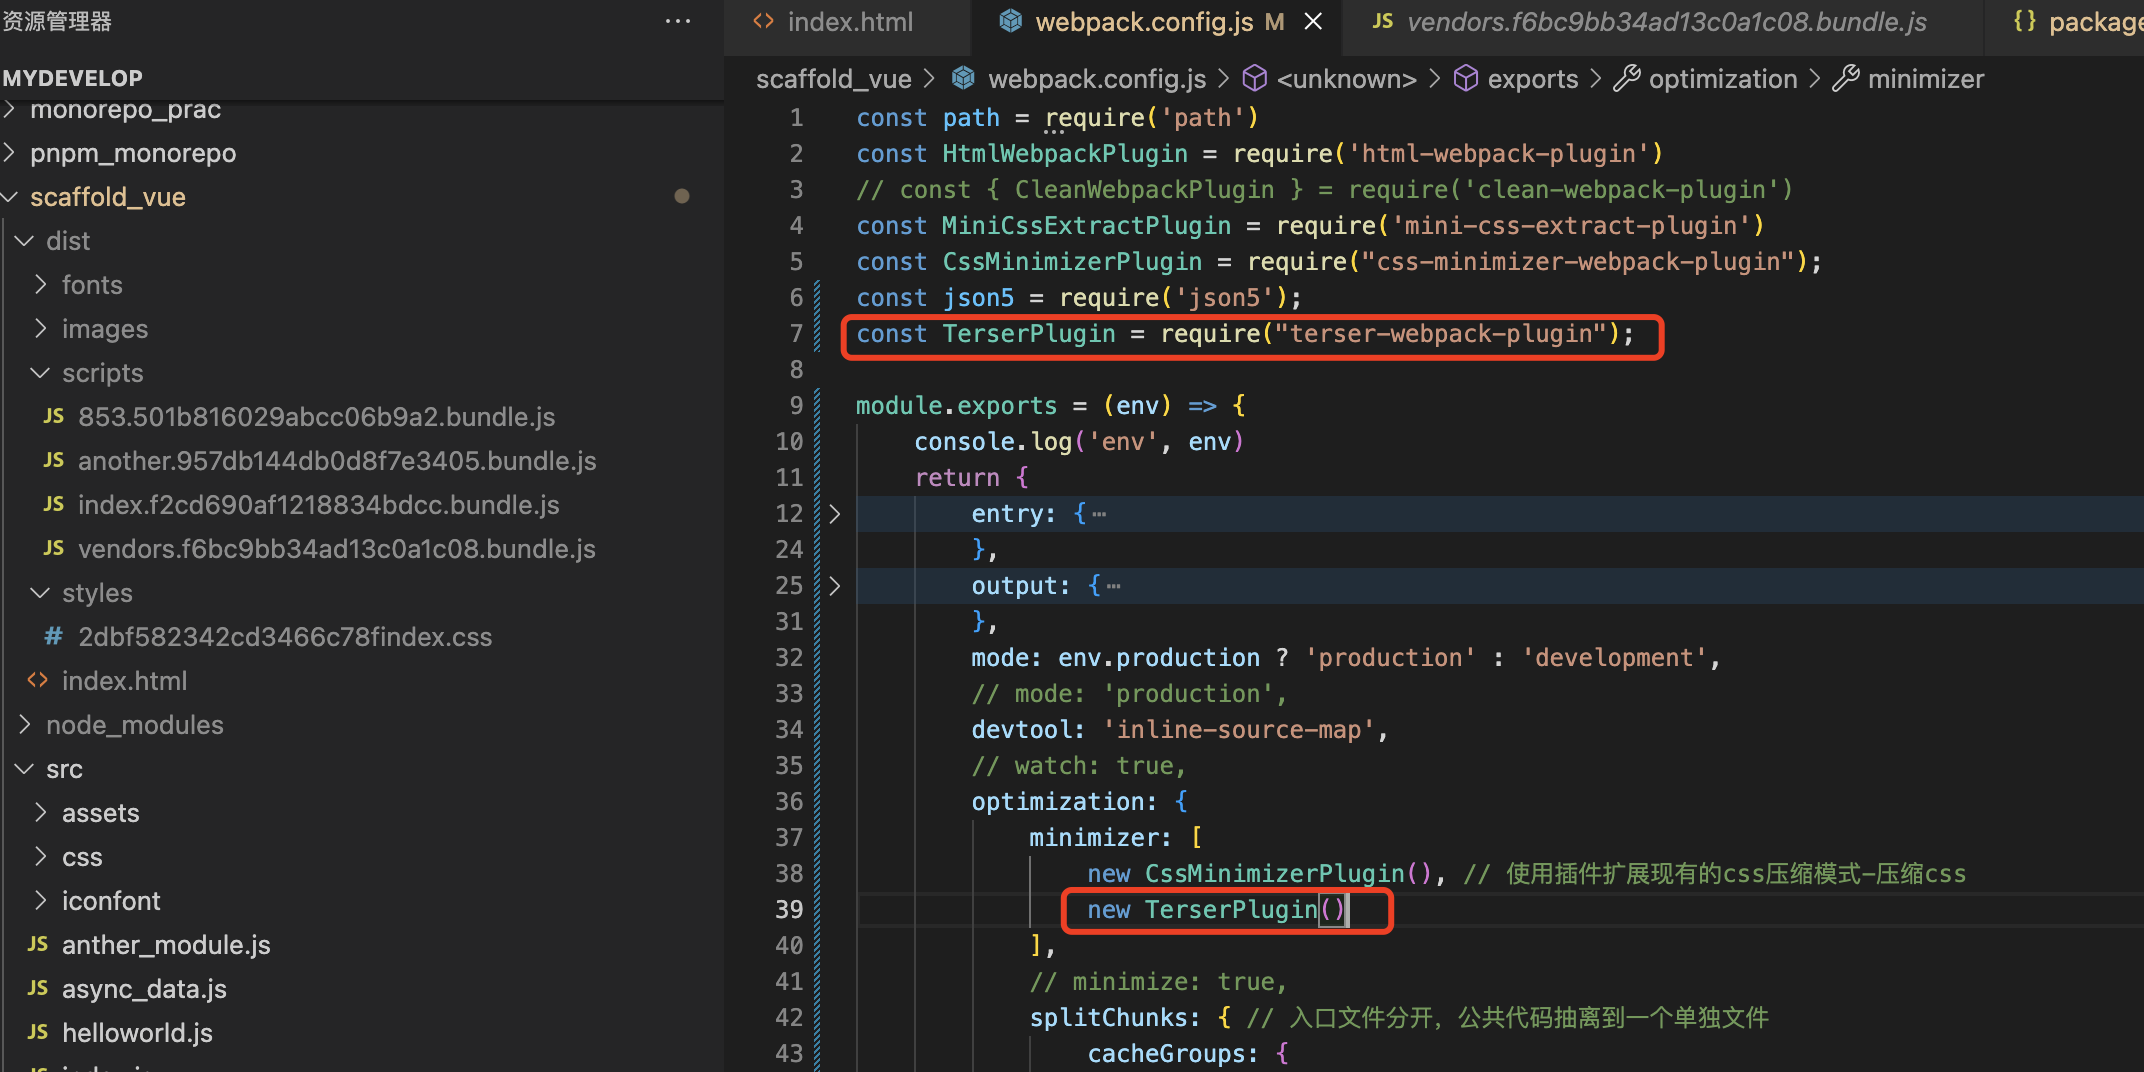
8.2 生产环境压缩
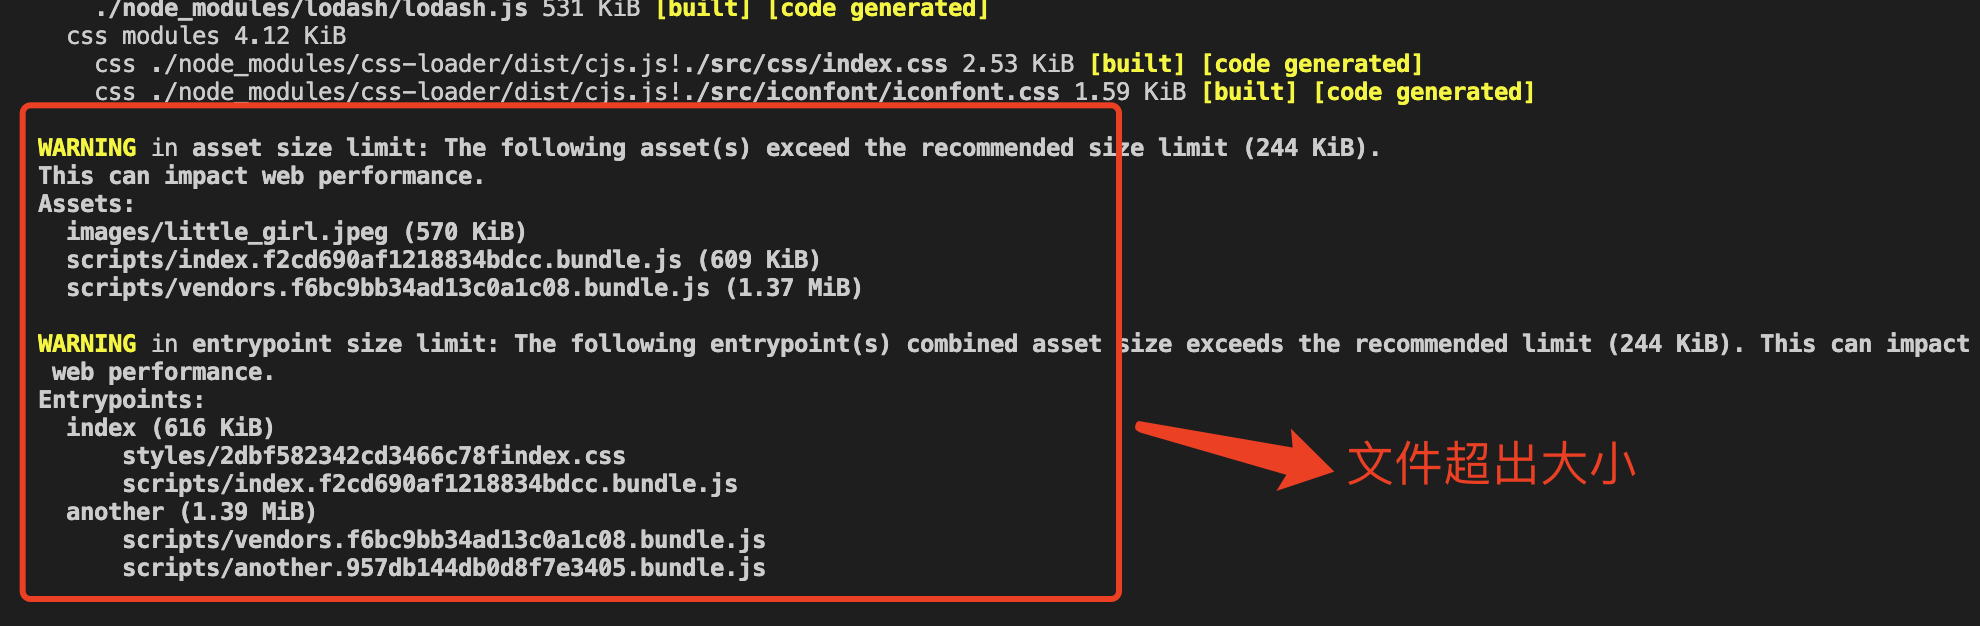
原因:打包后的js文件没有压缩
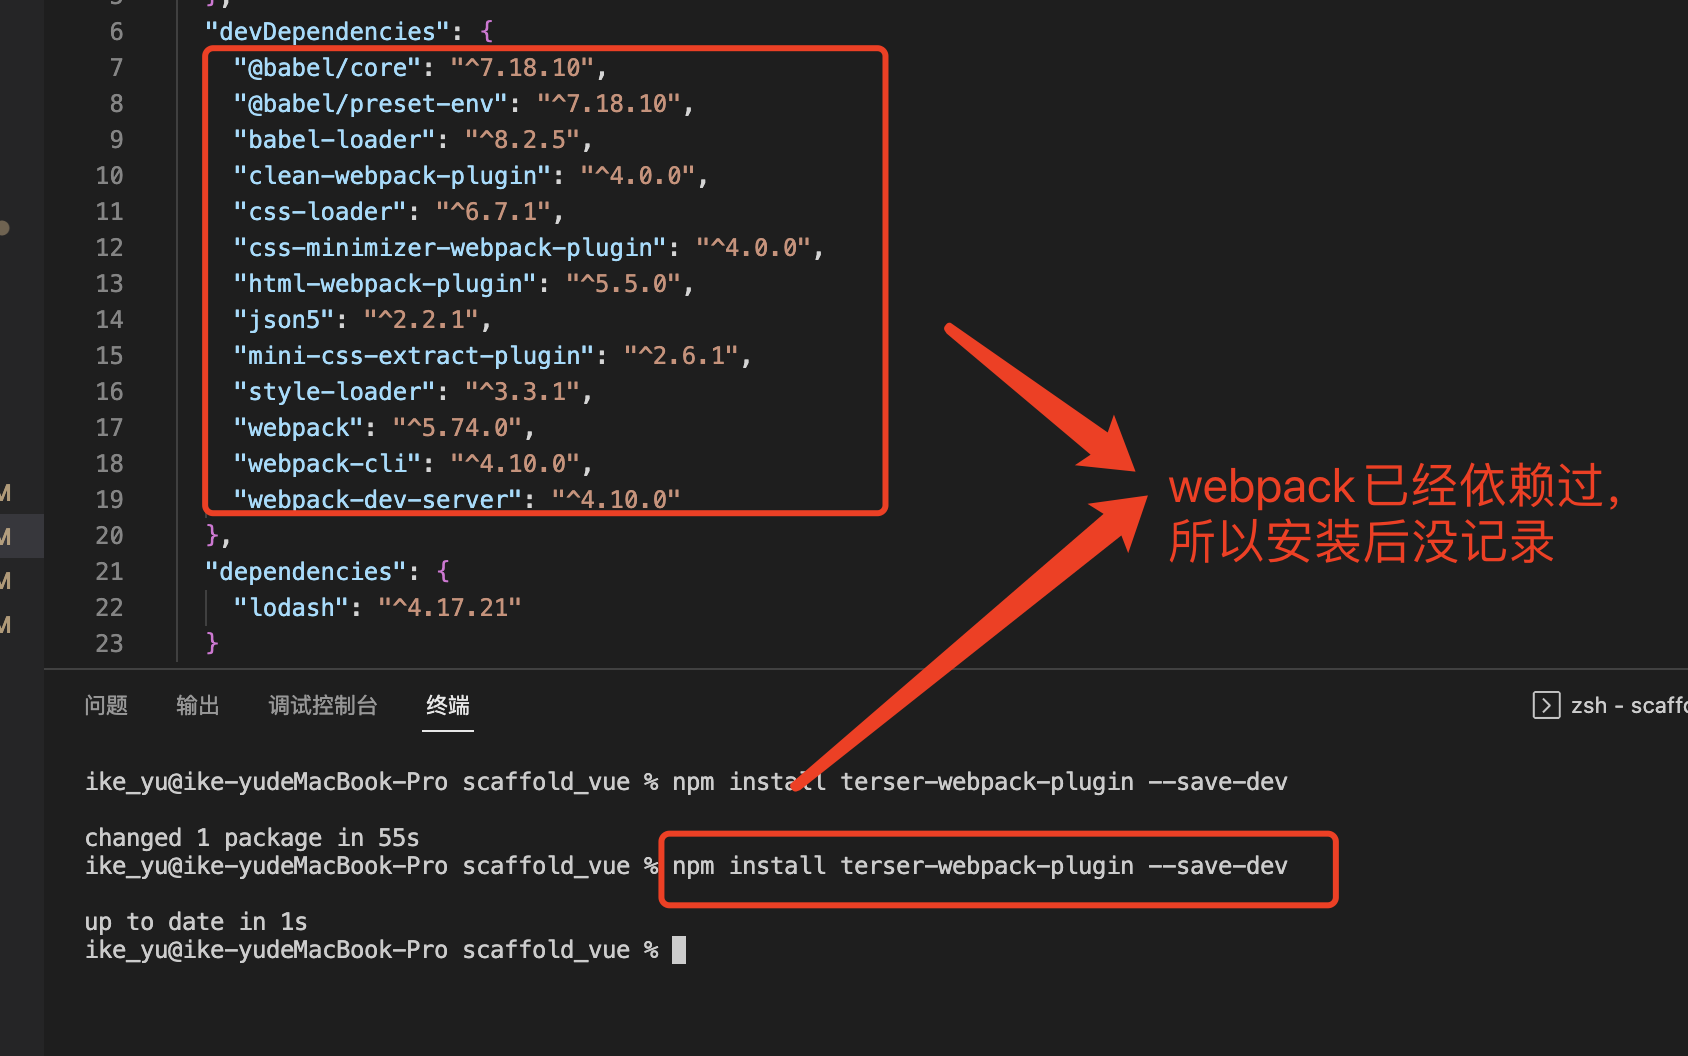
解决办法:terser-webpack-plugin压缩js文件
terser-webpack-plugin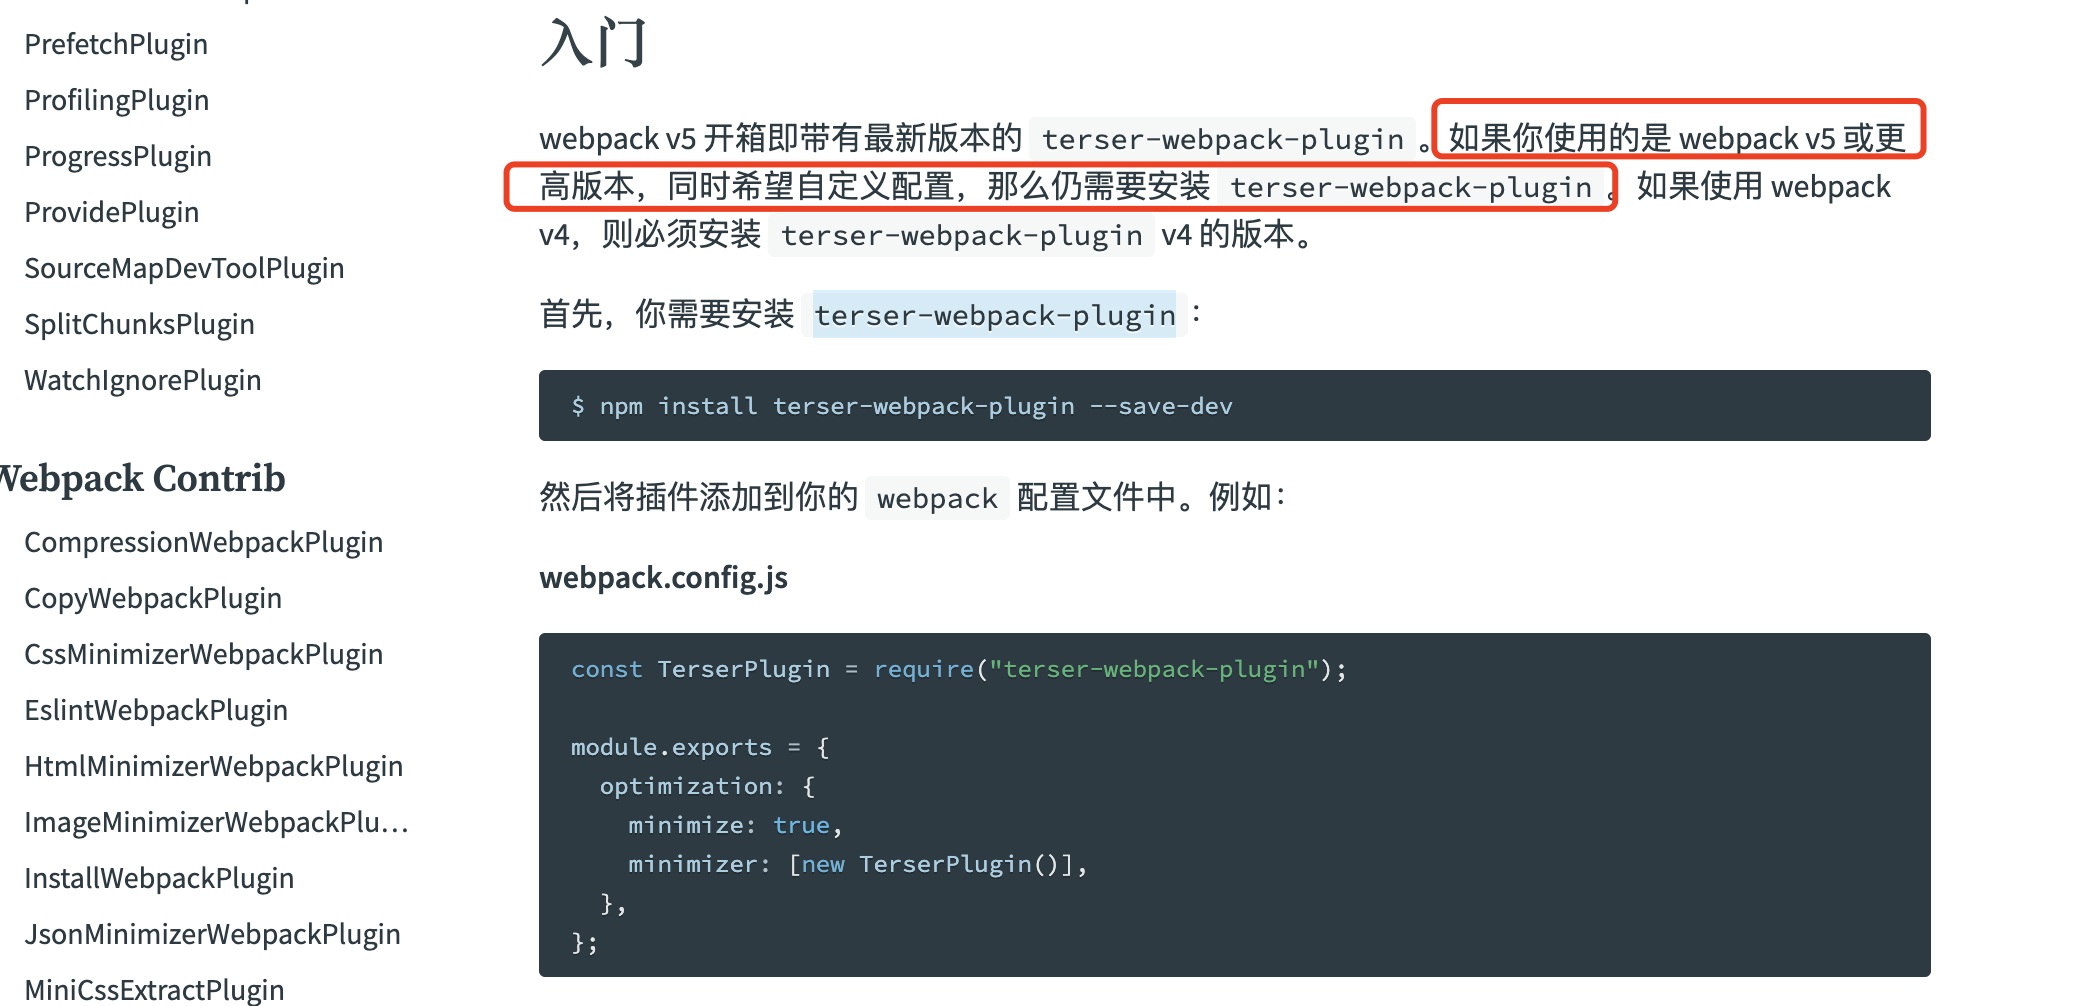
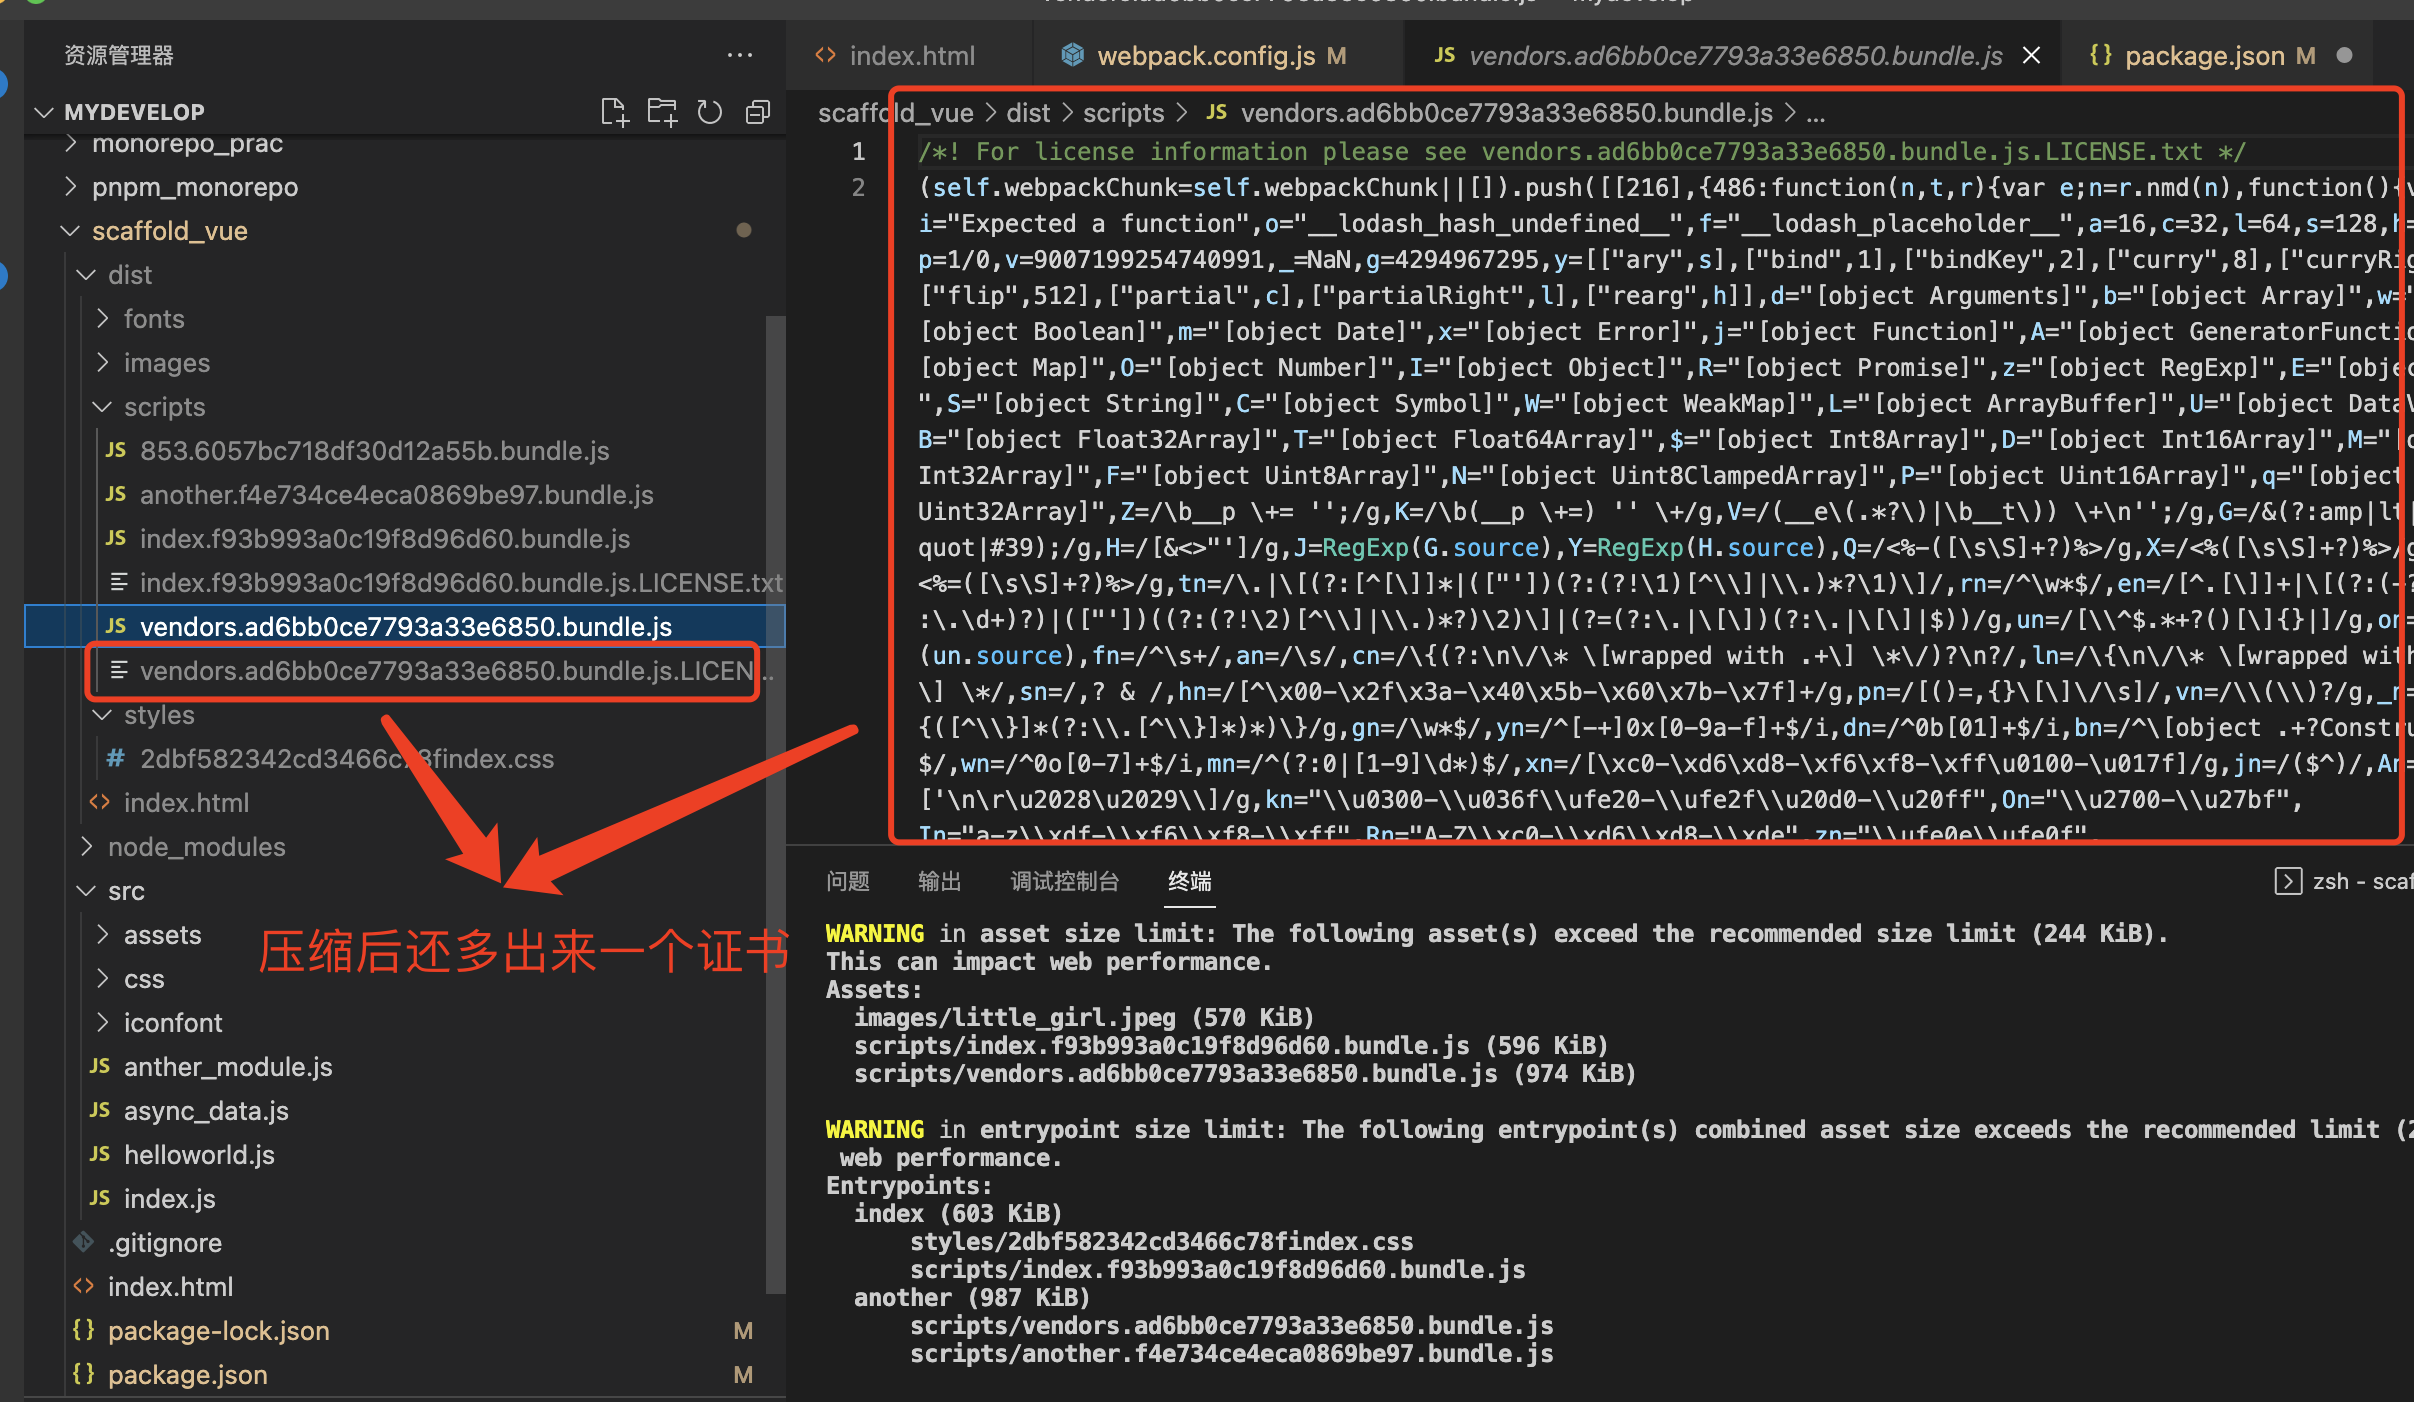
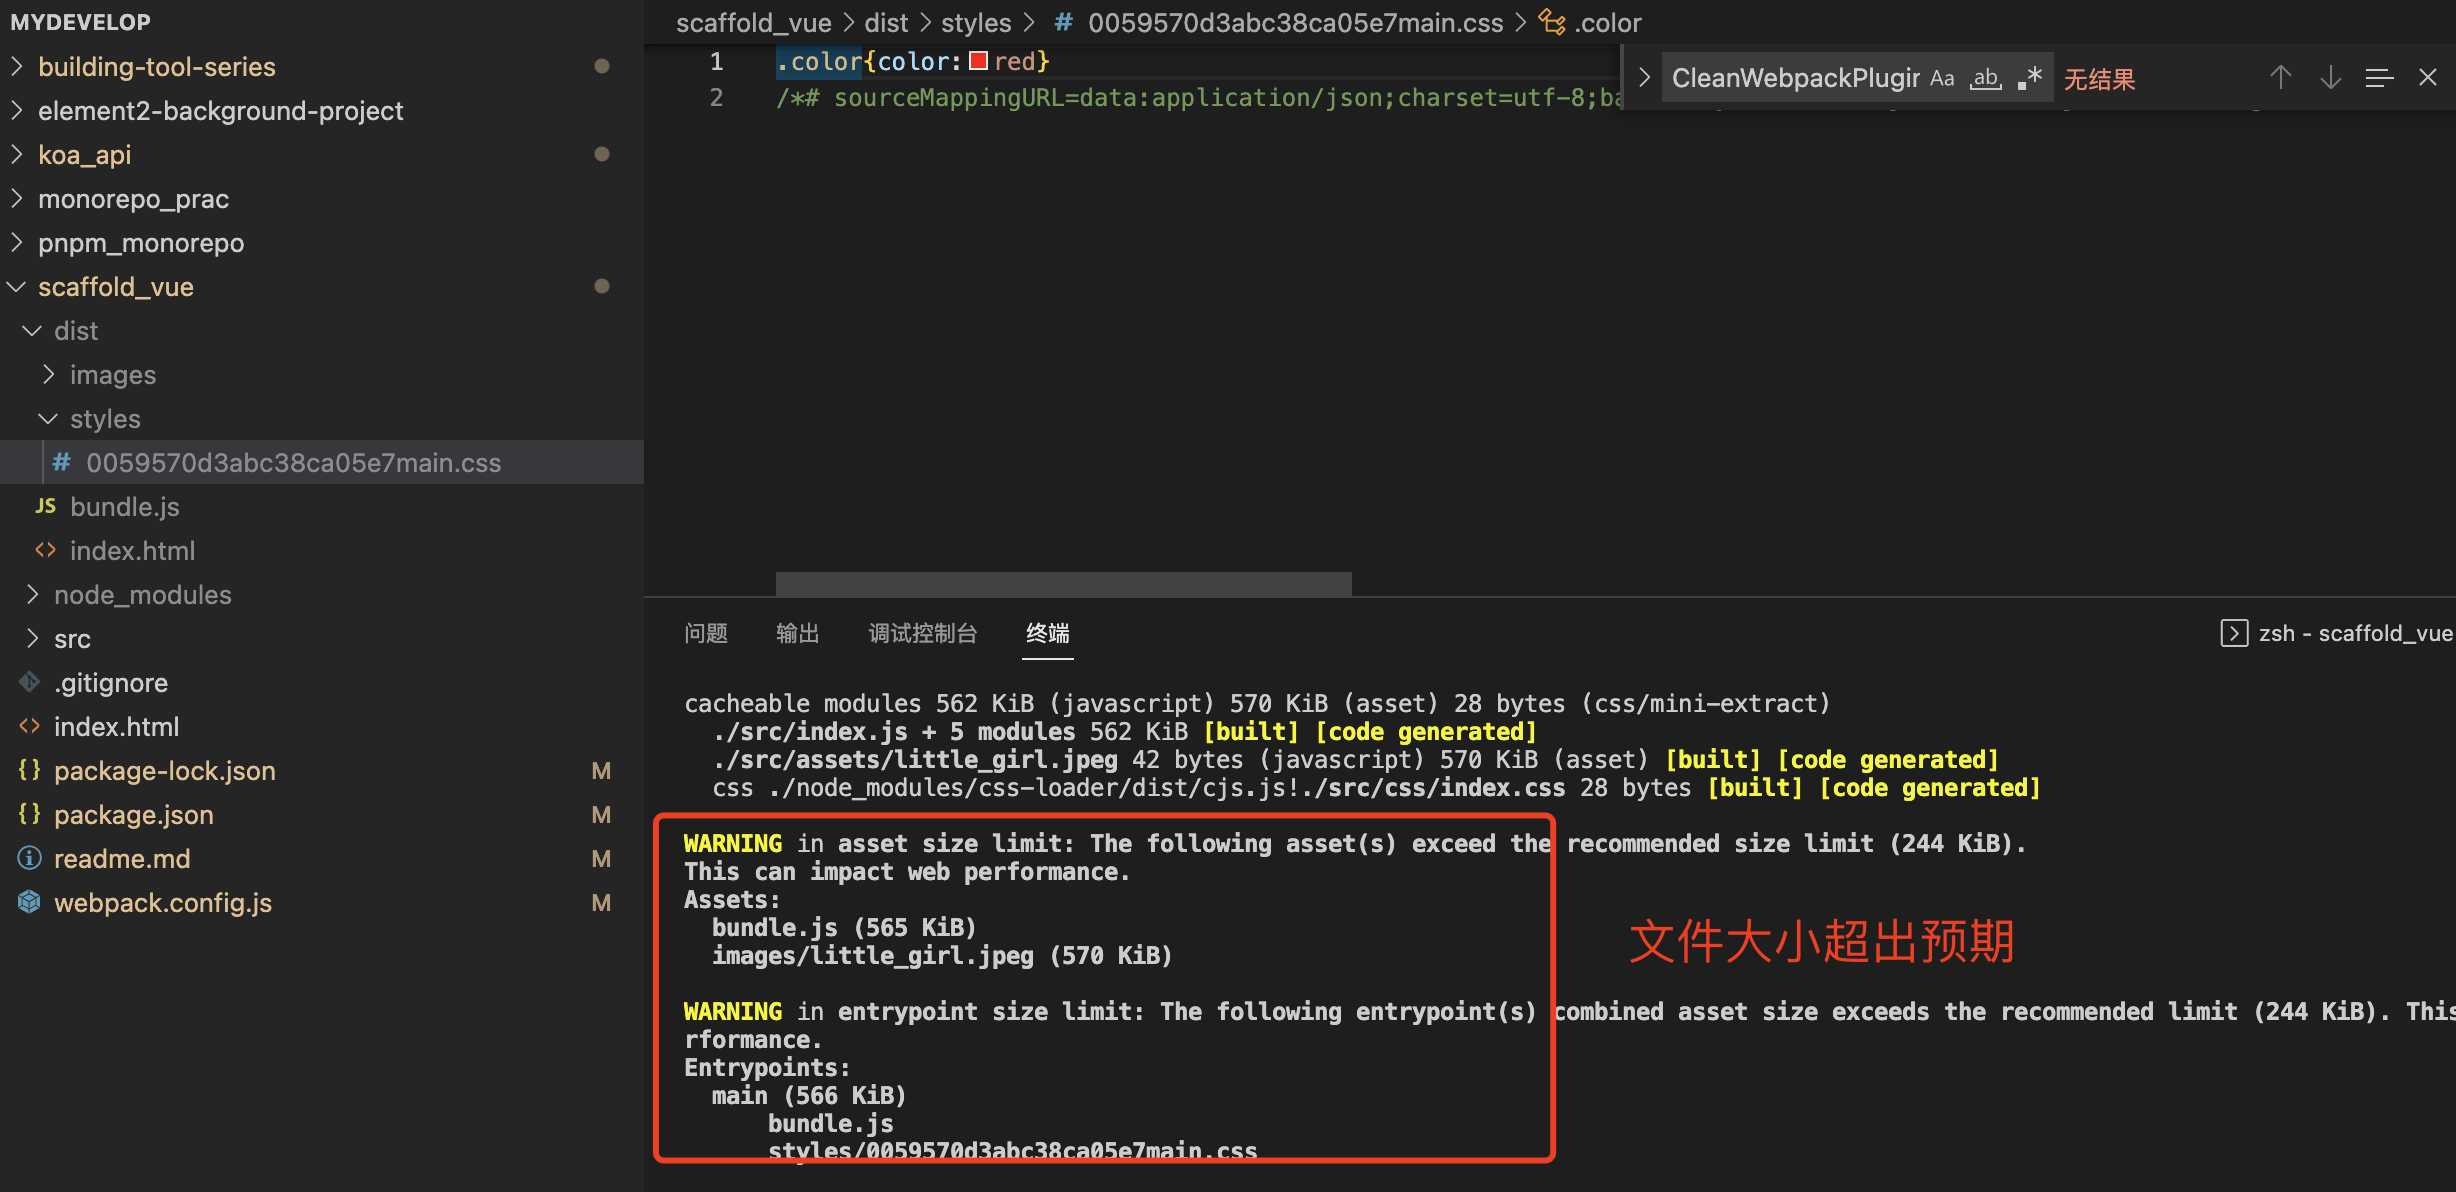
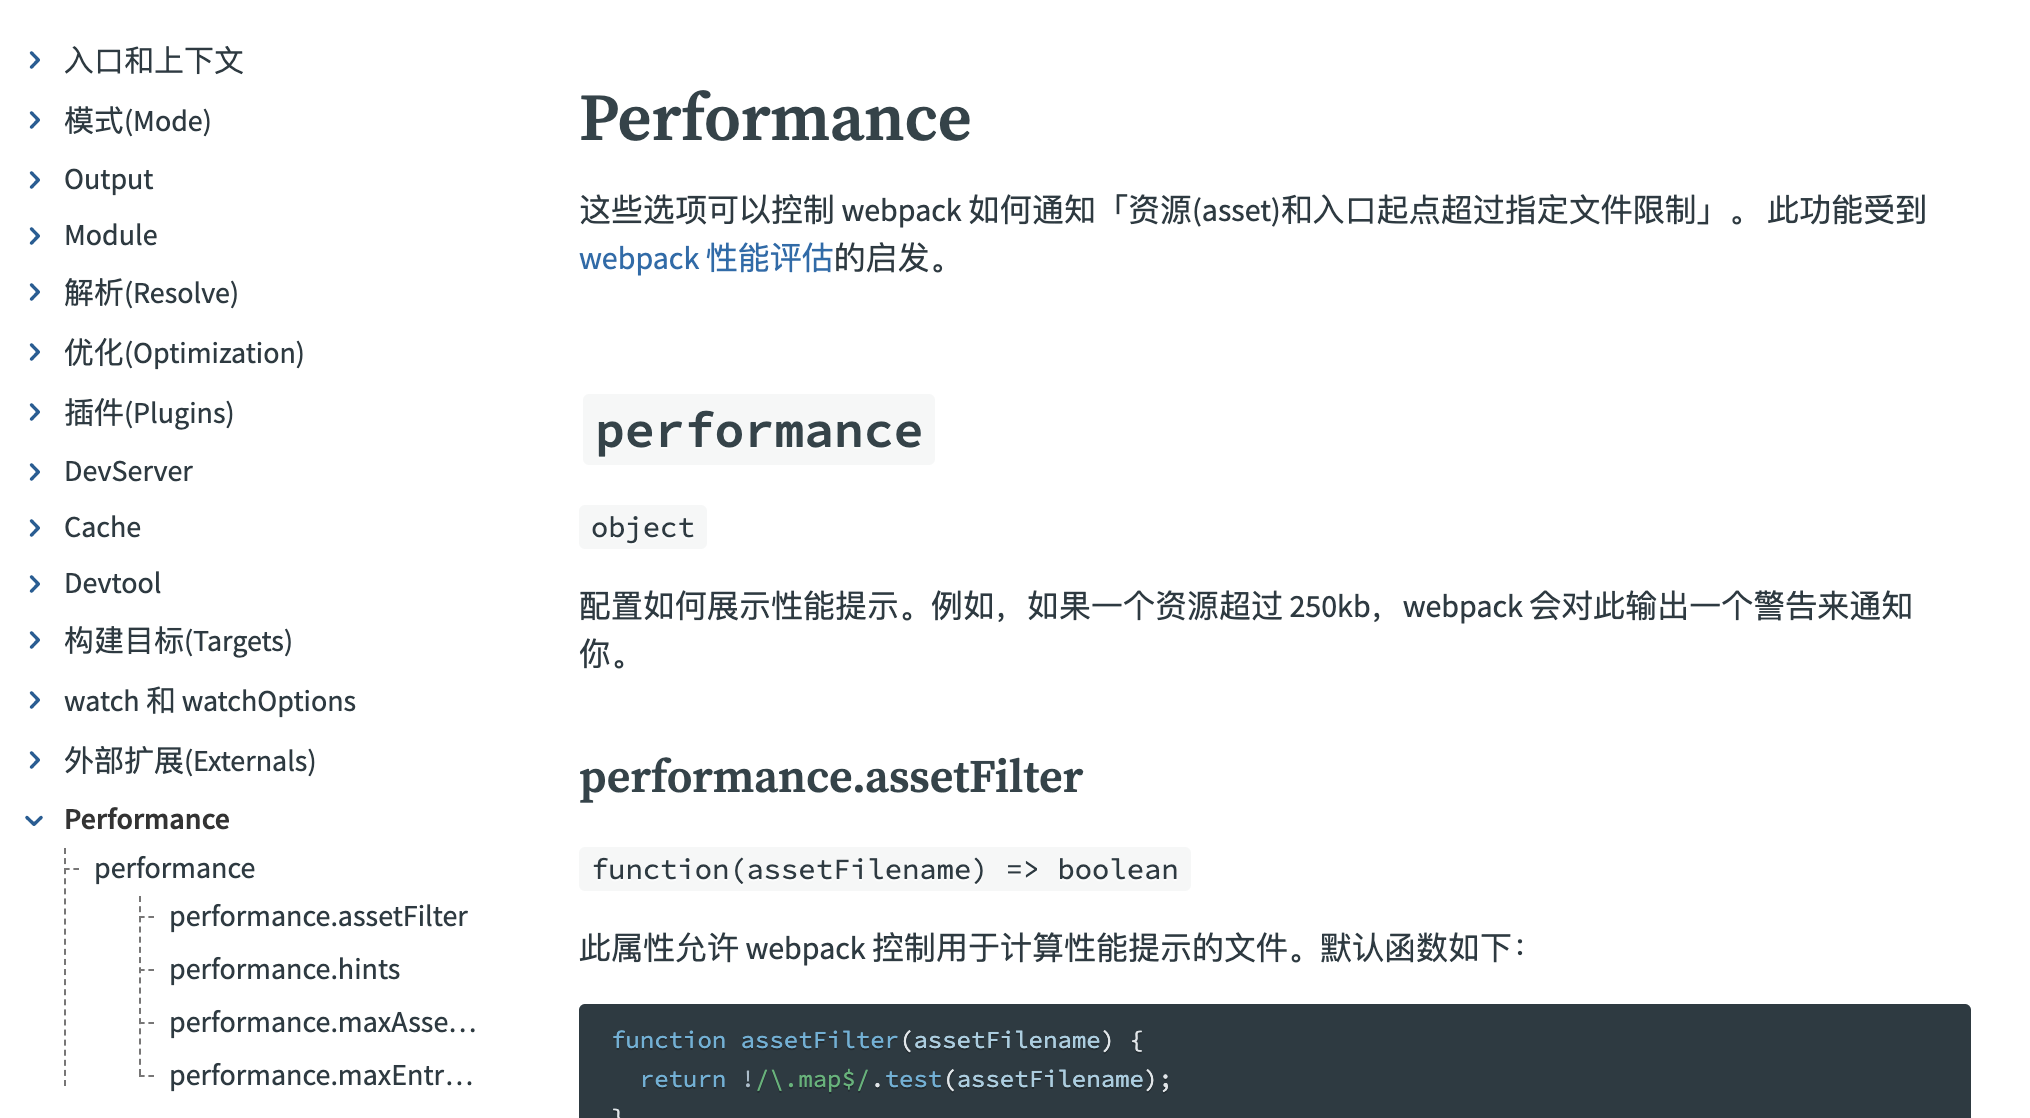
问题:还是存在文件超出指定大小的提示
解决办法:配置webpack的performance

9、配置文件拆分
9.1 拆分文件
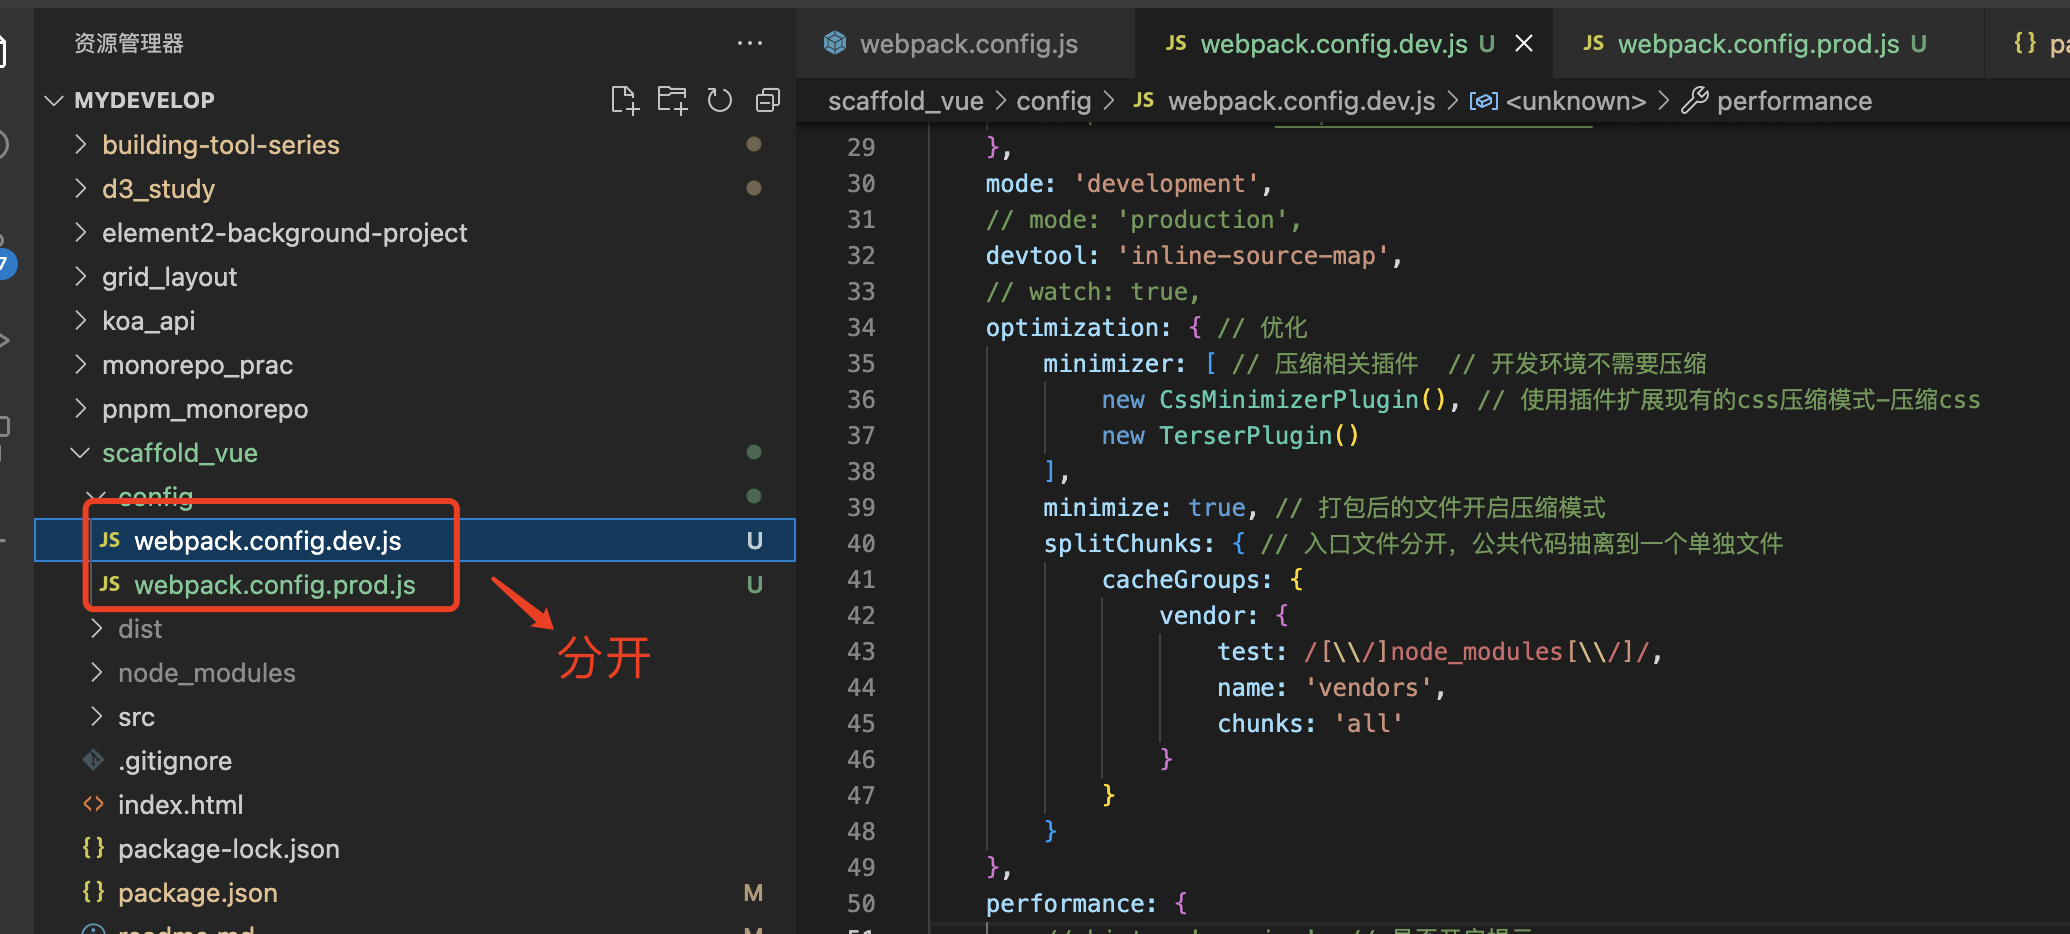
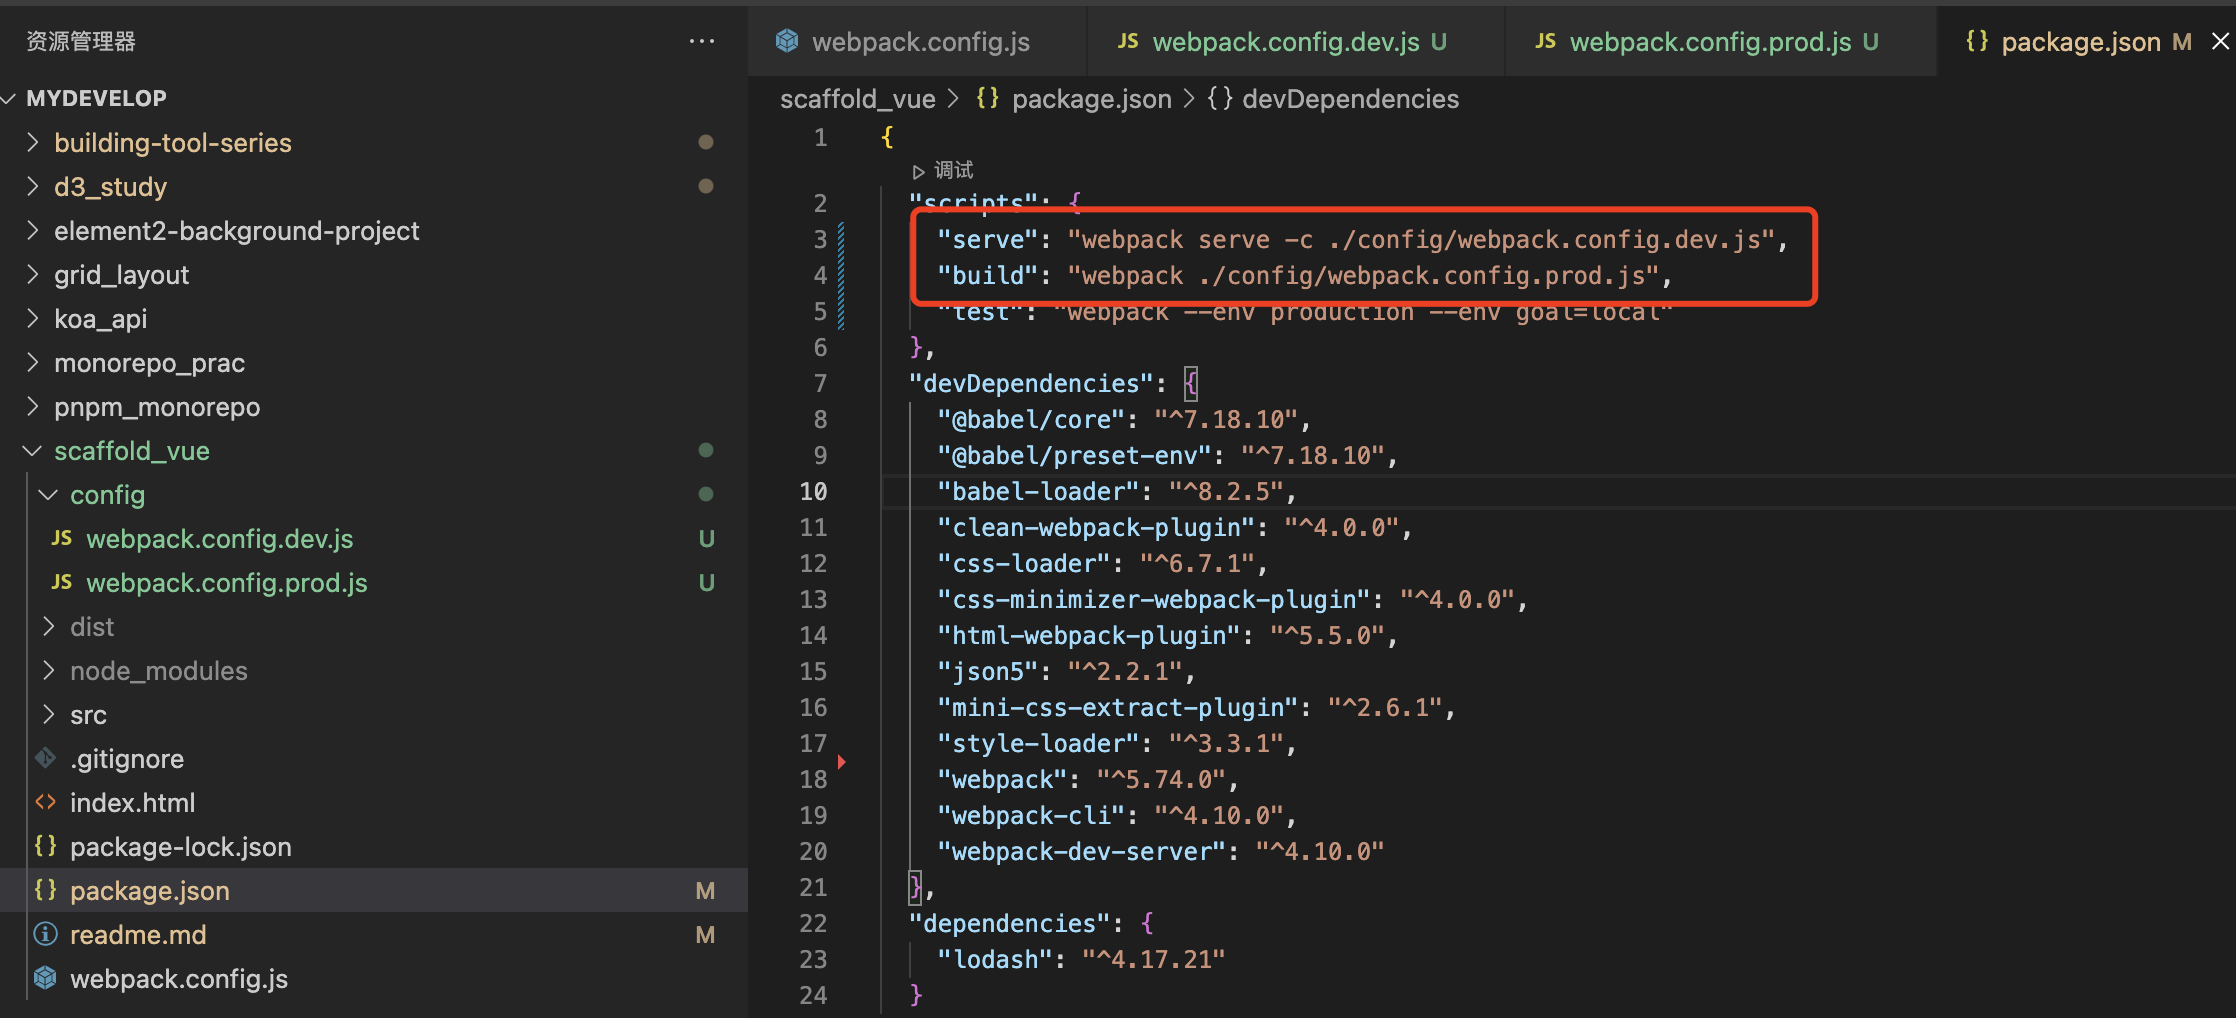
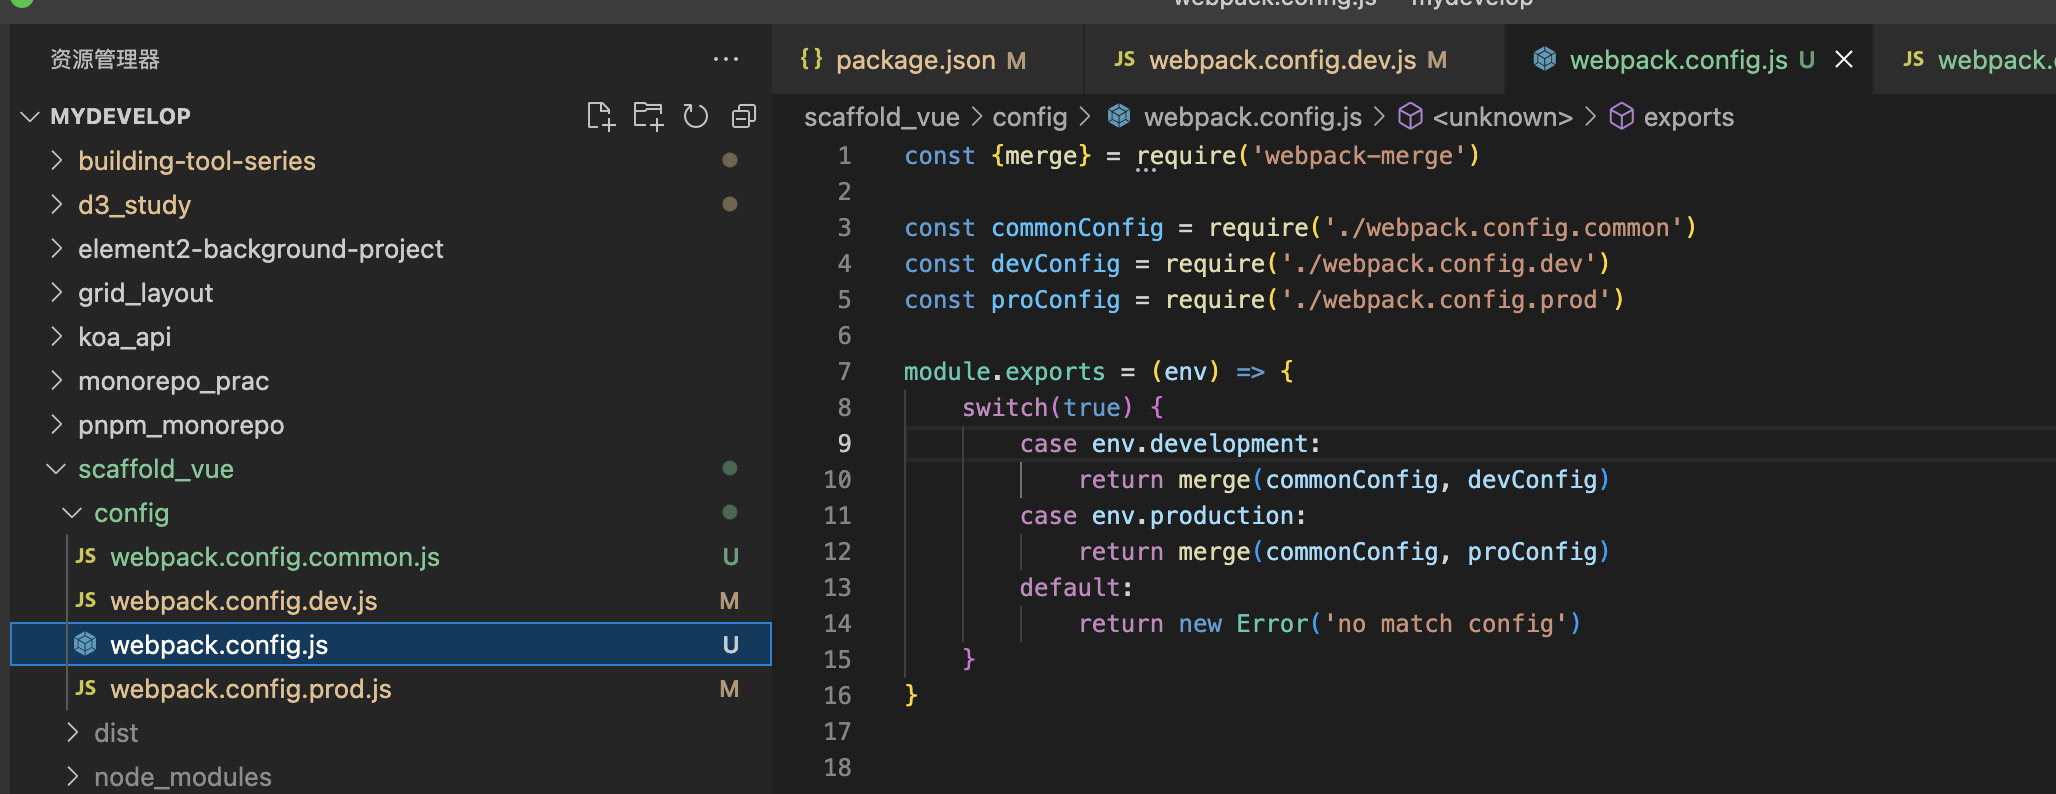
9.2 合并配置文件
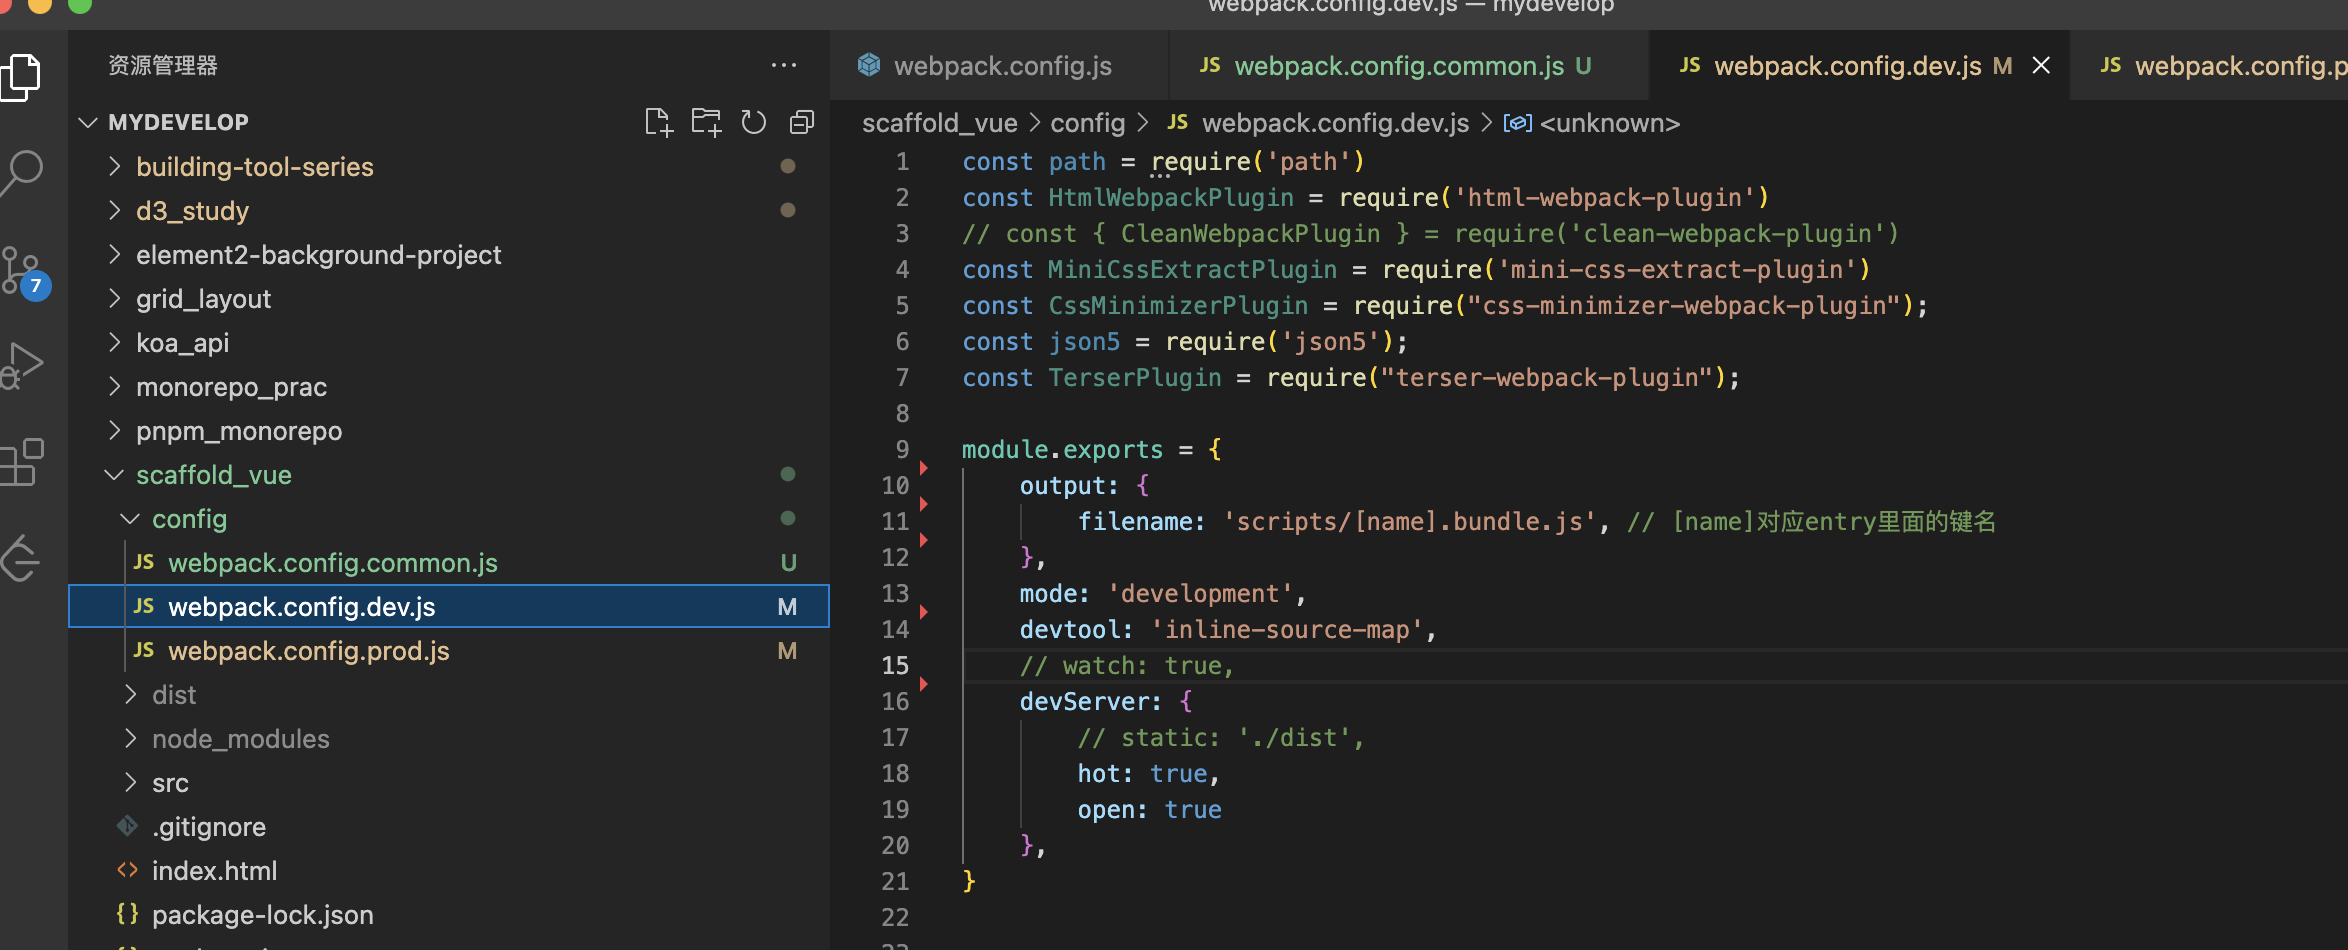
如上所示拆分出三个文件
需要借助webpack-merge这个包
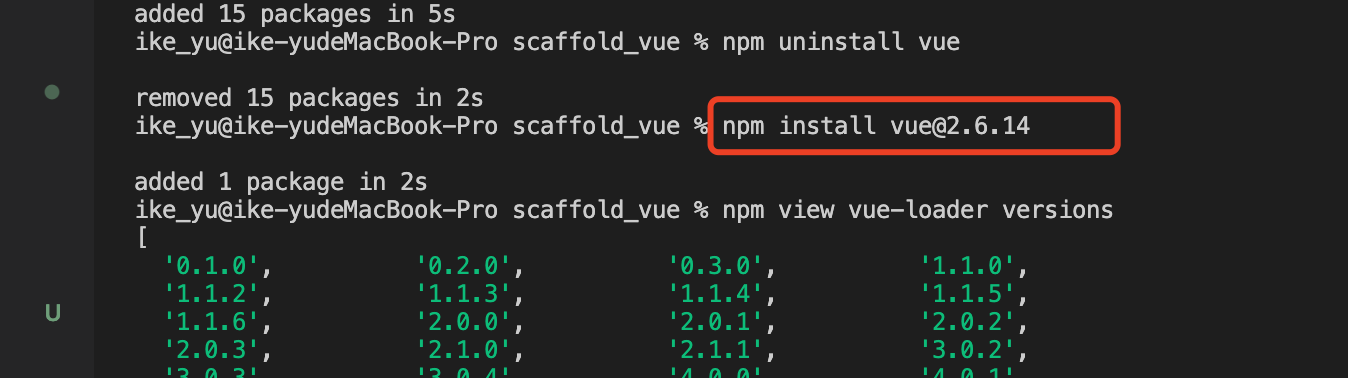
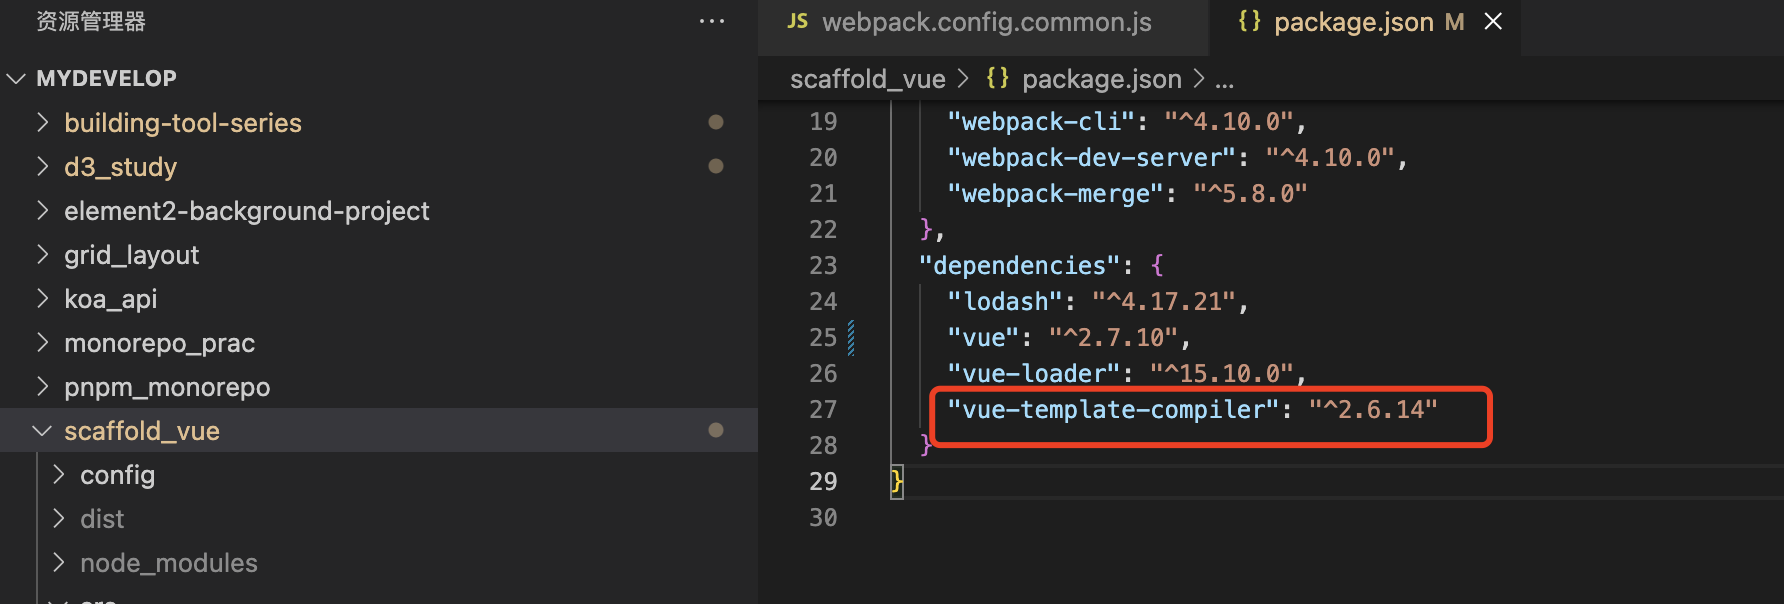
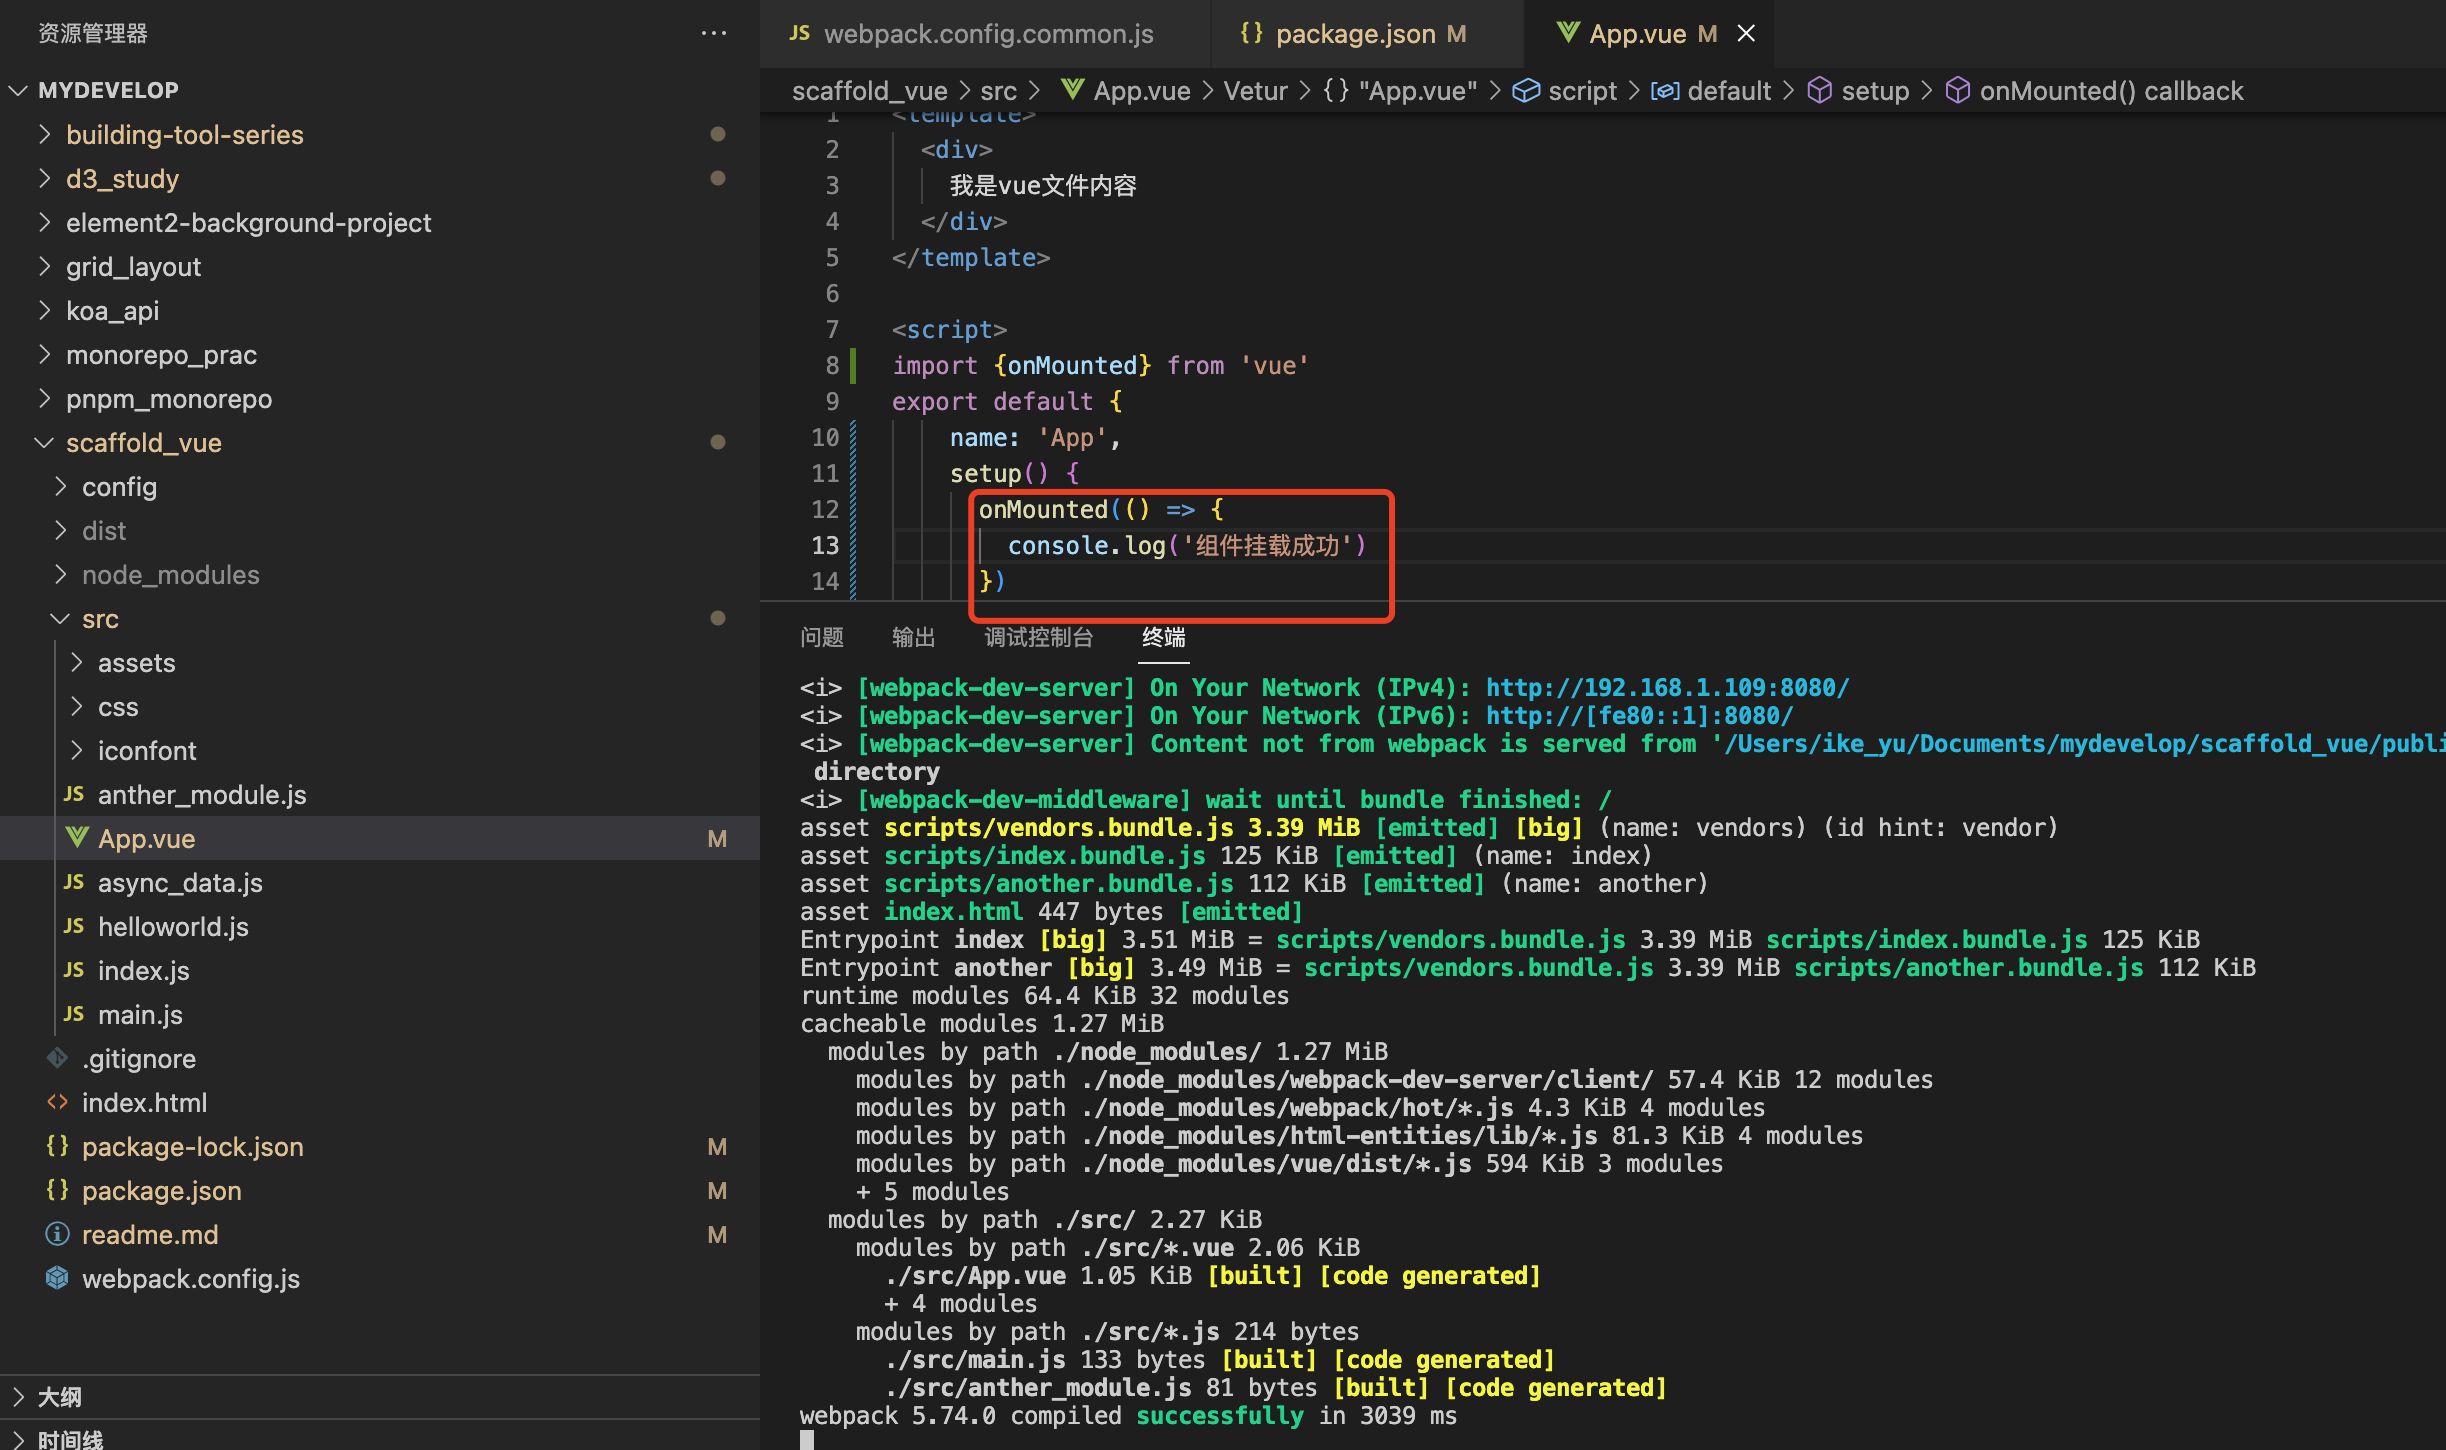
10、vue环境搭建
10.1 vue2搭建
安装[email protected]和vue-loader
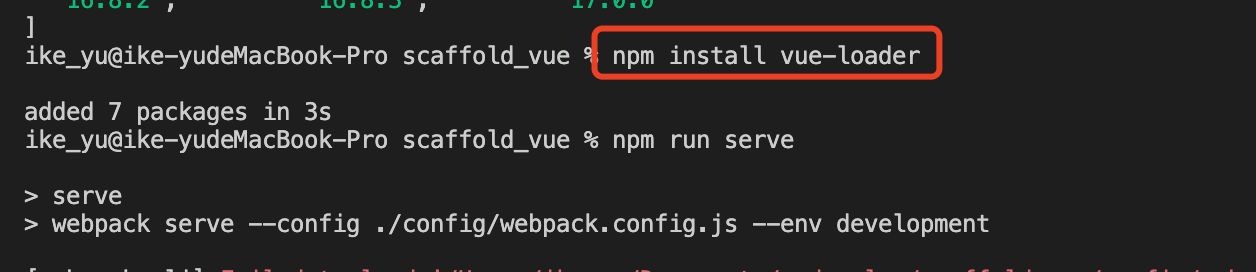
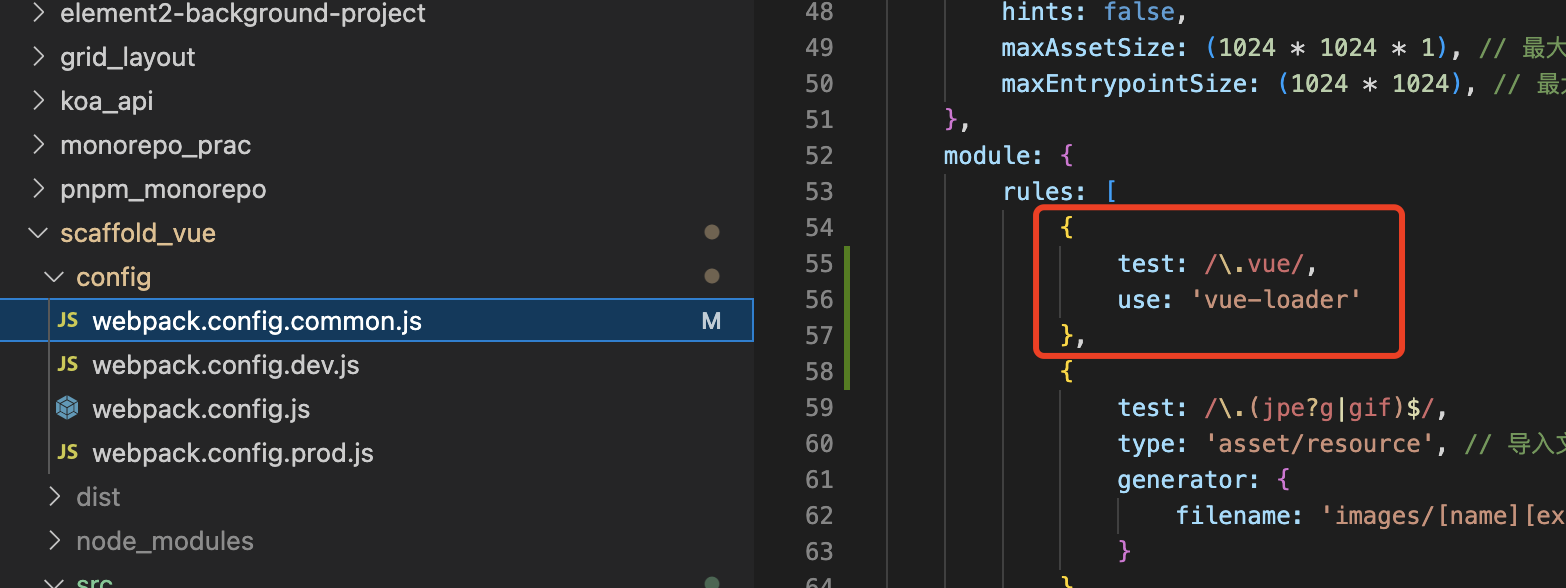
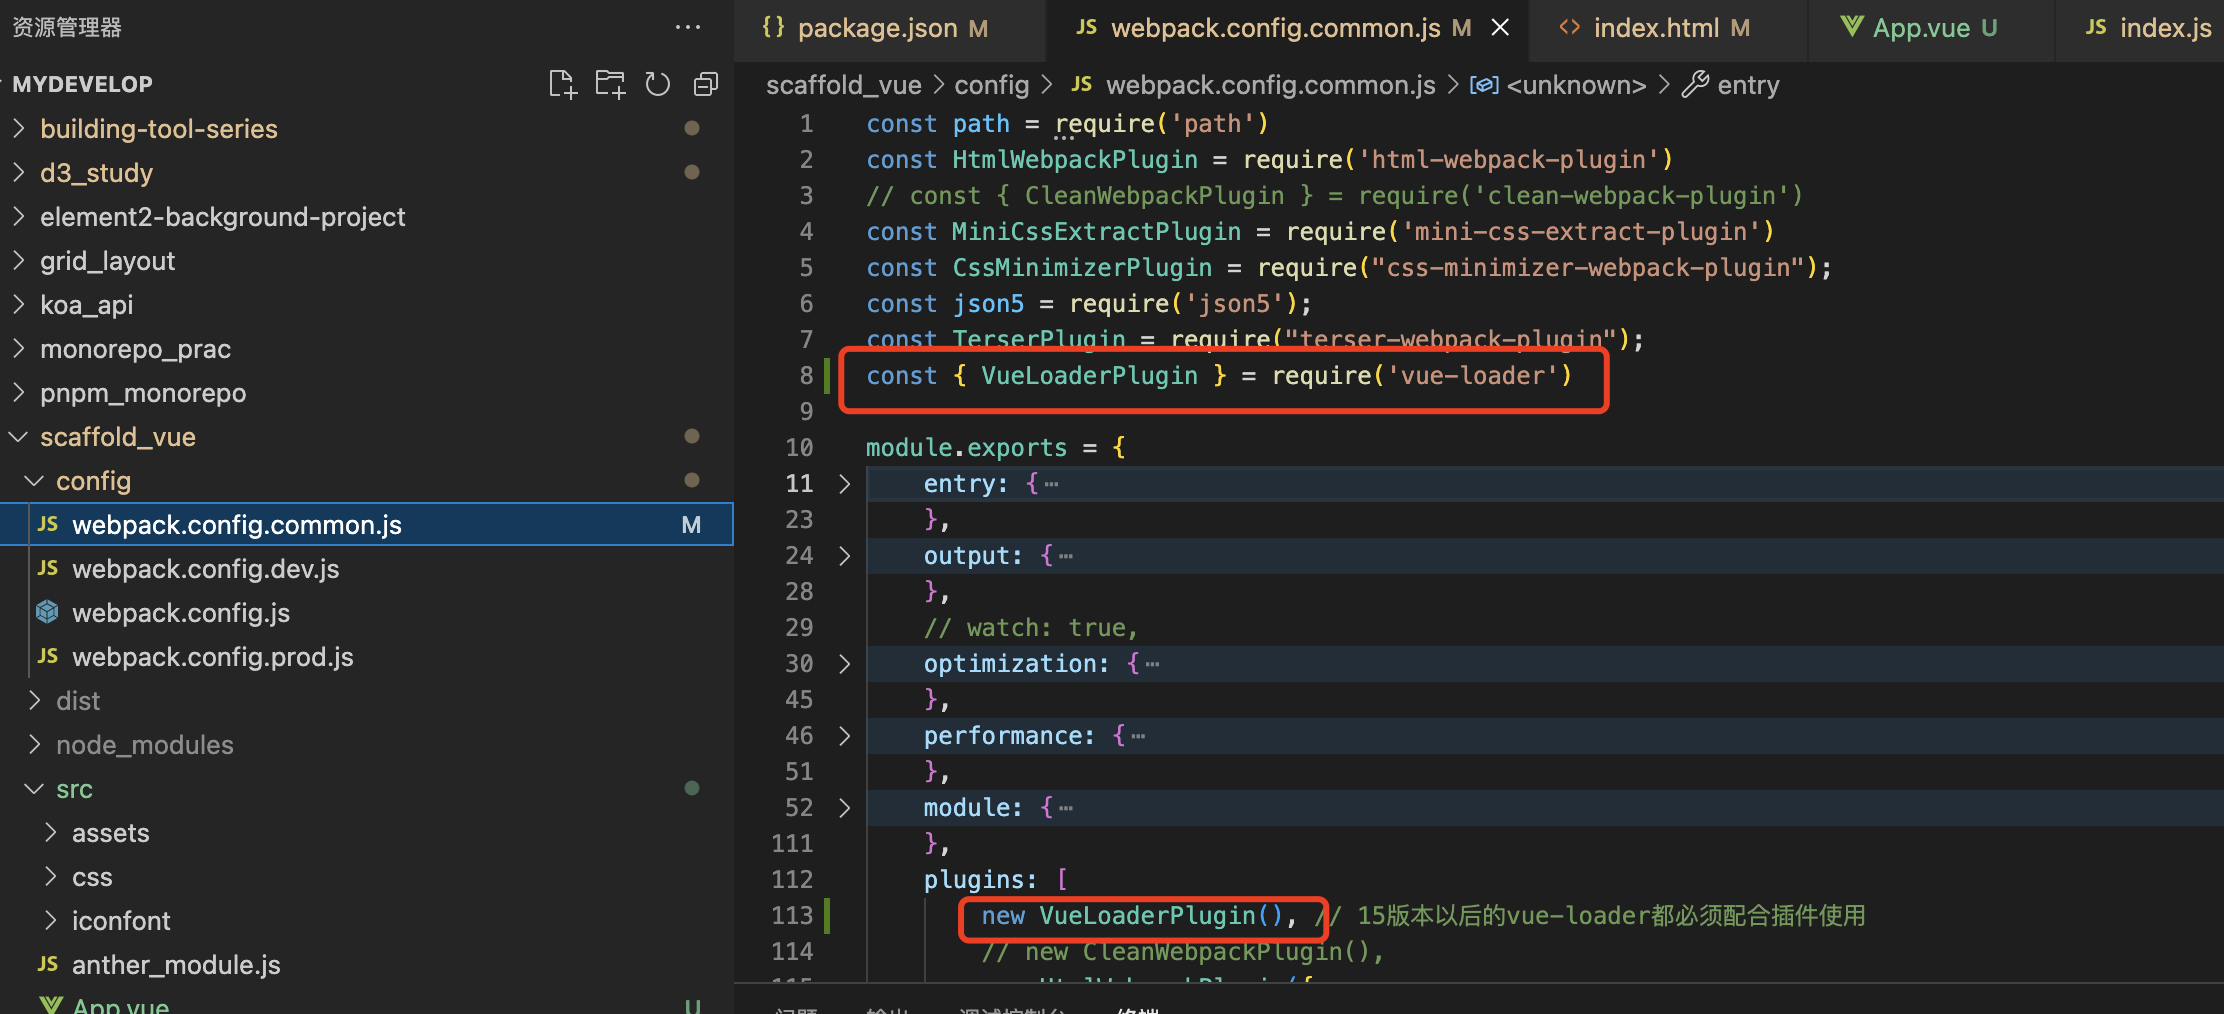
配置vue-loader
配置vue入口文件
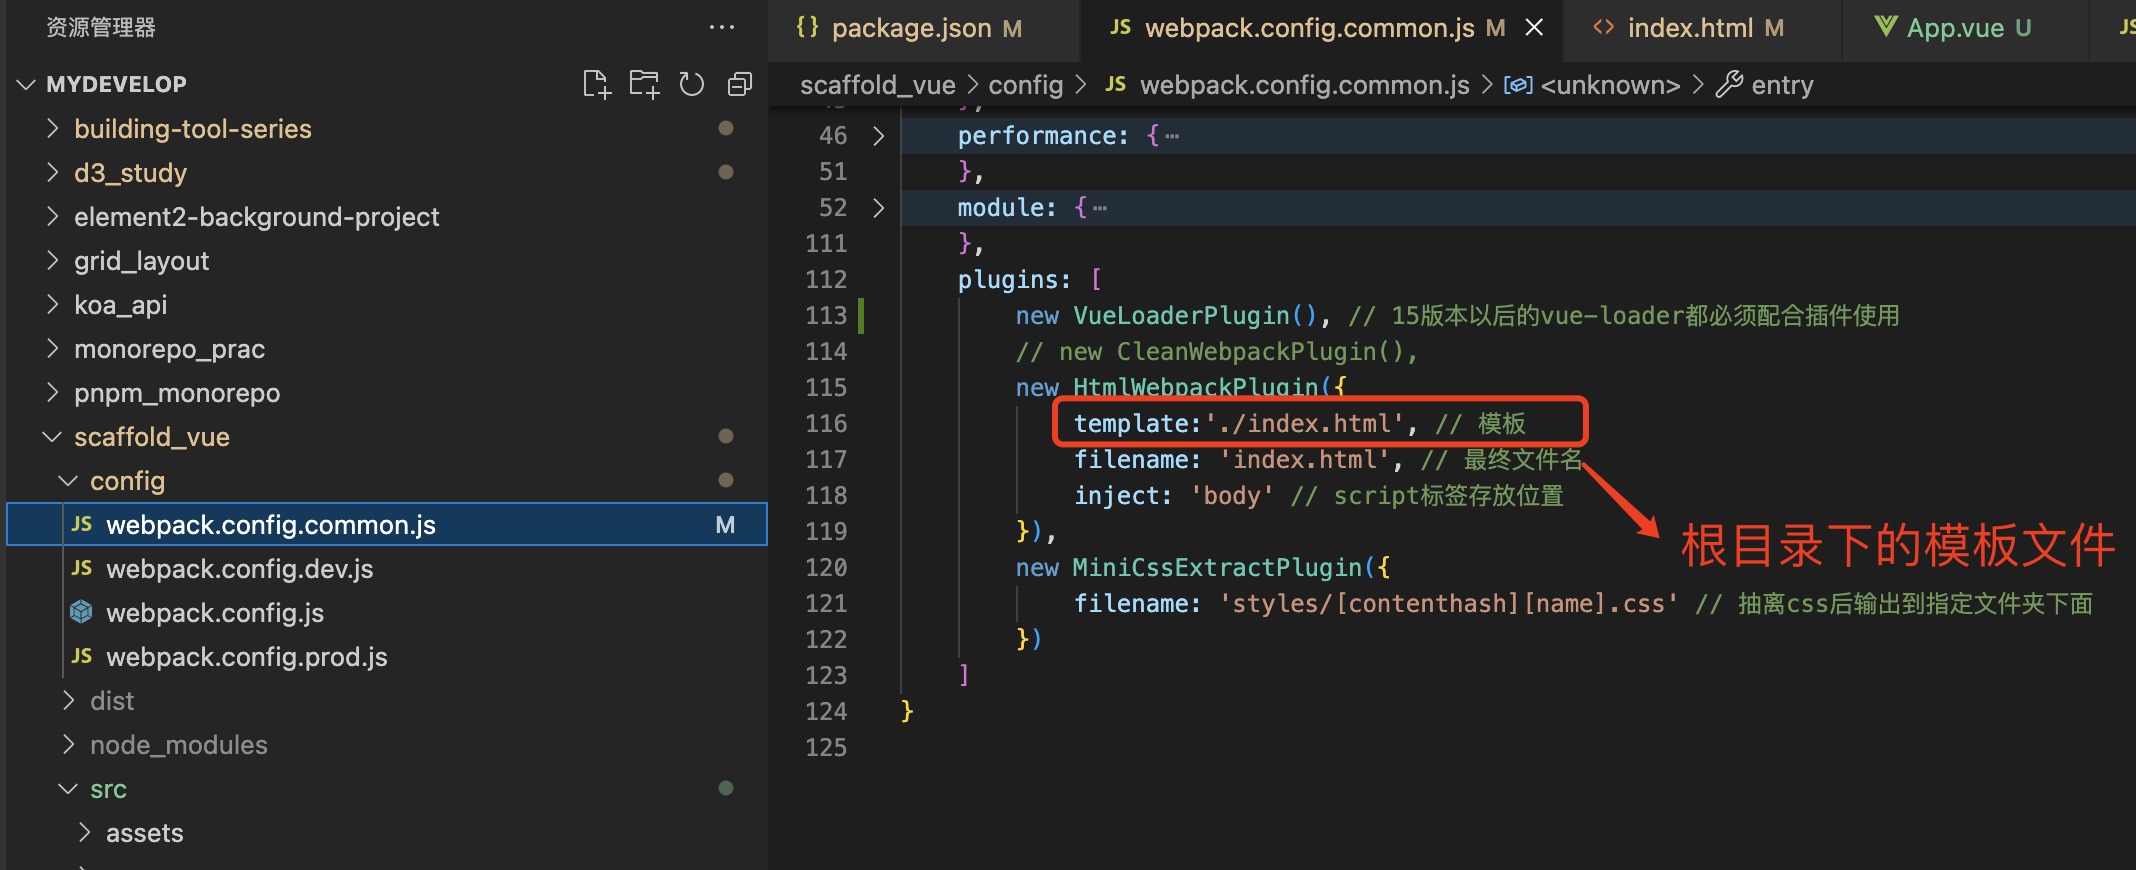
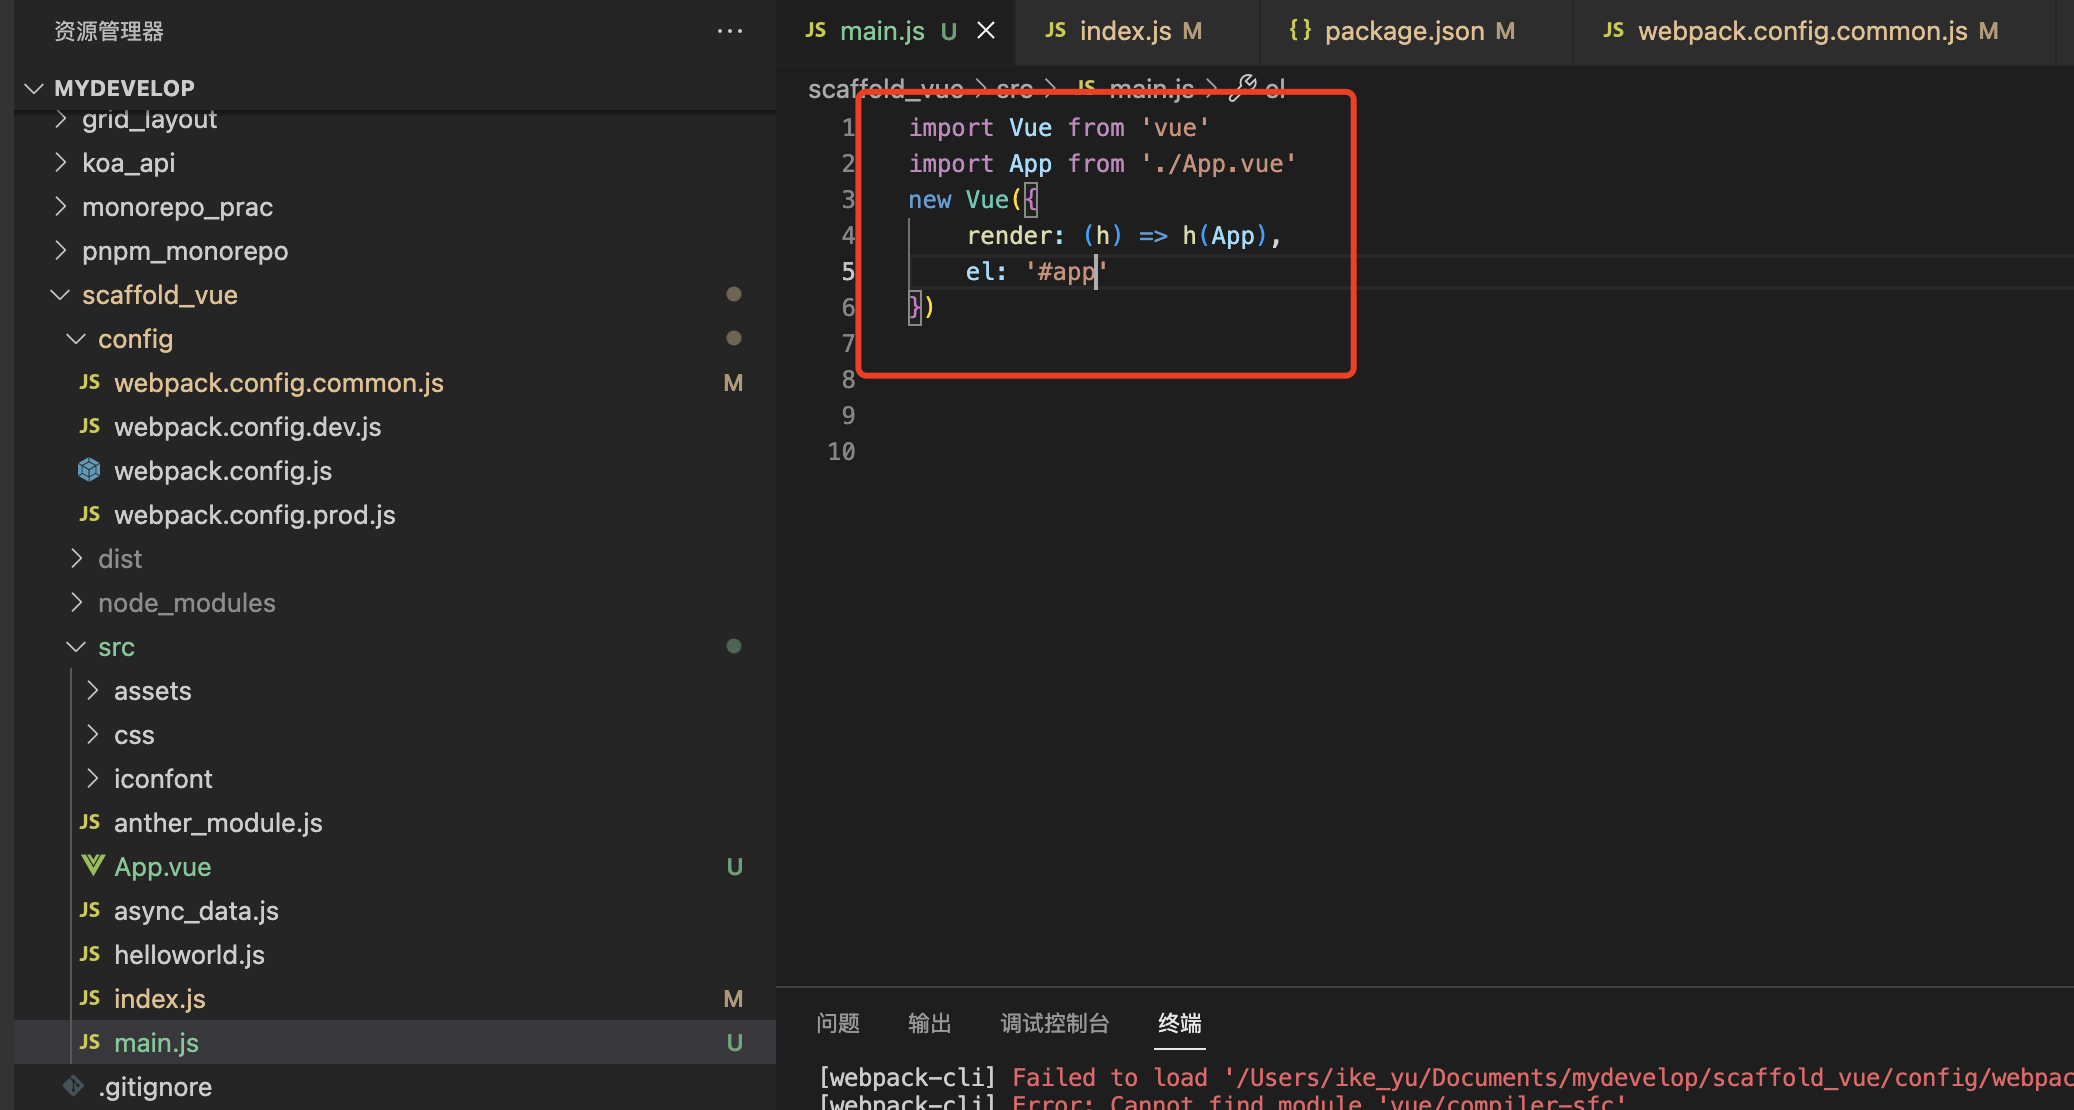
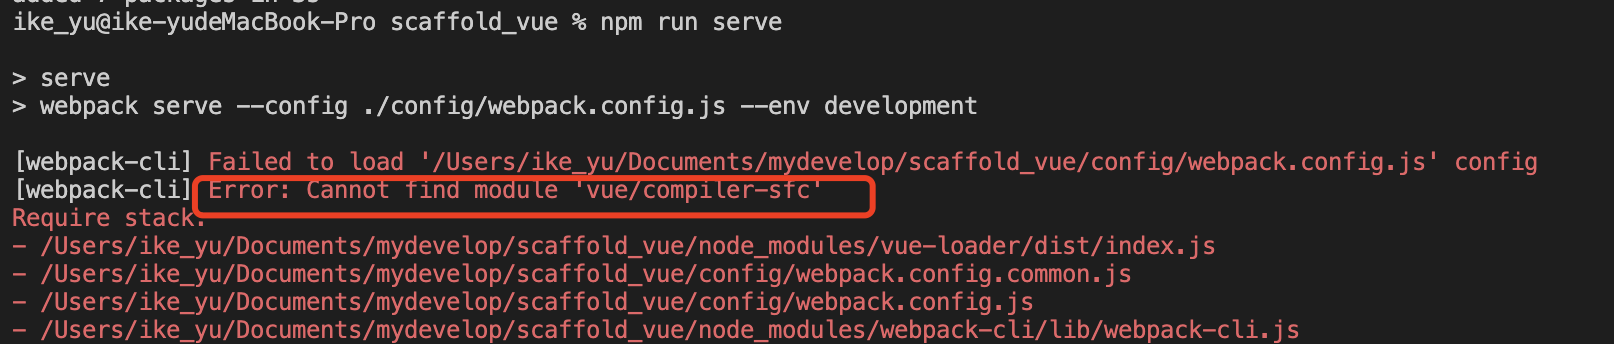
注意:此时还是无法编译vue文件
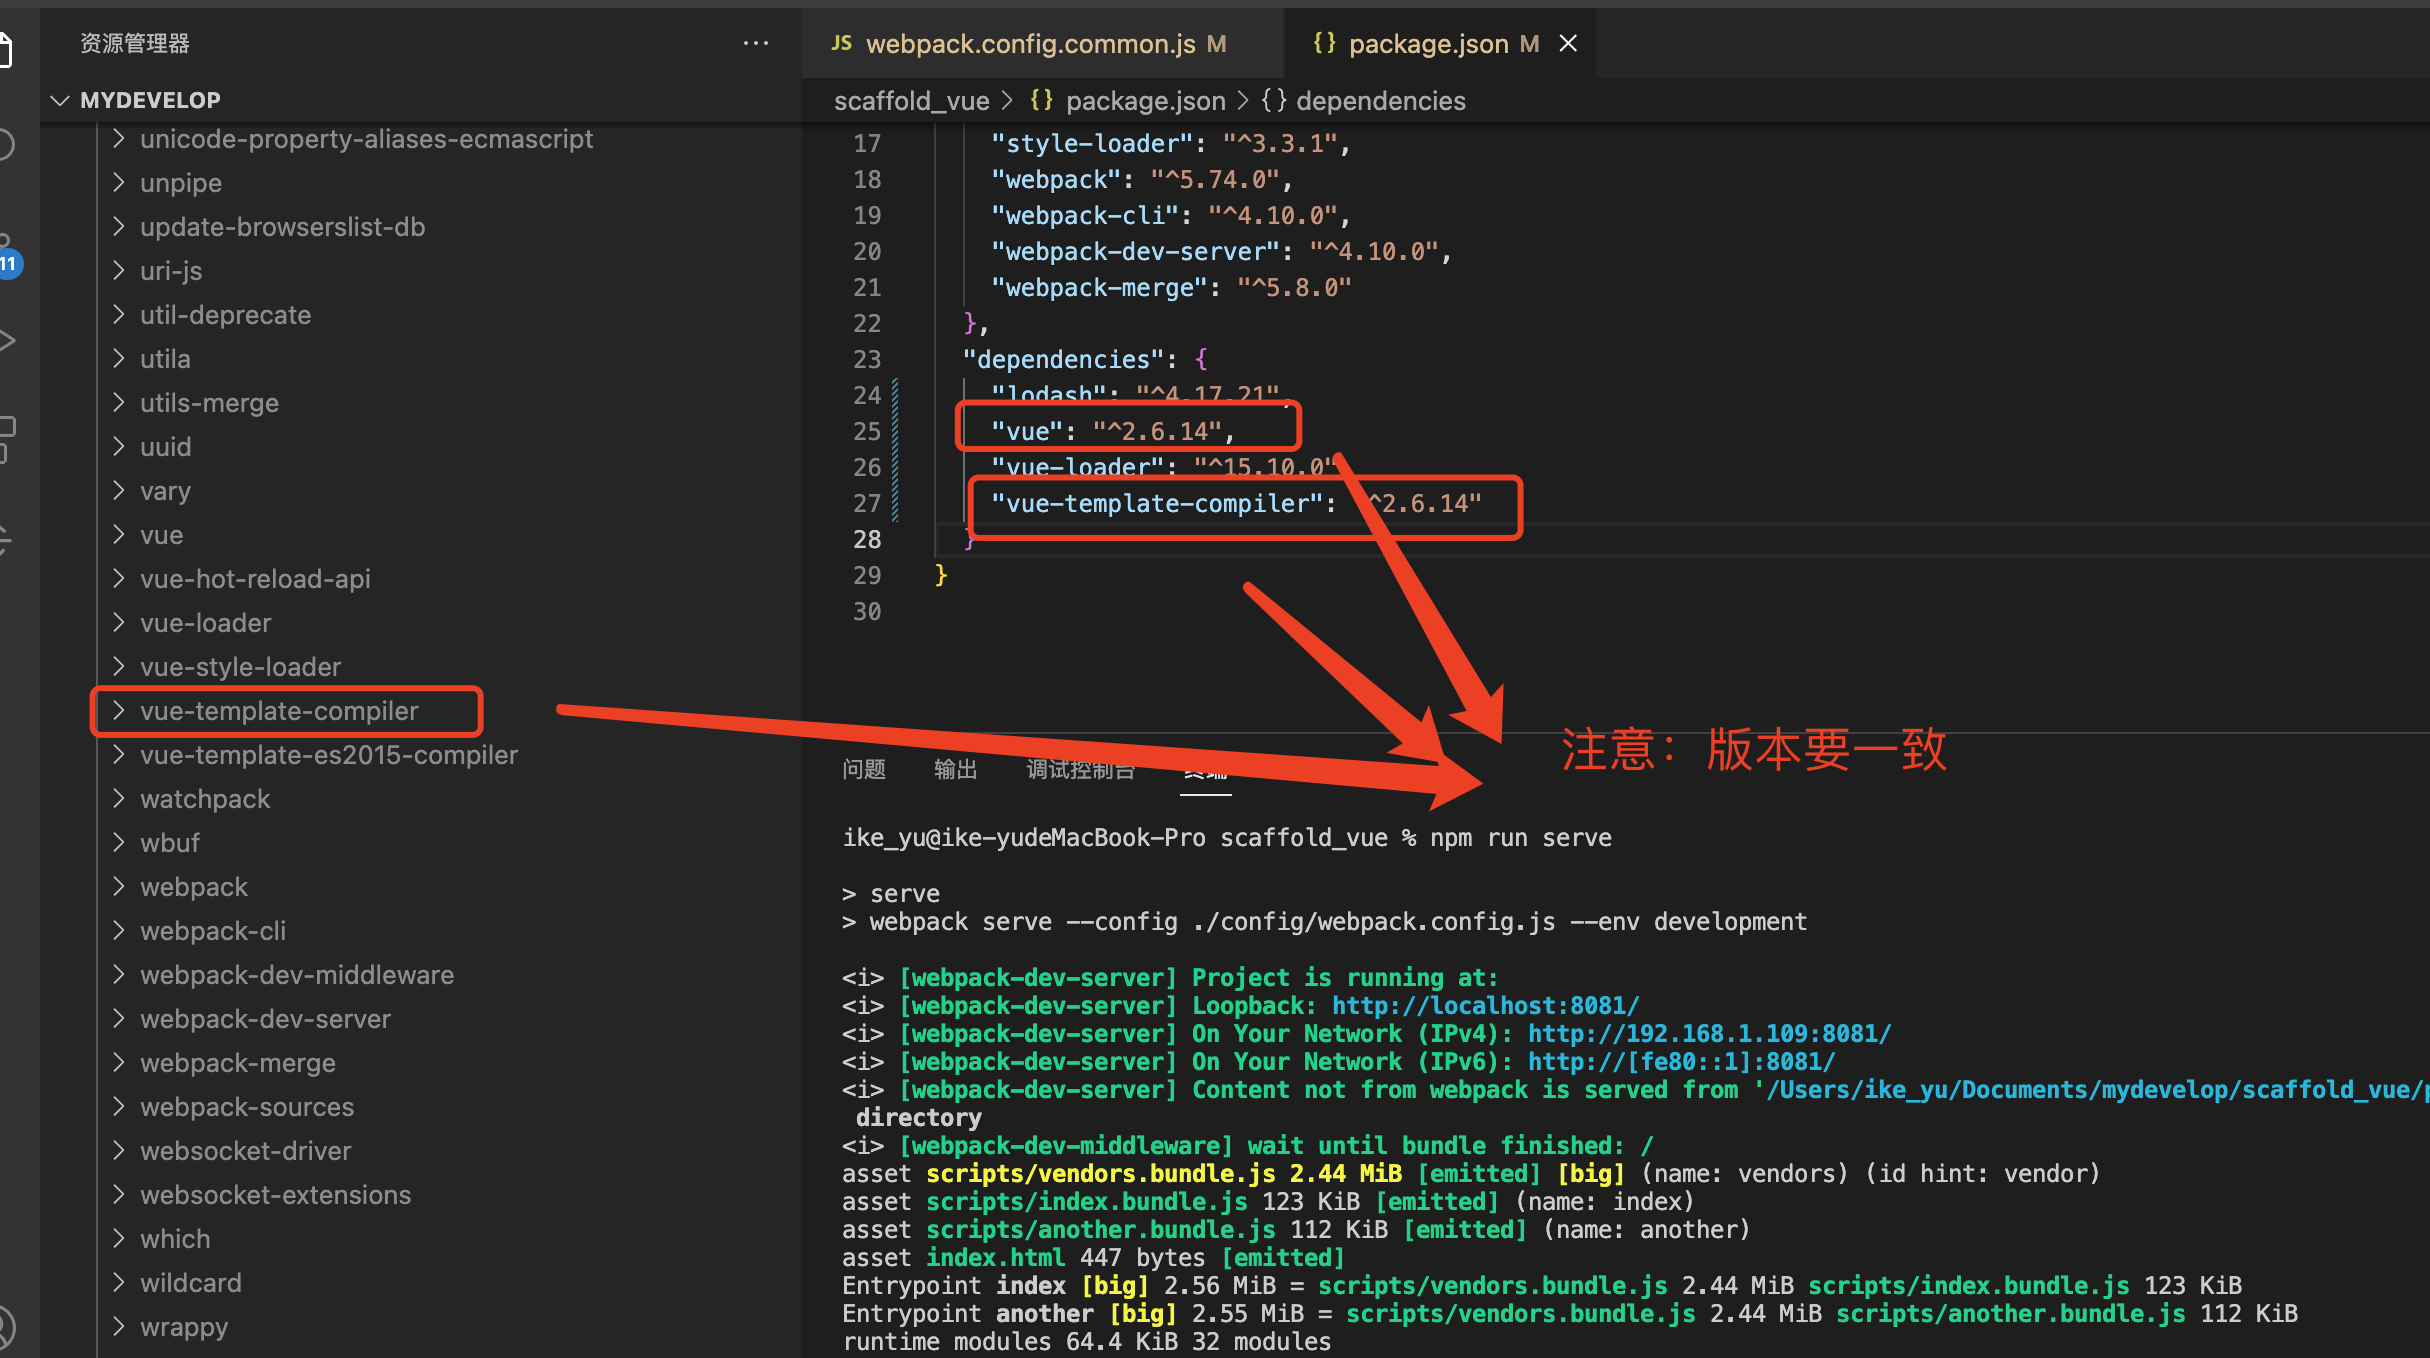
需要安装vue-template-compiler且版本要一致
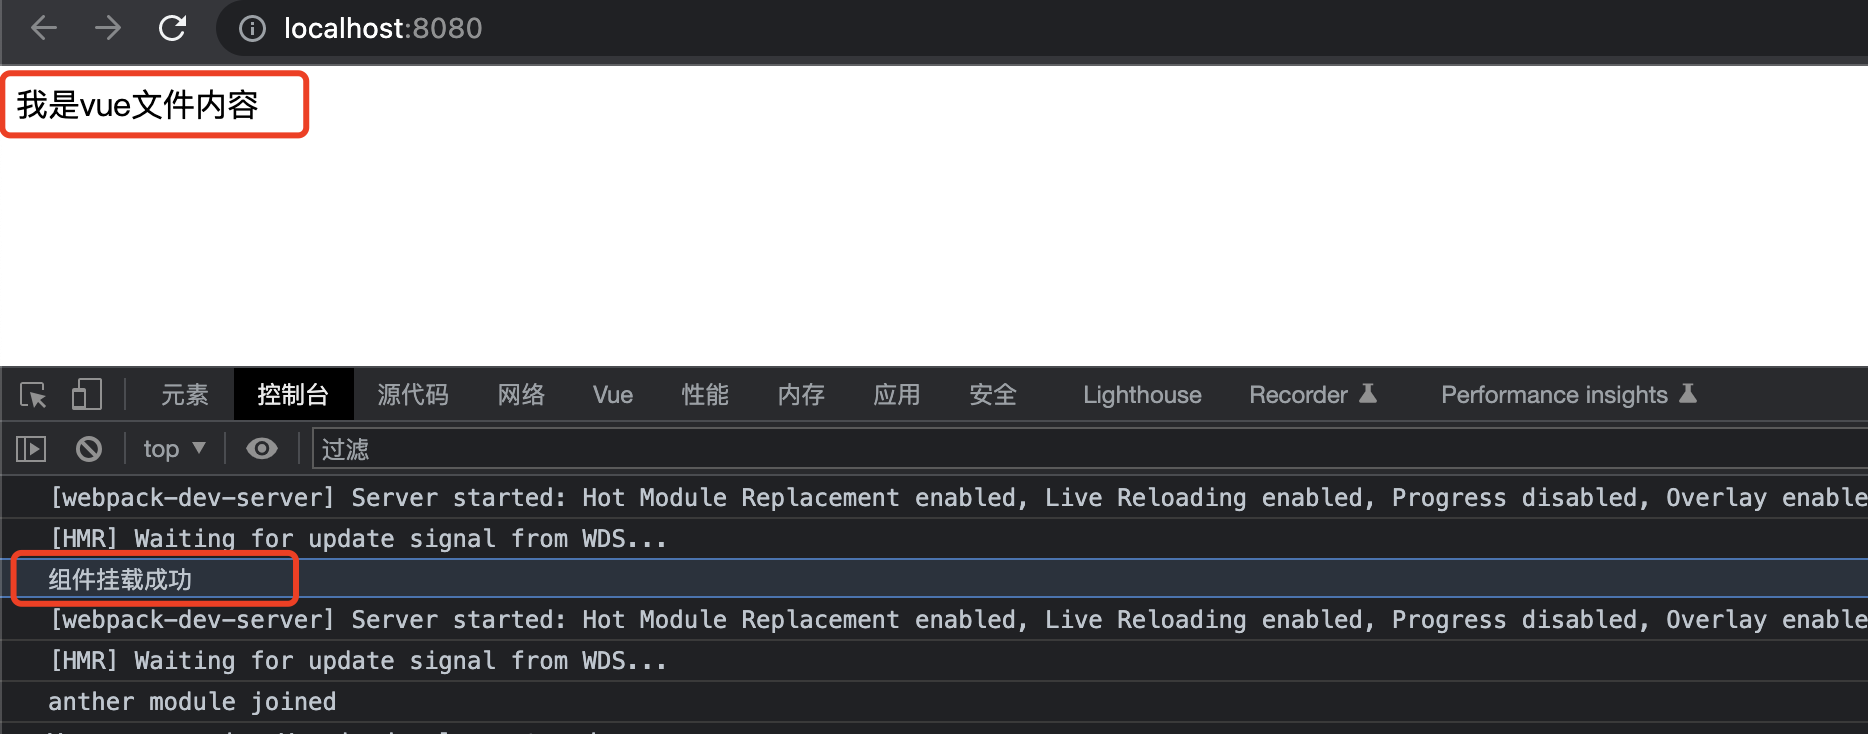
10.2 Naruto
Naruto: 即vue2.7版本
注意:vue2.6.14升级成2.7是vue-template-compiler版本不变
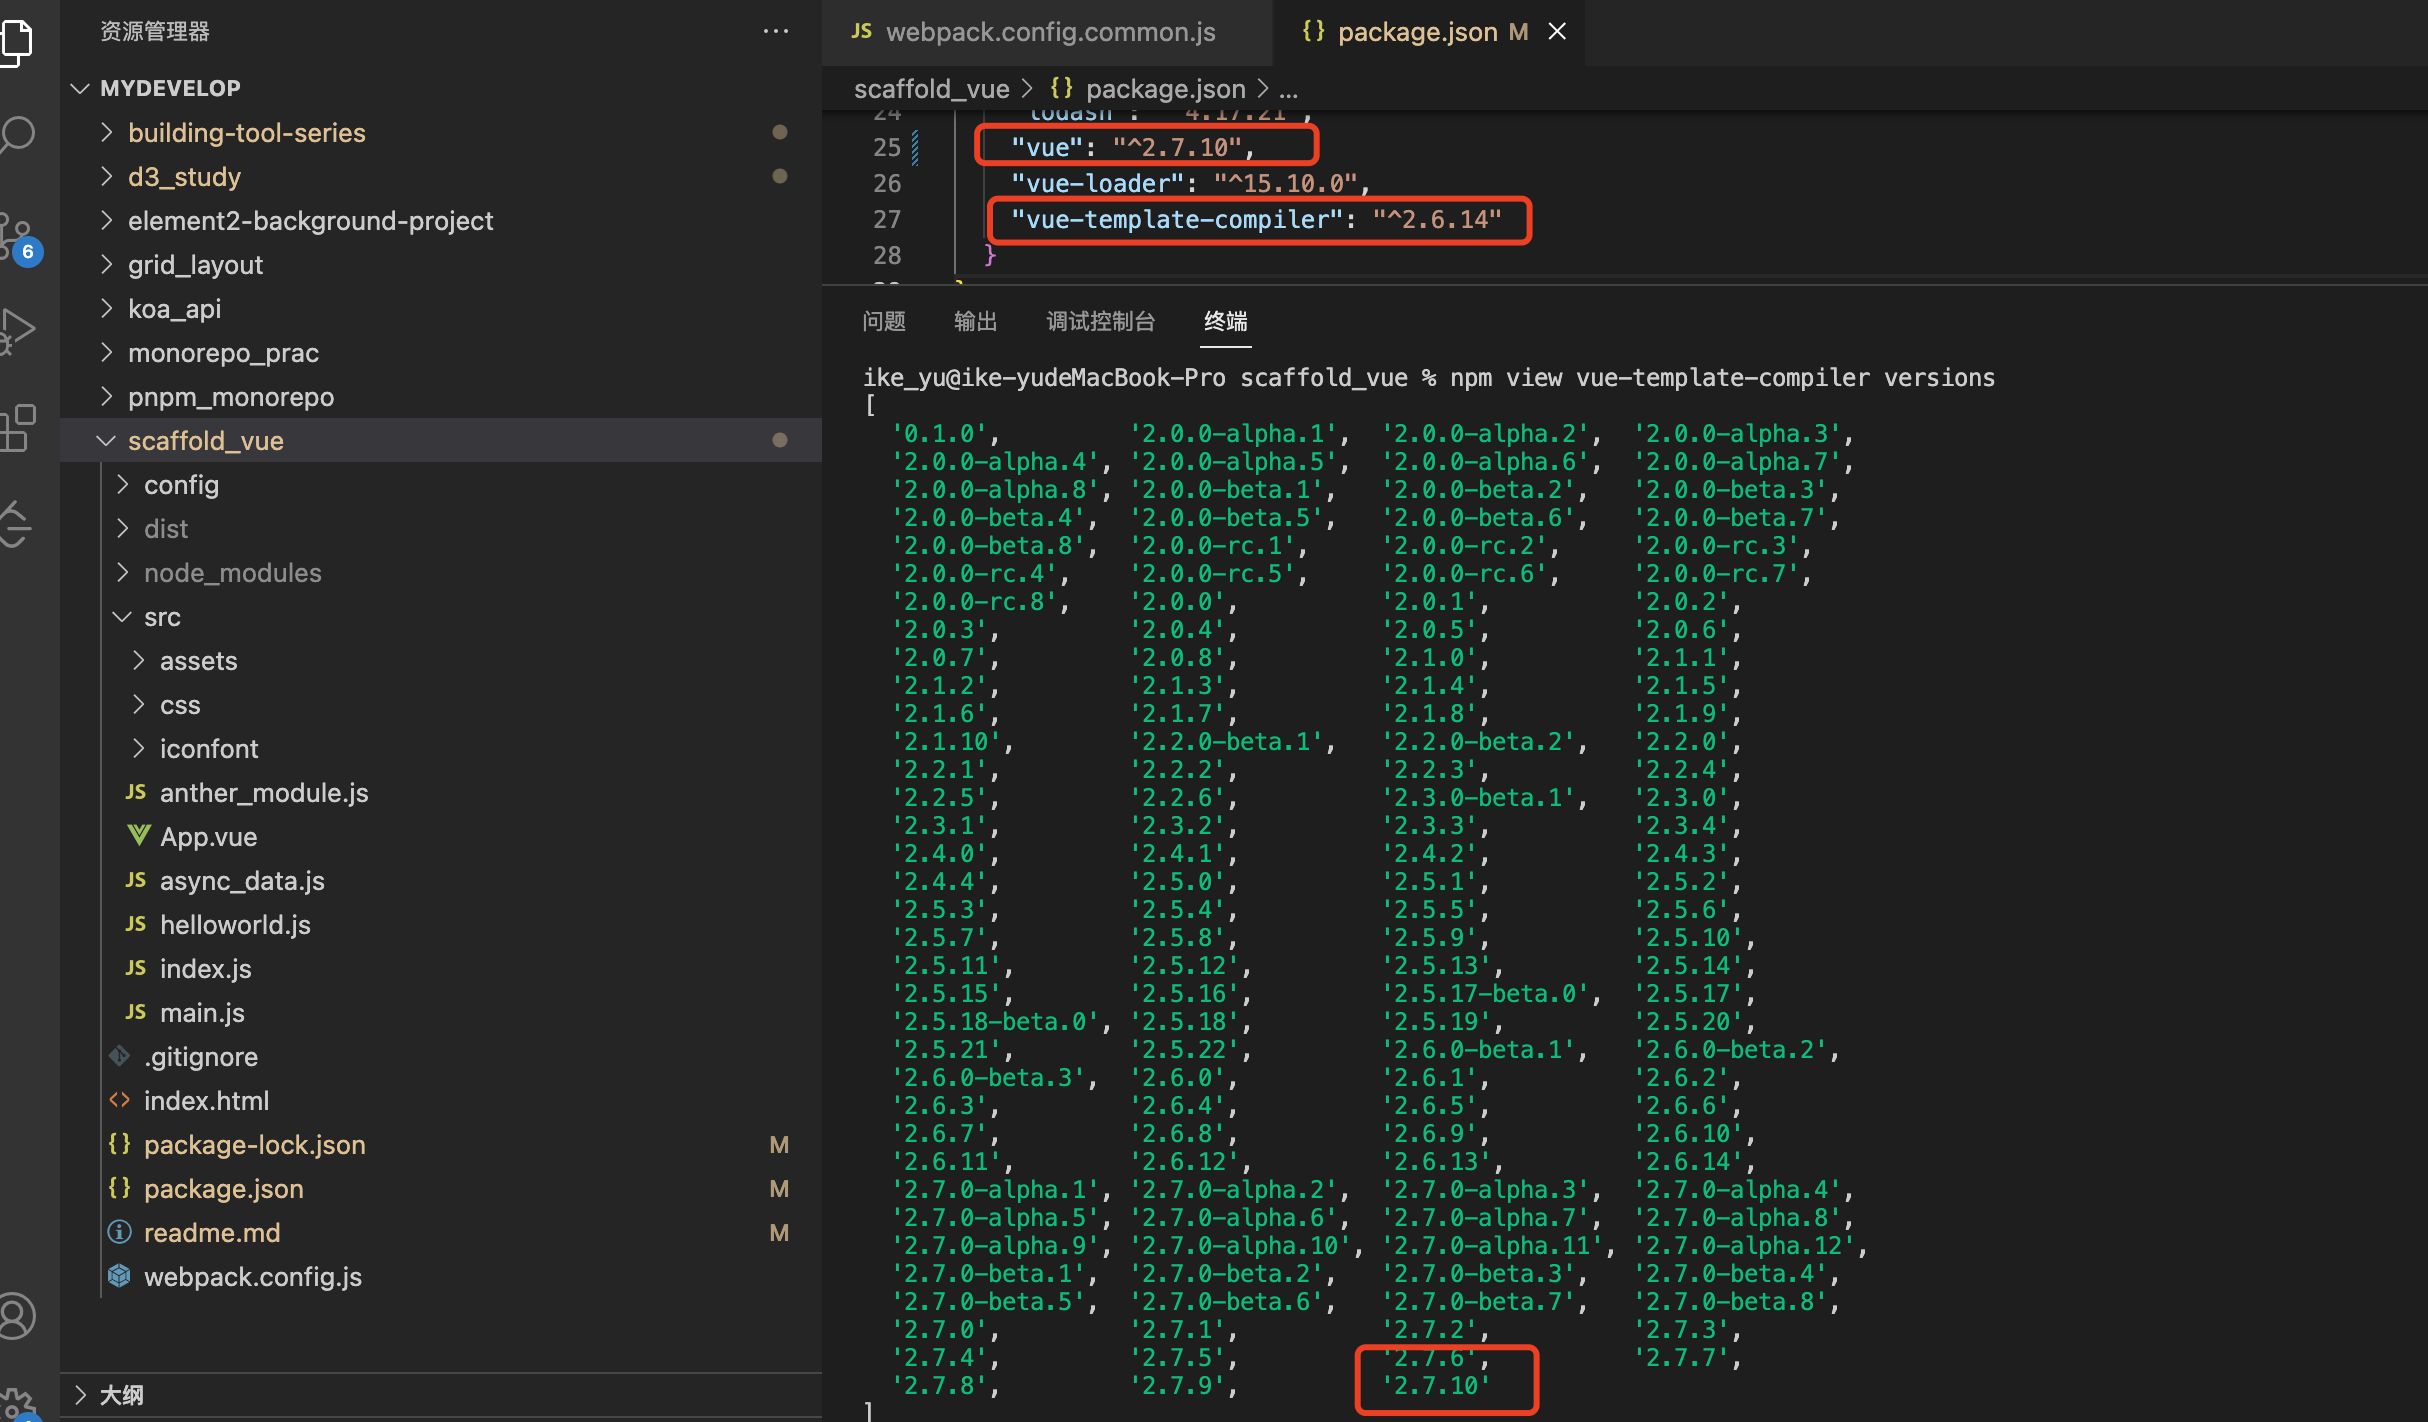
通过查看vue-template-compiler发现,还是有对应2.7版本
10.3 vue3
npm install vue-loader@next
npm install vue@next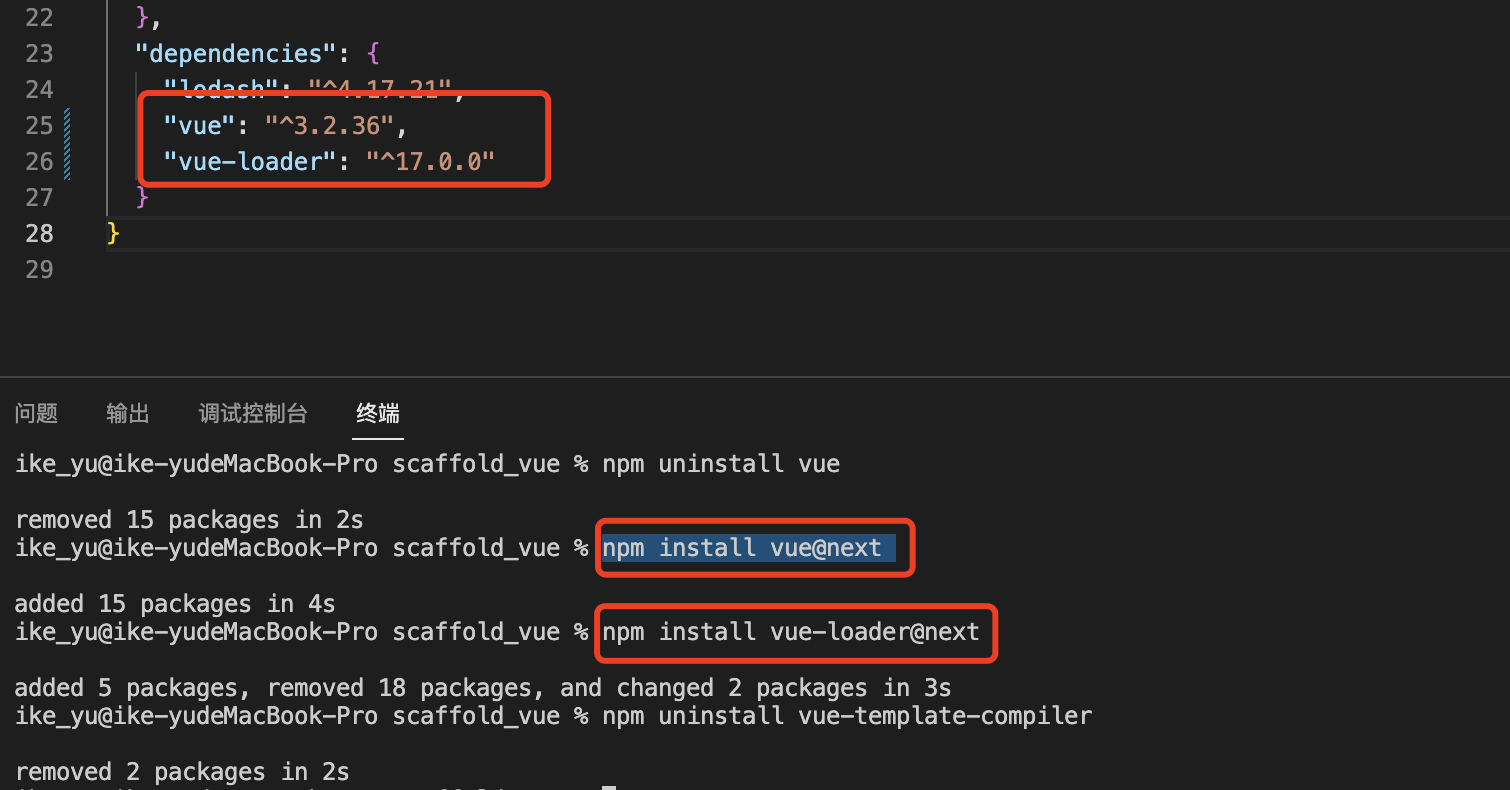
npm install @vue/compiler-sfc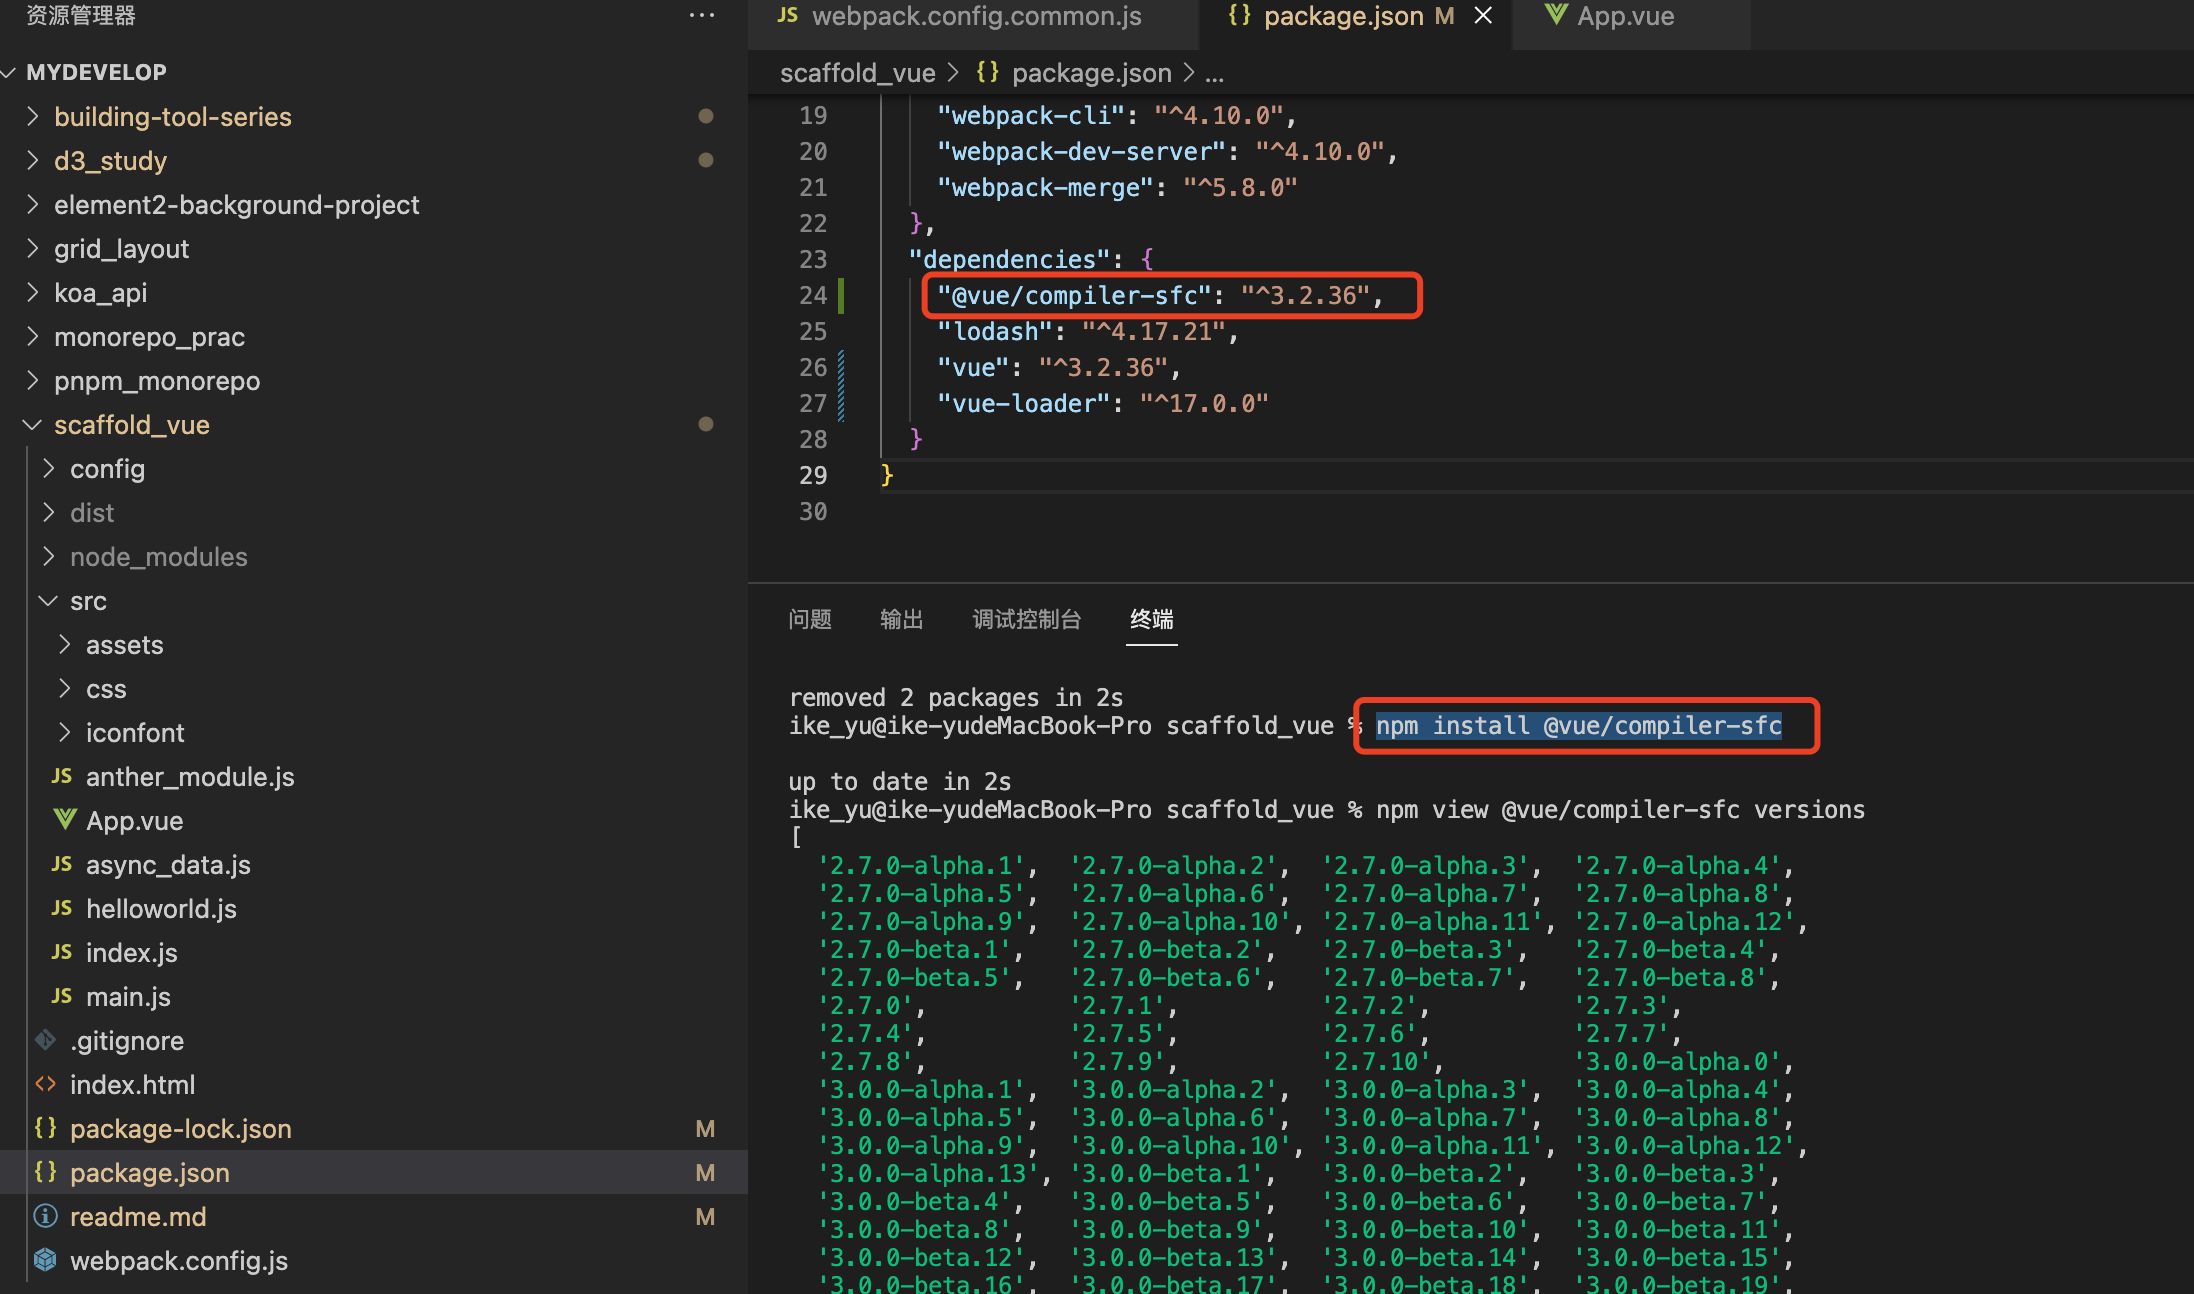
vueLoadPlugin的引入稍有差异
const {VueLoaderPlugin} = require('vue-loader/dist/index');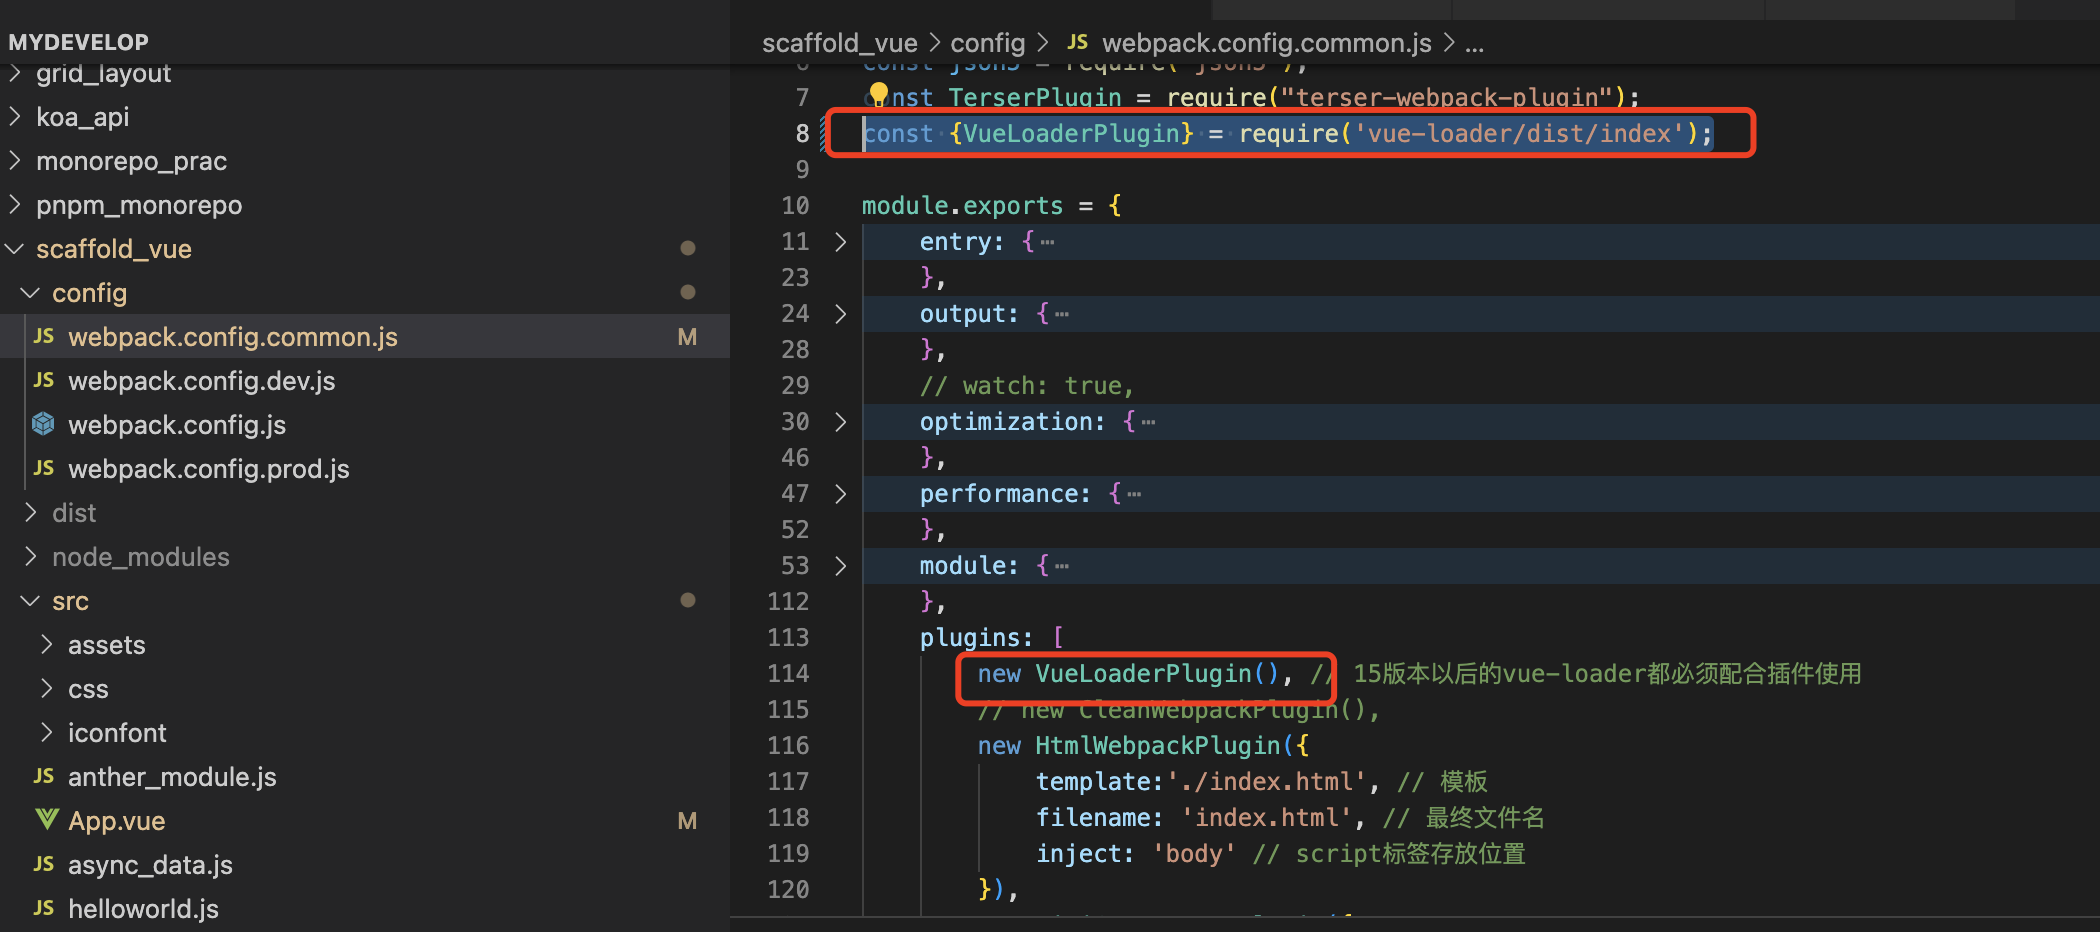
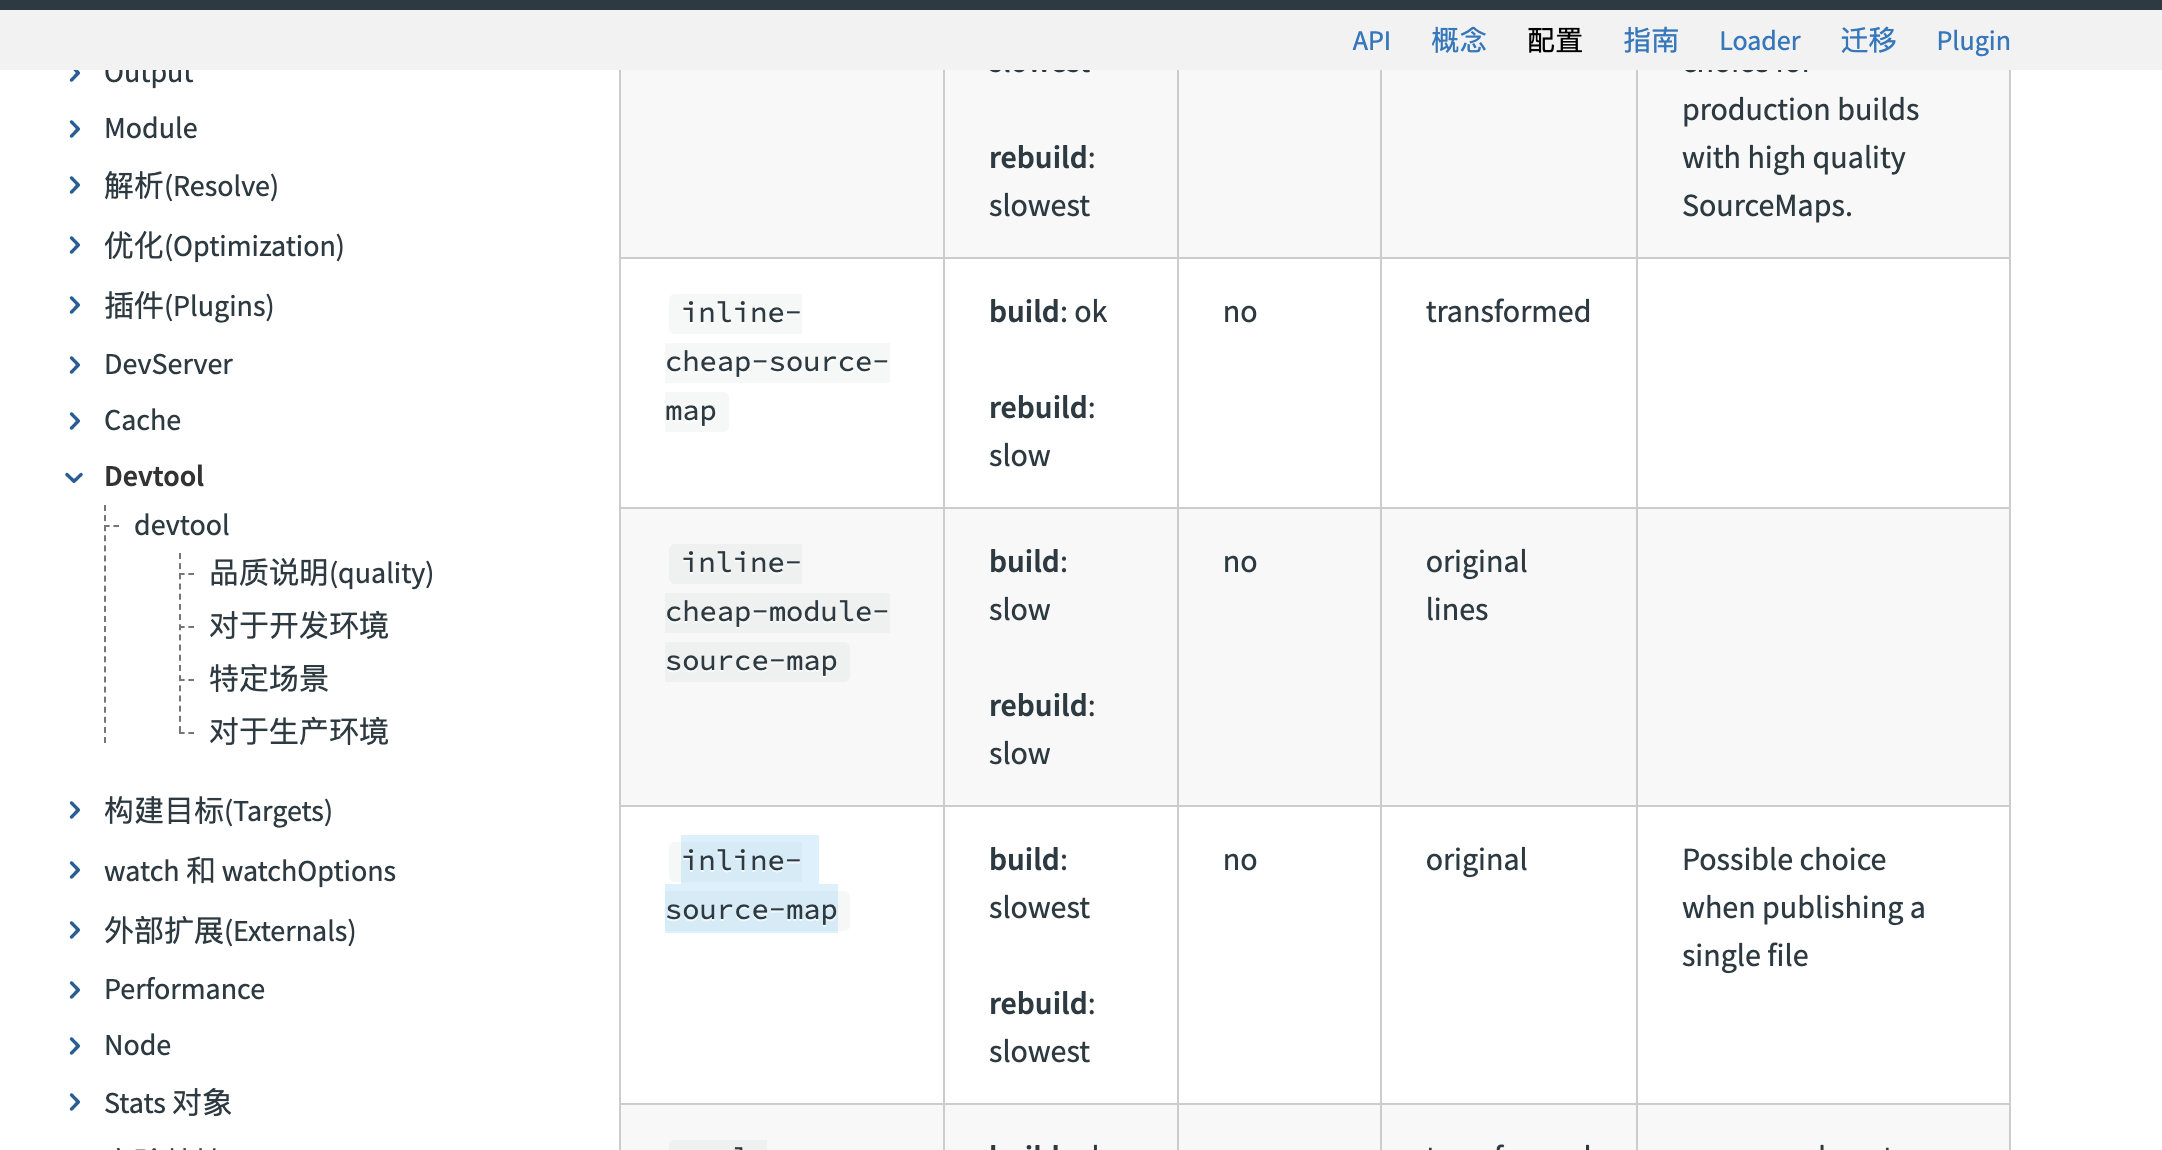
11、sourceMap
具体看官方文档
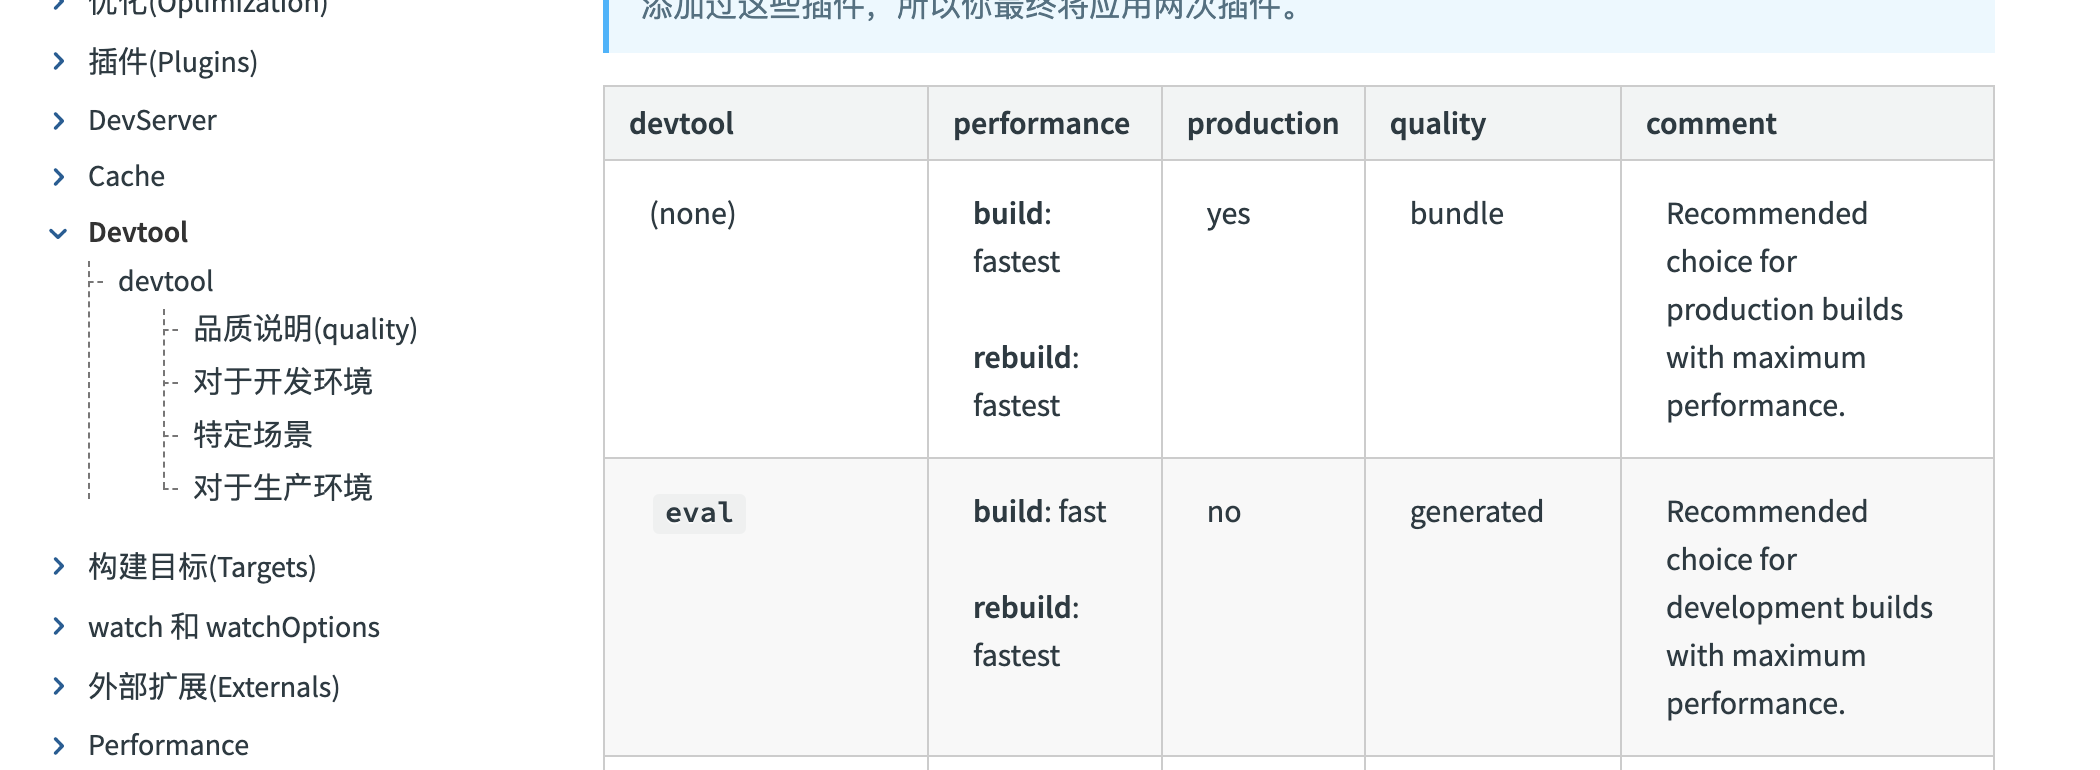
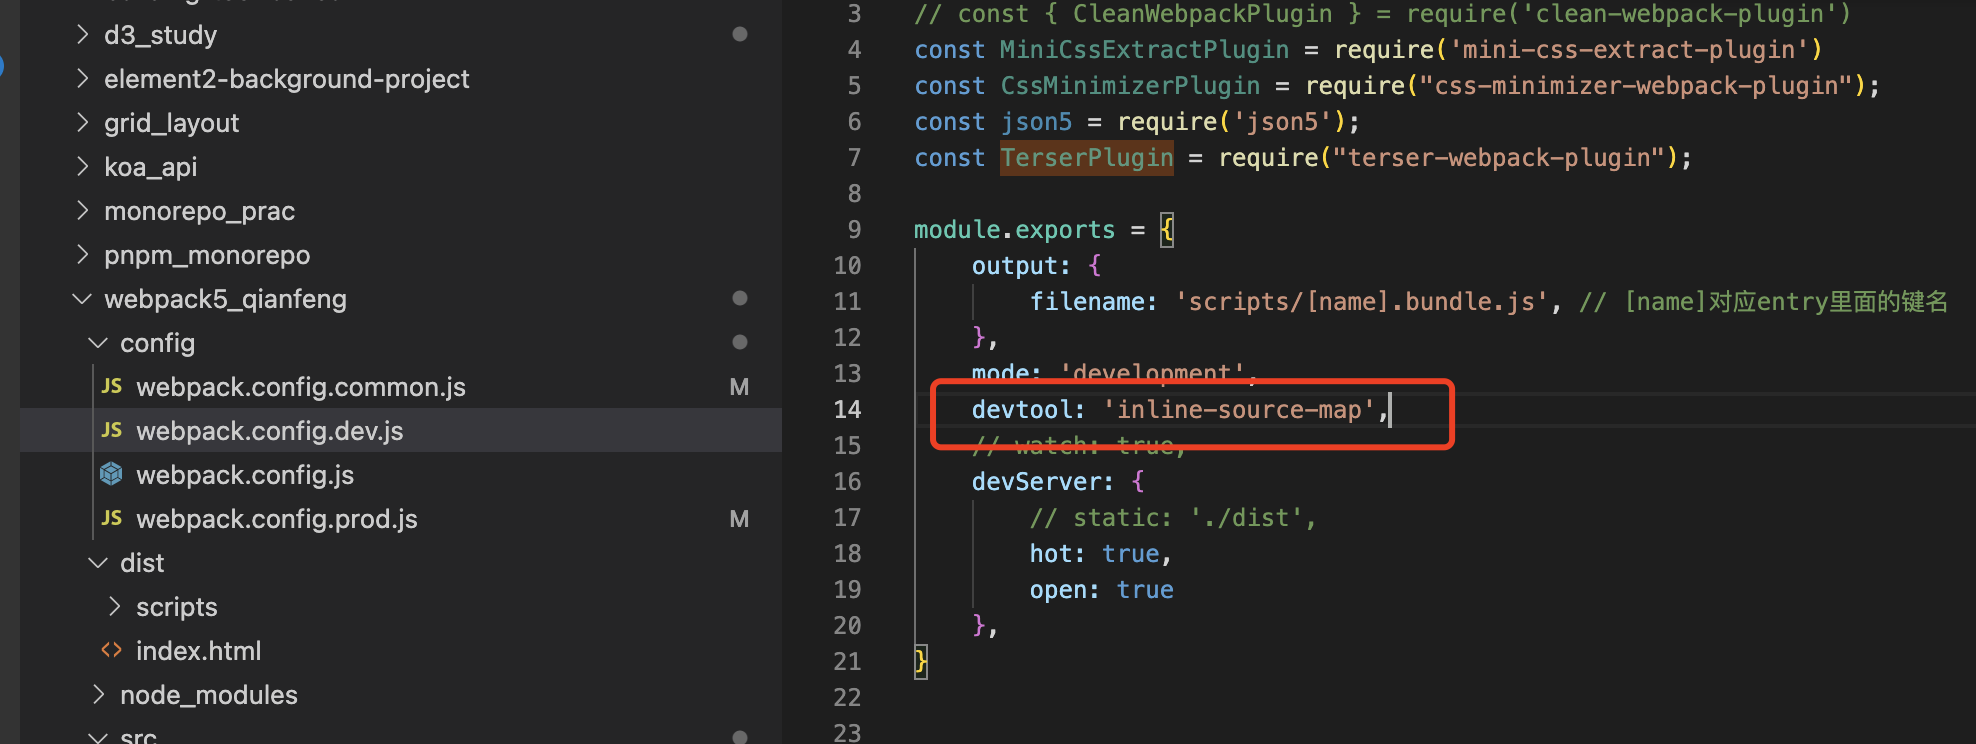
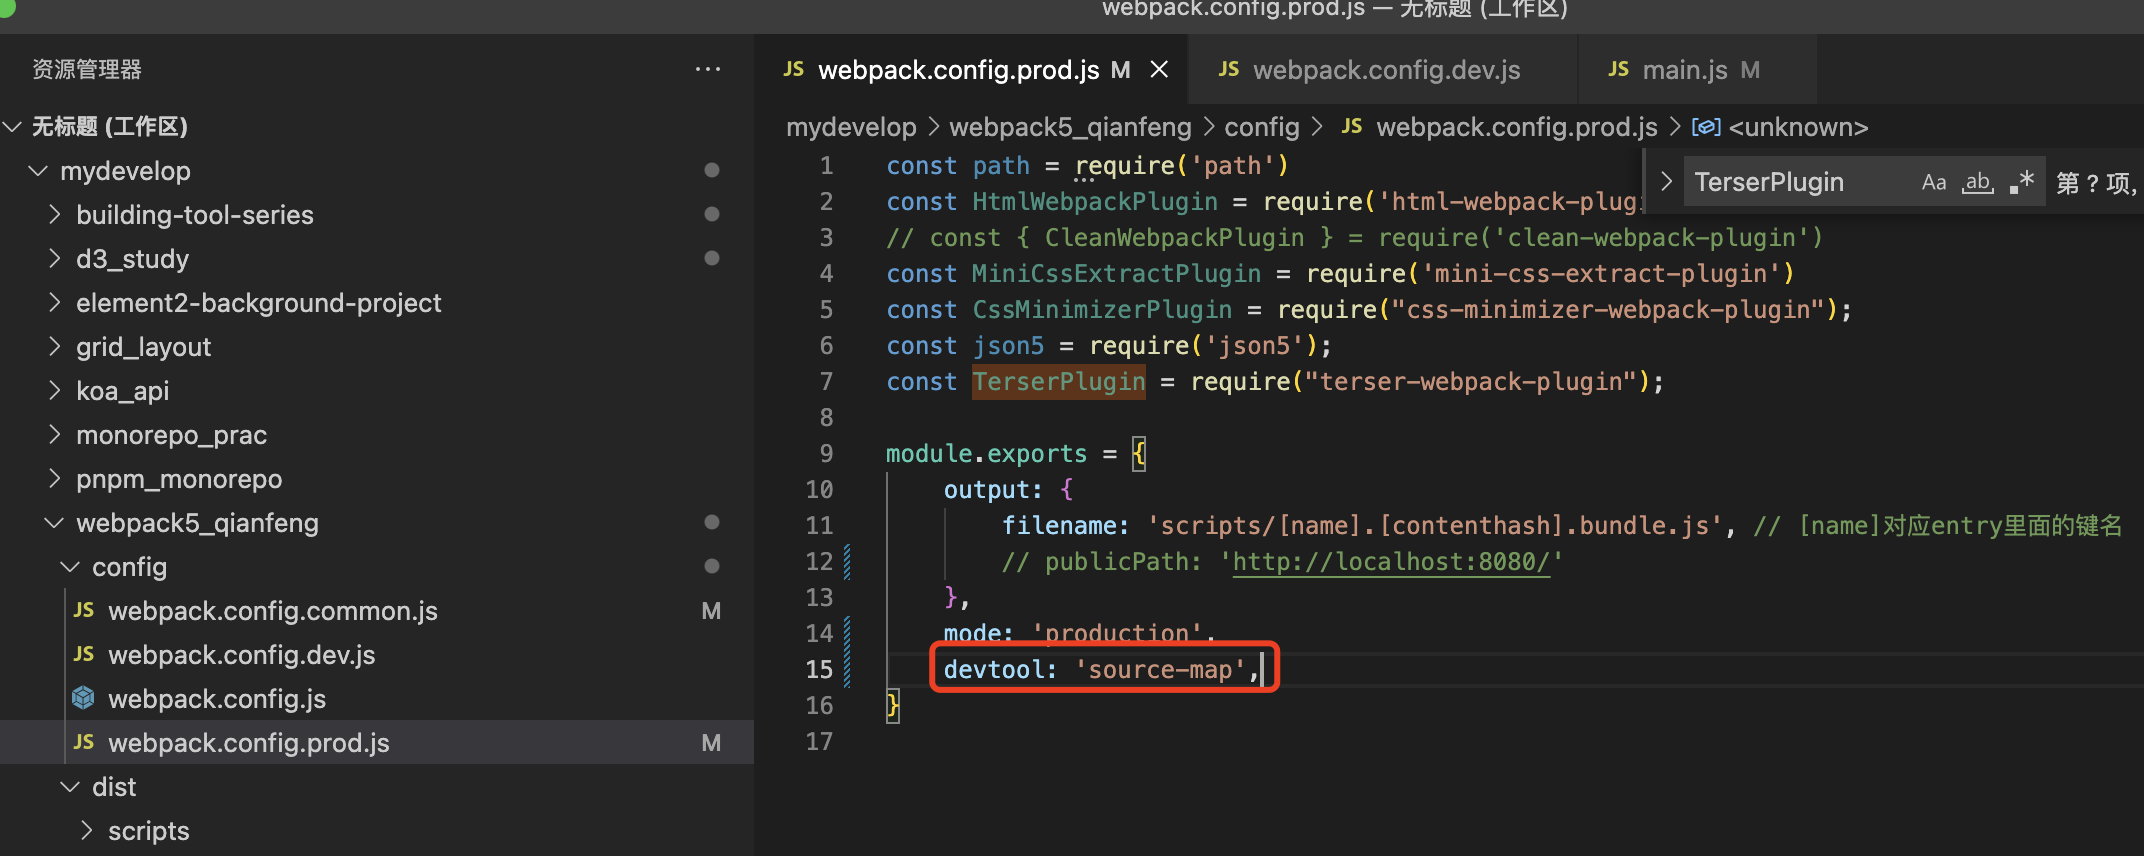
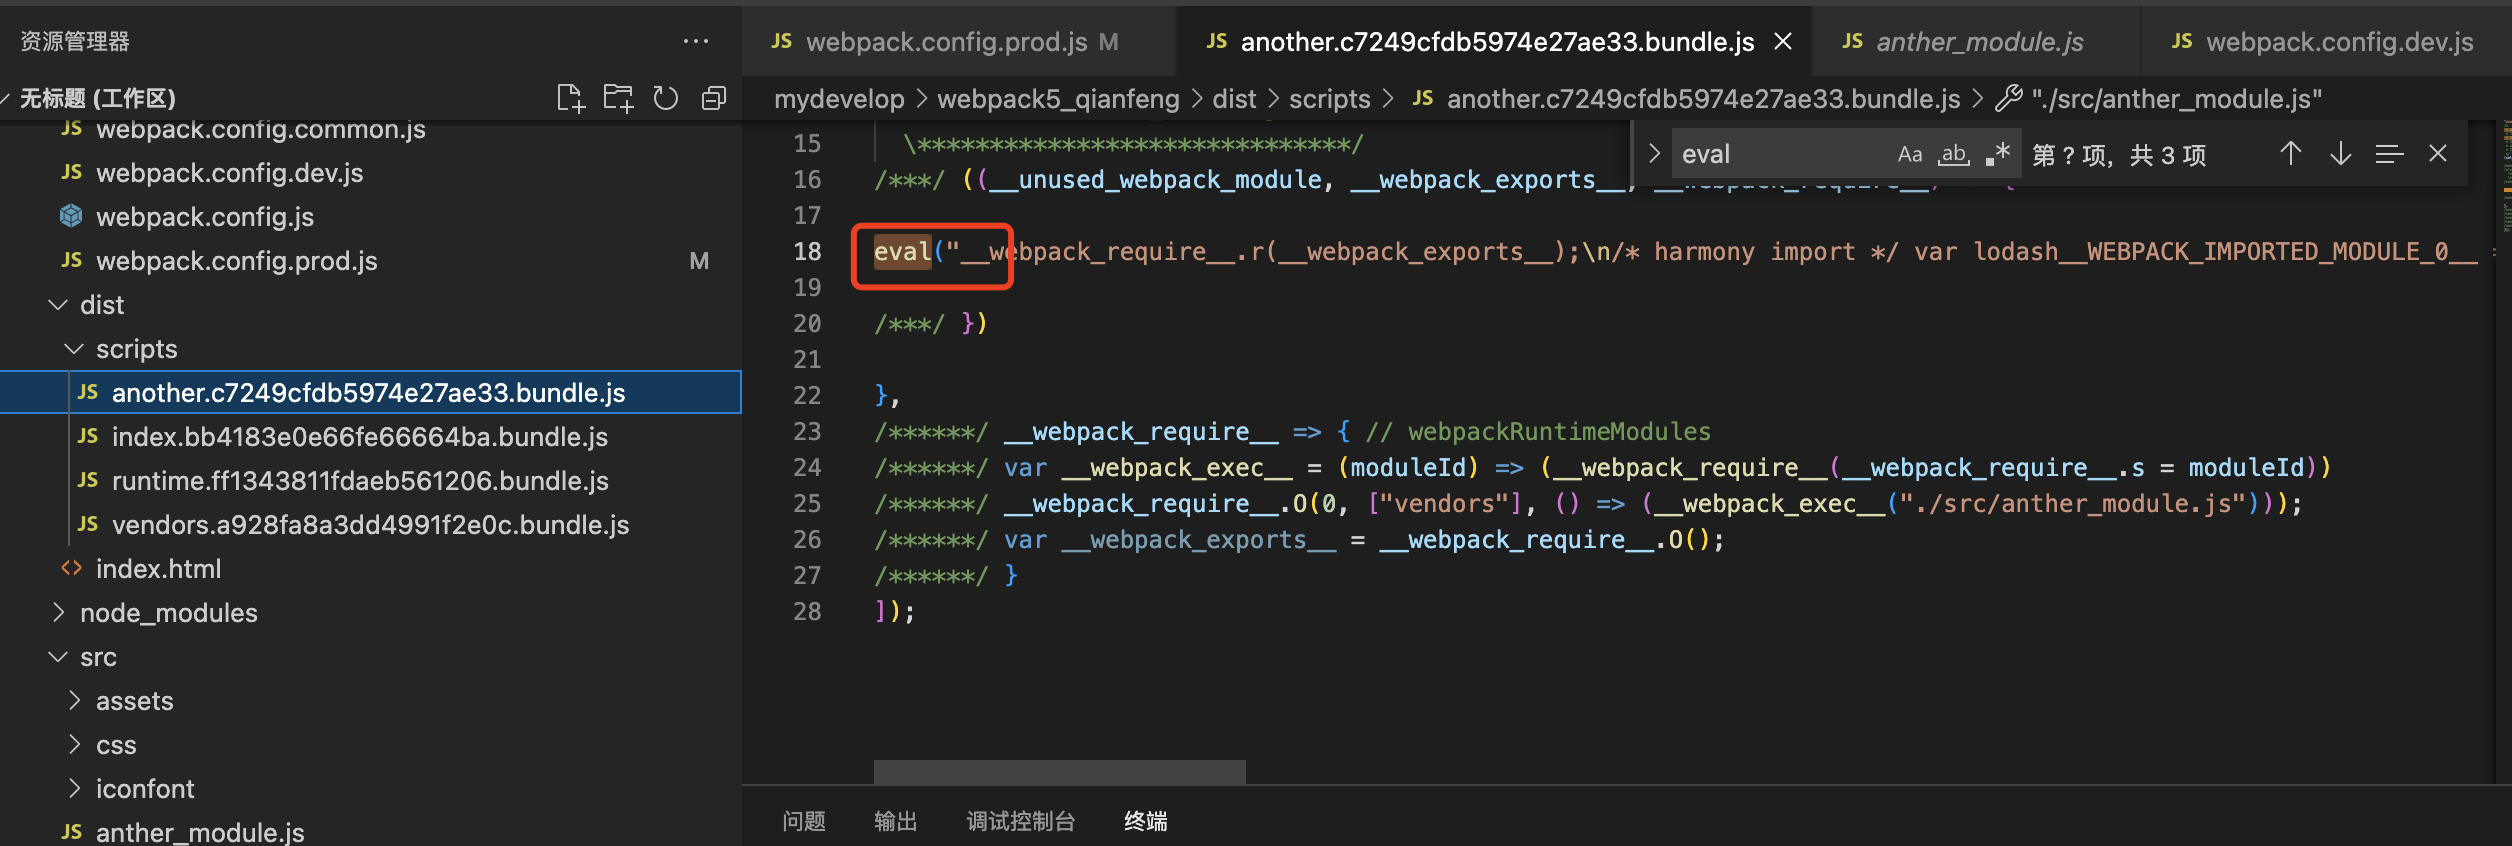
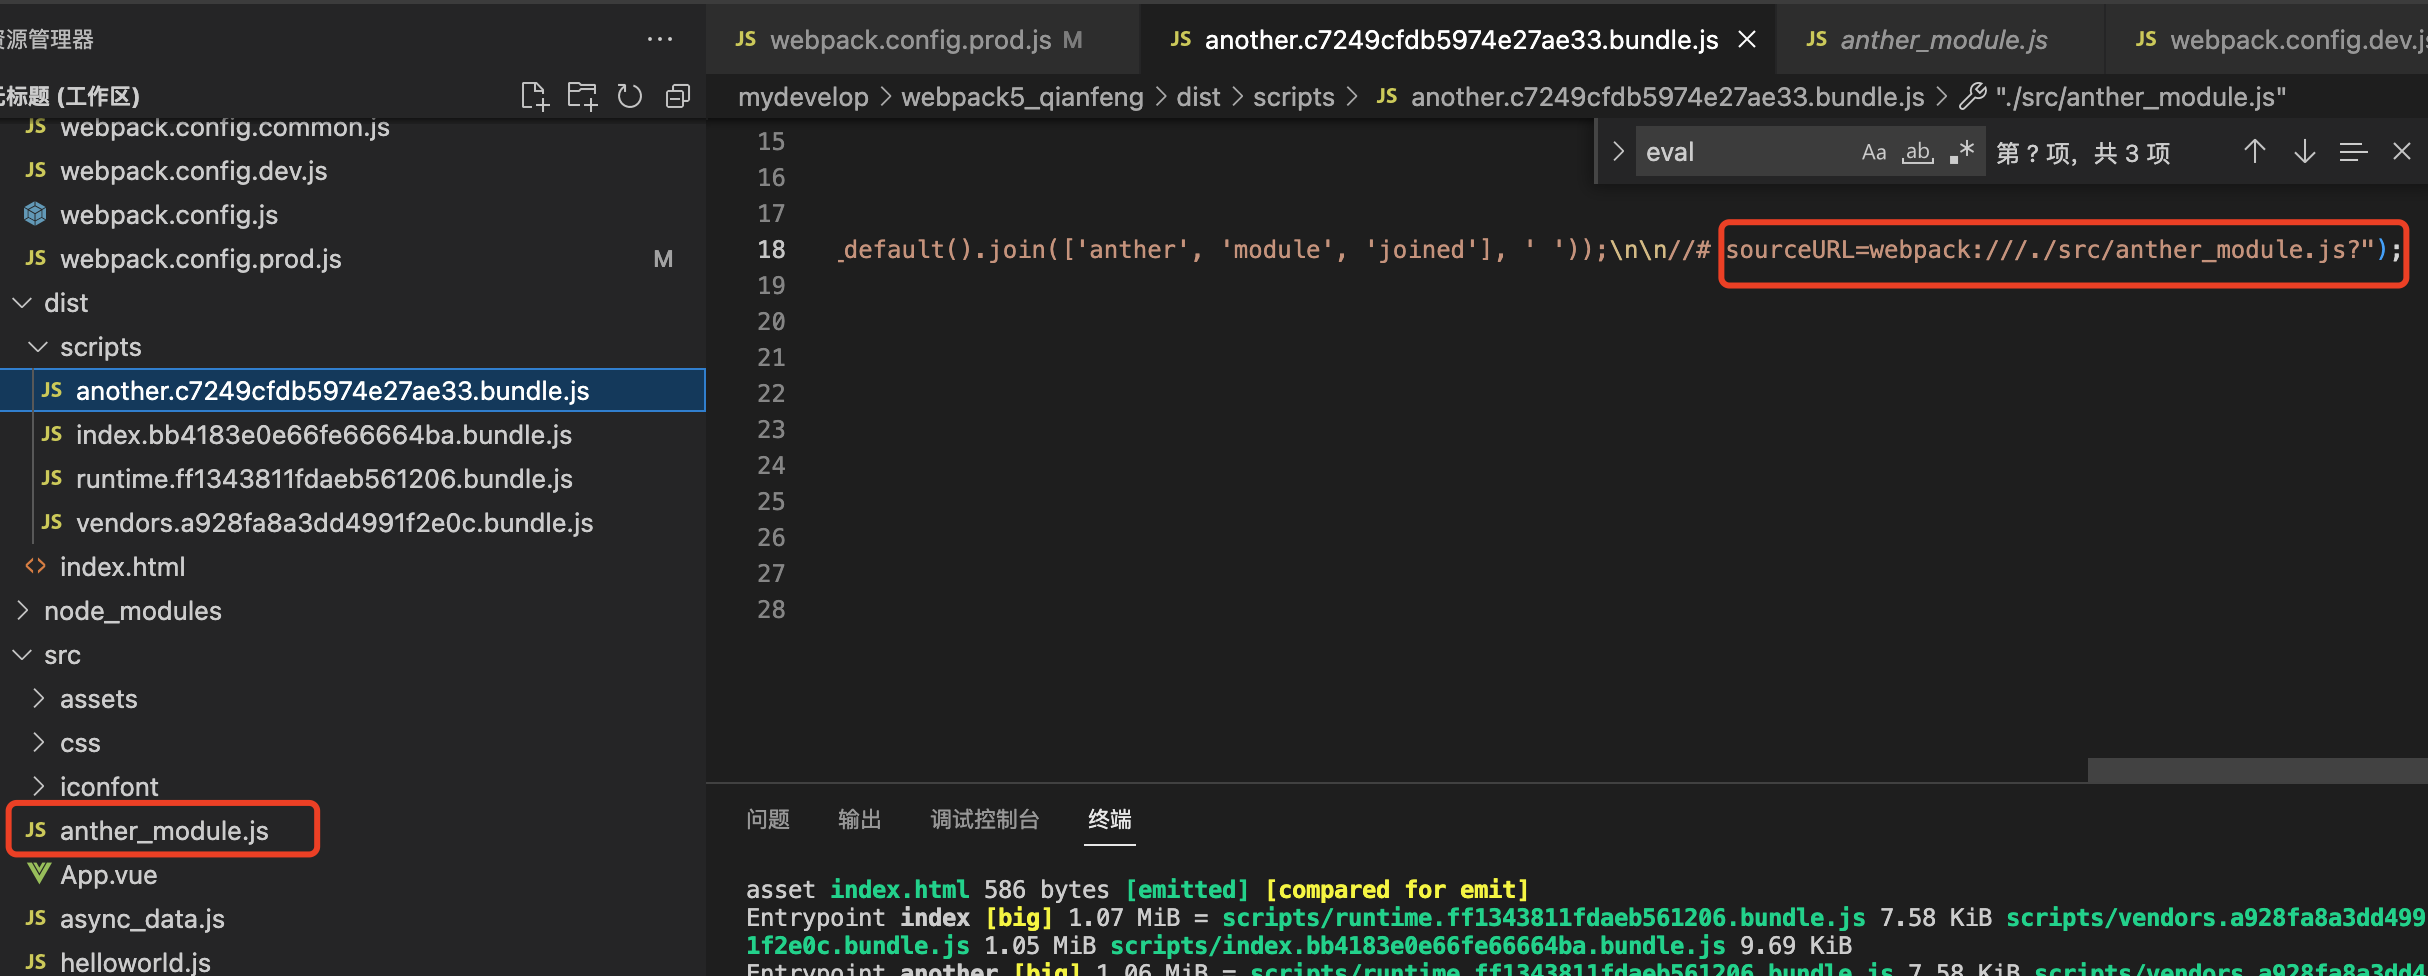
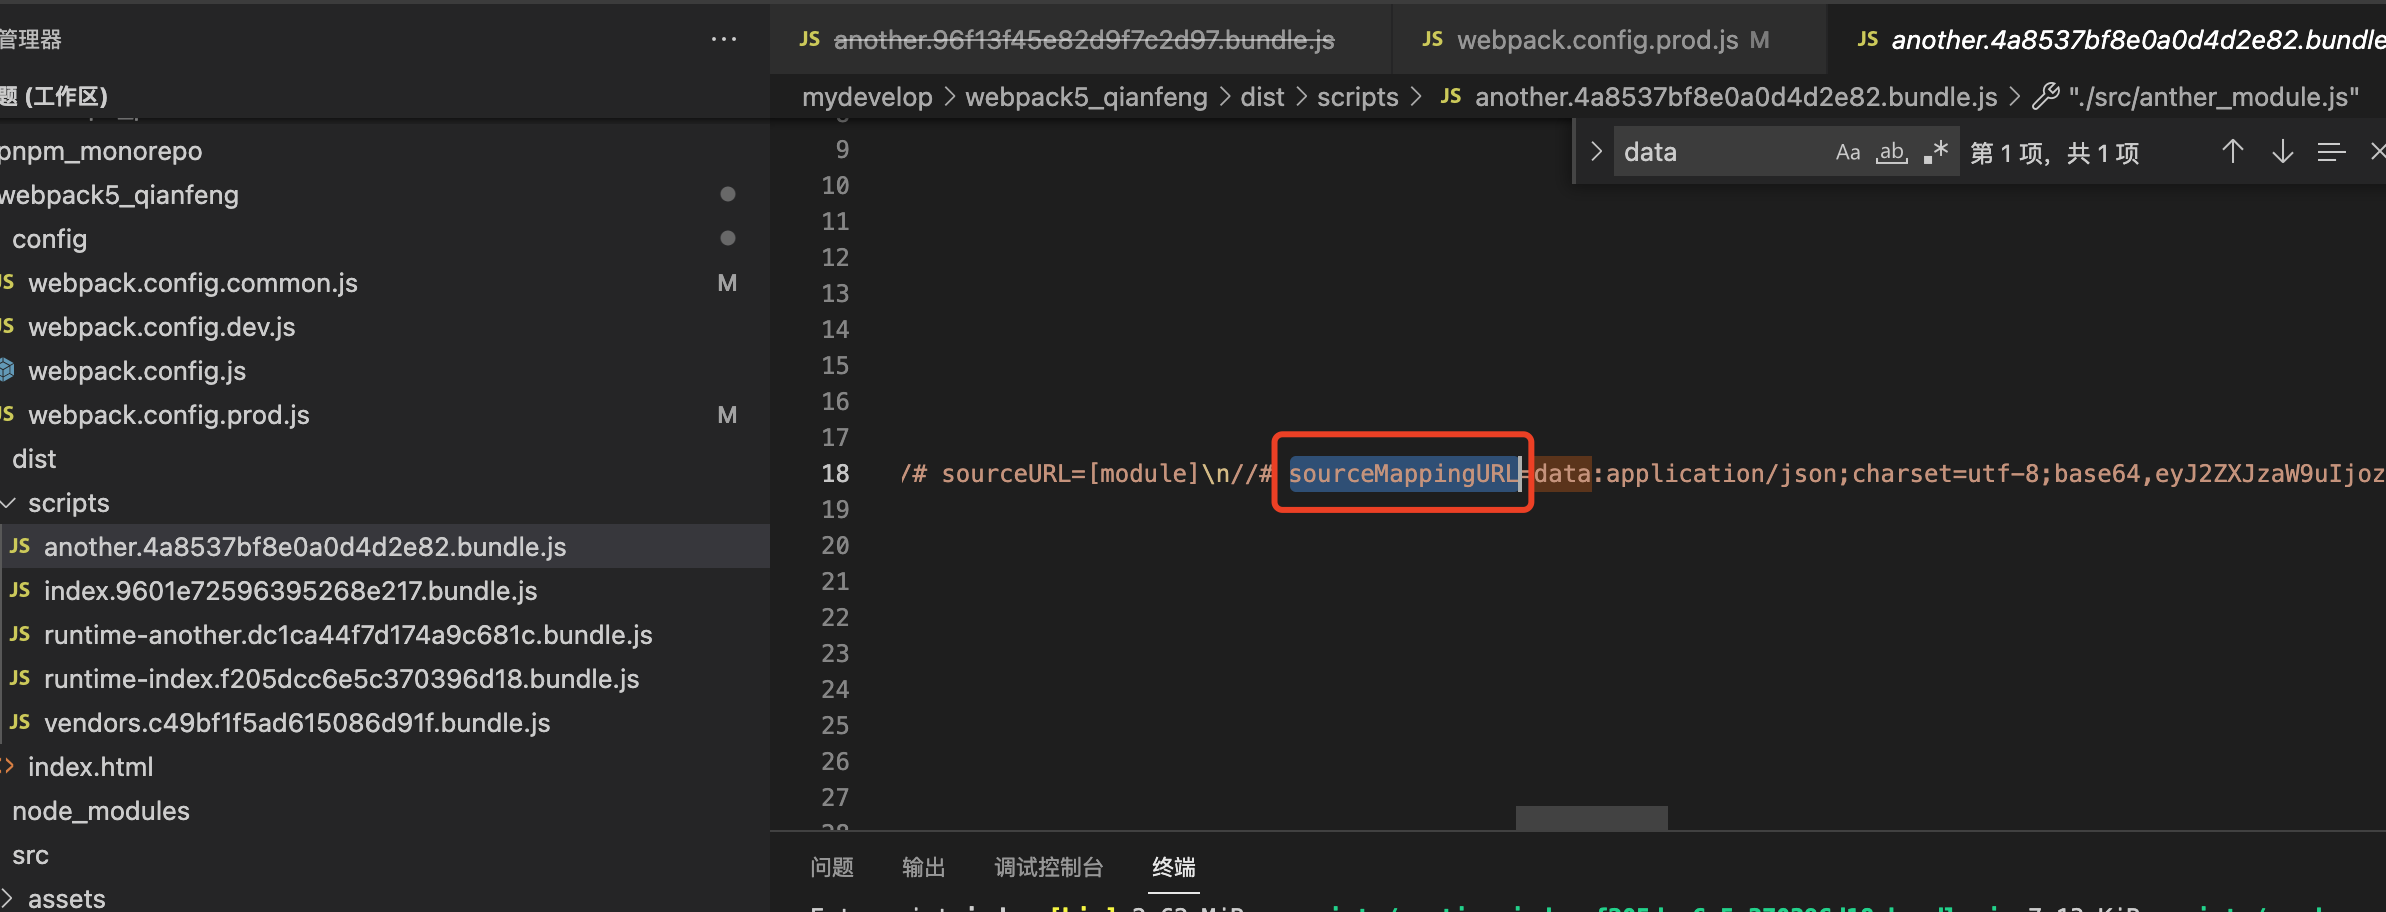
建议:开发环境,inline-source-map,生产环境:source-mapEval
特点:每个模块都会用eval包裹起来执行,仅开发环境支持,sourceURL指向资源路径
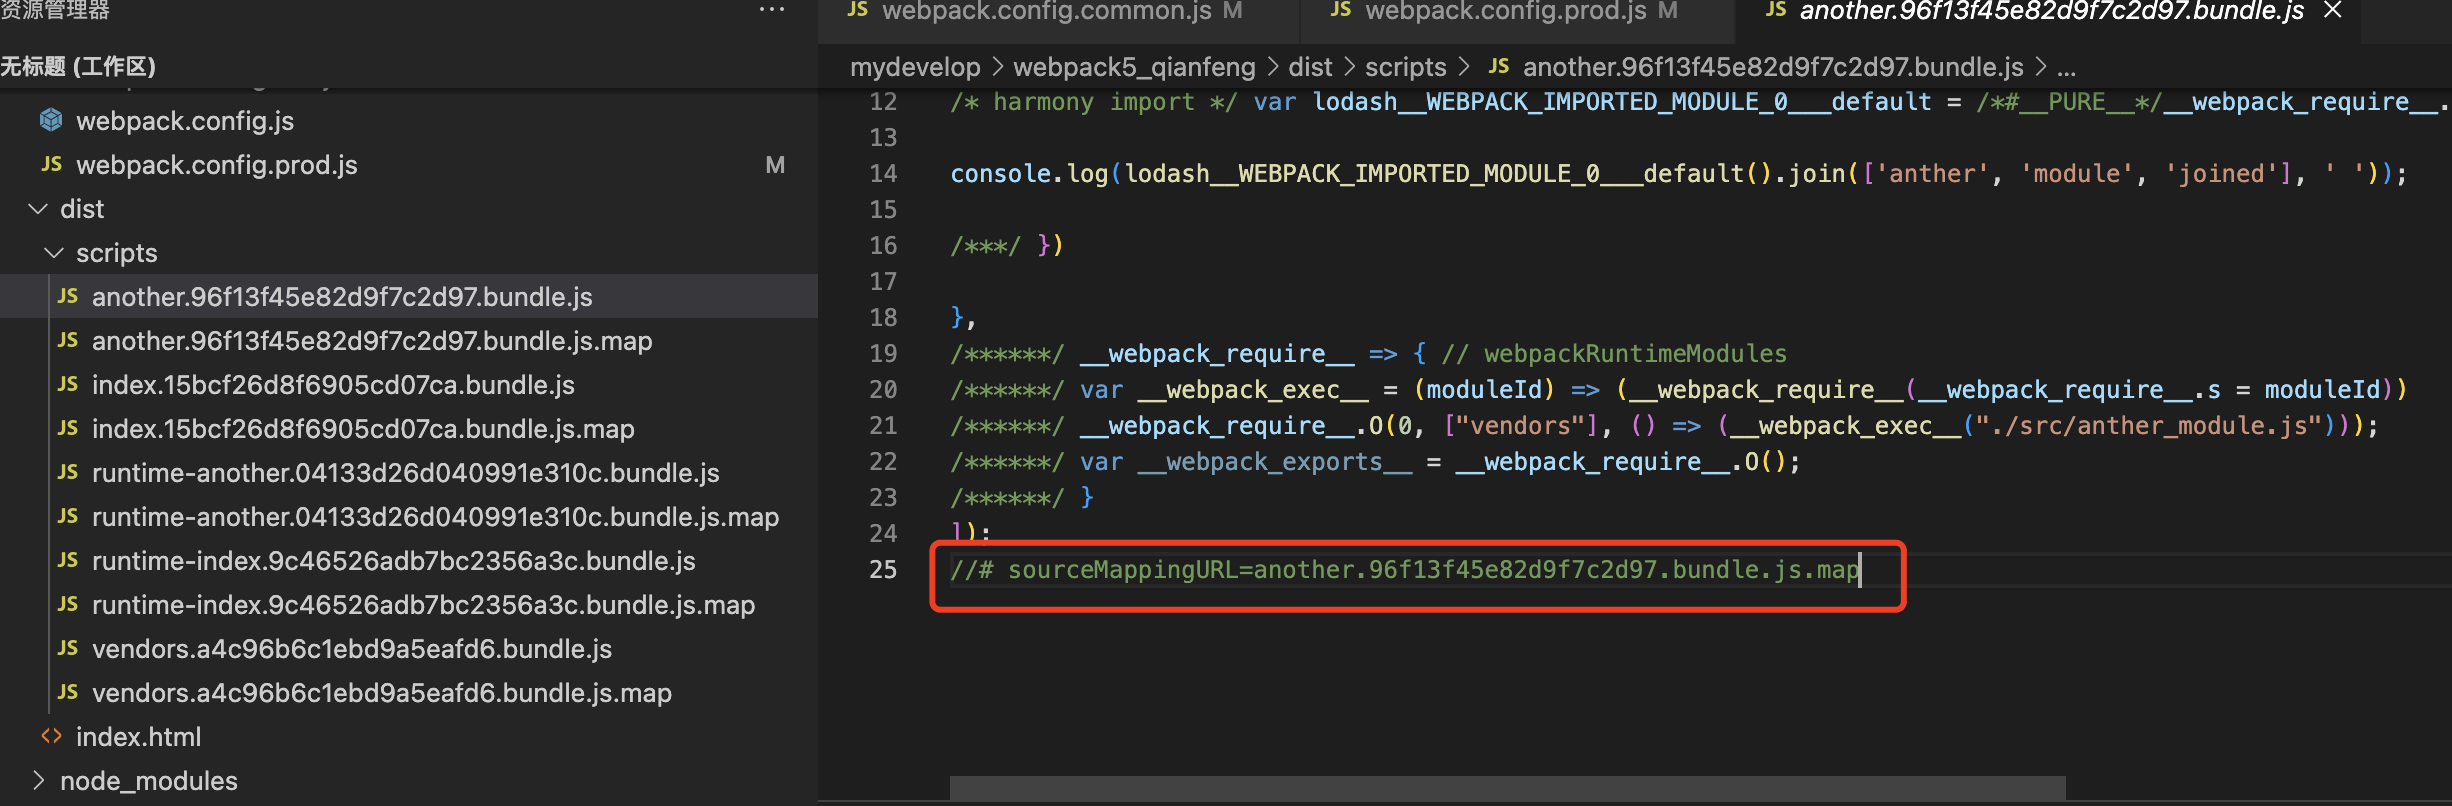
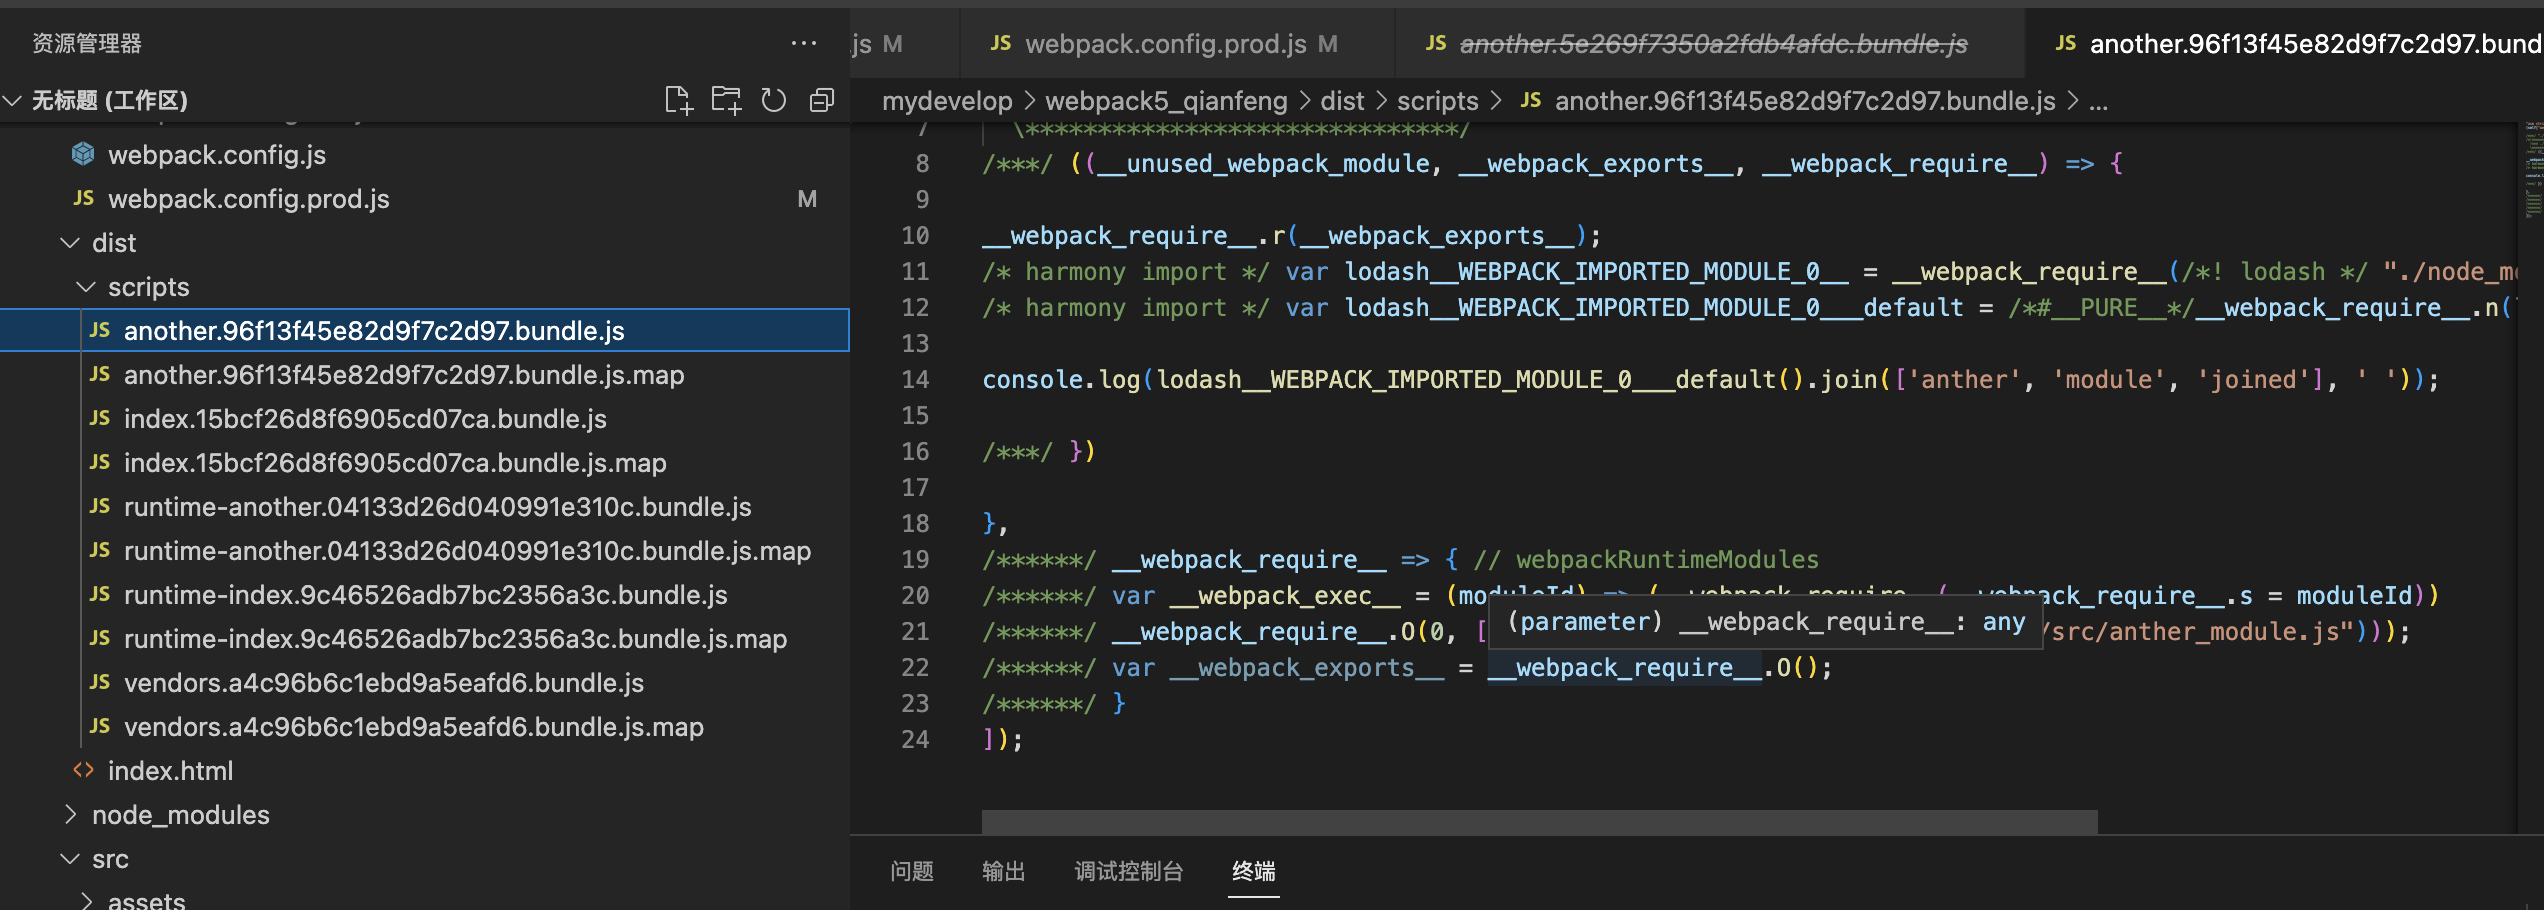
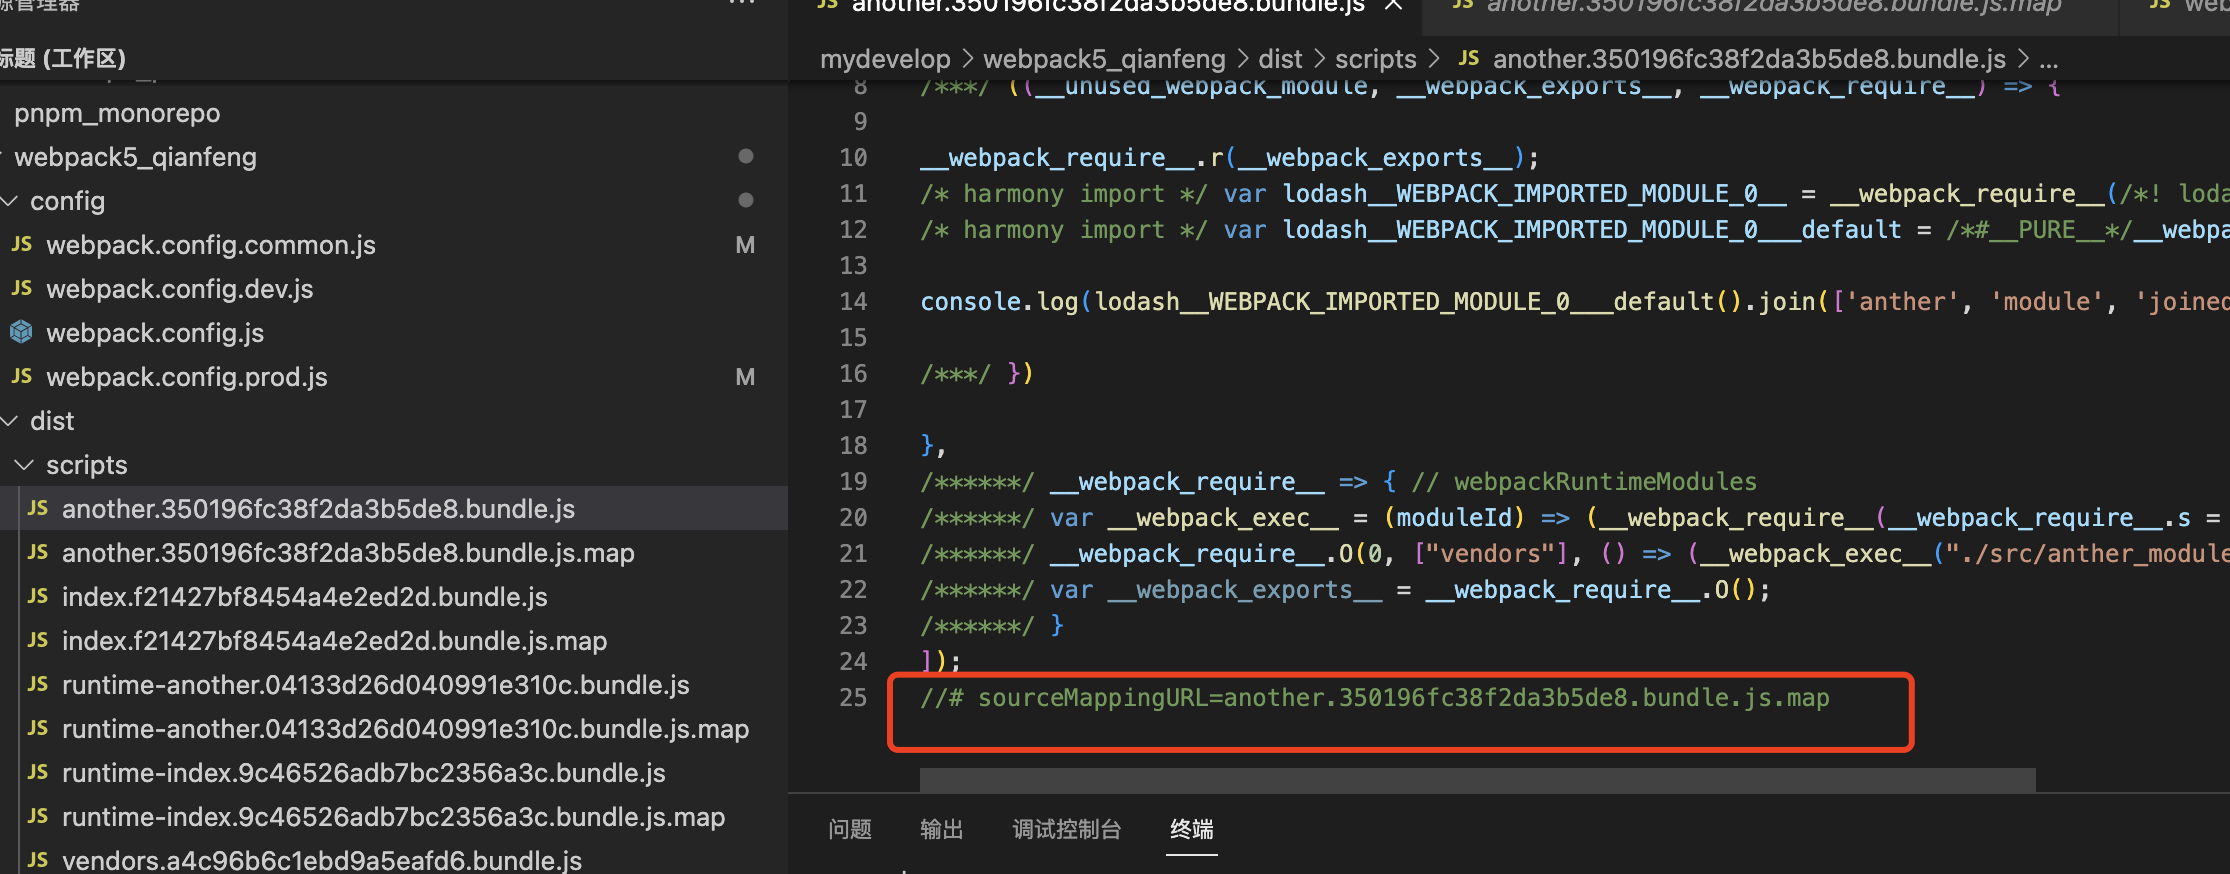
source-map
特点:生成一个sourceMap文件,sourceMappingURL指向资源路径
sourceMappingURL
Hidden-source-map
特点:和source-map一样,只是不会生成注释
Inline-source-map
特点:不会单独生成一个sourceMap文件
Eval-source-map
特点:每个module被eval包裹,并且生成一个sourceMappingURL形式的sourceMap

Cheap-source-map
特点:生成map文件,只记录代码行数,不记录代码列数
Cheap-module-source-map
特点:只是不显示列,排除各种loader对代码的影响
12、dev-server
proxy
const http = require('http')
const app = http.createServer((req,res) => {
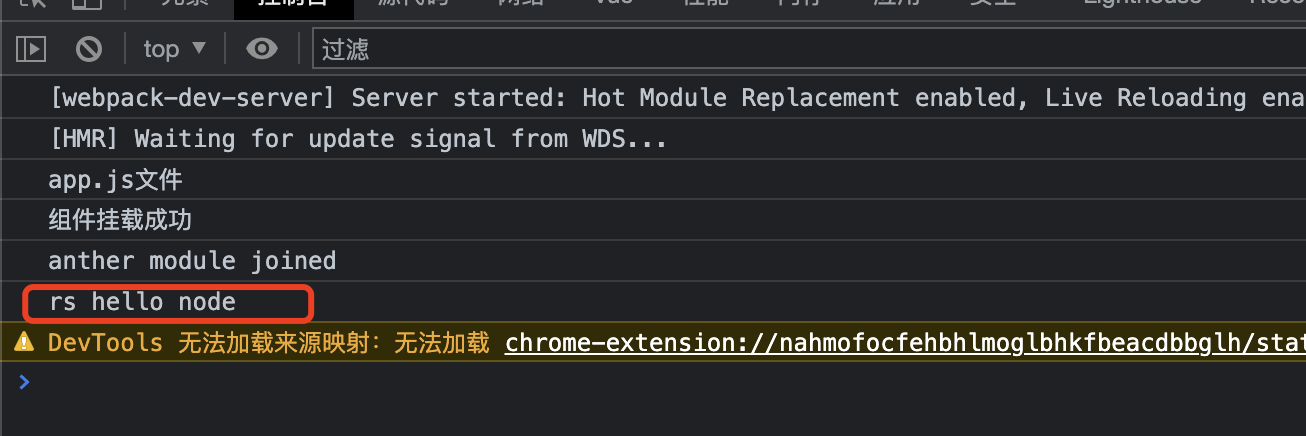
if(req.url === '/api/hello') {
res.end('hello node')
}
})
app.listen(9000, 'localhost', () => {
console.log('localhost:9000')
})fetch('/api/hello')
.then(response => response.text())
.then(res => {
console.log('rs', res)
})
.catch(err => {
console.log('err', err)
})devServer: {
// static: './dist',
hot: true,
open: true,
proxy: {
'/api': 'http://localhost:9000'
}
},
以上这种方式是路径拼接方式
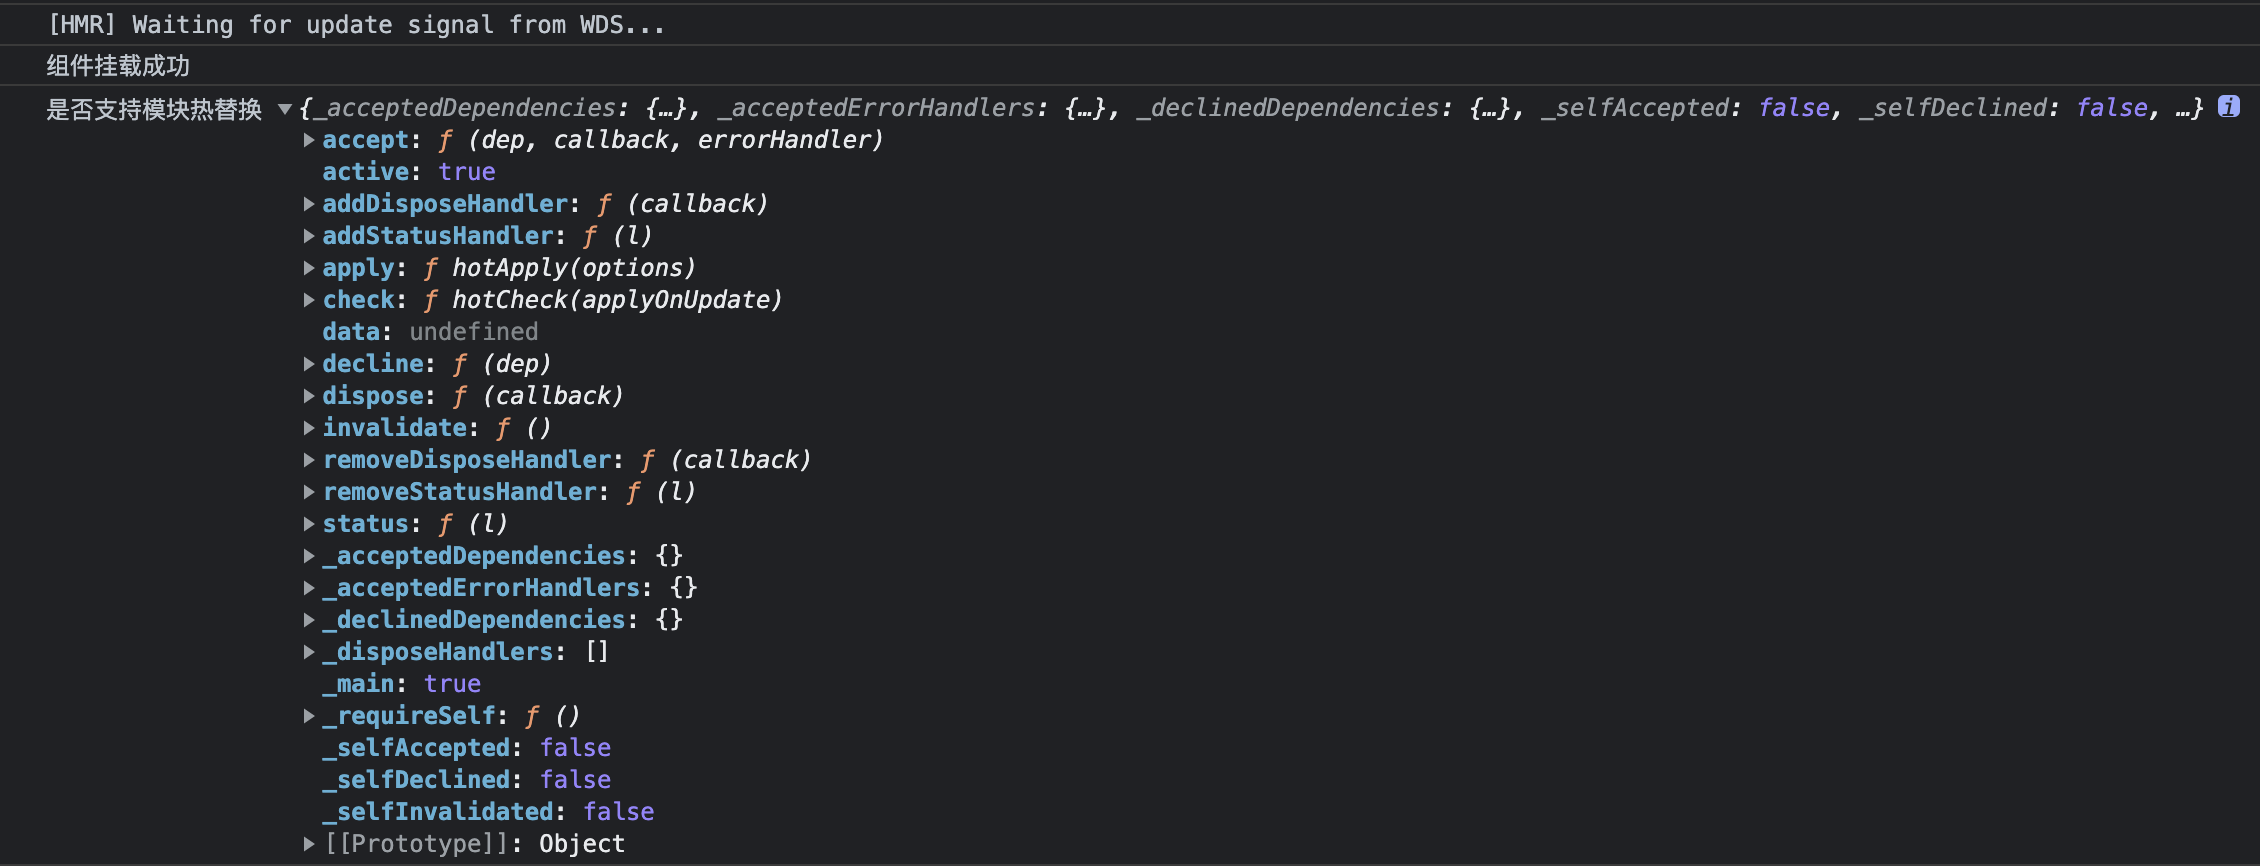
13、模块热替换、热加载
热替换:程序运行过程中,增删改模块,无需重新加载整个页面, 即hot
举例:动态生成5个绿色矩形,代码修改css样式为红色,开启hot后会5个绿色矩形变红色矩形,而不是整个页面重刷一遍。
原因:css-loader已经支持module.hot
热加载:修改模块后,自动刷新服务和页面, 即liveReload
// 判断当前是否支持模块热替换(本质:检查devServer是否开启hot属性)

console.log('是否支持模块热替换', module.hot)

// if(module.hot) {
//     module.hot.accept('某模块文件.js', () => {
//         console.log('这里是回调函数')
//     })
// }
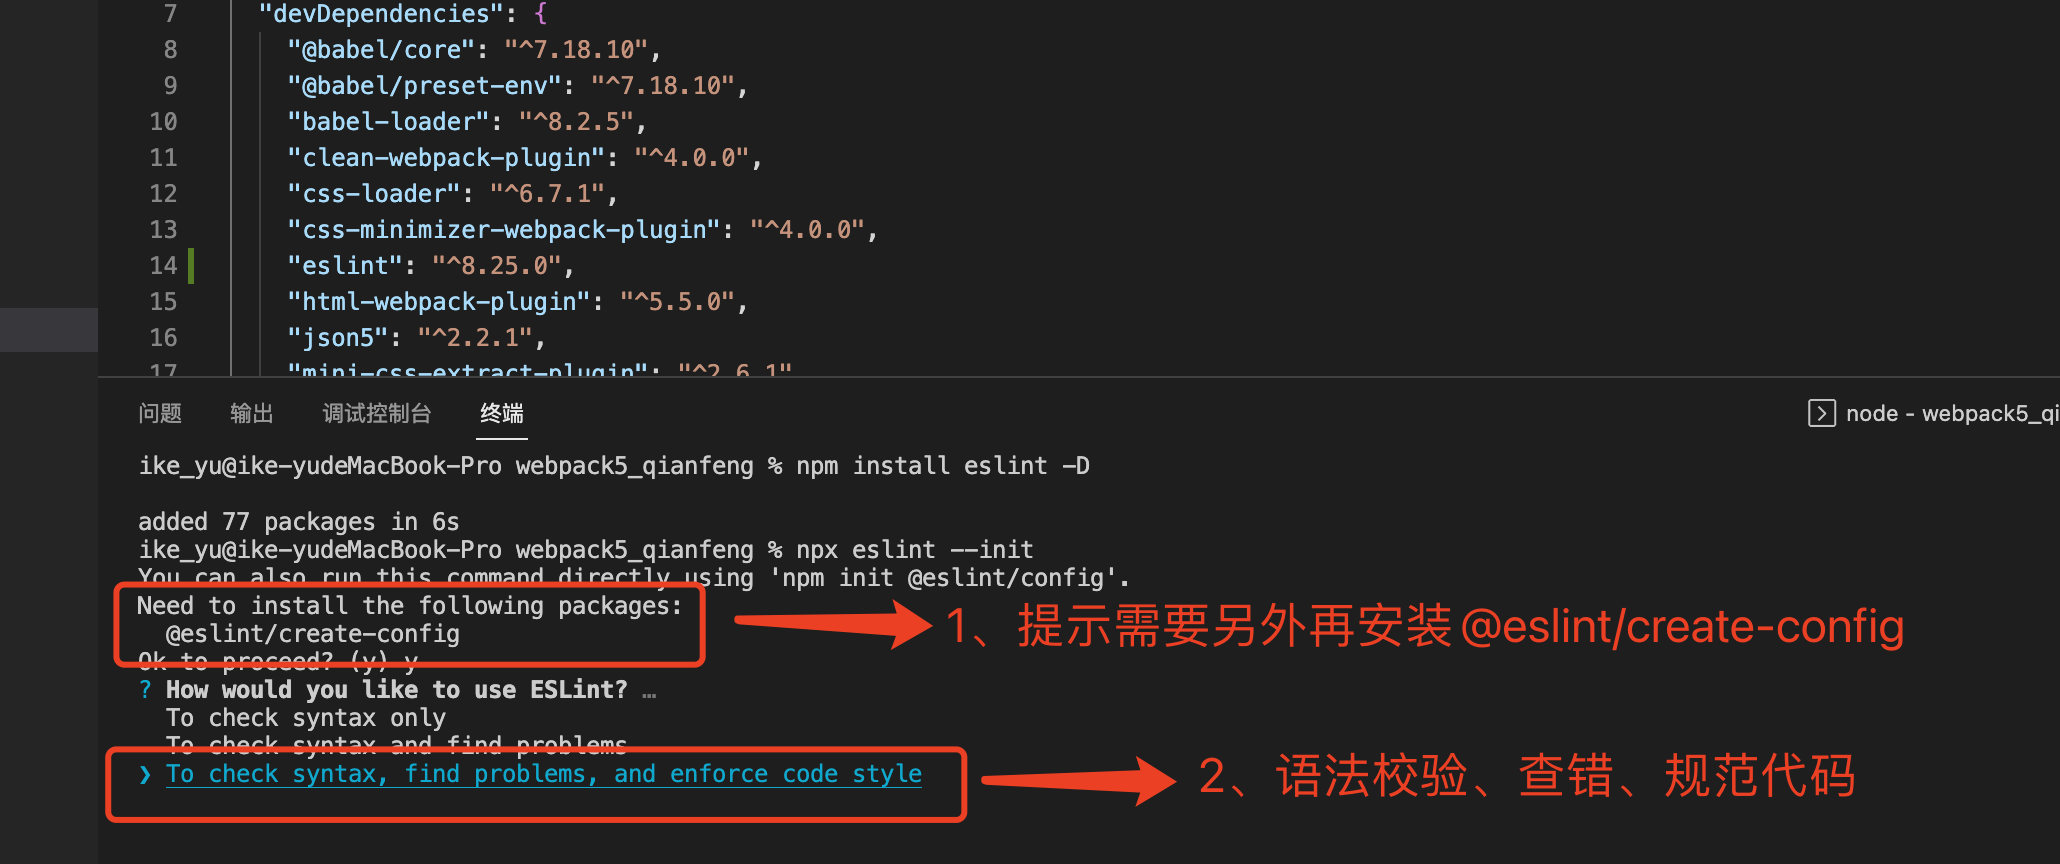
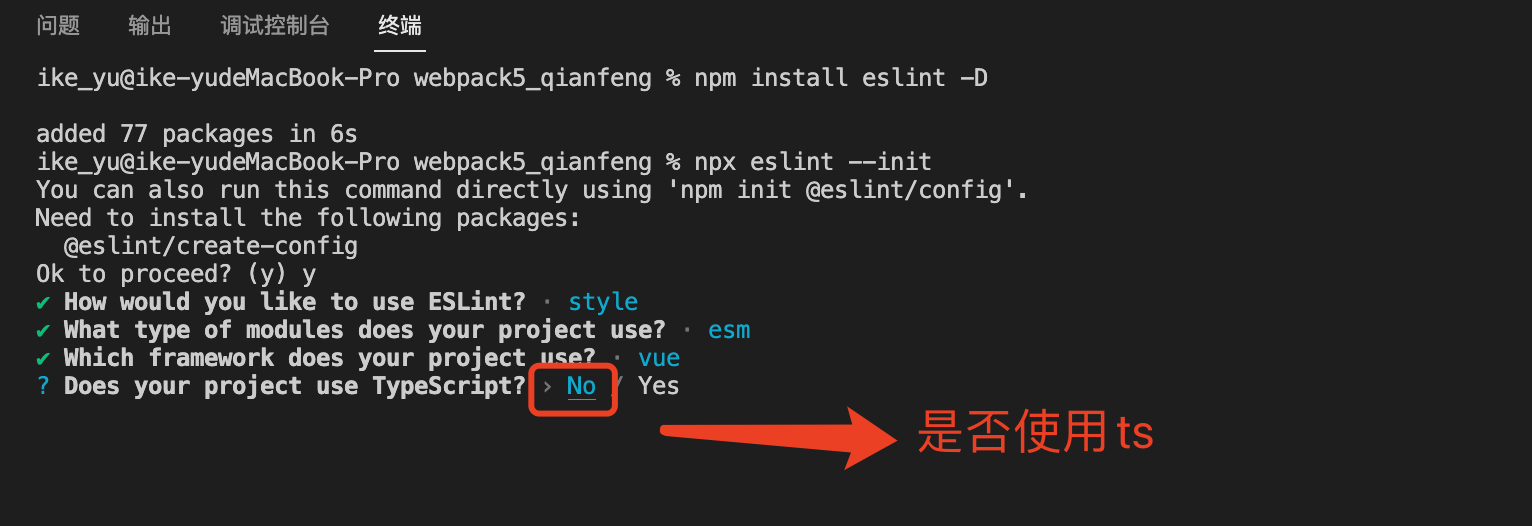
14、eslint
作用:一个扫描所写代码是否符合统一规范的工具。
注意:新版eslint初始化会出现下列问题
Need to install the following packages:
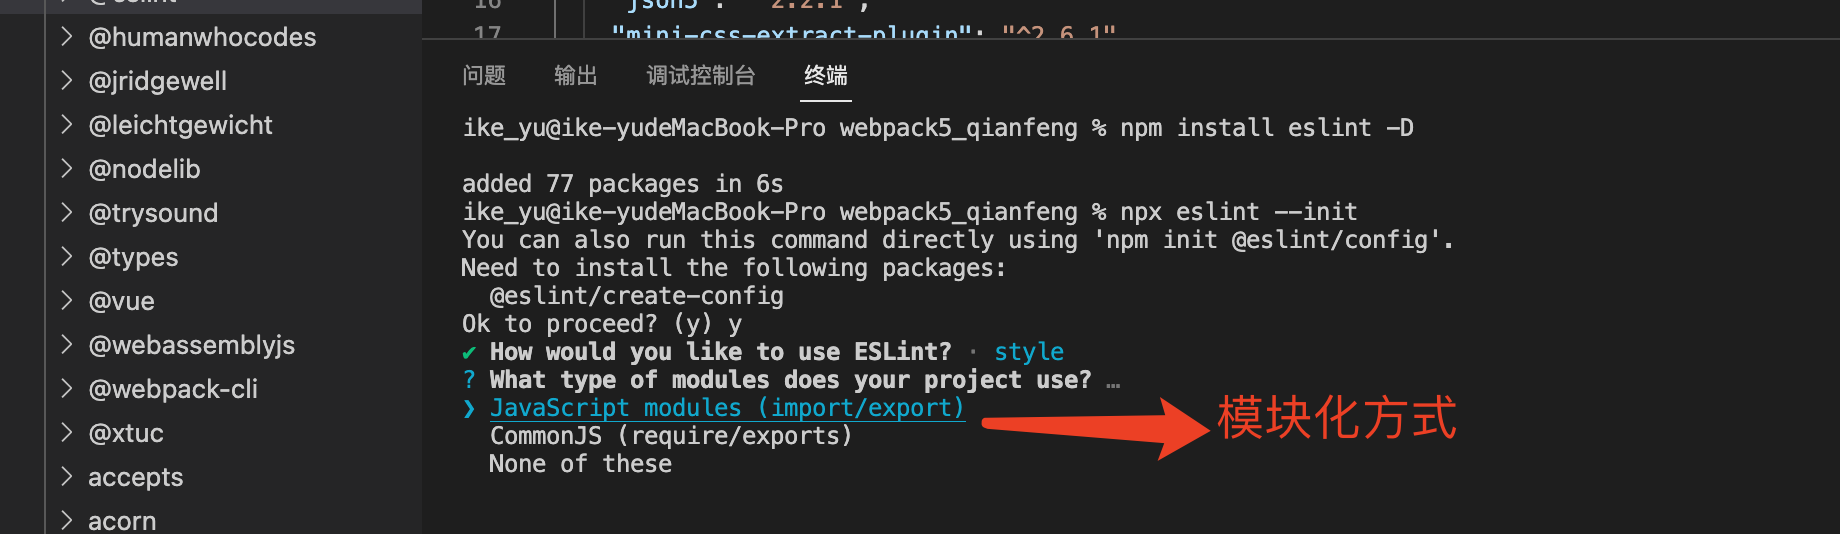
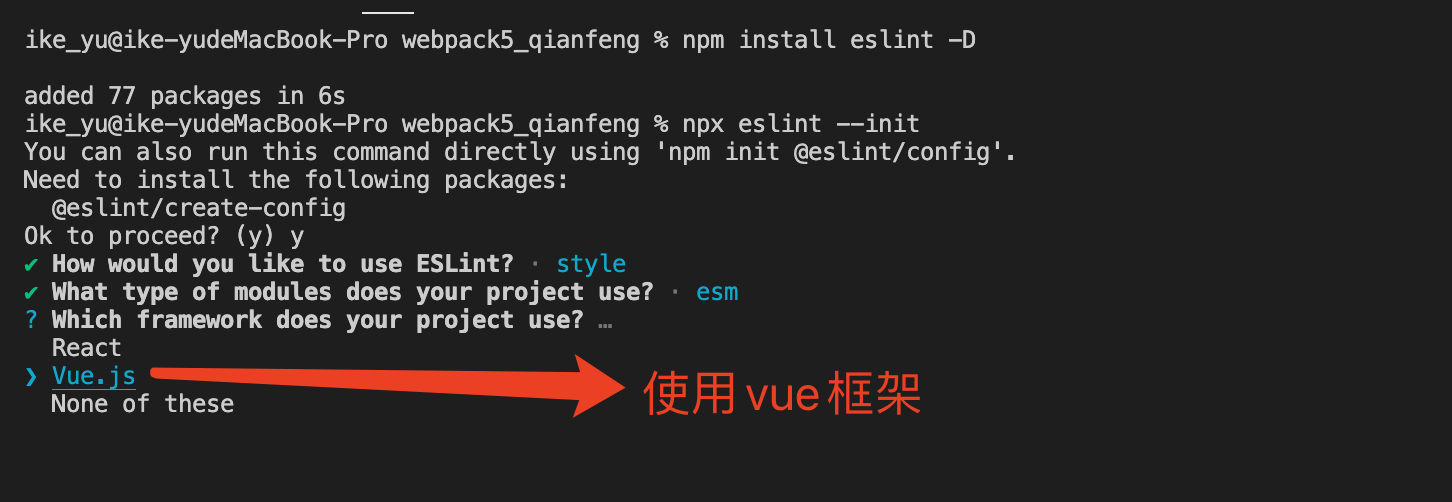
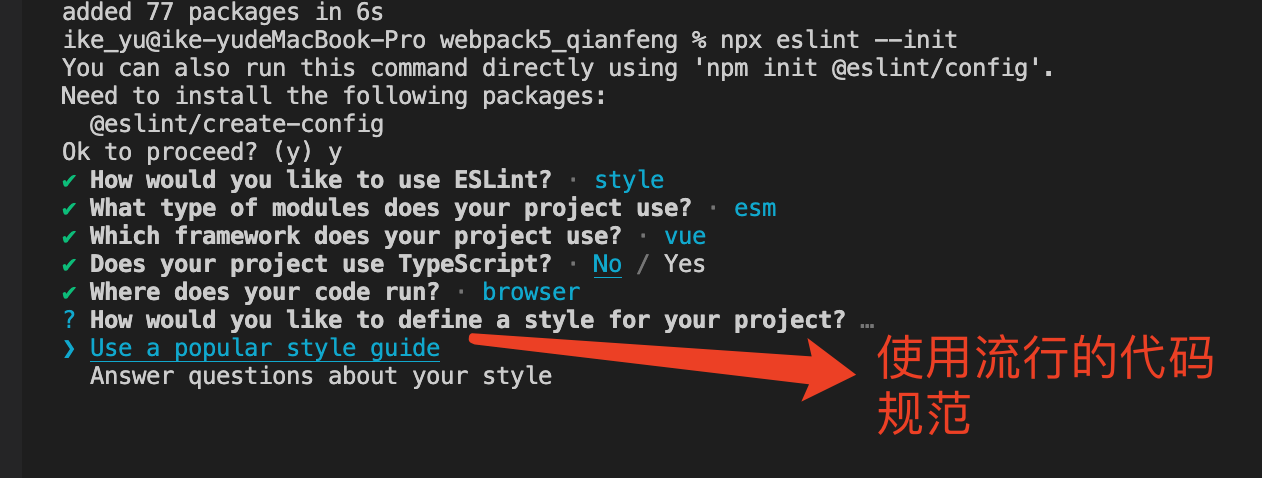
@eslint/create-config初始化配置

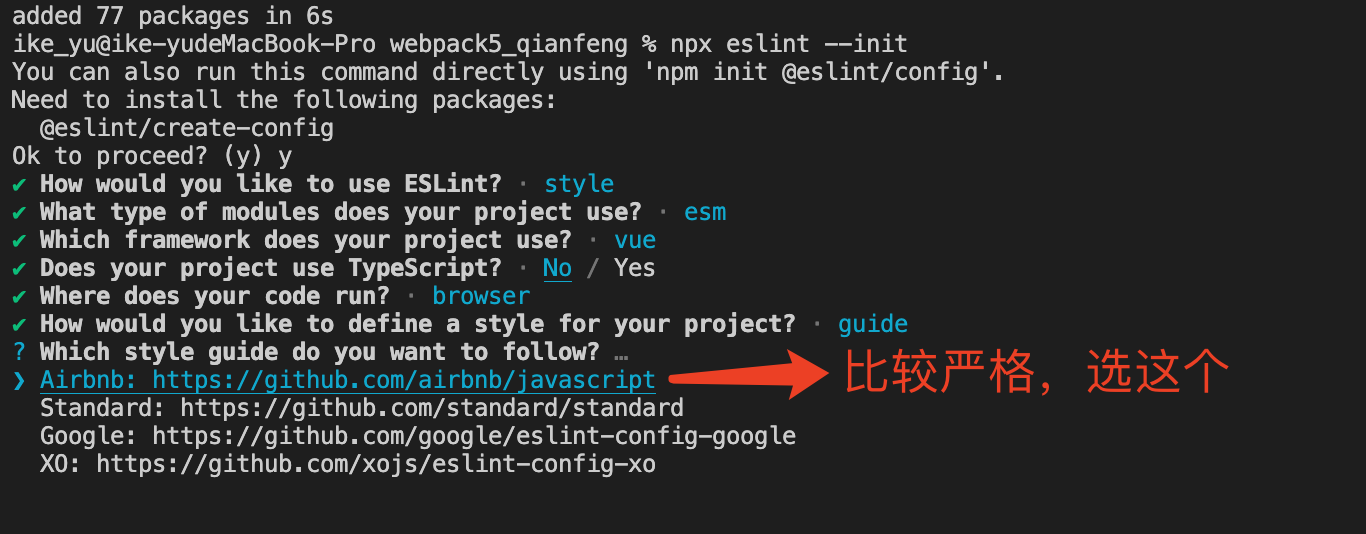

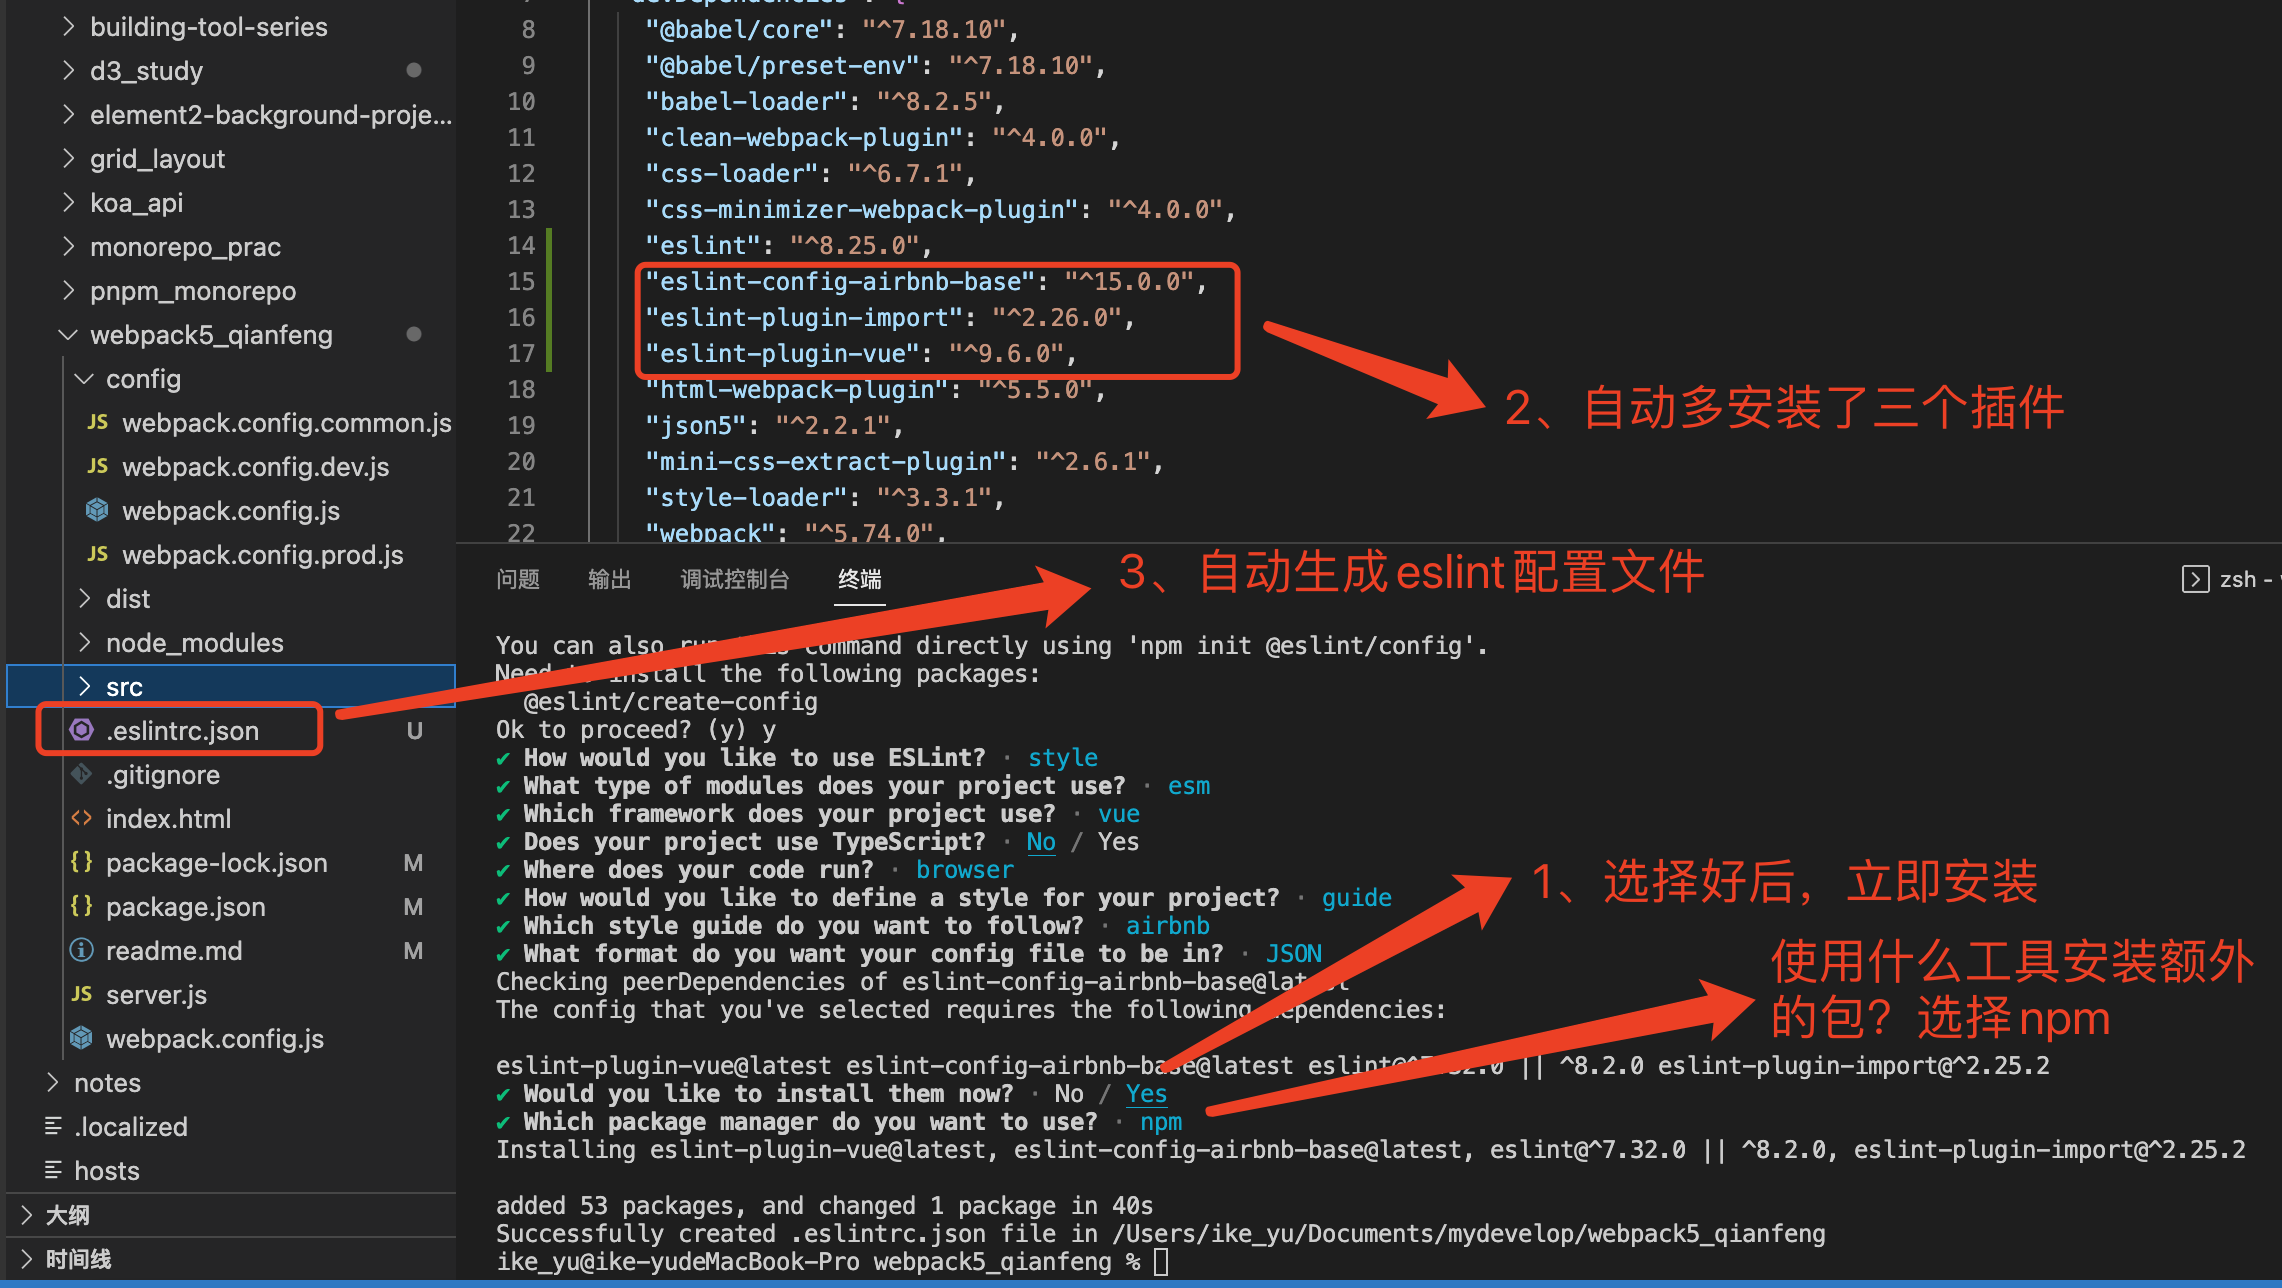
"eslint-config-airbnb-base": "^15.0.0", // 选择的airbnb规范
"eslint-plugin-import": "^2.26.0", // 模块化方式选择了import、export
"eslint-plugin-vue": "^9.6.0", // 选择的vue框架
{
"env": {
"browser": true,
"es2021": true
},
"extends": [
"plugin:vue/vue3-essential",
"airbnb-base"
],
"overrides": [
],
"parserOptions": {
"ecmaVersion": "latest",
"sourceType": "module"
},
"plugins": [
"vue"
],
"rules": {
}
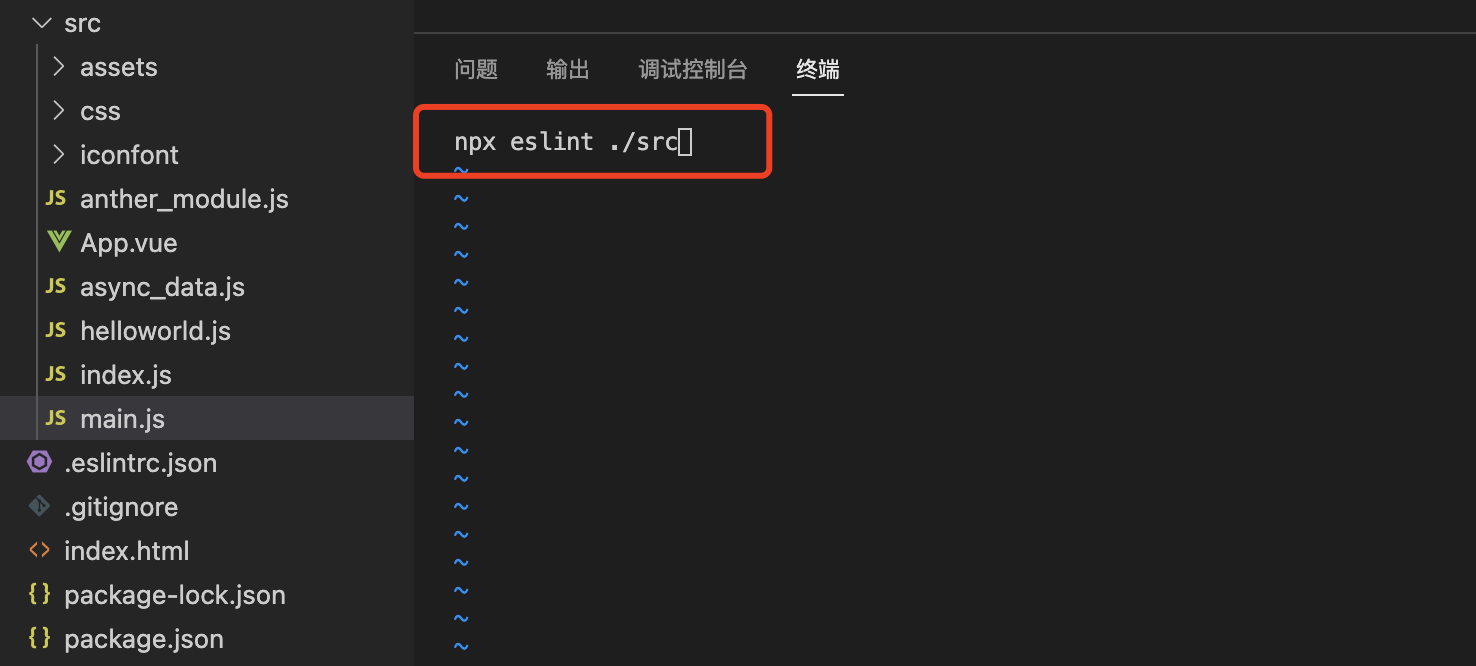
}检查指定文件
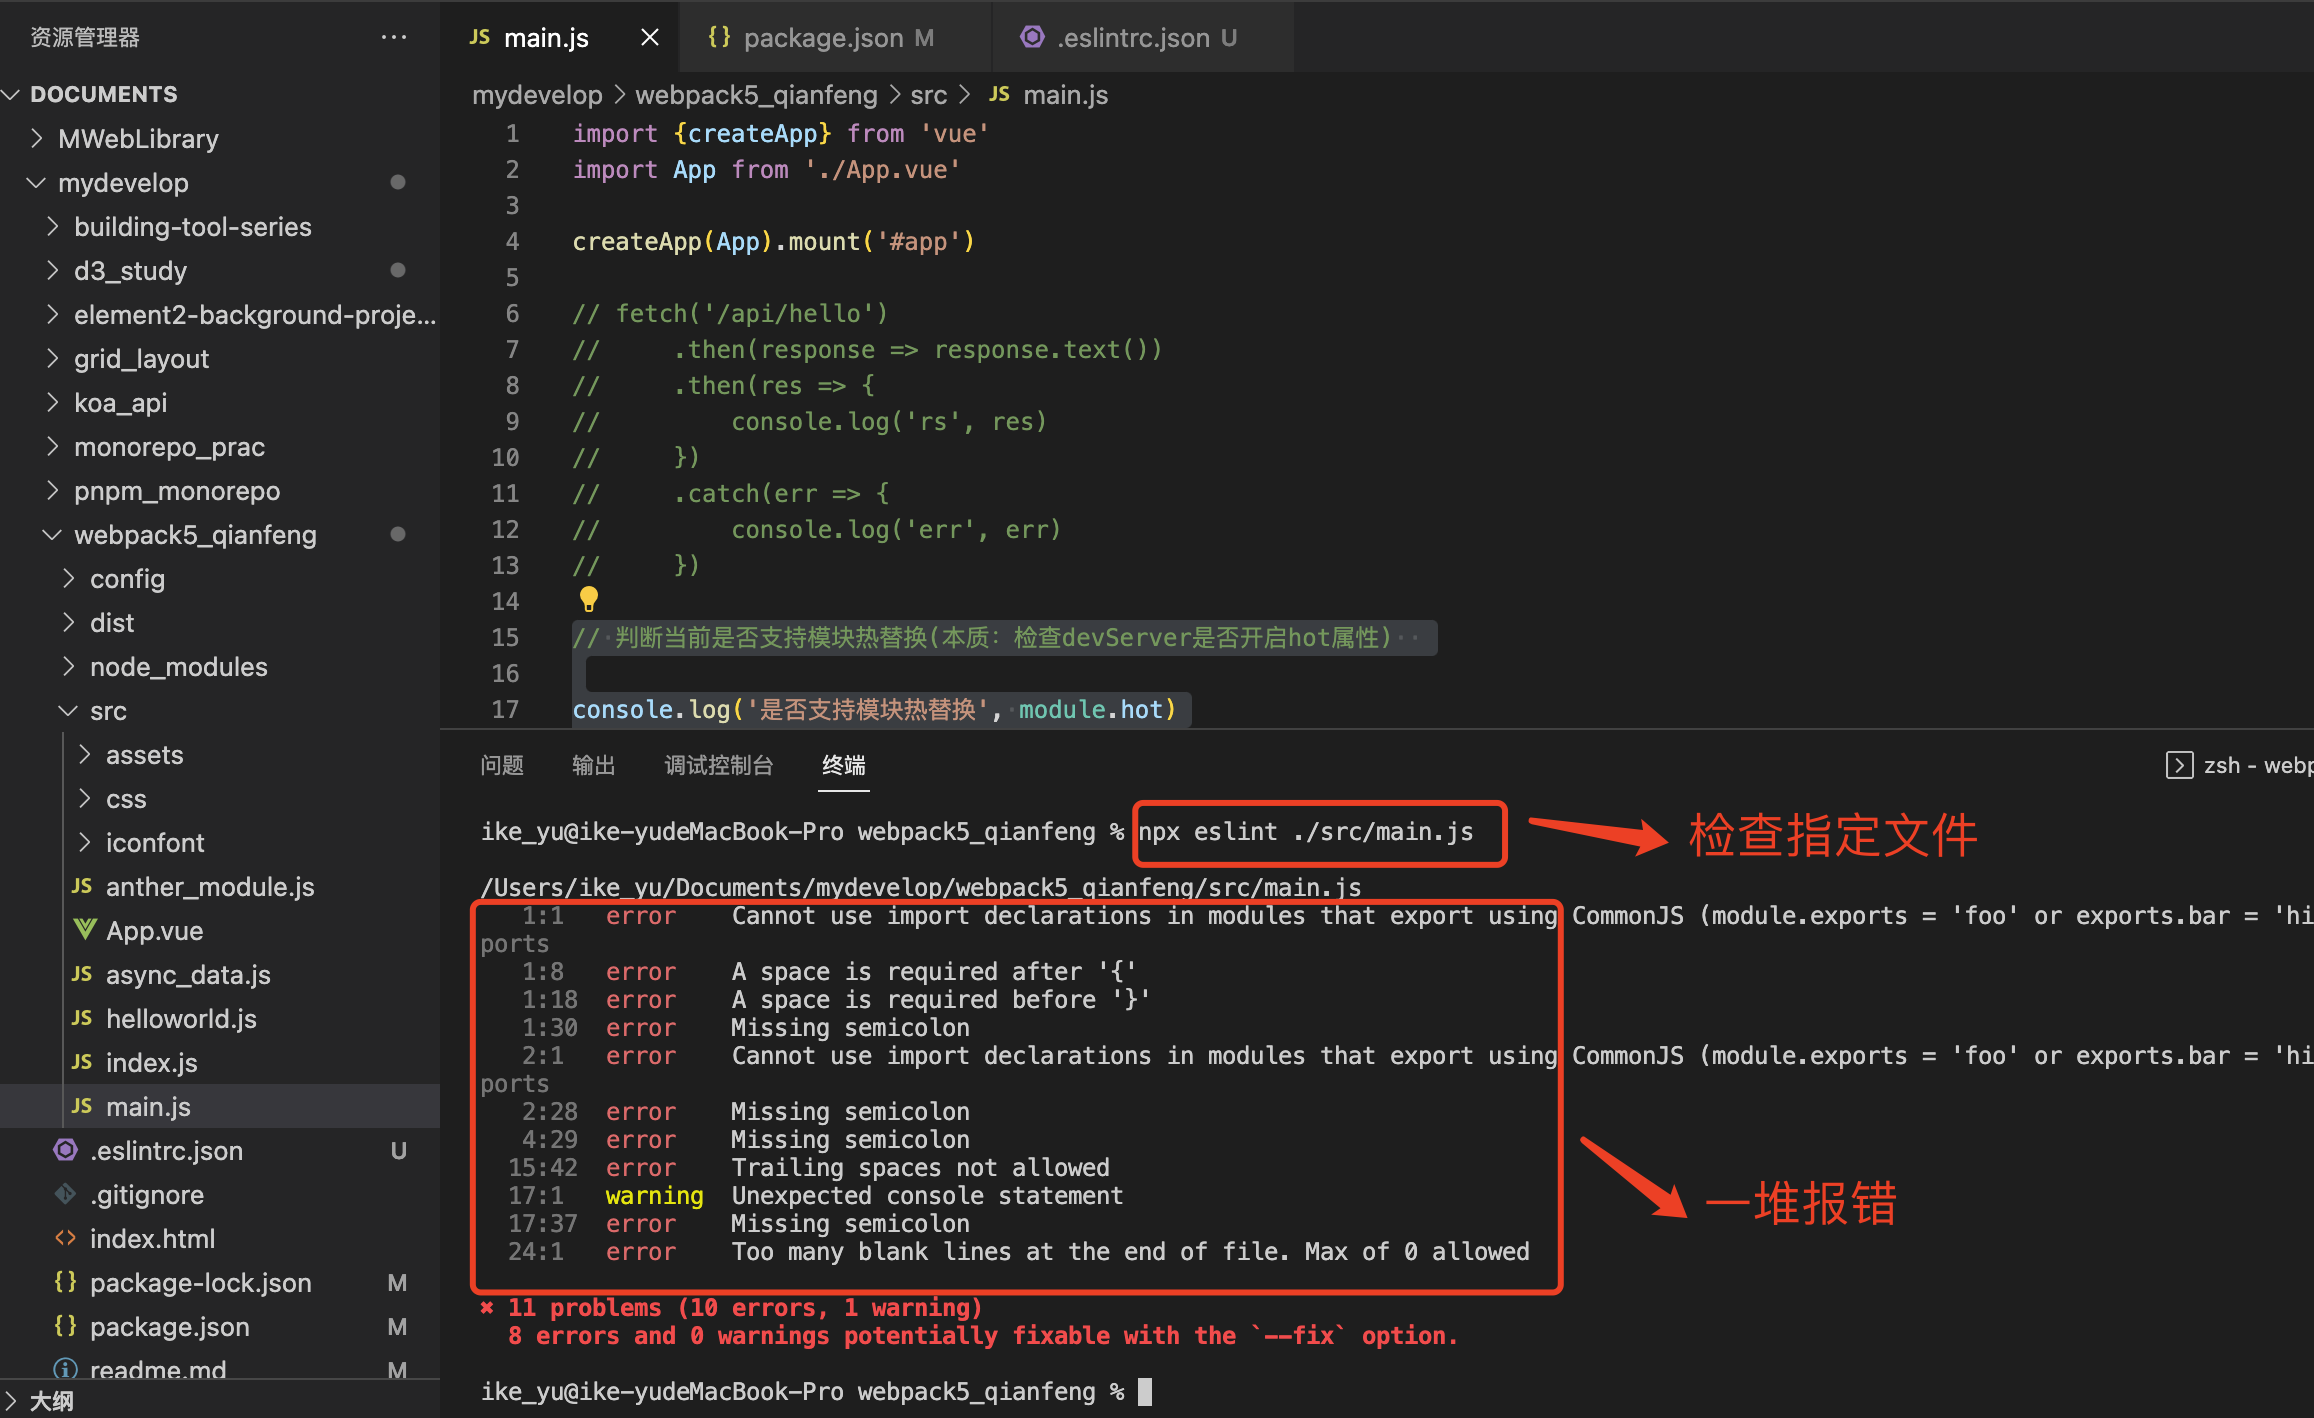
npx eslint ./src/main.js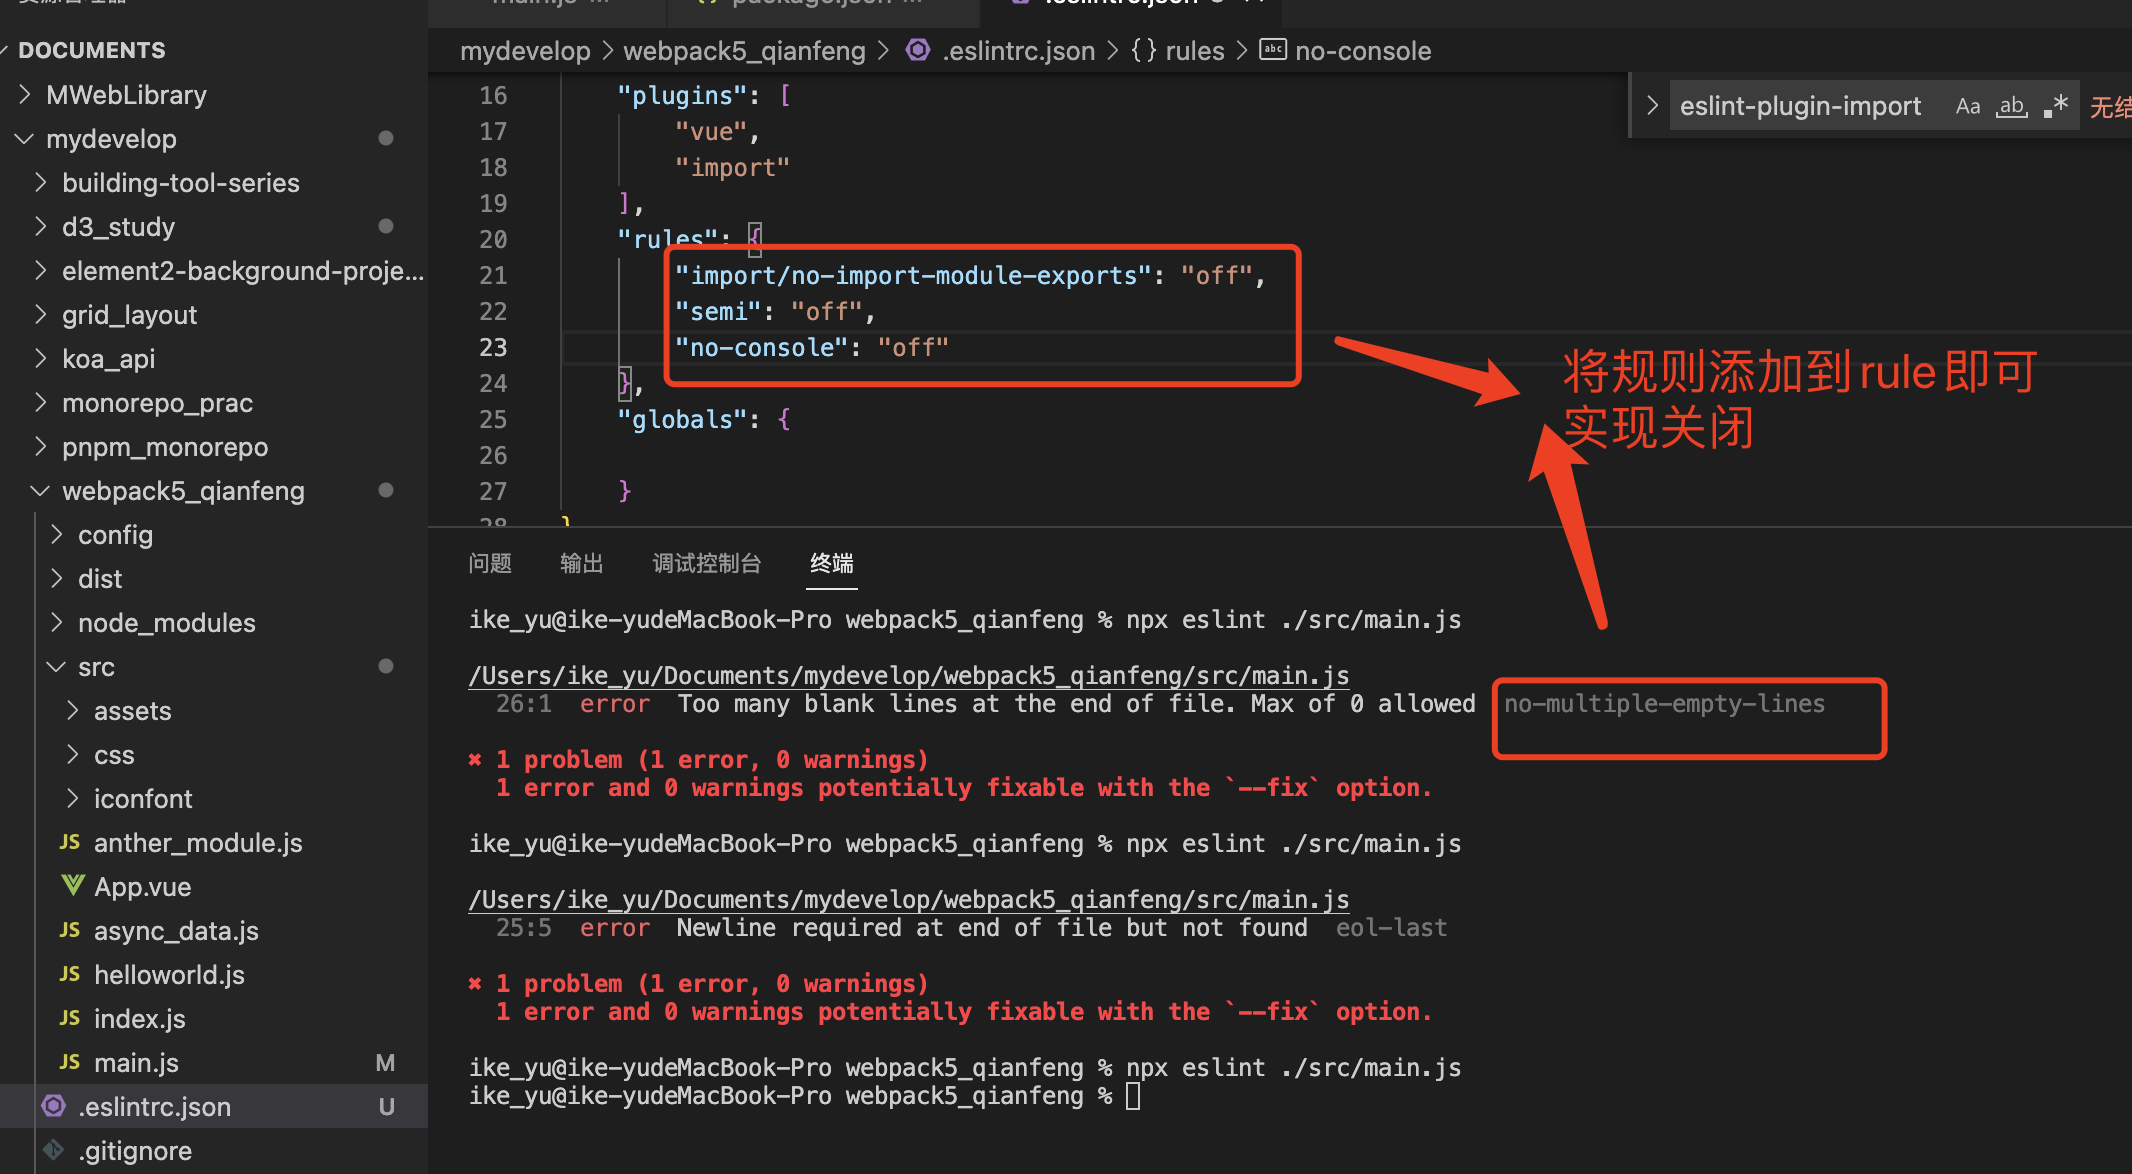
保存即检测
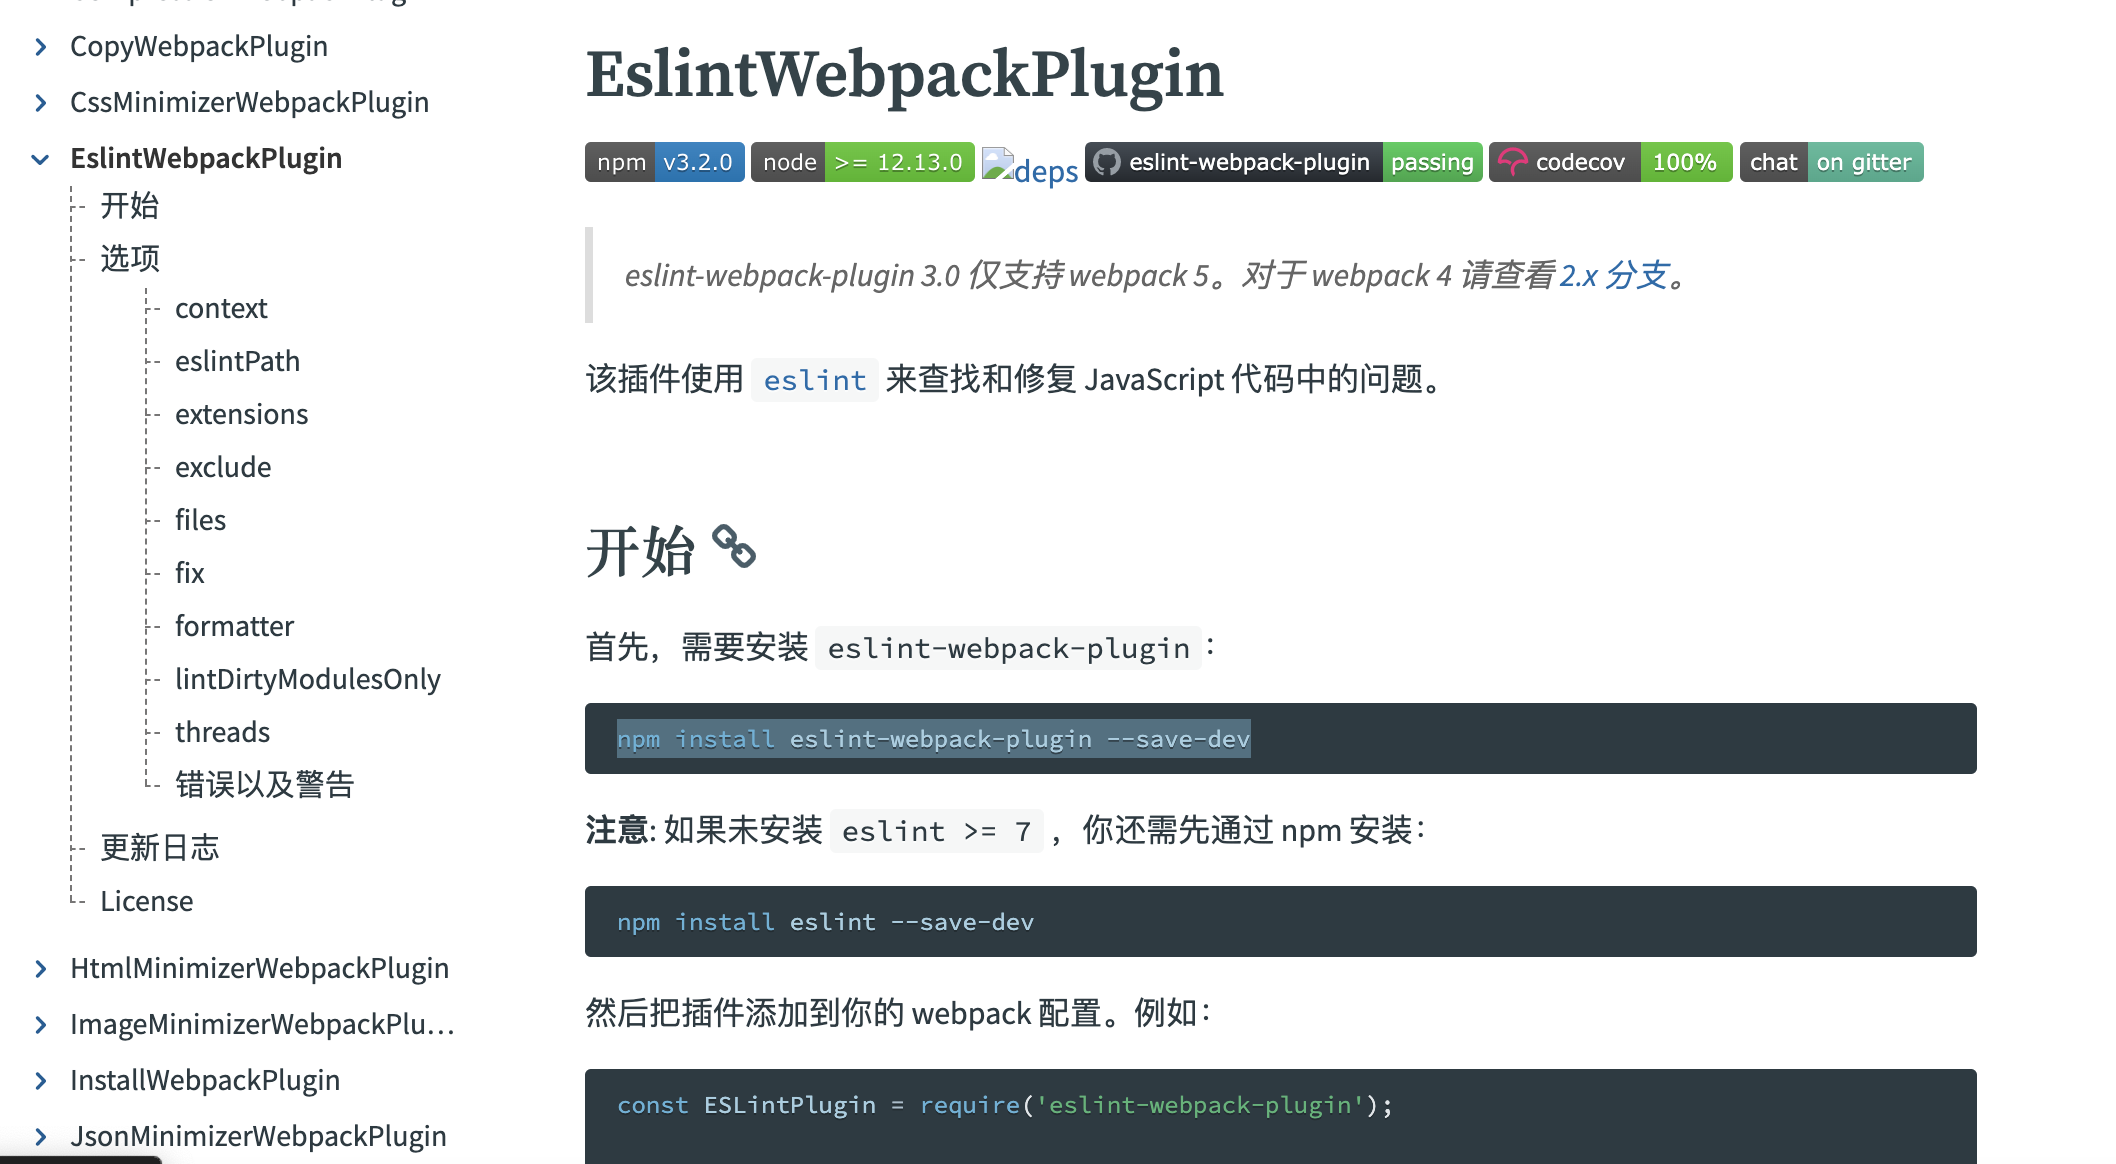
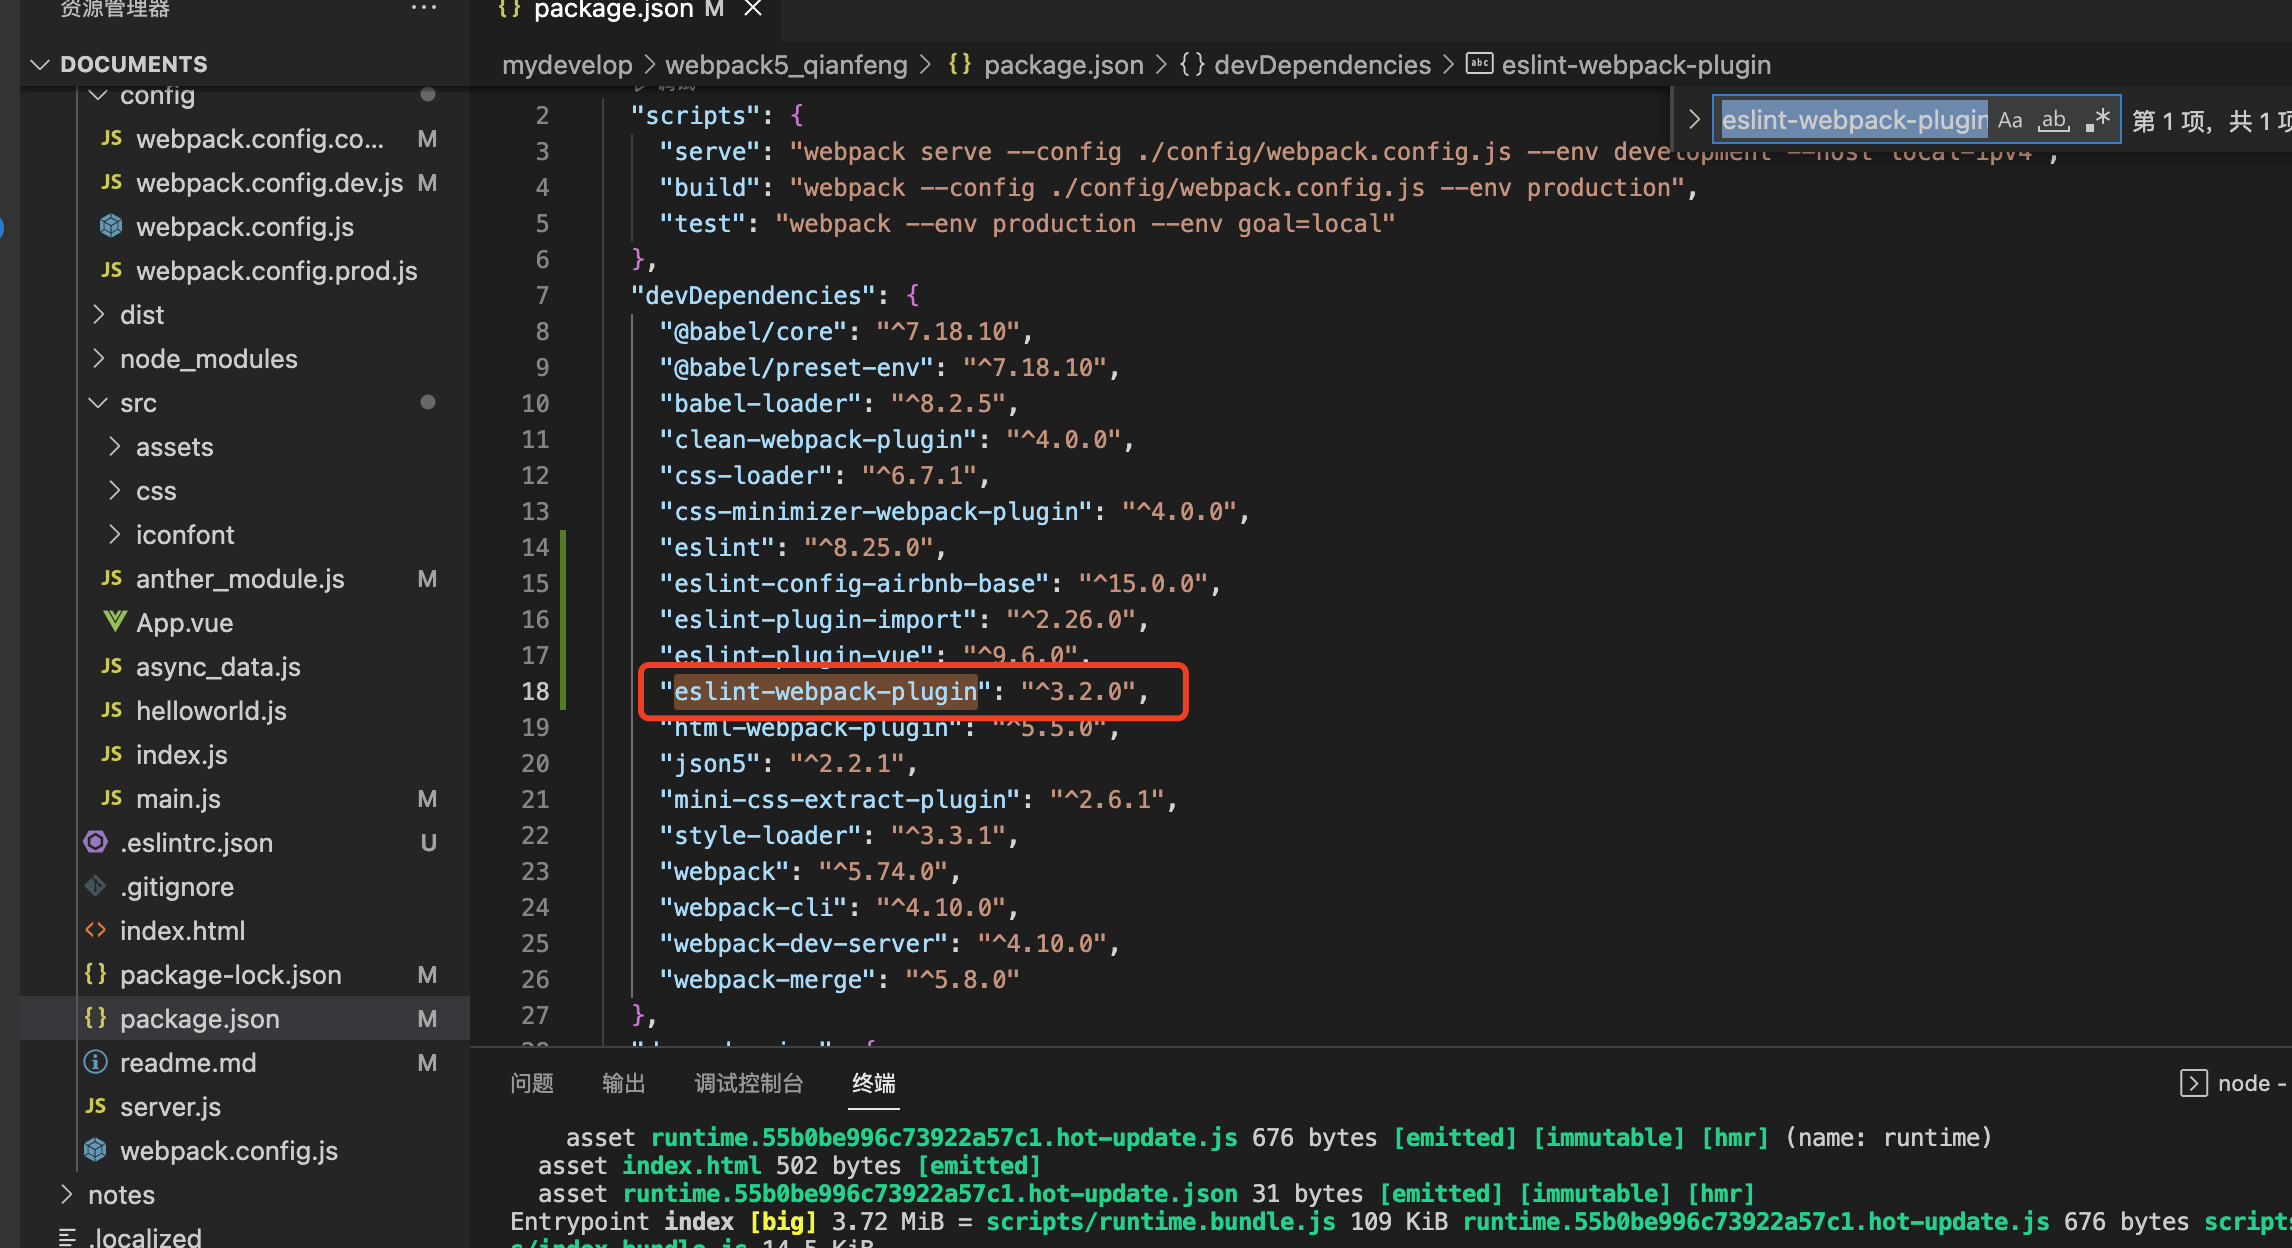
需要借助webpack的eslint-webpack-plugin,老版借助eslint-loader
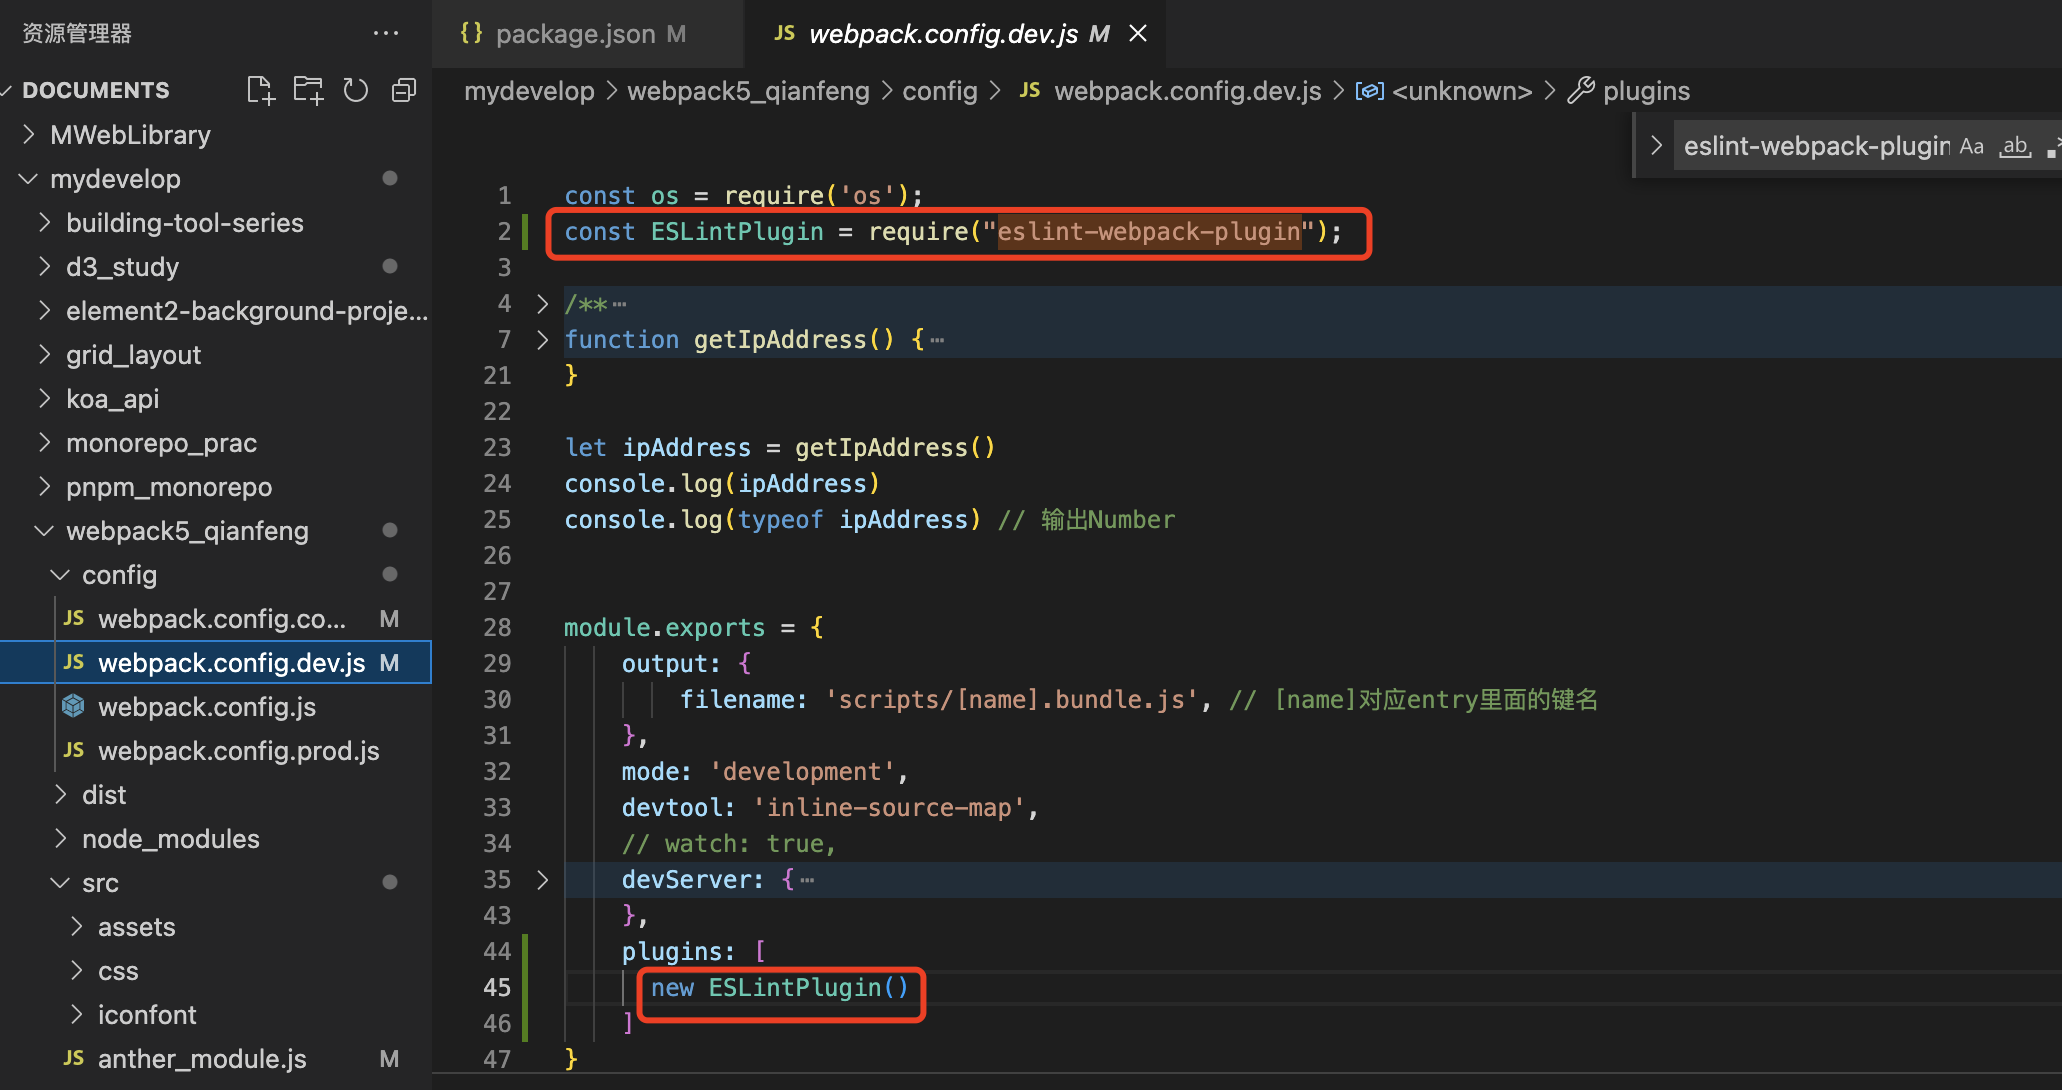
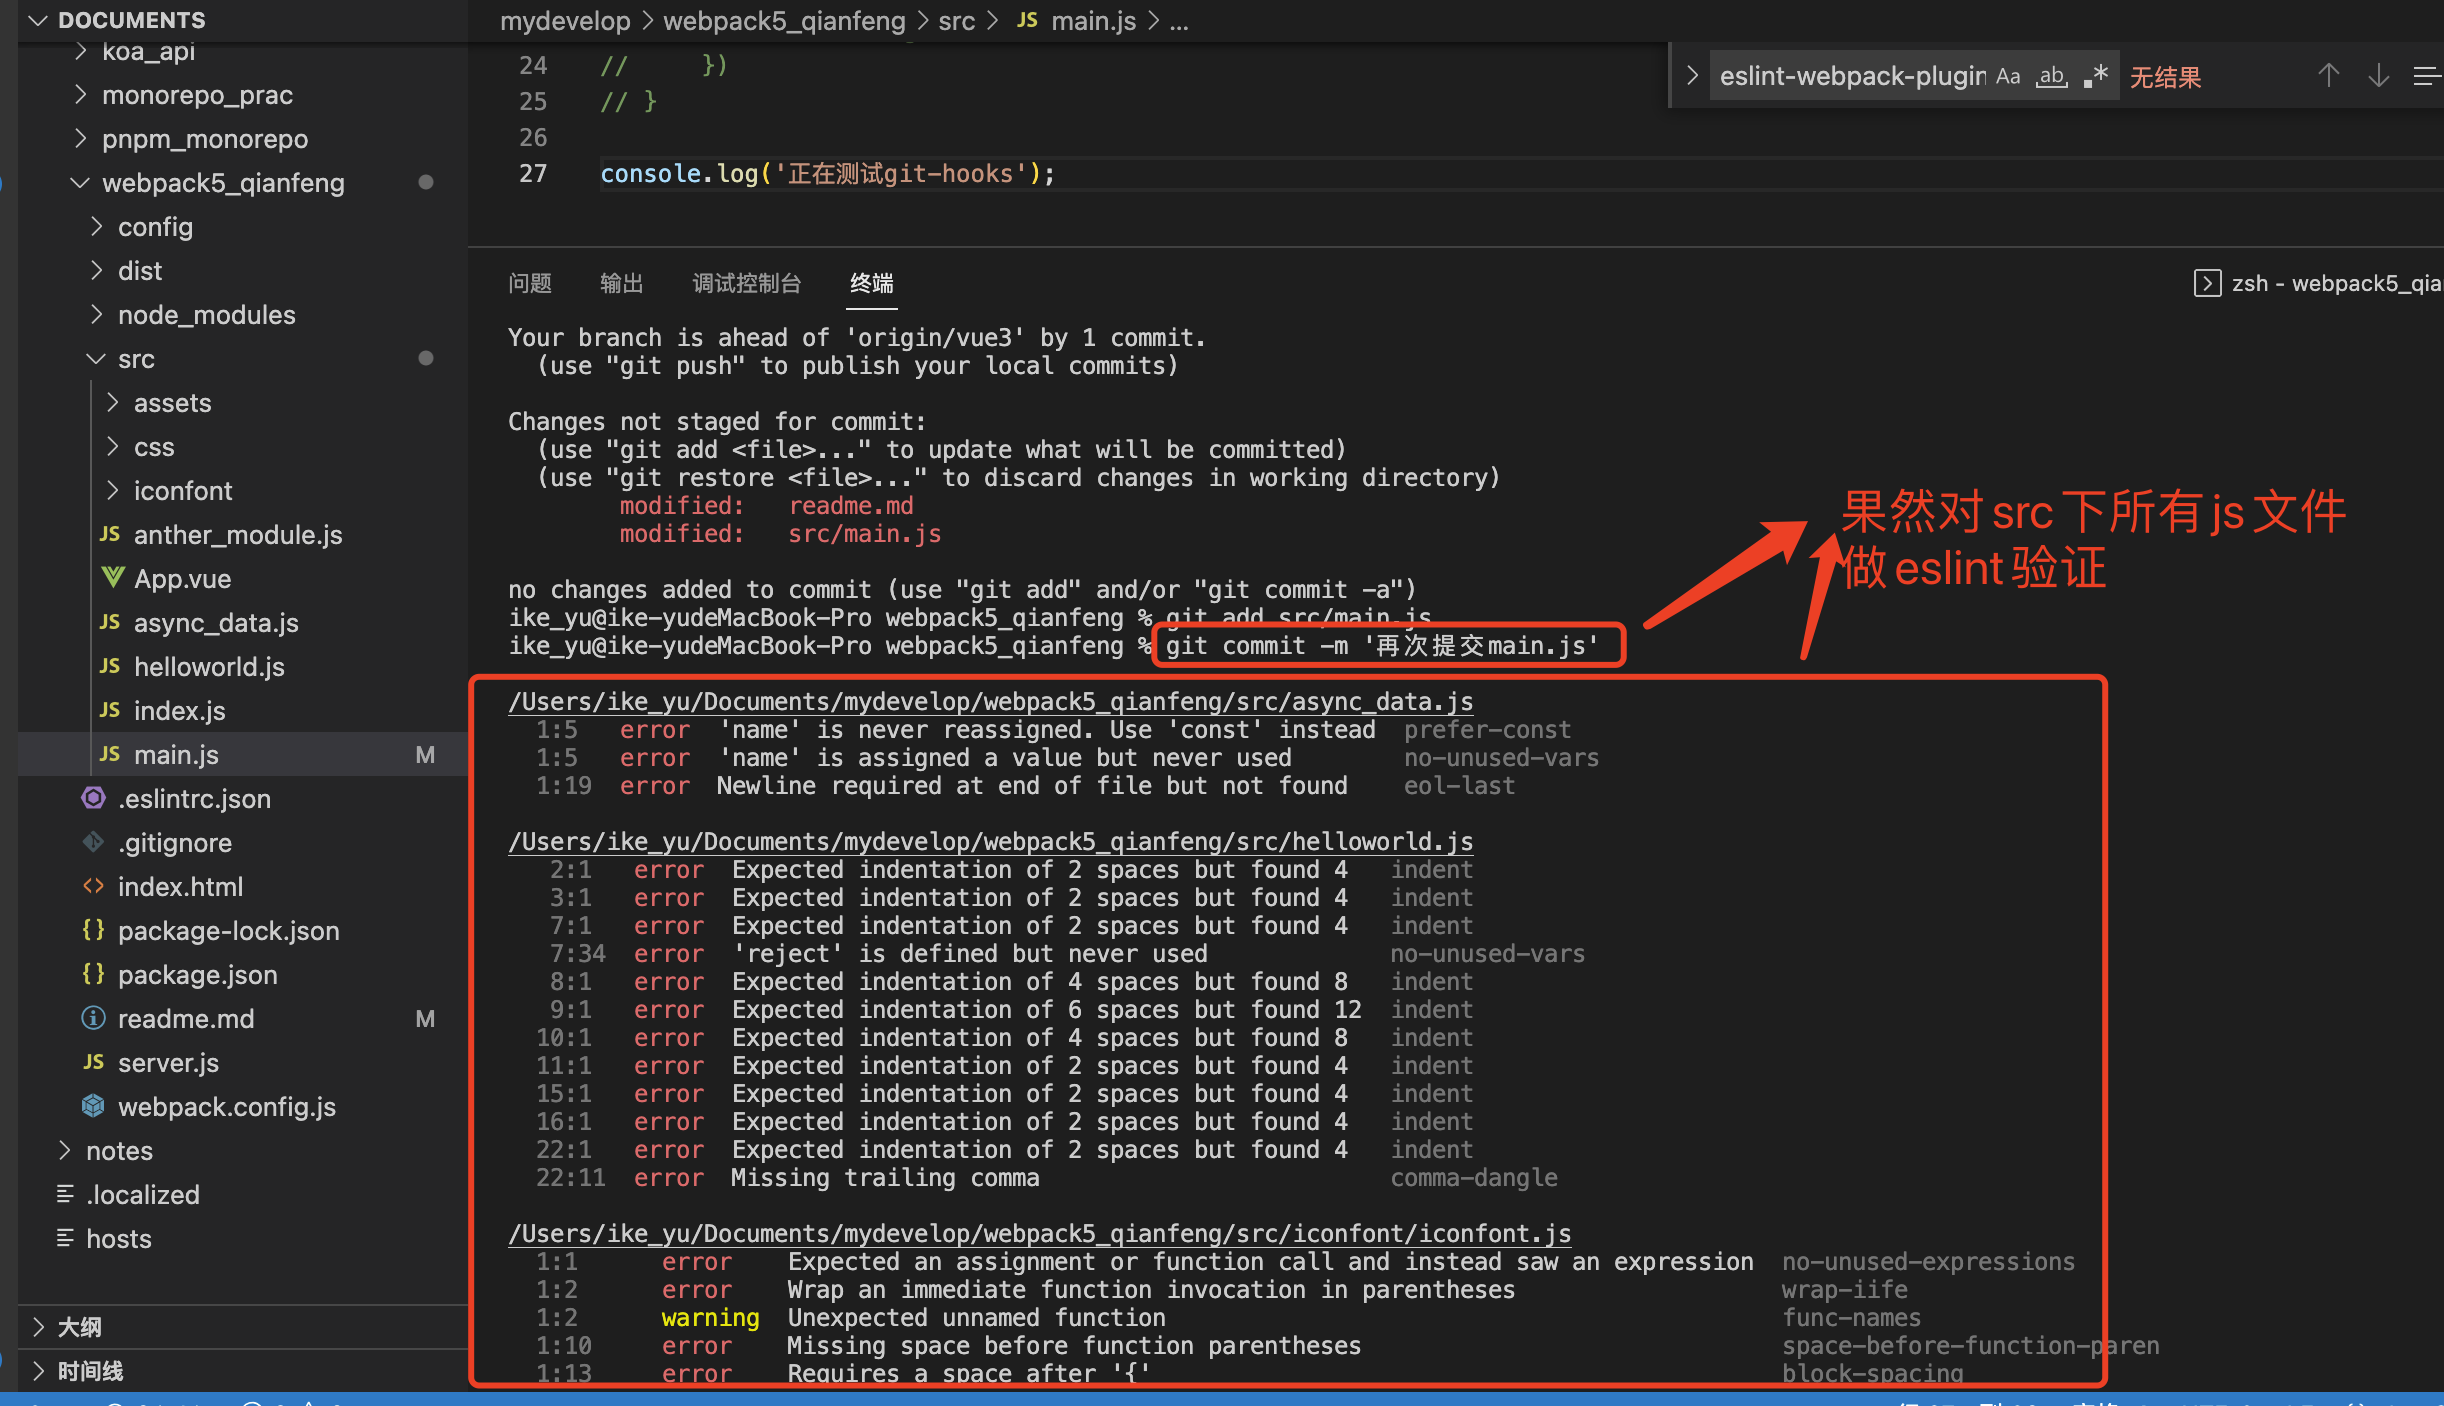
15、husky
作用:代码提交时做eslint验证。
git-hooks
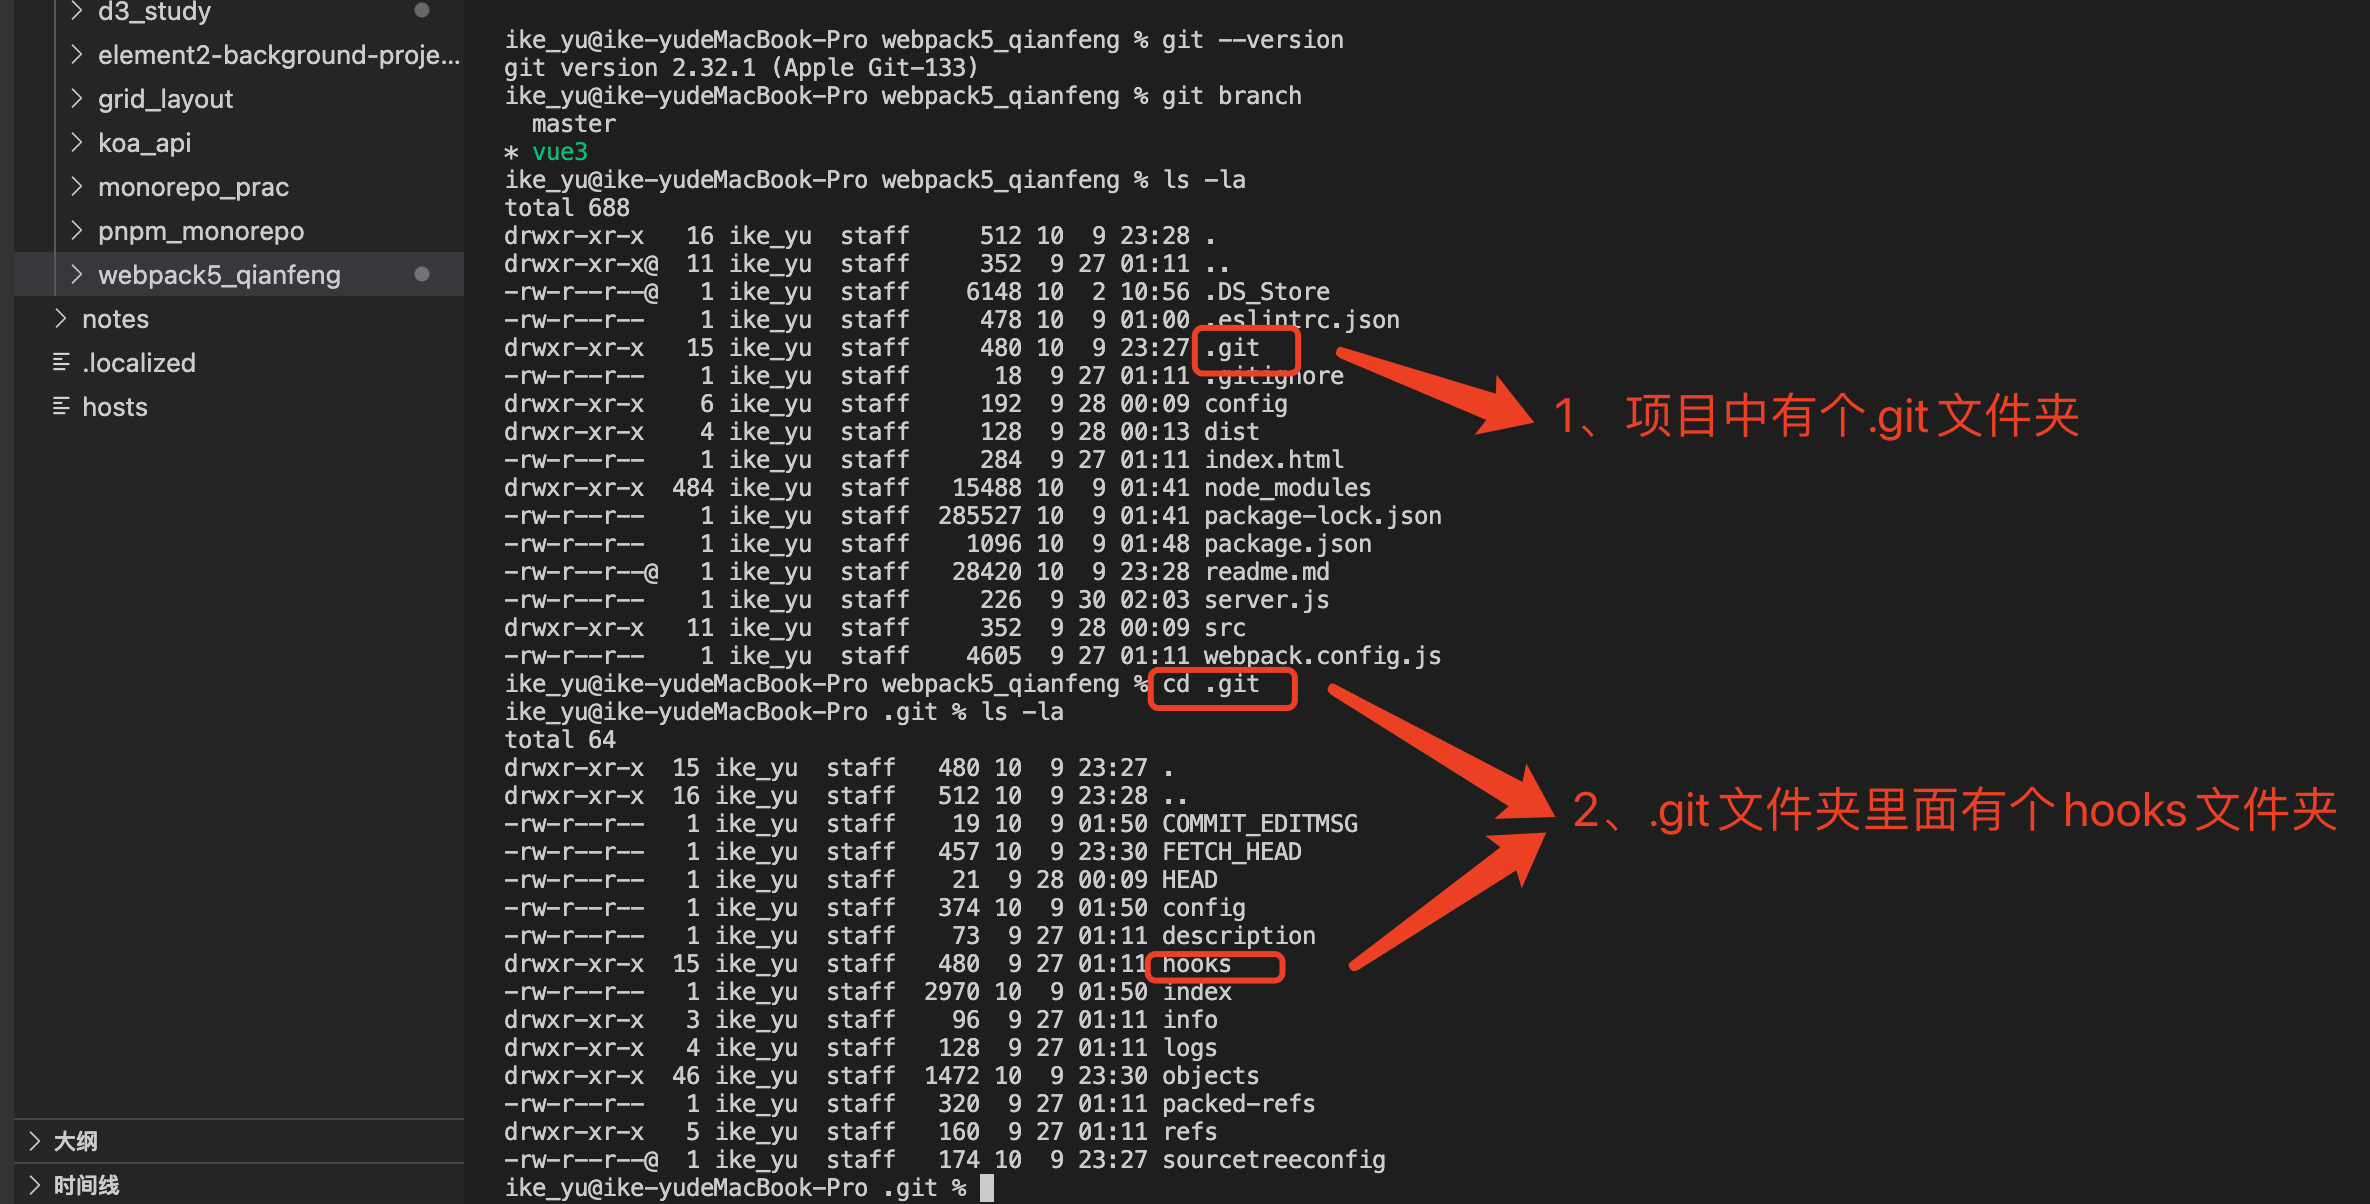
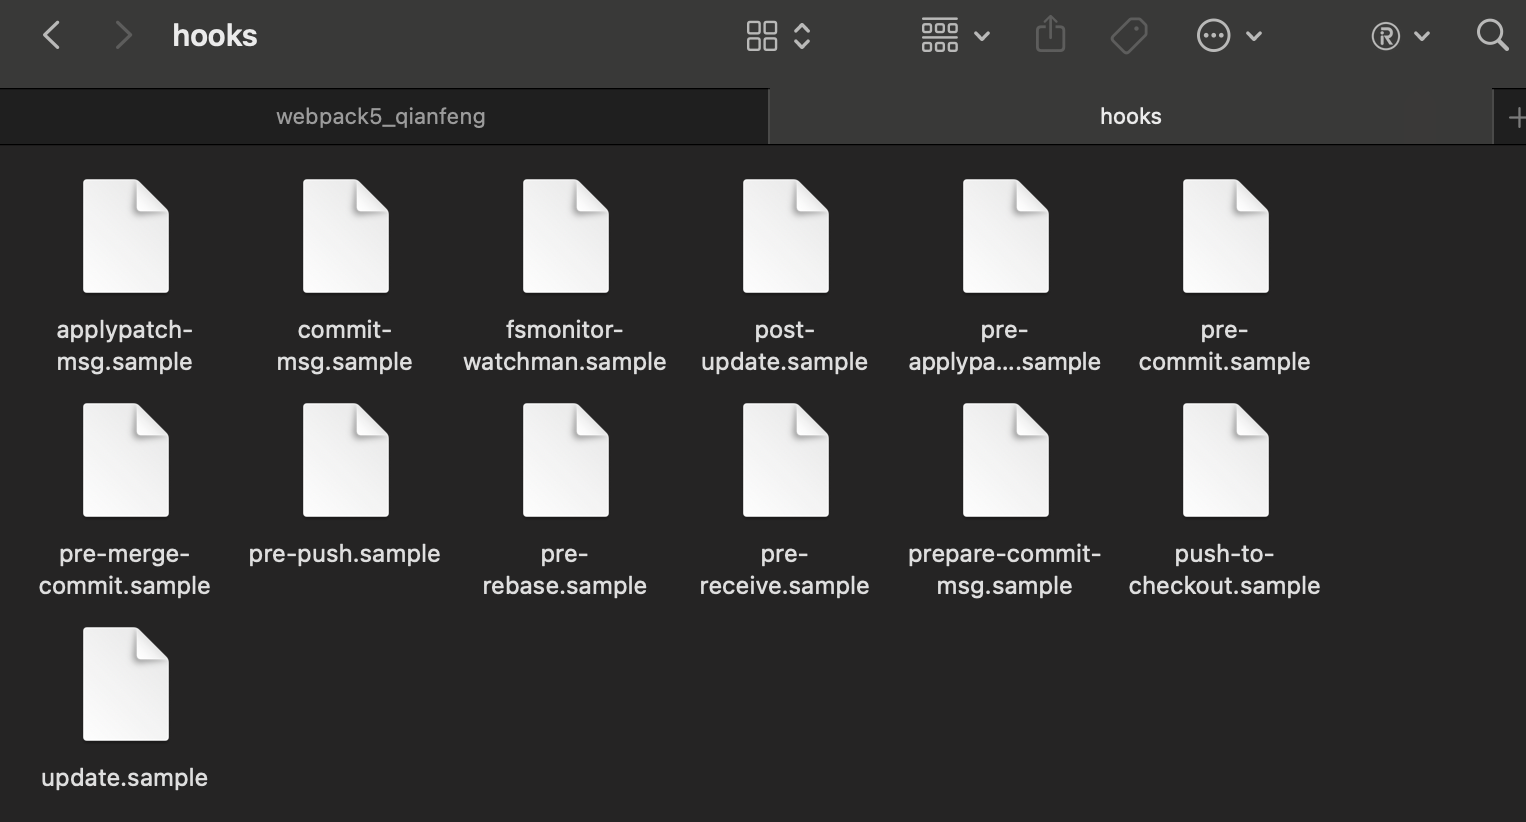
git有如上所示那么多hook

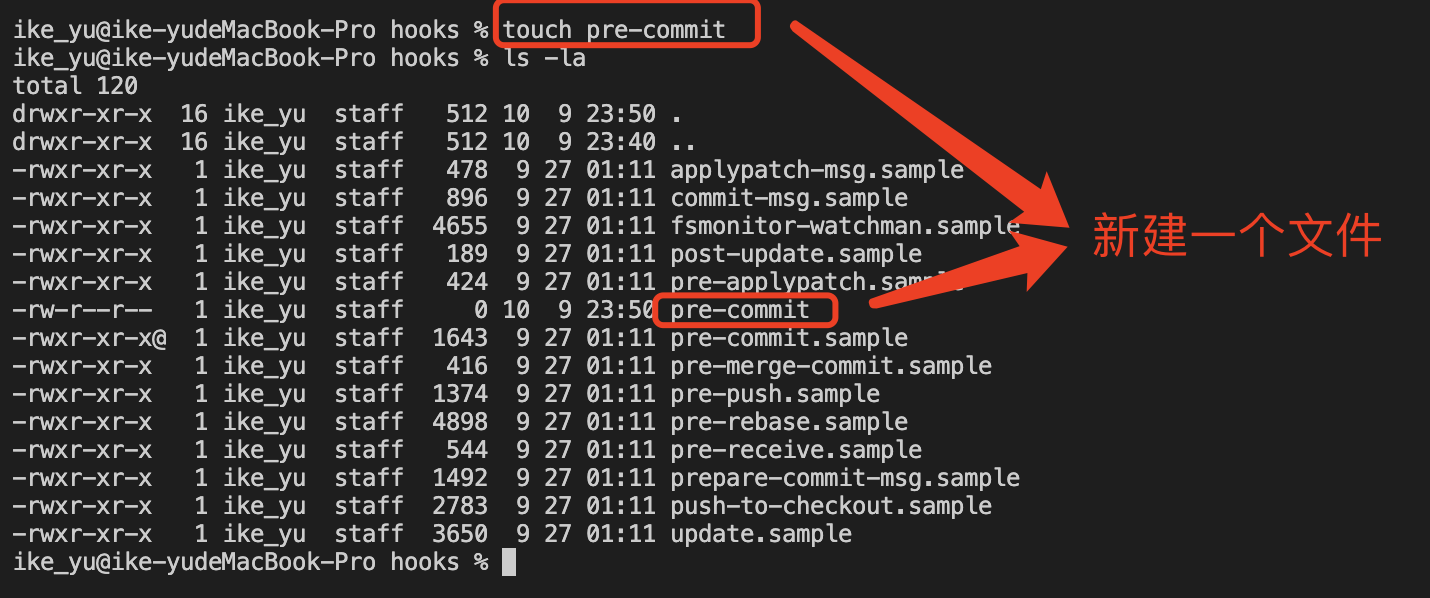
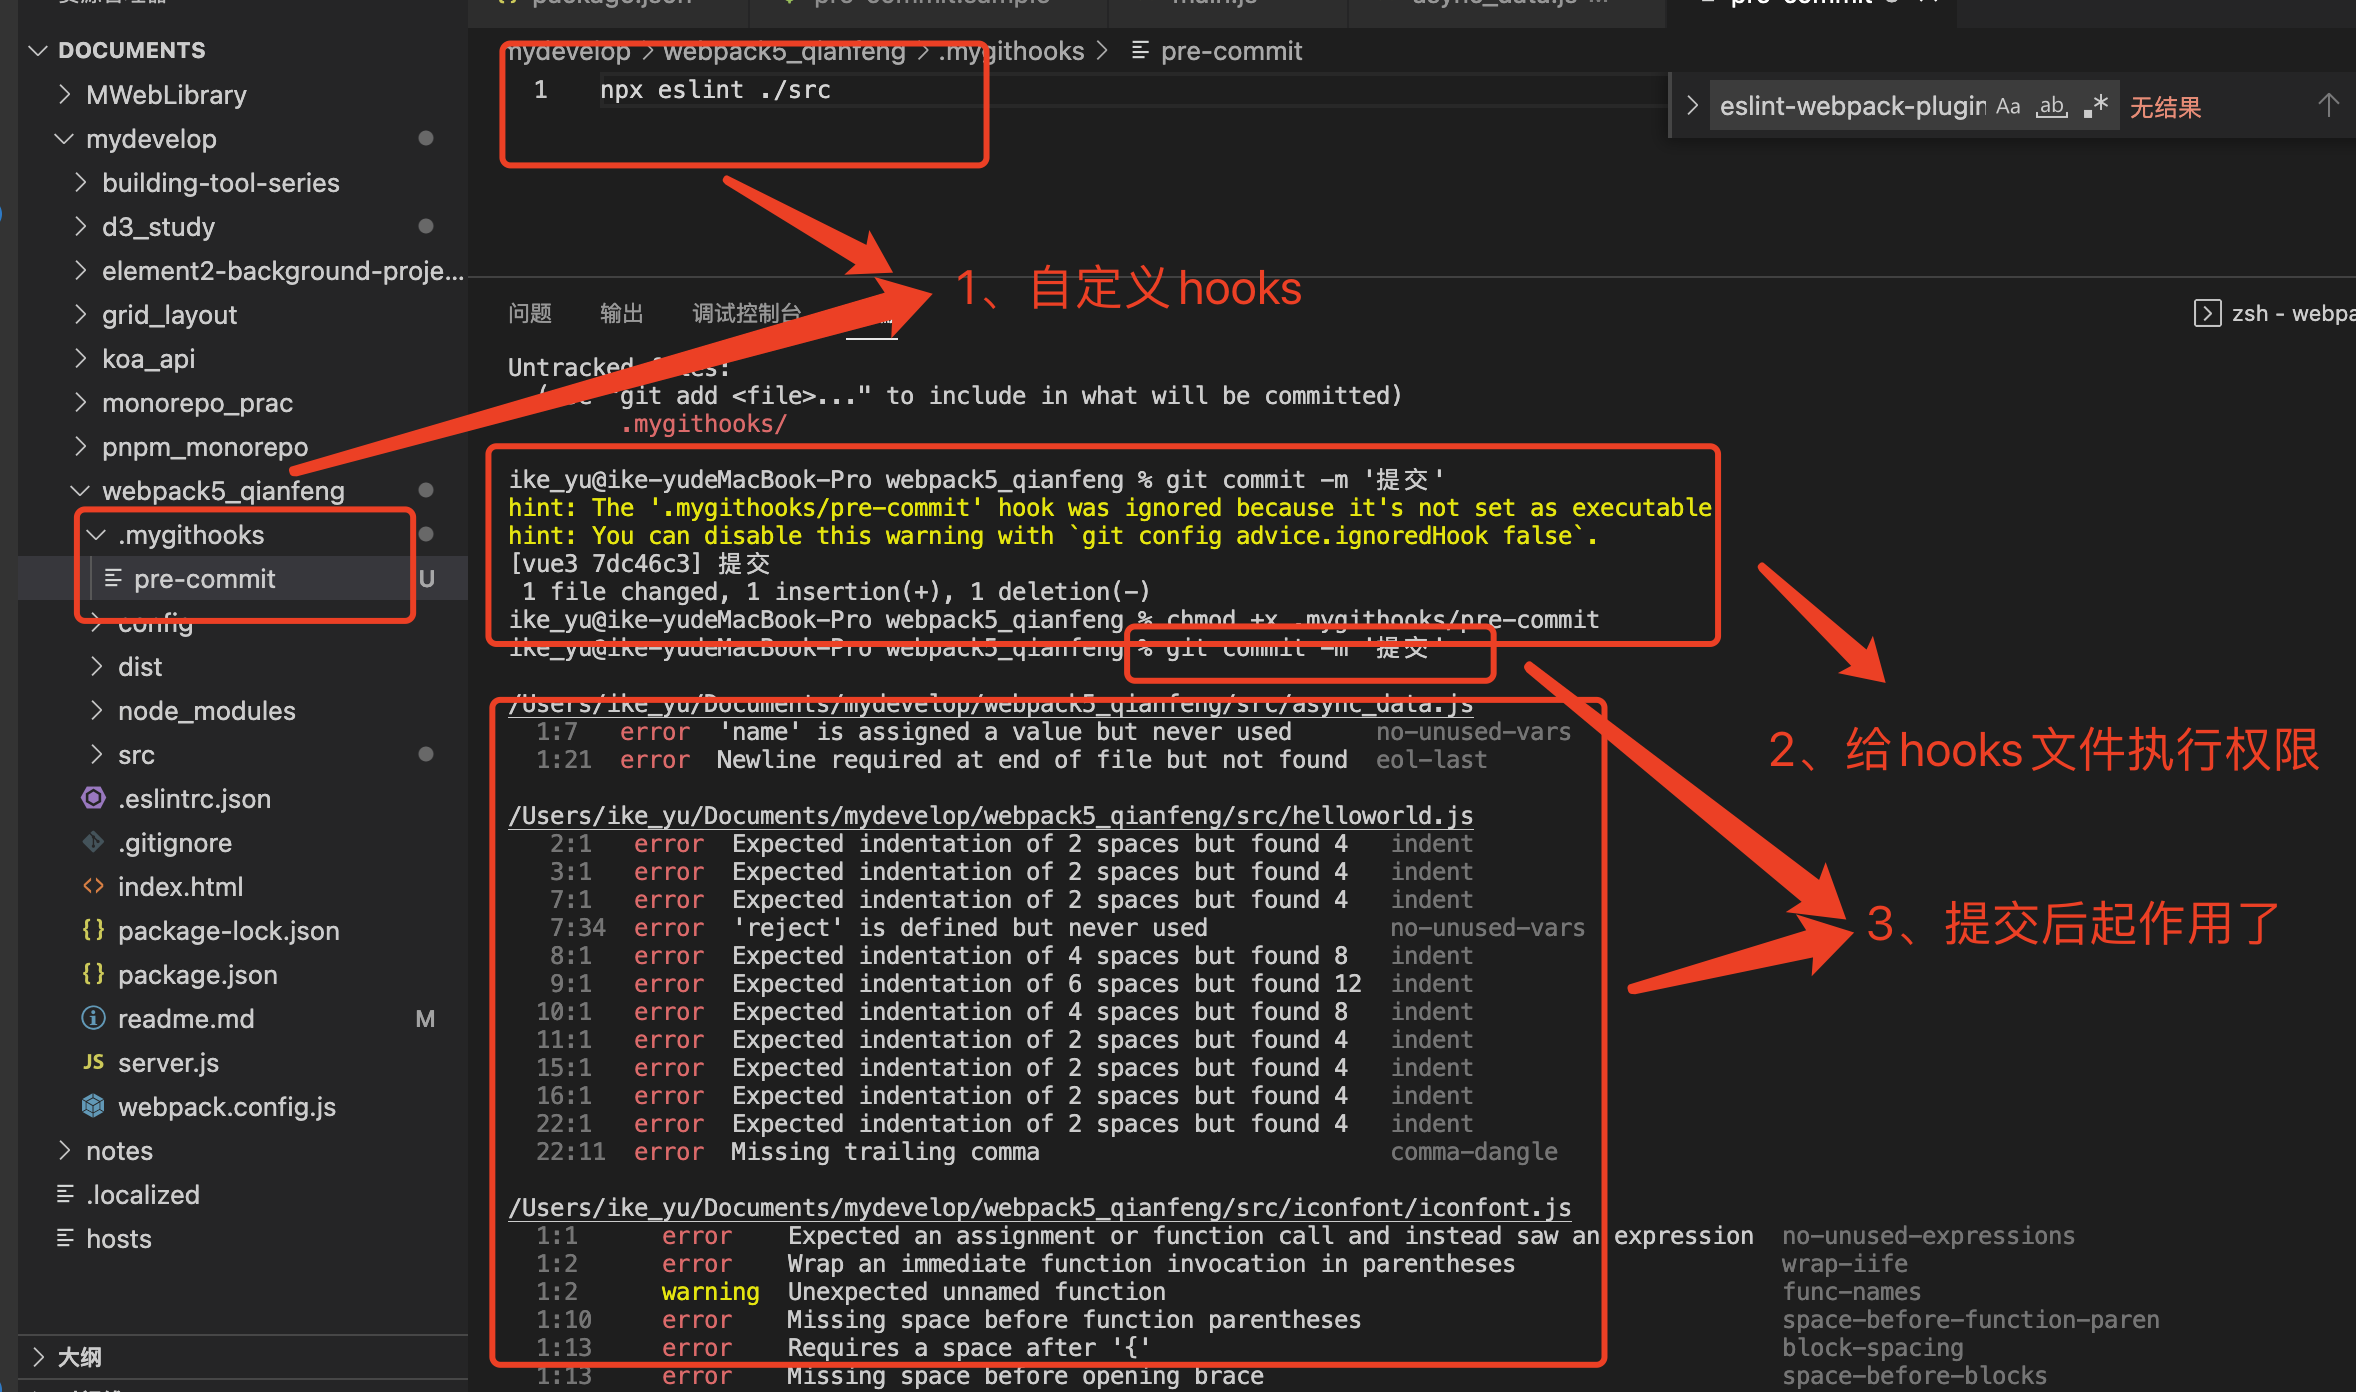
需要新建一个pre-commit文件
vim pre-commit
按下键盘i键进行输入
按下键盘esc退出编辑
按下键盘冒号,输入wq保存并退出
编辑文件
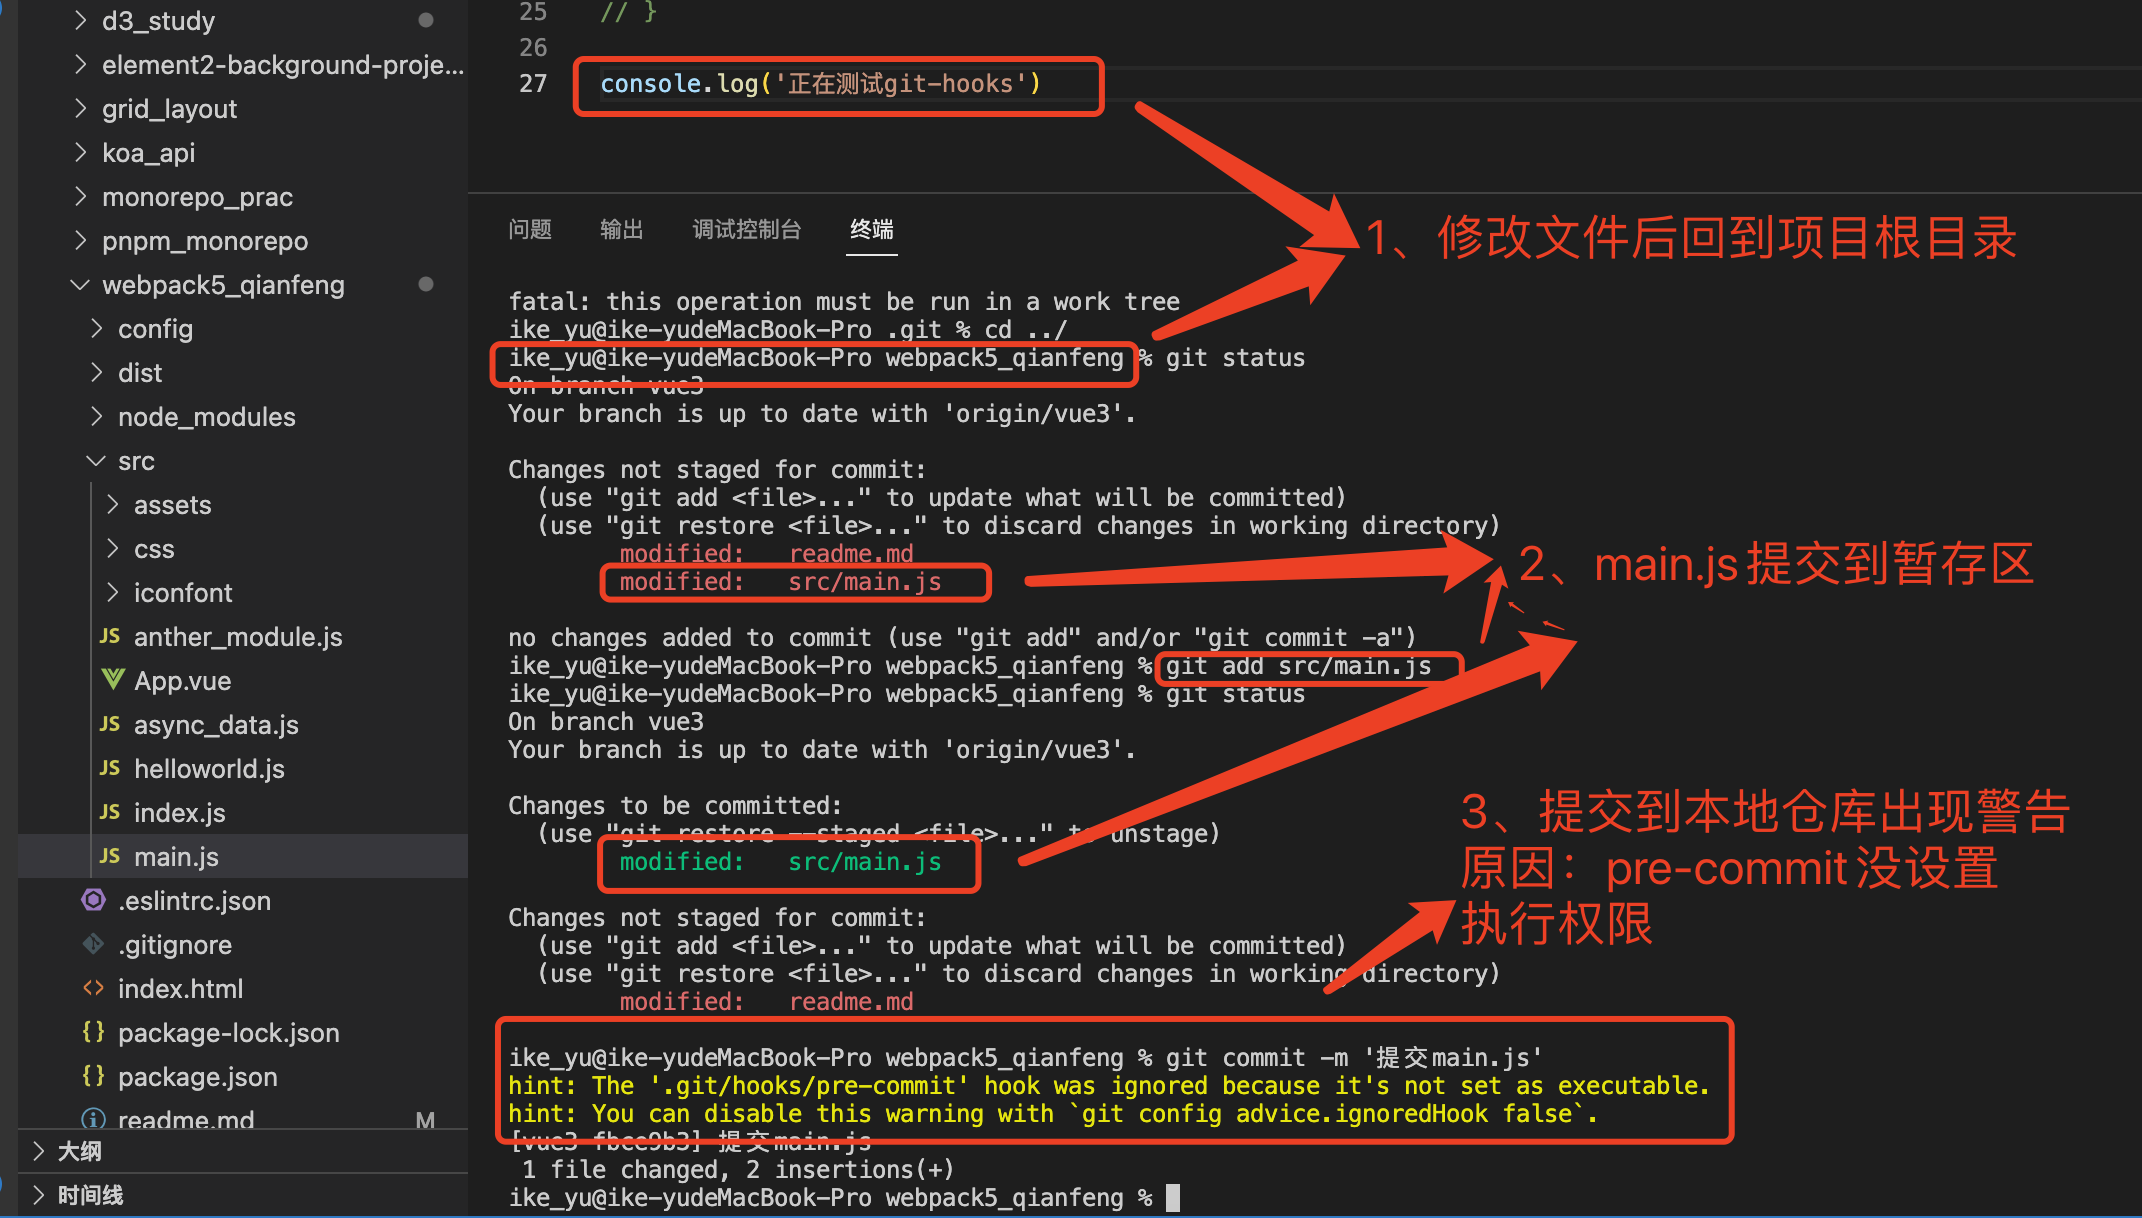
在commit之前会执行pre-commit, 但是pre-commit文件没有设置执行权限,故而报警告
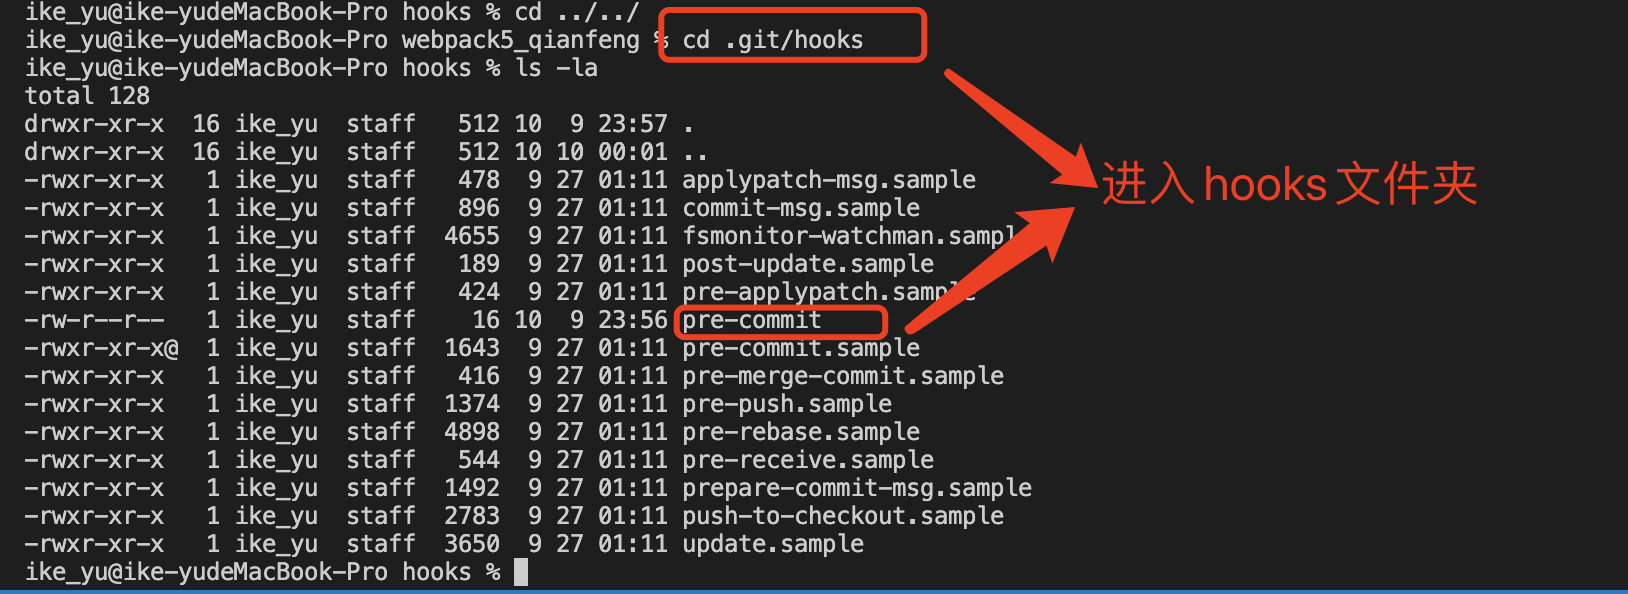
进入hooks文件夹,能看到pre-commit文件
chmod +x ./pre-commit
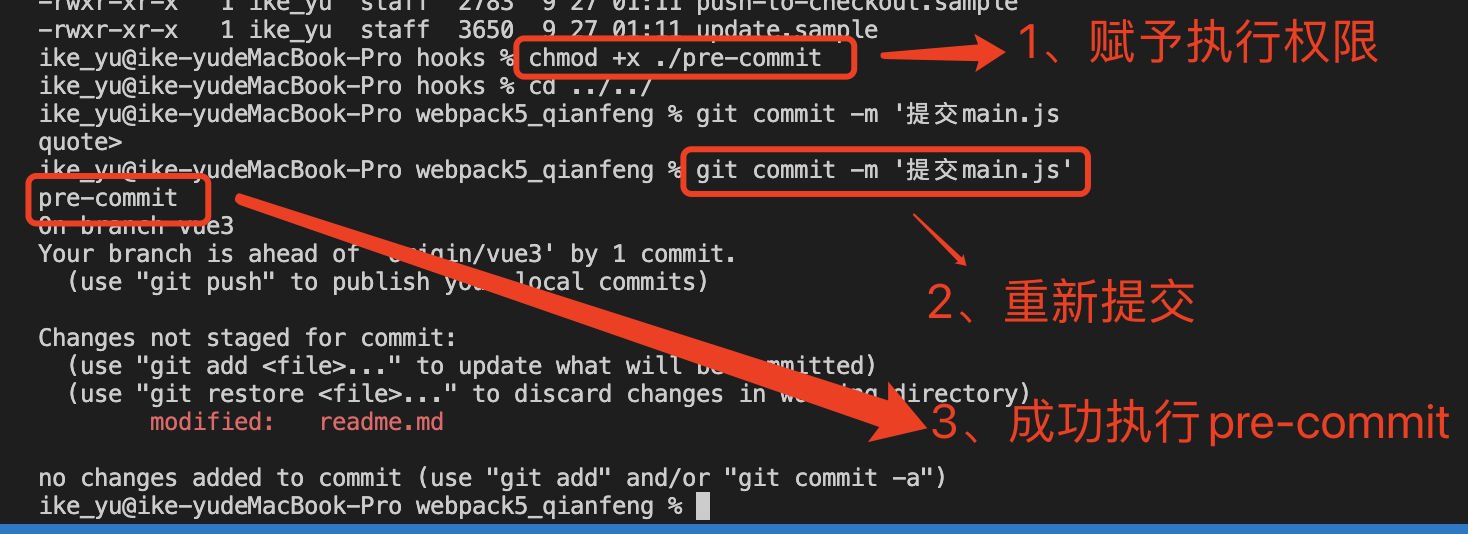
Pre-commit执行eslint
即在pre-commit文件夹中输入cli指令即可
虽然起作用了,但是pre-commit文件夹在.git/hooks里面,属于隐藏文件,不会提交到仓库
git config core.hooksPath .mygithooks修改hooks路径
husky
作用:不用手动修改hooks路径
npm install husky -D // 安装husky
npx husky install // 开启git-hooks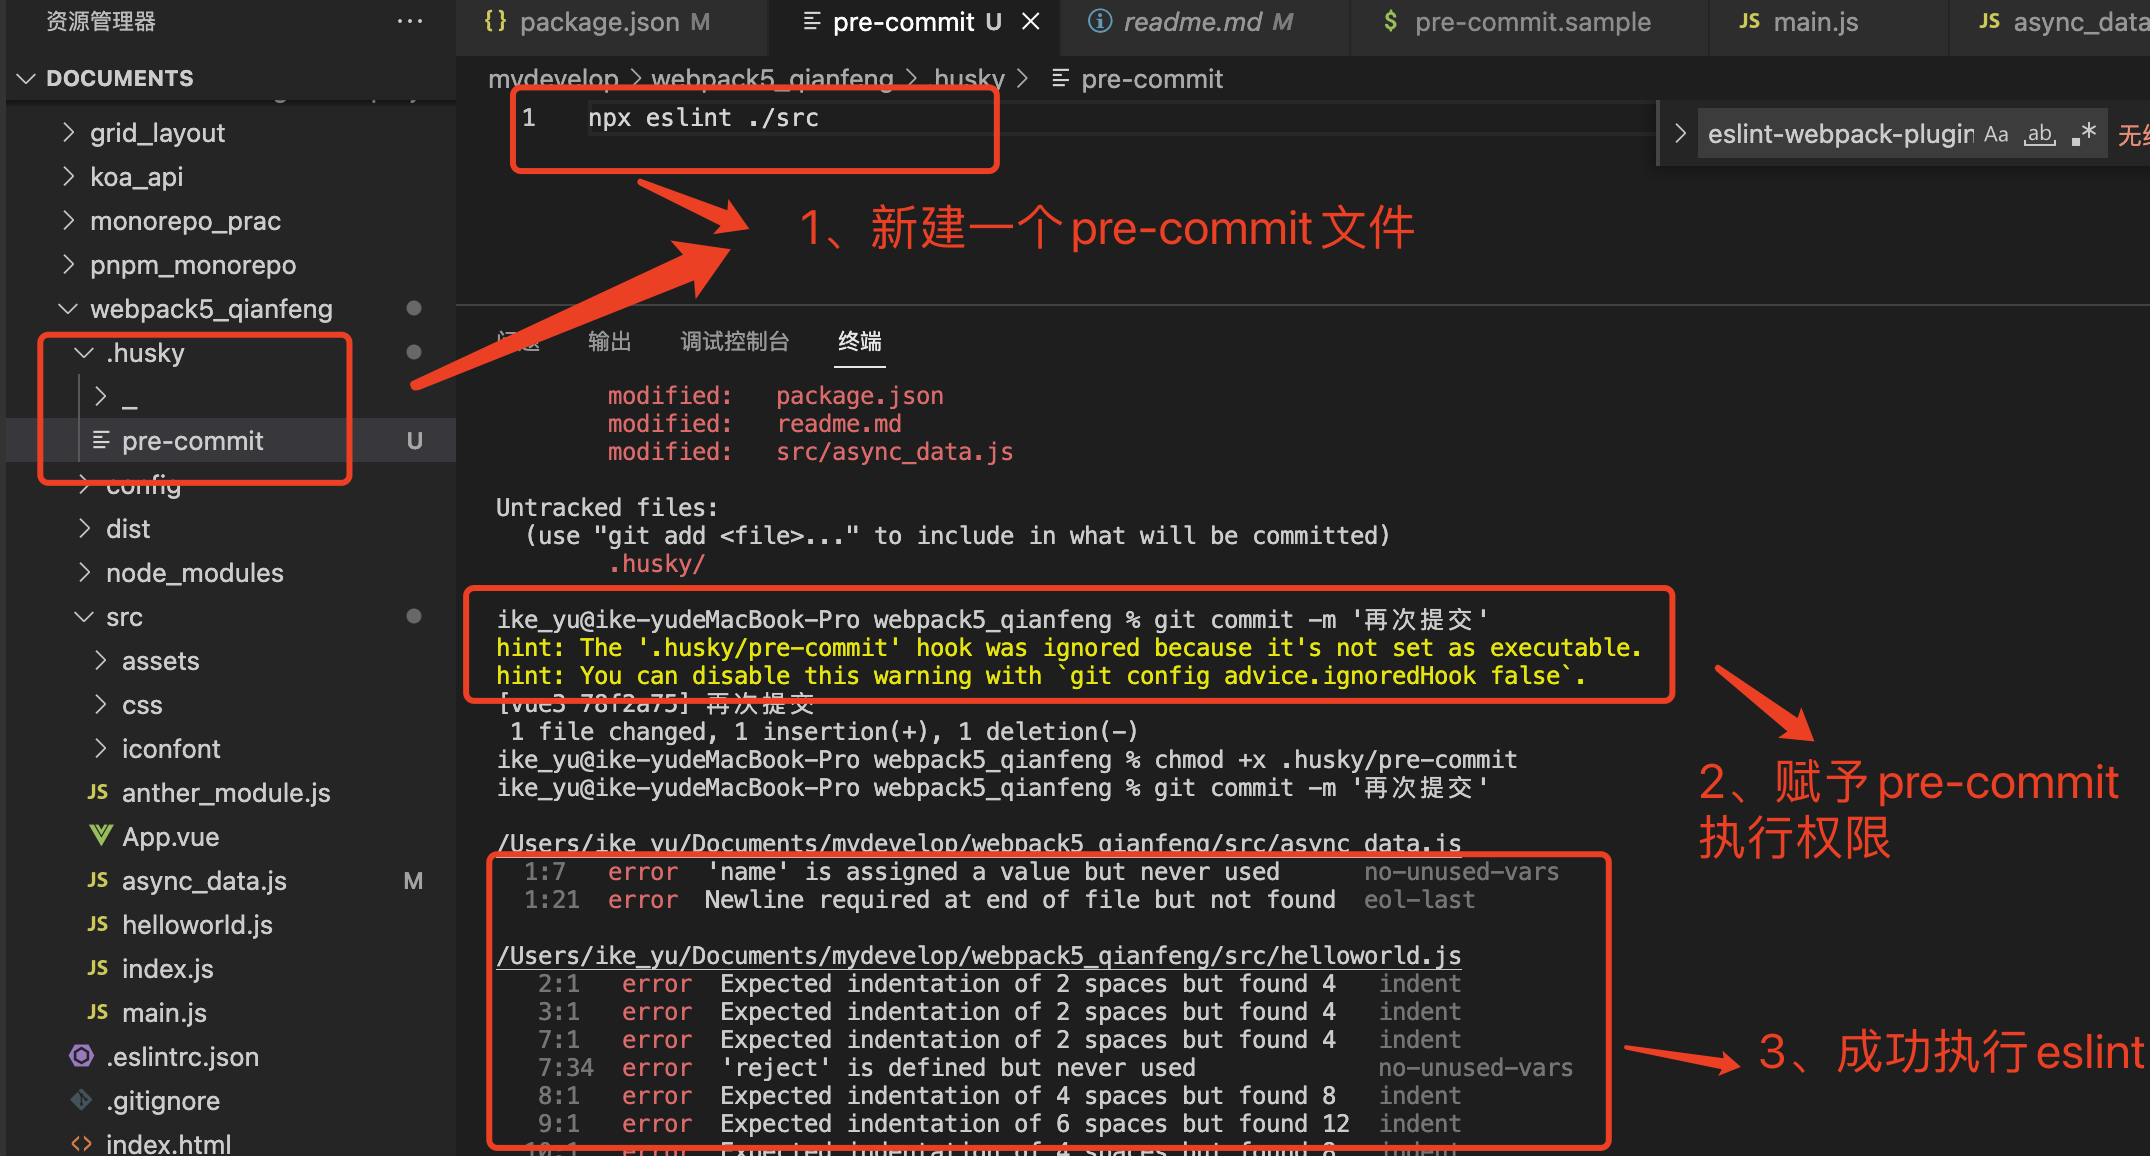
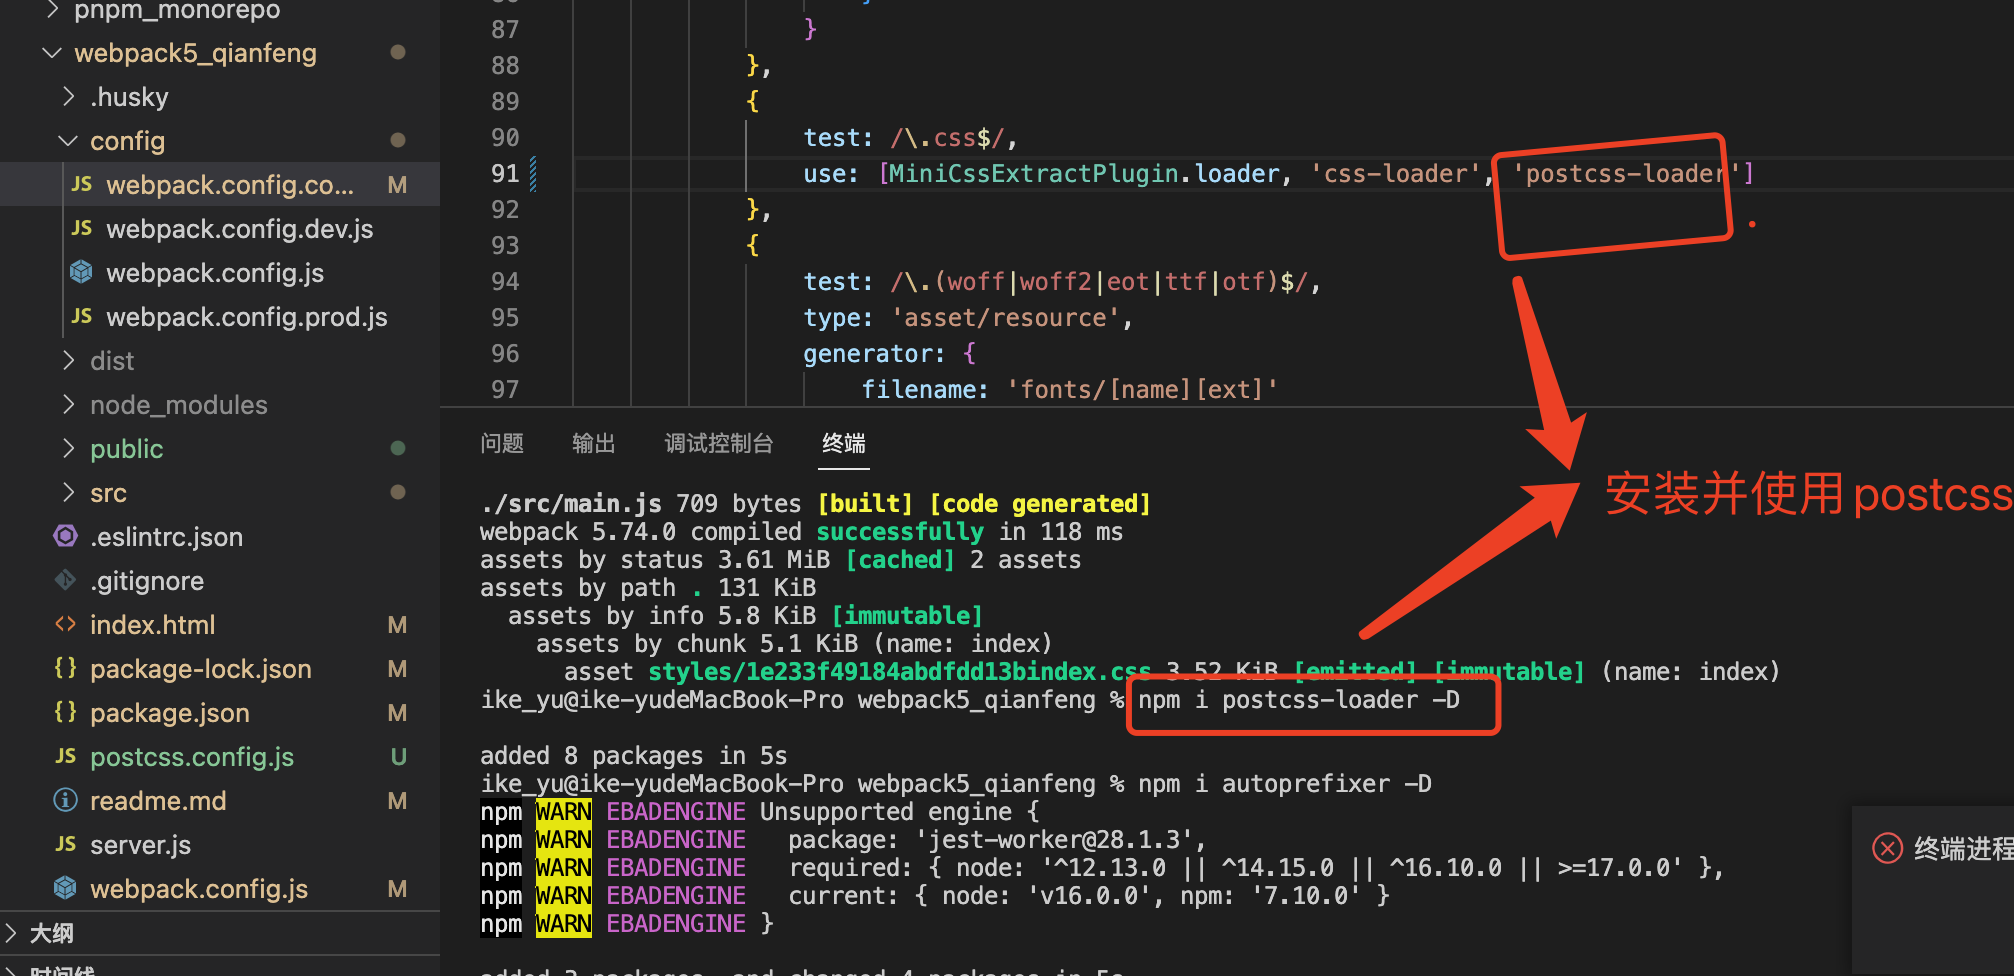
16、postcss
作用:用js工具和插件转换css代码的工具。
webpack已经依赖了postcss, 只需安装postcss-loader
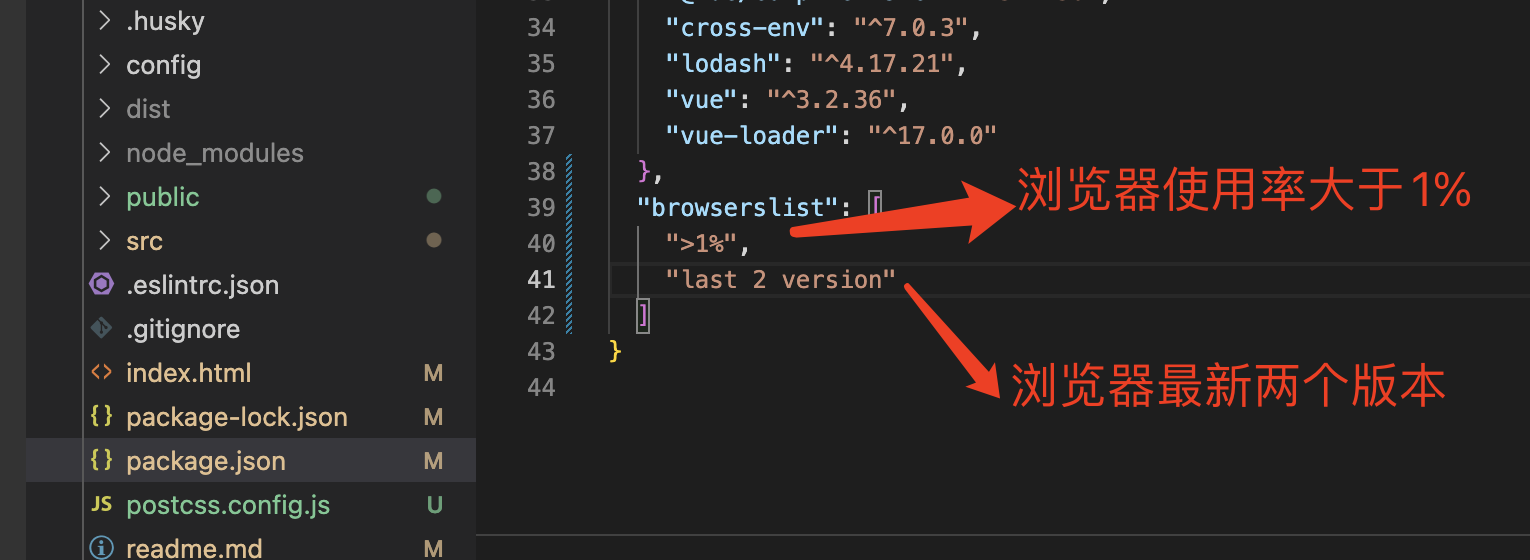
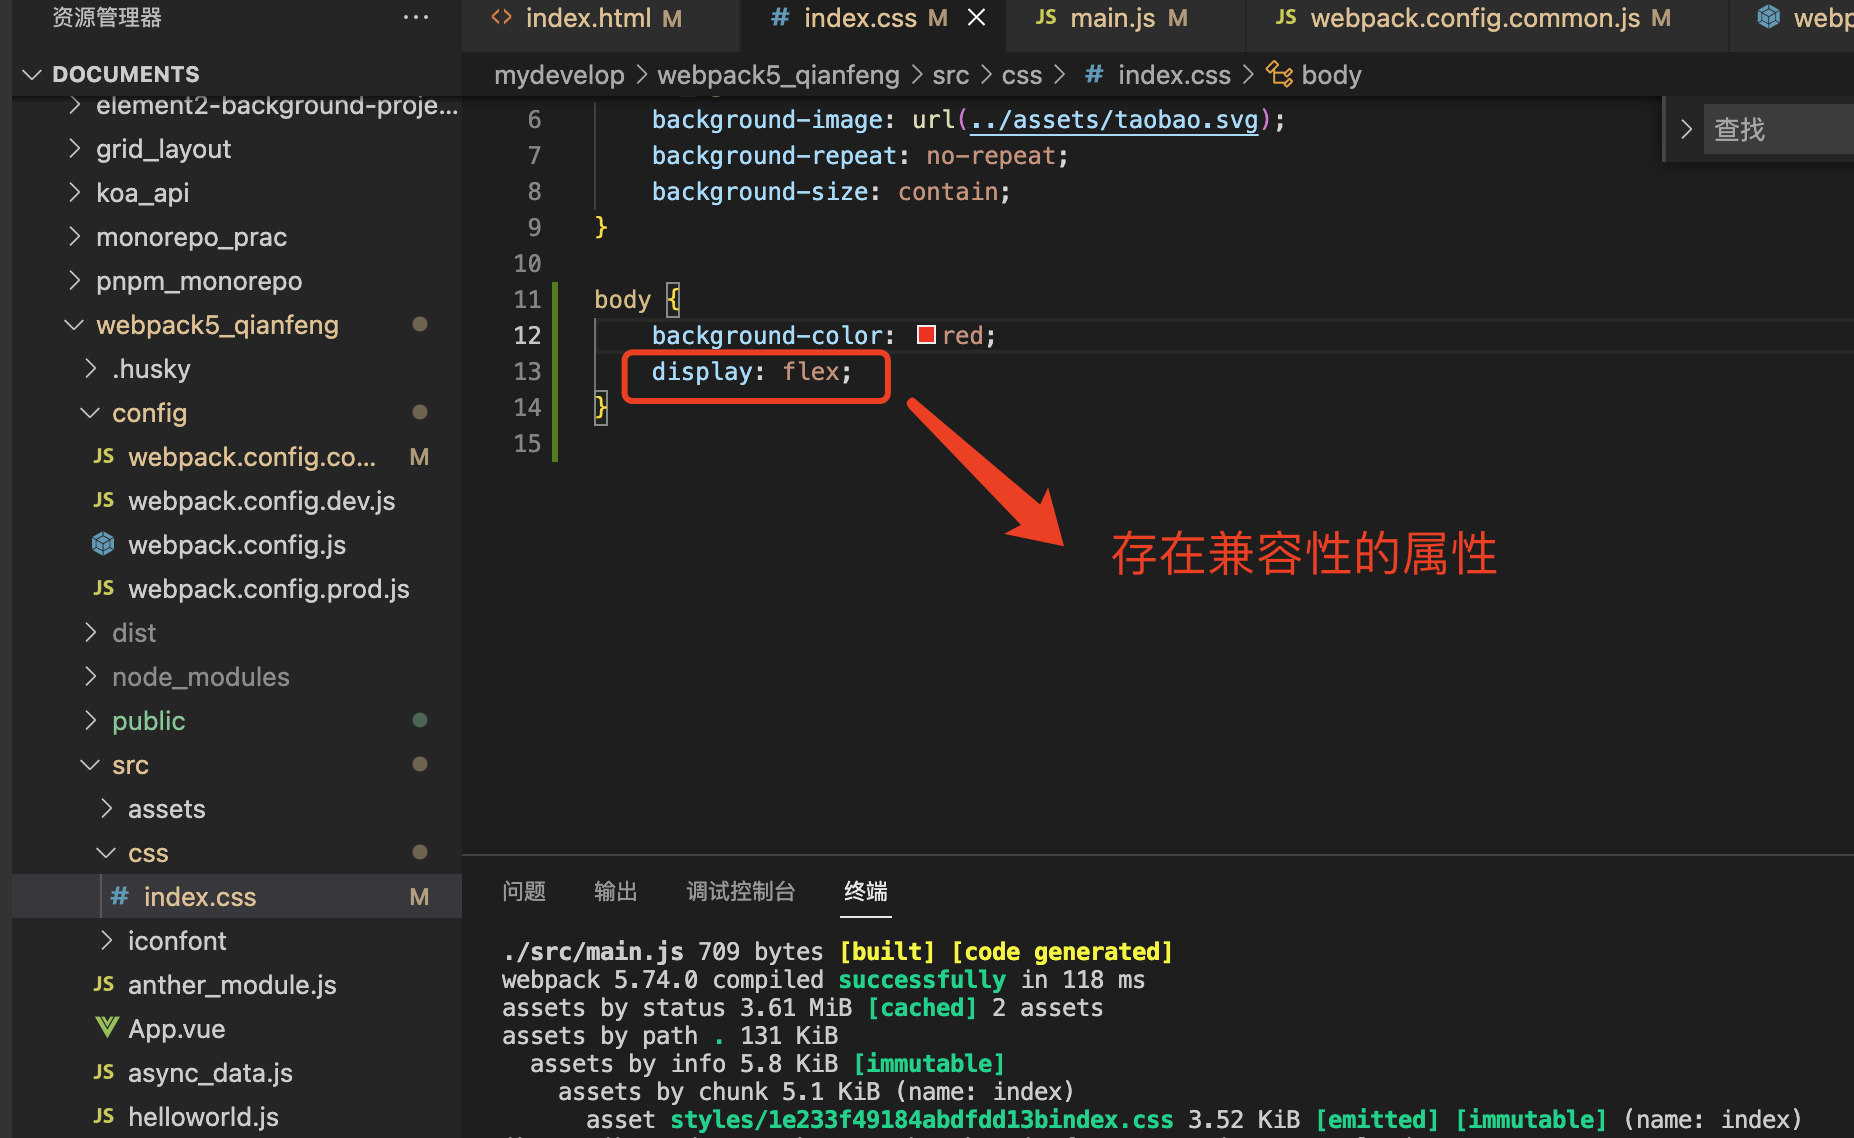
browserslist
作用:获取当前主流浏览器及各css属性兼容情况
postcss插件
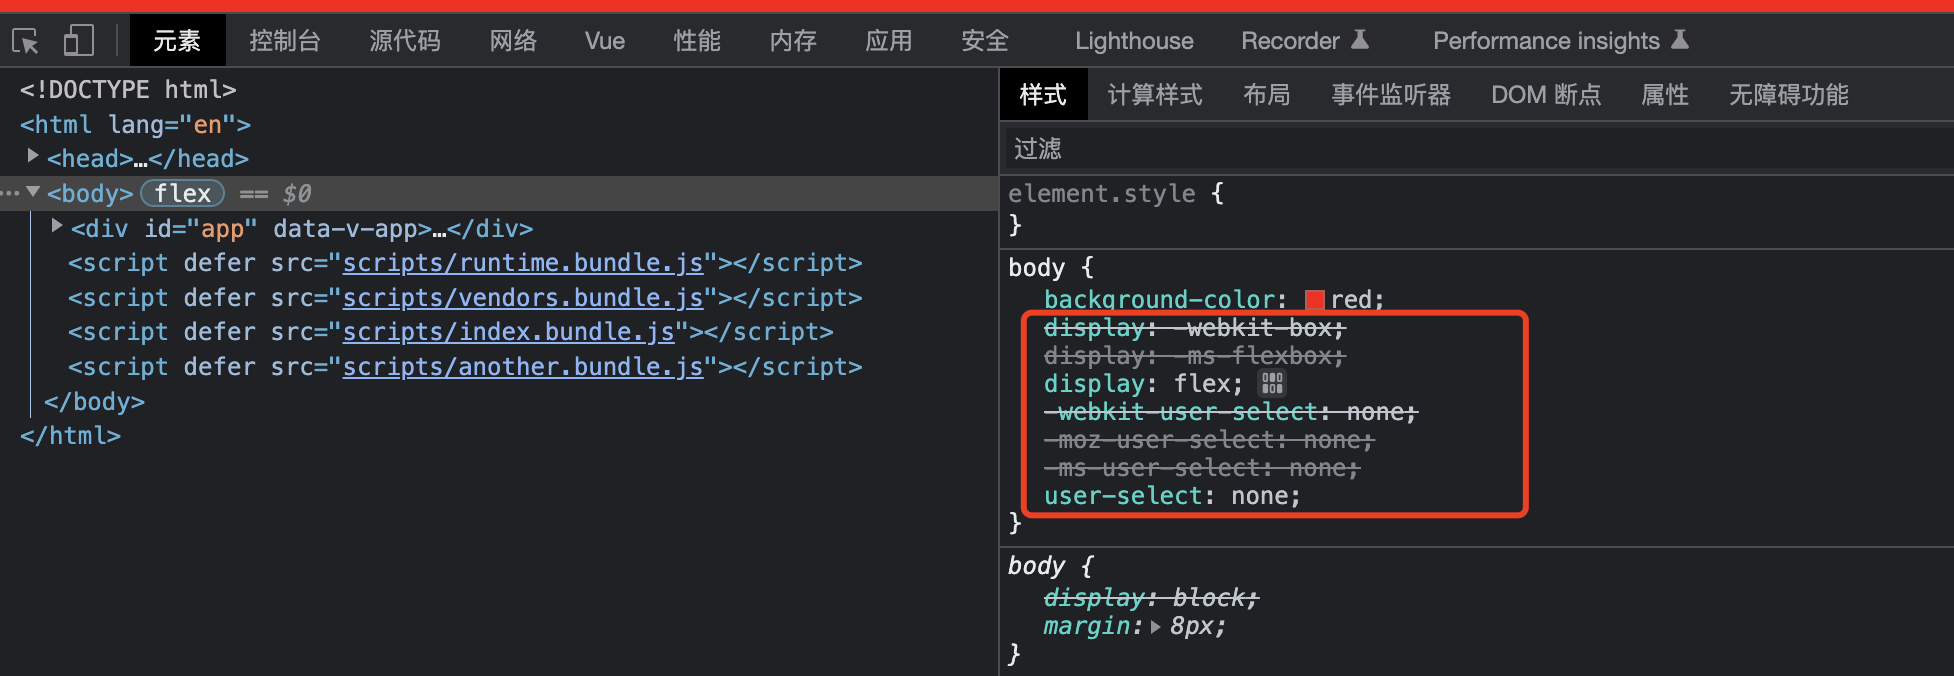
如autoprefixer为css属性添加前缀
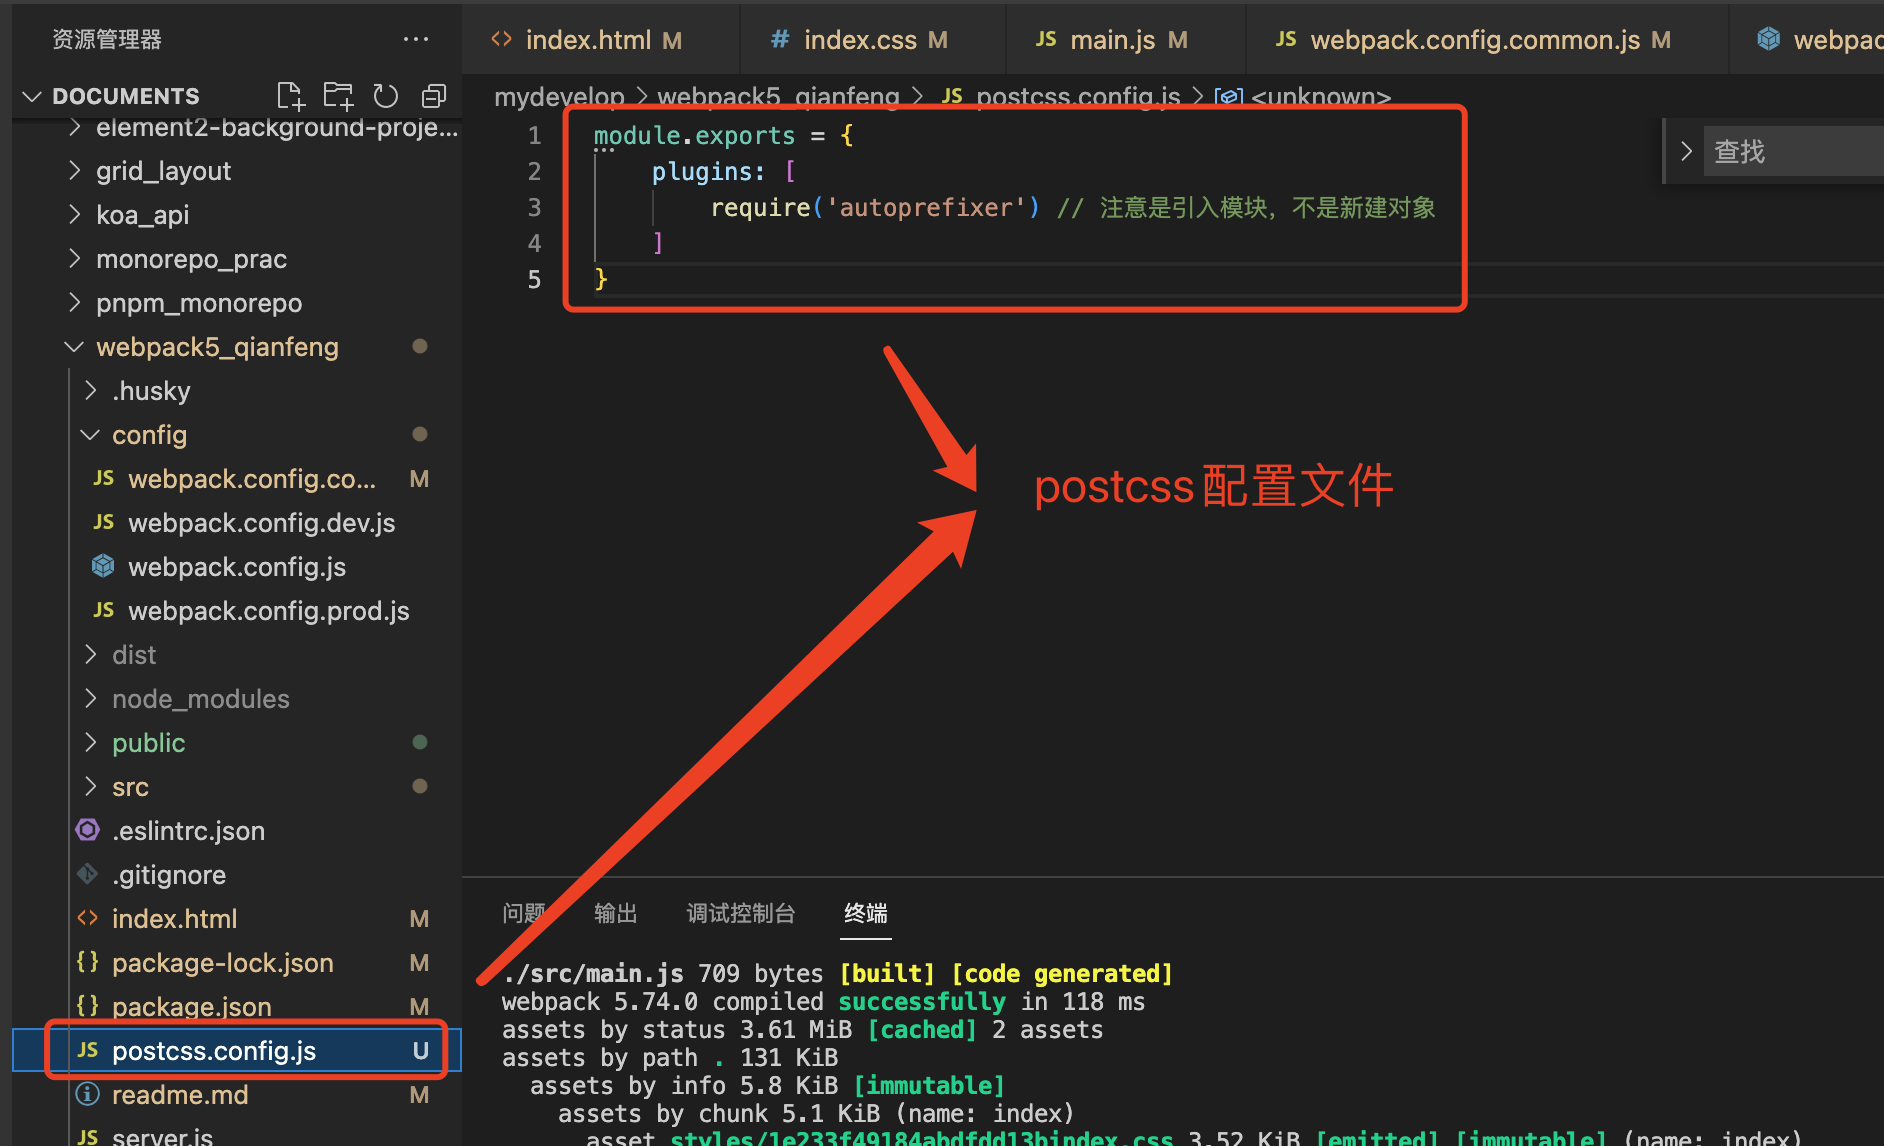

如上所示通过autoprefixer为css属性添加前缀。
17、模板导入资源
导入public下文件
index.html只能导入public文件夹里面的静态文件
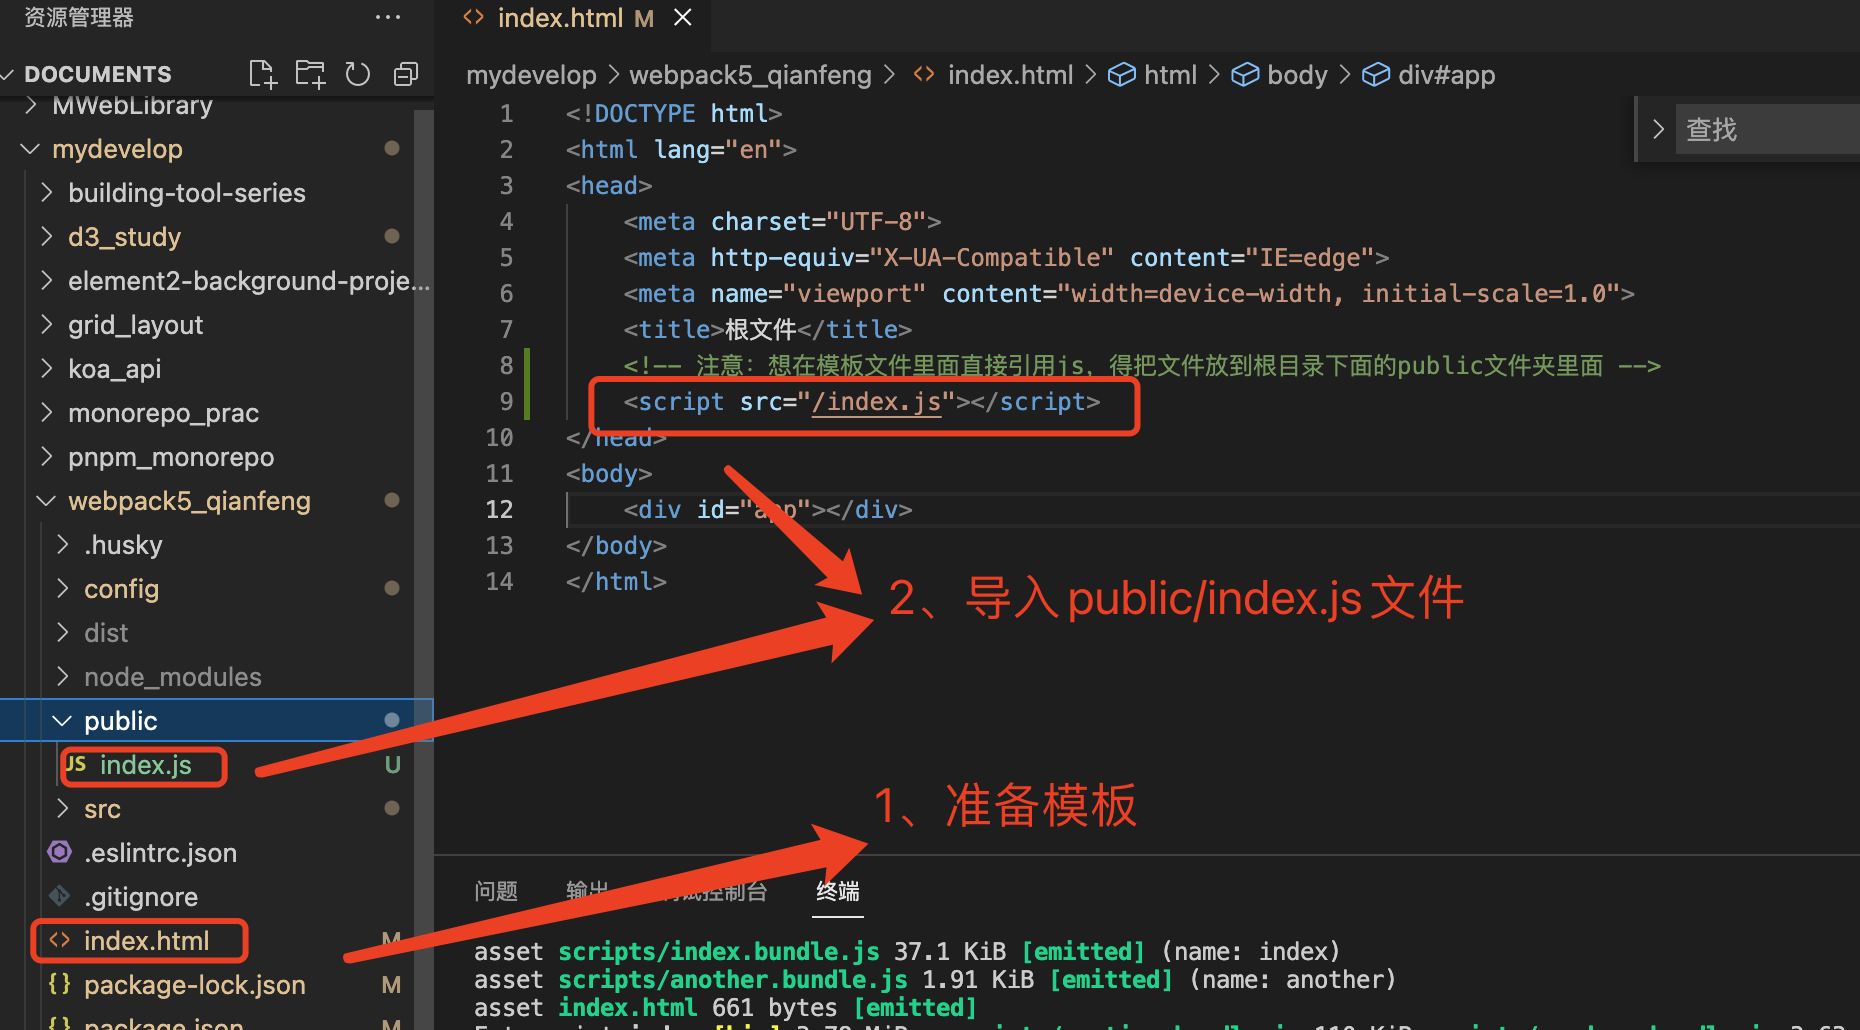
此方法不建议使用
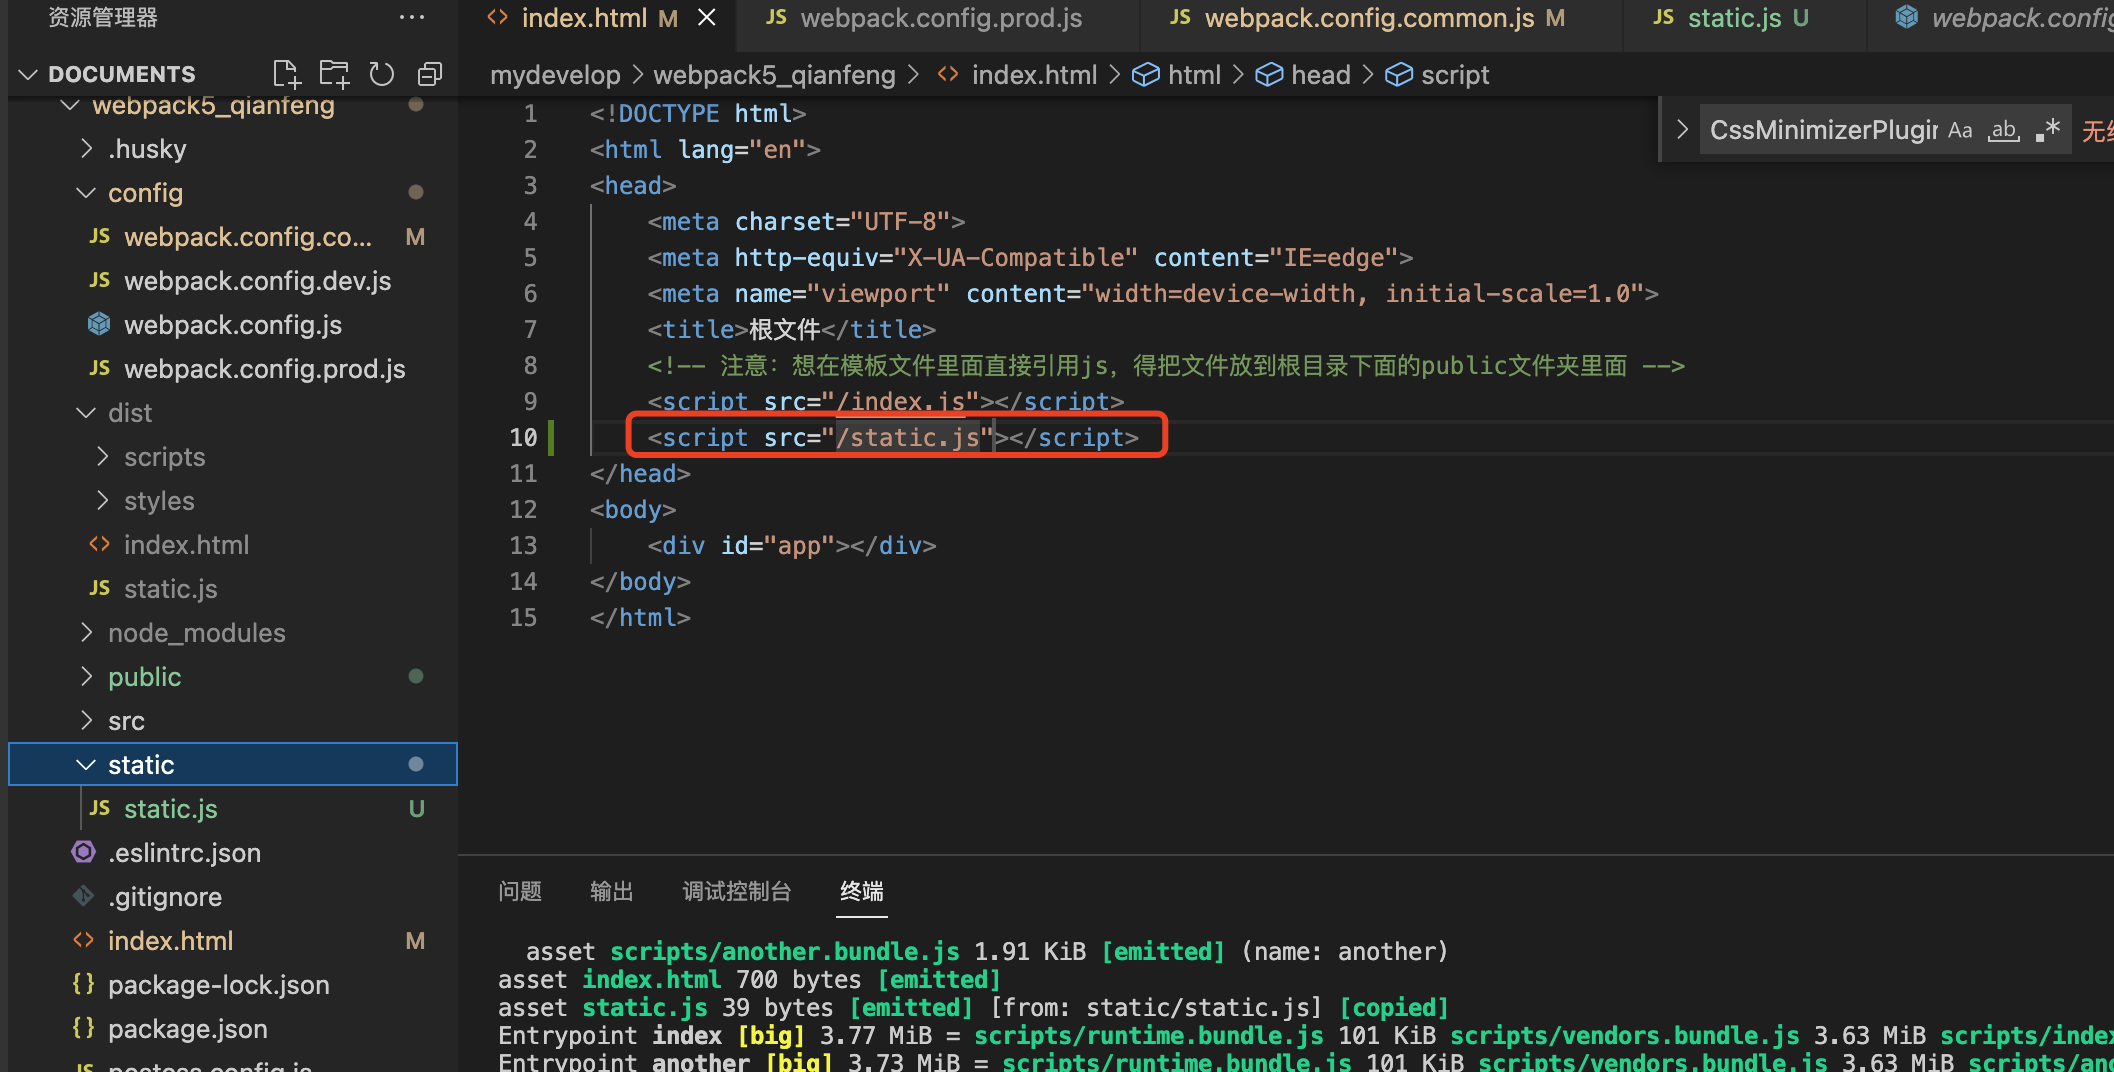
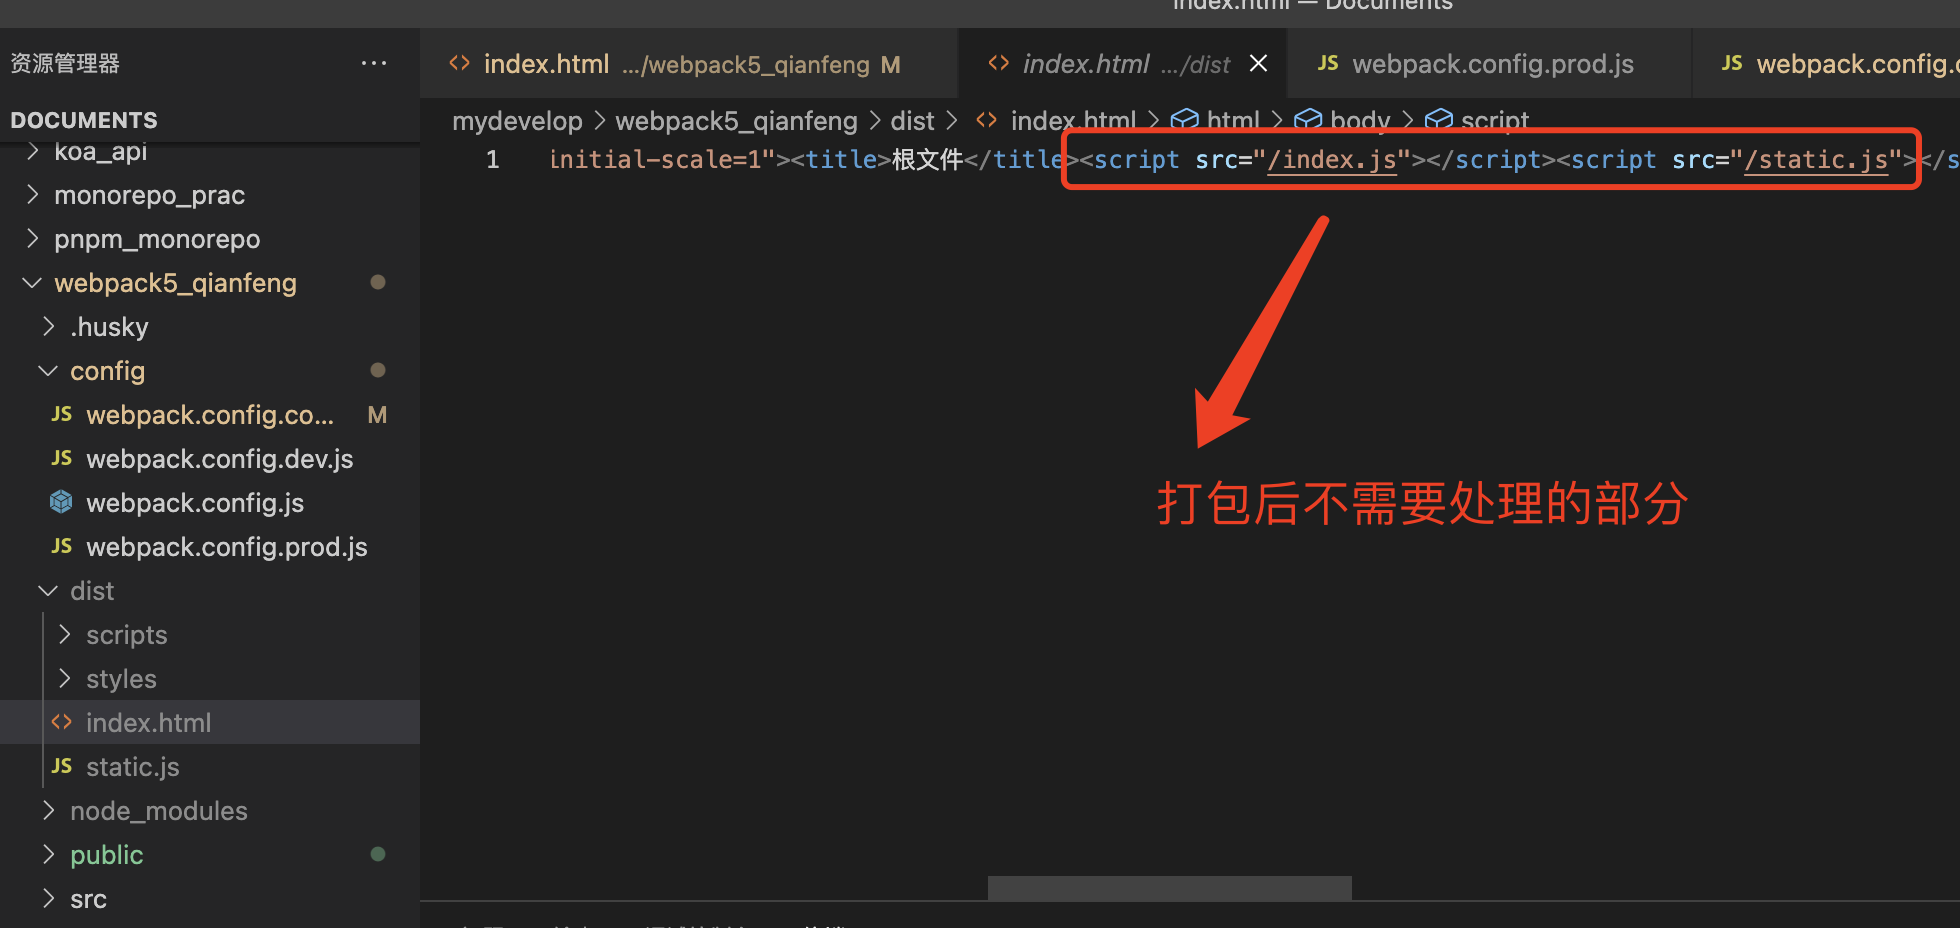
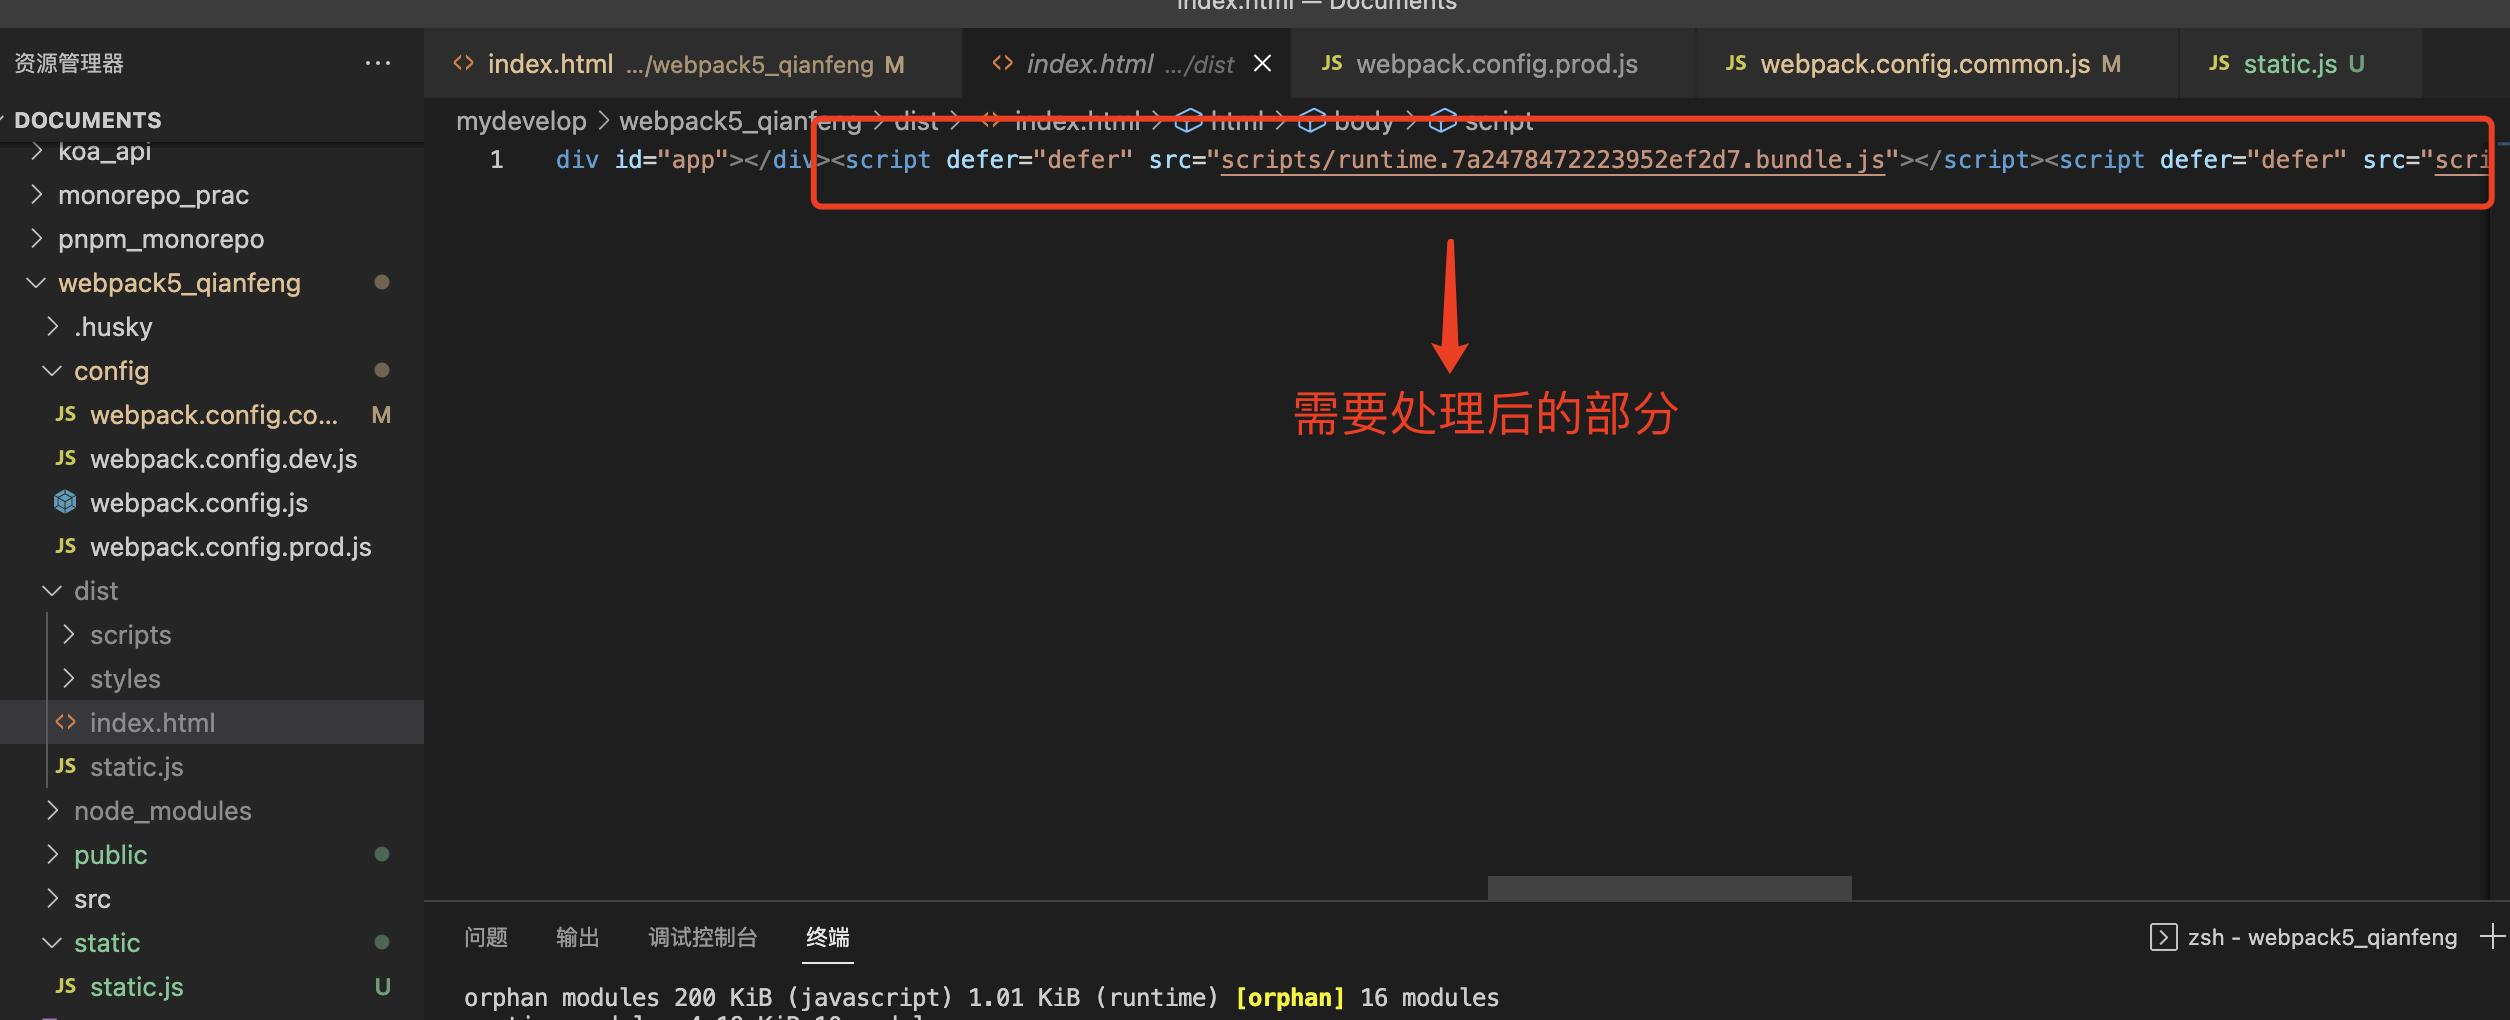
Copy-webpack-plugin
作用:将不需要打包的文件或文件夹复制到打包后的内容里面

尝试是否能在index.html里面导入文件???

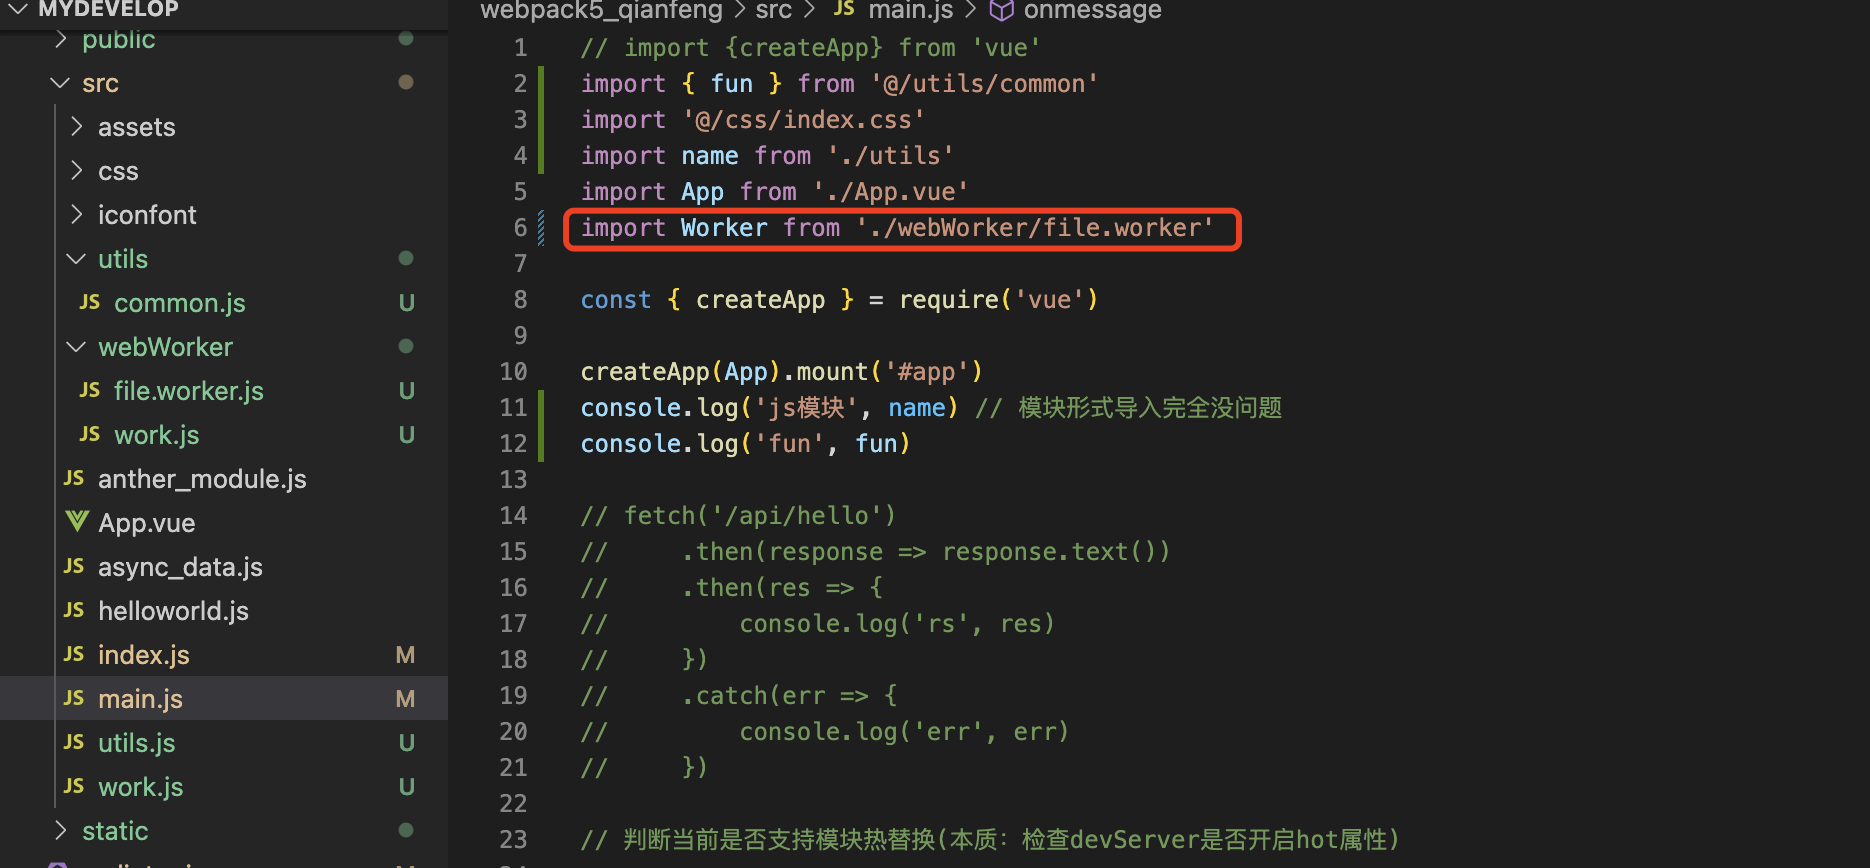
18、处理web worker文件
注意:直接靠相对路径来引入js文件是不行的。
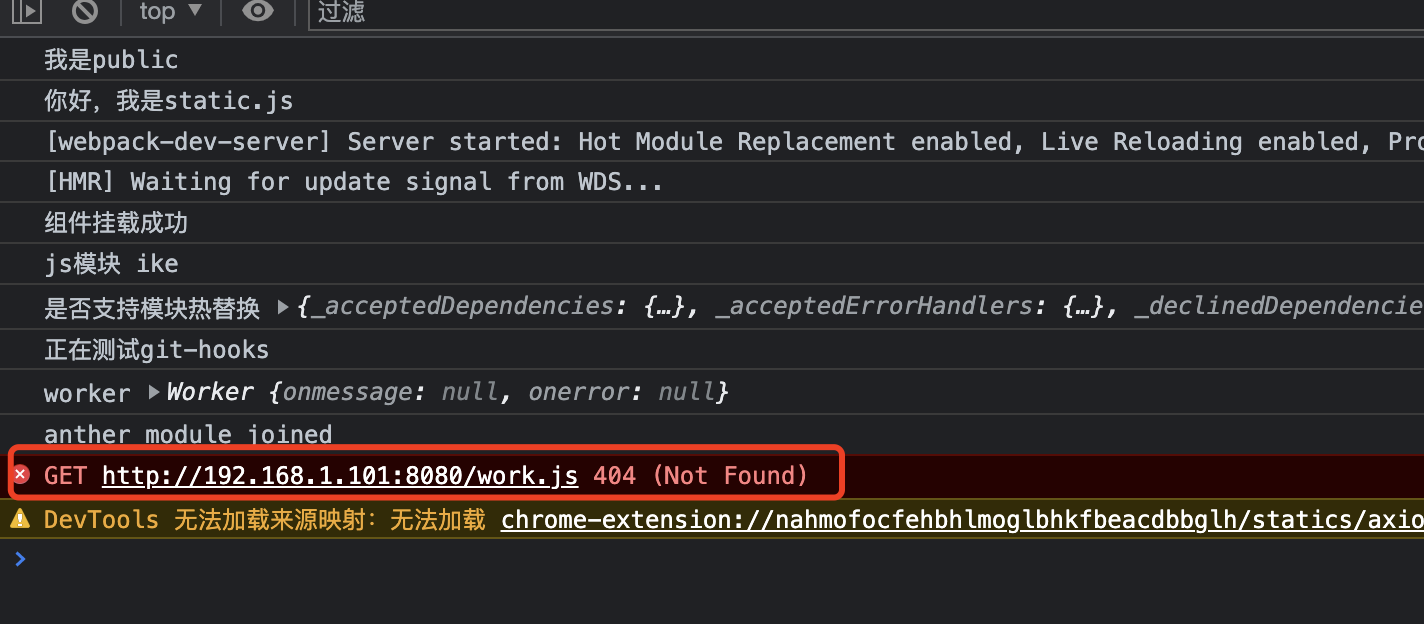
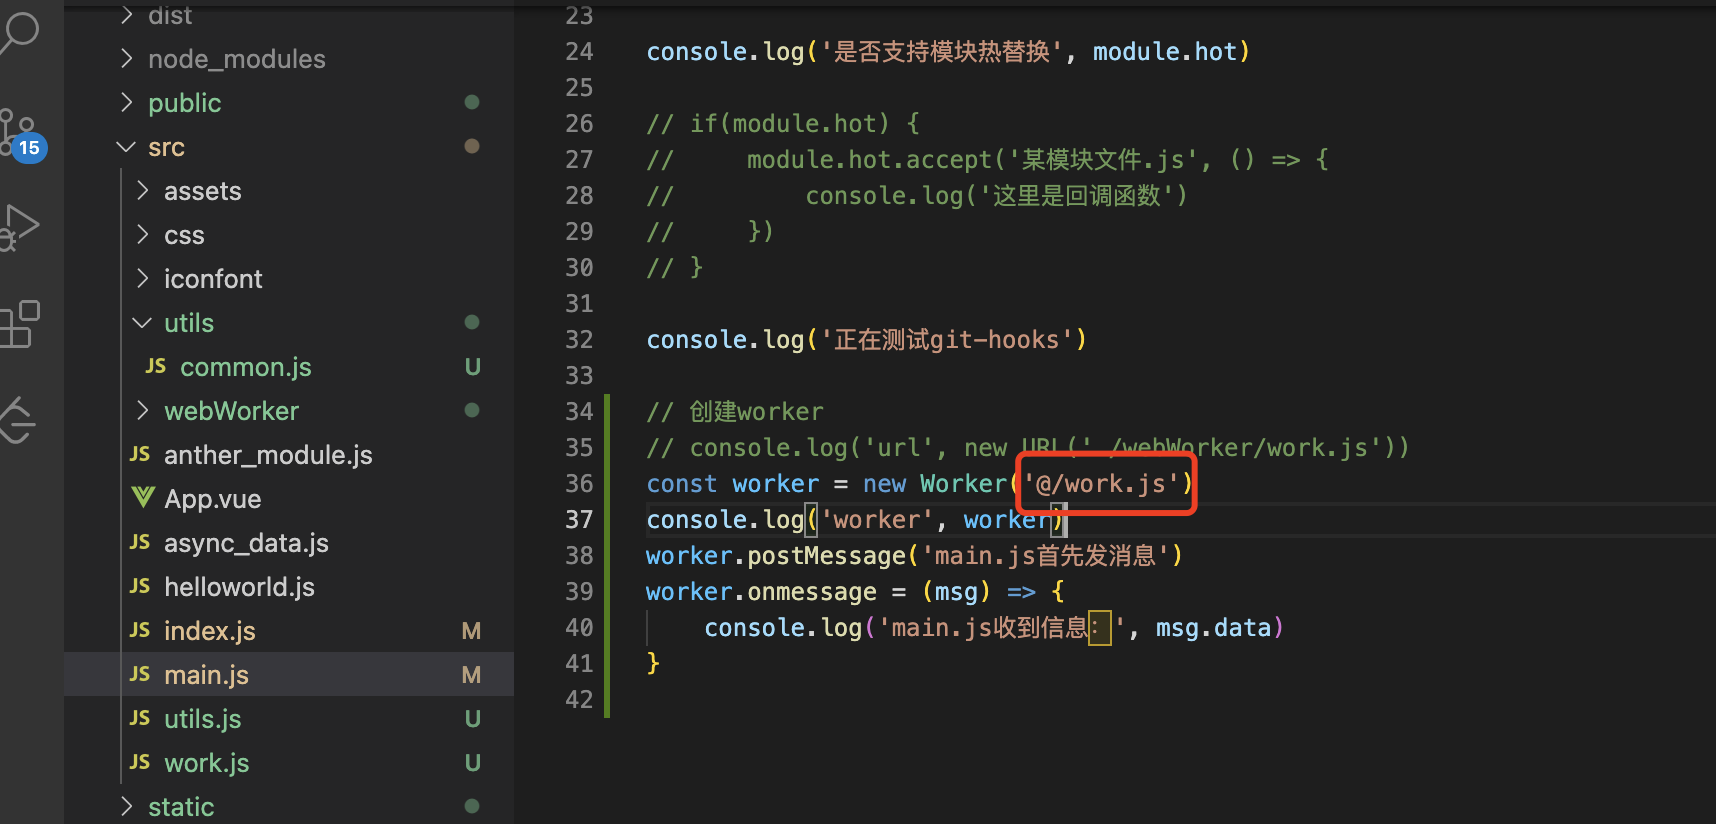
即使用文件解析路径也不行
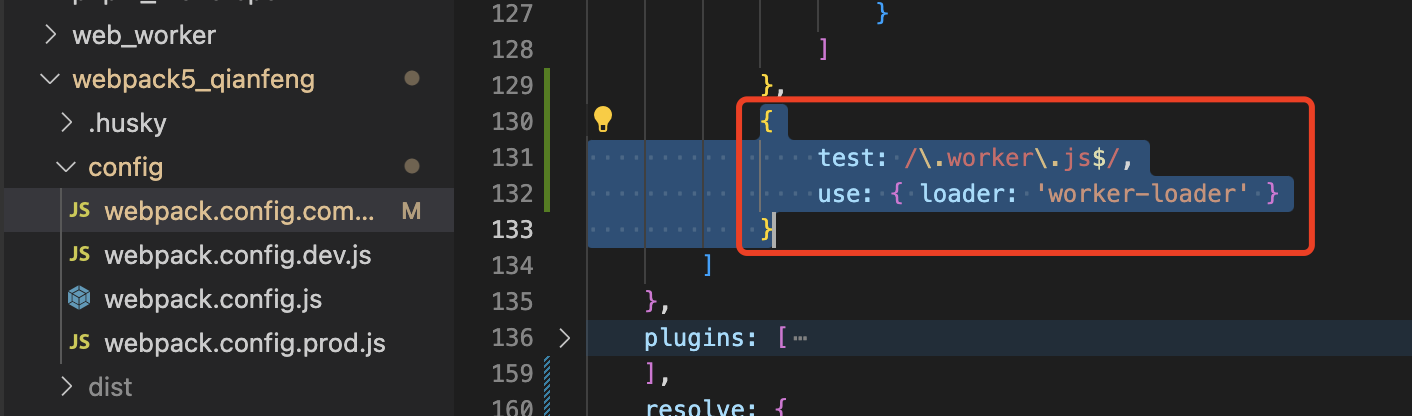
解决办法:
安装worker-loader
npm install worker-loader --save-devwebpack配置如下所示
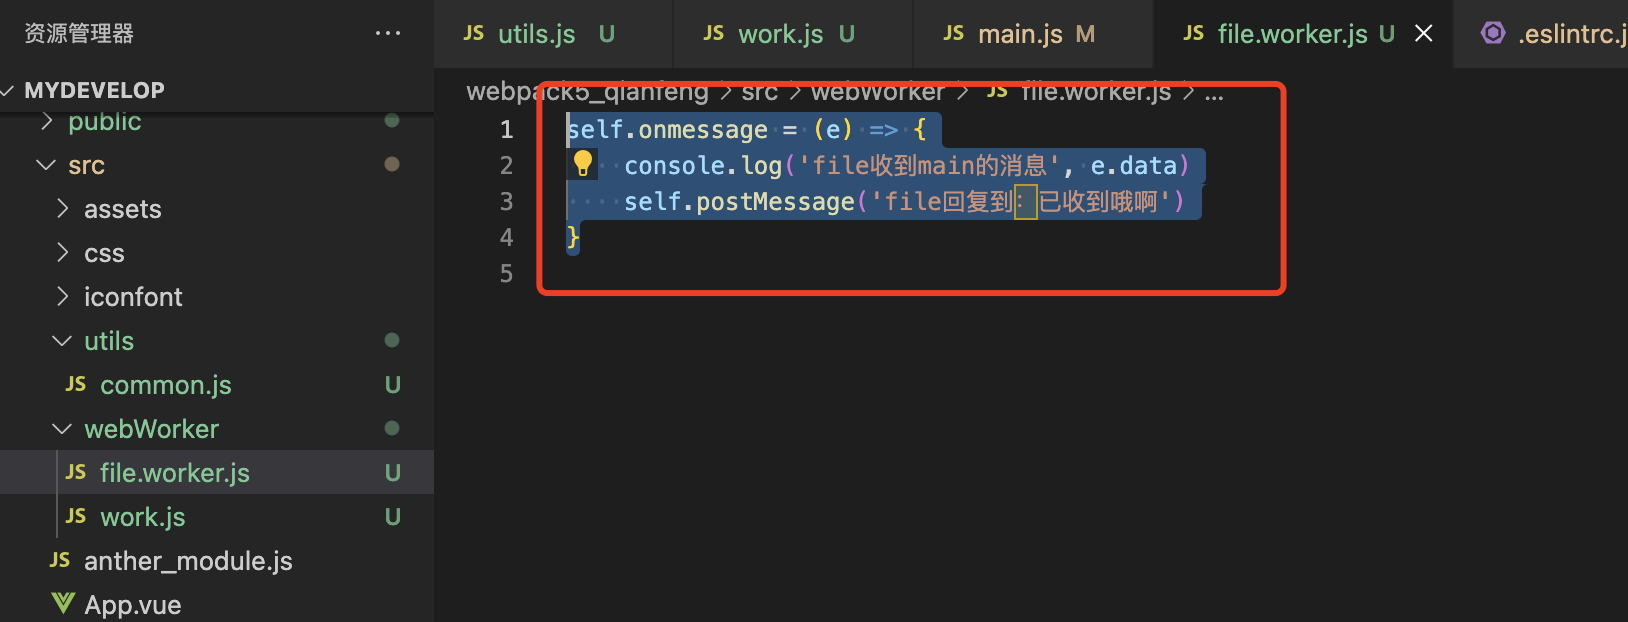

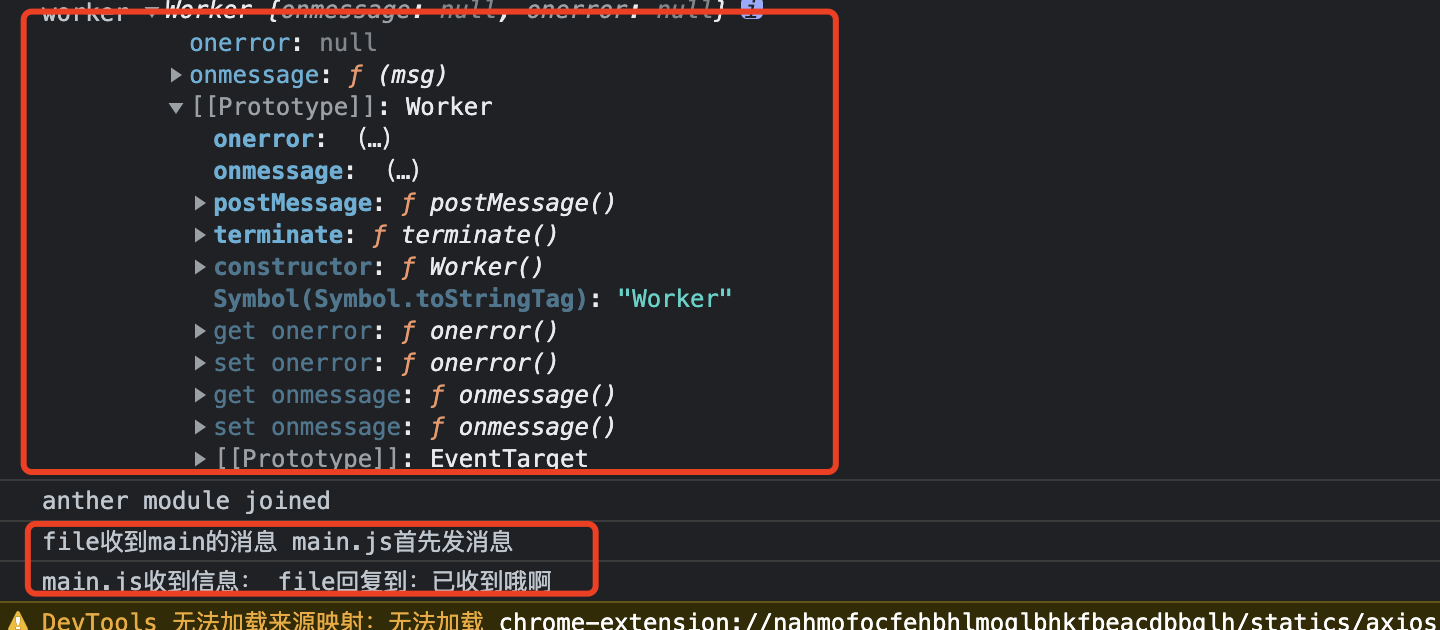
如上所示正常使用

打包后在主chunk里面可以看见引入文件情况如上所示
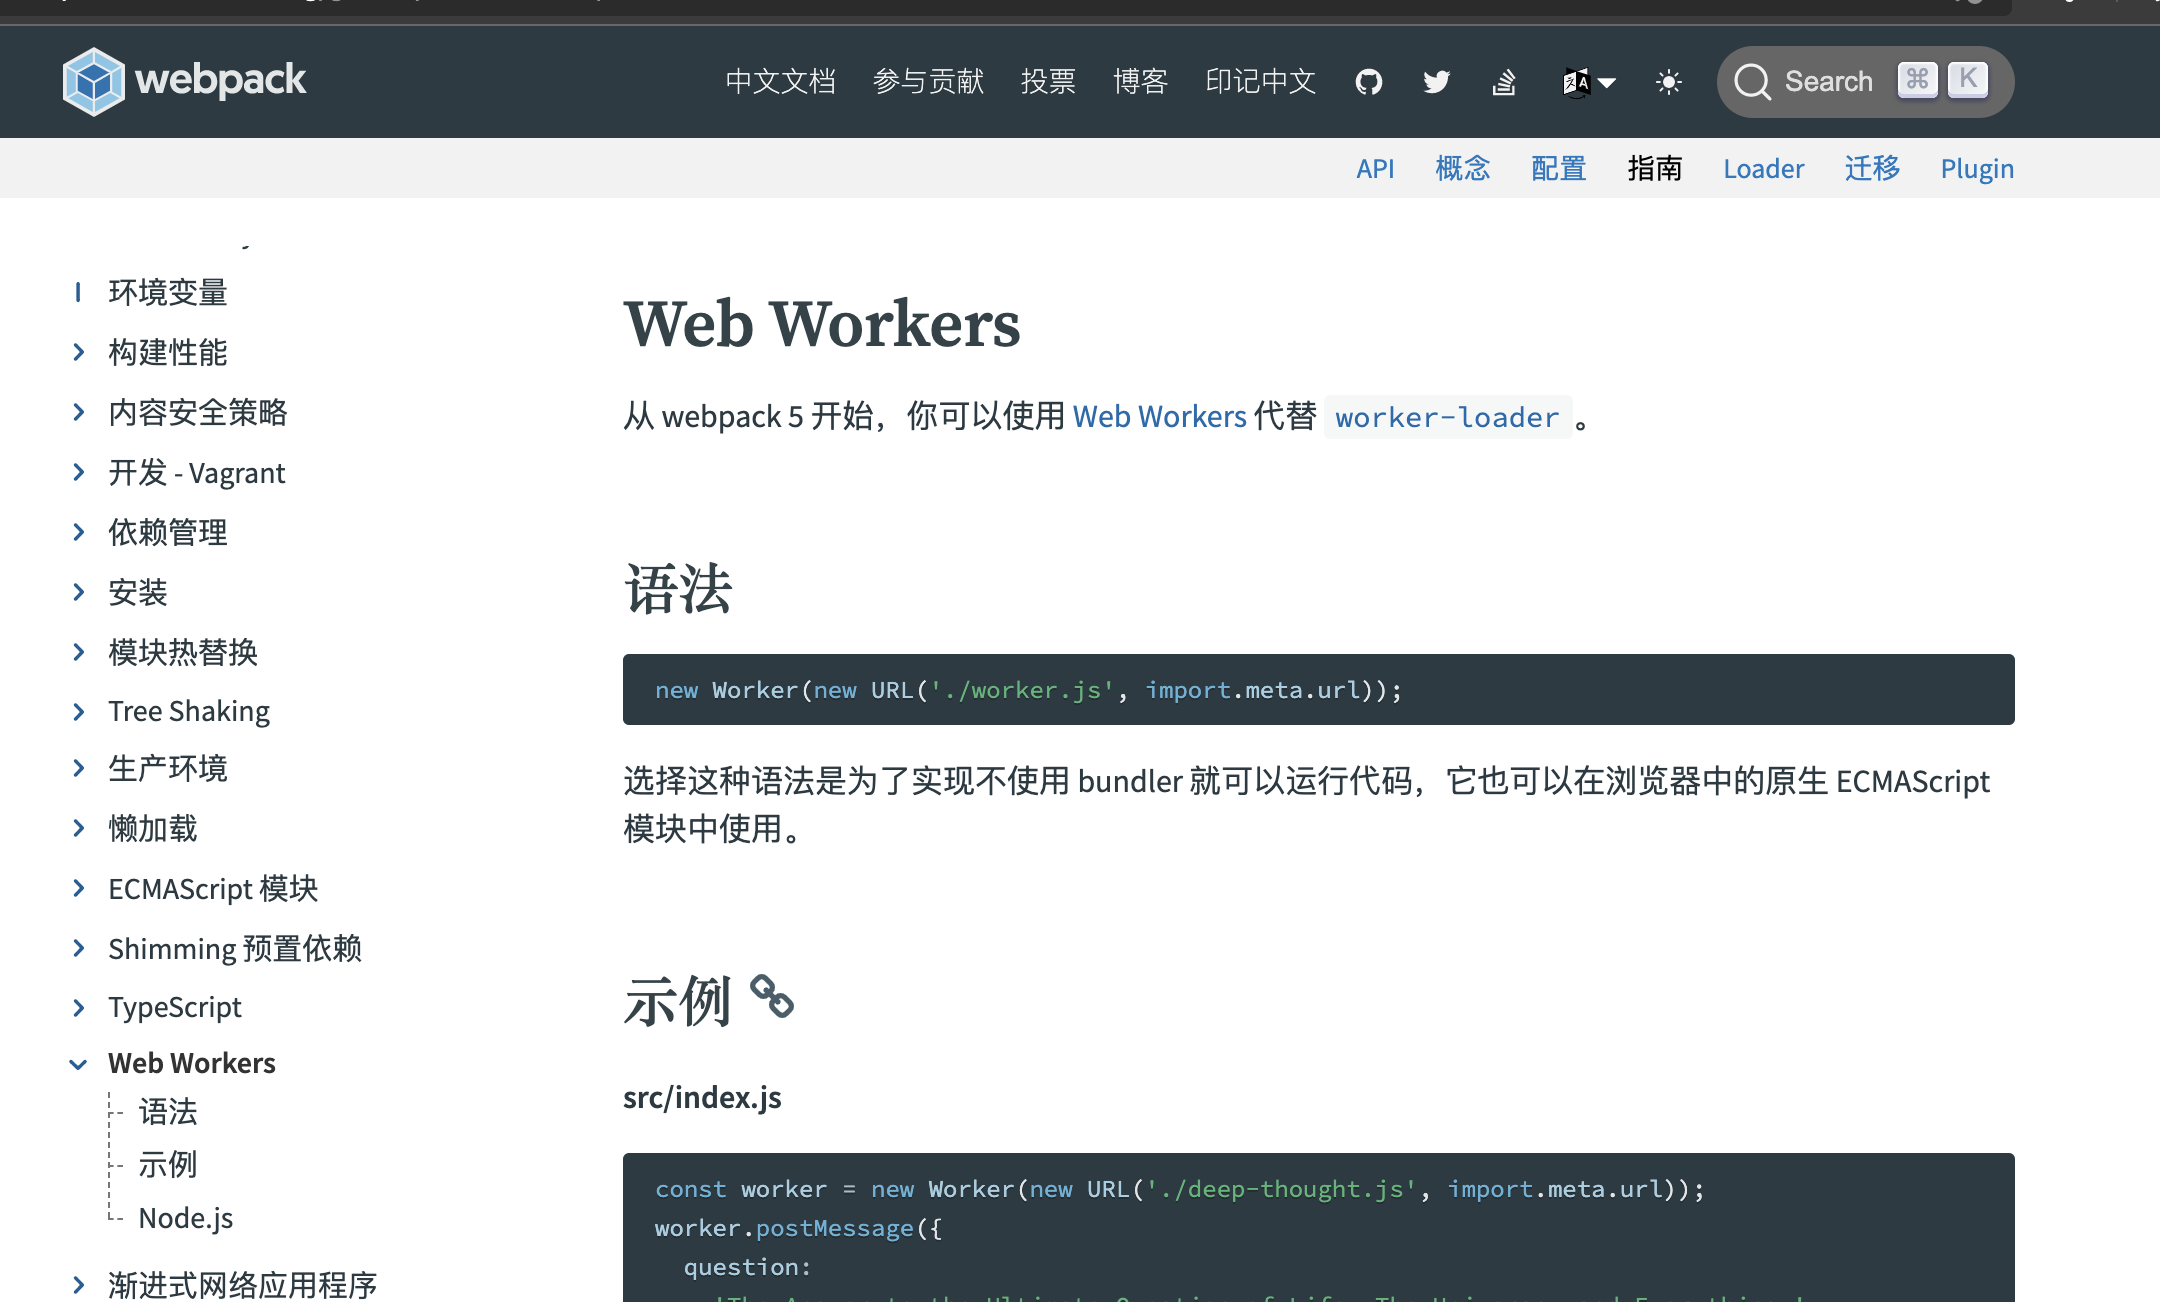
官网有介绍
19、集成typeScript
npm install typescript ts-loader -D项目根目录下创建tsconfig.json
npx tsx --init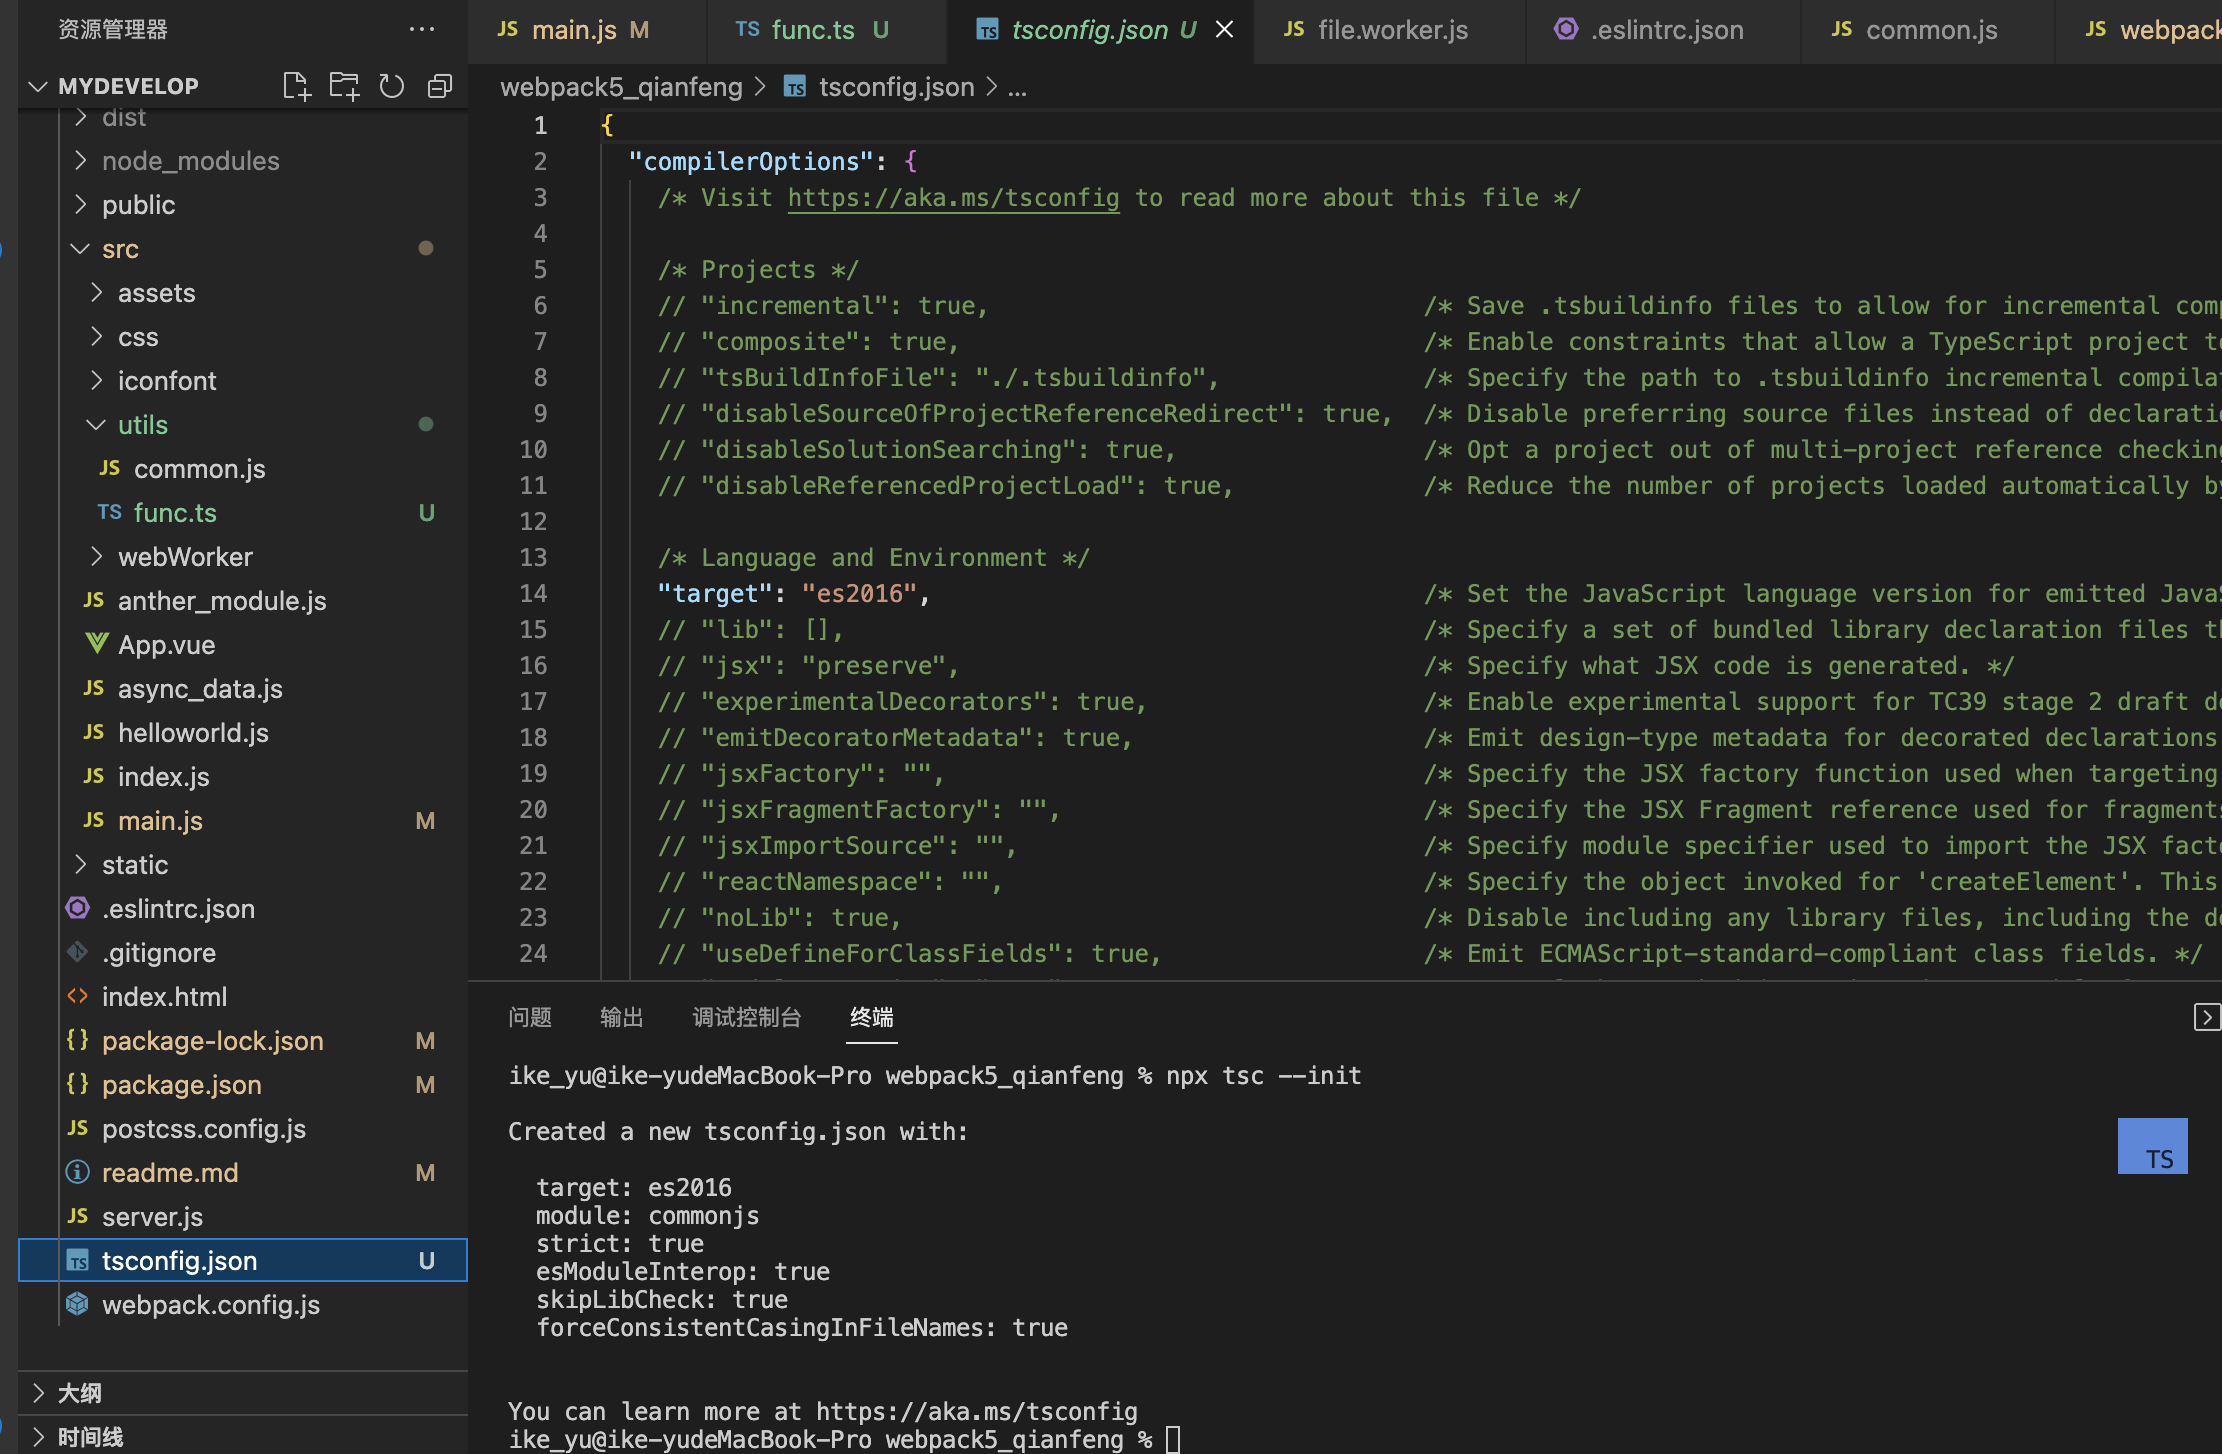
配置tsconfig.json, 即额外开启
"rootDir": "./src",
"outDir": "./dist",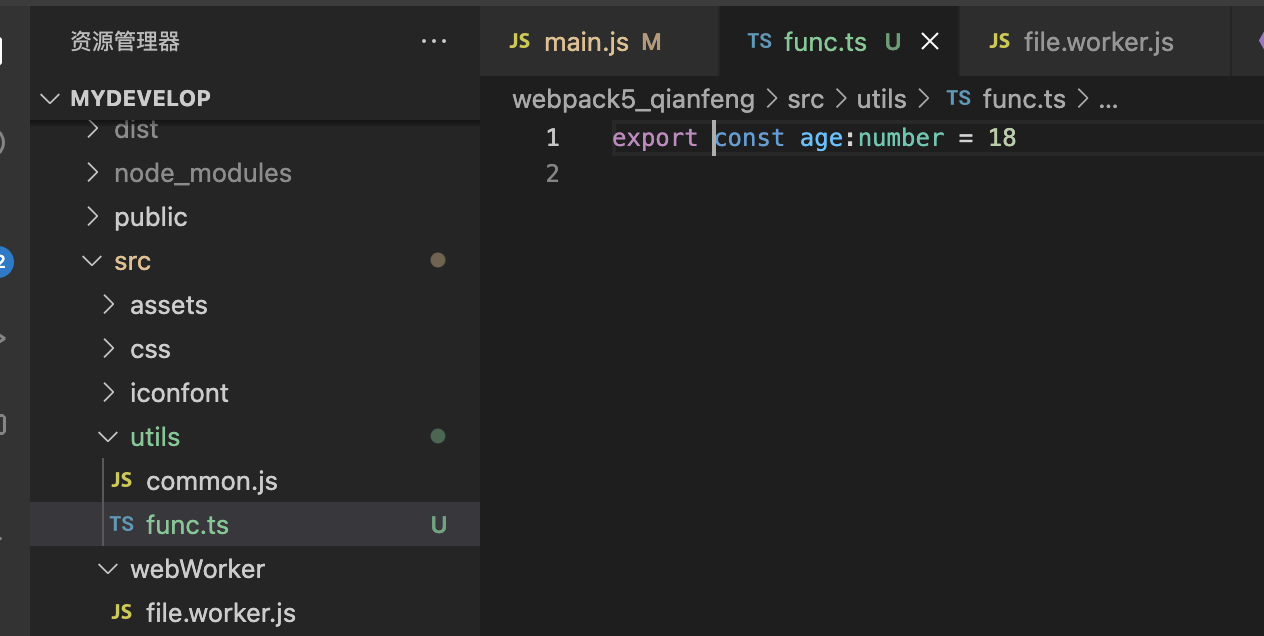
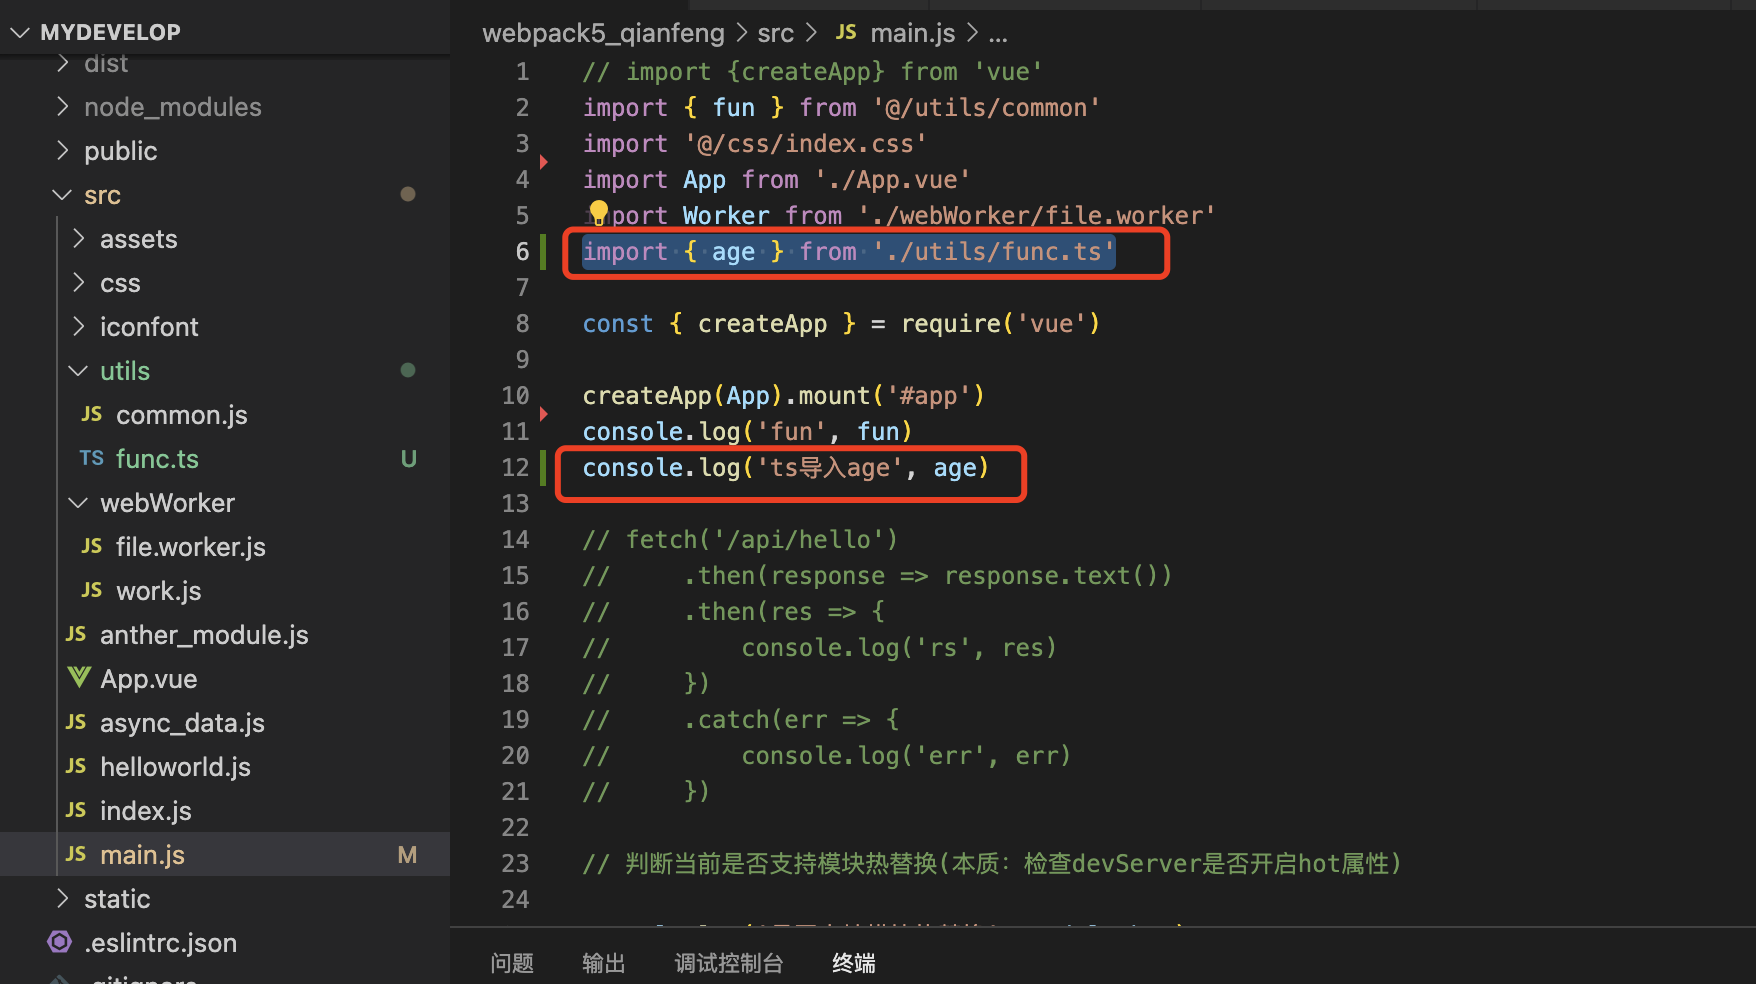
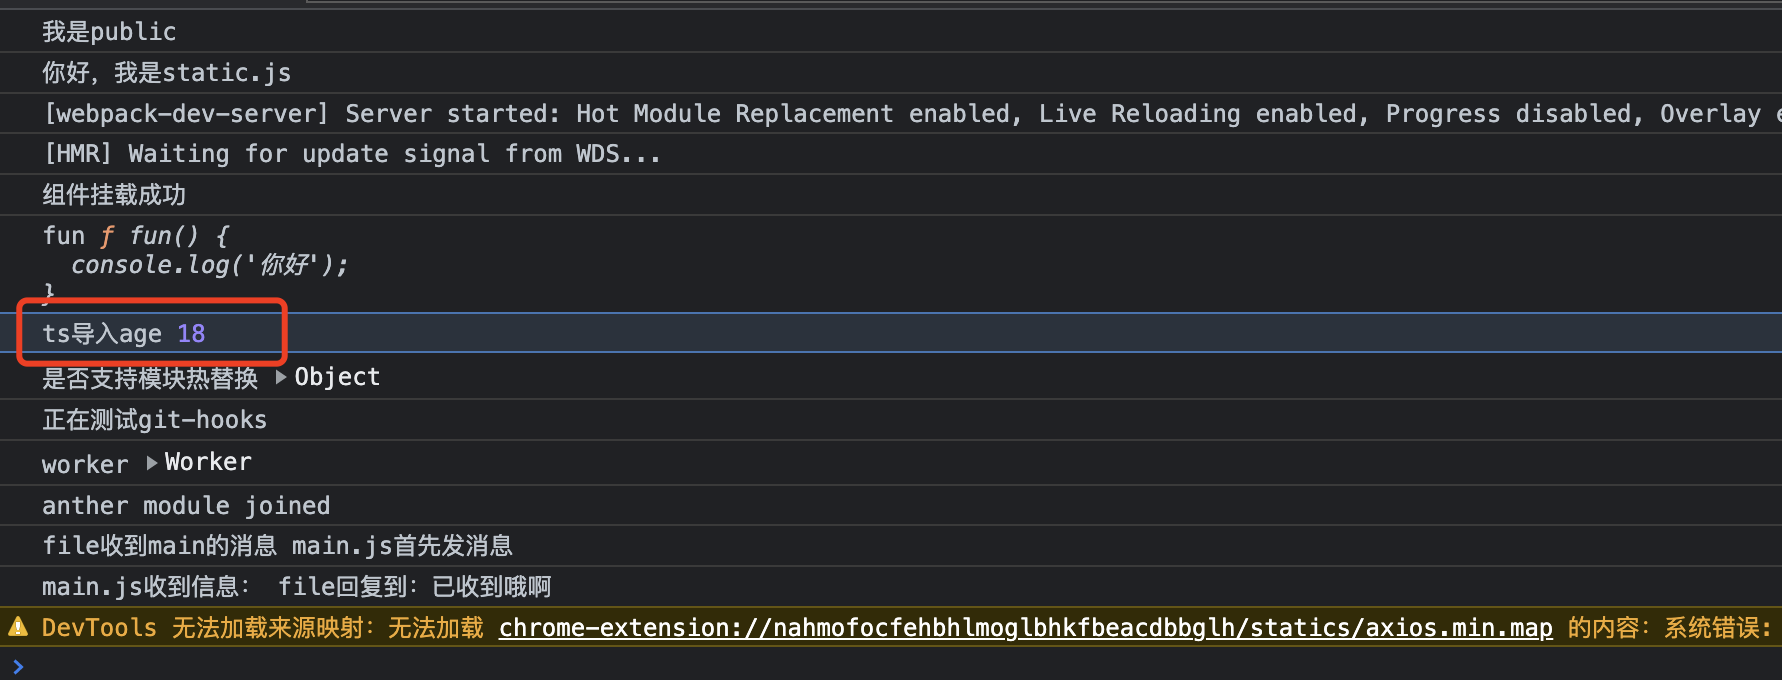
注意:ts中引入其它文件会报错
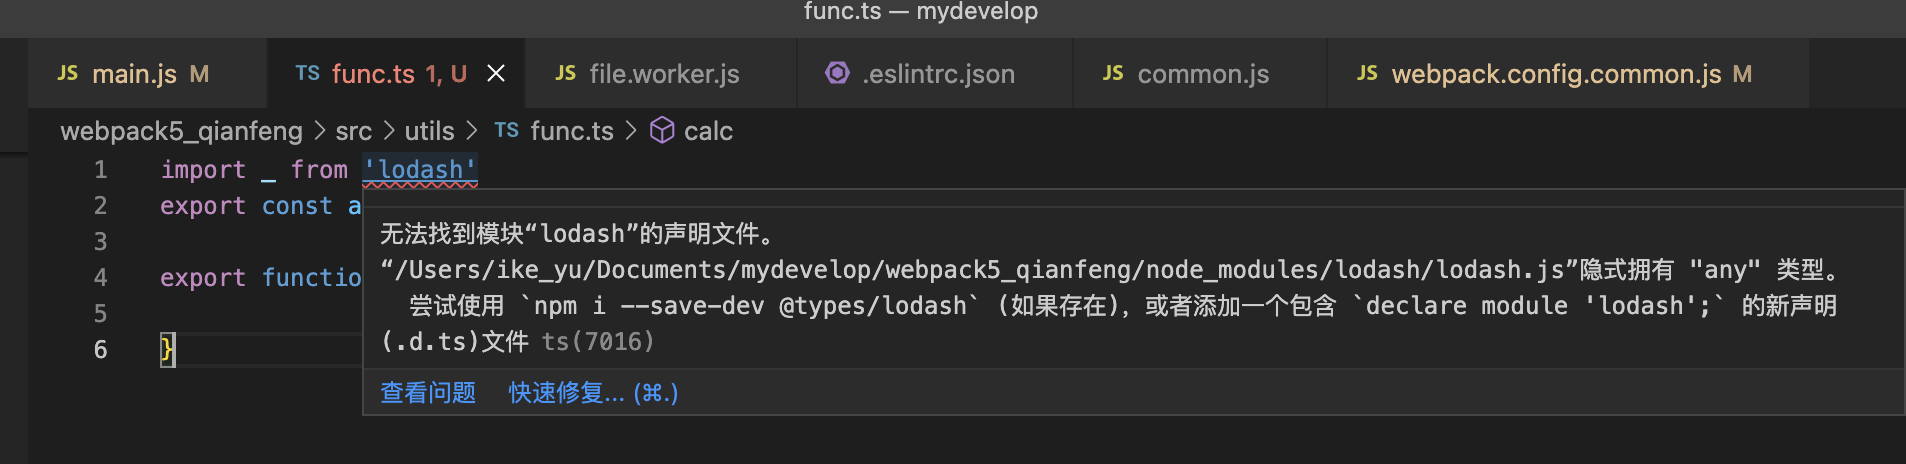
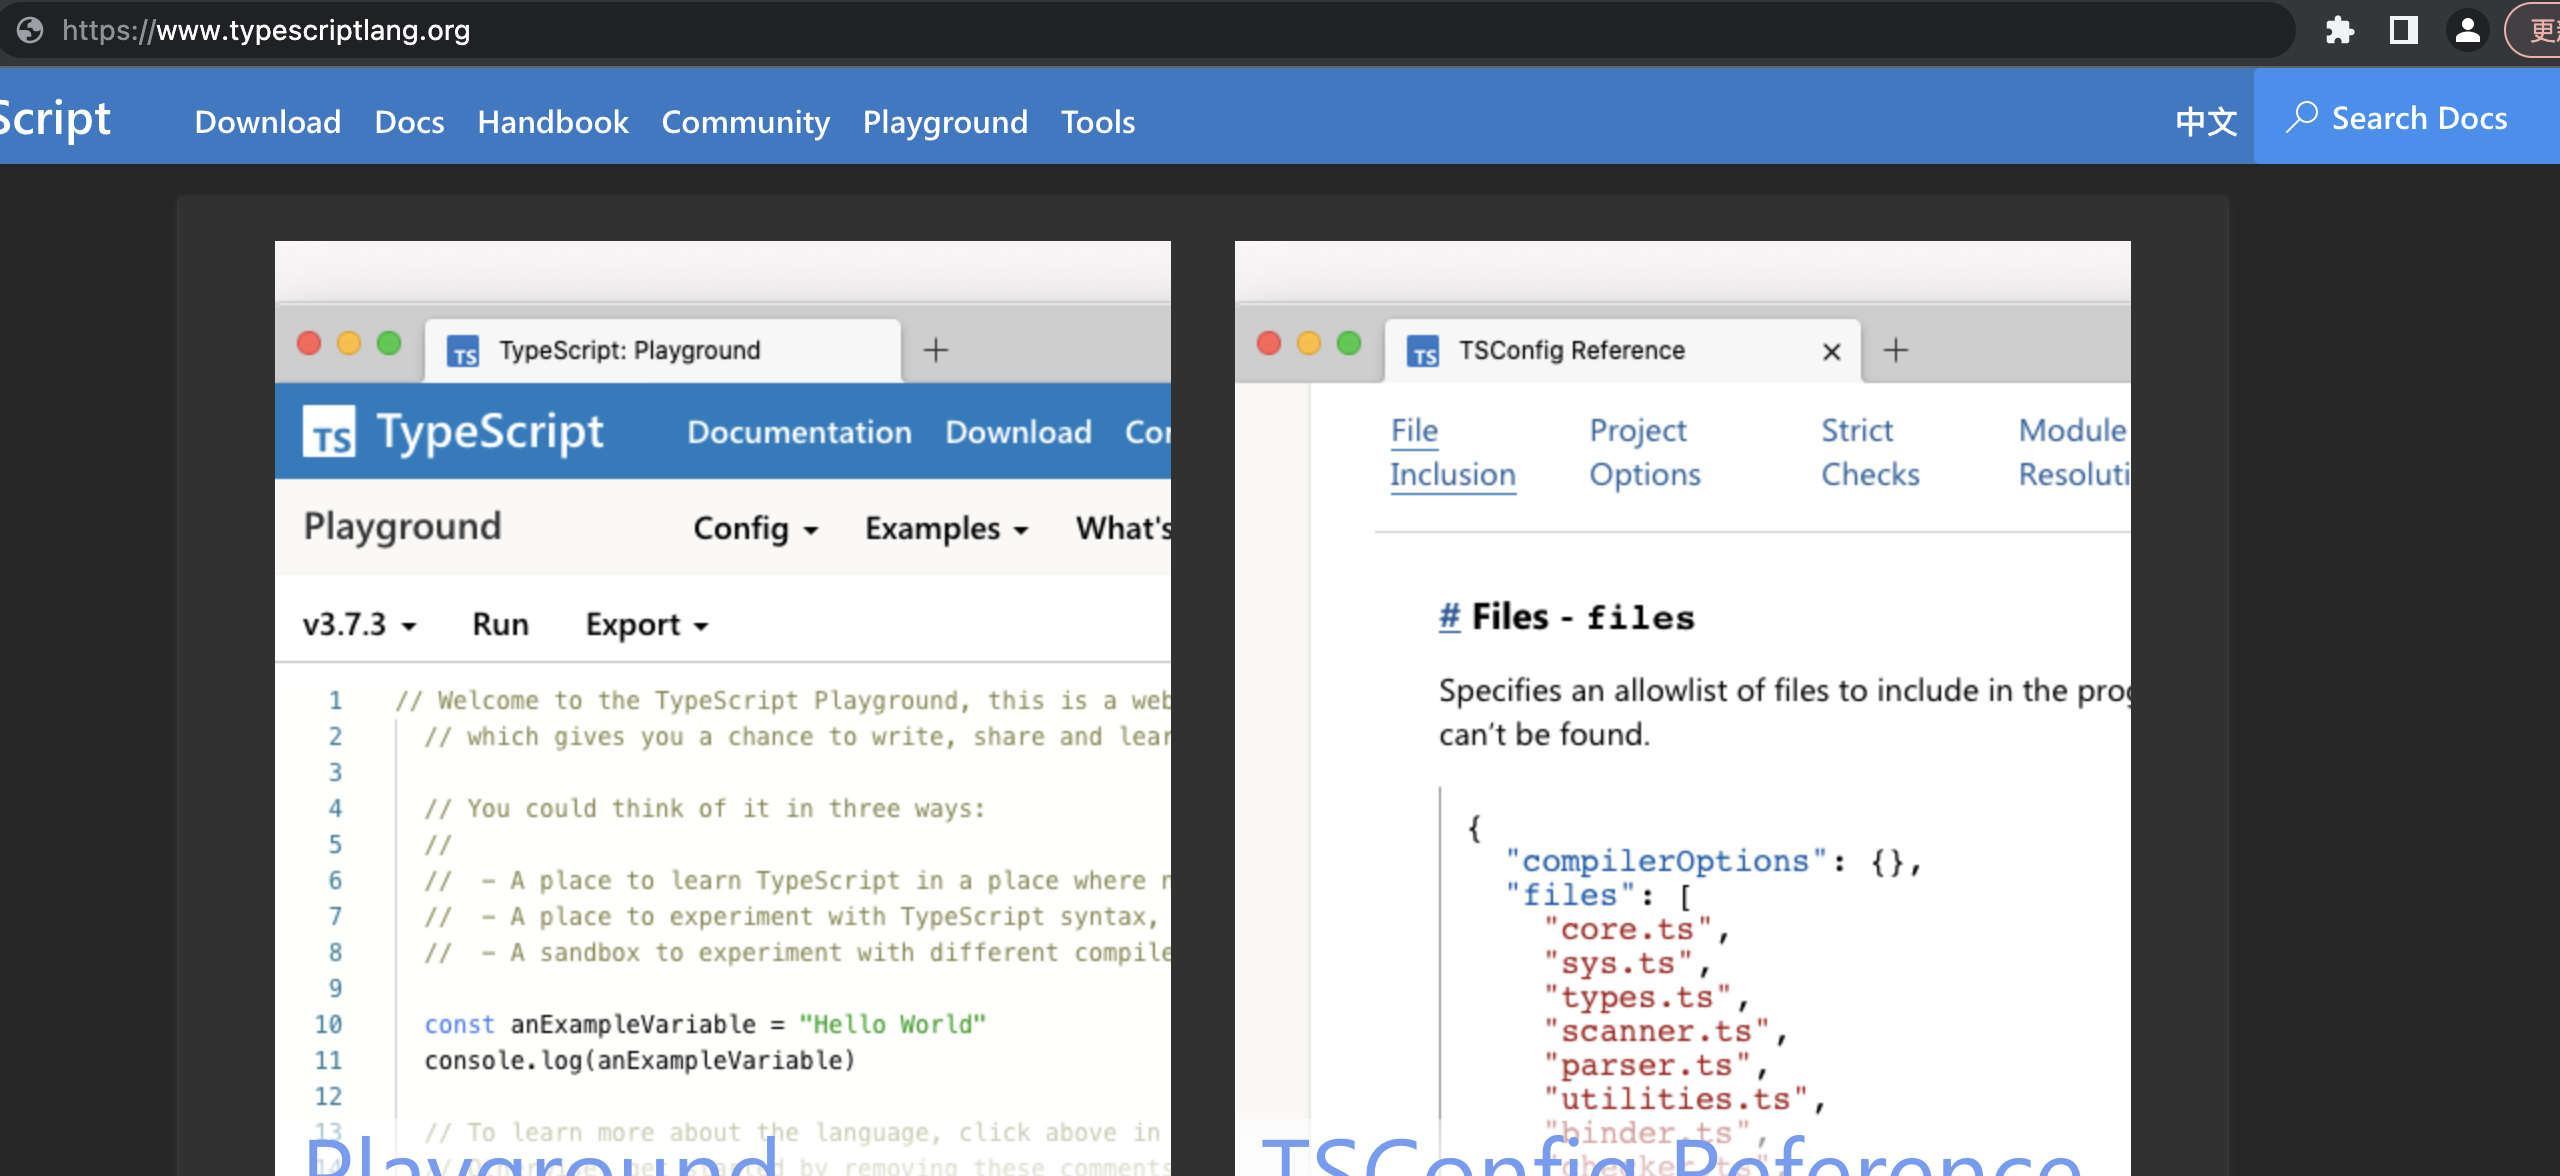
https://www.typescriptlang.org/
在typescript上查找对应依赖名,找对应依赖需要安装的类型包
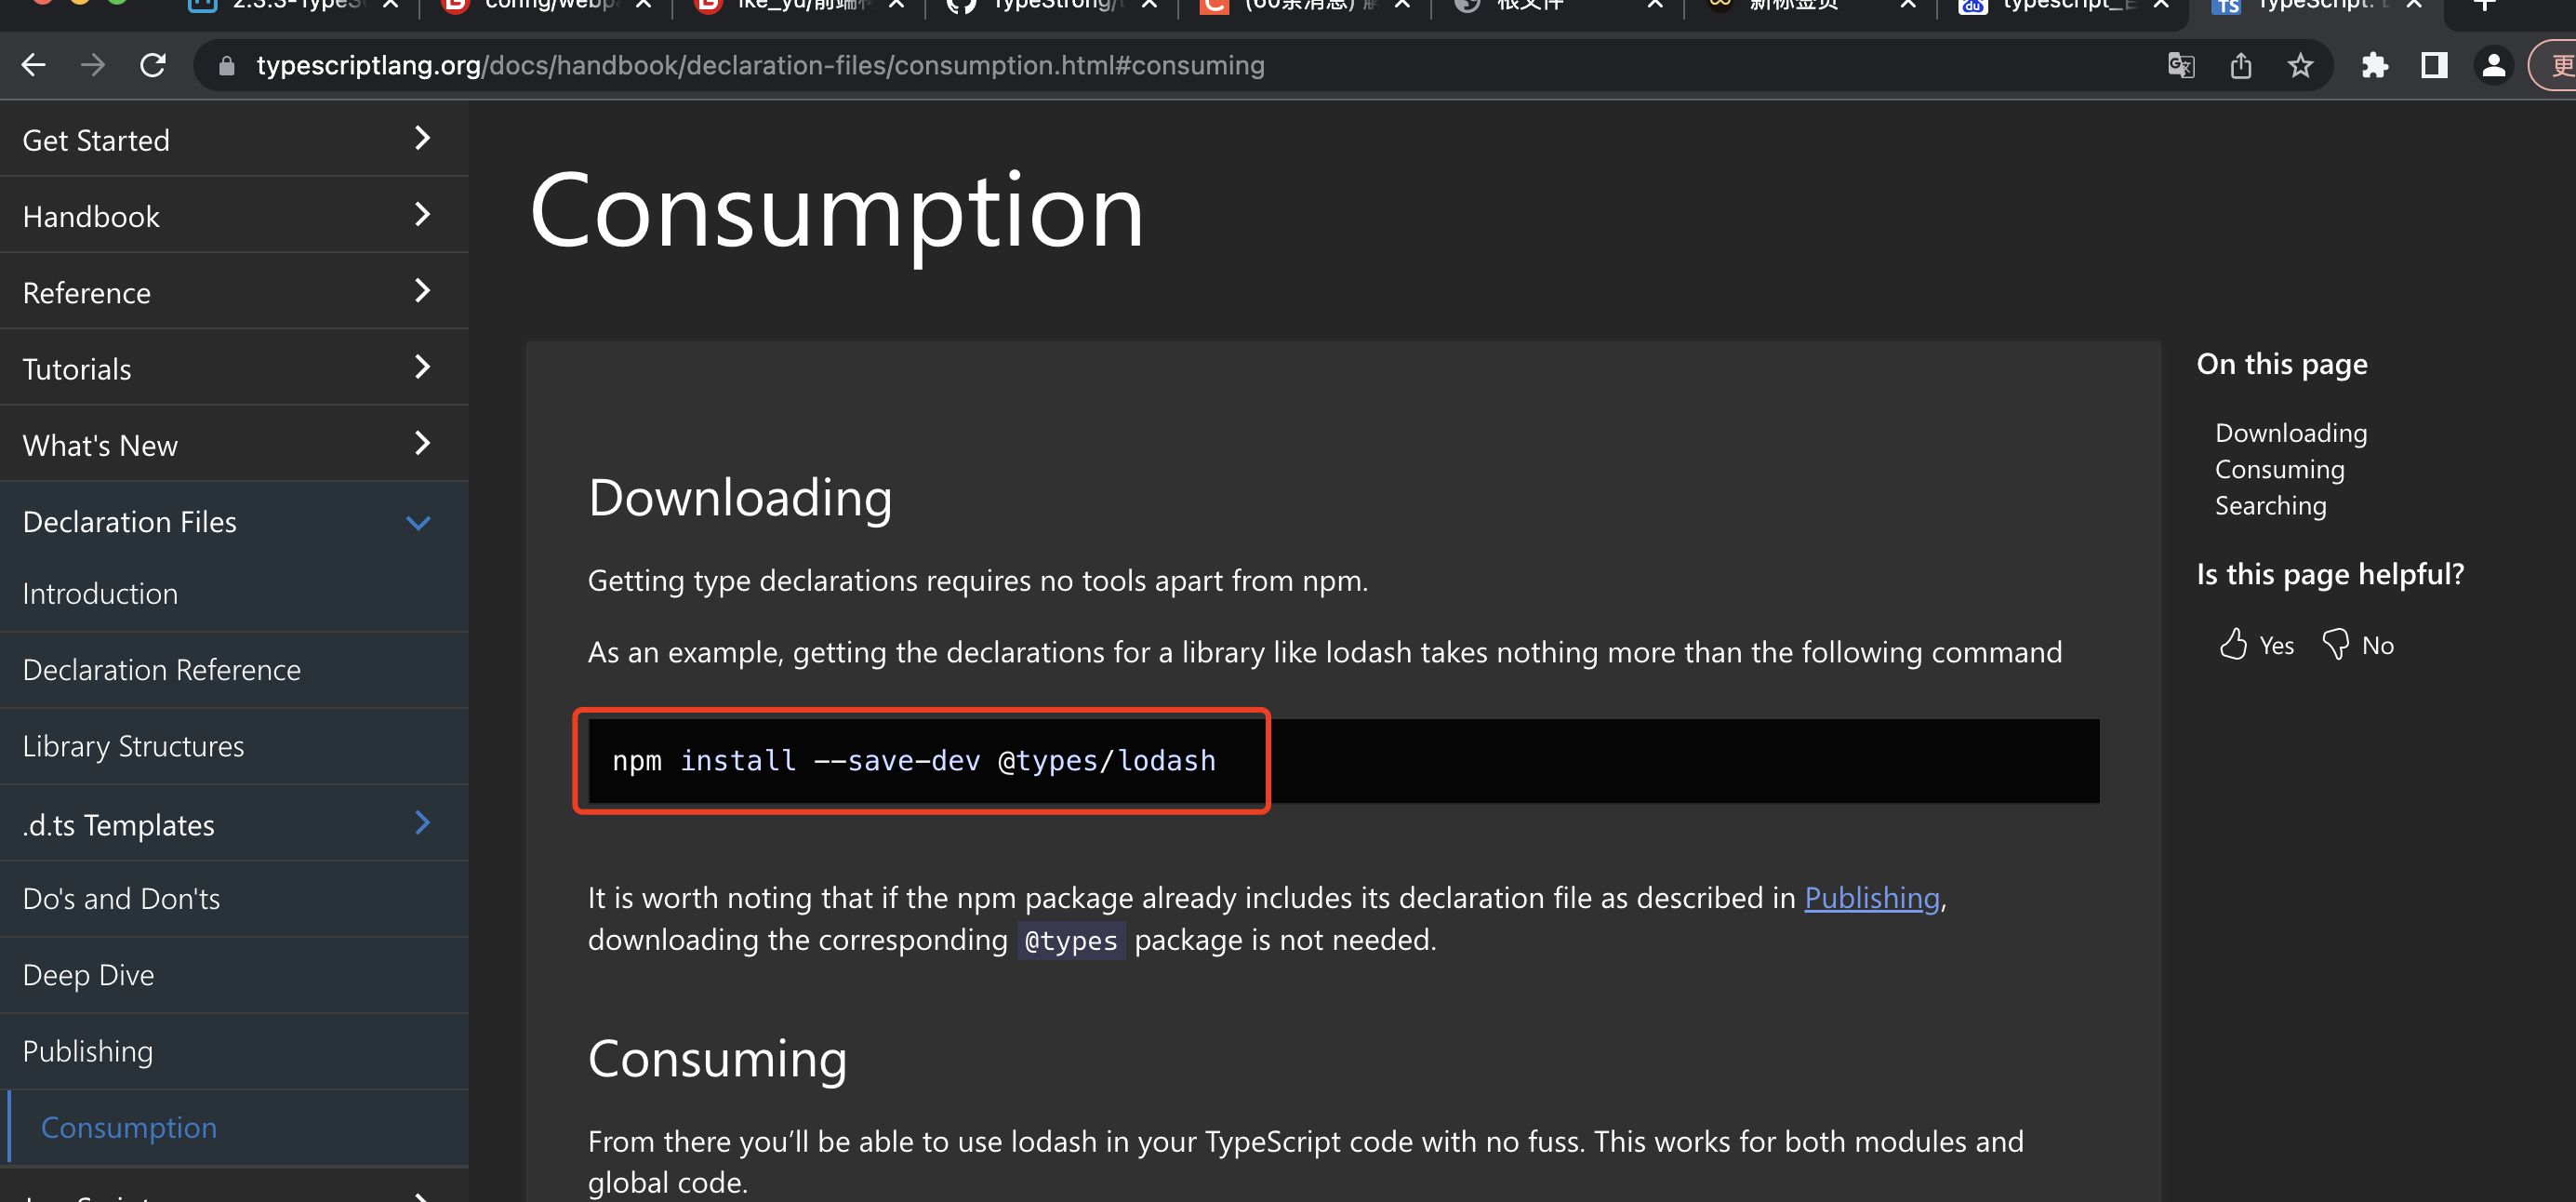
npm install --save-dev @types/lodash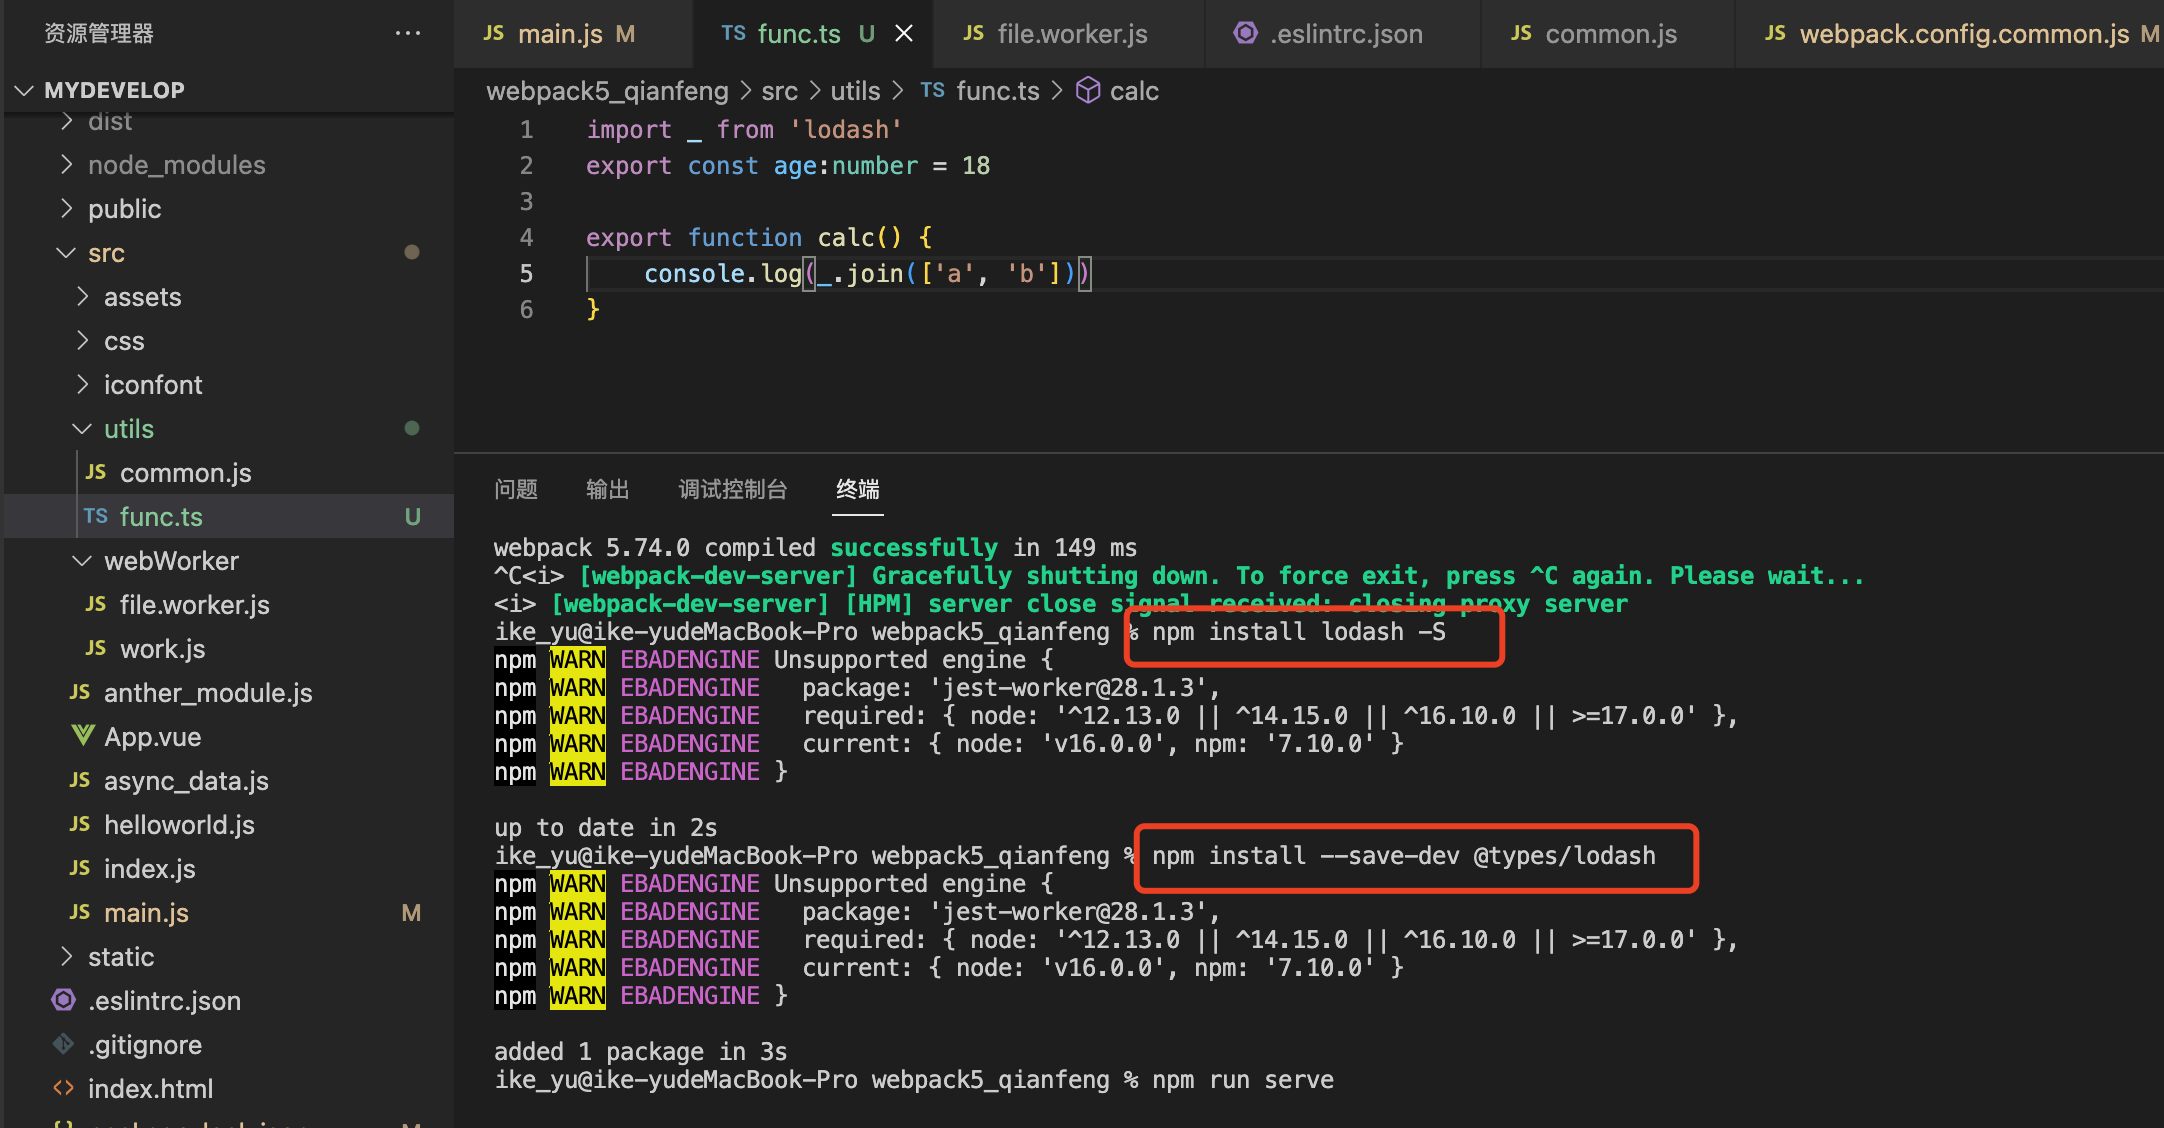
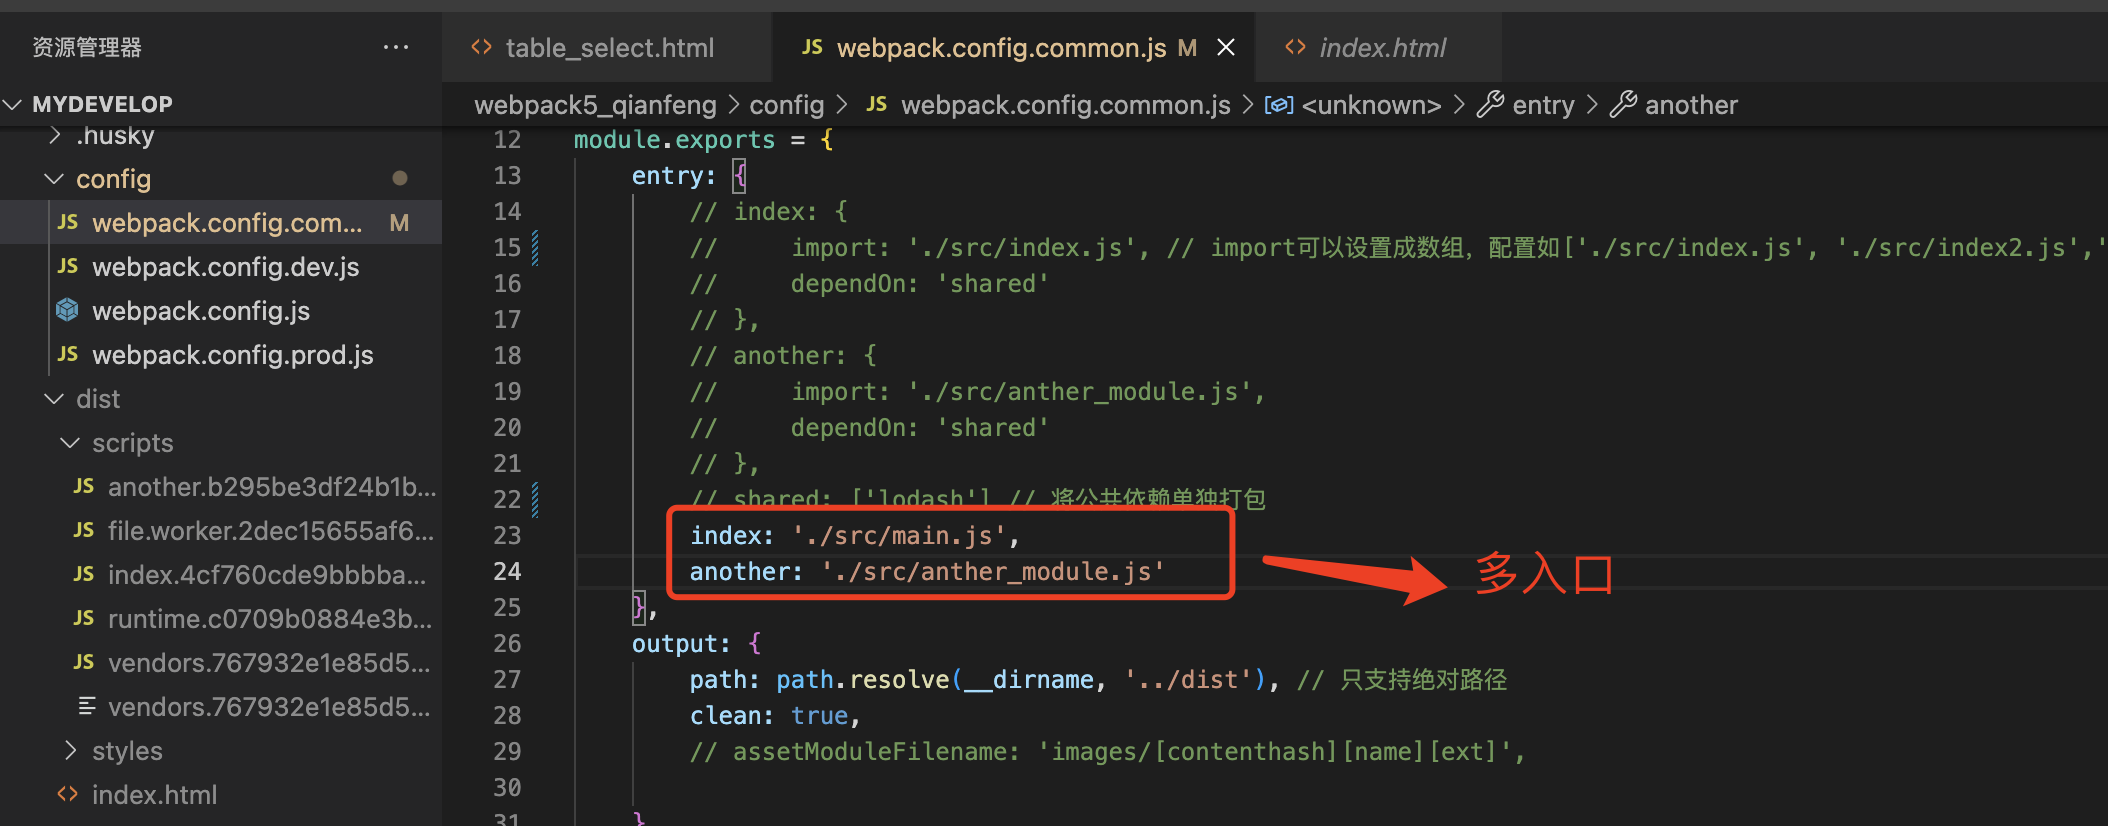
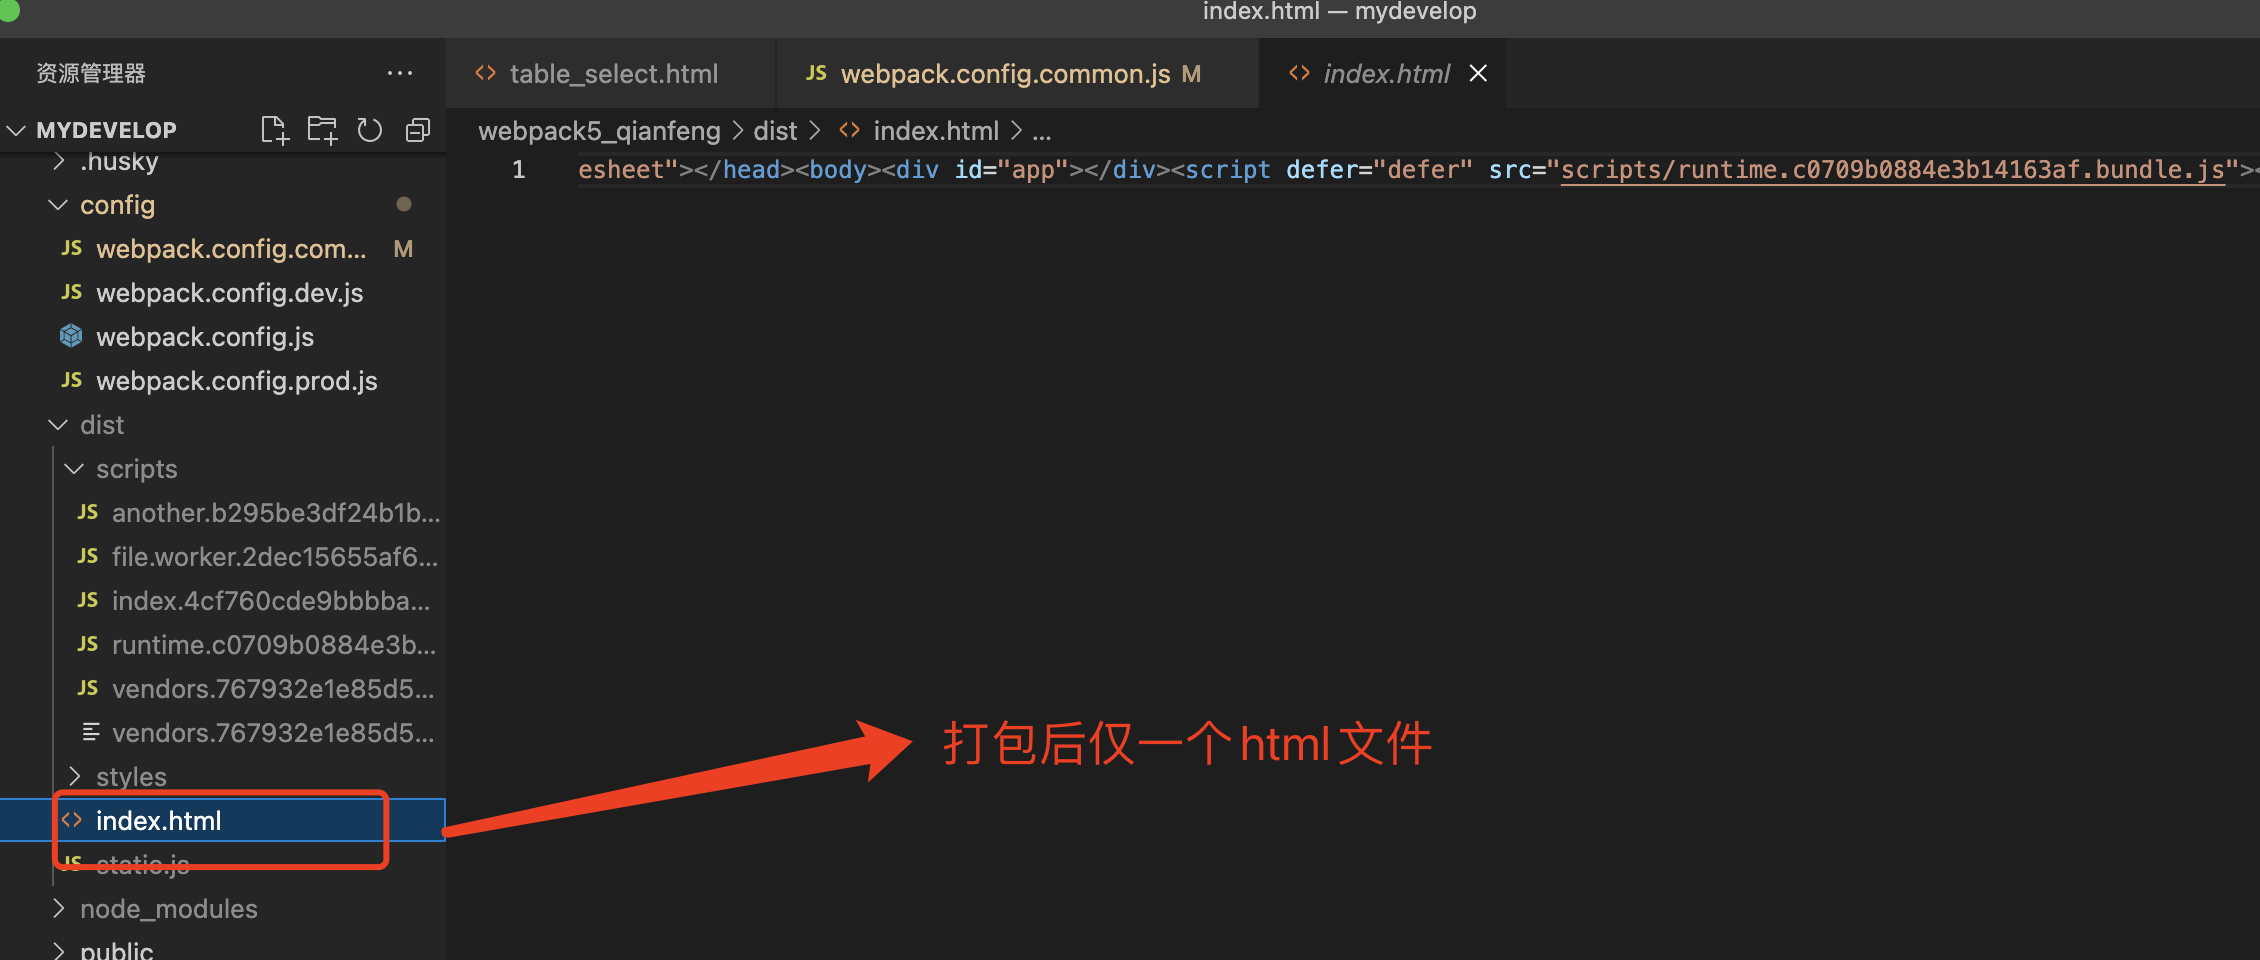
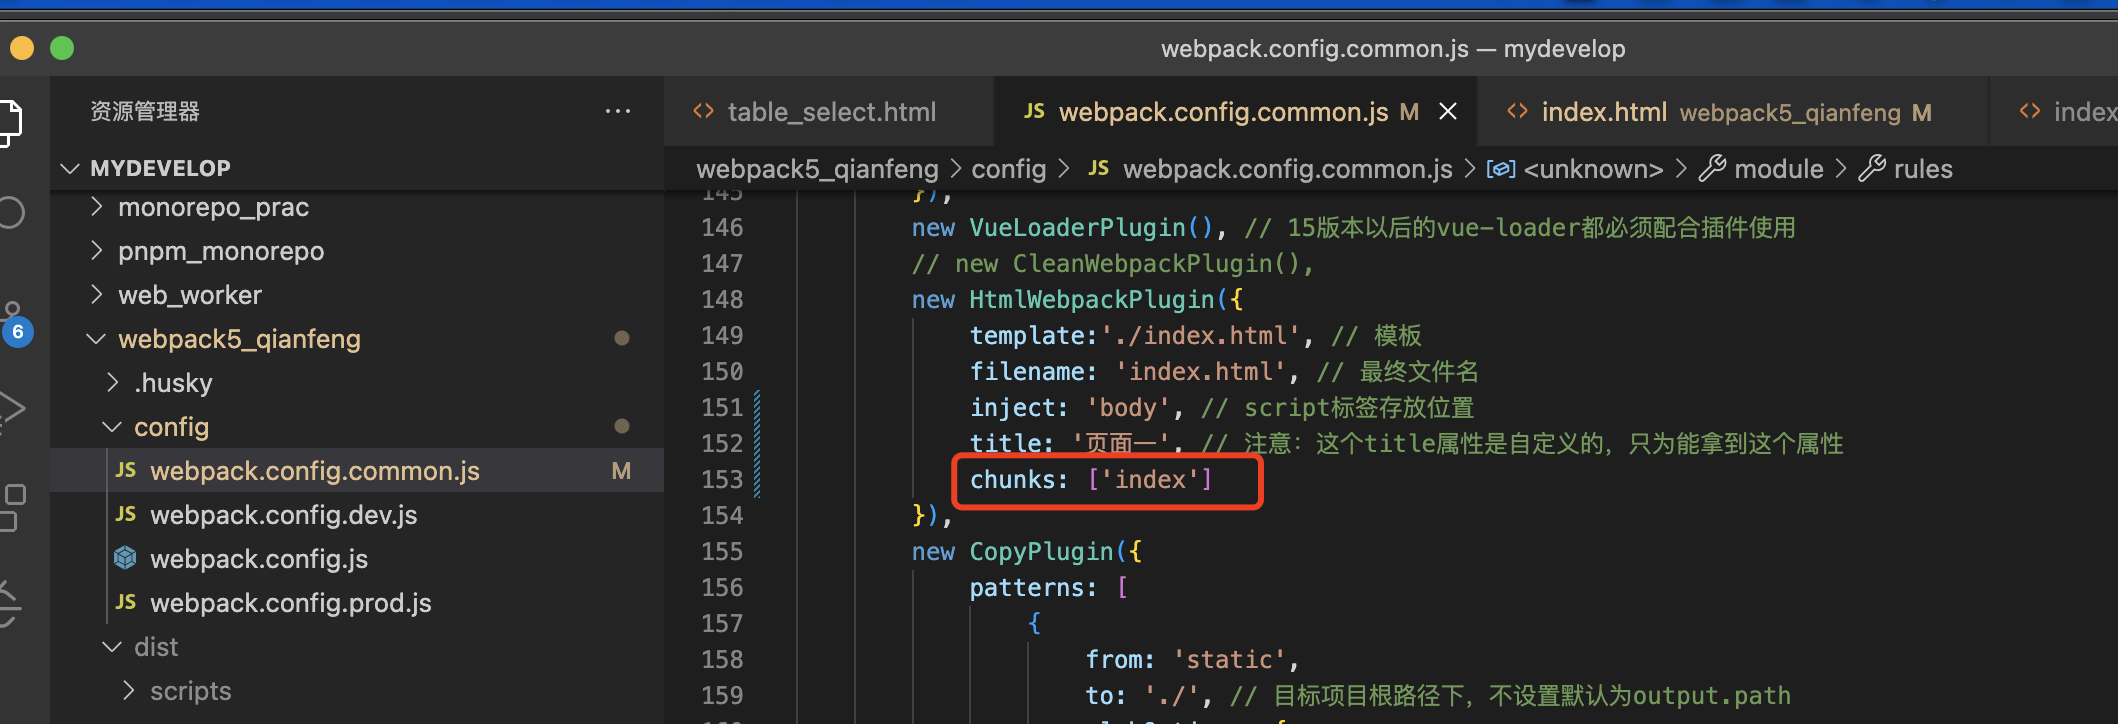
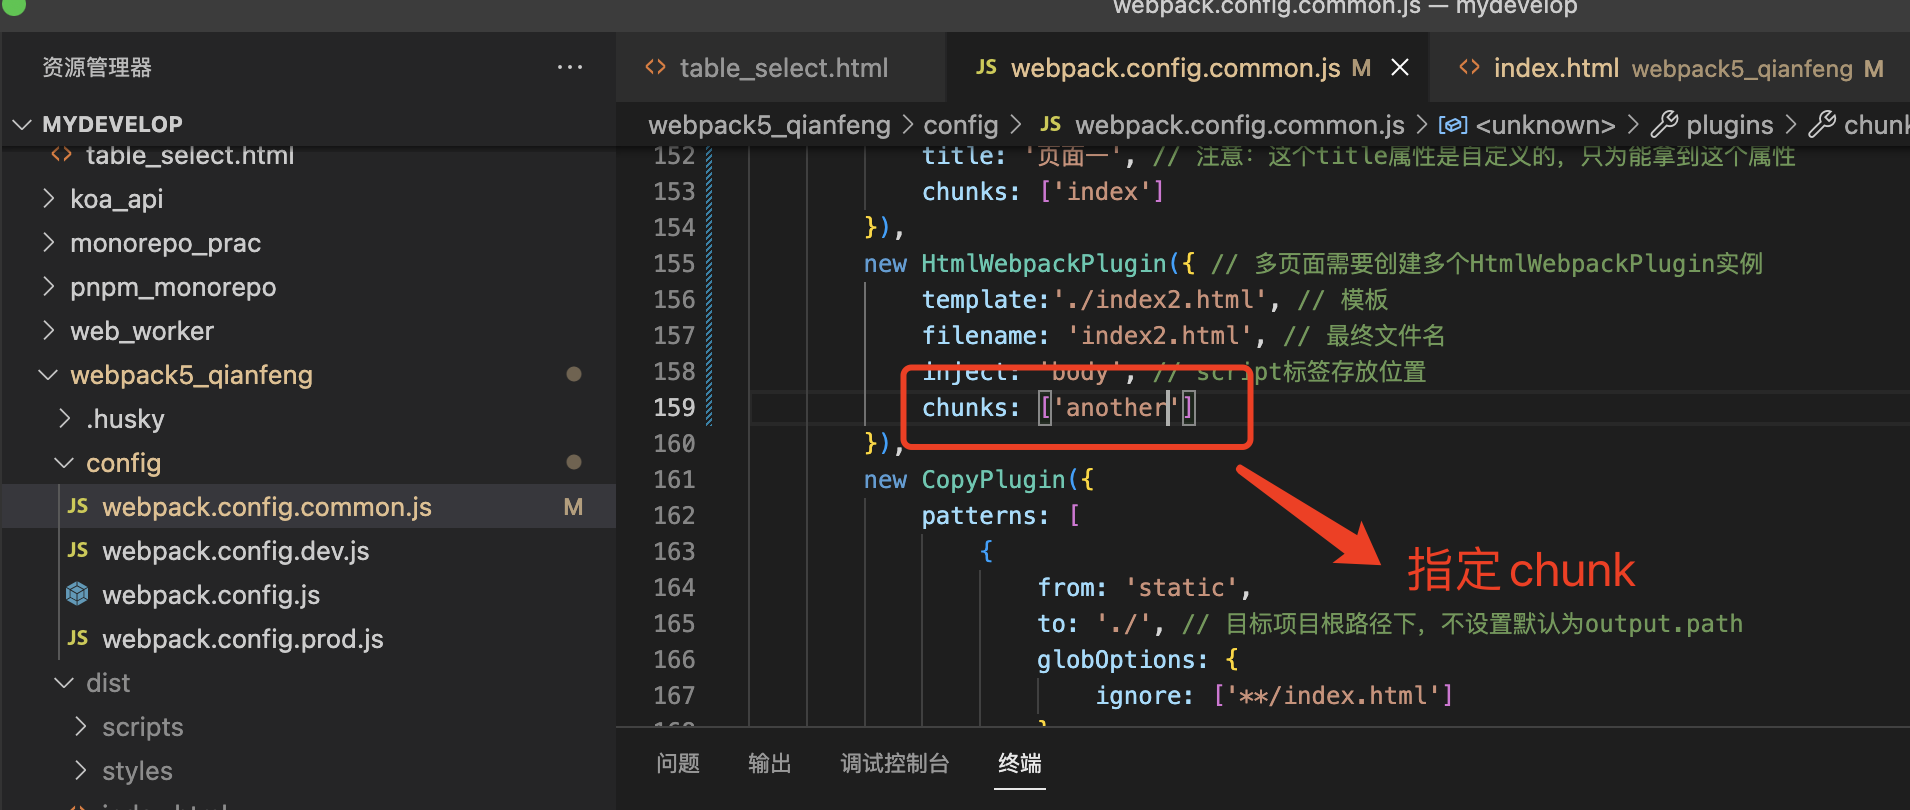
20、集成多入口html
常规配置下只有html文件导入打包后的所有资源(css/js)文件
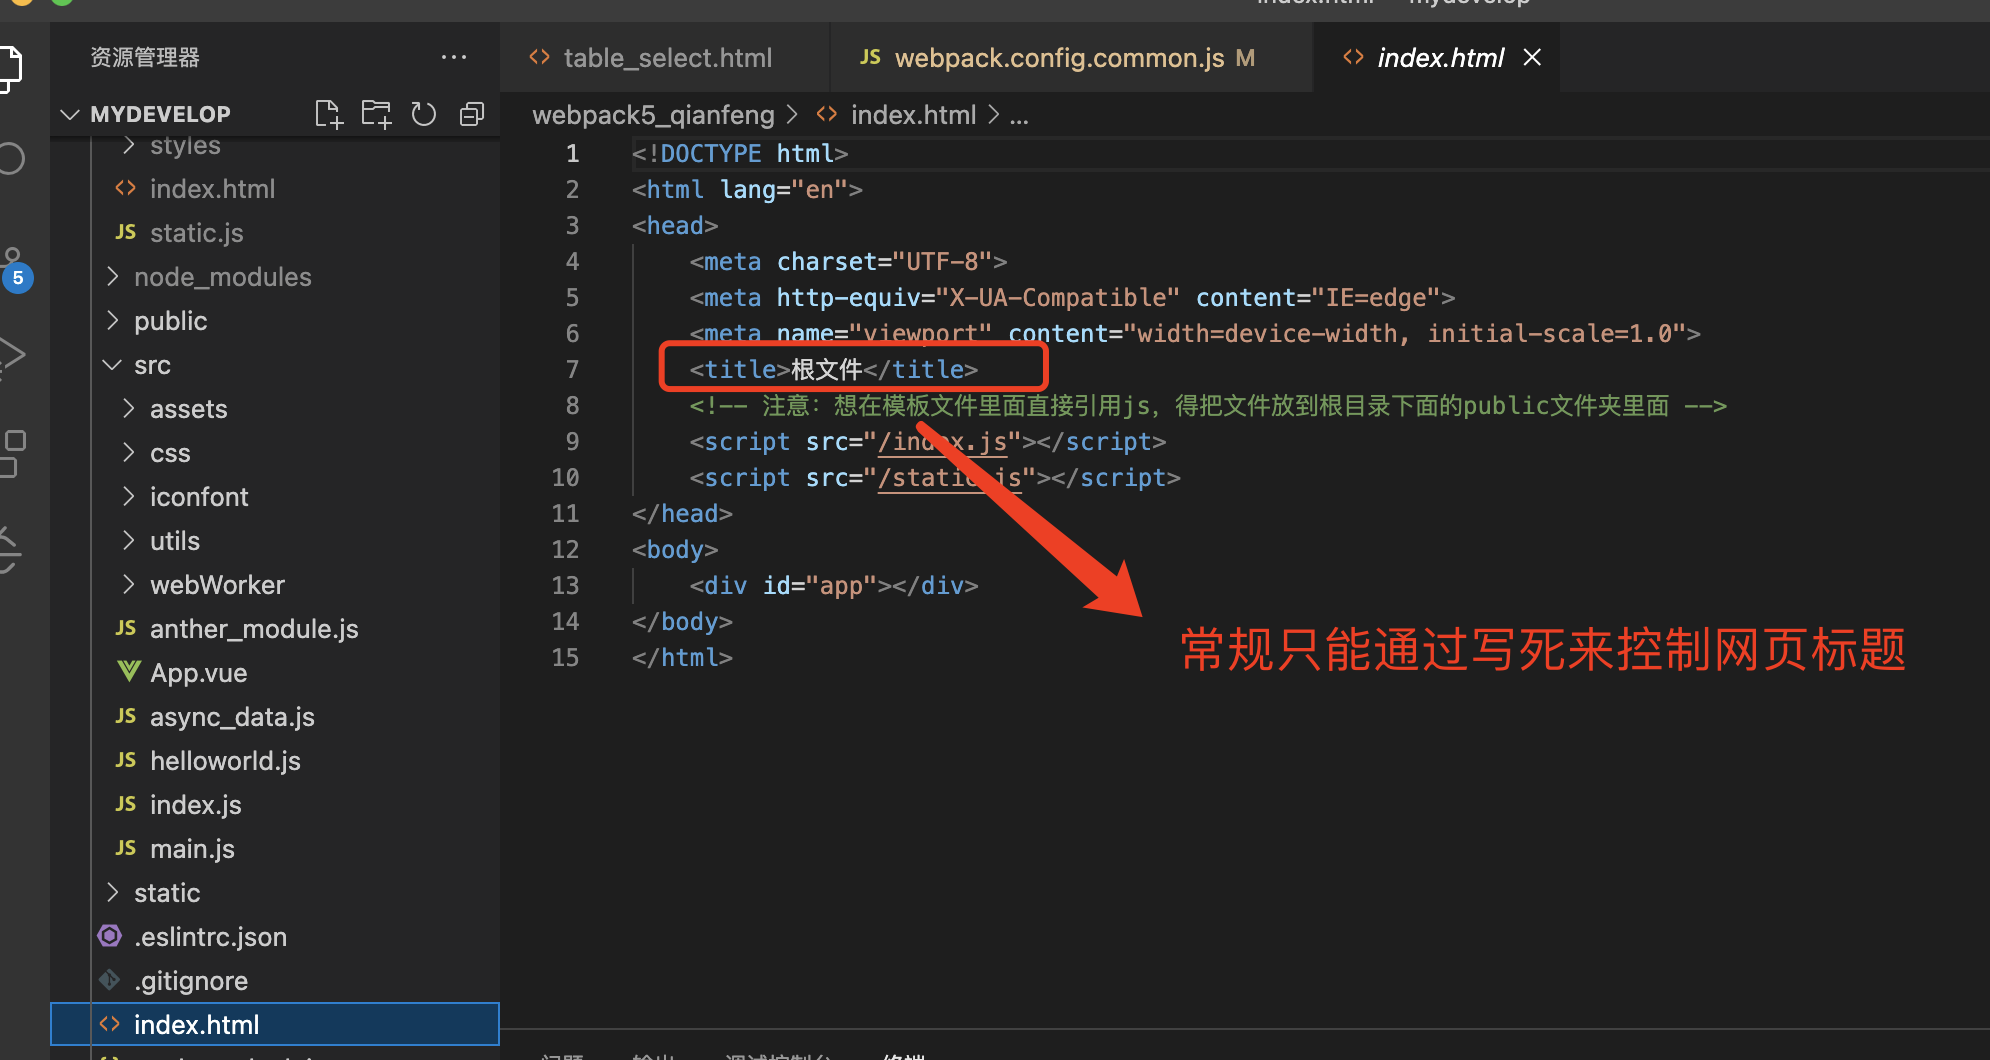
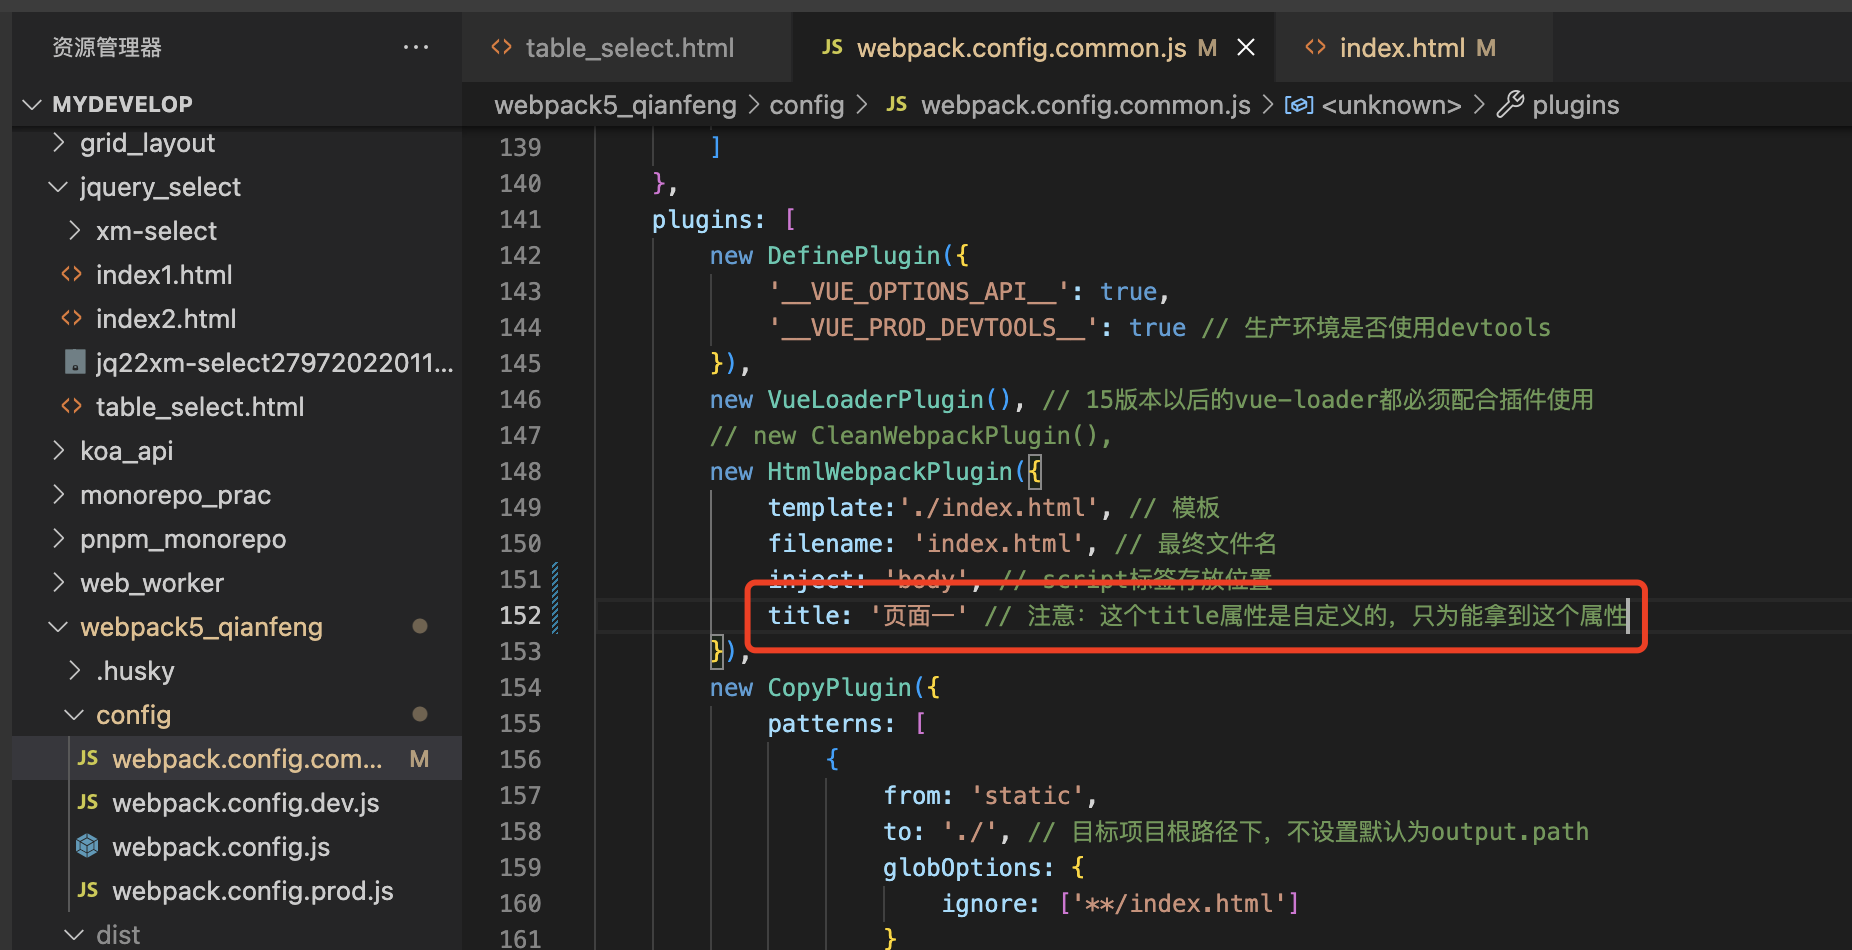
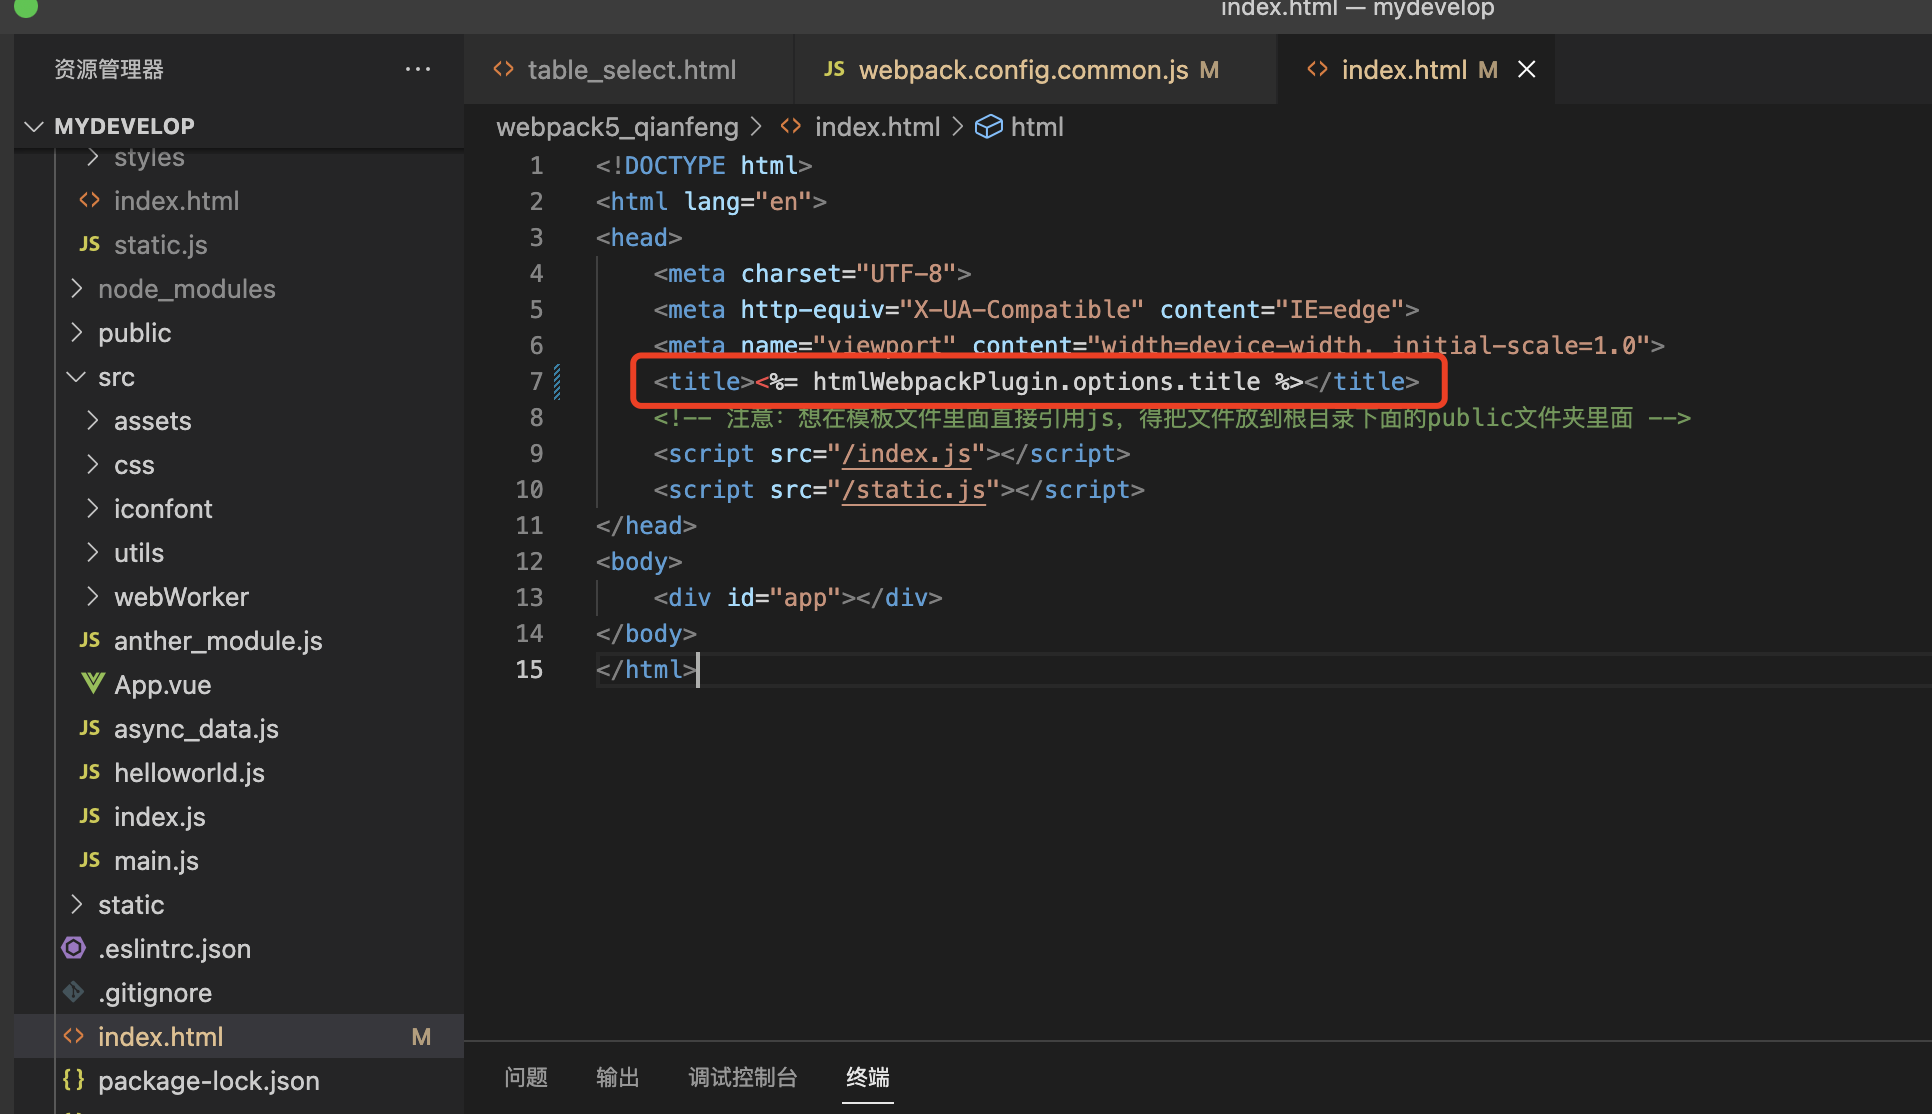
配置模板标题
模板指定chunks
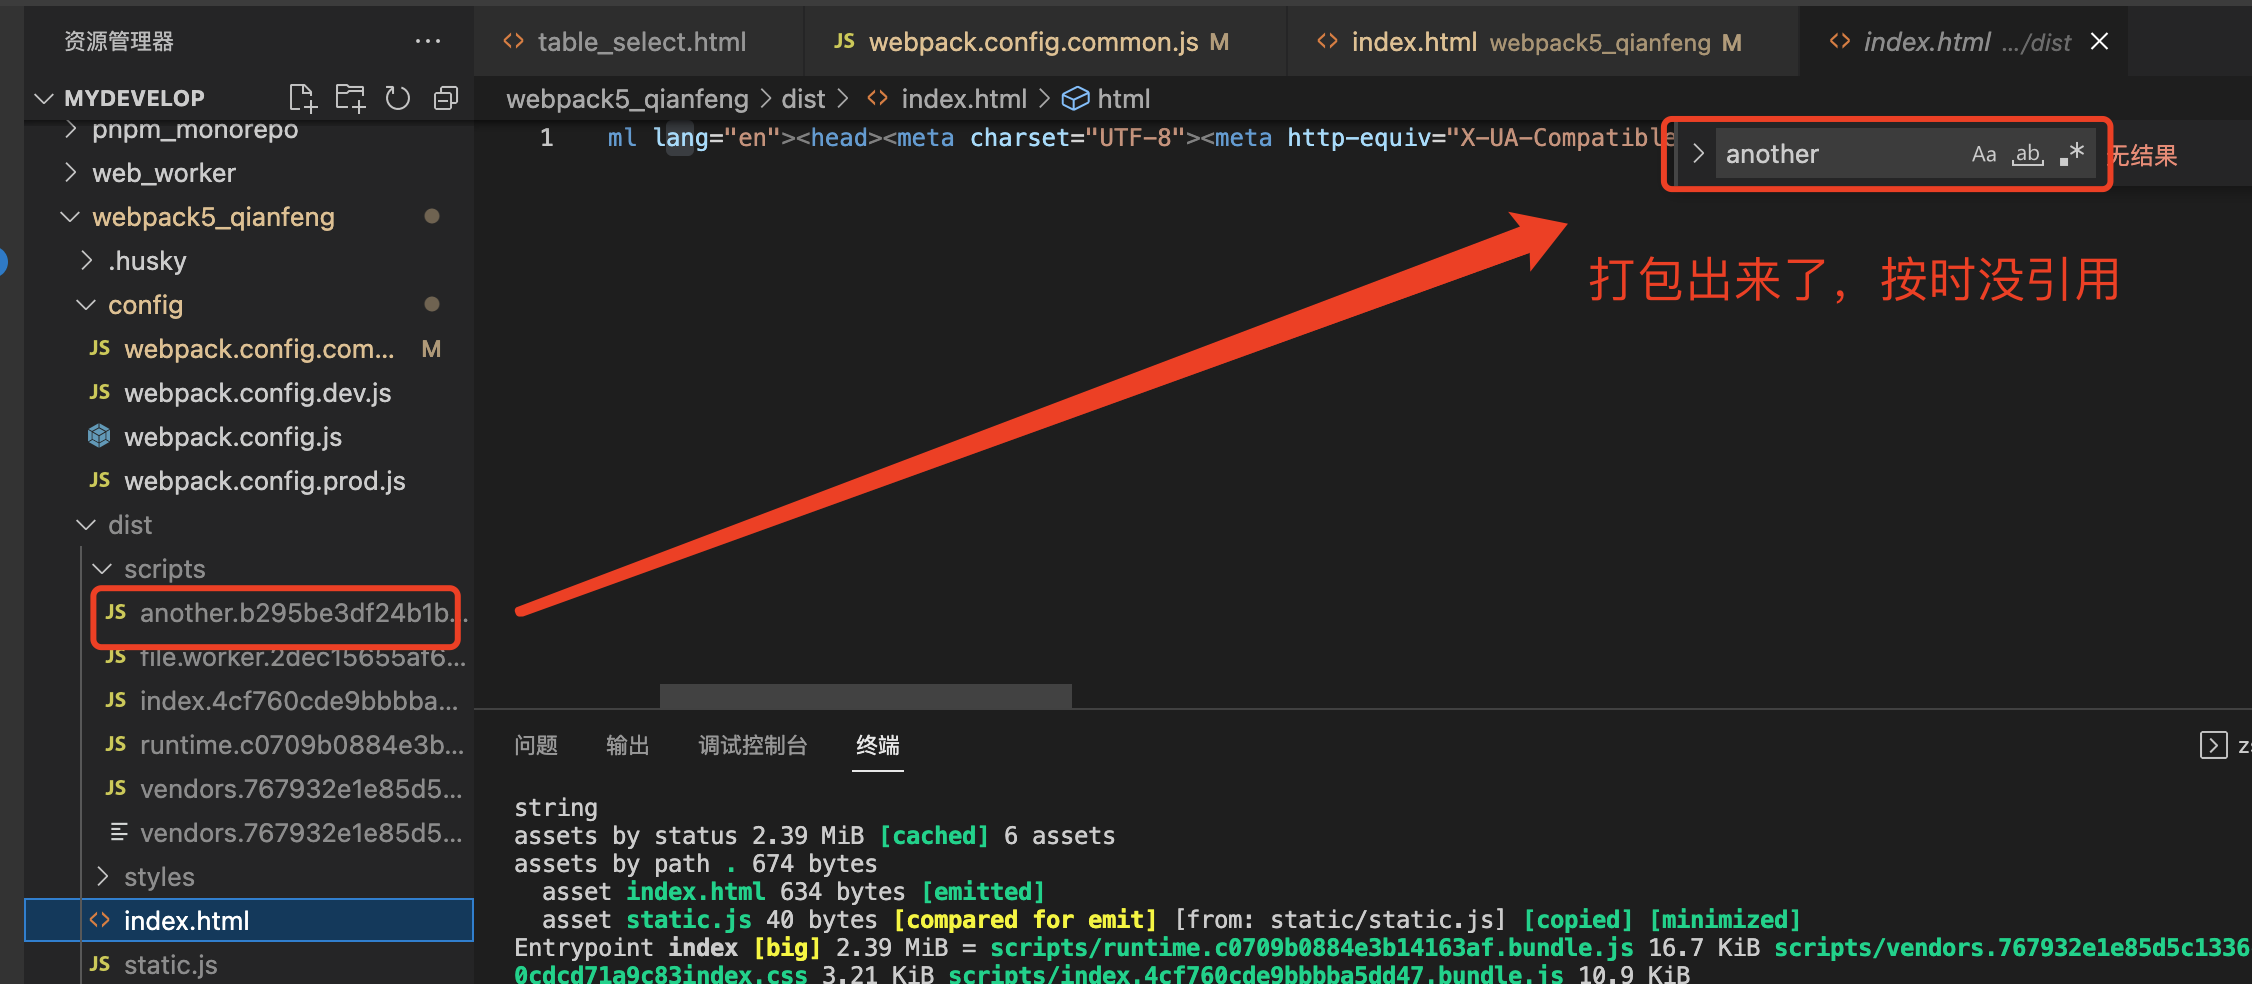
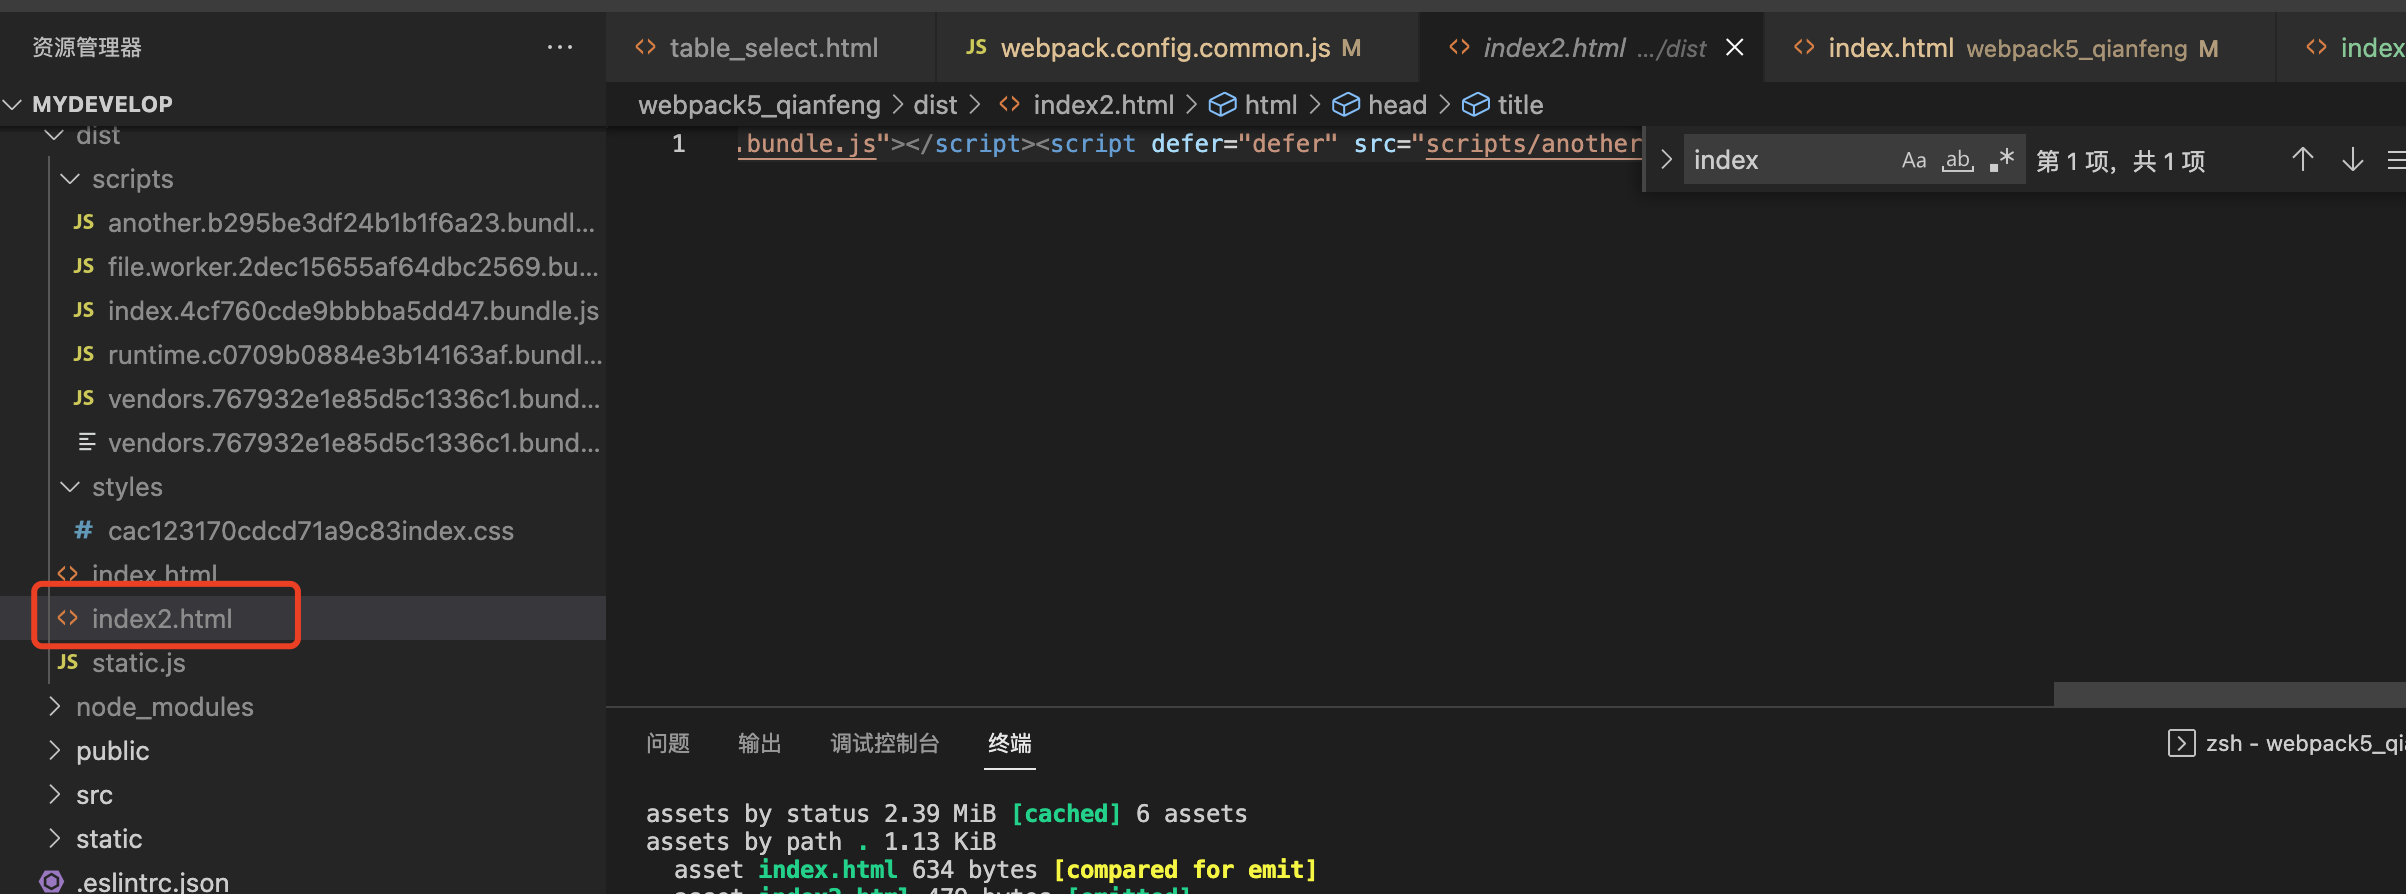
制定该引入的chunks

下面尝试打包后不引入该chunk
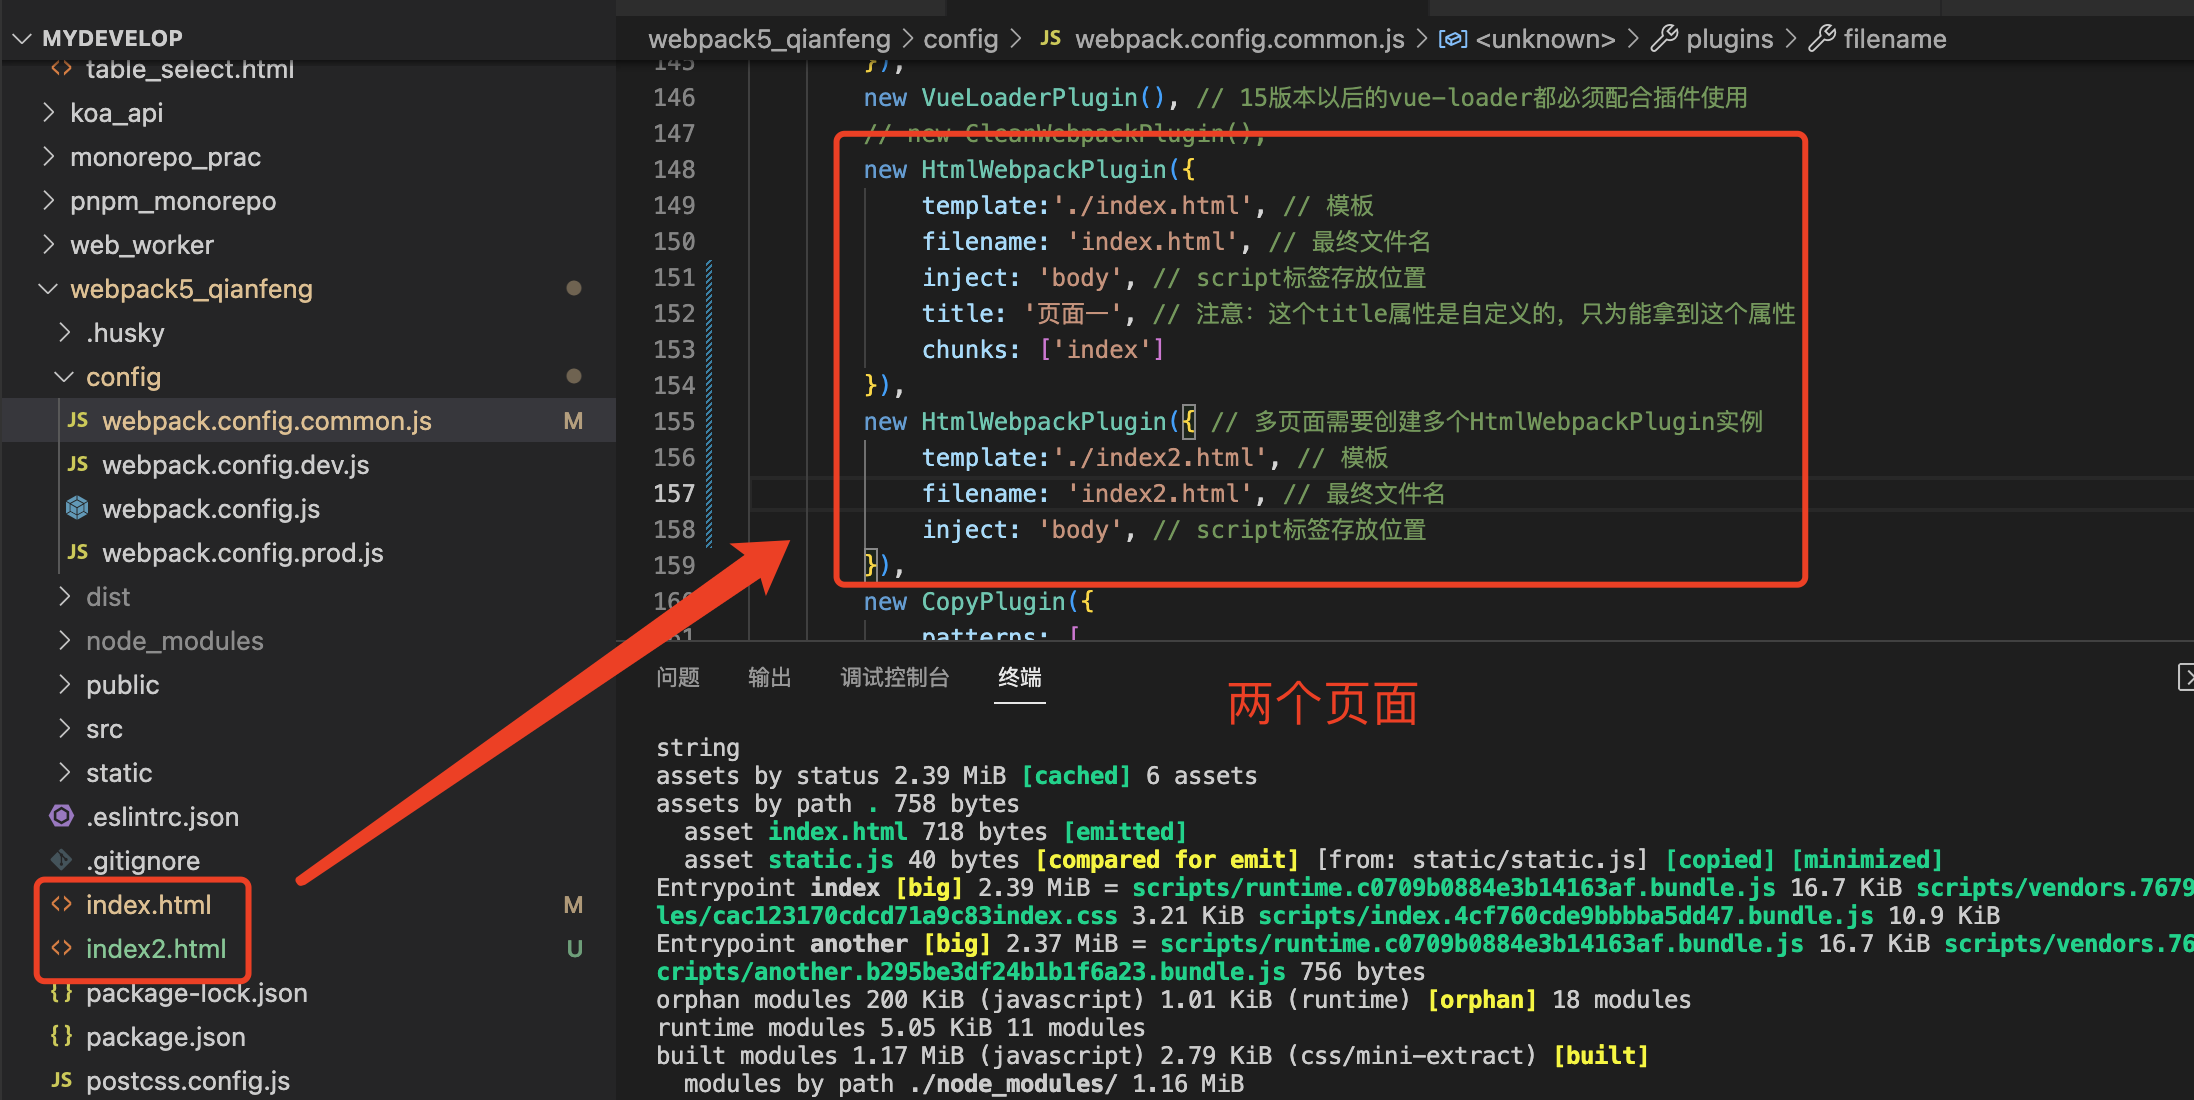
多模板多页面
即创建多个HtmlWebpackPlugin实例即可
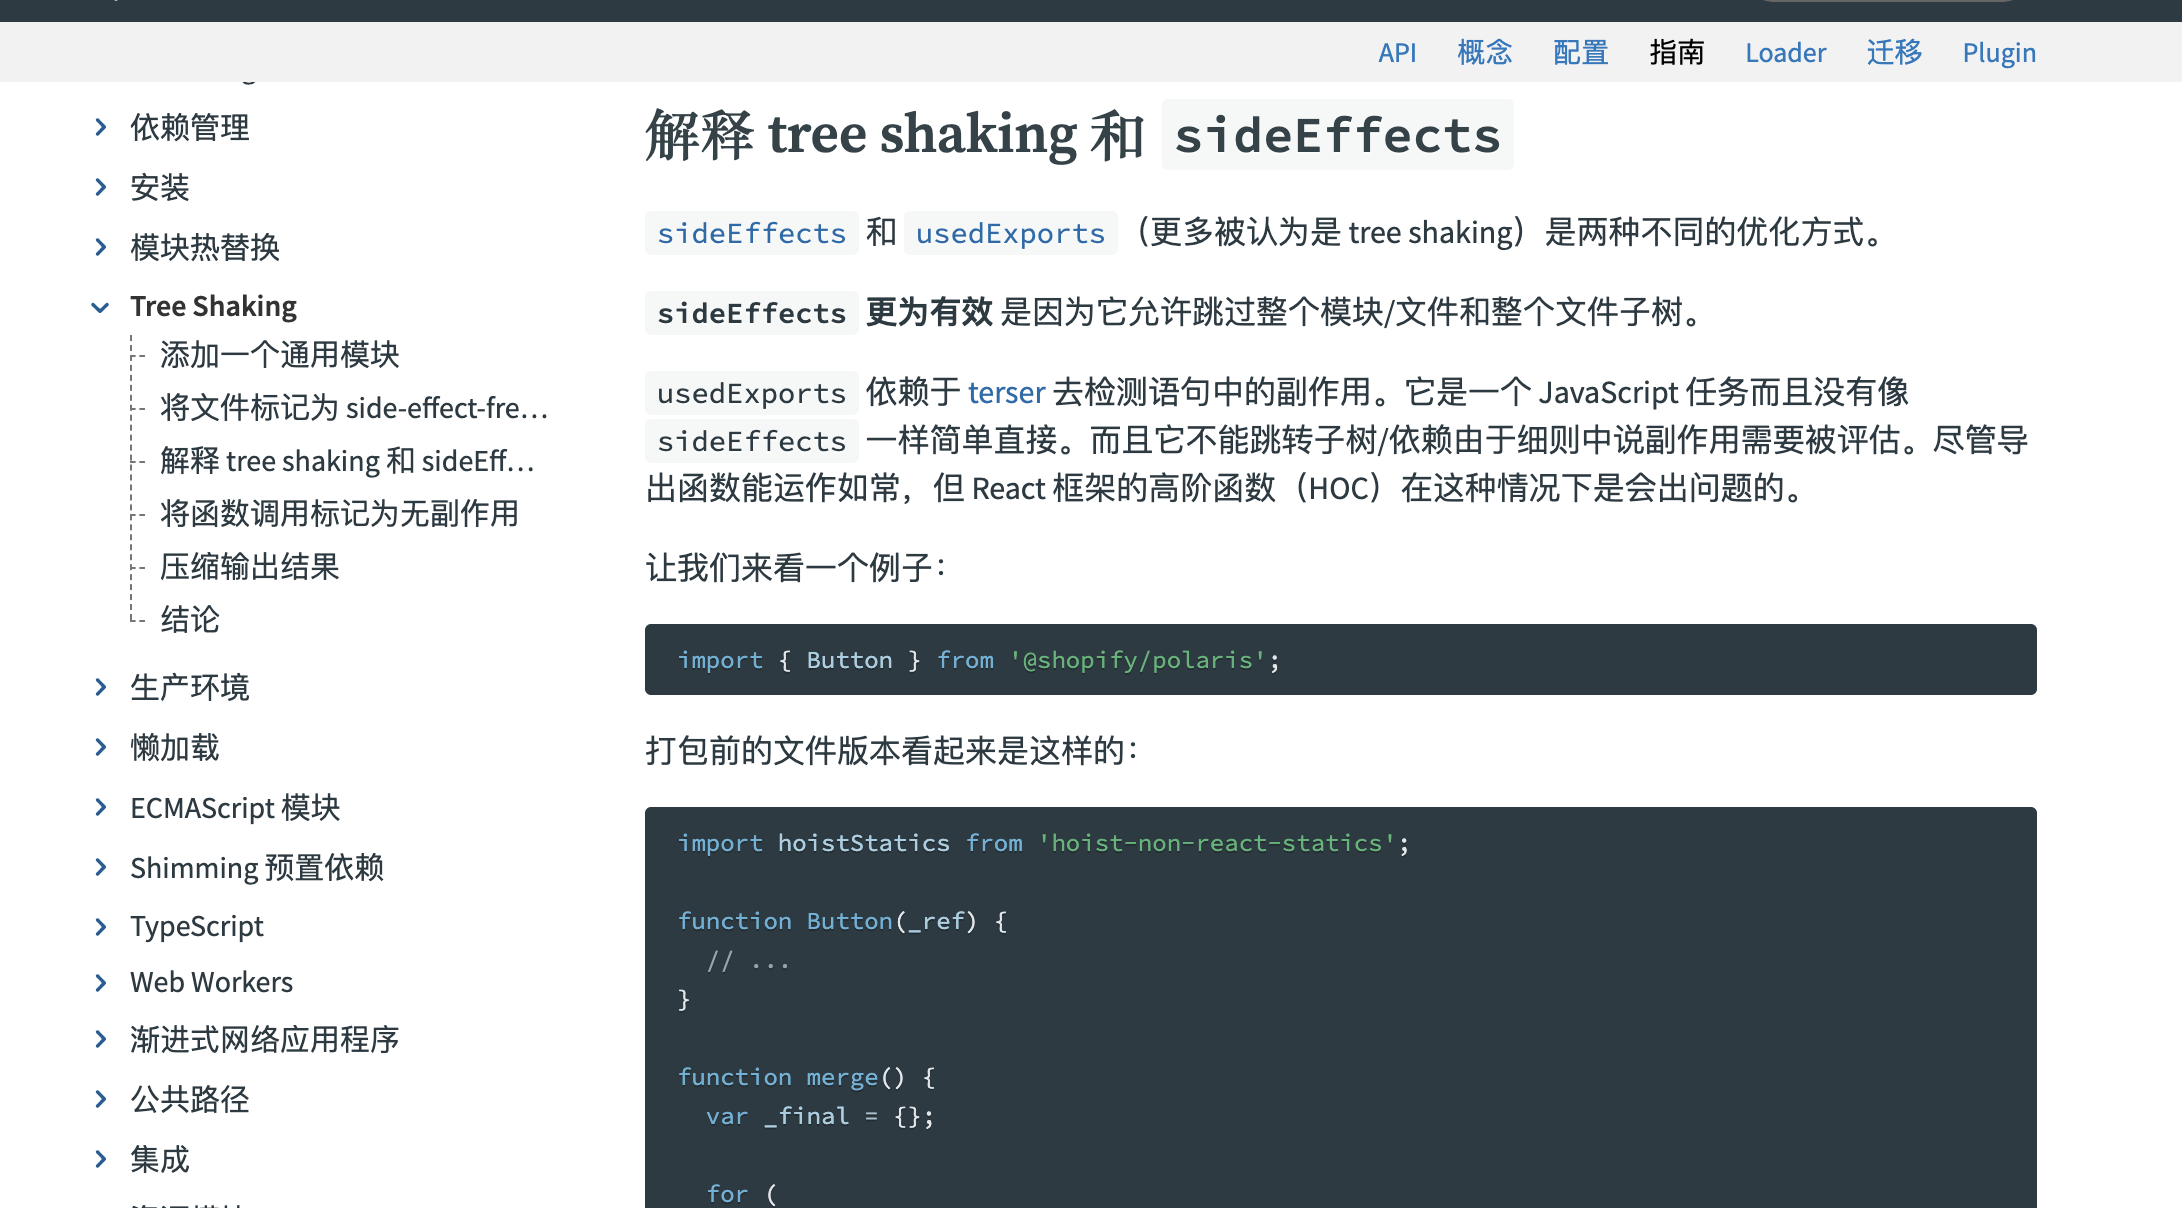
21、treeShaking
Treeshaking: 一个术语,移除JavaScript上下文中未被引用的代码(即dead code)
webpack5默认treeShaking,webpack4没有treeShaking
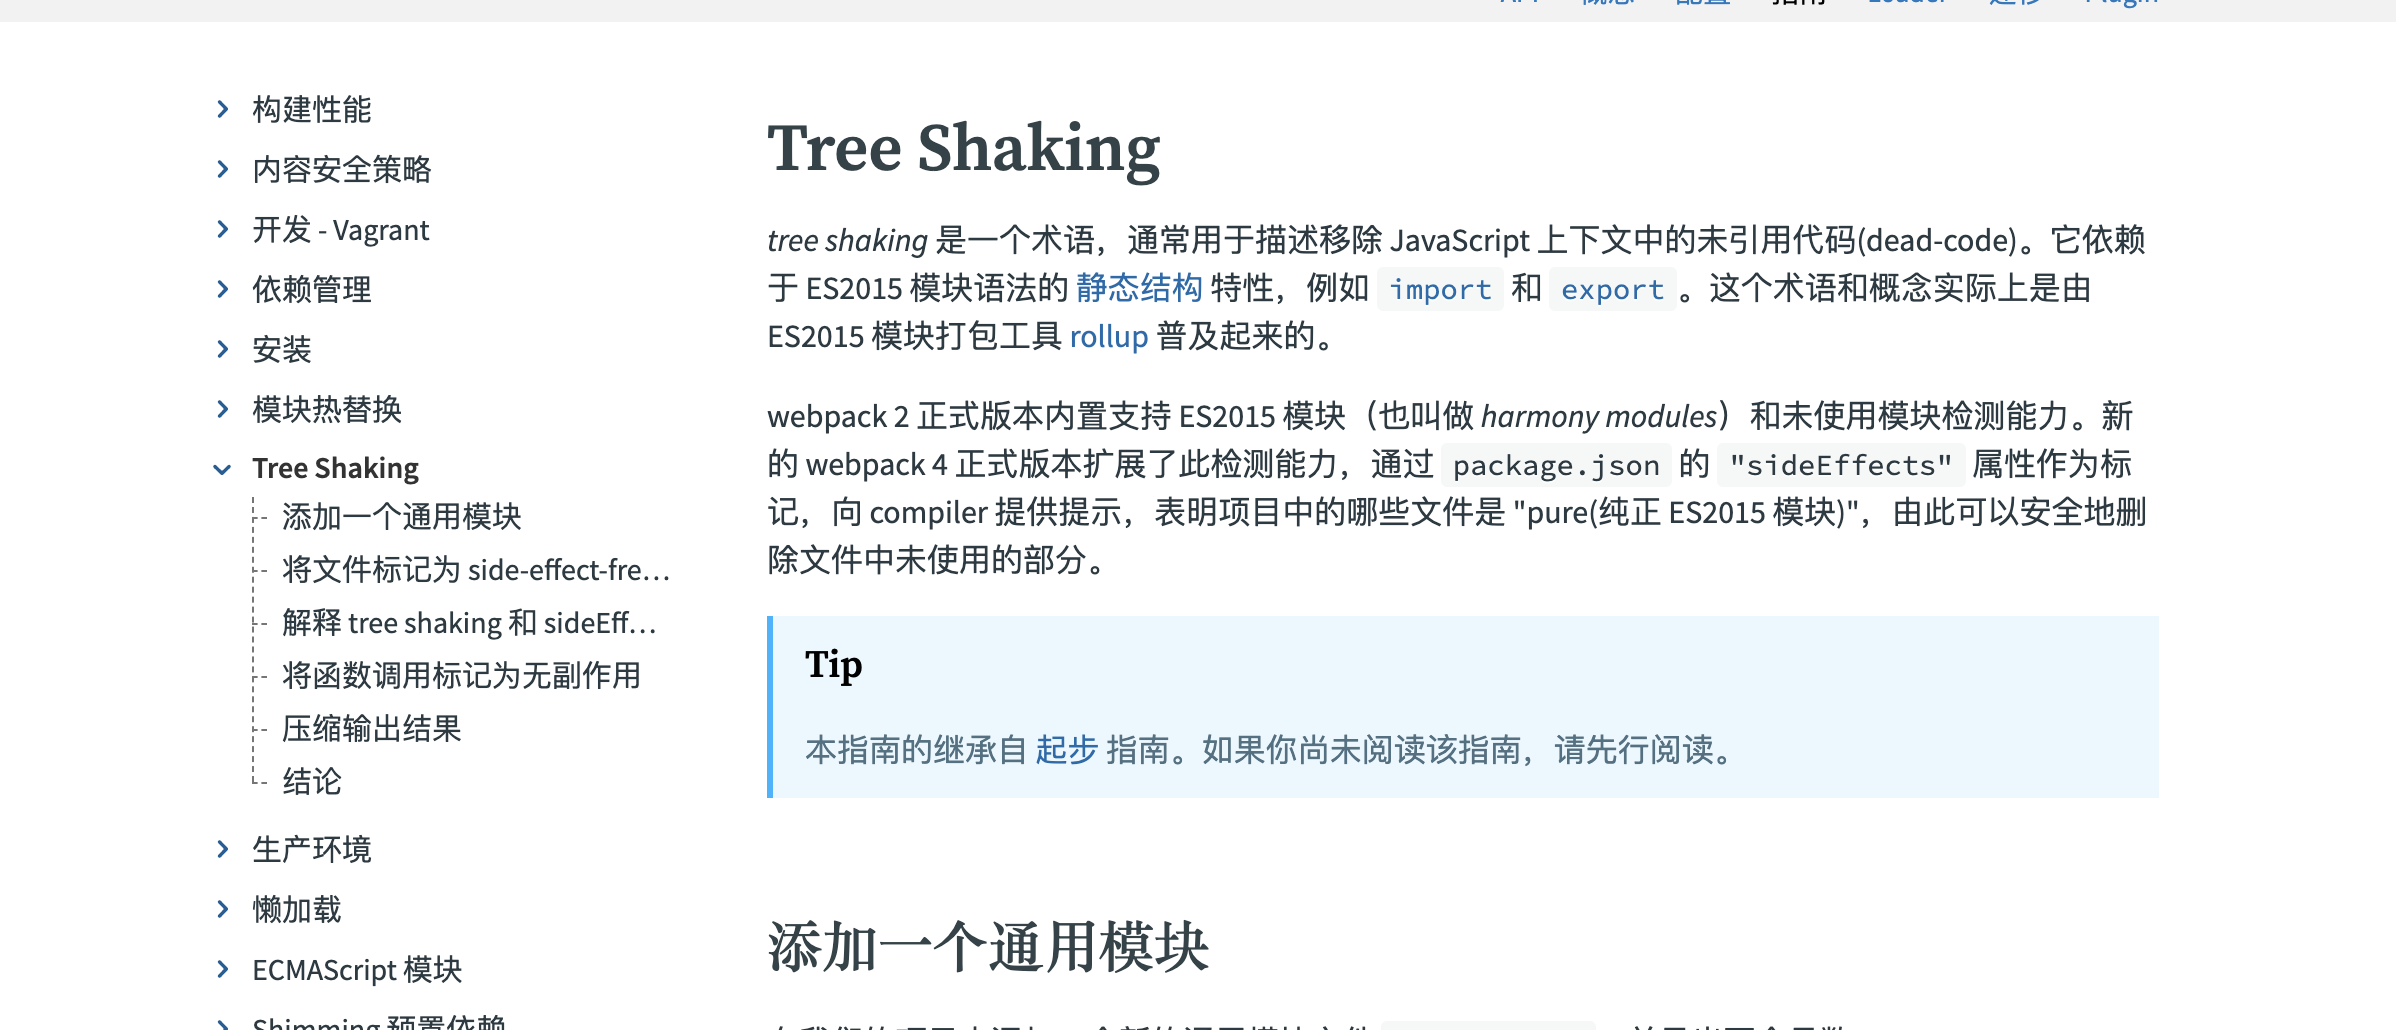
官网有介绍
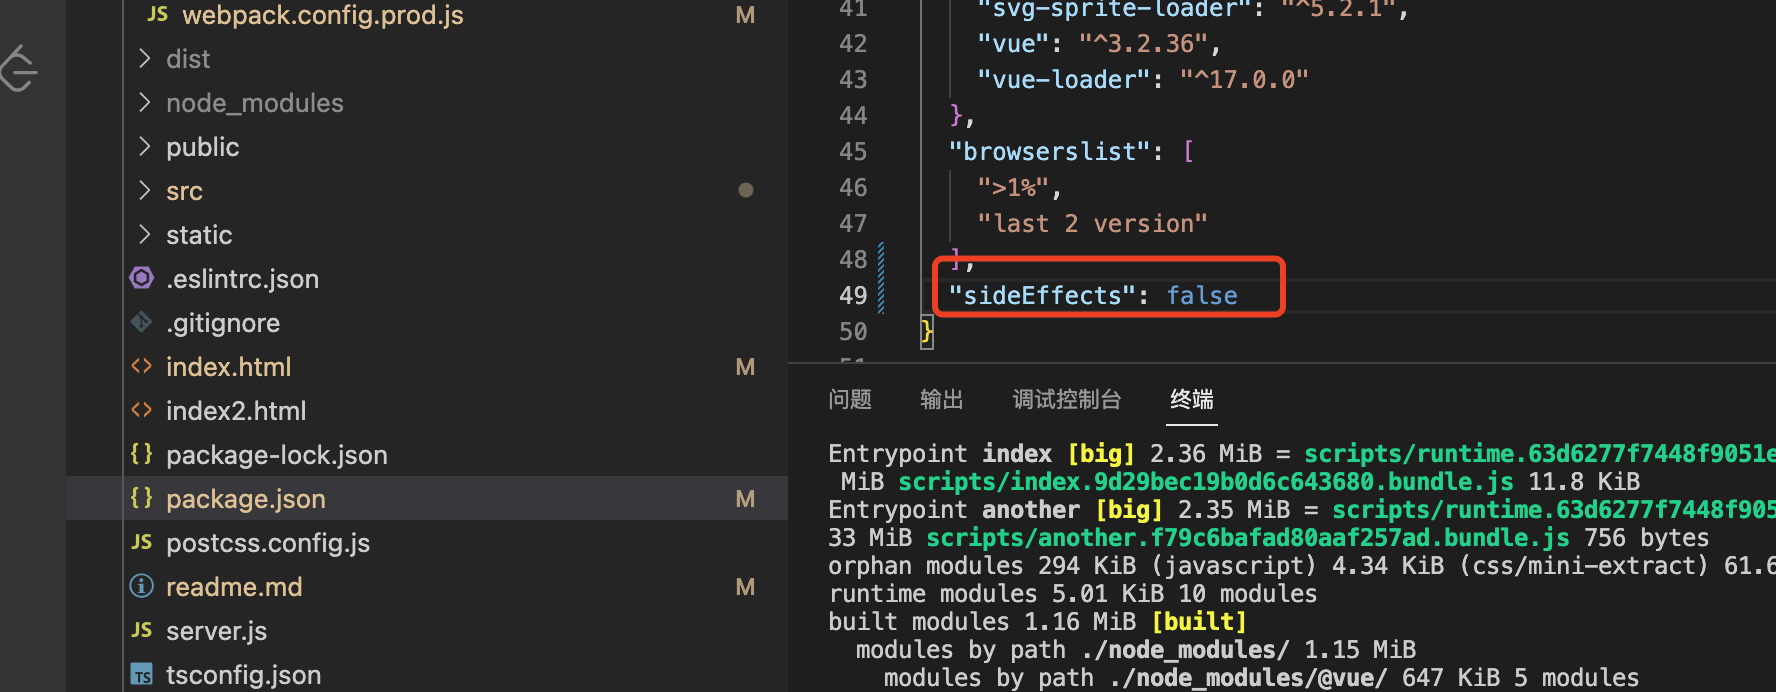
22、sideEffects
作用:告诉webpack代码有副作用,不应该随便删除,默认为true
以直接引用的css文件为例
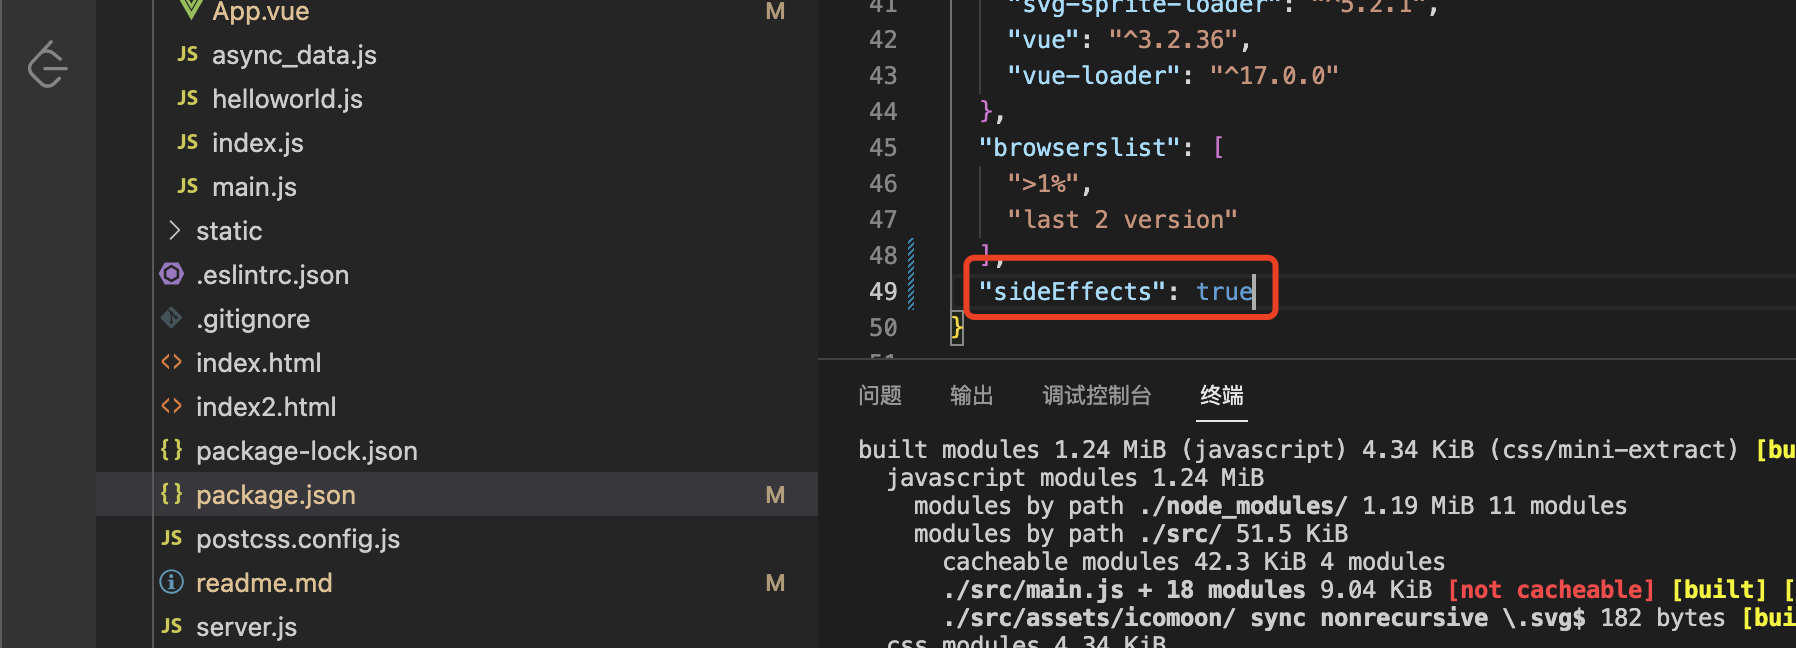

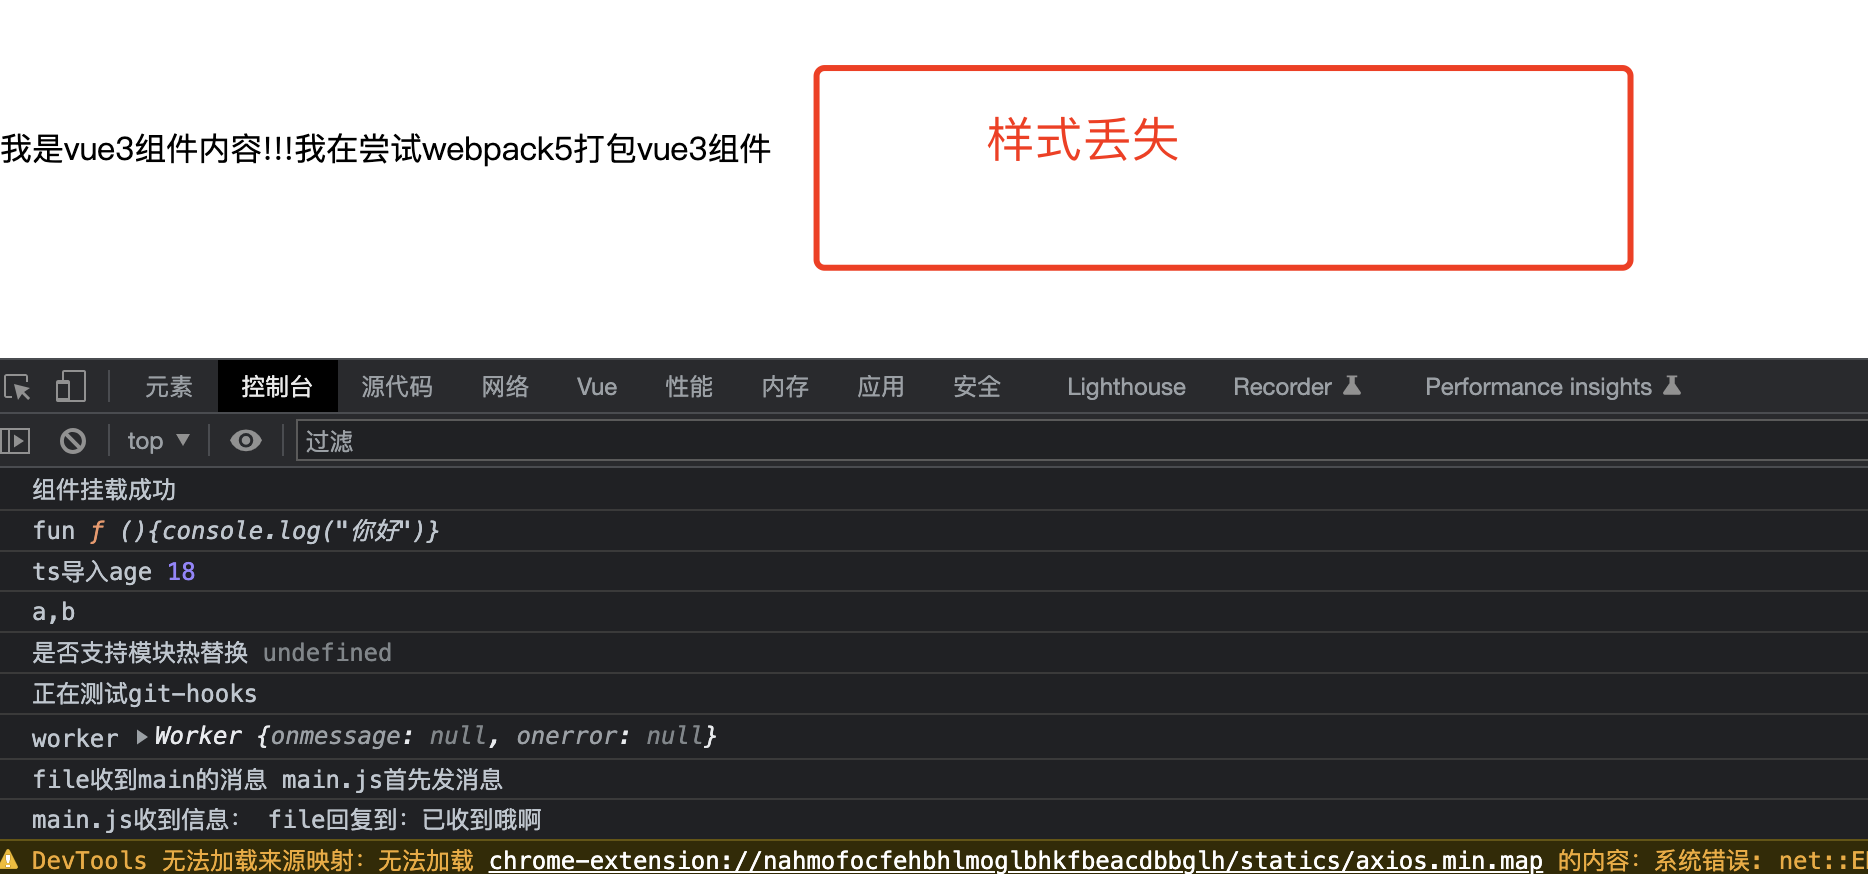
指定某文件类型不被sideEffect掉
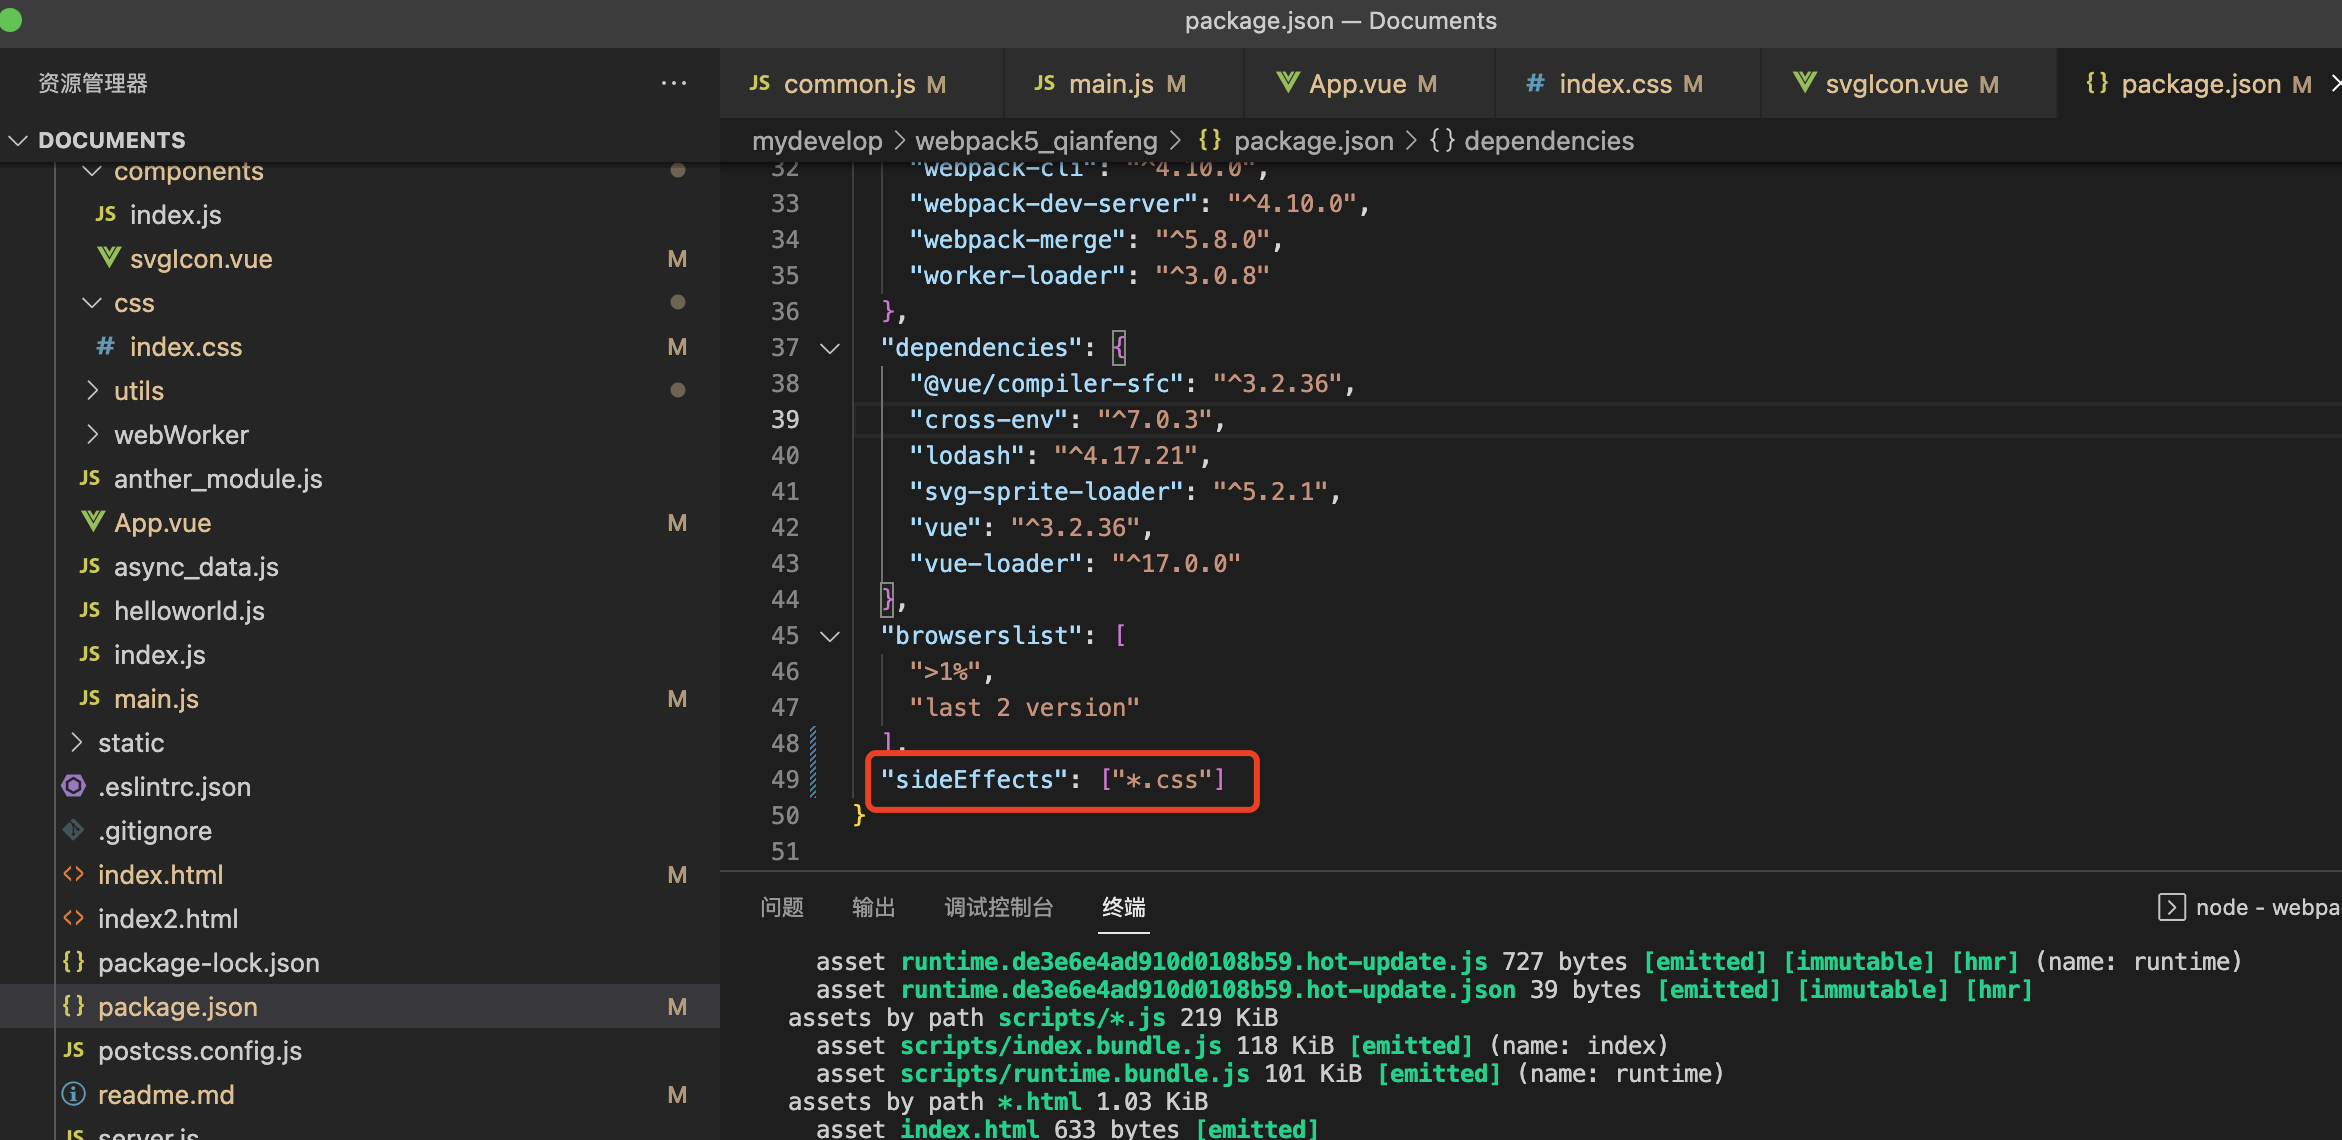
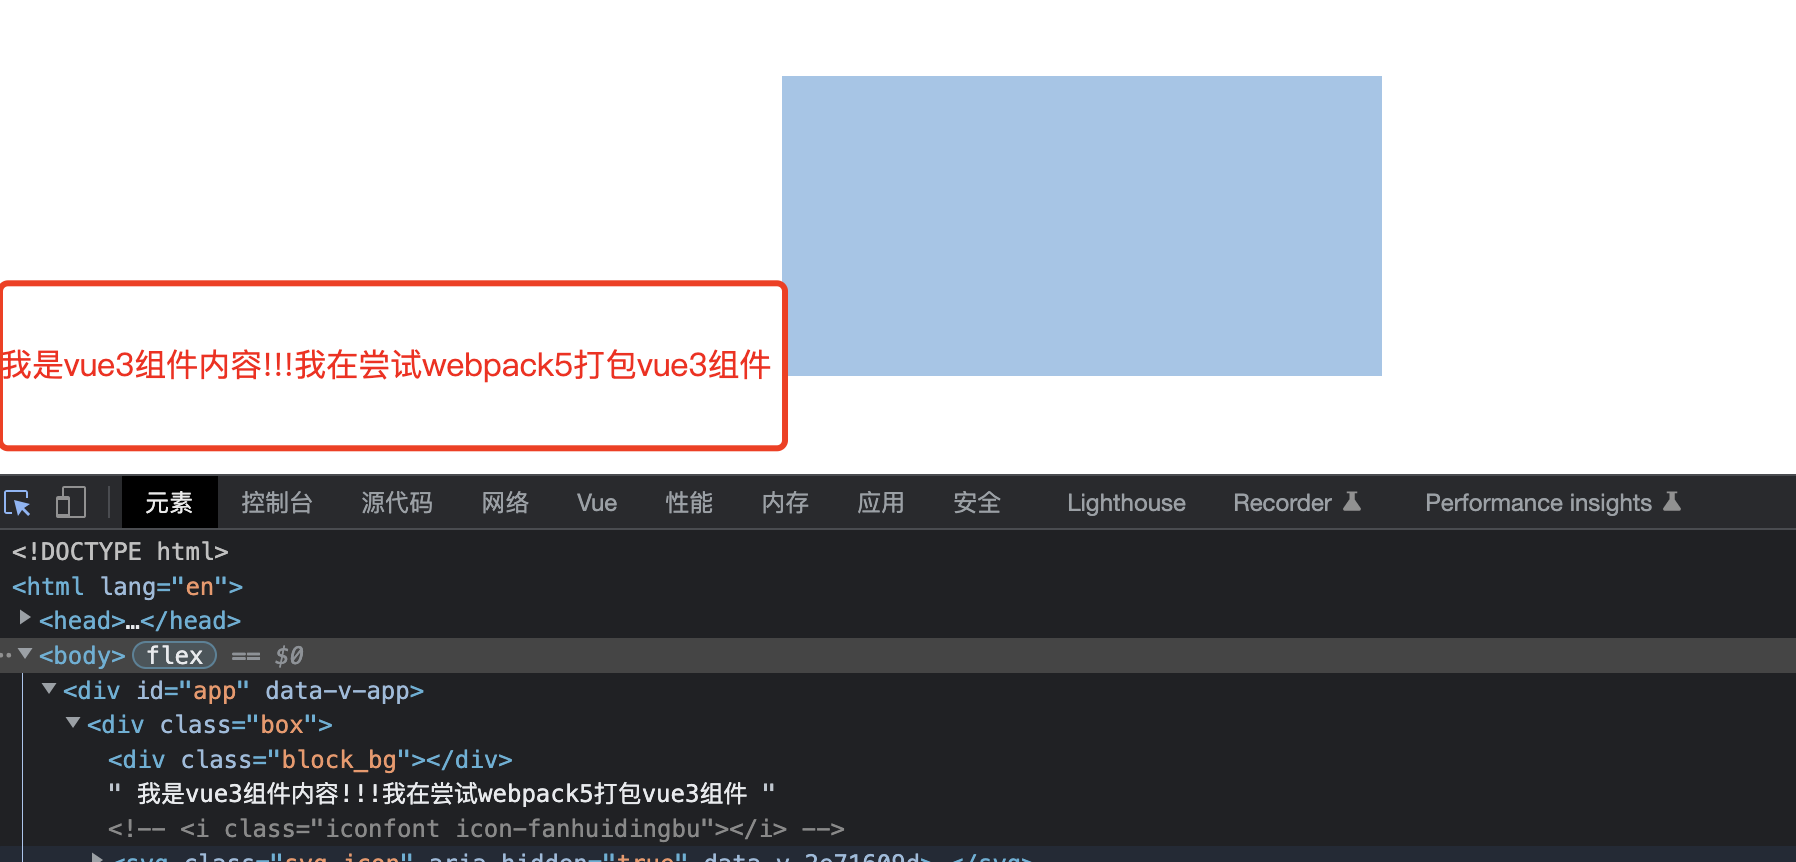
官网有介绍
23、PWA渐进式网络
PWA:渐进式网络程序,服务挂了也能能访问网页
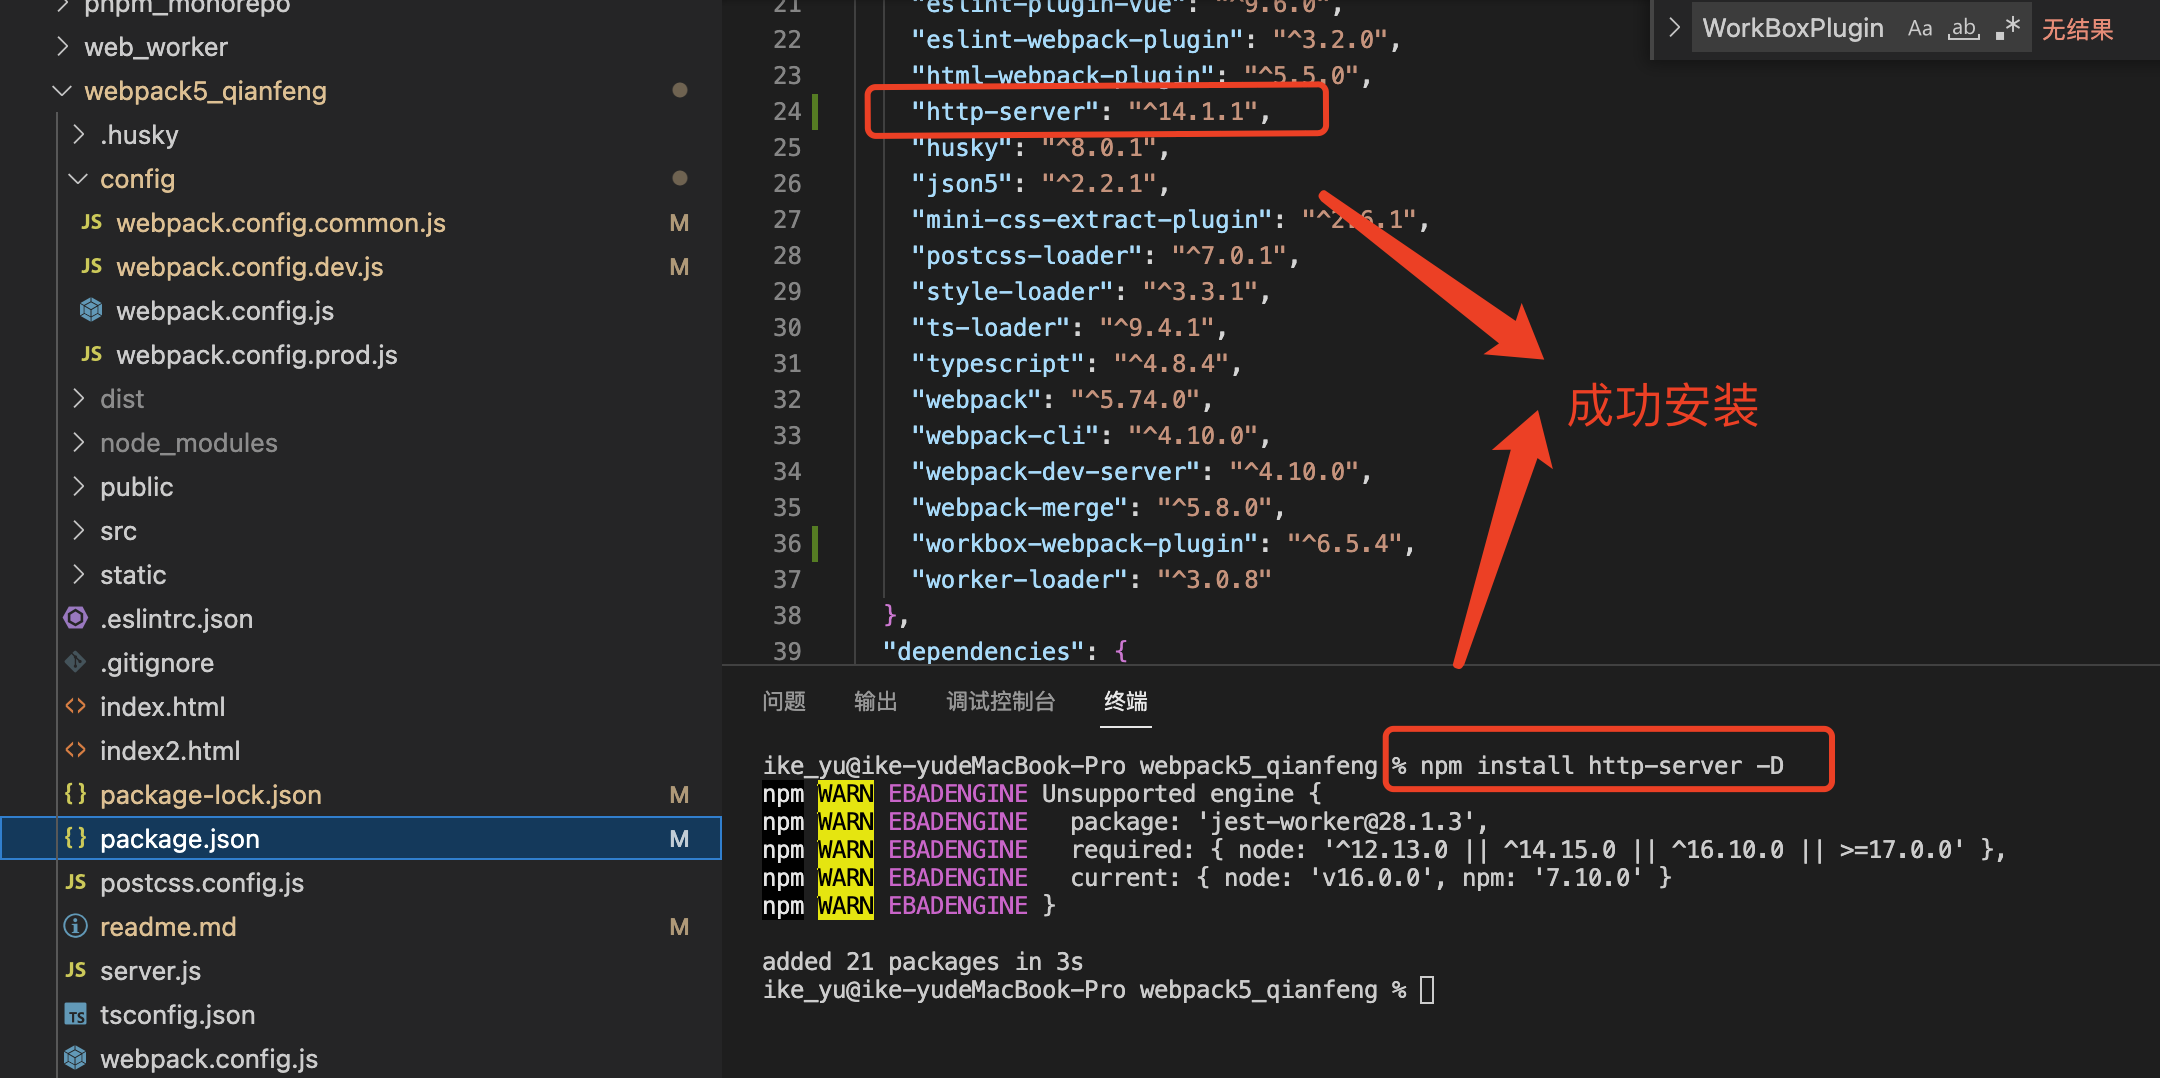
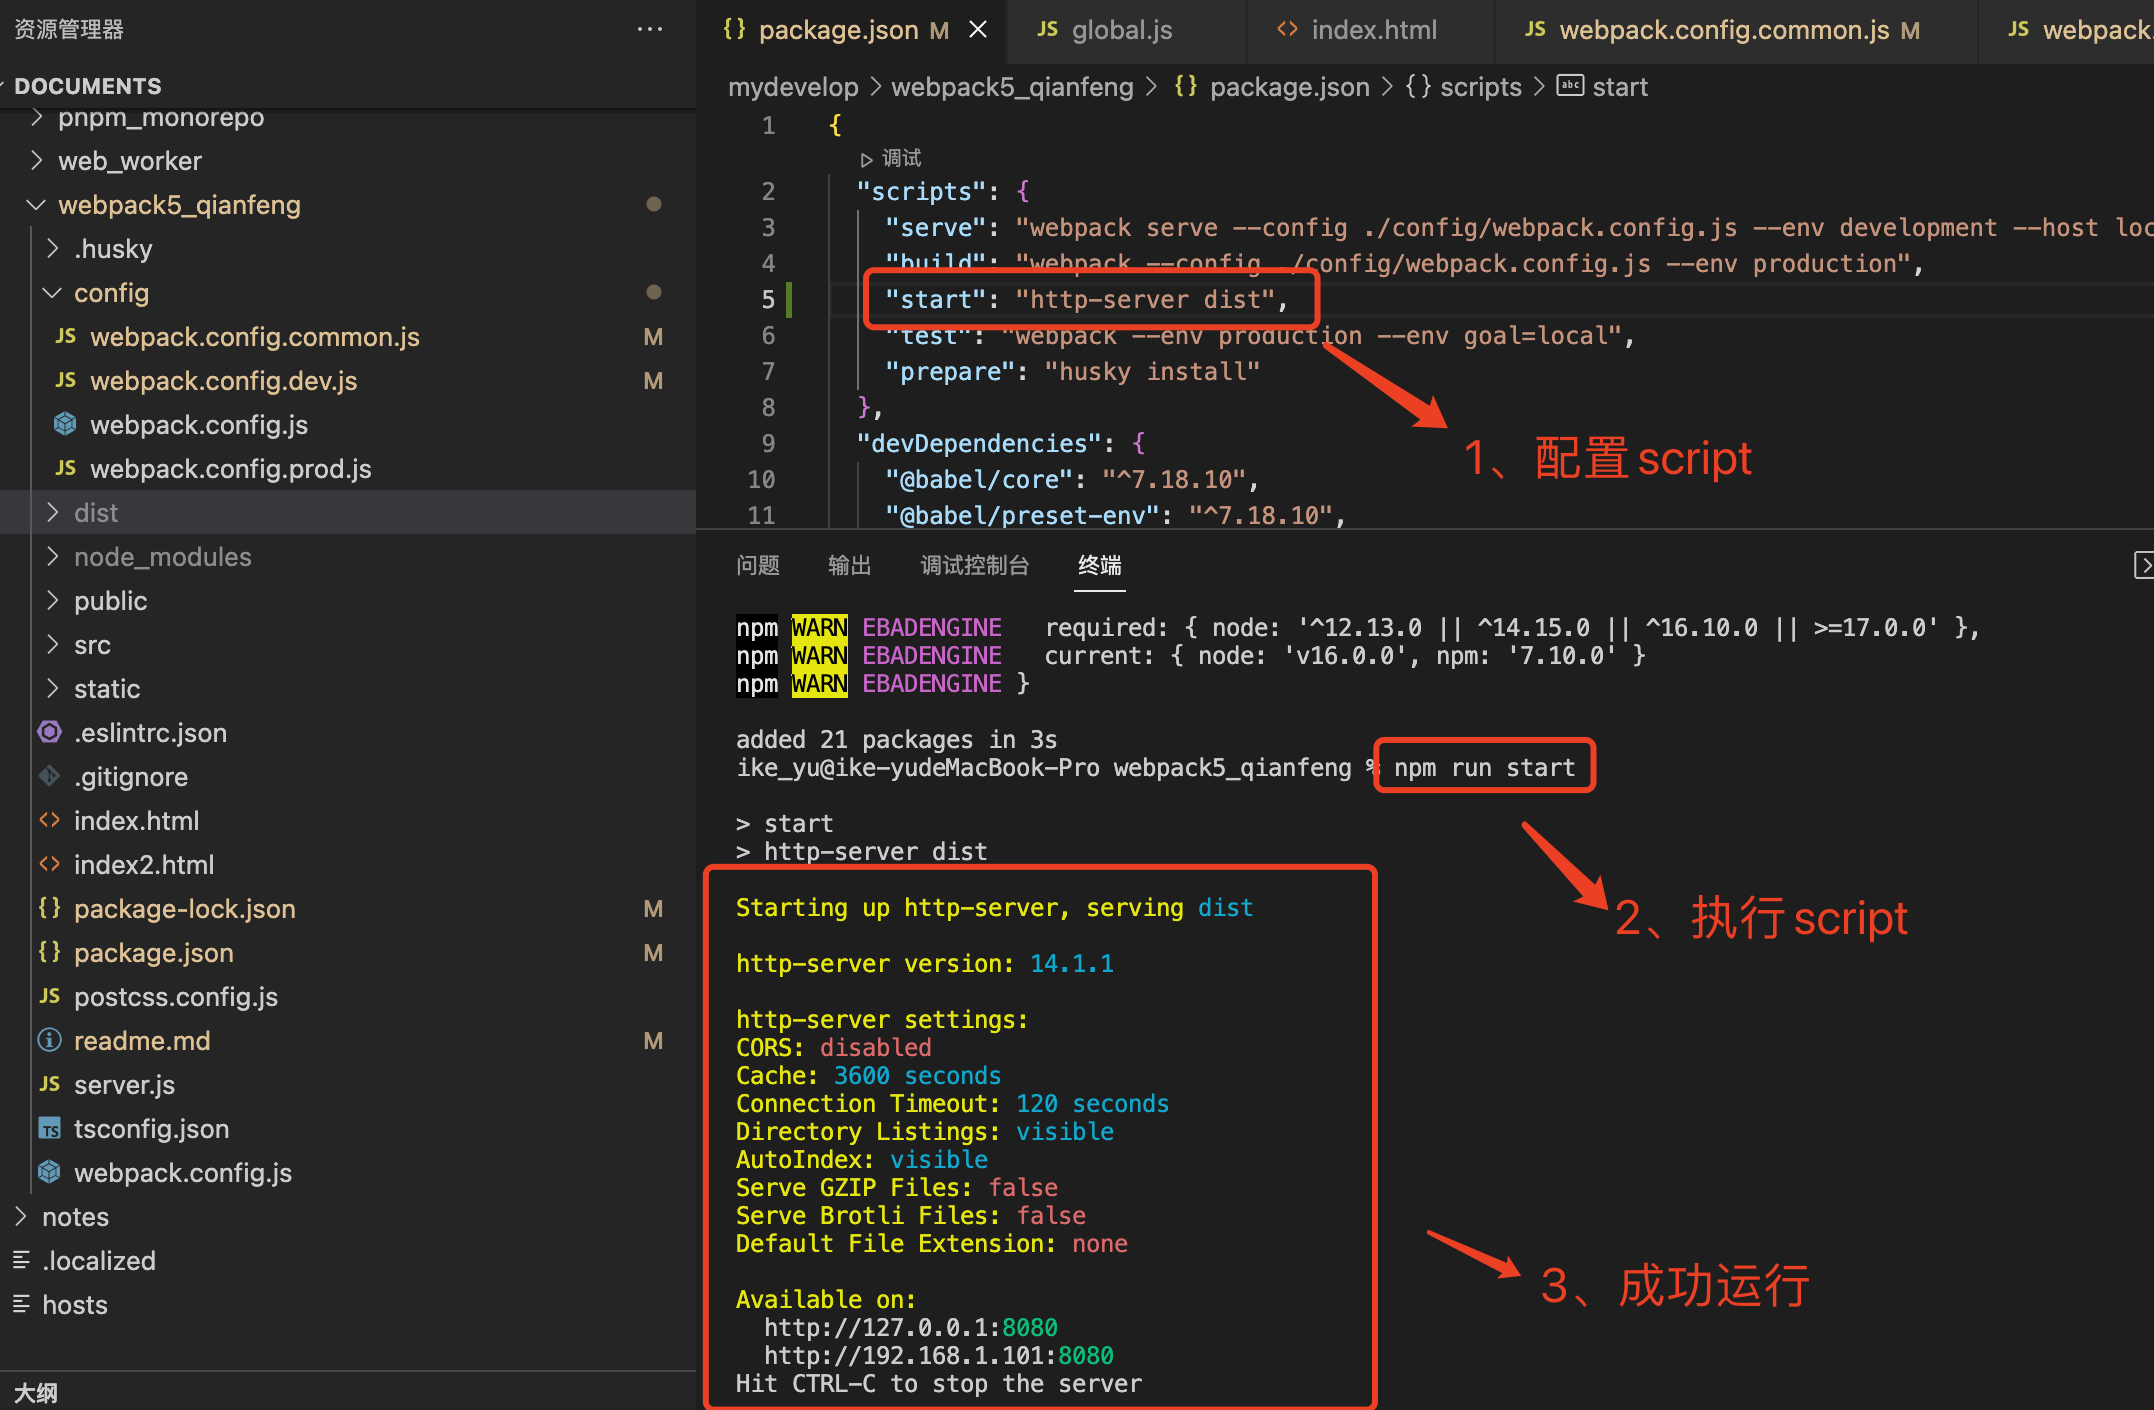
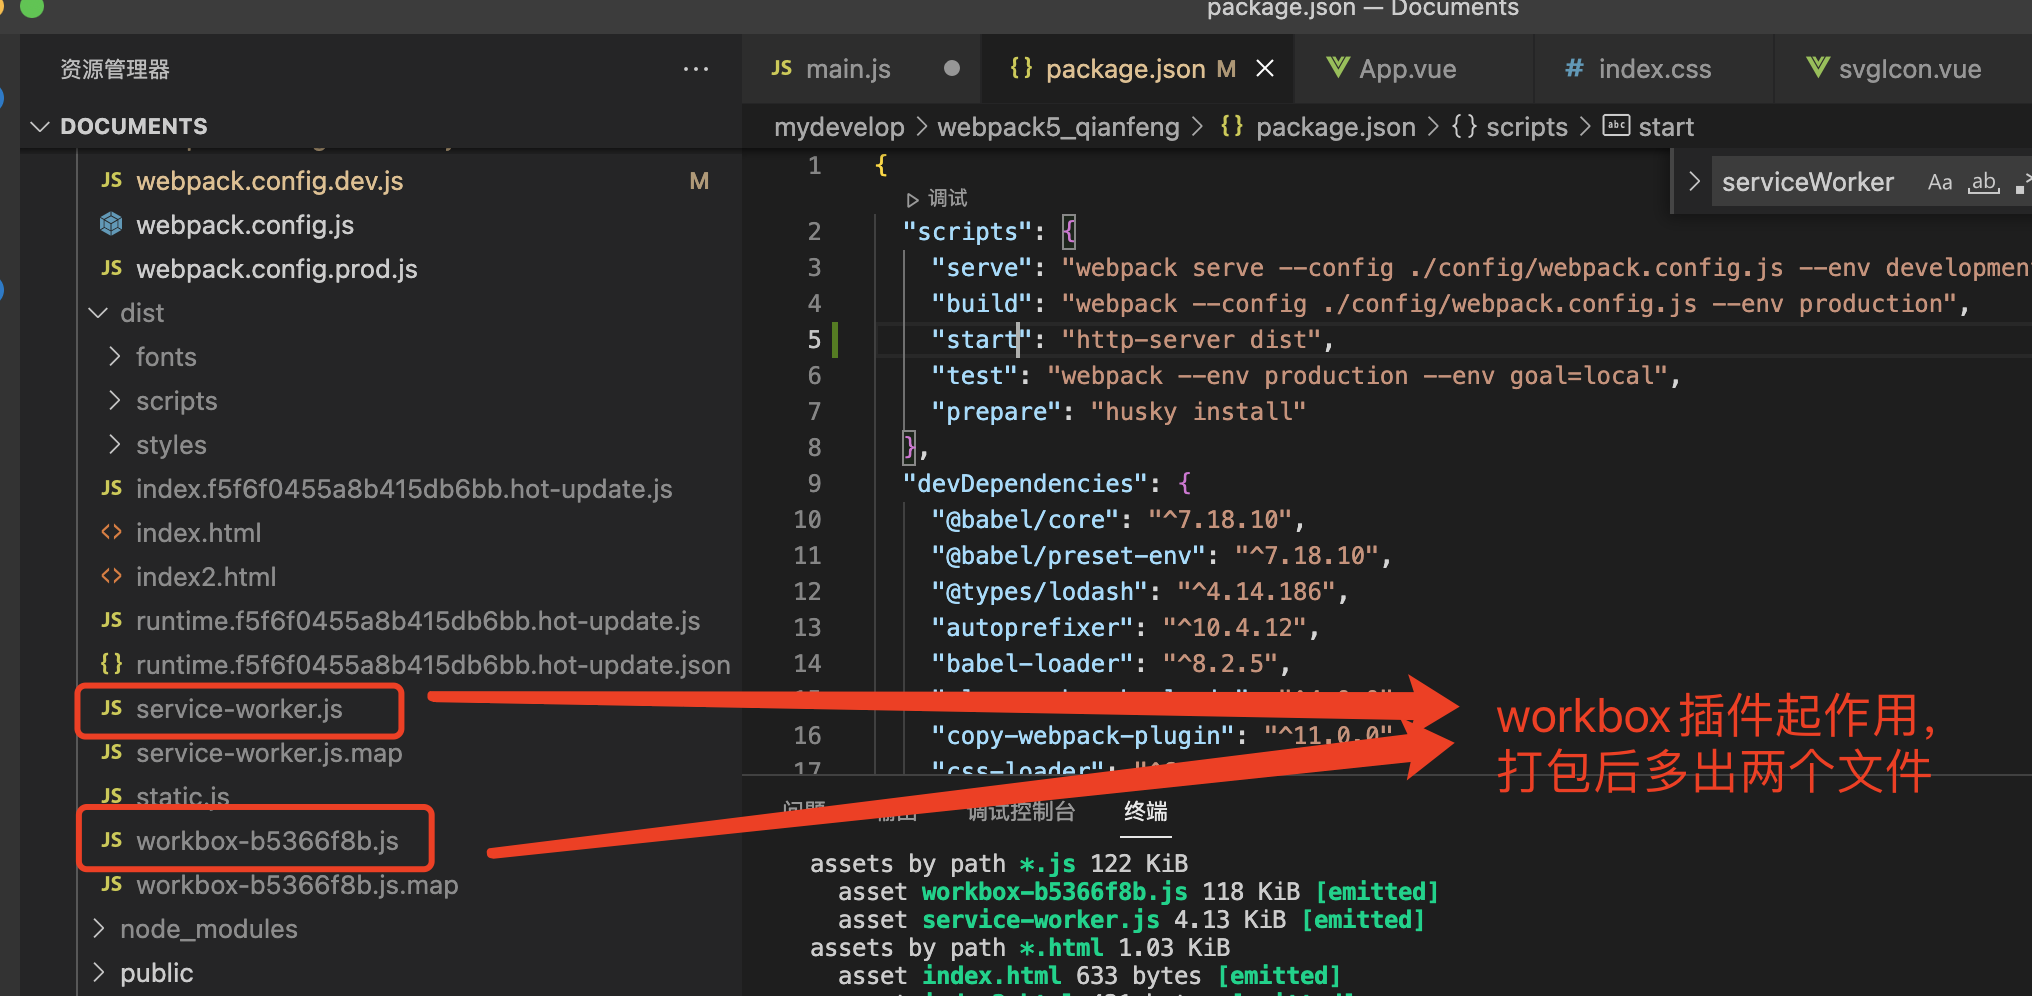
http-server
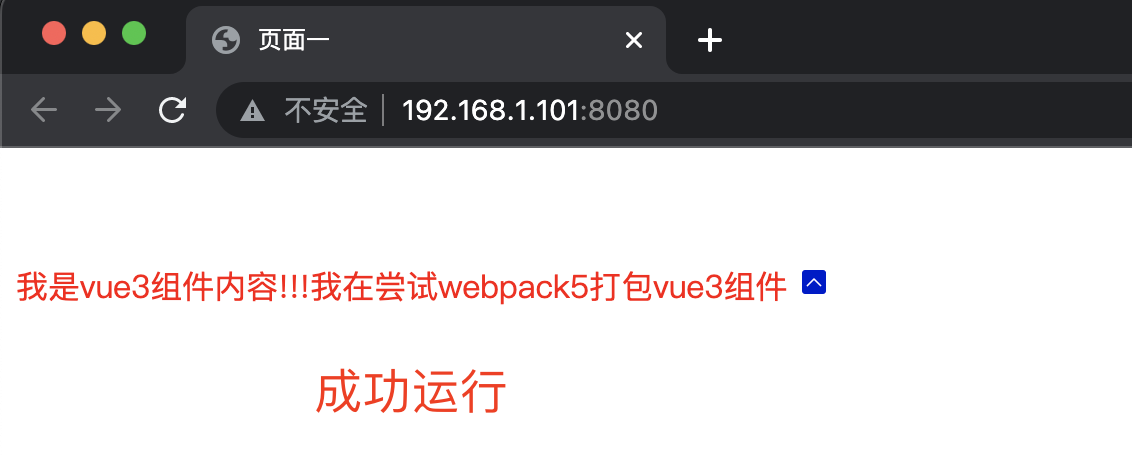
采用http-server
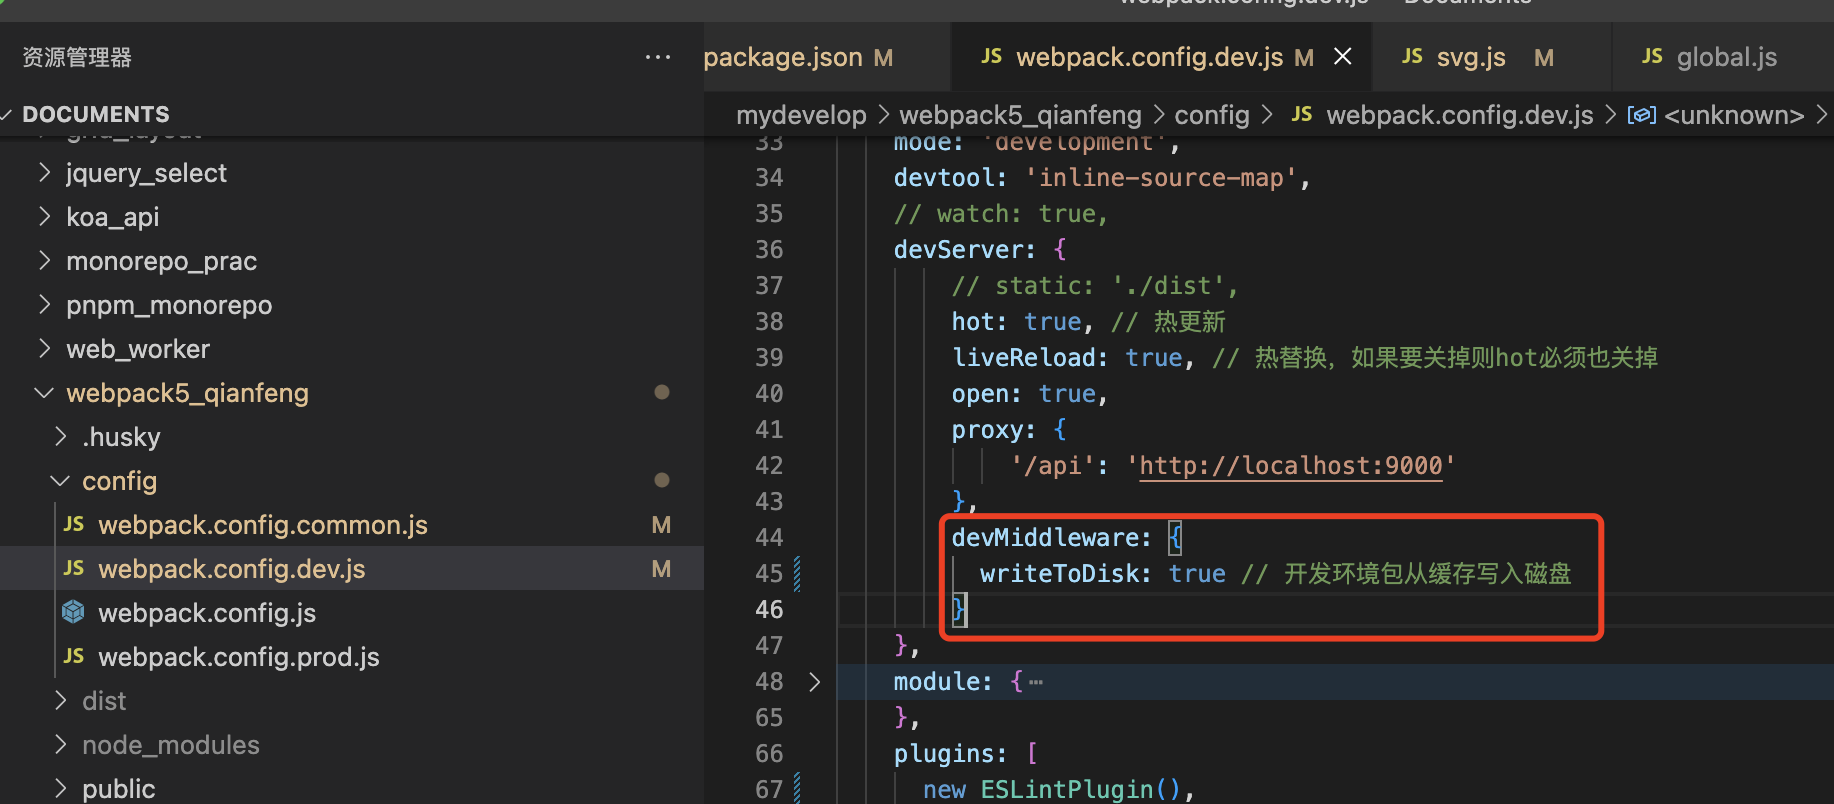
Dev-server写入硬盘
添加workbox
workbox:谷歌浏览器提供的浏览器端缓存数据的工具
需要借助workbox-webpack-plugin
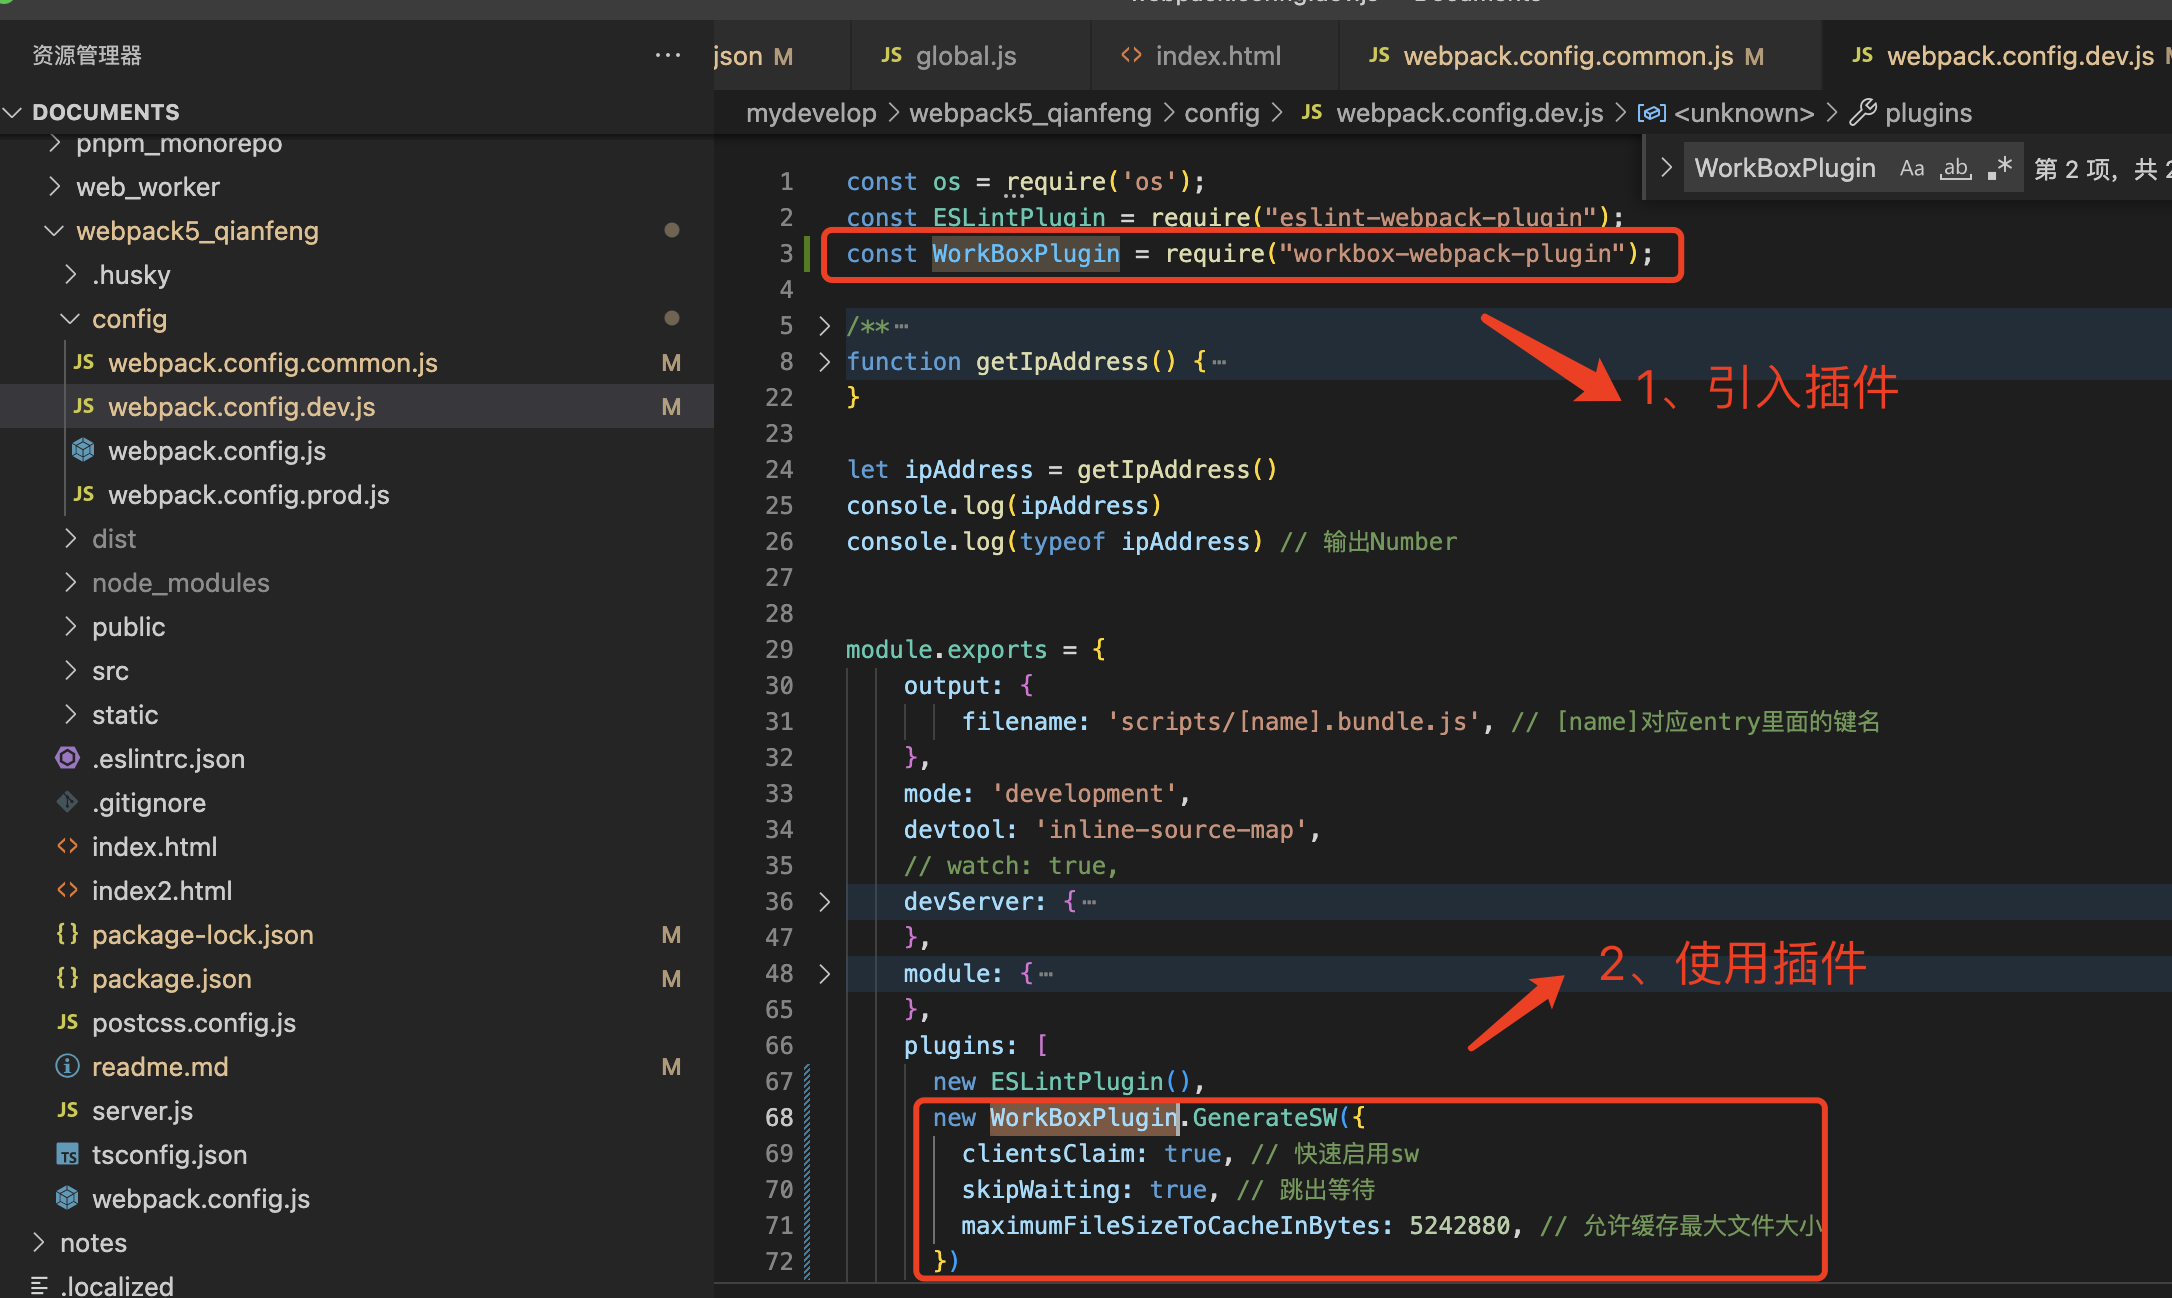
new WorkBoxPlugin.GenerateSW({
	clientsClaim: true, // 快速启用sw
	skipWaiting: true, // 跳出等待
	maximumFileSizeToCacheInBytes: 5242880, // 允许缓存最大文件大小
})注意:开发环境如果使用该插件,会因为热更新报如下警告
WARNING in GenerateSW has been called multiple times, perhaps due to running webpack in --watch mode. The precache manifest generated after the first call may be inaccurate! Please see https://github.com/GoogleChrome/workbox/issues/1790 for more information.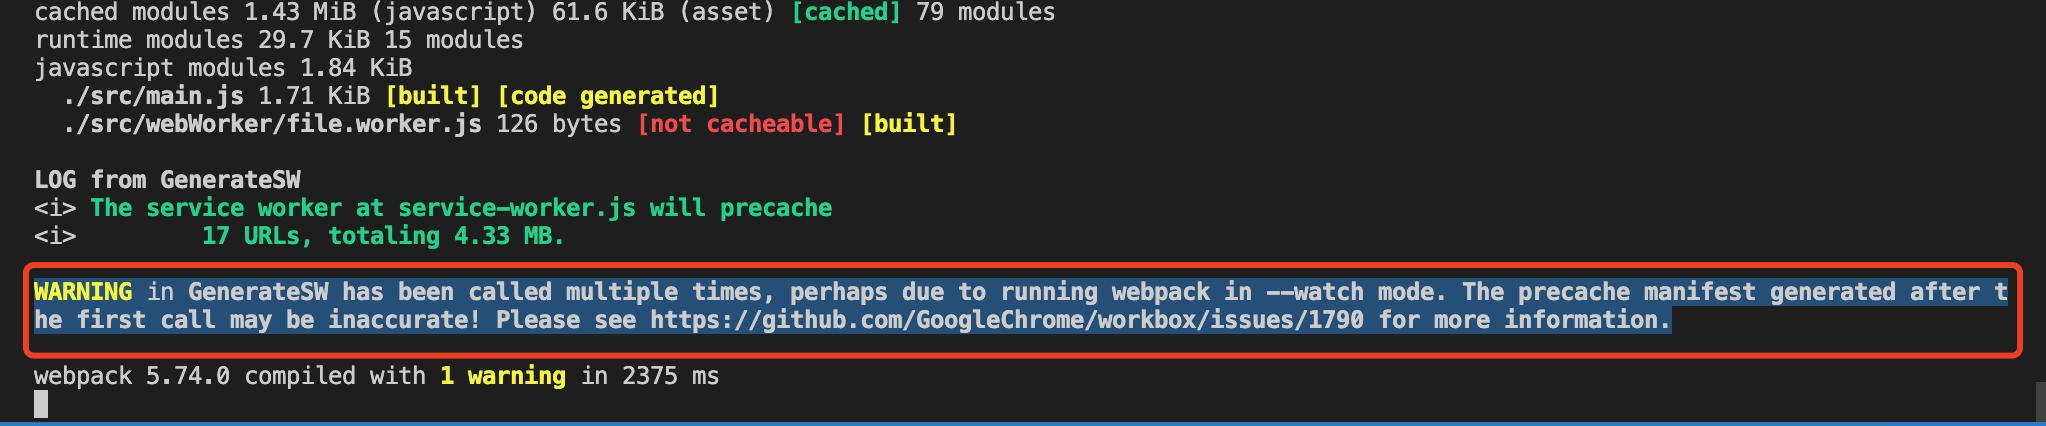
原因:上面例子用了dev-server写入硬盘方式生成dist文件夹及内容
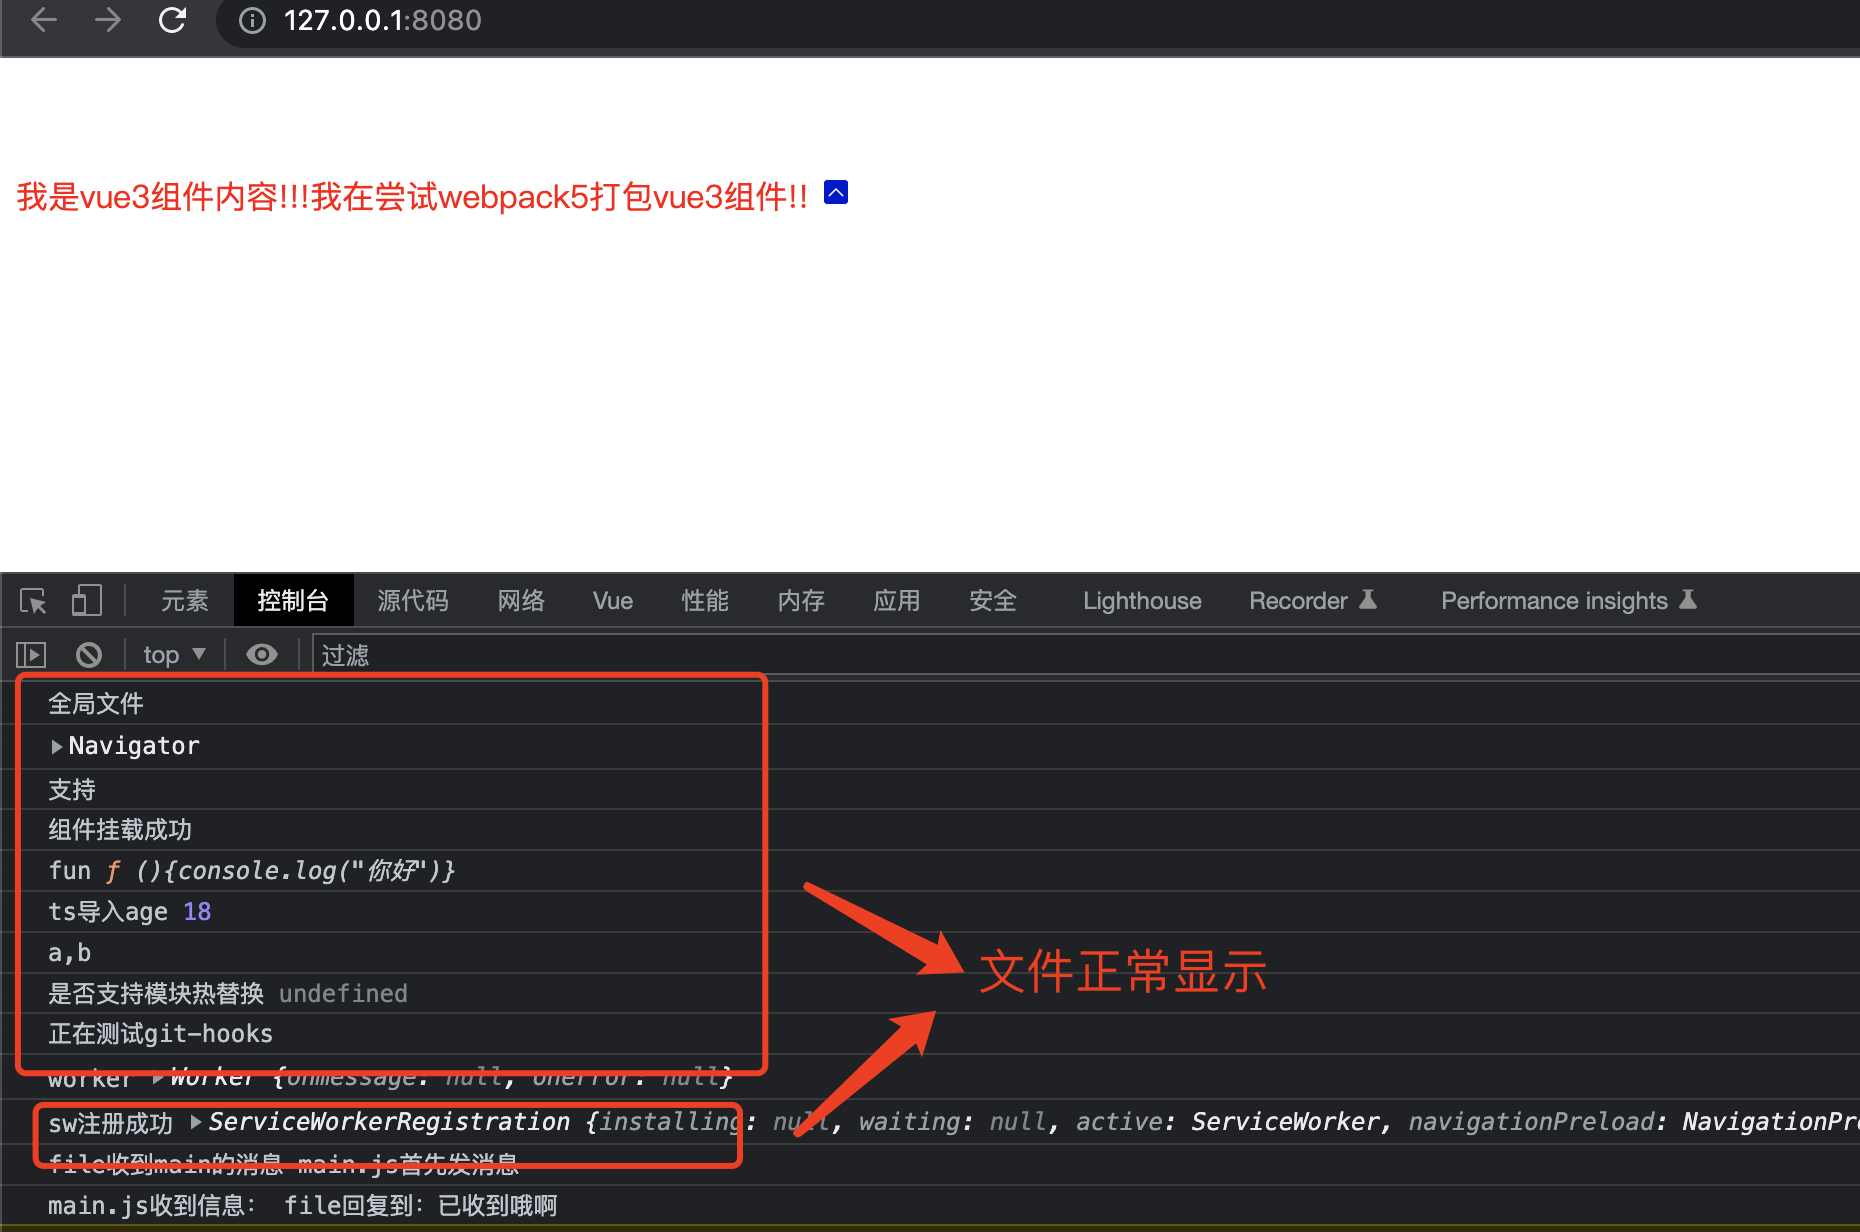
注册serviceWorker
判断浏览器是否支持service-worker,只需navigator.serviceWorker

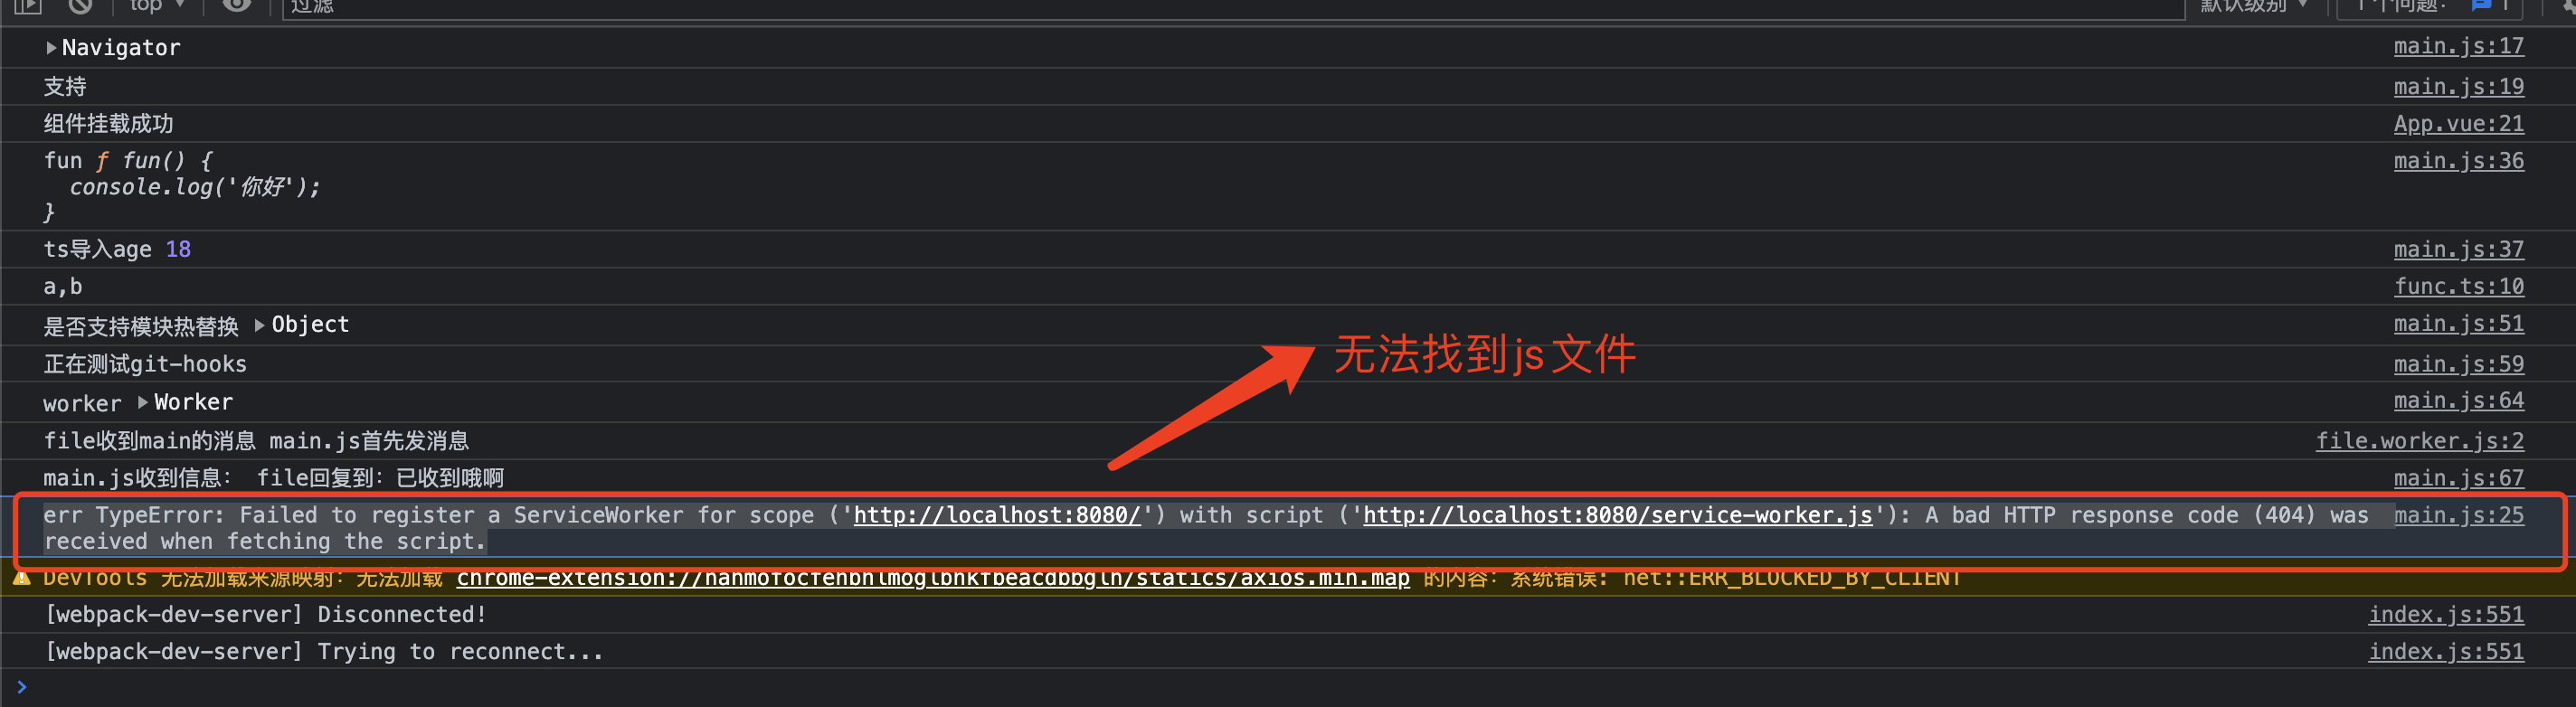
原因:service worker需要使用本地回环地址或采用https协议
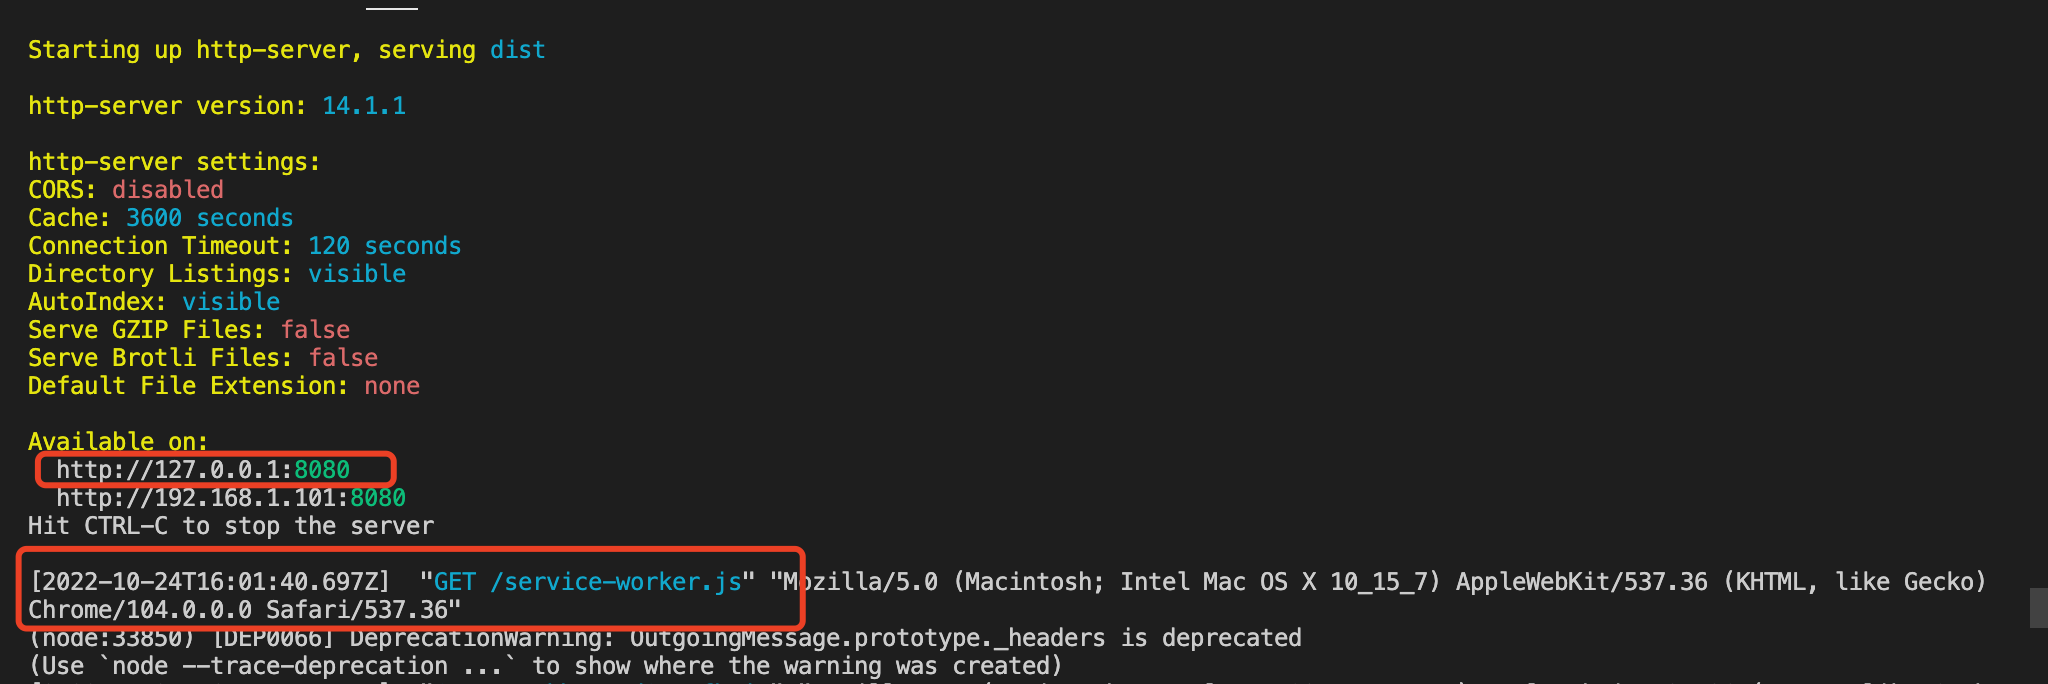
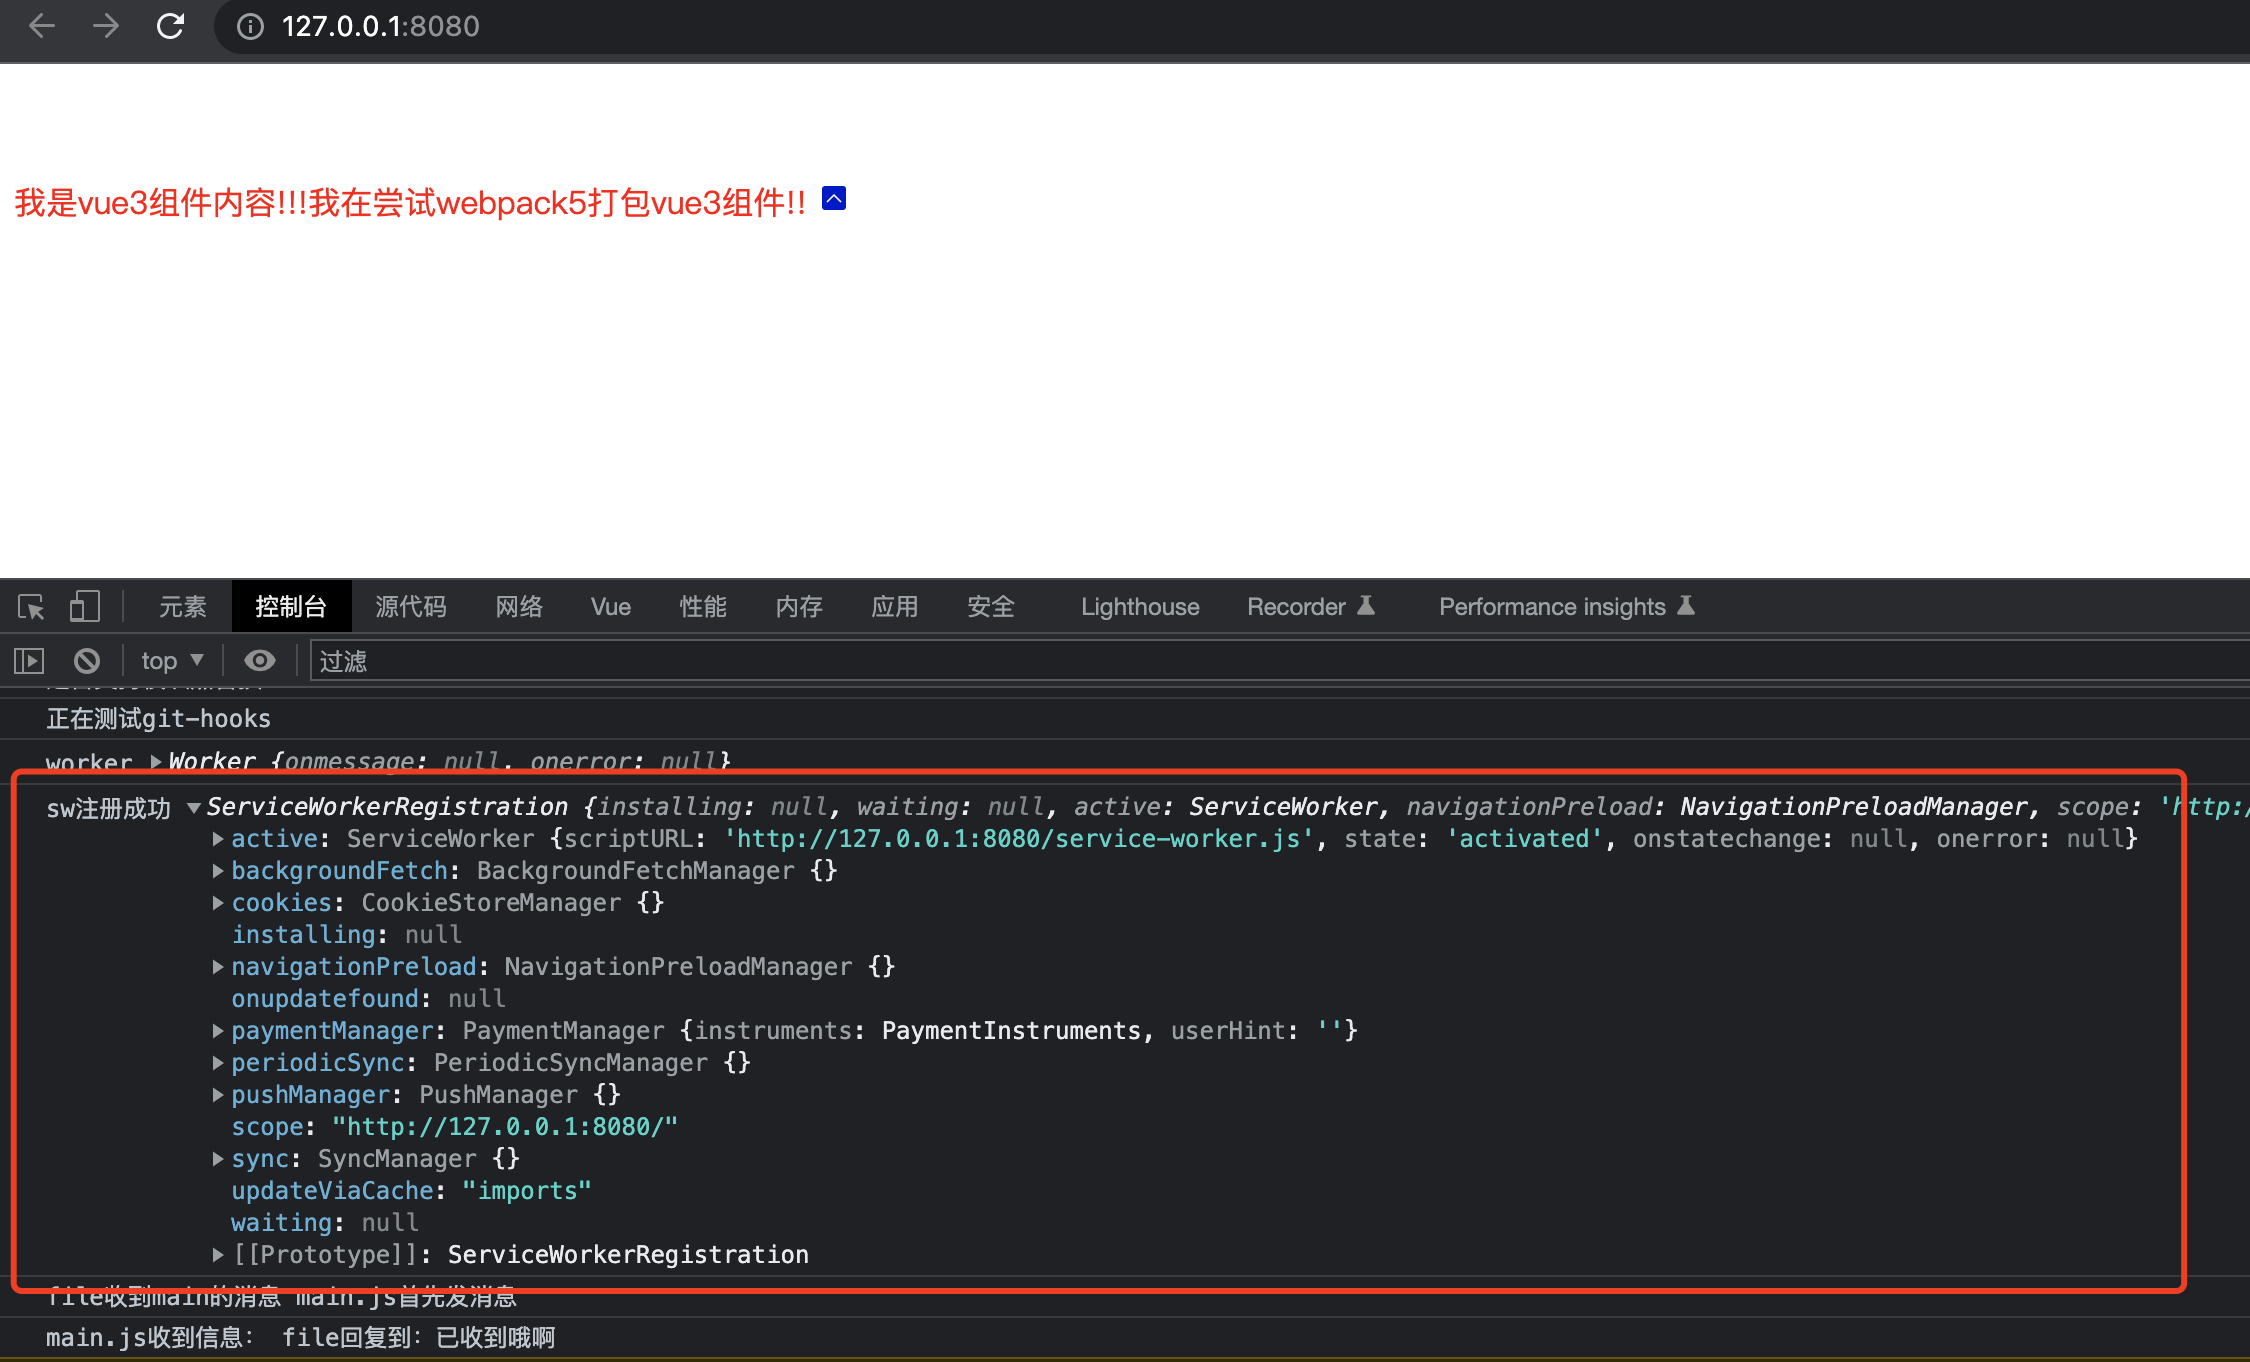
如上所示,采用本地回环地址注册成功
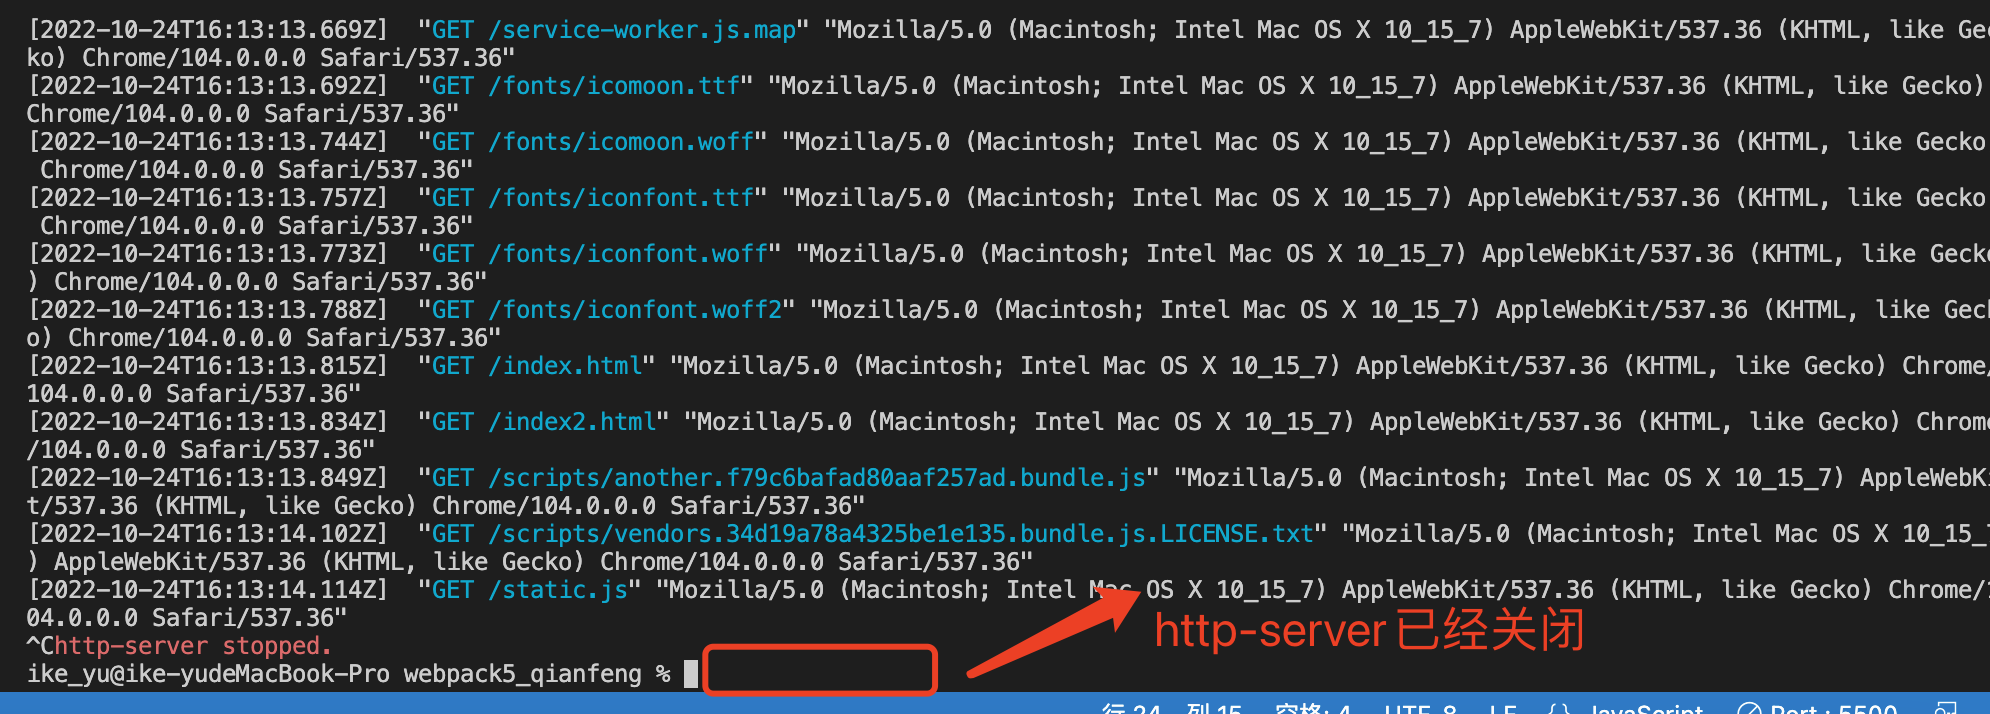
尝试关闭server
查看浏览器已注册的service worker
chrome://serviceworker-internals/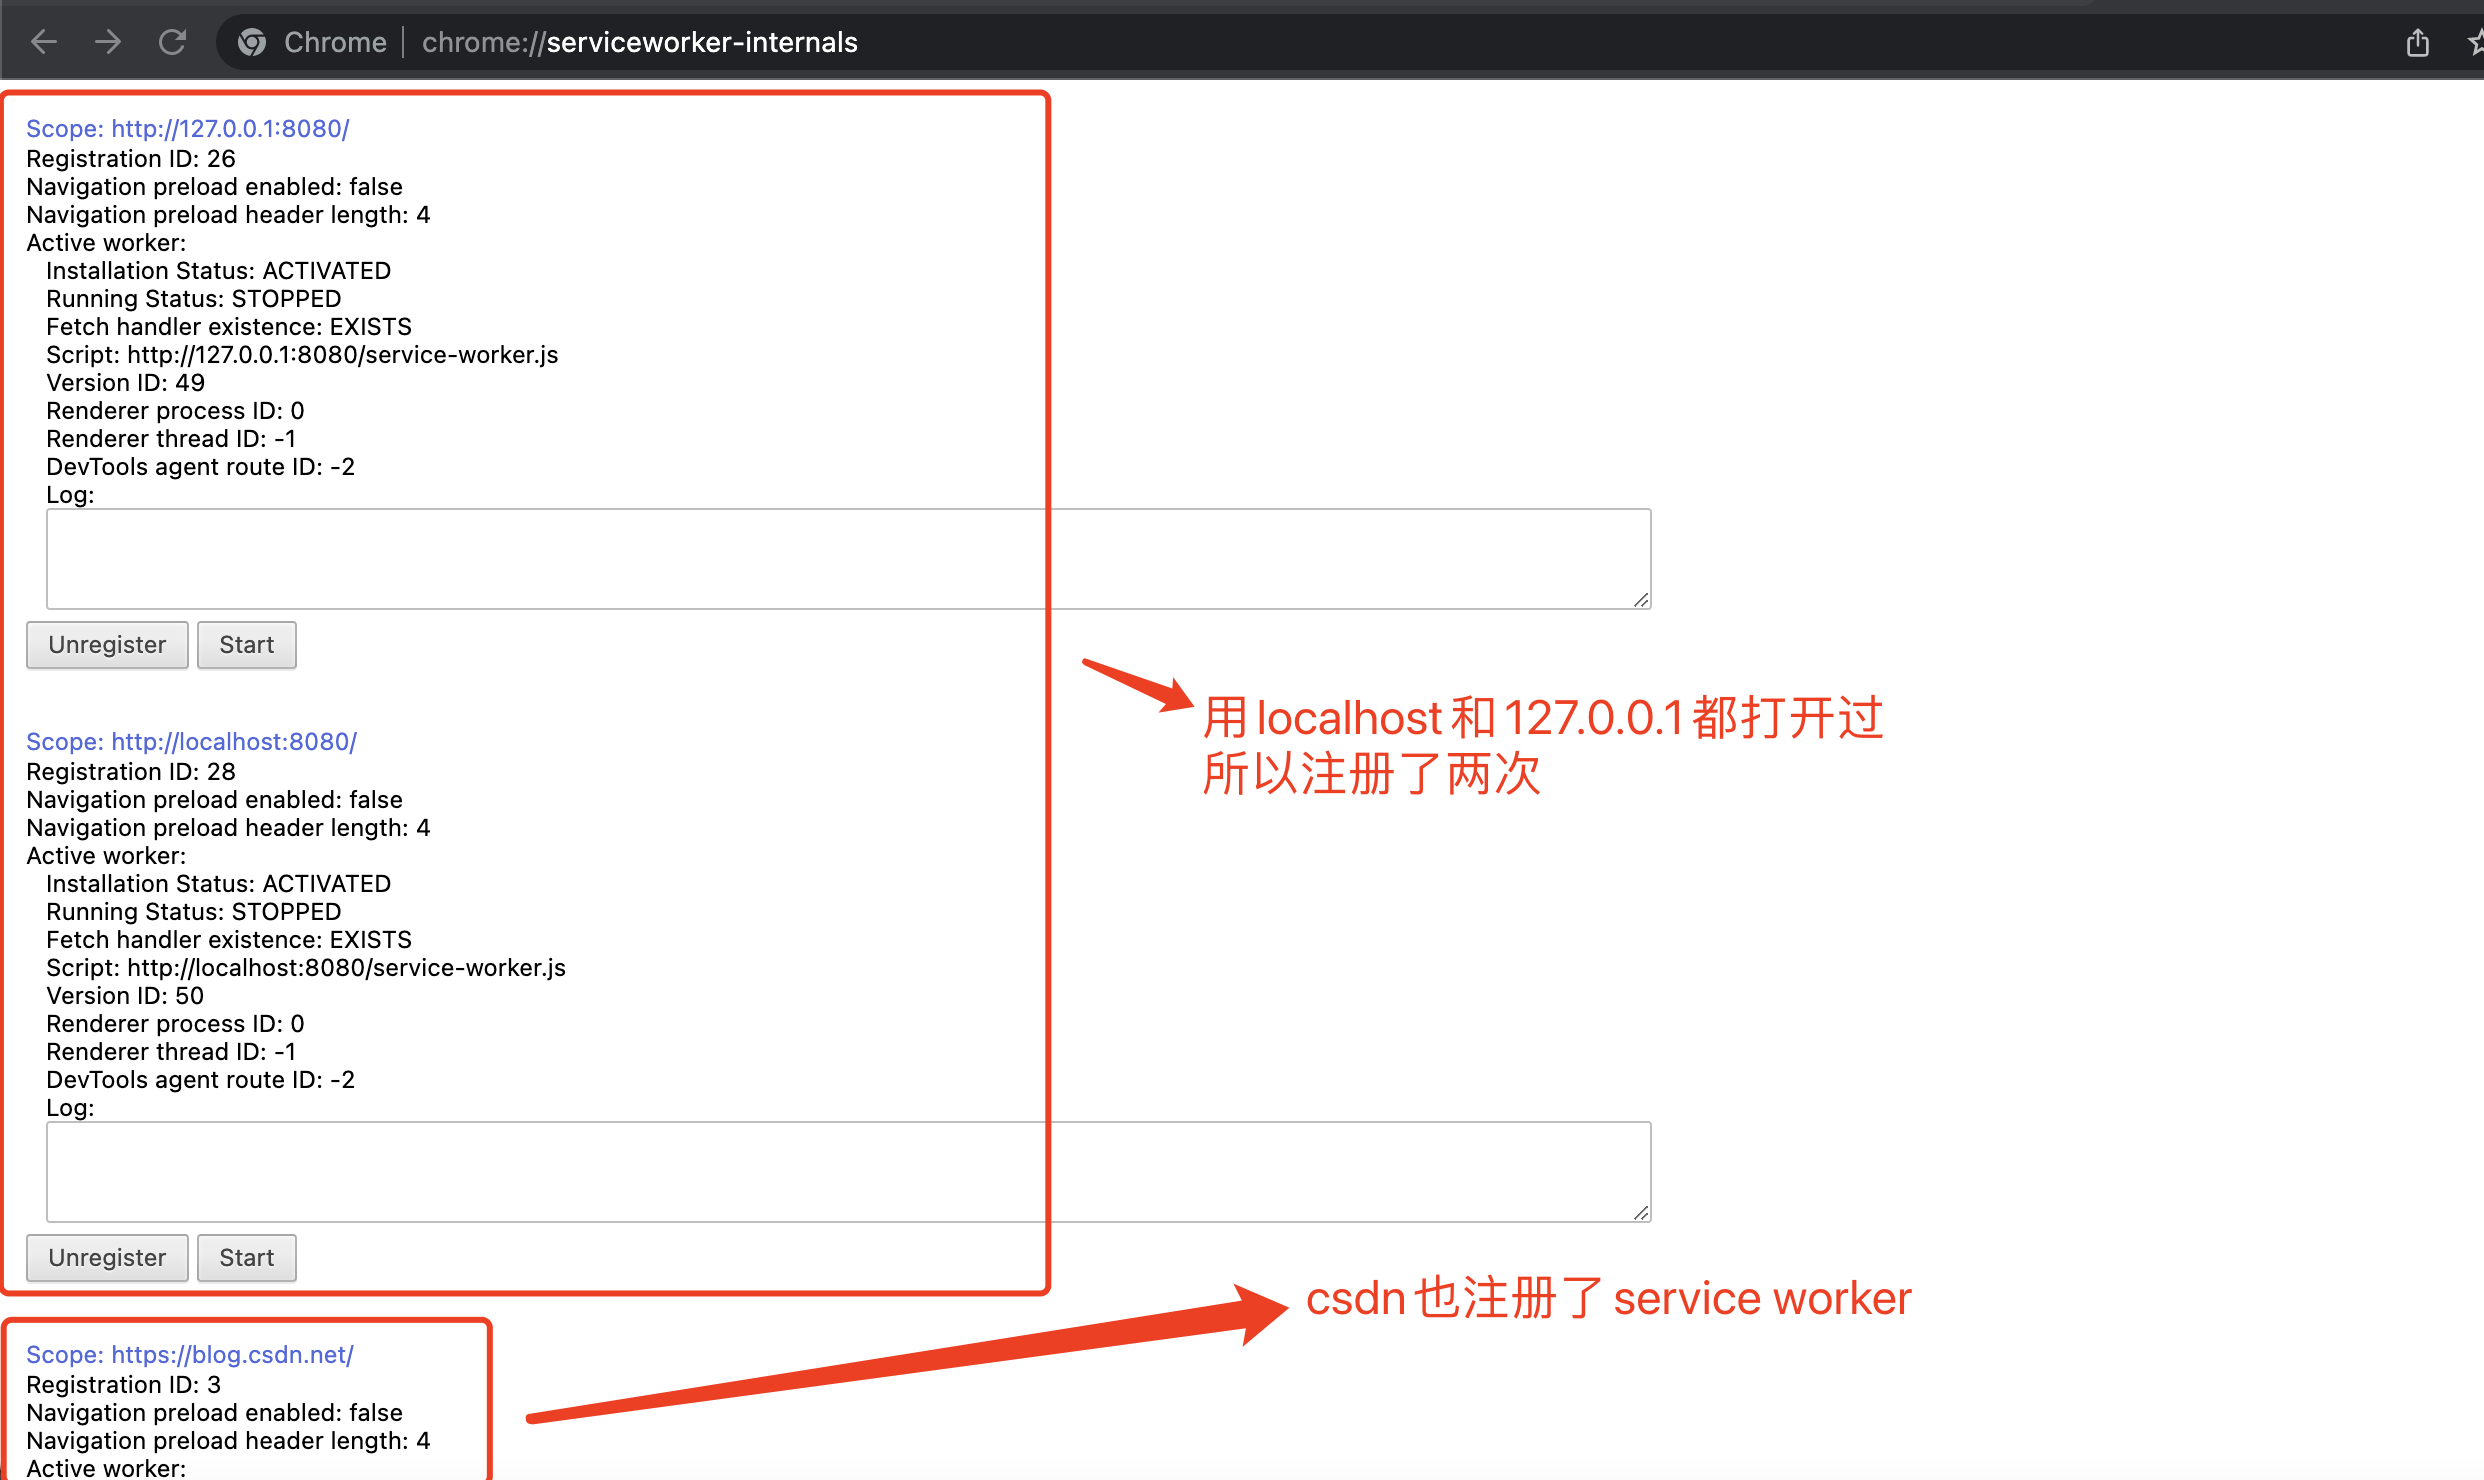
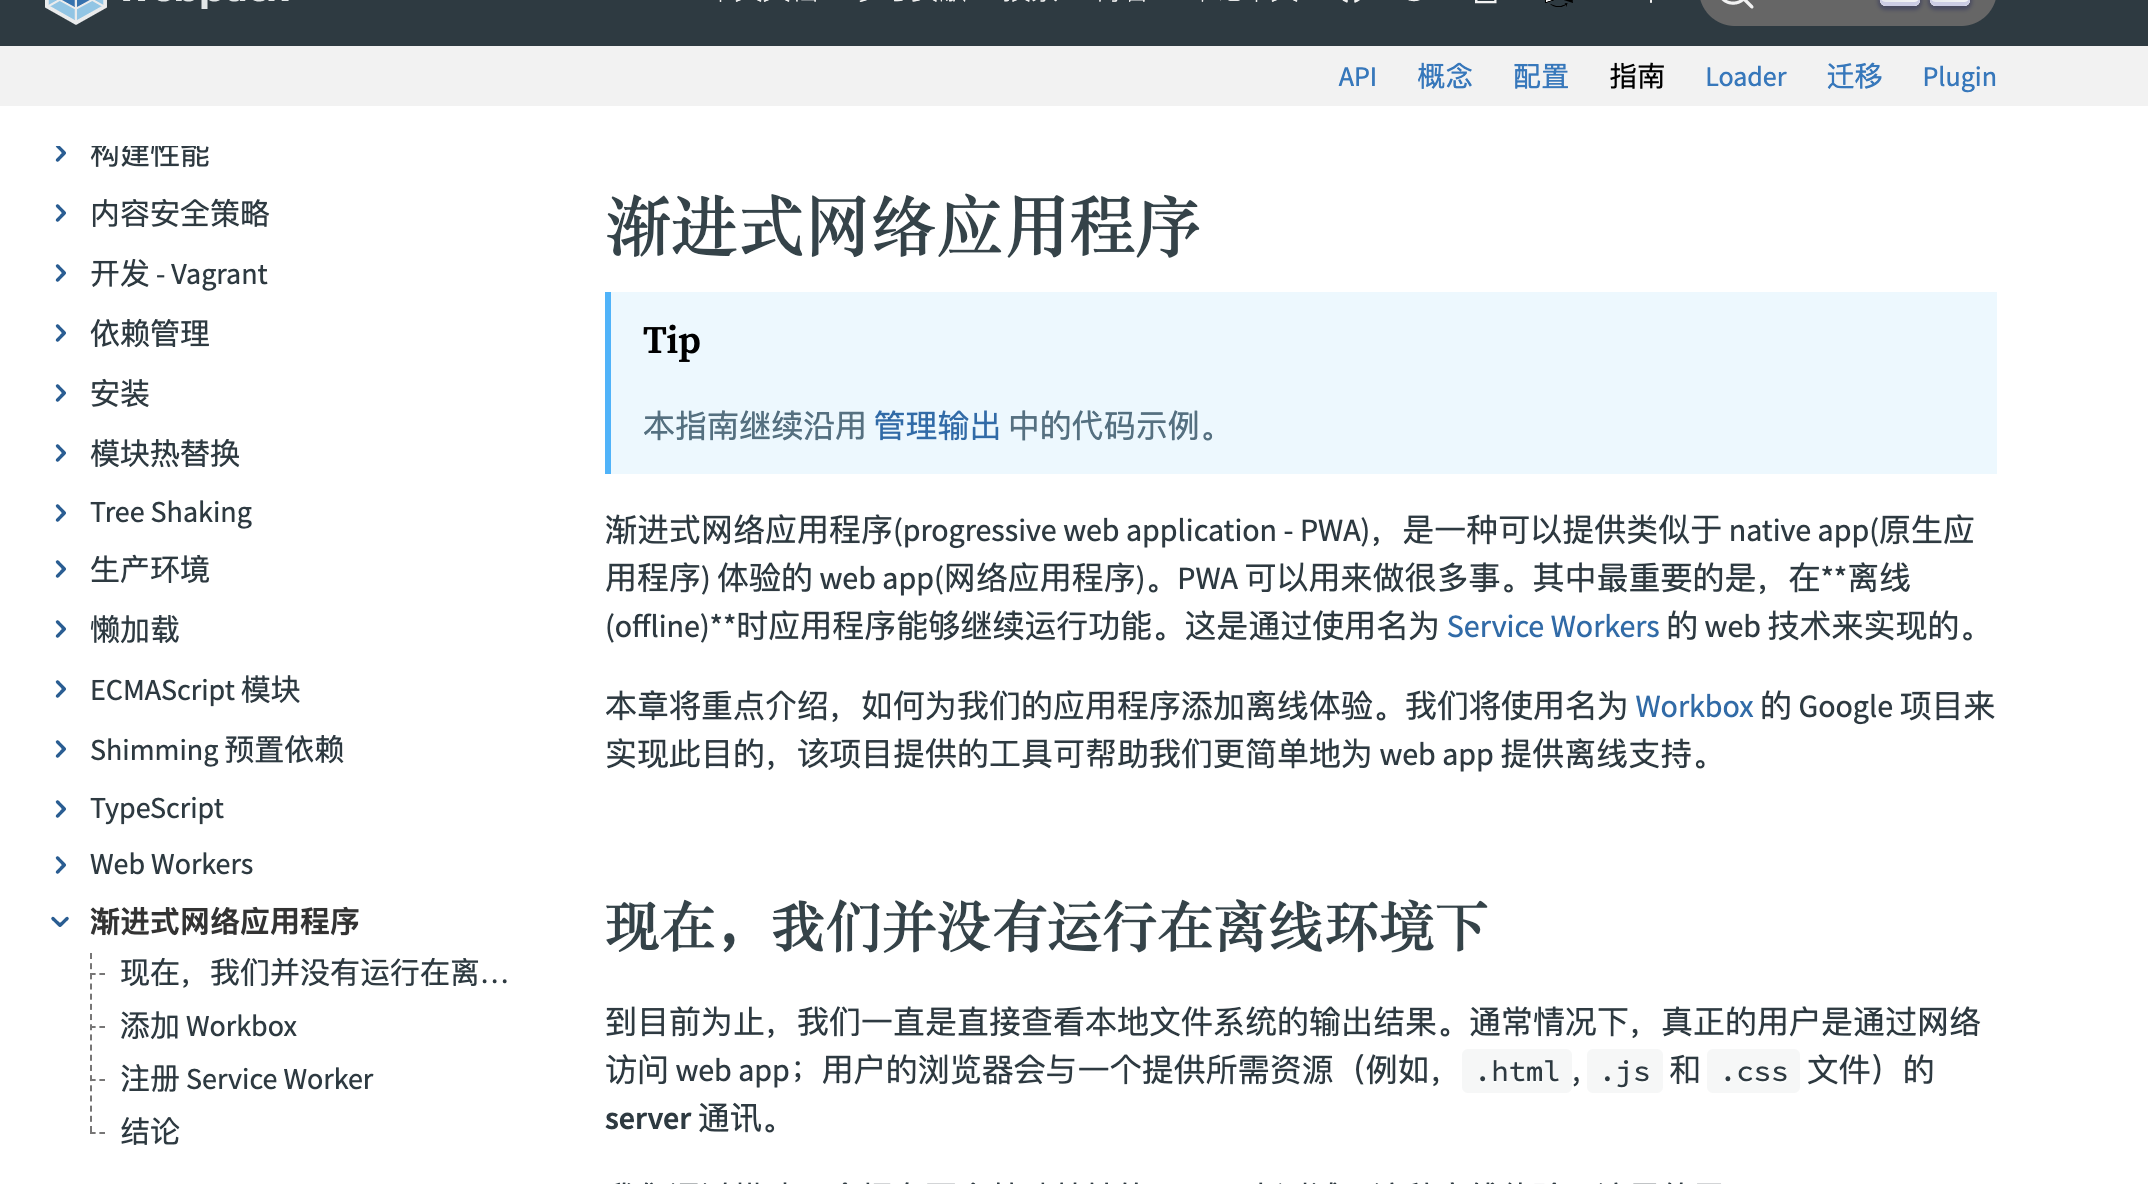
官网有介绍
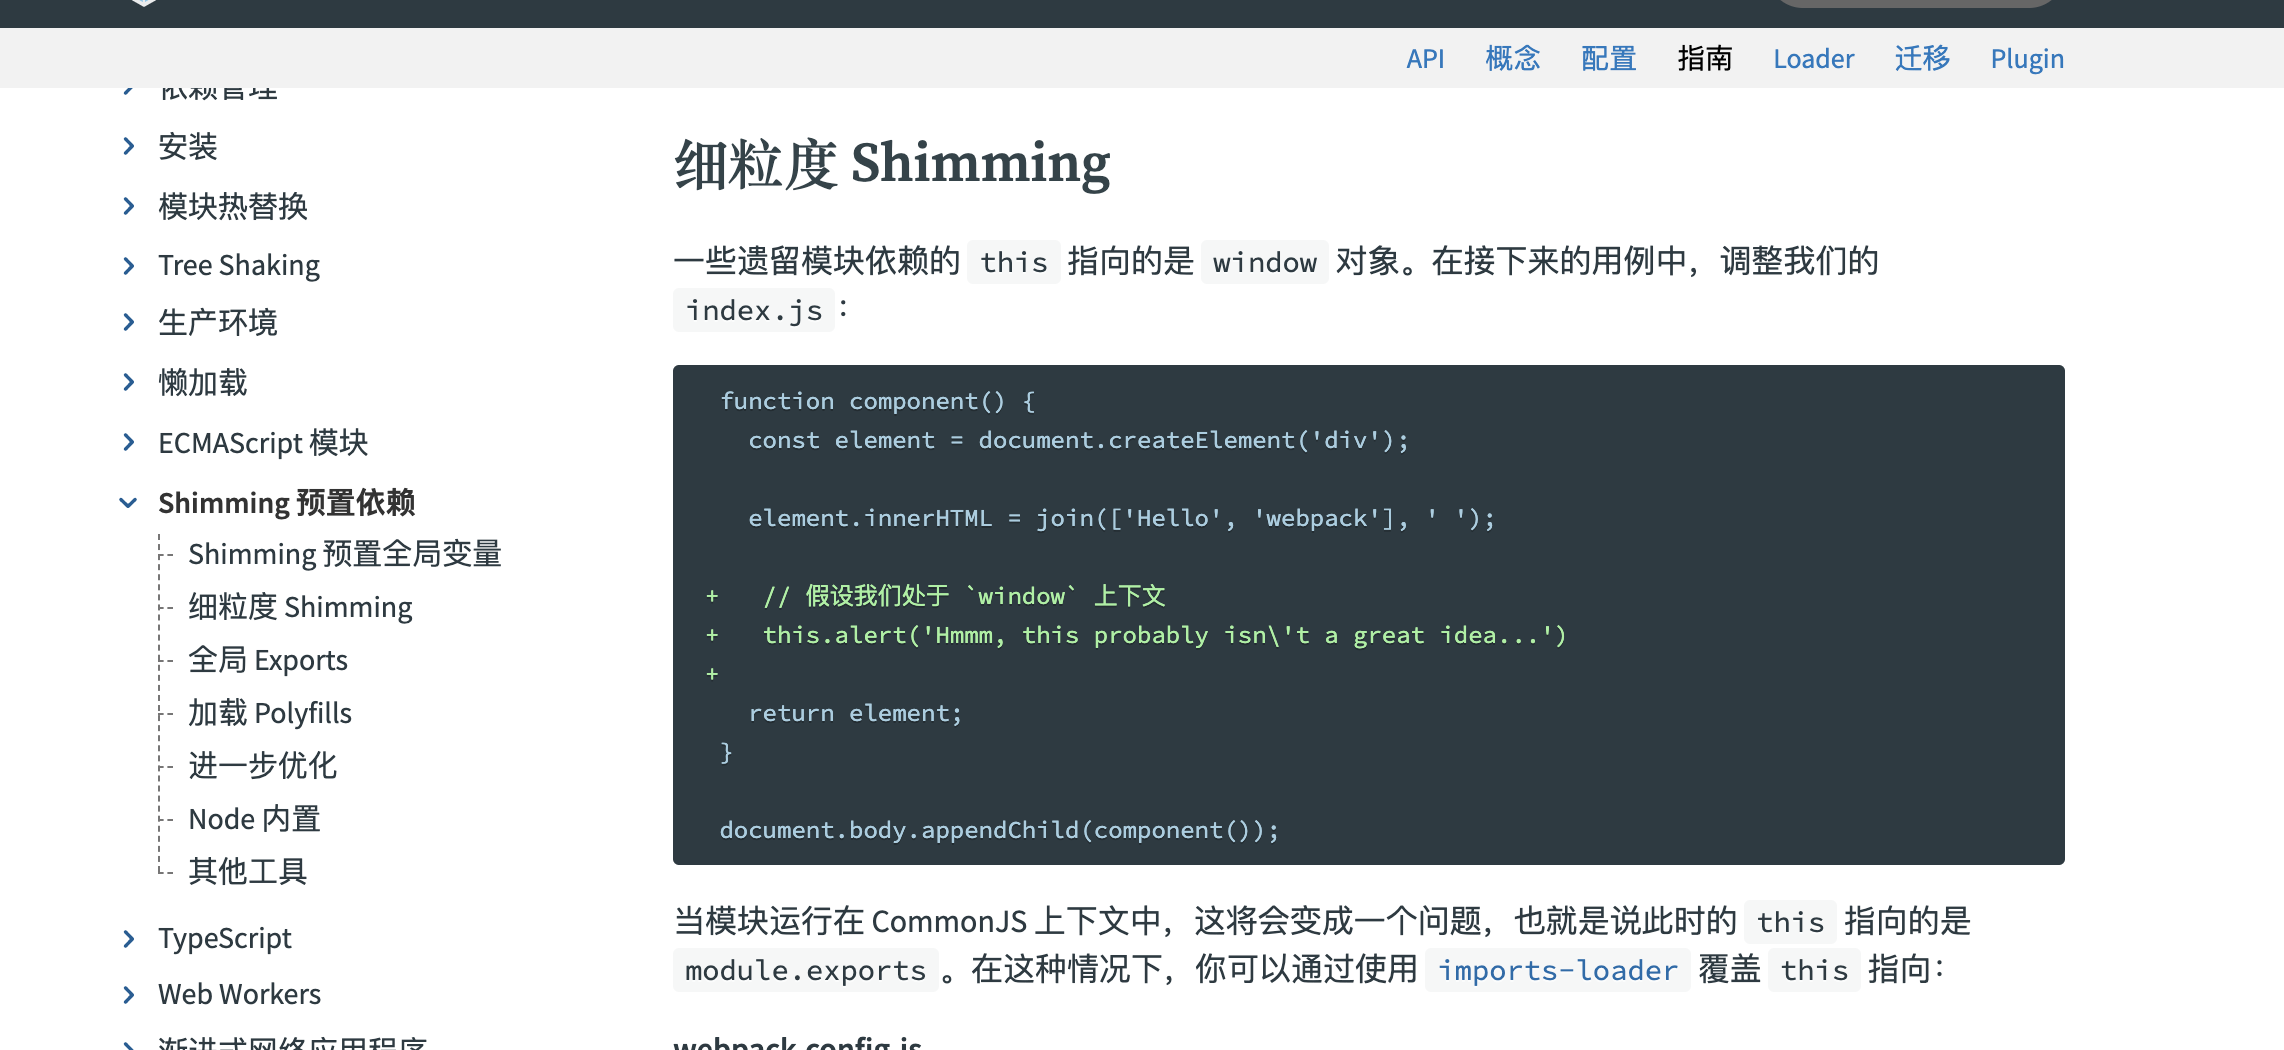
24、shimming预置依赖
webpack识别遵循es2015、commonJS、AMD编写的模块规范
一些第三方库会引用一些全局依赖,比如jquery中的$,因此这些库需要创建一些需要导出的全局变量
这些不合规范的模块需要预置依赖处理
ProvidePlugin
webpack内置的一个插件,自动加载模块并设置为全部依赖
下面以引入jquery为例
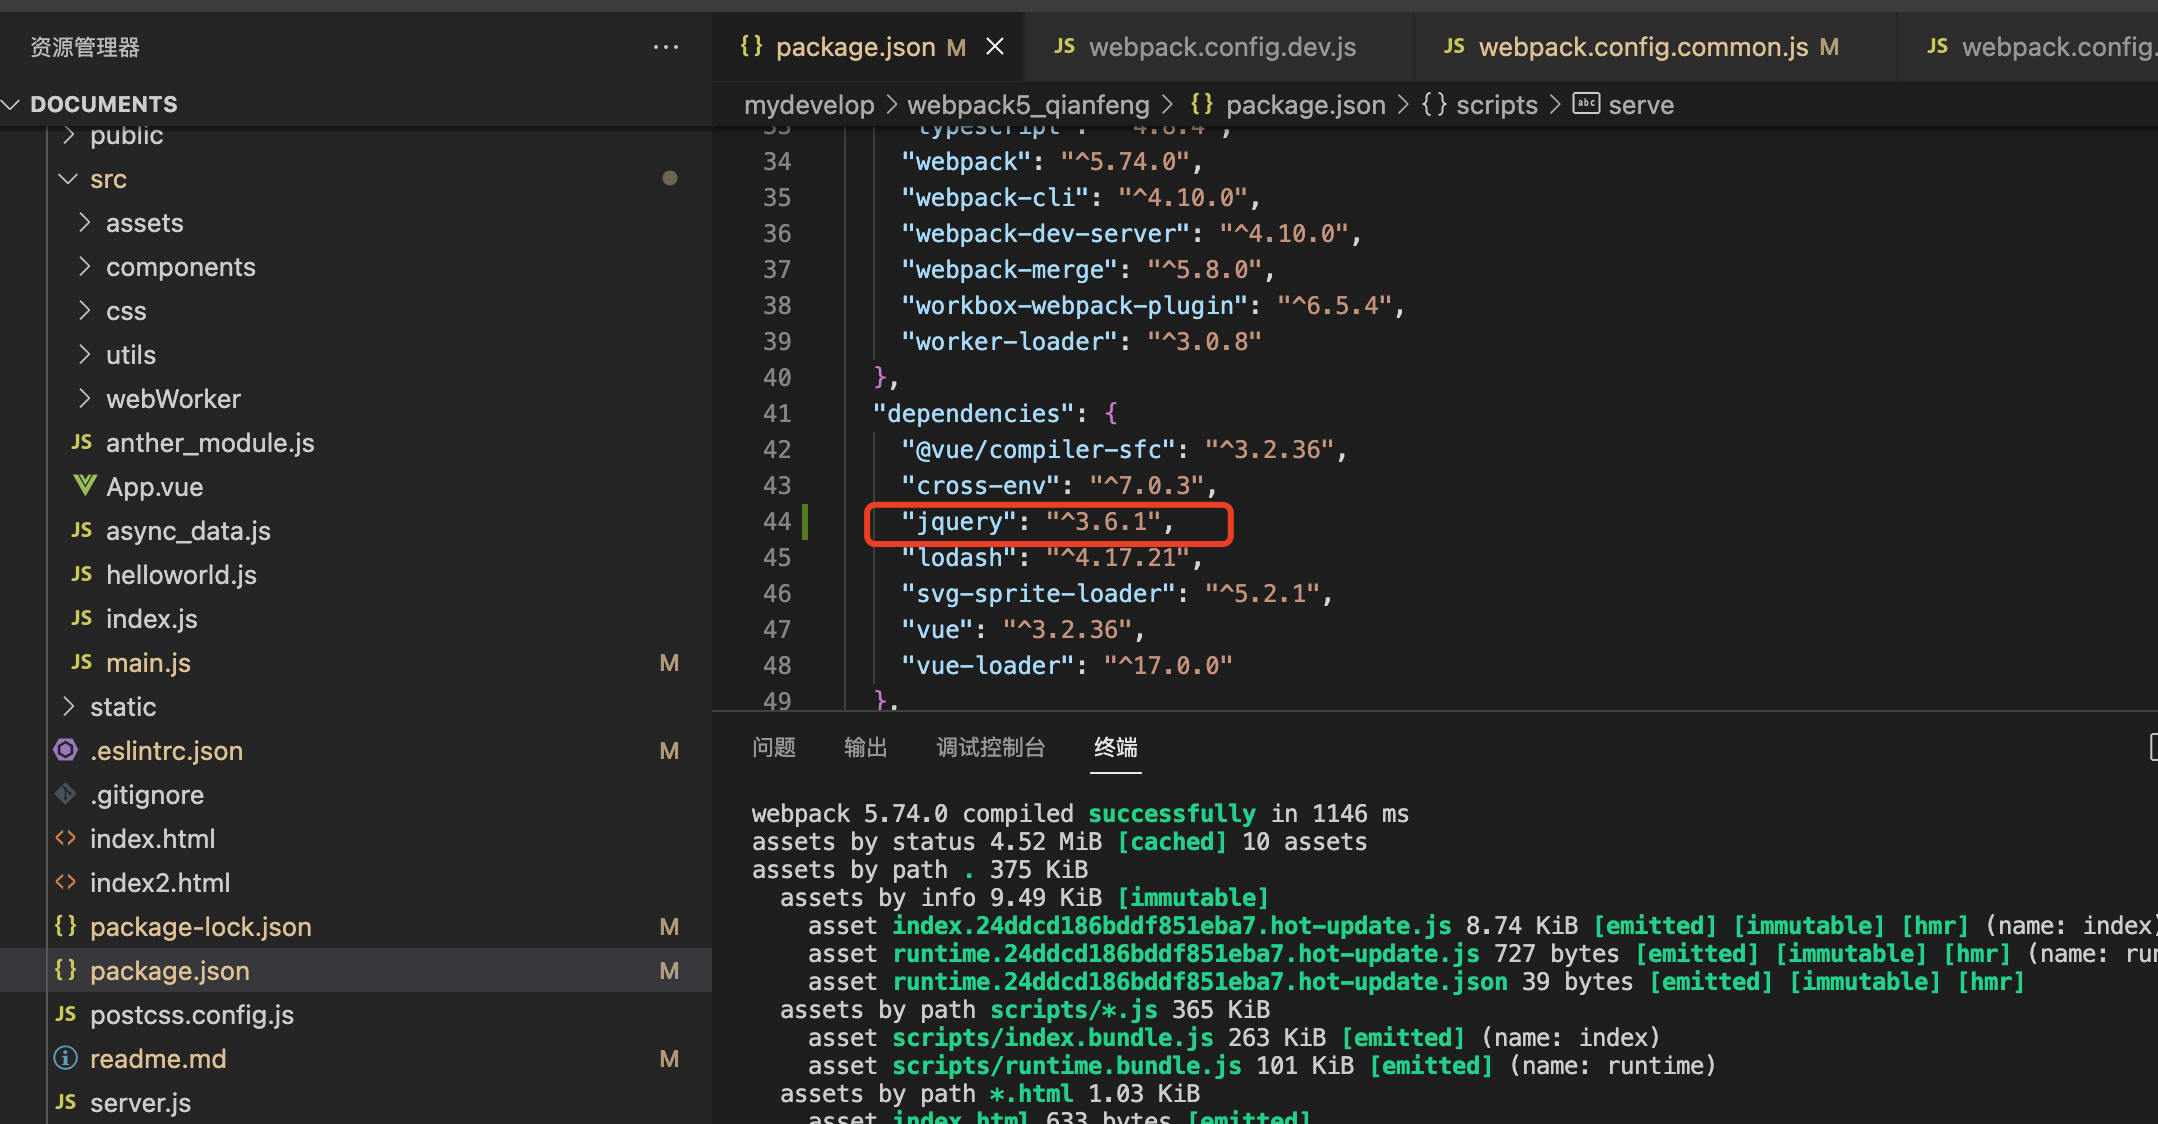
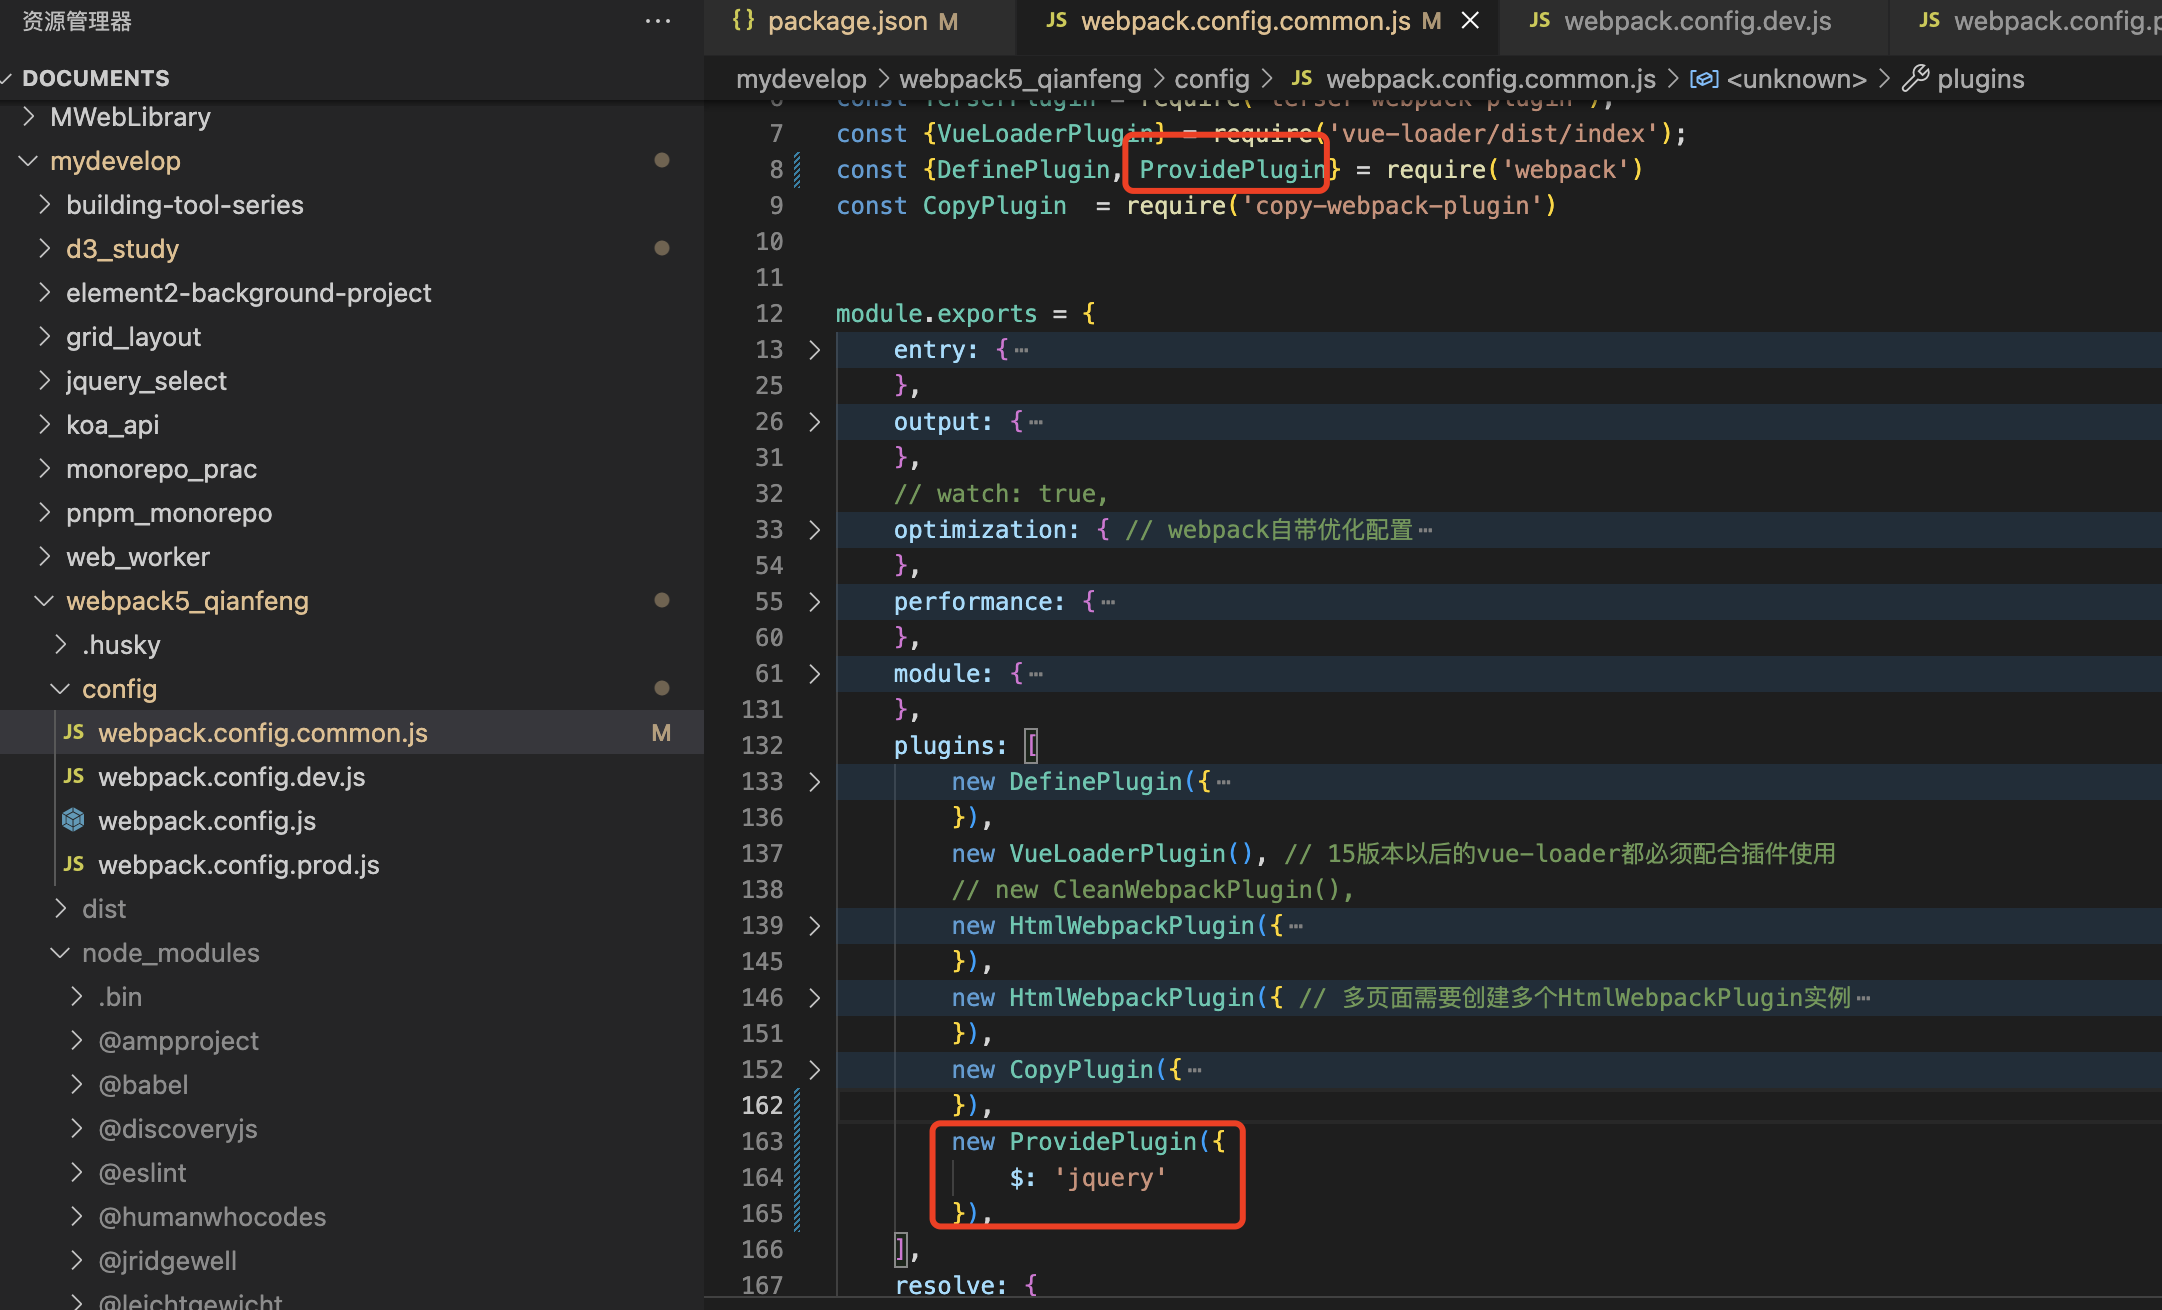
如上所示,就可以使用jquery了,注意jquery版本要大于2.xx
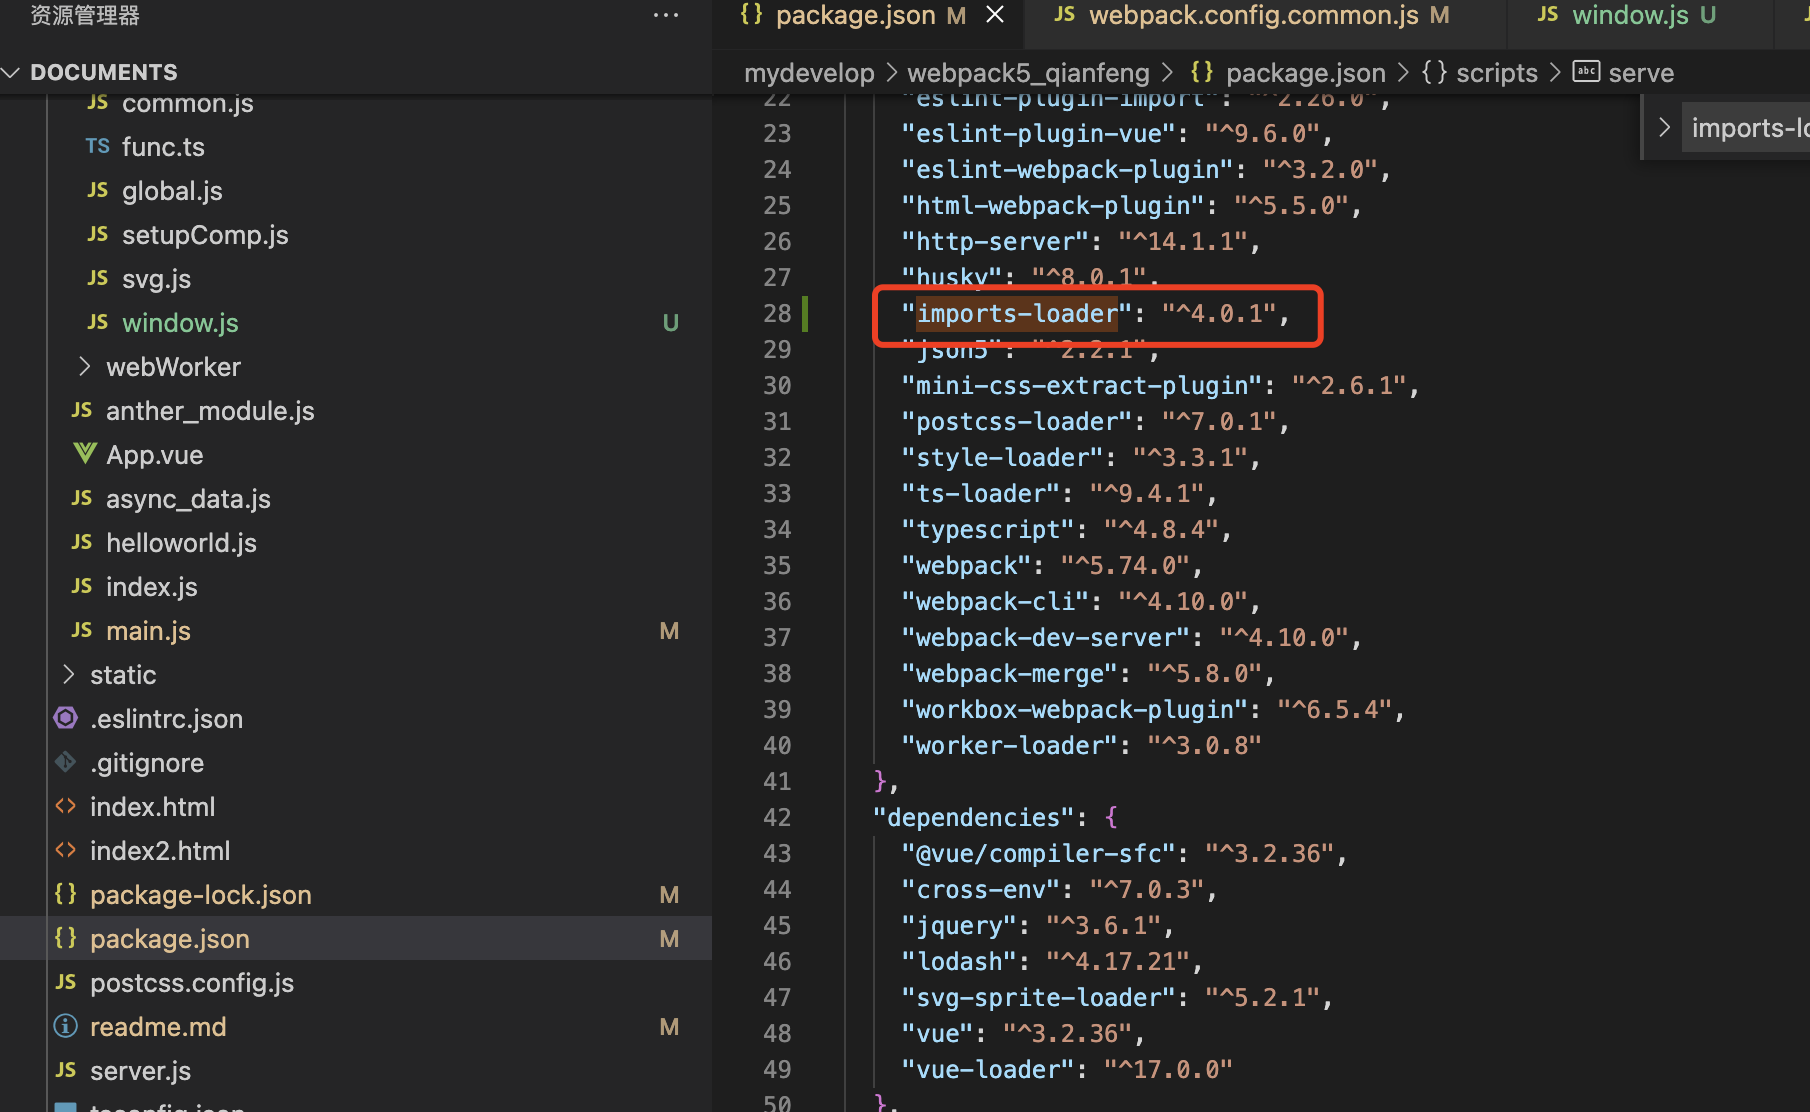
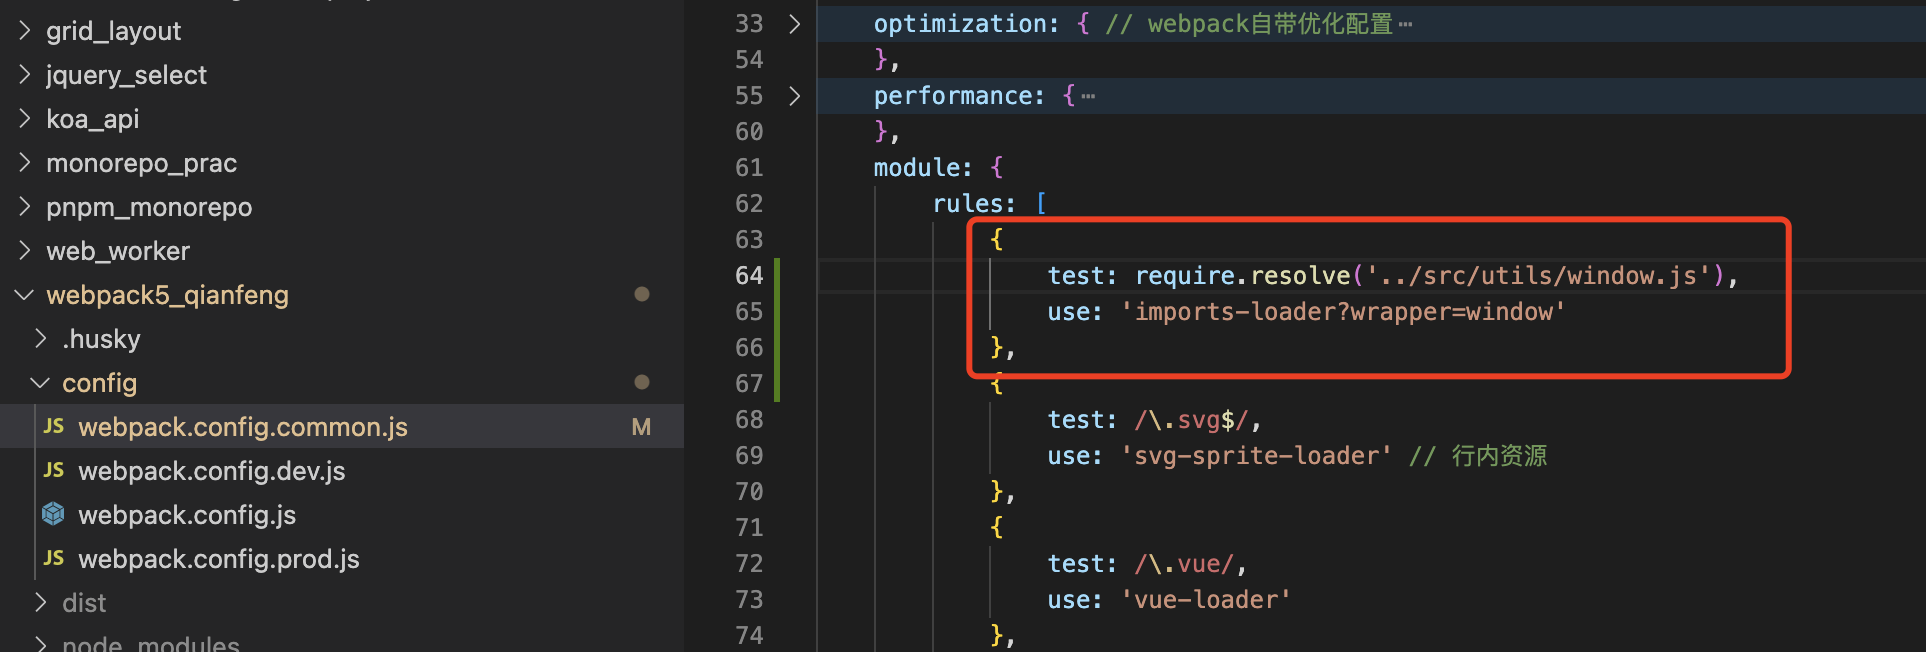
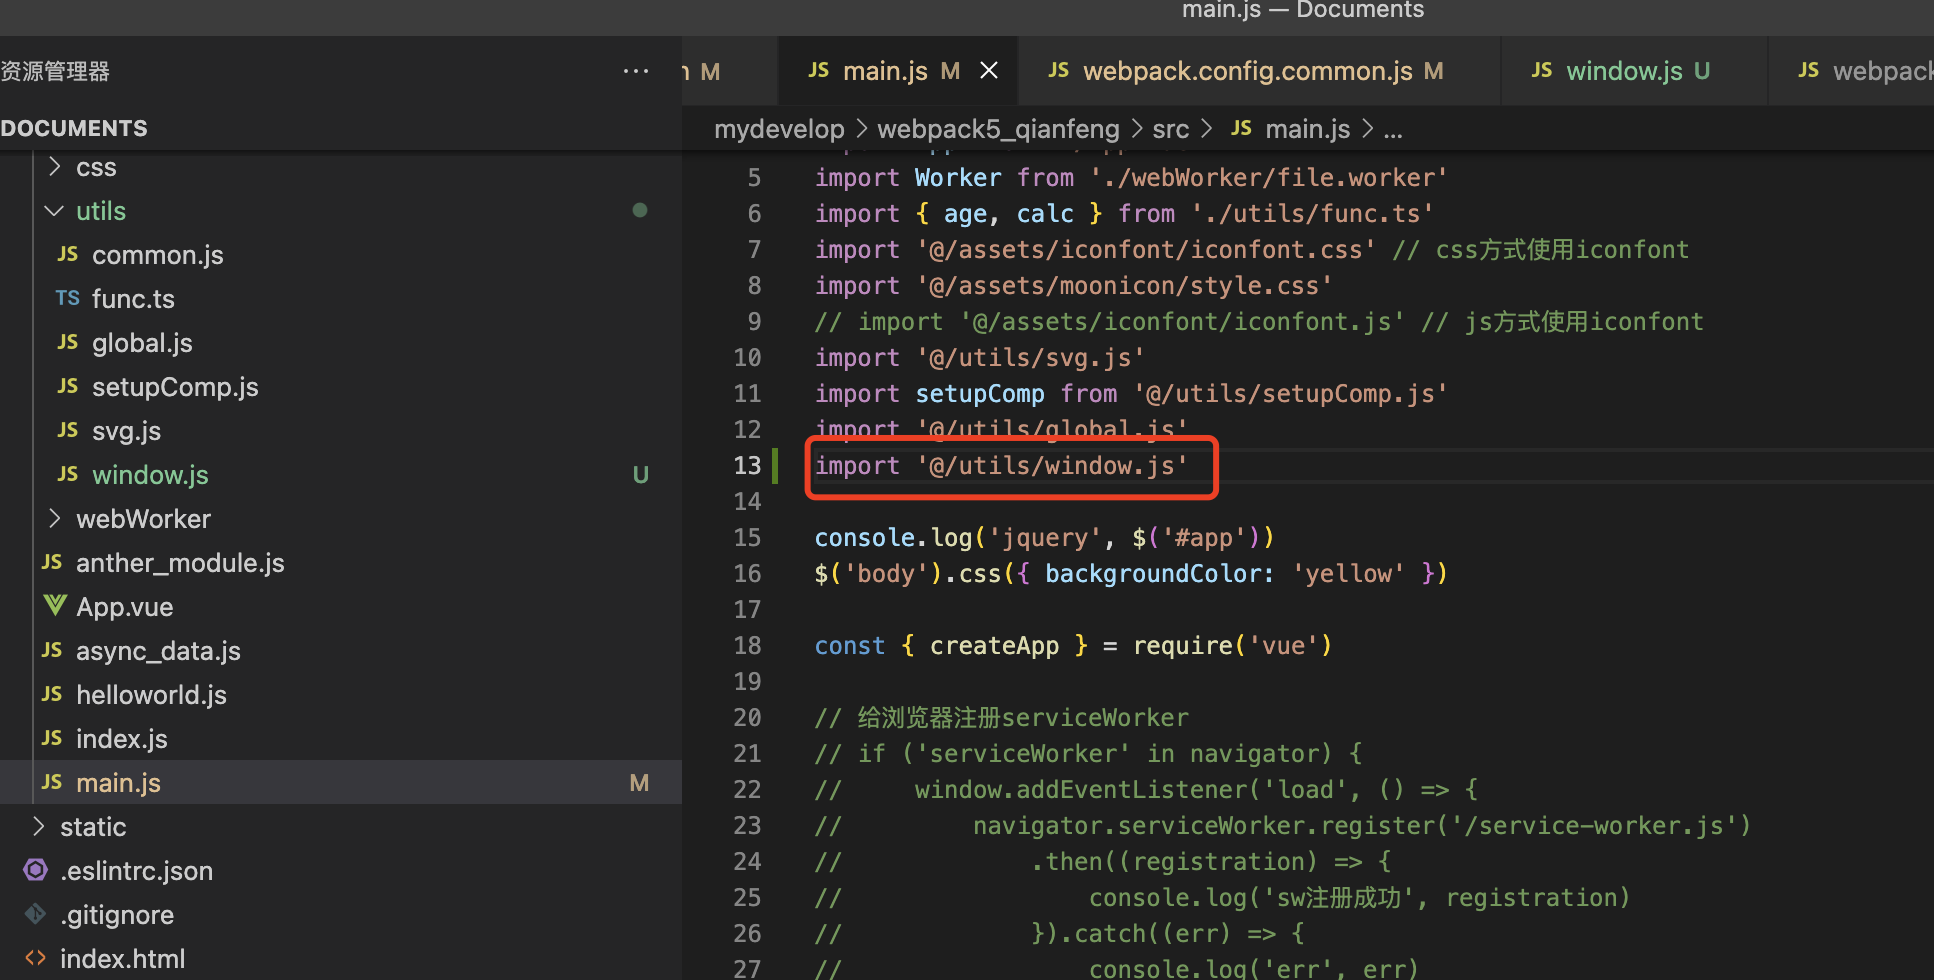
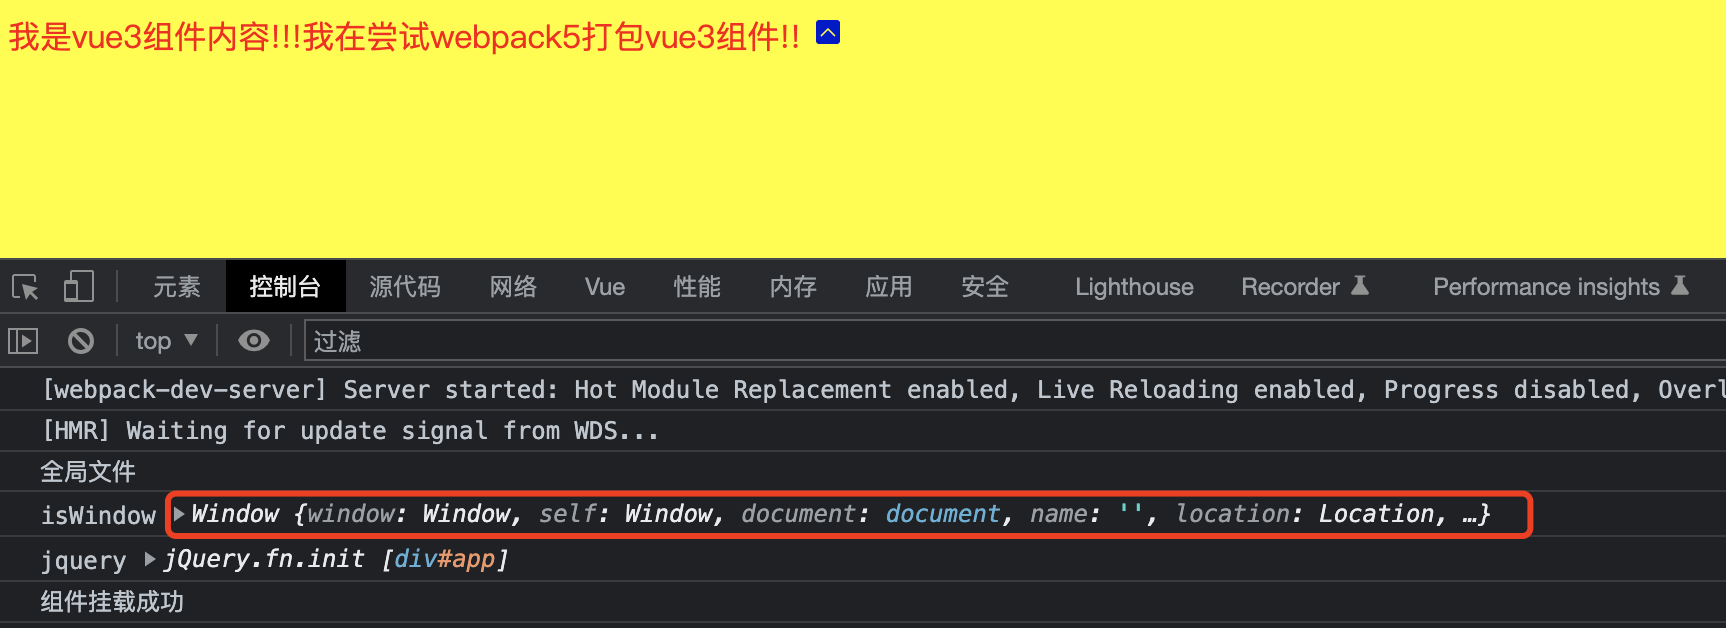
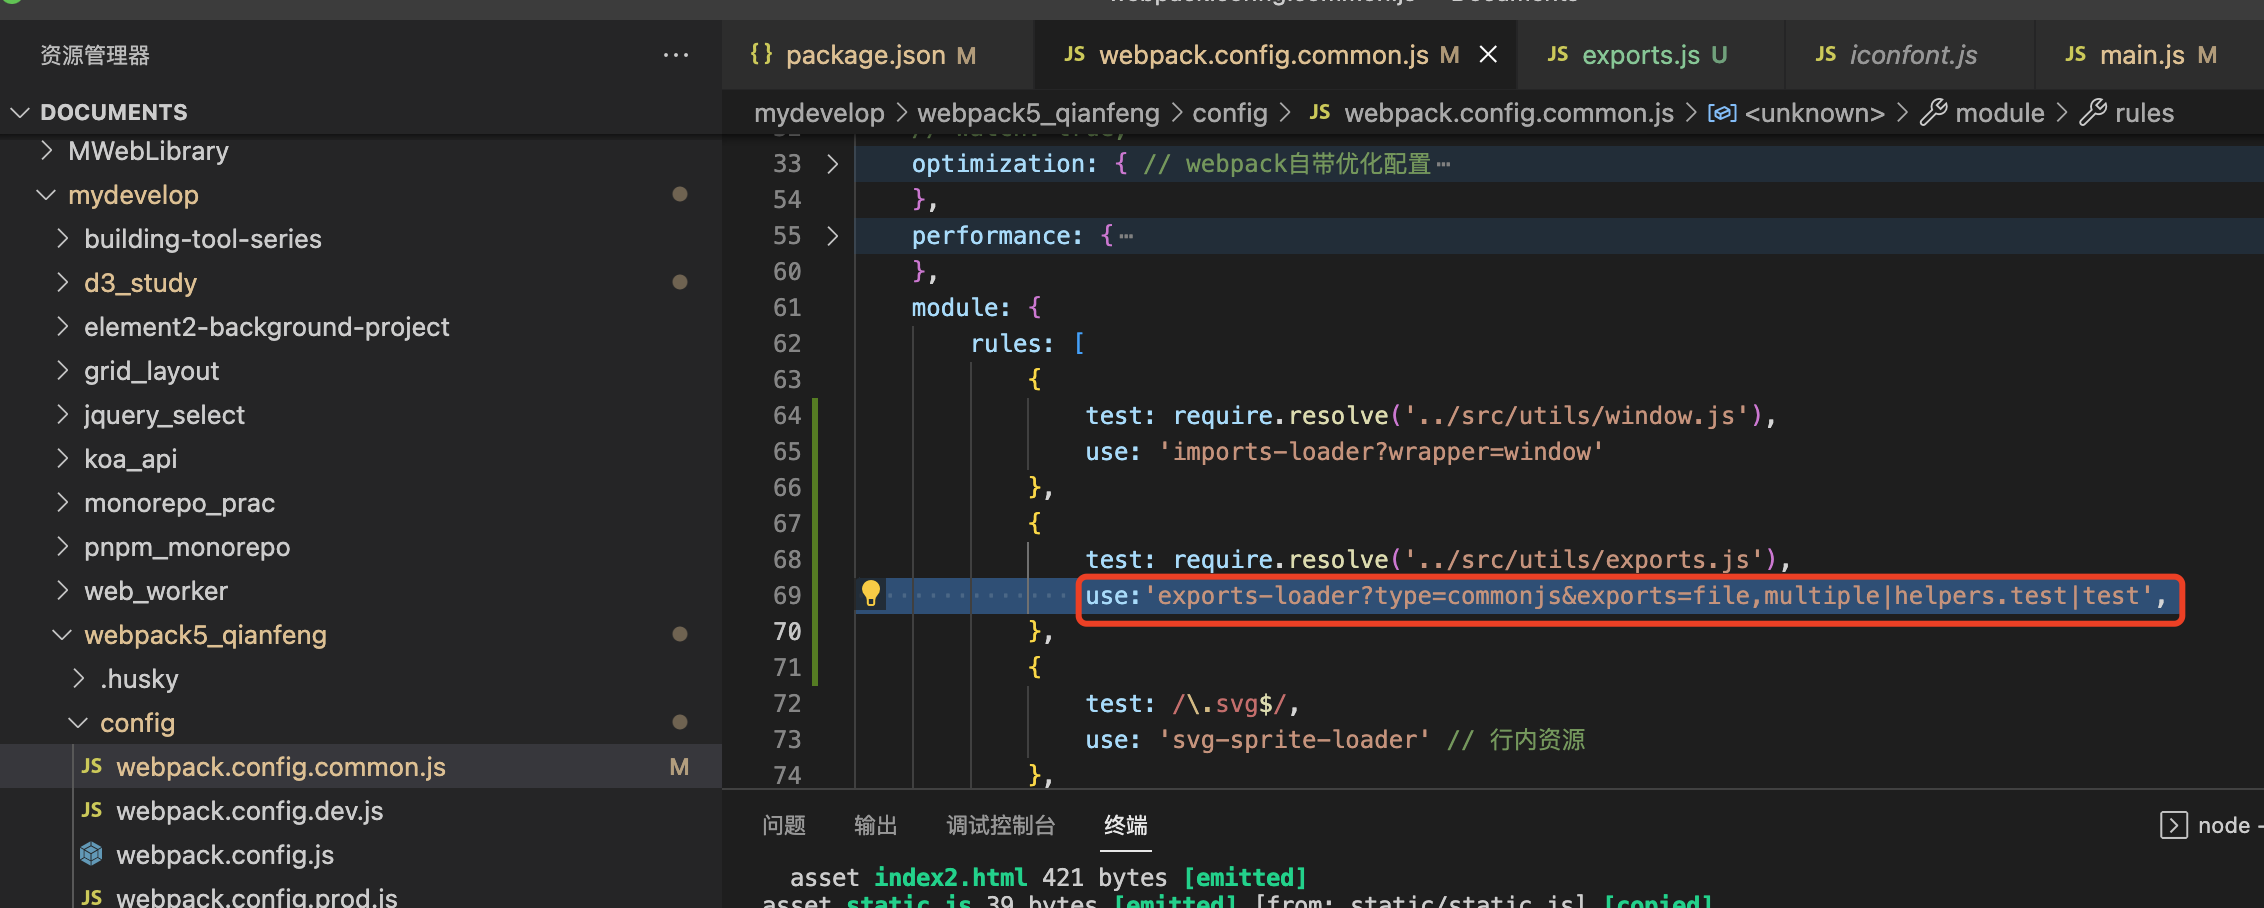
imports-loader
作用:默认以commonjs方式模块化导入非模块化js文件,并可指定模块内最外层全局变量的值
案例:将包里面this指向window
需要单独安装imports-loader
官网有介绍
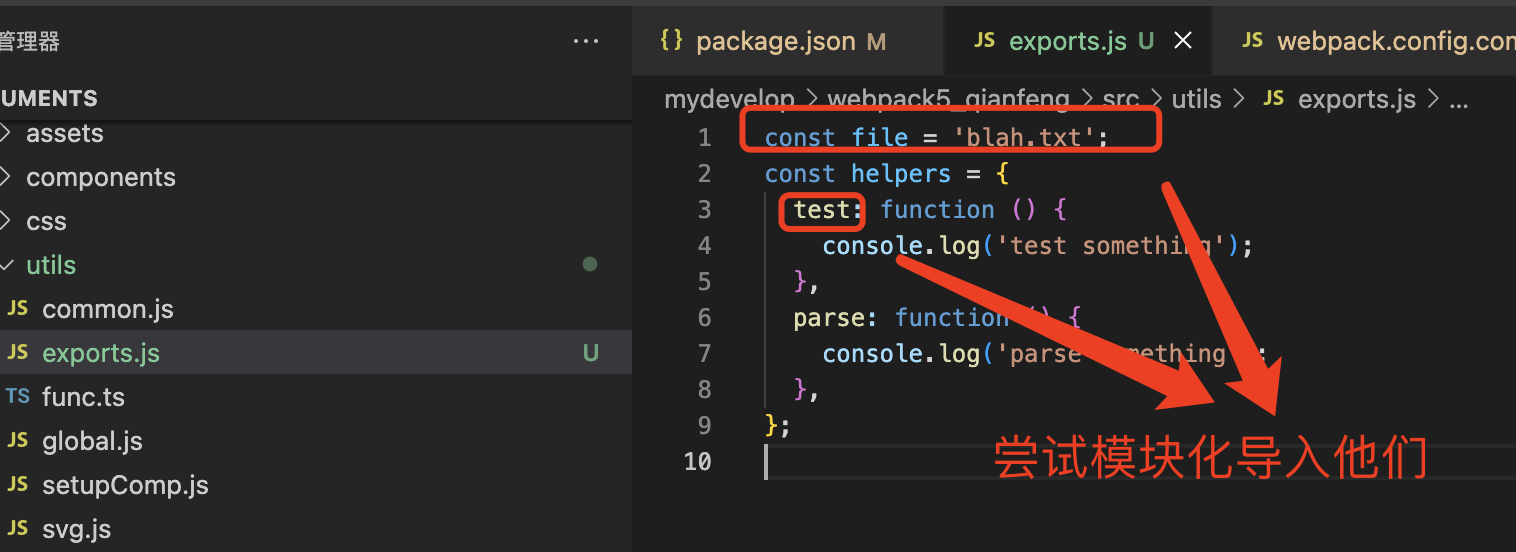
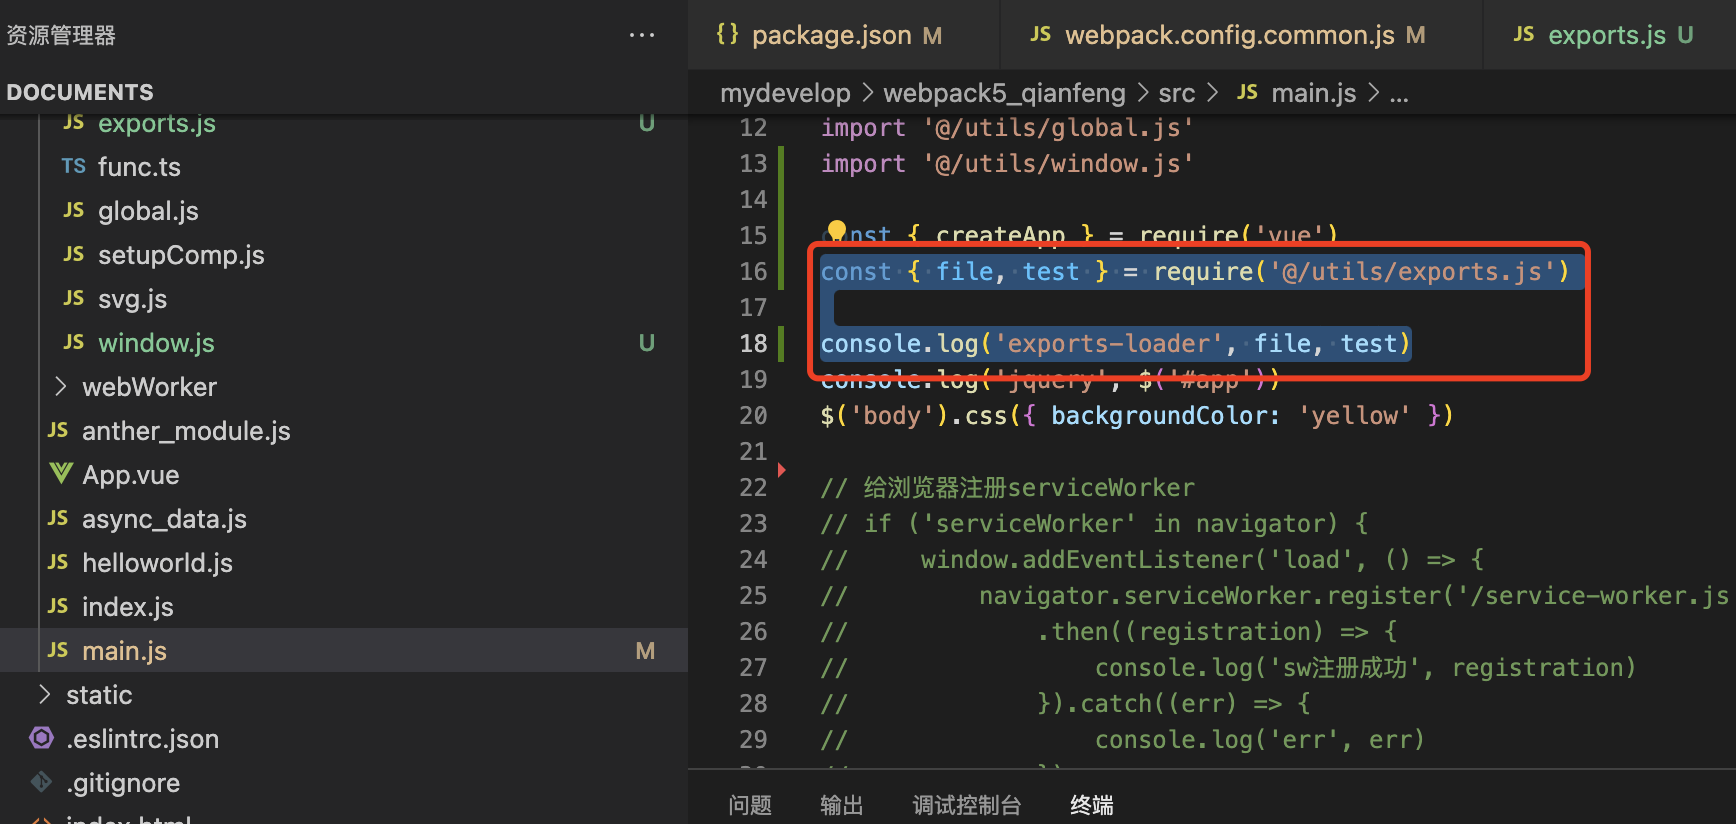
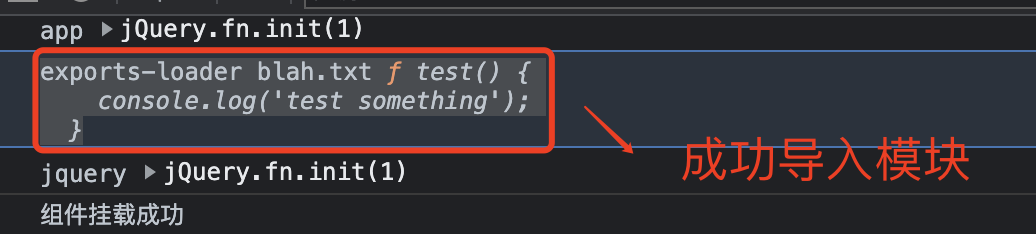
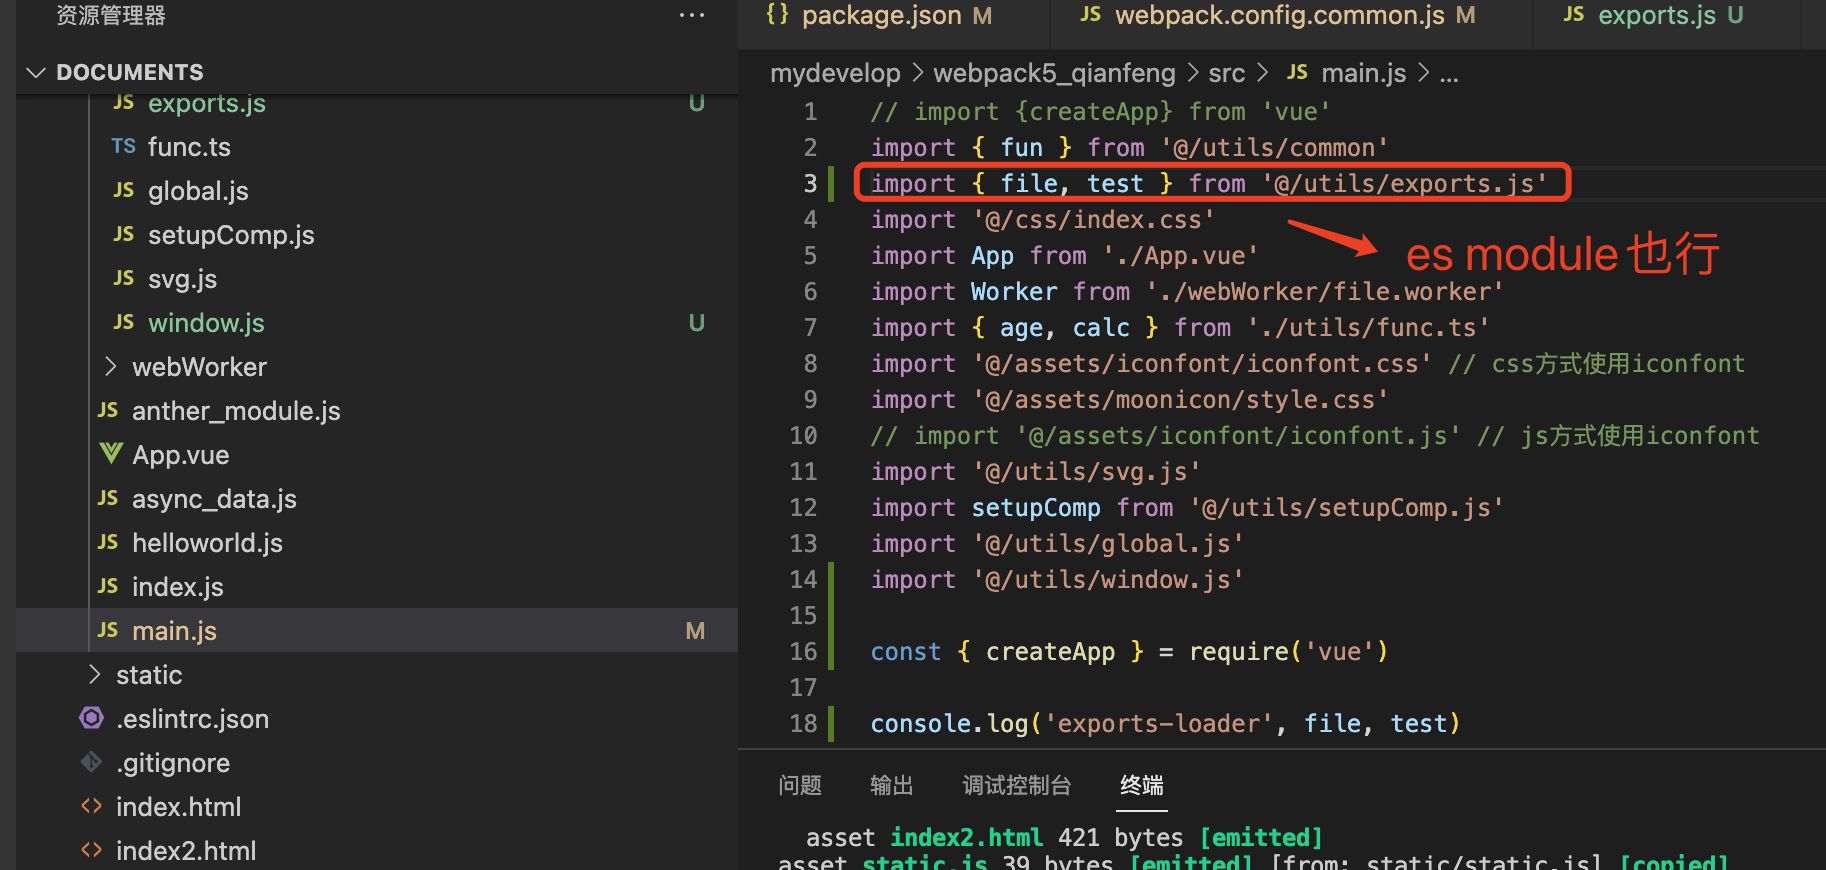
Exports-loader
作用:按loader提供的规则,将非模块化且非导出的方法或变量模块化导出

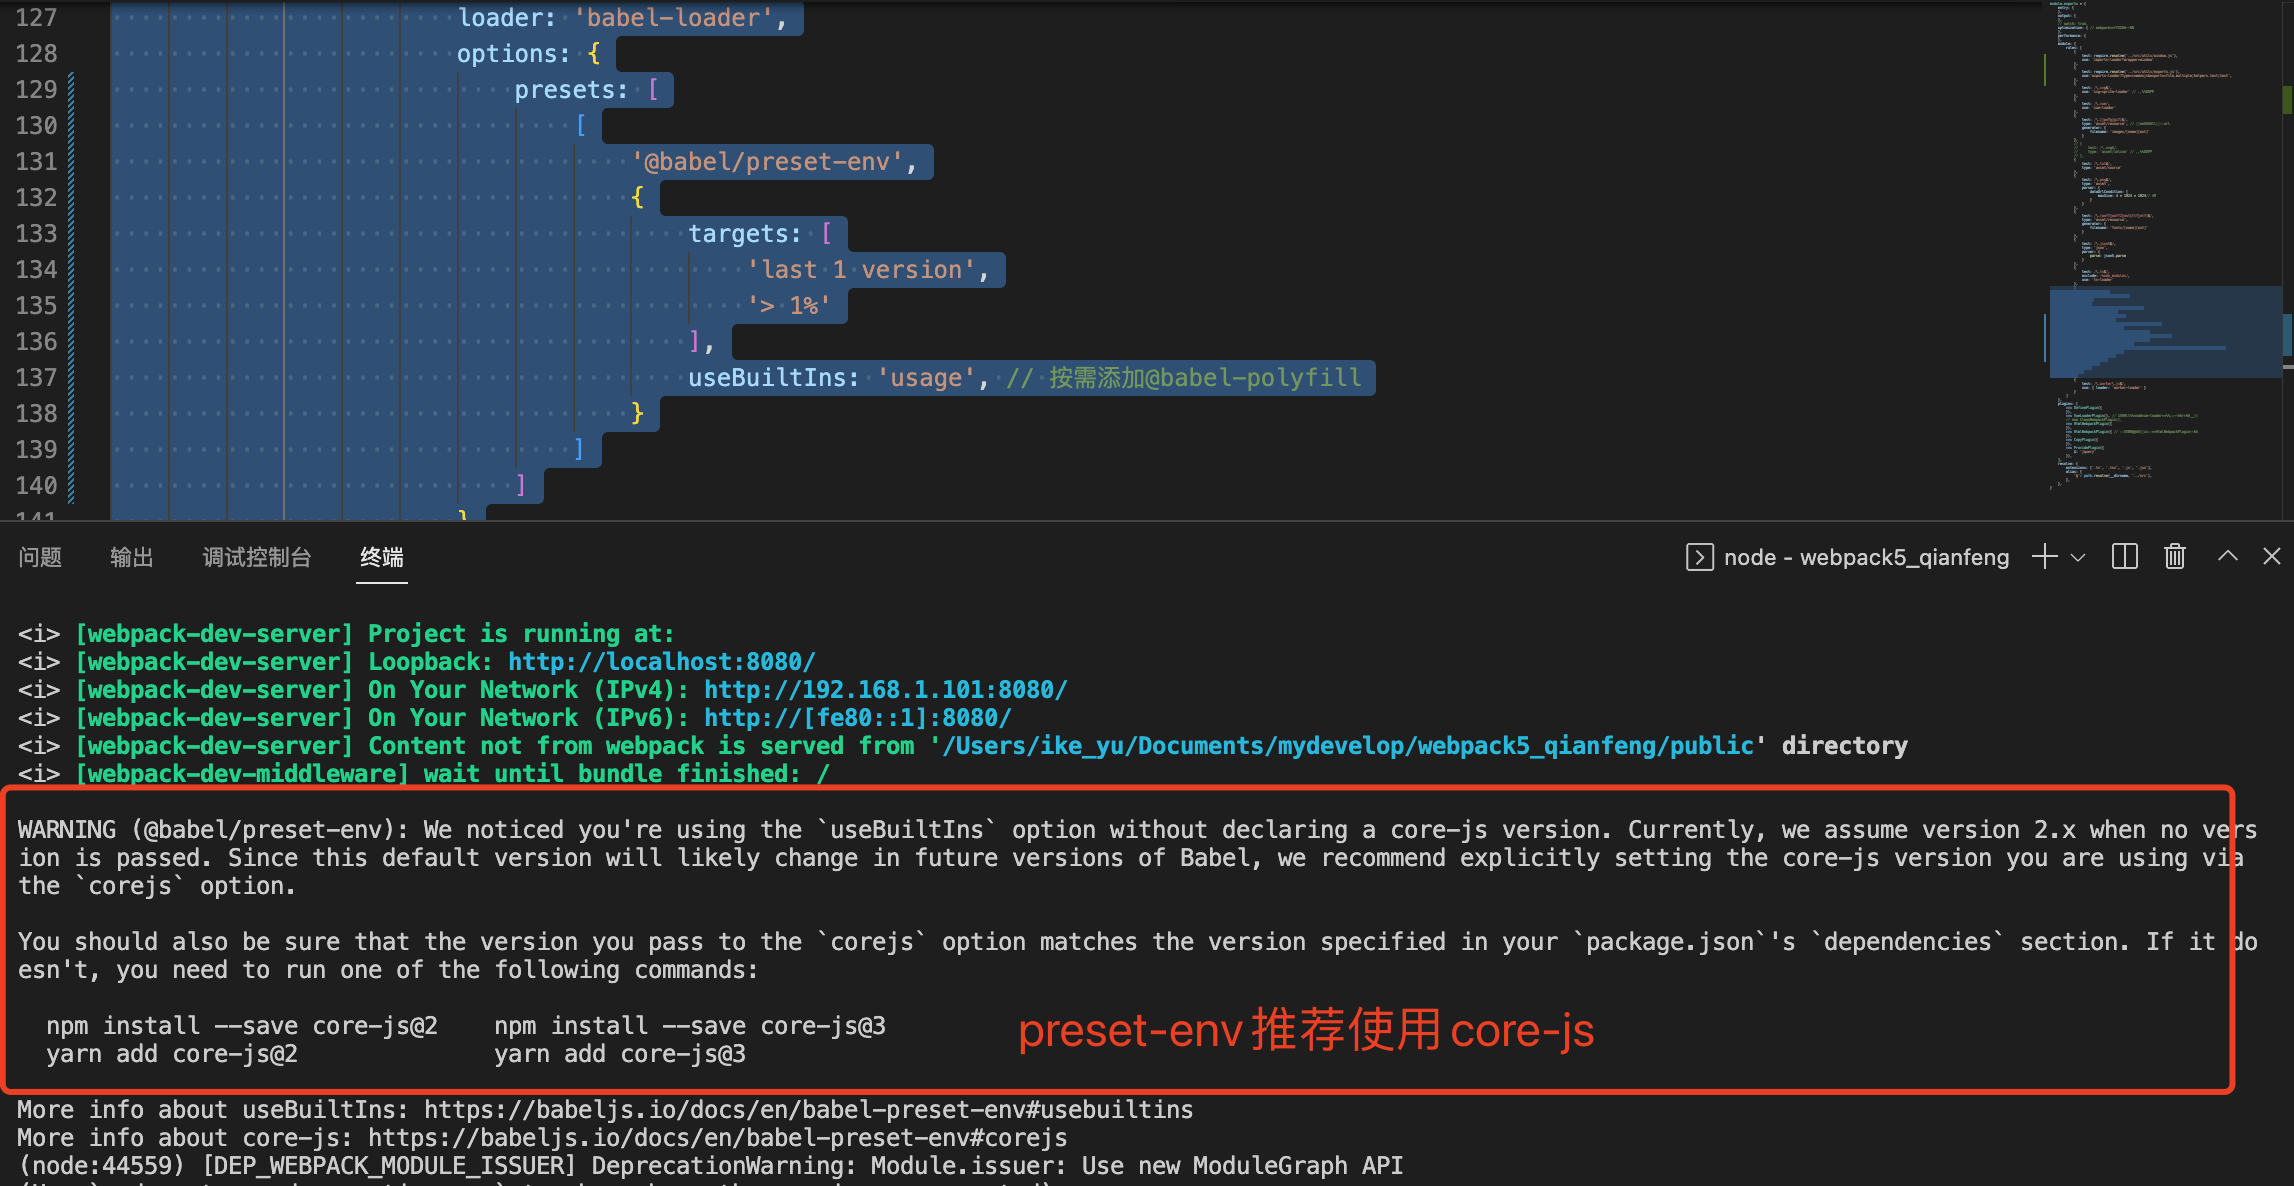
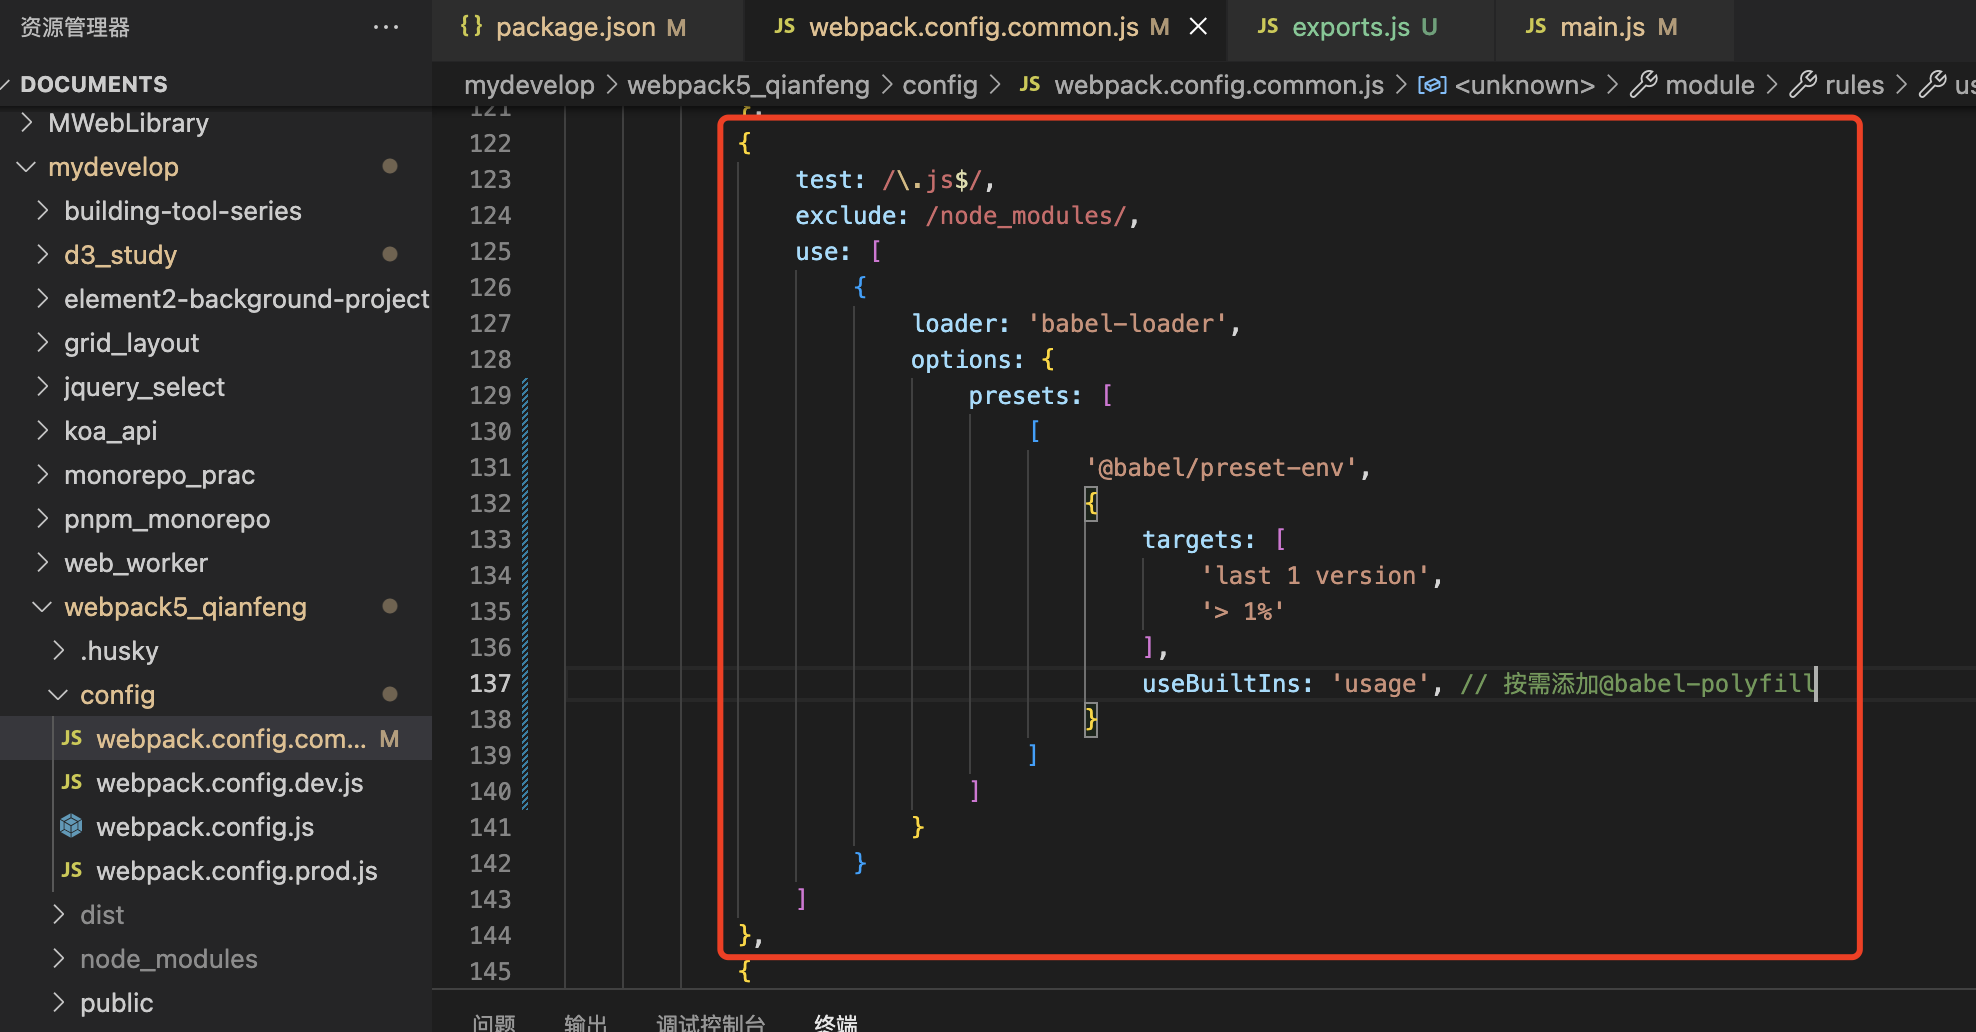
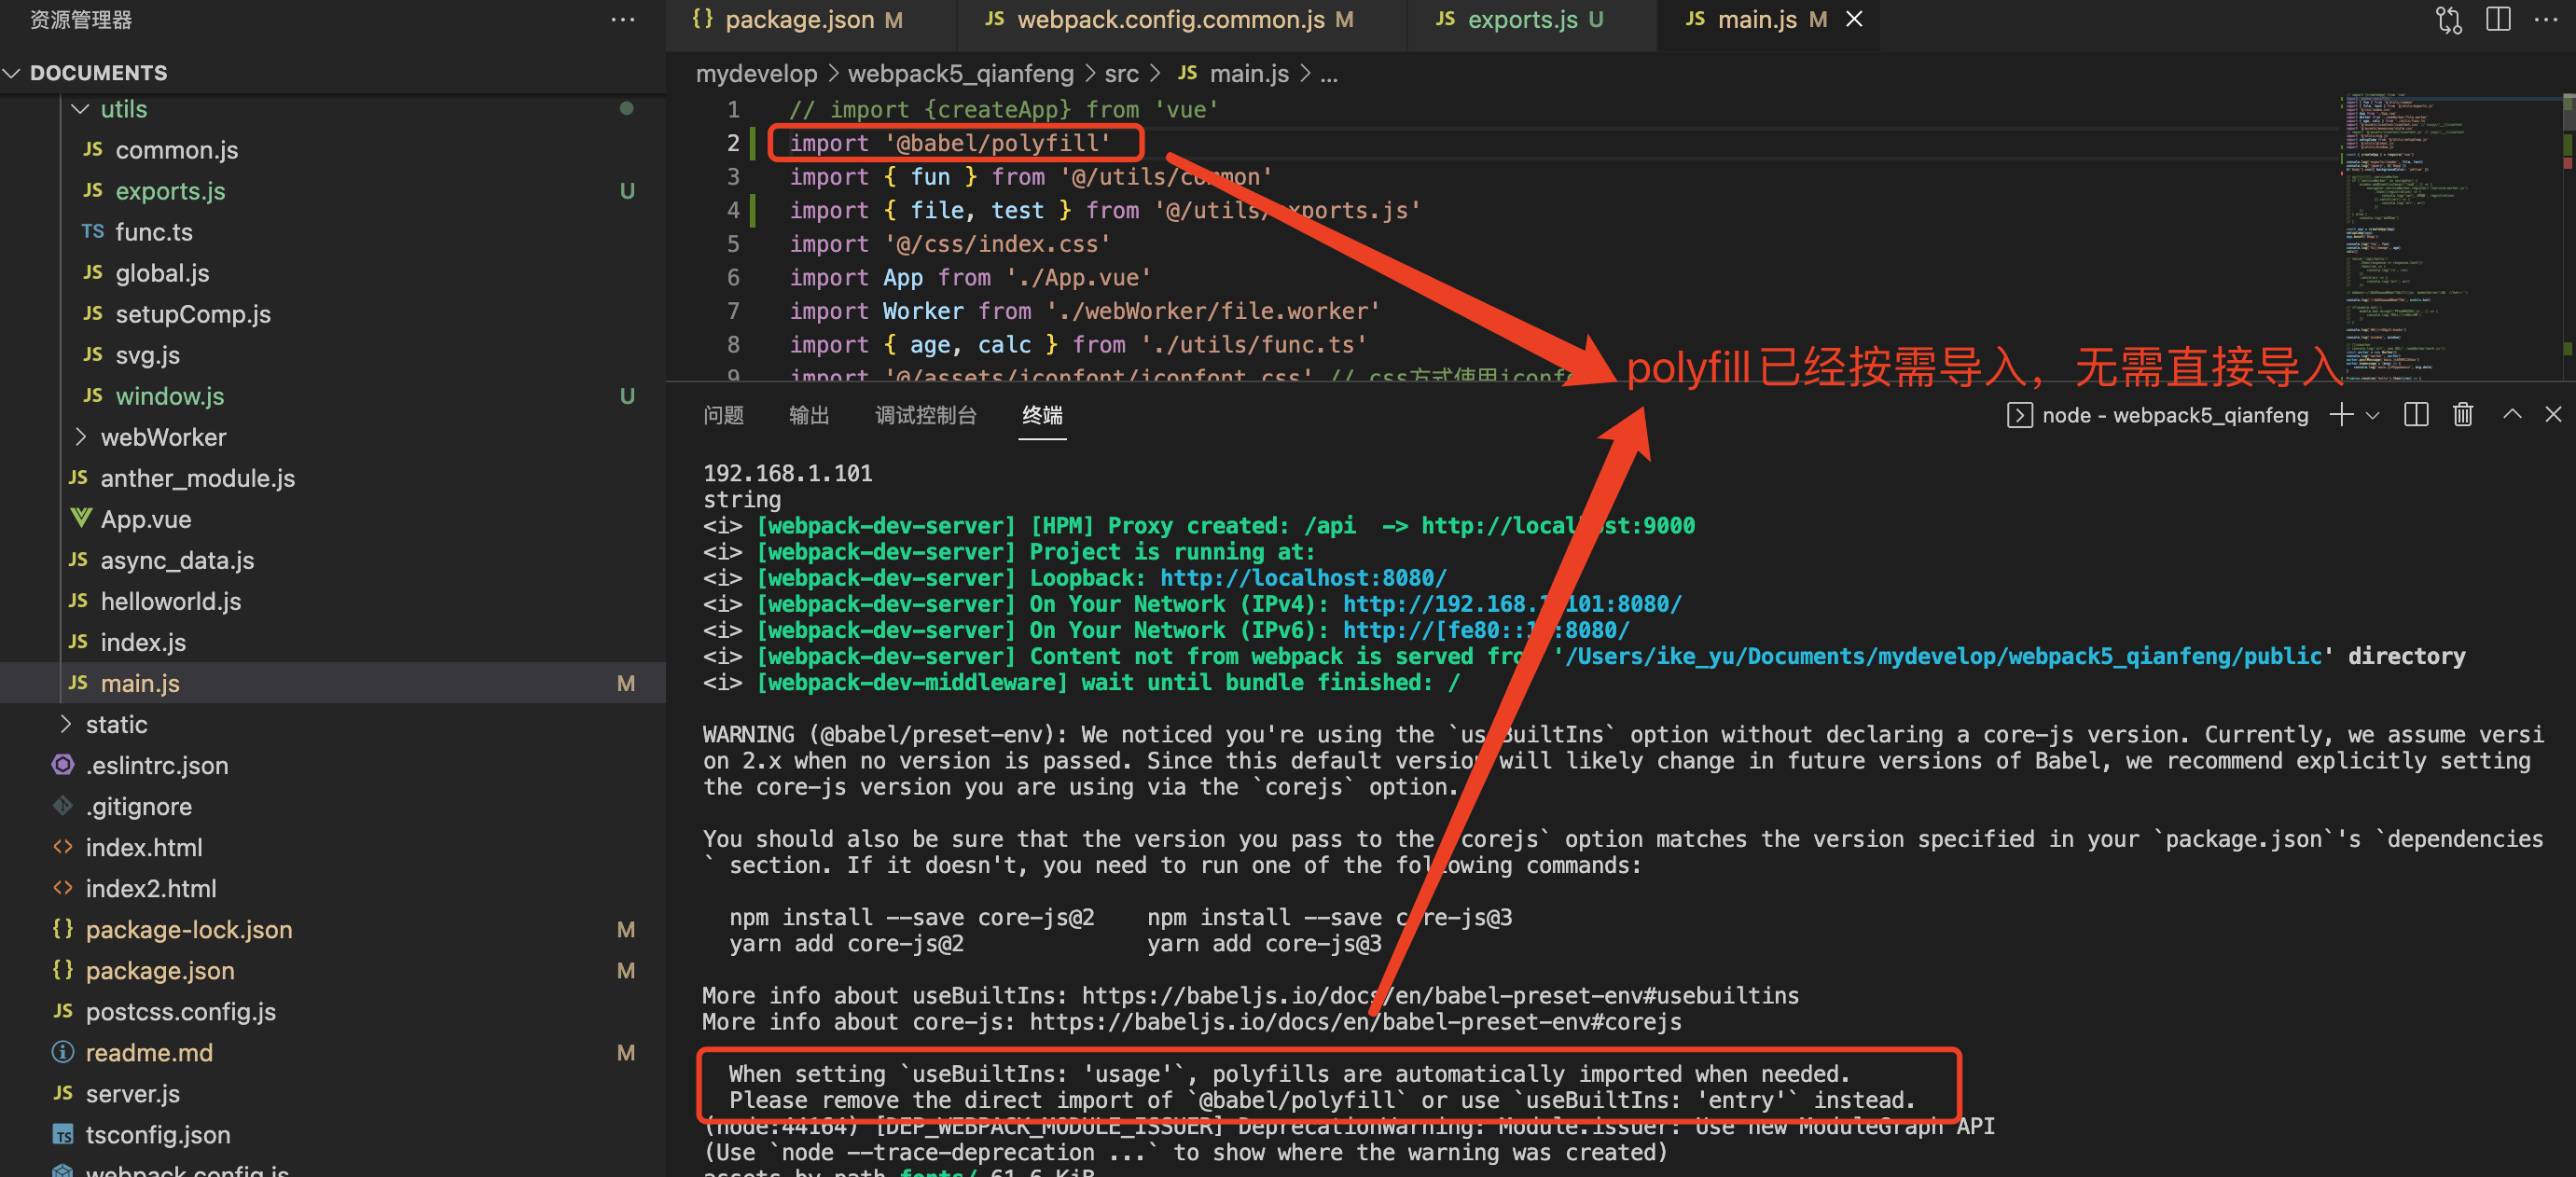
25、polyfill垫片
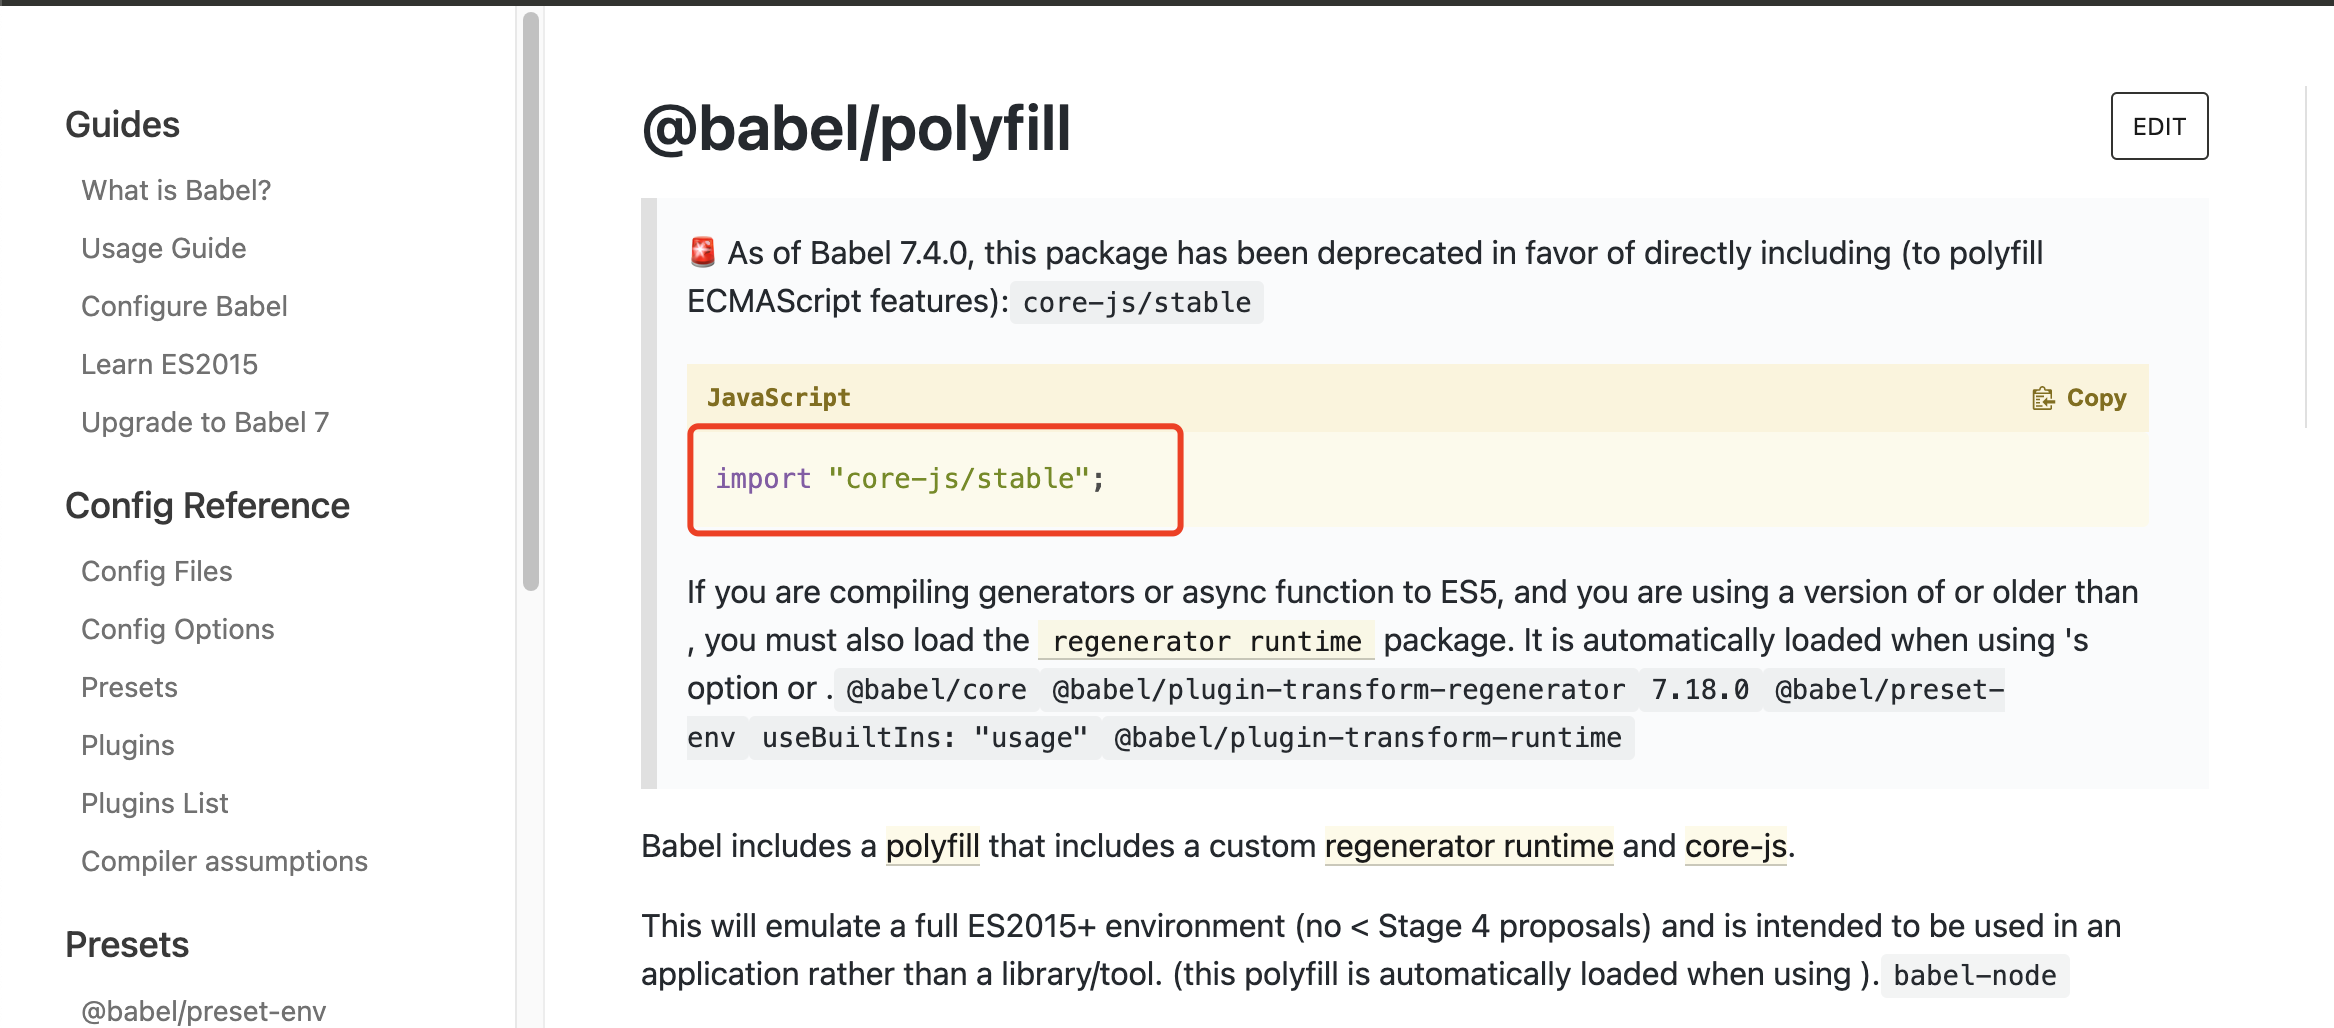
@babel/polyfill
需要安装@babel/polyfill依赖

{
test: /\.js$/,
exclude: /node_modules/,
use: [
{
loader: 'babel-loader',
options: {
presets: [
[
'@babel/preset-env',
{
targets: [
'last 1 version',
'> 1%'
],
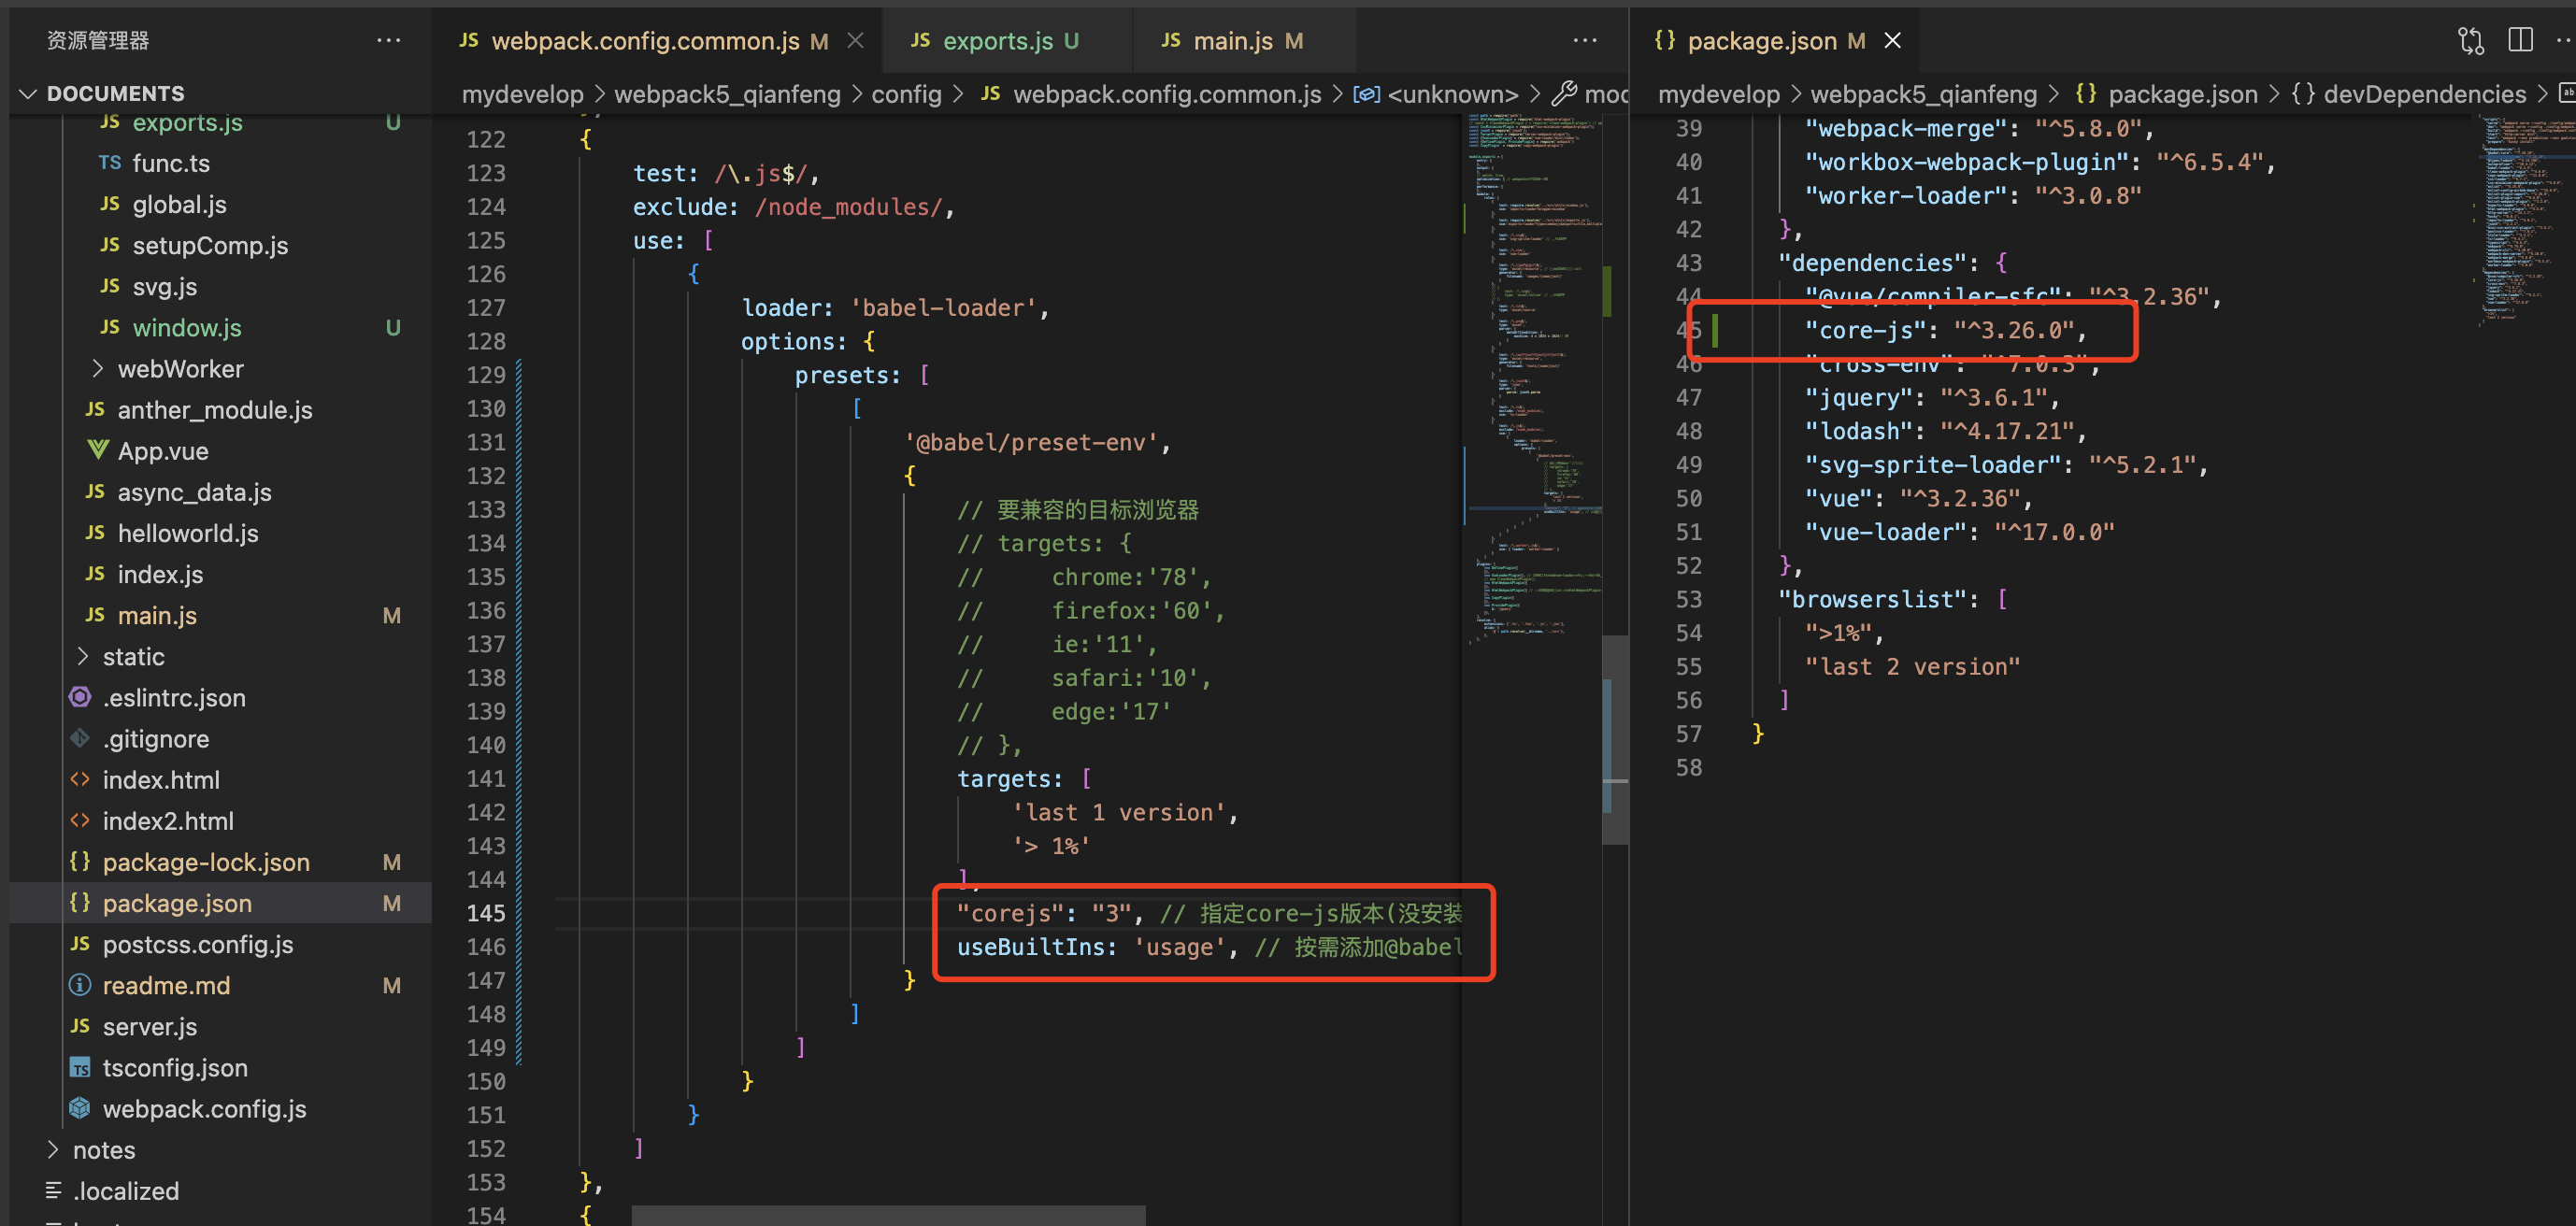
useBuiltIns: 'usage', // 按需添加@babel-polyfill
}
]
]
}
}
]
},
Core-js