webgme-codeeditor
v3.6.19
Published
Code Editor Visualizer for webgme using CodeMirror
Downloads
345
Maintainers
Readme
webgme-codeeditor
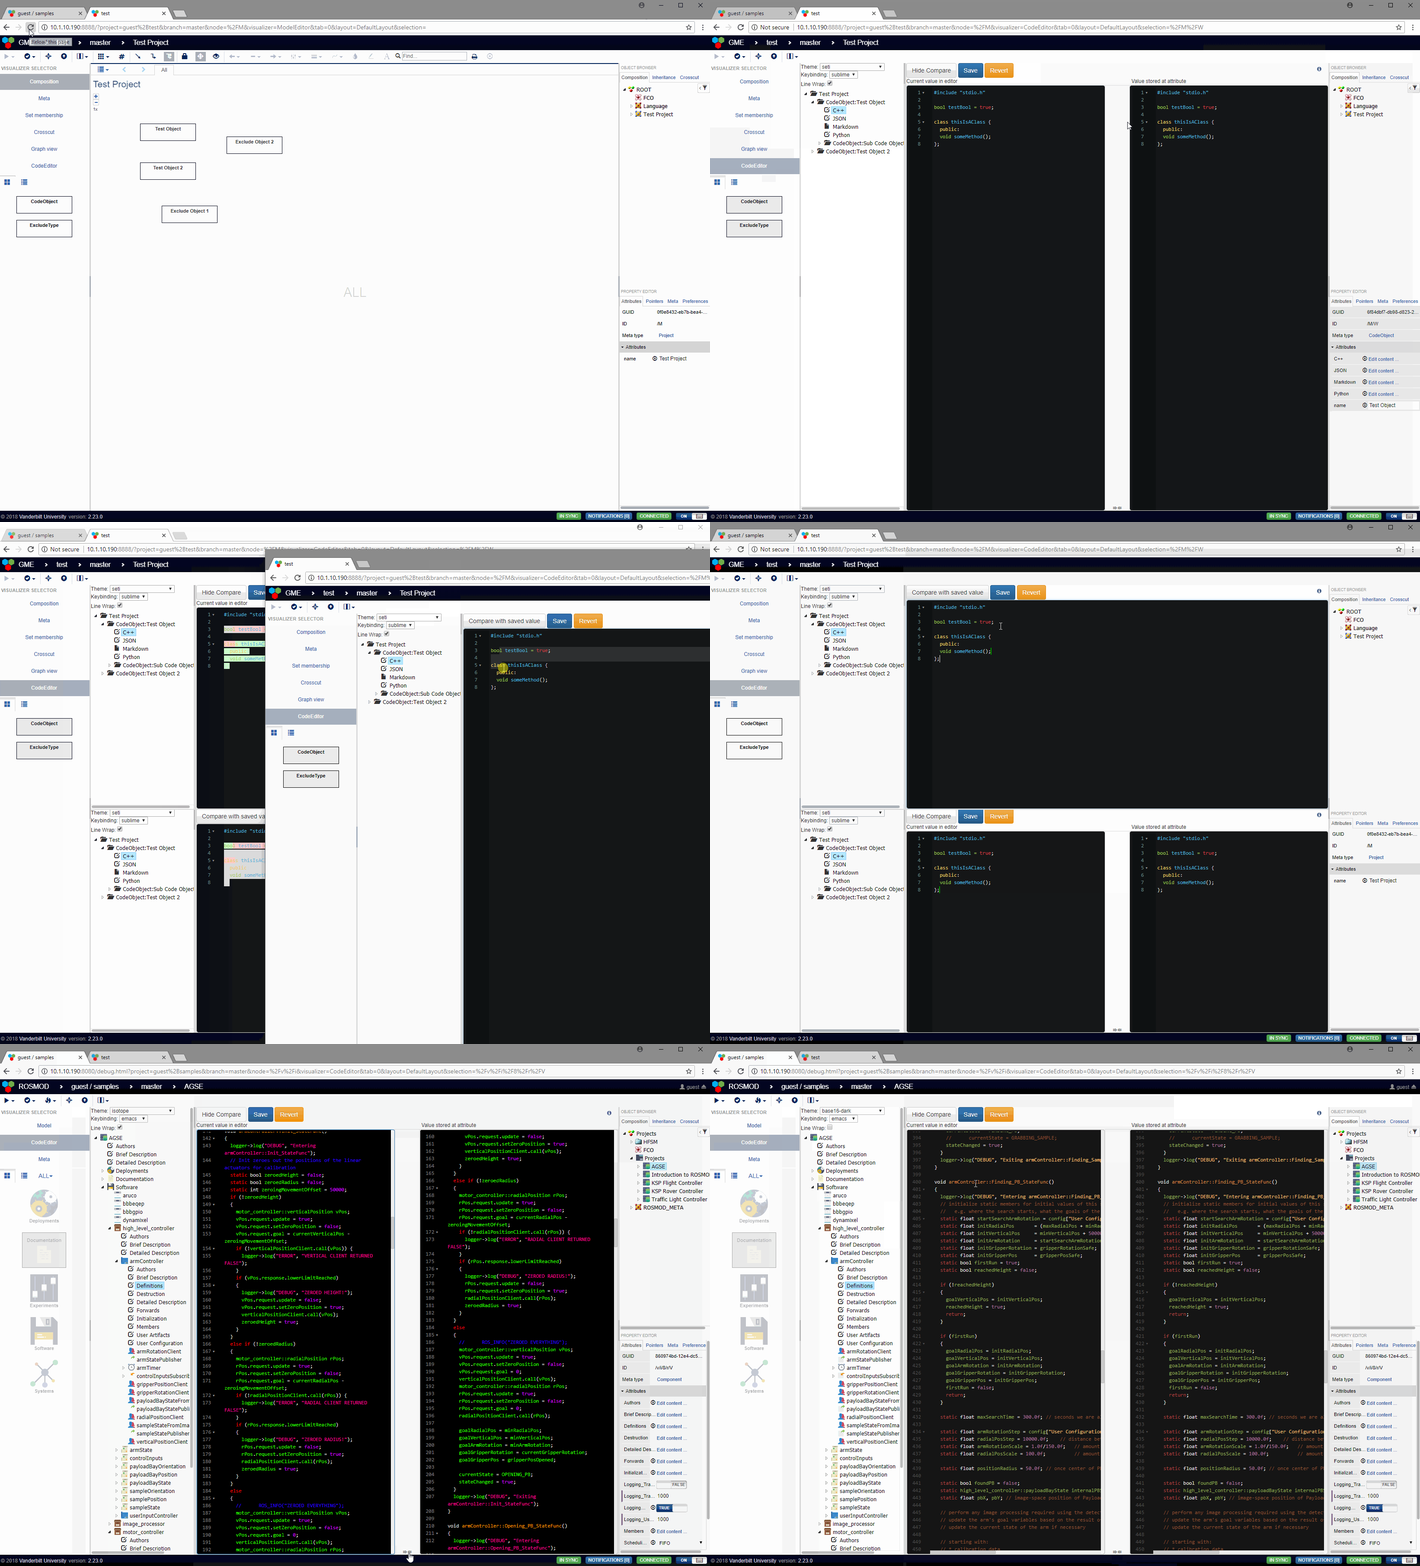
The WebGME CodeEditor is a multi-line text editor component for the WebGME collaborative web-based modeling environment WebGME, WebGME Github.
Please see the WIKI for further information, including links to relevant Youtube Videos and specific pages about development process and such.
The CodeEditor is built upon CodeMirror and
FancyTree. and provides a
reusable way to define the different multi-line attributes for each of
the meta-types in your WebGME domain, as well as what syntax
highlighting and other properties those attributes should support,
e.g. c++ or javascript.
Features:
- Syntax highlighting for all languages (modes) supported by CodeMirror
- Some code completion options depending on language
- Keybinding support for
vim,sublime text, andemacsstyle keybindings, saved per user + per project - Editor theme-ing, saved per user + per project
- Code Folding (depending on the text grouping in the mode
- A tree browser for easily navigating between different attributes across different nodes of your WebGME project.
- A diff view showing the changes you've made that are not committed.
- Collaborative simultaneous editing showing where each person is in the attribute, what they've highlighted, etc.
- Total revert capability or reverting of individual line changes
- User configuration of line-wrapping
- Full-screen distraction free editing mode (press
F11when the text editor has focus) - Full interoperability with WebGME's split-panel view.
Note: for mode documentation, see
CodeMirror Modes.
Adding the CodeEditor as a WebGME Component to your Project
Install instructions are below, after which you simply have to enable
the CodeEditor Visualizer as a valid visualizer in the META of the nodes
you wish it to be active on.
Installing With WebGME-CLI
To add the CodeEditor to your WebGME deployment, simply use the webgme-cli to install it:
webgme import viz CodeEditor webgme-codeeditorWhich will install the CodeEditor and then use bower to install the
CodeMirror and other dependencies.
Installing With NPM
You can also use npm to install it by running:
npm install --save webgme-codeeditorYou will need to inform webgme where to load the CodeEditor from, by editing
the config/config.webgme.js to have:
config.requirejsPaths = {
  "panels/CodeEditor": "./node_modules/webgme-codeeditor/src/visualizers/panels/CodeEditor",
  "widgets/CodeEditor": "./node_modules/webgme-codeeditor/src/visualizers/widgets/CodeEditor"
};
added to your config.requirejsPaths.
You will also need to tell WebGME that it is a visualizer, by adding it your 'src/visualizers/Visualizers.json`:
  {
    "id": "CodeEditor",
    "title": "CodeEditor",
    "panel": "panels/CodeEditor/CodeEditorPanel",
    "DEBUG_ONLY": false
  }
Finally you will need to add it to your webgme-setup.json:
  "dependencies": {
    "visualizers": {
      "CodeEditor": {
        "src": "panels/CodeEditor/CodeEditorPanel",
        "title": "CodeEditor",
        "panel": "src/visualizers/panels/CodeEditor",
        "secondary": false,
        "widget": "src/visualizers/widgets/CodeEditor",
        "project": "webgme-codeeditor"
      }
    },
Configuring the CodeEditor for your Project / Domain
After you've added the CodeEditor to your project, you can configure it just like any other WebGME component. Some example options are provided below.
When the CodeEditor is active on a WebGME node, it loads the node and
its children, up to a depth of config.loadDepth, while
simultaneously looking upwards for a root node of meta-type
config.RootType. Any nodes it loads whose type matches any of the
types in config.excludeTypes will be discarded, along with their
children. If you configure the config.loadDepth to be -1, the
CodeEditor visualizer will load the full subtree.
Example configuration
This configuration can be found in components.json.
{
    "CodeEditor": {
	    "theme": "default",
	    "enableThemeSelection": true,
	    "keyBinding": "sublime",
	    "enableKeybindingSelection": true,
	    "lineWrapping": false,
	    "enableLineWrappingToggle": true,
        "autoSaveInterval": "2000",
	    "defaultSyntax": "gfm",
	    "rootTypes": ["Project"],
	    "excludeTypes": ["ExcludeType"],
	    "loadDepth": 5,
	    "syntaxToModeMap": {
	        "gfm": {"name":"gfm", "icon": "glyphicon glyphicon-file"},
	        "C++": {"name":"text/x-c++src", "useCPP": true},
	        "JSON": {"name":"application/json"},
	        "Python": {"name":"text/x-python"}
	    },
	    "attrToSyntaxMap": {
	        "CodeObject": {
		        "Markdown": "gfm",
  		        "C++": "C++",
		        "JSON": "JSON",
		        "Python": "Python"
            }
        },
	    "attrToInfoMap": {
	        "CodeObject": {
                "docstring": [
                    "## CodeObject Documentation",
                    "this is some documentation for the code object itself.",
                    "",
                    "it will be appended to the documentation for all of CodeObject's attributes."
                ],
                "attributes": {
		            "Markdown": [
                        "## Markdown Code Attribute",
                        "This code attribute should be formatted with [Markdown](https://en.wikipedia.org/wiki/Markdown)"
                    ],
                    "C++": "## C++ Code Attrubute\nThis is c++ code.\n NOTICE HOW YOU CAN USE EMBEDDED NEWLINES OR ARRAYS",
                    "JSON": "Simple doc string here.",
                    "Python": "Useless doc string."
                }
            }
	    },
        "nameTemplateMap": {
            "CodeObject": "CodeObject:{{{name}}}"
        }
    }
}
Examples

Running the example in this repository
First, install the webgme-codeeditor following:
Second, start mongodb locally by running the mongod executable in
your mongodb installation (you may need to create a data directory
or set --dbpath).
Then, run npm start from the project root to start . Finally,
navigate to http://localhost:9000 to start using webgme-codeeditor!
The seed project test can be used as the base of a project to show how the CodeEditor works.


