
uniax
v1.0.2
Published
Somewhere to save the file from @Rainogo
Downloads
5

Readme
Npm
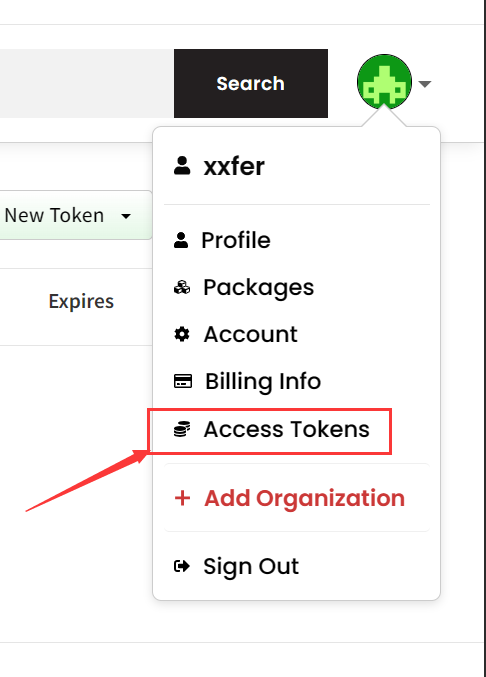
登录 npm 官网,没有账号的注册一个,点击右上角的头像,进入 Access Token
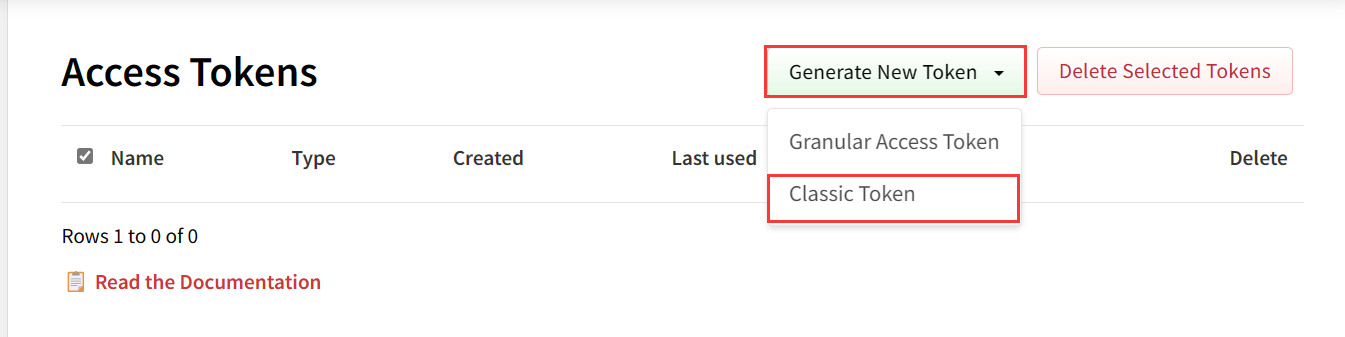
点击 Generate New Token,选择 Classic Token。
勾选 Automation,点击 Generate Token 生成令牌。
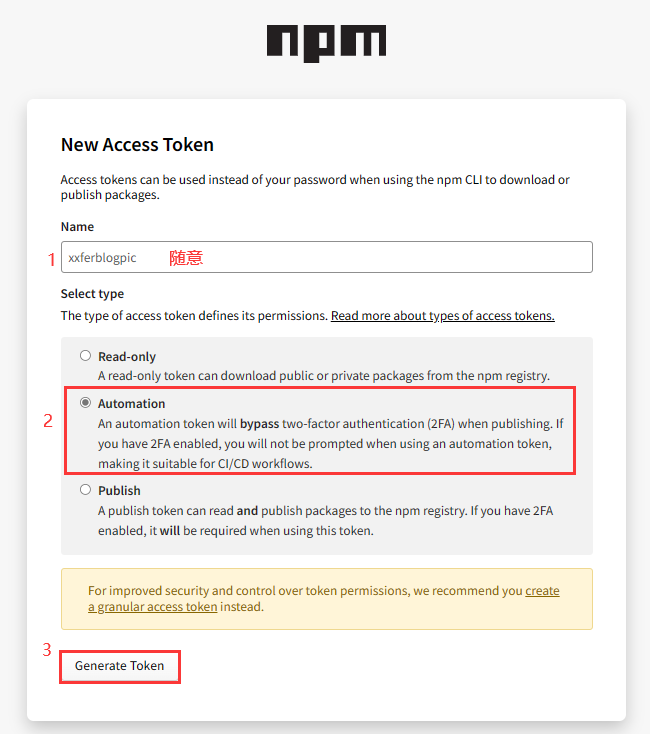
然后将生成的 Token 令牌保存好,只显示一次
Github
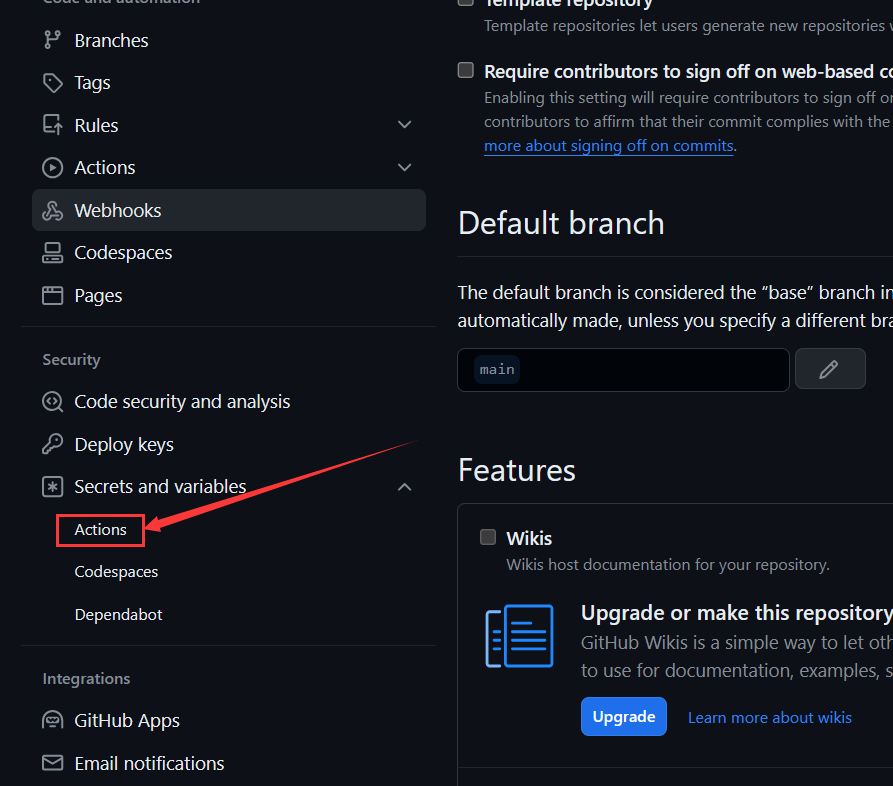
进入仓库,选择 Settings,选择 Secrets 中的 Actions
点击 New repository secret 添加一个新的 Secret
Name 填写 NPM_TOKEN,Secret 填写前面获取的 npm 令牌

在仓库根目录中新建一个 package.json 文件,内容如下:
{
    // name 必须小写
  "name": "rainogo-filecdn",
   // version 版本随便
  "version": "0.0.0",
  "description": "Somewhere to save the file from @Rainogo",
  "author": "Peter(@Rainogo)"
}
本地
- 在本地创建一个空的文件夹,打开 git 终端将图床仓库 clone 下来:
git clone [email protected]:[username]/[AssetsRepo].git
# 或者
git clone https://github.com/[username]/[AssetsRepo].git- 在 clone 下来的 [AssetsRepo] 文件夹内打开终端,输入以下指令切换回原生源
npm config set registry https://registry.npmjs.org- 添加本地 npm 用户设置
# 仅第一次使用需要添加用户,之后会提示你输入你的npm账号密码以及注册邮箱
npm adduser
# 非第一次使用直接登录即可,之后会提示你输入你的npm账号密码以及注册邮箱
npm login- 运行 npm 初始化指令,把整个图床仓库打包,按照指示进行配置
npm init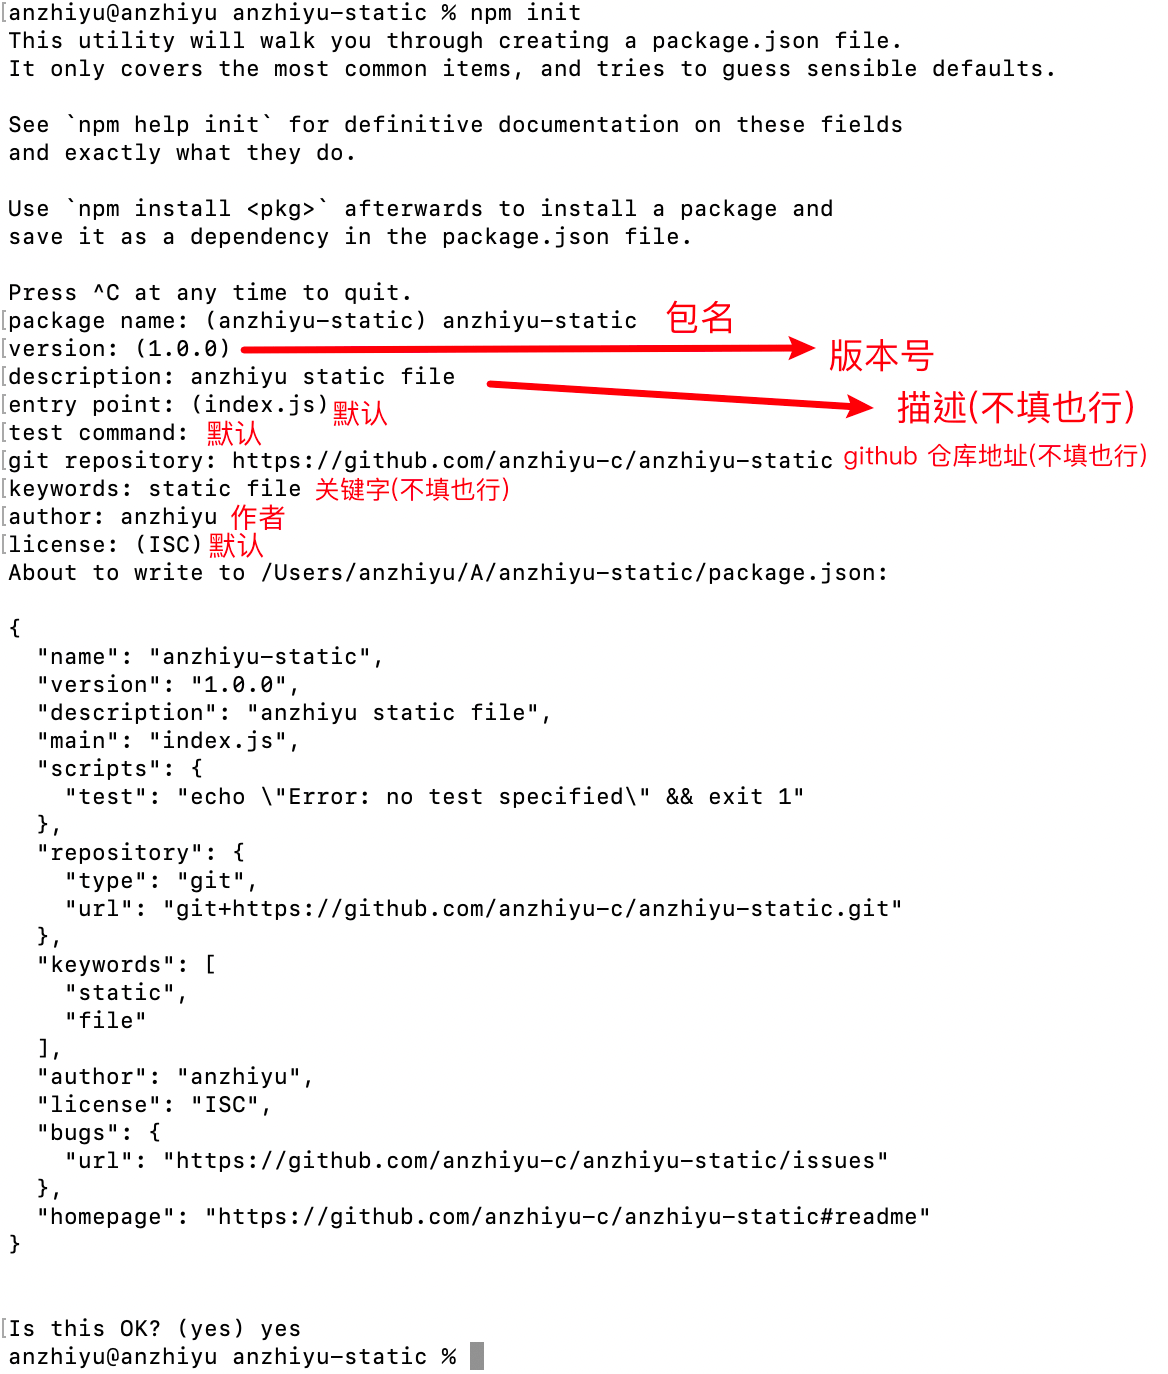
最后会输出一段 package.json,请求确认,输入 yes 即可。
发布
输入发布指令,我们就可以把包发布到 npm 上了。
npm publishGithub Action 自动上传
在本地的 [AssetsRepo] 文件夹下新建 [AssetsRepo]/.github/workflows/autopublish.yml
name: Node.js Package
# 监测图床分支,2020年10月后github新建仓库默认分支改为main,记得更改
on:
  push:
    branches:
      - main

jobs:
  publish-npm:
    runs-on: ubuntu-latest
    steps:
      - uses: actions/checkout@v2
      - uses: actions/setup-node@v1
        with:
          node-version: "12.x"
          registry-url: https://registry.npmjs.org/
      - run: npm publish
        env:
          NODE_AUTH_TOKEN: ${{secrets.npm_token}}
在本地的 [AssetsRepo] 文件夹下添加想要上传的图片,然后打开 git 终端,运行以下指令,上传新增内容至 github,即可触发部署
# 将更改提交
git add .
git commit -m "npm publish"
# 更新package版本号
npm version patch
# 推送至github触发action
git push #这里可能会遇到报错,大家可以使用git pull origin main然后git push
或者使用VScode自带的git上传
使用
jsdelivr+npm 的图片引用和 jsdelivr+github 很相似,例如我在 [AssetsRepo] 仓库里存放的 /img/index.png
# jsDelivr+github链接
https://gcore.jsdelivr.net/gh/[GithubUserName]/[AssetsRepo]/img/index.png
# jsDelivr+npm链接
https://gcore.jsdelivr.net/npm/[NpmPackageName]/img/index.png
上传的文件有200MB的限制