
tag-logger
v1.1.6
Published
A client-side logger which lets you easily turn (some) logs on and off at runtime
Downloads
16
Maintainers
 aikei
aikeiReadme
tag-logger
A tag-supporting logger for client-side javascript and typescript which lets you easily turn some or all logs on and off at runtime. Multiple interfaces are also supported.
Contents
Installation
To install run this command:
npm i tag-logger --saveIf you want to save logs to file with LoggerCordovaFileInterface, you will need to install cordova-plugin-file plugin in your app.
NOTE: --save option is actually optional in latest versions of npm. Before you had to specify it, to add package to your package.json file. Now this happens by default. If you still use older npm version, you might still need it, but a better idea would be to upgrade npm with npm i -g npm
Quick Start
Before using logger, you should initialize it:
import { Log } from "tag-logger";

Log.initialize();
The initialize method returns a promise which resolves once logger is initialized, so you can await it or use then on it:
async function start() {
    await Log.initialize();
    Log.info("Logger initialized");
}
function start() {
Log.initialize().then(() => {
Log.info("Logger initialized");
});
}You can also use a generic log method to log to any tag. In this case tag will be automatically created, if it does not exist:
Log.log("info", "hello");You can also import this log method directly:
import { log } from "tag-logger";

// you still need to call Log.initialize sometime before this
log("info", "Logger initialized");
When initializing, you can also specify whether this is a debug build or not (depending on this, default tags will be set):
Log.initialize({ debug: true/false });Tags
You need to prefix each log with a tag. Default tags: 'error', 'important', 'verbose', 'info', 'warn', 'ws_request', 'ws_response', 'ws_callback_response', 'http_req', 'http_resp'. You should log errors with tag 'error'. All websocket requests sent to the server should be logged with 'ws_request' tag. All websocket responses received from the server should be logged to 'ws_response' for normal responses and 'ws_callback_response' for callback responses to ws requests. To log http messages use 'http_req' and 'http_resp' logs. These are just recommendations, and you can create and use any tags you want.
Example:
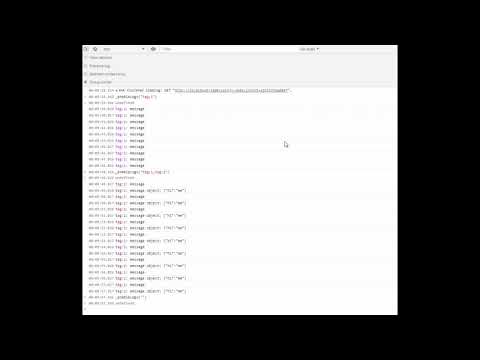
Log.info("hello");                  // this logs with tag 'info'
Log.error("an error has occured");  // this logs with tag 'error'
Log.log("info", "Hello 2");         // this also logs with tag 'info'
Logger uses node's util.format to log data. This means you can use all the same format specifiers to replace parts of your text. Most important of them are %s (gets replaced with a string value) and %j (gets replacesd with json-strigified object). Example:
const name = "Andrei";
const age = 31;
// `My name is Andrei, I am 31 years old` will be logged
Log.info("My name is %s, I am %s years old", name, age);

const me = {
    name: "Andrei",
    age: 31
}

// `me object: {"name":"Andrei","age":31}` will be logged
Log.info("me object: %j", me); // object `me` will only be stringified if "info" tag is turned on!

// Note that using above option is preferential to the option below
// Because in this case `JSON.stringify` will be run even if
// This tag is turned off.
Log.info("me object: "+JSON.stringify(me)); // this will stringify object even log is turned off!
Enabling Tags
Note that for logs to display you need to enable some tags. Some are enabled by default, but which ones, depends on interface:
- For
LoggerBrowserConsoleInterfacedefault types are"error"and"important","http_req","http_resp"or only"error"if this is not a debug build. - For
LoggerEmitLogsInterfacewhich is used to show logs on console-like screens, like debug window on mobile, default tags are:"error", "important", "init","info.*"(meaning, "anything starting withinfo") and"http_.*", or only"error"if this is not a debug build. - For
LoggerCordovaFileInterfacethese are"error","important","init","ws_.*","info.*","table_.*","http_.*"(for both build types). - For
LoggerSaveLogsInterfacethese are"error","important","init","ws_.*","info.*","table_.*","http_.*"(for both build types).
To enable additional tags, you need to pass a comma-separated string containing tags which you want to enable. You can also include symbols .* to show parts which may be substituted with any characters. E.g. Passing a string ".*" will enable all tags. Passing a string "ws_.*" will enable all tags starting with ws_ (i.e. "ws_request", "ws_response", "ws_callback_response").
Enabling Tags From Console
Easiest way to enable tags in browser console is to call "_enableLogs" function with a comma-separated string of tags which you want to enable:
_enableLogs("error,info.*,ws_.*")Above code will enable the following tags: "error", all tags starting with "info" and all tags starting with "ws" (which should log websocket requests/responses).
Enabling Tags Programmatically
You can either pass this string programmatically to setEnabledLogs method of an interface:
const fileInterface = Log.getInterface("LoggerCordovaFileInterface");
fileInterface.setEnabledLogs("error,info.*,ws_.*");
Enabling Tags with Local Storage
OR you can use localStorage, which is handy when using LoggerBrowserConsoleInterface. You can type the following in browser console to enable logs in browser:
localStorage.__printLogs = "ws_.*,error,info.*"Then you need to reload your app.
This also works for LoggerEmitLogsInterface:
localStorage.__emitLogs = "ws_.*,error,info";Don't forget you need to reload your app after that.
Creating New Tags
You can create new tags with Log.newLogger method:
Log.newLogger("my");Then you log to your tag same way you log to other tags:
Log.my("my log");If, however, you use generic Log.log method or if you imported log method directly, tags will be created automatically, if they don't exist:
Log.log("my", "my log");or
import { log } from "tag-logger";

log("my", "my log");
Interfaces
There are 4 interfaces available:
LoggerBrowserConsoleInterfacewhich logs data to browser console,LoggerEmitLogsInterfacewhich uses node'sEventEmitterto emit logs and can be used for anything,LoggerSaveLogsInterfacewhich saves data in memory to send later to a debug server, andLoggerCordovaFileInterfacewhich saves data to files (only availble in cordova cordova app, and only works if it is built with cordova-plugin-file plugin).
By default, 3 of 4 interfaces are enabled: LoggerBrowserConsoleInterface, LoggerEmitLogsInterface and LoggerSaveLogsInterface. If you want to enable a different set of interfaces, you will need to modify initialize method call:
Log.initialize({
    debug: true/false, // depending on whether this set to true or false, default logs will differ
    interfaces: [
        { type: "LoggerBrowserConsoleInterface" },
        { type: "LoggerEmitLogsInterface" },
        { type: "LoggerSaveLogsInterface" },
        { type: "LoggerCordovaFileInterface", options: {
            maxLogsLength: 5000,
            maxLogFiles: 2
        } },
    ]
});
This initializes all four interfaces. Moreover we set some parameters for LoggerCordovaFileInterface.
To get interface you can use getInterface method of the Log object by passing interface's name:
const browserInterface = Log.getInterface("LoggerBrowserConsoleInterface");Usually you should only get interface this if you want to enable tags programmatically. However, for LoggerCordovaFileInterface, there are several methods which you might need to use.
LoggerCordovaFileInterface
Logging Process
The LoggerCordovaFileInterface is used to save logs to files. It works the following way:
- When anything is logged, it is saved in memory until there are
maxLogsLengthentries (5000 by default). - Once there are
maxLogsLengthentries, this data is flushed to file. - A new file is created every day for logs. If there is no file for today, it is created, and, if there are more than
maxLogFiles(2by default) files, oldest file is removed.
These variables, maxLogsLength and maxLogFiles, have default values (5000 and 2 respectively), but you can set them when initializing logger:
// keep maximum 3 files and flush data to file from memory every 1000 entries
Log.initialize({
    debug: true/false,
    interfaces: [
        { type: "LoggerCordovaFileInterface", options: {
            maxLogsLength: 1000,
            maxLogFiles: 3
        } },
    ]
});
Getting Logged Data
To get logged data, you first need to get interface:
let fileInterface = Log.getInterface("LoggerCordovaFileInterface");Now we need to first get a list of log files, and then read these files:
async function getLogs() {
    // getLogsList returns a promise, so we can await result, if we are in async function
    const result = await fileInterface.getLogsList();
    // if this is an error, then format is: {type:"error",error:object}
    if (result.type === "error") {
        console.log("error getting logs: ", result.error);
    } else {
        // if this is not an error, we get an object with a list
        // which is an array of strings - filenames,
        // e.g. { list: ["Oct_14_2018","Oct_15_2018"] }
        const filesList = result.list;
        // note that there may be no files yet, if we never saved logs yet
        if (filesList.length > 0) {
            // now we can use these fileNames to get fileData.
            // `readFileByFilename` also returns a promise, which
            // resolves with fileData or an error
            const readFileResult = await fileInterface.readFileByFilename(filesList[0]);
            // if this is an error, then format is: {type:"error",error:object}
            if (readFileResult.type !== "error") {
                // fileData is an object of the following structure: `{contents:string,metadata:object}`
                // where `contents` field contains our logs, and metadata contains information
                // about the file, like size of the file, date it modified
                const fileData = readFileResult;
                console.log("file metadata is: ", fileData.metaData);
                console.log("file size: "+fileData.metaData.size);
                console.log("file last modified: "+fileData.metaData.modificationTime);
                // contents is a json-like array, but without starting "[" and ending "]",
                // of objects with the followings structure: {x:string,t:string,d:number}, where
                // x is log text, t is tag, and d is log date (unix timestamp)
                console.log("logs: "+fileData.contents);
                // optionally, you can also use formatLogs method to format logs fileData
                // returns a formatted string
                console.log("formatted logs: "+fileInterface.formatLogs(fileData));
            }
        }
    }
}
You can also flush logs which are currently in memory to file with:
// returns a promise
fileInterface.flushLogs();
You can delete all log files like this:
// returns a promise
fileInterface.clearAllLogs();
typescript support
This repository contains typescript typings, so it can be used in typescript. However, one thing should be noted. Since typescript requires a method to be defined to be used, you won't be able to do this:
import { Log } from "tag-logger";

Log.info("logging info");
Because info is a dynamically created method. Instead you can either use a generic Log.log method, or import this log method directly. This option also has an advantage in that it automatically creates a tag if it doesn't exist:
Log.log("info","typescript info log");import { Log, log } from "tag-logger";
Log.initialize().then(() => {
log("info", "typescript info log");
});Another way would be to import it using require:
const Log = require("tag-logger").Log;

Log.initialize().then(() => {
    Log.info("typescript info log");
});