styled-xls
v2.1.14
Published
Library to create Open XML documents with styles
Downloads
34
Maintainers
Readme
styled-xls
JS library to create Open XML with style which can be saved as XLS.
This library create XML files which can be downloaded as XLS. To create XLSX files directly use the library styled-xl. styled-xl
A 14KB JS library which helps to create Open XML files with styles which can be saved as XLS.
It has mainly four functions
- createFromObjectArray - to convert object arrays directly to XML
- createBook - to convert two dimensional arrays to XML file
- createFromObjectArrayURI - to convert object arrays directly to XML dataURI
- createBookURI - to convert two dimensional arrays to XML dataURI
Note: In excel a warning will popup when we open the file as we are saving xml file with an xls extension. Also enable editing in excel for formulas to work
Codepen sample
Installation and Setup Instructions
npm install styled-xls --save
Creating XML file from object array
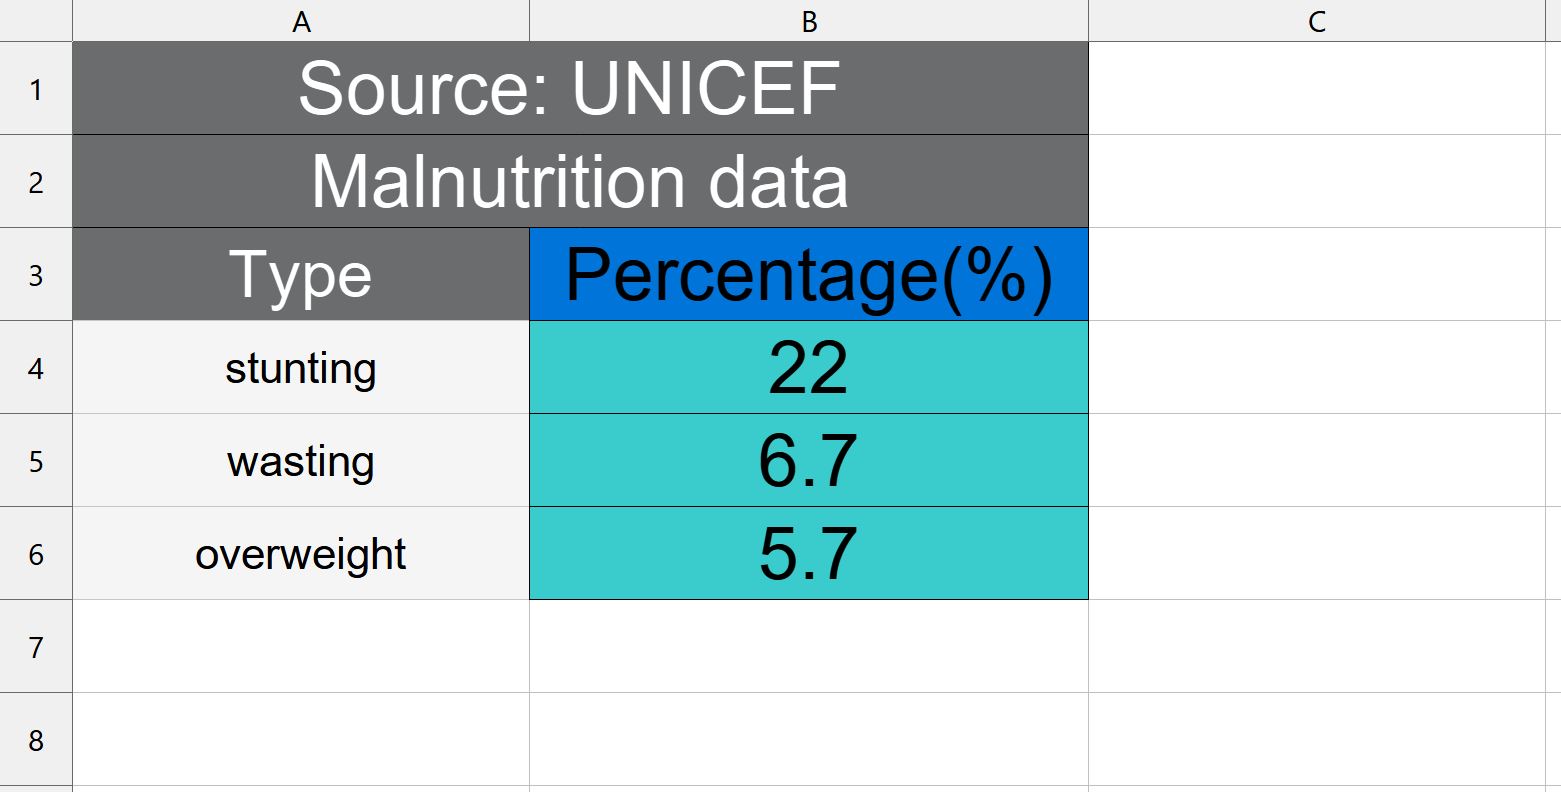
We will see how we can create a XML file as below from an object array of shape [{"key1":"value1","key2":"value2"}]
Step 1 : create a simple XML file and download it as XLS
import { createFromObjectArray } from "styled-xls";
import { saveAs } from "file-saver";


//suppose you have to convert the sample data in childMalnutrition below
const childMalnutrition =[{type:"stunting",percentage:"22"},{type:"wasting",percentage:"6.7"},{type:"overweight",percentage:"5.7"}]

//You can create the book by passing sheet name and object array to be converted
const malnutritionBook = createFromObjectArray("malnutrition_2020",childMalnutrition)

saveAs(malnutritionBook, "child-malnutrition.xls");
Step 2 : Adding header and content styles
You can pass an object having headerStyle and defaultStyle as third parameter to style the header and default style of all the populated cells
//Rest of the code same as in step 1

//create a constant headerStyle with required styles for header
const headerStyle= {
 backgroundColor: "#6A6C6D",
 color: "#ffffff",
 fontSize: "9",
};

//create a constant defaultStyle with default styles for the all the cells with content
const defaultStyle = {
 backgroundColor: "#f4f5f5",
 color: "#fff",
 borderColor:"#6A6C6D",
 fontSize: "6",
};

//pass an object with headerStyle and defaultStyle as the third parameter
const malnutritionBook = createFromObjectArray("malnutrition_2020",childMalnutrition,{headerStyle,defaultStyle})

//Rest of the code same as in step 1
Step 3 - Modifying header values and column styles
//Rest of the code same as in step 2

const columnConfig=[{key:"type",displayName:"Type"},{key:"percentage",displayName:"Percentage(%)",headerStyle:{backgroundColor:"#0074D9"},columnStyle:{backgroundColor:"#39CCCC"}}]

//Add columnConfig as the fourth parameter
const malnutritionBook = createFromObjectArray("malnutrition_2020",childMalnutrition,{headerStyle,defaultStyle},columnConfig)

//Rest of the code same as in step 2
Step:4 - Adding merged headers on top of the default header
//Rest of the code same as in step 3

//Add extra headers with column span for each column
//Adding first header
const extraHeader1 = {elements:[{element:"Source: UNICEF ",columnSpan:2,style:{backgroundColor: "#6A6C6D",color: "#ffffff"}}]}
//Adding second header
const extraHeader2 = {elements:[{element:"Malnutrition data",columnSpan:2,style:{backgroundColor: "#6A6C6D",color: "#ffffff"}}]}
const extraHeaders=[extraHeader1,extraHeader2]

//Pass extraHeaders array as the fifth parameter to function
const malnutritionBook = createFromObjectArray("malnutrition_2020",childMalnutrition,{headerStyle,defaultStyle},columnConfig,extraHeaders)

//Rest of the code same as in step 3
Creating XML file from two dimensional array
We will see how we can create a XML file as below from a two dimensional array
Step 1 : create a simple XLSX file download
import { createBook } from "styled-xls";
import { saveAs } from "file-saver";


//create a 2D array with required data

const data = [
  ["Yellow","Blue","Green"],
  ["This","is","red"],
  ["Default","Color","here"]
]

const colorBook = createBook("colorbook",data,defaultStyle);


//extracted xml can be saved in the required formal
saveAs(colorBook, "color-table.xls");
Step 2 : Adding default style to contents
 //Rest of the code same as in step 1

// Add a  default style for table
const defaultGreyStyle= {backgroundColor: "#c0c6c9"}

//create a 2D array with required data

const data = [
  ["Yellow","Blue","Green"],
  ["This","is","red"],
  ["Default","Color","here"]
]

const colorBook = createBook("colorbook",data,defaultGreyStyle);
 //Rest of the code same as in step 1
Step 3 : Adding style to a row
 //Rest of the code same as in step 2

//Create a style to be passed to row
const redStyle= {backgroundColor: "#ff0000"}

//Update the row to be styled as an object as shown below
const redRow = {elements:["This","is","red"],style:redStyle}

//Use the created row in data

const redRow = {elements:["This","is","red"],style:redStyle}

const data = [
  ["Yellow","Blue","Green"],
  redRow,
  ["Default","Color","here"]
]

 //Rest of the code same as in step 2
Step 4 : Adding style to a cell
 //Rest of the code same as in step 3

//Create style for different colors
const blueStyle= {backgroundColor: "#0000FF",color:"#FFFFFF"}
const yellowStyle= {backgroundColor: "#FFFF00"}
const greenStyle= {backgroundColor: "#00FF00"}

//Create cells with style as below
const yellowCell = {element:"Yellow",style:yellowStyle}
const blueCell = {element:"Blue",style:blueStyle,columnSpan:3}
const greenCell = {element:"Green",style:greenStyle}

const data = [
  [yellowCell,blueCell,greenCell],
  redRow,
  ["Default","Color","here"]
]

 //Rest of the code same as in step 3

