sails-angular-material
v0.1.6
Published
a Sails application using Angular Material
Downloads
2
Maintainers
Readme
Sails Angular Material
a Sails application (v0.11.0) using the latest version of Angular Material (v0.10.0)
##View the demo
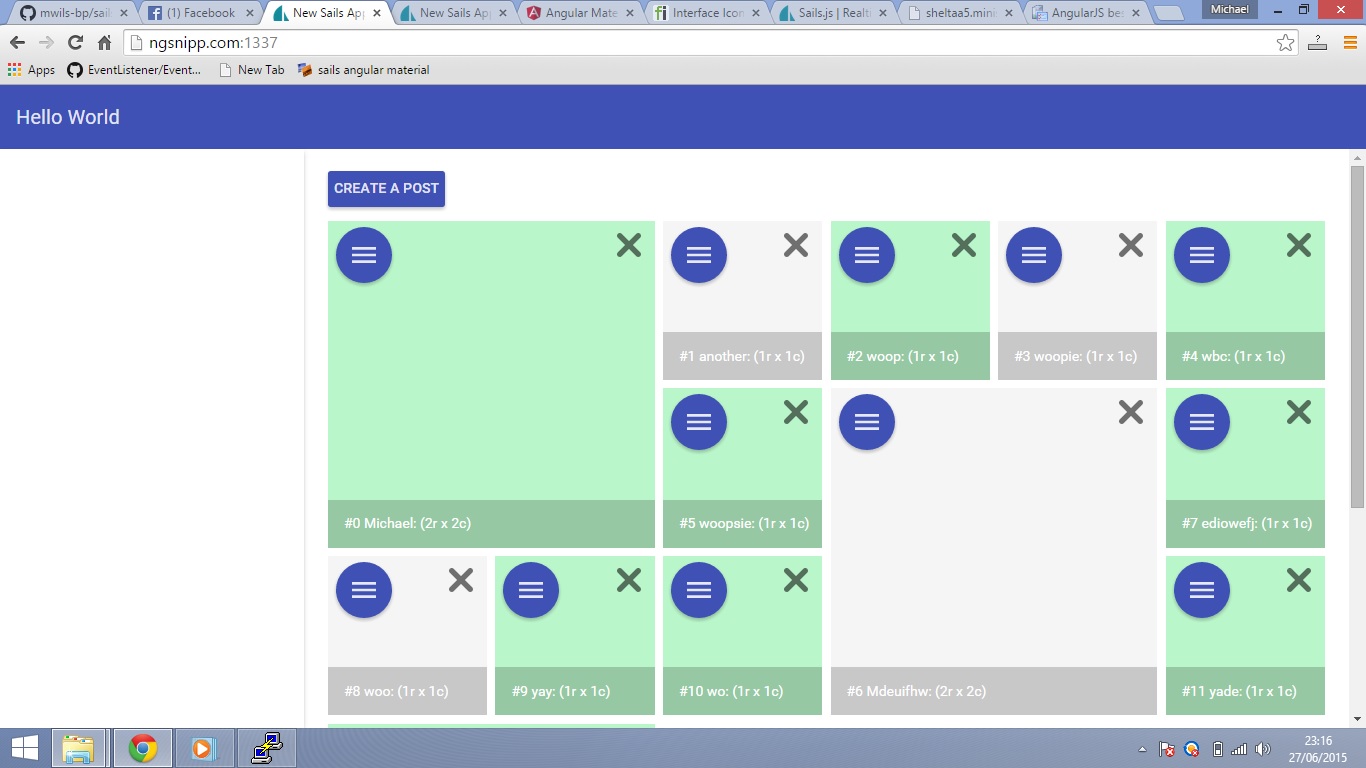
The demo is included in this repository showing off the Grid List component.
Angular dependencies
All dependencies can be found in the assets/js/dependencies directory. This includes of:
- angular.min.js (v1.4.1)
- angular-sails.min.js
- angular-animate.min.js
- angular-aria.min.js
- angular-material.min.js
Any angular modules placed inside this directory will be loaded after the above.
Grunt task
Any angular modules placed inside this directory will be loaded after the above. This order of the dependencies is kept within the assets pipeline bundled with Sails.
// Client-side javascript files to inject in order
// (uses Grunt-style wildcard/glob/splat expressions)
var jsFilesToInject = [

  // Load sails.io before everything else
  'js/dependencies/sails.io.js',

  // Dependencies like jQuery, or Angular are brought in here
  'js/dependencies/angular.min.js',
  'js/dependencies/angular-sails.min.js',
  'js/dependencies/angular-animate.min.js',
  'js/dependencies/angular-aria.min.js',
  'js/dependencies/angular-material.min.js',
  'js/dependencies/**/*.js',

  // All of the rest of your client-side js files
  // will be injected here in no particular order.
  'js/**/*.js'
];
app.js
All of your Angular components will be in the app.js file which is in the directory just before, assets/js/
Getting started
Clone this repository, make sure you install of the require dependencies and go inside the sails-angular-material directory. You can do this in one command:
cd sails-angular-material && npm install && sails liftNow you can test out the example post api, which uses only the default create and destroy.
How does it work?
We let Sails do most of the work here through its Blueprint API, which makes it a perfect match for when using Angular. The API gets set up with the following command:
If your doing this from scratch and haven't cloned this repository, create a new app:
sails new appNow generate an API for "posts" which will consist of a Model, a View and a Controller:
sails generate api postsA controller will be created, found in the api/ folder.
/**
 * PostsController
 *
 * @description :: Server-side logic for managing posts
 * @help        :: See http://links.sailsjs.org/docs/controllers
 */

module.exports = {

 index: function(req, res) {

   Posts.watch(req.socket);

   Posts.find({}).exec(function findPosts(err, foundPosts) {

     Posts.subscribe(req.socket, foundPosts);
     res.json(foundPosts);

   });

 }

};
Next is to create your model, this will be where your business logic resides:
/**
* Posts.js
*
* @description :: TODO: You might write a short summary of how this model works and what it represents here.
* @docs        :: http://sailsjs.org/#!documentation/models
*/

module.exports = {

  attributes: {

    r: {
     type: "integer",
     required: true
    },
    c: {
     type: "integer",
     required: true
    },
    color: {
     type: "string",
     required: true
    },
    name: {
      type: "string",
      unique: true
    }
  }

};
We then use angular-sails on the front end for use of web sockets.
$sails.get("/posts")for the first time and attach it to the$scope.- On every new action which happens to the "posts", do that action
  (function () {

    $sails.get("/posts")
      .success(function (data, status, headers, jwr) {

        $scope.posts = data;

      })
      .error(function (data, status, headers, jwr) {

        throw new Error(data);

      });

    $sails.on("posts", function (message) {

      if(message.verb == "destroyed") {

        var index = $filter('getIndex')($scope.posts, parseInt(message.id));
        $scope.posts.splice(index, 1);

      } else if(message.verb == "created") {

        $scope.posts.push(message.data);

      }

    });

  }());
Now we can start to perform actions with Angular like destroying or creating a record:
$scope.createPost = function (newPost) {

  var req = {
    method: 'POST',
    url: '/posts/create',
    data: newPost
  };

  $http(req)
    .success(function (data) {
       $mdDialog.cancel();
    })
    .error(function (data) {
       console.log(data);
   });

};

$scope.deletePost = function (postId) {

  if (typeof postId === 'number') {

    var req = {
      method: 'POST',
      url: '/posts/destroy?id=' + postId
    };

    $http(req);

  }

};
The Angular Material Grid List is used to display the posts via this code here:
<md-grid-list ng-show="determinateValue === 100" md-cols-sm="1" md-cols-md="2" md-cols-gt-md="6" md-row-height-gt-md="1:1" md-row-height="2:2" md-gutter="12px" md-gutter-gt-sm="8px">
    <md-grid-tile ng-init="isOpen = false" ng-repeat="post in posts" class="{{post.color}}" md-rowspan="{{post.r}}" md-colspan="{{post.c}}" md-colspan-sm="1">
        <div>
            <md-fab-speed-dial md-open="isOpen" md-direction="{{demo.selectedDirection}}" ng-class="demo.selectedMode">
                <md-fab-trigger>
                    <md-button aria-label="menu" class="md-fab md-primary">
                        <md-icon md-svg-src="/images/menu.svg"></md-icon>
                    </md-button>
                </md-fab-trigger>
                <md-fab-actions>
                    <md-button aria-label="twitter" class="md-fab md-primary md-hue-1 md-mini">
                        <md-icon md-svg-src="/images/edit.svg"></md-icon>
                    </md-button>
                    <md-button aria-label="facebook" class="md-fab md-primary md-hue-1 md-mini">
                        <md-icon md-svg-src="/images/settings.svg"></md-icon>
                    </md-button>
                </md-fab-actions>
            </md-fab-speed-dial>
            <md-button ng-click="deletePost(post.id)" aria-label="delete" class="md-mini deletePost">
                <md-icon md-svg-src="/images/delete.svg"></md-icon>
            </md-button>
        </div>
        <md-grid-tile-footer>
             <h3>#{{$index}} {{post.name}}: ({{post.r}}r x {{post.c}}c)</h3>

        </md-grid-tile-footer>
    </md-grid-tile>
</md-grid-list>
More coming soon!
If you would like to contribute to this repository, feel free!

