react-to-commonjs
v2.2.32
Published
A tool to help you build your React Component and distribute it as a commonJS module.
Downloads
12
Maintainers
Readme
react-to-commonjs2 AKA r2c2
A tool to help you build, test and preview your react component and distribute it as a commonJS module.
Gathering and configuring the several different technologies necessary to build a React Component can be overwhelming for a novice and for a more experienced developer it becomes a repetitive process. Also, when building a component with the purpose of being used by other Apps, you'll need your own web page to preview and document the different ways your React Component can be used.
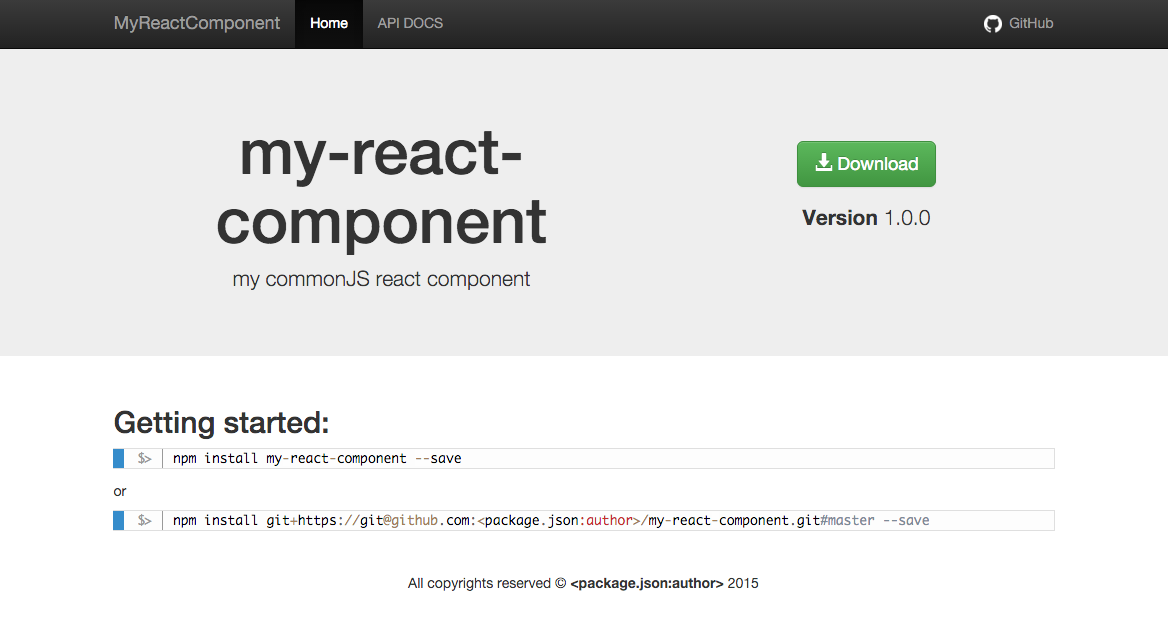
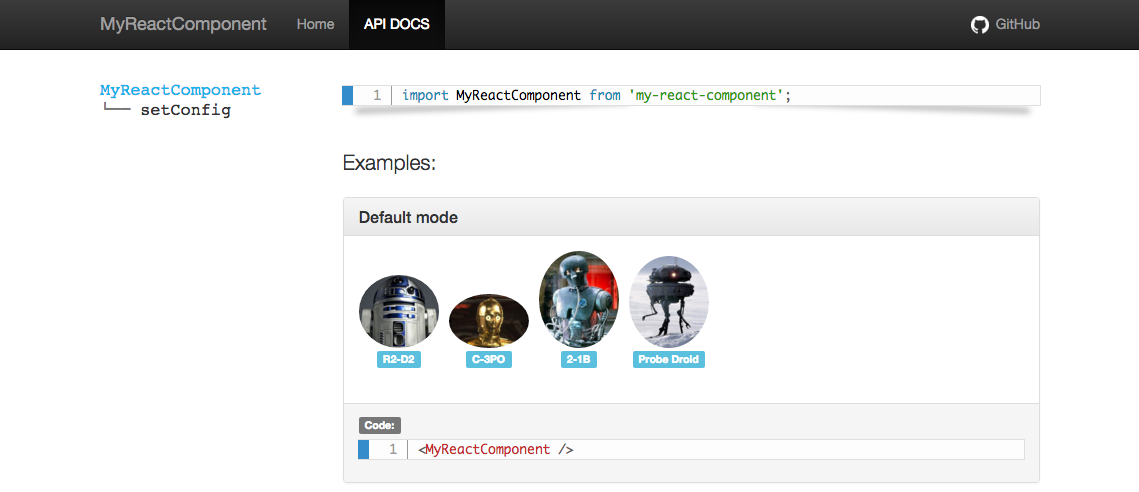
Check out this React Component Stardoroido and its documentation page, both created with the help of r2c2.
This is not a tool for creating full-fledged single page React Apps. Its a tool to help you build and distribute CommonJS (or standalone) React Components ready to be used by other people.
Getting started:
$> npm install react-to-commonjs -gThis will install a binary called r2c2.
$> r2c2 new my-component
$> cd my-component
$> <your favorite editor> .
$> npm start
See Usage section for more information.
Problems:
- New front-end developers get overwhelmed by all the new tools and concepts they need to put together to build a React Component and being able to export it has a npm node package, ready to be used by other npm packages or has a standalone project;
- More experienced developers don't want to deal with the pain of gathering all the necessary tools to build a React CommonJS project, everytime they create a new npm node package;
- Most of the time when building a React Component you need a web page to preview and perfect your work;
- and some of the times you also need to mock API server responses to preview and perfect your component behaviour.
What this solution, offers:
- package.json with common "scripts" and "devDependencies" for building, testing and coverage your react component;
- Simple Single Page Application (SPA) project built with React (independent from you React project) with live reload, sass, etc. so you can preview and interact with your component (you might also wanna use this to document your Component so others might learn how to used it);
- One small React Component example and its correspondent Test spec for those that are new to React and for the SPA to "show something".
- Mock Servers so you can mimic what would be an API responding to your React Component (if it needs one);
- Ability to export the SPA into a static web page for you to use has your React Component Github Page.
Usage:
1. Creating a new project
$> npm install react-to-commonjs -g
$> r2c2 new my_component
or
$> r2c2 new my_component --css_modulesFor a React Component with React CSS Modules installed and configured. npm run build in this case, will not also export your code but your css too.
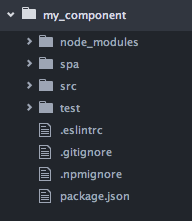
- The "new" command creates the following files:

Be sure to fill in the missing package.json fields like "repository" and "author".
src directory is where normally your source code goes.
spa directory is a separate project that you can delete at will if you have no need for a web app where you can test and or document your component.


In case you delete the spa directory, remember to delete its package.json#devDependencies reference and the package.json#scripts, start, spa and build-docs entries.
2. Developing
$> cd my_component
<open the directory in your favorite editor>
$> npm start
<open browser on http:localhost:9000>
A gulp task will launch browser-sync that in turn will serve the SPA on localhost:9000. You can change the server port in spa/config/application.js file and run npm start again.
The contents of spa/css, spa/js and spa/public/ directories will all be processed and converted to proper html, css and javascript that the browser can understand. These files will be then copied to spa/tmp directory (ignored by .gitignore).
In case of a 404 request browser-sync is configured to always return the spa/tmp/index.html, something that's required by a SPA that handles its own routes.
A gulp task will be watching the spa/public and spa/css files and automatically updates the browser, through browser-sync.
Webpack will be watching both the spa/js and your src directory, transpiling the code to plain javascript and updating your browser automatically, through react-hot-loader.
Eslint can be connected to Webpack to let you know when your changes do not meet the Airbnb javascript style guide (you can enable it in spa/config/application.js).
An expressJS instance will be raised and will include all of the spa/mock_servers/ files. Each mock server file will receive that expressJS instance and from that you get all the control you need to mock you API. (If you have no need for mock servers, you can just delete the spa/mock_servers directory, you can change the mockServer port at spa/config/application.js).
Each expressJS instance is already configured with cors to accept your localhost:9000 requests and with body-parser to properly understand your requests submitted body, checkout mocking-birds repo for more detail.
3. Testing
$> npm testbabel-istanbul will do the same as babel on 4. Building section but will also check and report your code coverage while running you tests with mocha.
Coverage reports will be exported to the coverage directory (ignored by .gitignore).
$> npm run quick-test- npm run quick-test is a quicker version, that bypasses the coverage verification that npm test does.
4. Building
$> npm run build- Will run two other tasks: npm run build-commonjs and npm run build-standalone.
$> npm run build-commonjsbabel will run through your code and convert your es6 and jsx code to plain Javascript, but will leave intact all the require functions on your code so it can be properly imported by other CommonJS packages.
Your CommonJS code will be exported to the dist/commonjs directory. That is the reason why your prebuild package.json#main section points to dist/commonjs/index.js and not src/index.js.
$> npm run build-standaloneRuns a gulp task that uses webpack to bundle up your code into a standalone single file and export it to the dist/standalone directory.
This build version, unlike the CommonJS one, will gather all the code referenced by a require function and bundle it all up on a single file.
Also. This task will create two directories: dist/standalone/bundle and dist/standalone/minified being that the later will contain a minified and uglified version of the first.
PS: I don't recommend using the standalone version unless you know what packages you should or should not require on your source code upon building the standalone version.
Keep in mind that IF your standalone version incorporates React onto itself, when someone else includes your standalone version onto his React app, that person will effectively be importing 2 "Reacts" (yours thats inside your standalone version and the one he is already using on his app). The same goes to other libraries like jQuery for example.
5. Publishing
- Cool video with instructions https://docs.npmjs.com/getting-started/publishing-npm-packages on how to publish your npm package.
$> npm run build-docs- A static version of the SPA will be exported to docs directory, so you can use it has a real web page for you to document or show examples on how to use your React Component.
- Uploading the docs files on Github Pages will work just fine except for the mock-servers, but in this case you will probably be using a real API and not your mocks.
- If your SPA files' location will not be the root path of your domain (e.g: domain.io/my_component), be sure to change baseHref entry on spa/config/application.js (to "/my_component/") this will alter the path of your links and routes. If you change the development#baseHref entry, the command npm start will start to serve your SPA on localhost:9000/my_component. If you change the production#baseHref entry, the exported files of npm run build-docs will be pointing to that new path.
6. Importing your React Component on another project
- TODO
Notes:
This tool was built using:
- node 5.0
- npm 3.3.6
Node troubleshoot:
If you are having permission issues, set your global node folder like this:
$> echo prefix=~/.node >> ~/.npmrcand add "~/.node/bin" to your $PATH by adding:
export PATH=~/.node/bin:$PATHto your ~/.bash_profile or ~/.bash_rc file.
You should have no problems installing packages with the --global flag now.
