react-open-weather-qm
v1.3.9
Published
React Weather component
Downloads
57
Maintainers
Readme
React Open Weather
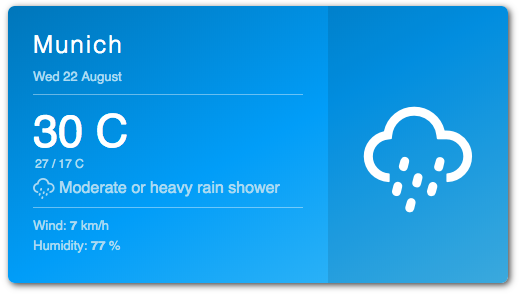
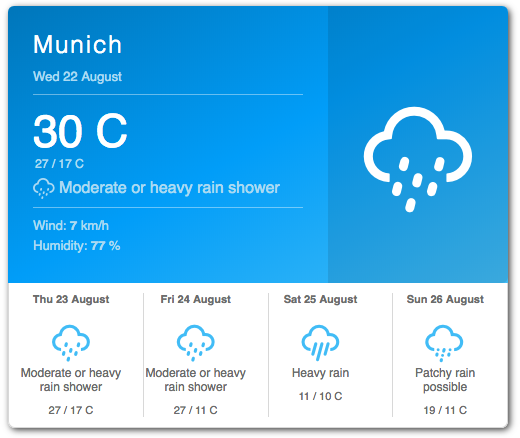
React open weather is a React Component loading forecast data from OpenWeather API, WeatherBit and Visual Crossing API.


Version 1
The component has been fully refactored and now the UI presentation is completely decoupled from the weather provider to allow using any data sources for weather, the component currently comes with 2 weather providers (WeatherBit and OpenWeather), you can create your own provider easily and provide data to the component, the two providers are built as custom react hooks
- WeatherBit provider (useWeatherBit)
- OpenWeather provider (useOpenWeather)
- Visual Crossing provider (useVisualCrossing)
- Removed the dependency on the weather icon library in favor of SVG icons
- Removed the dependency on momentjs
- Allow custom theming to style the component with your colors
- Fixed some major issues from version 0.6
More providers to be added in the future, feel free to open a pull request with any weather providers that allow a free plan.
For verion 0.6 please find the old read me here v0.6 readme
Dependencies
- React 16+
Installation
First you will need to register an account on OpenWeather, WeatherBit or Visual Crossing to obtain an API key
Next, in your project directory run:
$ npm install react-open-weatherUsage with OpenWeather
import ReactWeather, { useOpenWeather } from 'react-open-weather';

const App = () => {
  const { data, isLoading, errorMessage } = useOpenWeather({
    key: 'YOUR-API-KEY',
    lat: '48.137154',
    lon: '11.576124',
    lang: 'en',
    unit: 'metric', // values are (metric, standard, imperial)
  });
  return (
    <ReactWeather
      isLoading={isLoading}
      errorMessage={errorMessage}
      data={data}
      lang="en"
      locationLabel="Munich"
      unitsLabels={{ temperature: 'C', windSpeed: 'Km/h' }}
      showForecast
    />
  );
};
Usage with WeatherBit
import ReactWeather, { useWeatherBit } from 'react-open-weather';

const { data, isLoading, errorMessage } = useWeatherBit({
  key: 'YOUR-API-KEY',
  lat: '48.137154',
  lon: '11.576124',
  lang: 'en',
  unit: 'M', // values are (M,S,I)
});
Usage with Visual Crossing
import ReactWeather, { useVisualCrossing } from 'react-open-weather';

const { data, isLoading, errorMessage } = useVisualCrossing({
  key: 'YOUR-API-KEY',
  lat: '48.137154',
  lon: '11.576124',
  lang: 'en',
  unit: 'metric', // values are (metric,us,uk)
});
Custom styling
const customStyles = {
	fontFamily:  'Helvetica, sans-serif',
	gradientStart:  '#0181C2',
	gradientMid:  '#04A7F9',
	gradientEnd:  '#4BC4F7',
	locationFontColor:  '#FFF',
	todayTempFontColor:  '#FFF',
	todayDateFontColor:  '#B5DEF4',
	todayRangeFontColor:  '#B5DEF4',
	todayDescFontColor:  '#B5DEF4',
	todayInfoFontColor:  '#B5DEF4',
	todayIconColor:  '#FFF',
	forecastBackgroundColor:  '#FFF',
	forecastSeparatorColor:  '#DDD',
	forecastDateColor:  '#777',
	forecastDescColor:  '#777',
	forecastRangeColor:  '#777',
	forecastIconColor:  '#4BC4F7',
};

		<ReactWeather
			theme={customStyles}
			...
		/>
useOpenWeather, useWeatherBit and useVisualCrossing options
| Option | Description | | ------ | ----------------------------------------------------------------------------------------------------------------------------------------- | | key | your api key from the openweather, weatherbit or visual crossing websites | | lon | longitude of the location | | lat | latitude of the location | | unit | the unit will be passed to the openweather, weatherbit or visualcrossing "units" property, please check their documentation for more info |
UI Component Props
| Props | Options | Default | Description | | ------------- | ---------------- | --------------------------------------- | ---------------------------------------------------------------------------------------------------------------------------------------------- | | data | - | - | the data object provided from the provider hooks or your custom data provider (check the customization section below to provide your own data) | | isLoading | true, false | false | boolean to determine if the component shows a loader until data is ready | | errorMessage | - | - | error message string | | lang | "en", "de", "es" | "en" | the language to show "humidity" and "wind speed", feel free to open a PR to lang.js to add more languages | | locationLabel | - | - | The name of the location or city to show in the component | | unitsLabels | - | { temperature: 'C', windSpeed: 'Km/h' } | the labels to be used for temperature and windspeed | | showForecast | true, false | true | whether or not to show the forecast bottom part of the component |
Customizations
You can always create your own data provider, it can be a react hook or any other implementation as long as it follows the schema the component is expecting like below
    const data = {
      forecast: [
          {
            date: 'Fri 27 November',
            description: 'Clear',
            icon:'SVG PATH',
            temperature: { min: '-0', max: '6' },
            wind: '2',
            humidity: 60,
          },
          {
            date: 'Sat 28 November',
            description: 'Clouds',
            icon:'SVG PATH',
            temperature: { min: '-1', max: '6' },
            wind: '3',
            humidity: 67,
          },
          .....
      ],
      current: {
          date: 'Fri 27 November',
          description: 'Clear',
          icon:'SVG PATH',
          temperature: { current: '-2', min: -3, max: 1 },
          wind: '2',
          humidity: 90,
        },
    };
Translate Wind and Humidity
In lang.js you can implement the necessary translation, to correctly translate Wind and Humidity into other languages, if you want to implement another language, this is where you can do it. Remember to make a Pull request to share it with everyone
langText: {

en: { Wind: 'Wind', Humidity: 'Humidity',},

es: { Wind: 'Viento', Humidity: 'Humedad',}

}
now in order to format the dates according to your locale you will need to import the locale from dayjs and in your code before rendering the component you will need to set the locale as follows
import 'dayjs/locale/de';
import dayjs from 'dayjs';

// then before using the hooks you will need to set the local
dayjs.locale('de');
Contribution
If you want to contribute to the project and make it better, your help is very welcome, create a pull request with your suggested feature/bug fix/ enhancements.

