
react-native-image-light
v1.0.4
Published
React native library image processing
Downloads
11
Maintainers
 alien9996
Readme
react-native-image-light
Libraries add mode lighting effects to your images
Demo

Getting started
$ npm install react-native-image-light --save
Or
$ yarn add react-native-image-light
Mostly automatic installation (react-native < 0.6)
$ react-native link react-native-image-light
Manual installation (react-native < 0.6)
iOS
- In XCode, in the project navigator, right click
Libraries➜Add Files to [your project's name] - Go to
node_modules➜react-native-image-lightand addRNImageLight.xcodeproj - In XCode, in the project navigator, select your project. Add
libRNImageLight.ato your project'sBuild Phases➜Link Binary With Libraries - Run your project (
Cmd+R)<
Android
- Open up
android/app/src/main/java/[...]/MainActivity.java
- Add
import com.reactlibraryimagelight.RNImageLightPackage;to the imports at the top of the file - Add
new RNImageLightPackage()to the list returned by thegetPackages()method
Append the following lines to
android/settings.gradle:include ':react-native-image-light' project(':react-native-image-light').projectDir = new File(rootProject.projectDir, '../node_modules/react-native-image-light/android')Insert the following lines inside the dependencies block in
android/app/build.gradle:compile project(':react-native-image-light')
Example
You have two choices to use the library.
- Resource use is available.
import RNImageLight from "react-native-image-light";

RNImageLight.getResourcesImageLight(
  {
    imageSource1: "/storage/emulated/0/Download/img.jpg",
    imageSource2: null,
    dataType1: "Path",
    dataType2: "Path",
    overlayType: 3,
    isAccsets: true,
  },
  (source) => {
    this.setState((imgBase64: source.base64));
    console.log("SOURCE", source);
    // "source" returns the height, width and the Base64 string of the image.
  }
);
The result you get will be the same as the demo
- Use an external rescource of your
import RNImageLight from "react-native-image-light";

RNImageLight.getResourcesImageLight(
  {
    imageSource1: "/storage/emulated/0/Download/img.jpg",
    imageSource2: "/storage/emulated/0/Download/img2.jpg",
    dataType1: "Path",
    dataType2: "Path",
    overlayType: 0,
    isAccsets: false,
  },
  (source) => {
    this.setState((imgBase64: source.base64));
    console.log("SOURCE", source);
    // "source" returns the height, width and the Base64 string of the image.
  }
);Note: To get the most perfect picture, you should send to imageSource1 and imageSource2 images of similar size. You will get the following result

Options
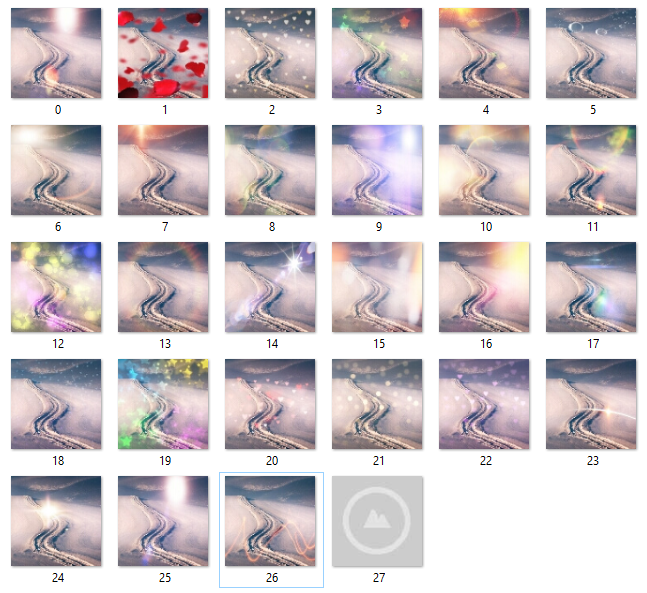
| Props | Default | Options/Info | | --------------------- | ------- | ---------------------------------------------------------------------------------------------------------------------------------------------------------------------- | | imageSource1 (String) | null | The path to the image in the device or a Base64 string. | | imageSource2 (String) | null | The path to the image in the device or a Base64 string. | | dataType1 (String) | Path | If you send a path, enter the string "Path"If you send a Base64 string, enter the string "Base64". | | dataType2 (String) | Path | If you send a path, enter the string "Path"If you send a Base64 string, enter the string "Base64". Note: Valid only when isAccsets = false. | | overlayType (int) | 0 | Select the type you want to process images, the values from 0 to 26. Other values around 0 to 26 will not take effect. Note: Valid only when isAccsets = true. | | isAccsets (boolean) | true | If you want use the resource, select true.If you do not want use resource, select false. |
Overlay types
Note
- The image path you send into imageSource1:'' and imageSource2:'' must be the absolute path. If you have problems with the absolute path, you can find the solution here.