
pk-markdown
v1.3.8
Published
pk项目的markdown编辑器,基于tui.editor,所见即所得(wysiwyg),增加了emoji组件和全屏组件
Downloads
49

Readme
pk-markdown
pk生态服务平台 markdown组件,基于tui.editor,所见即所得(wysiwyg)
1.文档地址与demo
线上demo或dist目录下为demo文件
2.使用
npm i pk-markdown
<template>
  <div id="app">
    <pk-editor :upload-url="'/user-api/uploadFile/image'"/>
  </div>
</template>

<script>
  import PkMarkdown from "../package/pk-markdown"

  export default {
    name: 'App',
    components: {
      PkMarkdown
    }
  }
</script>
3.自定义属性
{
    value: { // 默认值
      type: String,
      default: ''
    },
    id: { // dom ID值,当一个页面有多个markdown时用id值进行区分
      type: String,
      required: false,
      default() {
        return `markdown-editor-${Math.floor(Math.random() * 100)}`
      }
    },
    options: { // editor 选项值,可参考官方文档
      type: Object,
      default() {
        return {}
      }
    },
    mode: { // 模式,有wysiwyg(所见即所得)和 markdown
      type: String,
      default: 'wysiwyg'
    },
    height: { // 容器高度
      type: String,
      required: false,
      default: '300px'
    },
    language: { // 语言
      type: String,
      required: false,
      default: 'zh_CN' // https://github.com/nhnent/tui.editor/tree/master/src/js/langs
    },
    viewer: { // 是否展示页
      type: Boolean,
      required: false,
      default: false
    },
    divideImg: { // 是否需要将图片与文字分隔展示(需要有一个.img-list的dom容器装图片,且默认最多九张
      type: Boolean,
      required: false,
      default: false
    },
    placeholder: { // placeholder
      type: String,
      default: ''
    },
    uploadUrl: { // 上传图片的地址,没有则默认转Base64
      type: String,
      default: ''
    },
    inputMode: { // 是否显示为输入框模式
      type: Boolean,
      default: false
    },
    imageMaxWidth: { // 图片展示时最大宽度
      type: Number,
      default: 800
    },
    imageMaxHeight: { // 图片展示时最大高度
      type: Number,
      default: 500
    }
  }
4.自定义功能
- 图片添加预览功能 在上传图片(指定了上传地址后)和viewer模式下调用parseImg可以对图片添加预览功能
parseImg () {
        setTimeout(() => {
          $('.tui-editor-contents').find('img:not(.viewer-image)').each((i, v) => {
          const style = this.getImageScale(v)
          const markedVue = new Vue({
            components: {
              Viewer
            },
            data() {
              return {
                image: v.src,
                style
              }
            },
            template: `
                <viewer style="display: inline-block" :options="{toolbar: false, title: false, navbar: false}" :images="[image]">
                  <img :style="style" alt="${v.alt}" :src="image" class="viewer-image"/>
                </viewer>`
          }).$mount()
          $(v).replaceWith(markedVue.$el)
        })
        }, 500)
      },
- 文字与图片分离展示功能 根据需求传入参数divideImg可以将此图片抽出加入至临近的.img-list元素中进行展示
divider () {
        setTimeout(() => {
          $(`#${this.id}`).find('img:not(.viewer-image)').each((i, v) => {
          const markedVue = new Vue({
            components: {
              Viewer
            },
            data() {
              return {
                image: v.src
              }
            },
            template: `
                  <viewer style="display: inline-block" :options="{toolbar: false, title: false, navbar: false}"
                          :images="[image]"><img :src="image"
                                                 class="viewer-image">
                  </viewer>`
          }).$mount()
          $(v).remove()
          const $targetDom = $(`#${this.id}`).next('.img-list')
          $targetDom.children().length < 9 ? $targetDom.append(markedVue.$el) : ''
        })
        }, 500)
      }
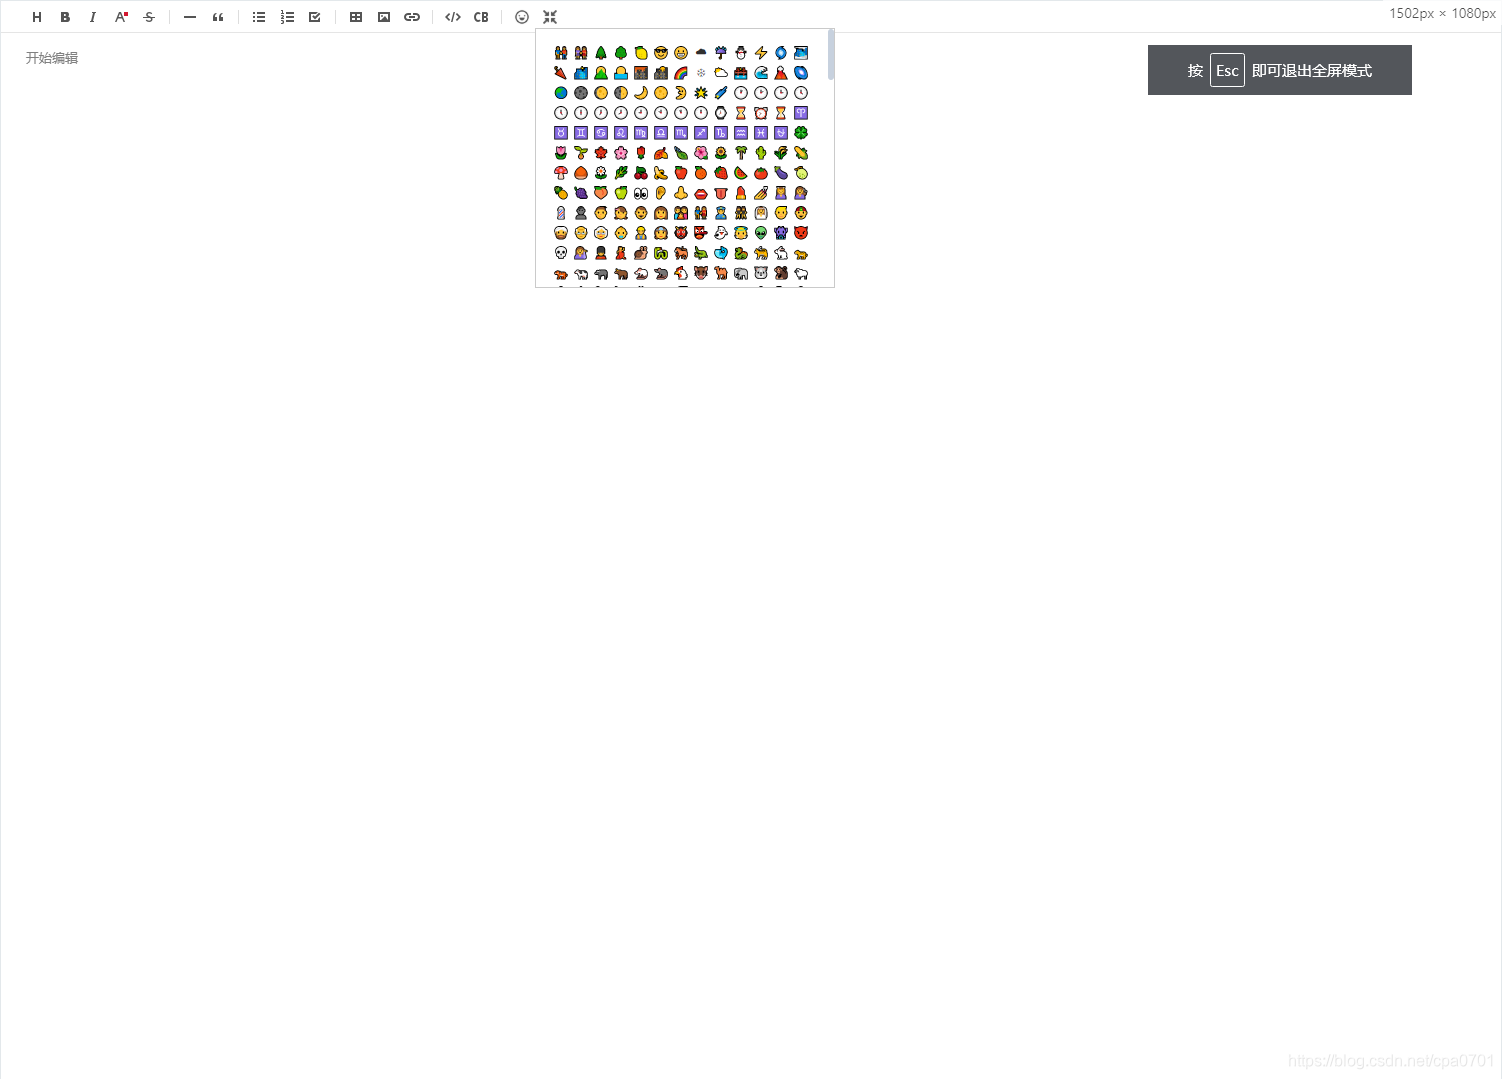
- 添加emoji表情
/**
       * 生成emoji按钮
       */
      initEmojiItem () {
        const emoji = `<button class="emoji"></button>`
        // 添加emoji
        this.toolbar.addItem({
          type: 'button',
          options: {
            name: 'emoji',
            $el: $(emoji),
            event: 'emojiButtonClicked',
            tooltip: 'emoji表情'
          }
        })
        const $emojiRoot = $('<ul></ul>')
        Object.values(emojiJson).map(v => {
          const emojiText = `&#x${v[0].substring(2)};`
          const $emoji = $(`<li class="emoji-icon">${emojiText}</li>`)
          $emoji.on('click', (e) => {
            this.editor.insertText(e.target.innerHTML)
          })
          $emojiRoot.append($emoji)
        })
        // 绑定点击emoji按钮事件
        const emojiButtonIndex = this.toolbar.indexOfItem('emoji')
        const $button = this.toolbar.getItem(emojiButtonIndex).$el
        this.editor.eventManager.addEventType('emojiButtonClicked')
        this.editor.eventManager.listen('emojiButtonClicked', () => {
          if (popup.isShow()) {
            popup.hide()
            return
          }

          const _$button$get = $button.get(0)
          const offsetTop = _$button$get.offsetTop
          const offsetLeft = _$button$get.offsetLeft

          popup.$el.css({
            top: offsetTop + $button.outerHeight(),
            right: _$button$get.parentElement.offsetWidth - offsetLeft - _$button$get.offsetWidth
          })

          popup.show()
        })
        // 生成emoji弹框
        const popup = this.editor.getUI().createPopup({
          header: false,
          title: false,
          content: $emojiRoot,
          className: 'emoji-list',
          $target: this.editor.getUI().getToolbar().$el,
          css: {
            'width': '300px',
            'height': '260px',
            'position': 'absolute'
          }
        })
        // 聚焦时弹框消失
        this.editor.eventManager.listen('focus', function () {
          popup.hide()
        })
      },
- 添加全屏功能
/**
       * 生成全屏非全屏按钮
       */
      initFullScreenItem () {
        const $root = this.editor.getUI().$el
        this.editor.eventManager.addEventType('toggleFullScreen')
        this.editor.eventManager.listen('toggleFullScreen', function () {
          const $fullscreen = $($root).find('.fullscreen')
          if ($fullscreen.hasClass('exit-fullscreen')) {
            $fullscreen.removeClass('exit-fullscreen')
          } else {
            $fullscreen.addClass('exit-fullscreen')
          }
          toggle.toggleFullScreen($root[0])
        })
        this.toolbar.addItem({
          type: 'button',
          options: {
            name: 'fullScreen',
            tooltip: '全屏/非全屏',
            event: 'toggleFullScreen',
            $el: $('<button class="fullscreen"></button>')
          }
        })
      },
- 限制图片展示时的比例大小
getImageScale(image) {
      const ratioOfImage = image.naturalWidth / image.naturalHeight
      if (ratioOfImage > 1) { // 宽大些,宽图
        if (image.naturalWidth > this.imageMaxWidth) { // 大于图片限制的最大宽度则进行等比缩小
          const height = image.naturalHeight / (image.naturalWidth / this.imageMaxWidth)
          return { width: `${this.imageMaxWidth}px`, height: `${height}px` }
        } else {
          return {}
        }
      } else { // 长大些,长图
        if (image.naturalHeight > this.imageMaxHeight) { // 大于图片限制的最大高度则进行等比缩小
          const width = image.naturalWidth / (image.naturalHeight / this.imageMaxHeight)
          return { height: `${this.imageMaxHeight}px`, width: `${width}px` }
        } else {
          return {}
        }
      }
    }