nightwatch-html-reporter-thapovan-custom
v2.0.4
Published
Generates an HTML view of the Nightwatch.js test reports by either parsing the XML files generated by Nightwatch or by using the Nightwatch reporter options.
Downloads
13
Maintainers
Readme
nightwatch-html-reporter
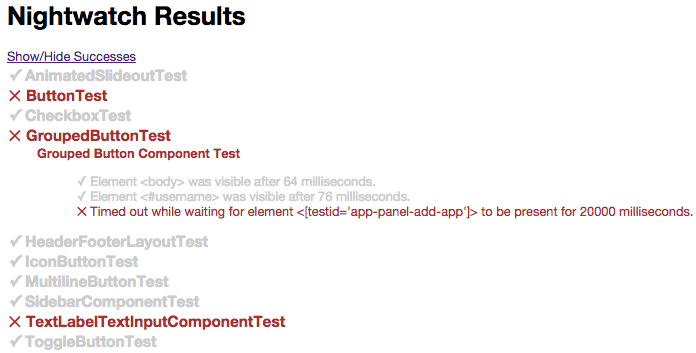
Generates an HTML view of the Nightwatch.js test reports by either parsing the XML files generated by Nightwatch or by using the Nightwatch reporter options.
Compatibility
In version 0.6.4 Nightwatch changed the format of both the generated XML reports and the object the reporter receives after a test run.
Version 0.3.1 is the last version that supports Nightwatch < 0.6.4
For Nightwatch versions < 0.6.4
npm install [email protected]For all other versions of Nightwatch
npm install nightwatch-html-reporterUsage
Using Built in Nightwatch reporter
Requires Nightwatch >= 0.5.32.
/* In nightwatch/globals.js */
var HtmlReporter = require('nightwatch-html-reporter');
var reporter = new HtmlReporter({
	openBrowser: true,
	reportsDirectory: __dirname + '/reports'
});
module.exports = {
	reporter: reporter.fn
};
Using Command Line
Assumes you have installed globally
$ nightwatch-html-reporter -d ~/myProject/tests/nightwatch/reportsUsing Nightwatch --reporter option
Create a file beside nightwatch/globals.js that is called something similar to html-reporter.js with the contents
var HtmlReporter = require('nightwatch-html-reporter');
/* Same options as when using the built in nightwatch reporter option */
var reporter = new HtmlReporter({
  openBrowser: true,
  reportsDirectory: __dirname + '/reports/'
});

module.exports = {
  write : function(results, options, done) {
    reporter.fn(results, done);
  }
};
then use the --reporter option like ./nightwatch --reporter ./html-reporter.js
Options
{
	/* True or False.  If true the generated html will be opened
		in your browser after the test run. */
	openBrowser: true,

	/* The directory you've set nightwatch to store your reports.
		On the CLI this determines where we read reports from, but on this
		interface it determines where the generated report will be saved. */
	reportsDirectory: __dirname + '/reports',

	/* The filename that the html report will be saved as. */
	reportFilename: 'generatedReport.html',

	/* Boolean.  If true we ensure the generated report filename
		is unique by appending a timestamp to the end. */
	uniqueFilename: false,

	/* Boolean.  If true we append the last suite name to
		the report filename. */
	separateReportPerSuite: false,

	/* The theme that will be used to generate the html report.
		This should match a directory under the lib/themes directory. */
	themeName: 'default',

	/* If true then only errors will be shown in the report. */
	hideSuccess: false,

	/* If true we append a timestamp to the end of the generated report filename */
	uniqueFilename: false,

	/* If true we convert screenshot paths from absolute paths to relative to output file. */
	relativeScreenshots: false
}
CLI usage
nightwatch-html-reporter -d <reports-directory> [--theme (default:'default')] [--output (default:generatedReport.html)]Options:
-d, --report-dir Directory where nightwatch reports are stored. [required]
-t, --theme Name of theme to use. Should match a directory in lib/themes. [default: "default"]
-o, --output Filename to use when saving the generated report. [default: "generatedReport.html"]
-u, --unique-filename Appends a timestamp to the end of the generated report filename. [default: false]
-p, --prepend-filename Prepend filename to the package name in the report. Helps distinguish between multiple runs/diff browser/same test [default: false]
-r, --relative-screenshots Convert screenshot paths from absolute to relative to output file. [default: false]
-b, --browser If true generated report will be opened in the browser. [default: true]
-c, --compact Hides success cases and only shows error cases.
-l, --log-level Sets what is logged to the console. 0 - all, 1 - info, 2 - warn, 3 - error [default: 1]
--save-nightwatch-report Debug: A filename we use to save the report object passed to us by nightwatch.
--save-xml-report Debug: A filename we use to save the parsed XML object from XML reports.Available Themes
You can see examples of all of the available themes below. You can also create your own theme by copying an existing
theme directory and editing the styles.css file. If you want to also change the structure of the html generated
you can edit/copy lib/themes/default/report.pug which contains the markup for the majority of themes.
Theme options that are available on command line and in the options block:
- default
- default-gray
- compact
- compact-gray
- cover
- outlook
Example Reports
Default Theme (default)

Cover Theme (cover)
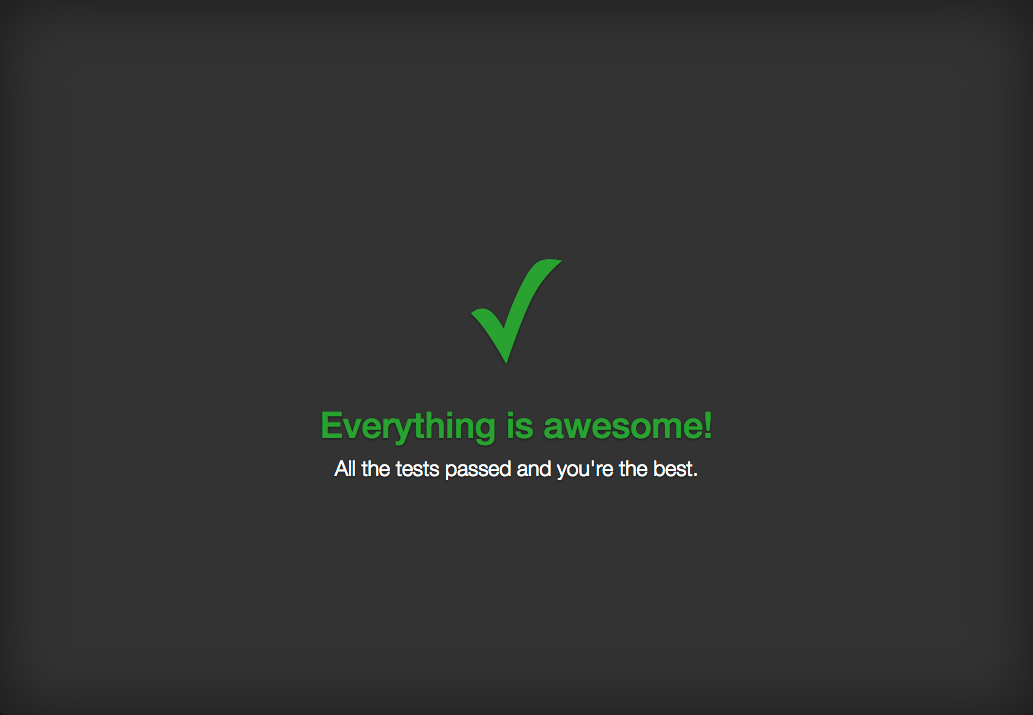
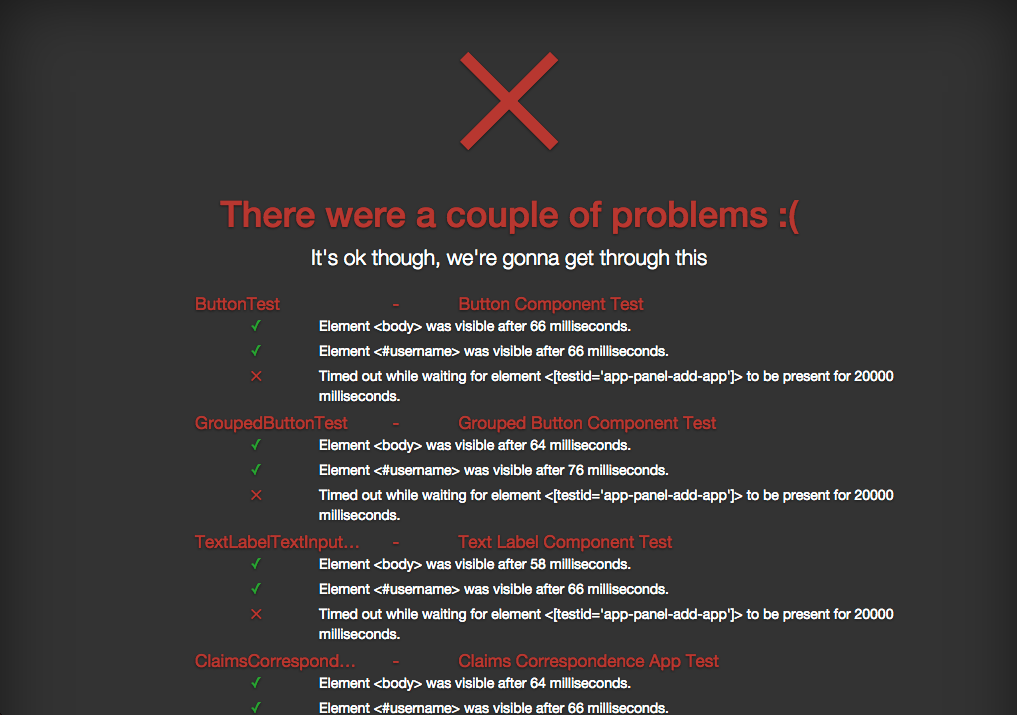
Compact Theme (compact)
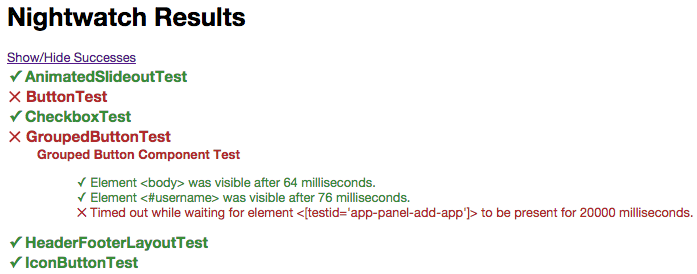
Default-Gray Theme (default-gray)
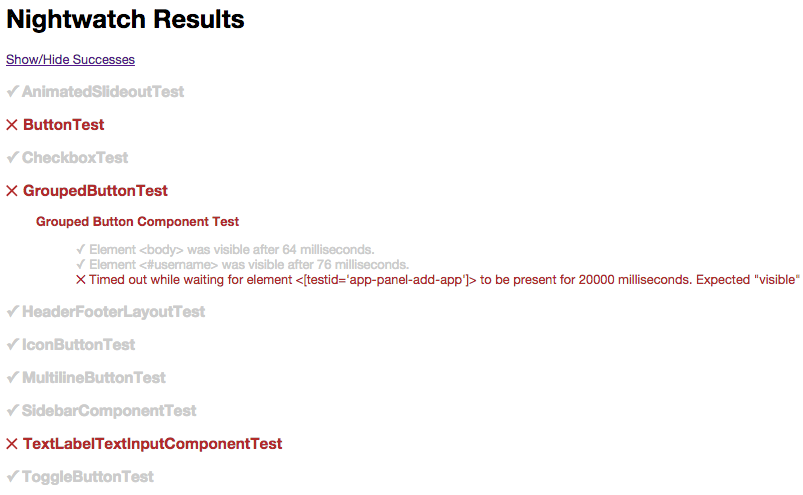
Compact-Gray Theme (compact-gray)
License
Copyright (c) 2014 James Smith Licensed under the MIT license.


