
json-table-editor
v1.1.0
Published
JSON table editor is a minimal, yet flexible HTML table editor, where you can attach formatting to each cell and it gives you JSON output.
Downloads
14
Maintainers
 rajatrs5054
Readme
JSON Editable Table
JSON table editor is a minimal, yet flexible tabular data editor, where you can attach formatting to each cell and it gives you JSON output.
Build status

Code style
Using Standard code style.
![]()
Demo
https://rajatsingla.github.io/JSON-table-editor/
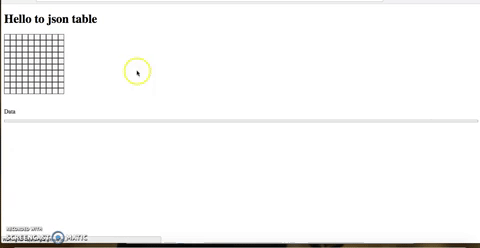
Screenshot
Features
It is not meant to be a viewer for large spreadsheet data.
It is intended to maintain tablular data and save JSON data which you can use anywhere.
You can -
- Edit content of each cell.
- Attach formatting to each cell like bold, right align, Italic etc.
- Initialize with JSON data.
- Subscribe to content-change callback.
- Keyboard shortcuts up, down, left, right keys, tab, reverse tab.
- Paste table data from another website or excel sheet.
- Insert rows and columns in between table.
USE CASE- Just to attach formatting information to each cell and content of each cell. Then you can use this JSON data to show table anywhere be it web, andriod, ios, shell etc.
Tech/framework used
Built With vanillaJS (ES5)
Quick Start
Bower
The easiest way to use JSONTableEditor in your project is via the Bower package manager.
bower install json-table-editor

<script type="text/javascript" src="bower_components/json-table-editor/dist/json-table-editor.min.js"></script>

<link rel="stylesheet" href="bower_components/json-table-editor/dist/json-table-editor.min.css" />
NPM
Also, you can download it using npm.
npm install json-table-editor --save

import JSONTableEditor from 'json-table-editor'

@import '../../node_modules/json-table-editor/dist/json-table-editor.min.css'
Otherwise, download the zip folder from here, extract it, and copy dist/json-table-editor.min.js and dist/json-table-editor.min.css into your project’s folder.
Initialize the table
table = new JSONTableEditor(<selector for container>, <Options Object (optional)>, <JSON data (optional)>);Examples
<div id="foobar"></div>
table = new JSONTableEditor("#foobar")
table = new JSONTableEditor("#foobar", {
defaultRows: 3,
defaultColumns: 3
})table = new JSONTableEditor("#foobar", {
maxColumns: 5,
maxRows: 20,
formatOptions: [
{
type: 'button',
name: 'bold',
innerHTML: 'Bold'
},
]
})Get Data
table.model.tableDataAttach a callback to dataChange
table.view.container.addEventListener('dataChanged',function(){
  console.log('table.model.tableData')
})
Options Object
Options Object can have following keys
defaultRows Default number of rows in table to start with.
Default value is 3defaultColumns Default number of columns in table to start with.
Default value is 3maxRows For limiting number of rows in table.
Default value is 1000maxColumns For limiting number of columns in table.
Default value is 1000formatOptions For defining format buttons on editor, like bold, underline etc.
More info on formatOptions
Default value is
[
  {
    type: 'button',
    name: 'bold',
    innerHTML: 'Bold'
  },
  {
    type: 'button',
    name: 'italic',
    innerHTML: 'Italic'
  },
  {
    type: 'radio',
    name: 'align',
    options: ['left', 'center', 'right']
  }
]
More info on formatOptions
formatOptions is an object which determines the buttons for formatting each cell.
There can be two types of formatOptions
button
{
  type: 'button',
  name: 'bold',
  innerHTML: 'Bold'
}
This will add a button named bold in format buttons.
Button click will add true to active cell's format data under key bold.
You can add multiple button types and any name based on your format need, use your imagination.
Button click will also add a class named jt-cell-bold to active cell.
CSS for some of the classes is written, if you use some other name you may have to write css for that class.
innerHTML is for button's innerHTML.
radio
{
  type: 'radio',
  name: 'align',
  options: ['left', 'center', 'right']
}
This will add three buttons left, center, right in format buttons.
These will behave like radio buttons and only one will be active at a time.
If center is active it will add center to active cell's format data under key 'align'.
You can add multiple radio types and any number of options based on your format need, use your imagination.
If center is active it will also add a class named jt-cell-center to active cell.
CSS for some of the classes is written, if you use some other options you may have to write css for that class.
How to pass formatOptions
Format of table JSON data
{
  "meta": {
    "rows": 2,
    "columns": 2
  },
  "data": [
    [
      {
        "content": "Narendra Modi",
        "format": {
          "align": "right",
          "italic": true
        }
      },
      {
        "content": "Manmohan Singh",
        "format": {
          "align": "right",
          "italic": true
        }
      }
    ],
    [
      {
        "content": "55",
        "format": {}
      },
      {
        "content": "65",
        "format": {}
      }
    ]
  ]
}
Keyboard shortcuts
- tab or right arrow - Move to right cell by pressing tab.
- shift + tab or left arrow - Move to left cell by shift + tab.
- top arrow - Move to upper cell by pressing upper arrow.
- down arrow - Move to upper cell by pressing down arrow.
Test
npm test
Contribute
- Fork this project
- Make changes in src/.js or src/.css
- Run
gulp build - Generate a PR
TODOs
- Implement undo/redo functionality
- Write tests
License
LICENSE (MIT)
Made while working at scroll.in