ixbrl-viewer
v1.4.59
Published
iXBRL Viewer
Downloads
1,018
Readme
Arelle iXBRL Viewer

Table of Contents
- Arelle iXBRL Viewer
- Table of Contents
- Description
- Documentation
- Installation
- Accessing the JavaScript viewer application
- JavaScript Versioning
- Producing an ixbrl-viewer via the Arelle GUI
- Producing an ixbrl-viewer via the Arelle command line
- Stub viewer mode
- Optional Features
- Runtime config
- Disable viewer loading
- Running tests
- 👥 Contributors
- License
Description
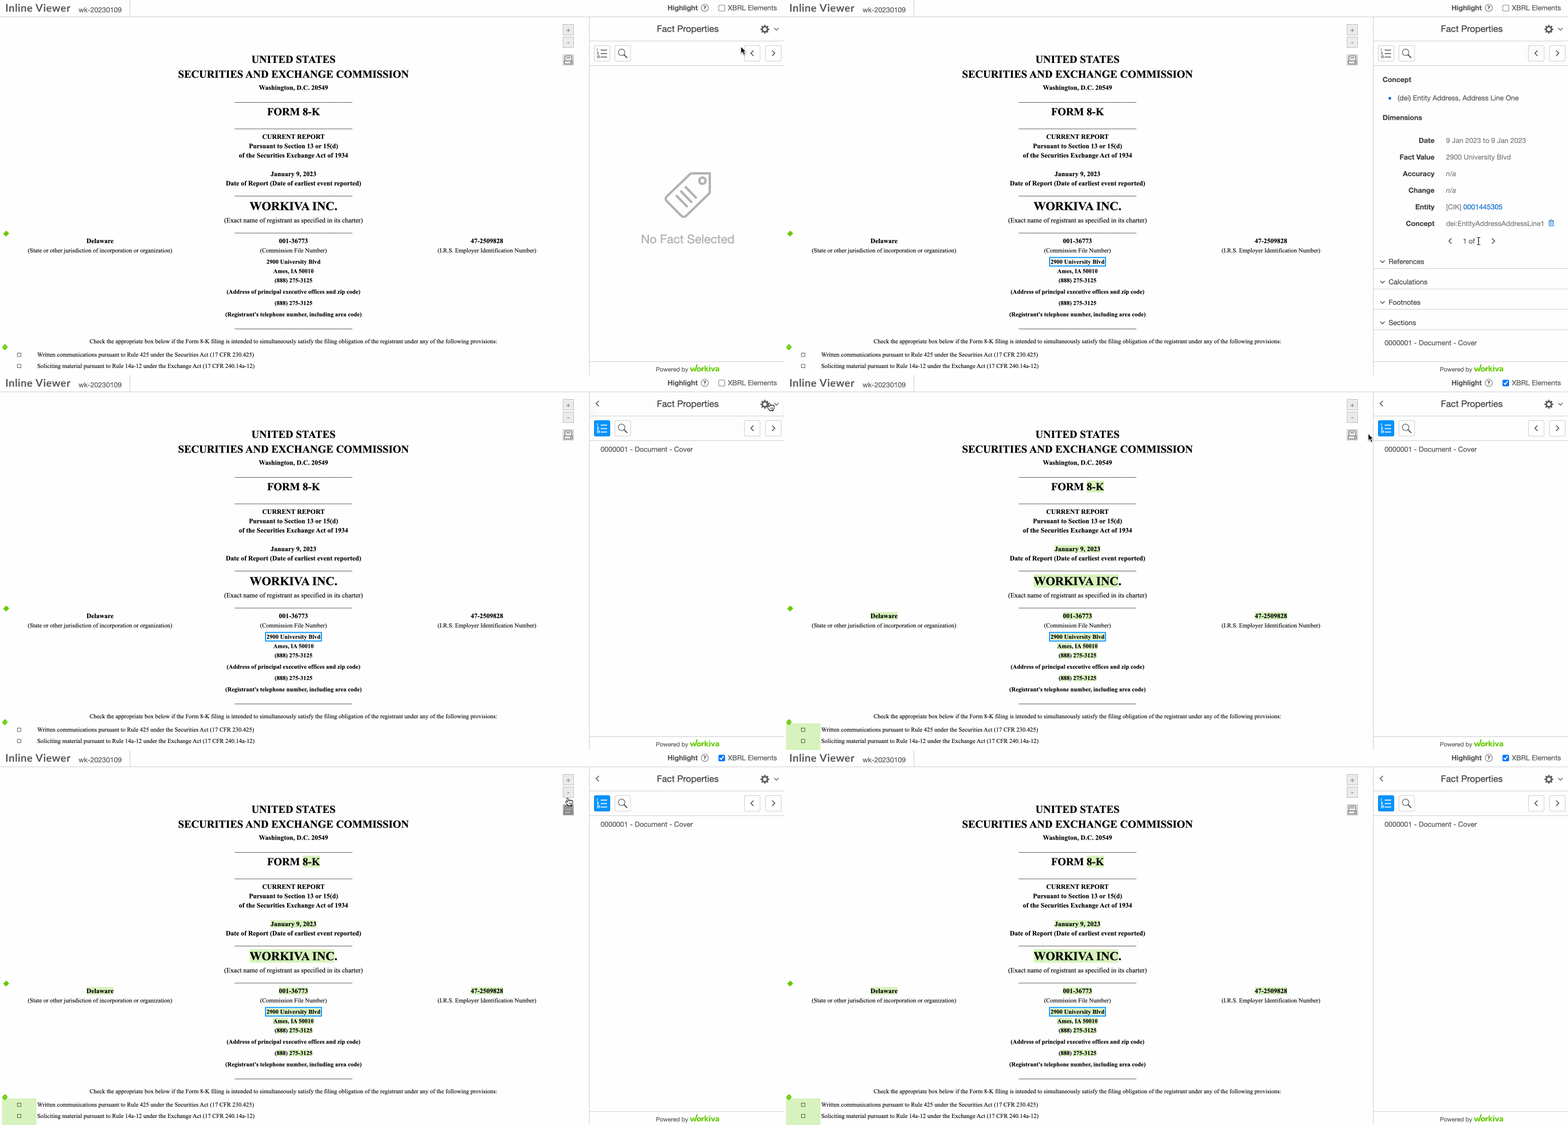
The Arelle iXBRL Viewer allows Inline XBRL (or iXBRL) reports to be viewed interactively in a web browser. The viewer allows users to access the tagged XBRL data embedded in an iXBRL report. Key features include:
- Full text search on taxonomy labels and references
- View full details of tagged facts
- Export tables to Excel
- Visualize and navigate calculation relationships
- Produce on-the-fly graphs using XBRL data
A sample viewer is provided in the examples for those interested.
The viewer project consists of two components:
- A plugin for the Arelle XBRL tool
- The Javascript viewer application
In order to view an iXBRL report in the viewer, it must first be prepared using the Arelle plugin. The preparation process updates the iXBRL file to include:
- A link to the JavaScript viewer
- A block of JSON data that contains the results of processing the XBRL data and associated taxonomy
Once prepared, the resulting file provides an entirely standalone viewer, and does not require access to the taxonomy, or to any online services. The only dependency is on the JavaScript viewer application, which is a single file which can be accessed directly online, downloaded or built locally.
It is also possible to place the link to the viewer, and the block of JSON data in a separate file. See Stub Viewer Mode below.
The JavaScript viewer application is a single JavaScript file called ixbrlviewer.js. It contains all of the JavaScript that runs the viewer functionality.
Documentation
Need help with the Arelle iXBRL Viewer? Go check out our documentation.
Installation
The Python portion of this repo is developed using Python 3.12.
- Clone the iXBRL Viewer git repository.
- Download and install Arelle
Accessing the JavaScript viewer application
Accessing via the CDN
The JavaScript file is available via a CDN. It can be accessed via the following url:
https://cdn.jsdelivr.net/npm/ixbrl-viewer@<version>/iXBRLViewerPlugin/viewer/dist/ixbrlviewer.jsWhere <version> is the current version of ixbrl-viewer you are using. For instance 1.2.0.
Accessing via Github
When a new version of ixbrl-viewer is released, the javascript is included as a release asset. The asset can be found on the releases page for each version of the ixbrl-viewer.
Building the JavaScript locally
- Install npm. Instructions can be found here: https://www.npmjs.com/get-npm
- Install the dependencies for javascript by running:
npm install. This command must be run from within theixbrl-viewer directory(i.e. the root of your checkout of the repository). - Run
npm run font. This will build the icon files. - Run
npm run prod. This will create the ixbrlviewer.js in the iXBRLViewerPlugin/viewer/dist directory.
JavaScript Versioning
The ixbrl-viewer plugin embeds processed XBRL metadata in the HTML that has a specific format read by the JavaScript. The metadata produced will work with a viewer application that has the same major version, and the same or later minor version as the plugin used to create it.
This means that once an XBRL report has been prepared by the plugin, the associated JavaScript viewer application can be upgraded within the same major version. Any features introduced in newer versions of the viewer that rely on additional metadata will degrade gracefully if that metadata is not present.
Producing an ixbrl-viewer via the Arelle GUI
Preparing an iXBRL file via the GUI
Open Arelle and select Manage Plugins from the Help menu.
Press Browse under "Find plug-in modules".
Browse to the iXBRLViewerPlugin directory within your checkout of the iXBRL Viewer git repository and select the __init__.py file within it.
Press Close and then Yes when prompted to restart Arelle.
You should now have a Save iXBRL Viewer instance on the Tools menu.
Open the ixbrl filing zip in Arelle
Select Save iXBRL Viewer instance option on the Tools menu
Provide a script URL to the ixbrlviewer.js file.
This url can be one of the following:
https://cdn.jsdelivr.net/npm/ixbrl-viewer@<version>/iXBRLViewerPlugin/viewer/dist/ixbrlviewer.js- A relative url to the downloaded ixviewer.js from github
- A relative url to the locally built ixviewer.js
Save the viewer iXBRL file to a new file in the newly created directory by selecting Browse, browsing to the directory, and providing a file name.
You should now be able to open the created file in Chrome, and the iXBRL viewer should load.
Preparing an iXBRL document set using the Arelle GUI
To prepare an iXBRL document set, open the document set in Arelle. The process is as for a single file, except that a directory should be selected as the output location, rather than a file.
Producing an ixbrl-viewer via the Arelle command line
Preparing an iXBRL file via the command line
The plugin can also be used on the command line:
python3 Arelle/arelleCmdLine.py --plugins=<path to iXBRLViewerPlugin> -f ixbrl-report.html --save-viewer ixbrl-report-viewer.html --viewer-url https://cdn.jsdelivr.net/npm/ixbrl-viewer@<version>/iXBRLViewerPlugin/viewer/dist/ixbrlviewer.jsNotes:
"Arelle/arelleCmdLine.py" should be the path to your installation of Arelle
The plugin path needs to an absolute file path to the ixbrl-viewer plugin
The viewer url can be one of the following:
https://cdn.jsdelivr.net/npm/ixbrl-viewer@<version>/iXBRLViewerPlugin/viewer/dist/ixbrlviewer.js- A relative url to the downloaded ixviewer.js from github
- A relative url to the locally built ixviewer.js
Preparing an iXBRL document set
The iXBRL Viewer supports Inline XBRL document sets. This requires the inlineXbrlDocumentSet plugin.
The input is specified using JSON in the following form:
[
  {
    "ixds": [
      { "file": "file1.html" },
      { "file": "file2.html" },
    ]
  }
]
The output must be specified as a directory. For example:
python3 Arelle/arelleCmdLine.py --plugins '/path/to/iXBRLViewerPlugin|inlineXbrlDocumentSet' -f '[{"ixds":[{"file":"document1.html"},{"file":"document2.html"}]}]' --save-viewer out-dir --viewer-url https://cdn.jsdelivr.net/npm/ixbrl-viewer@<version>/iXBRLViewerPlugin/viewer/dist/ixbrlviewer.jsNotes:
The first file specified is the "primary" file, and should be opened in a browser to use the viewer. The other files will be loaded in separate tabs within the viewer.
"Arelle/arelleCmdLine.py" should be the path to your installation of Arelle
The plugin path needs to an absolute file path to the ixbrl-viewer plugin
The viewer url can be one of the following:
https://cdn.jsdelivr.net/npm/ixbrl-viewer@<version>/iXBRLViewerPlugin/viewer/dist/ixbrlviewer.js- A relative url to the downloaded ixviewer.js from github
- A relative url to the locally built ixviewer.js
Due to browser security restrictions, the resulting viewer cannot be loaded directly from
file:URLs; it must be served by a web server.
Using build-viewer.py
As an alternative to the standard Arelle command line, the
samples/build-viewer.py script can also be used. To use the script, both the
Arelle source code and the iXBRLViewerPlugin must be on the Python path. e.g.:
PYTHONPATH=/path/to/Arelle:/path/to/ixbrl-viewer ./samples/build-viewer.py --helpA document set can be processed by passing a directory as input. All .html
and .xhtml in the directory will be combined into a document set. The
generated files will be saved into the directory specified by the --out
option.
Taxonomy packages can be specified using --package-dir. All ZIP files in the
specified directories will be loaded as taxonomy packages.
e.g.
PYTHONPATH=/path/to/Arelle:/path/to/ixbrl-viewer ./samples/build-viewer.py --out out-dir --package-dir /my/packages/ ixds-dirStub viewer mode
By default, the link to the JavaScript viewer and the JSON data block are added to the iXBRL report file (or to the first file, in the case of a document set).
Stub viewer mode is an optional generation mode that creates an additional, minimal HTML file containing the JSON data block, and the link to the JavaScript viewer. This mode has two advantages over the default approach of embedding the JSON data and JavaScript link in the iXBRL report:
- Provided that all facts and footnotes in the iXBRL report already have ID attributes, no modification of the iXBRL report is required.
- The iXBRL viewer loading mask will be displayed much more quickly. This is helpful for very large iXBRL reports which can otherwise result in a long delay before there is any sign of the iXBRL Viewer loading.
The downside of this mode is that due to browser security restrictions, the
viewer cannot be loaded directly from files (using file: URLs); they must be
served by a web server.
Optional Features
Some features are disabled by default but can be enabled at generation time or with query parameters.
To enable features:
- Via CLI:
--viewer-feature-{feature name} - Via query parameter:
?{feature name}=true
Features enabled by CLI/JSON can be disabled by query parameter via ?{feature name}=false.
Note that any other value besides "false" (case-sensitive) will enable the feature.
This will override any enabling query parameters, so ?review=true&review=false&review=true would result in the 'review' feature being disabled.
This table uses the 'review' feature as an example to demonstrate how these options interact:
| CLI/JSON | Query Param | Result |
|----------|-------------|------------|
| unset | unset | disabled |
| unset | true | enabled |
| unset | false | disabled |
| review | unset | enabled |
| review | true | enabled |
| review | false | disabled |
Feature: Review Mode

A review mode is available that is intended to assist in reviewing partially tagged or incomplete documents. This mode replaces the namespace-based highlighting with optional highlighting based on untagged numbers and/or dates.
| CLI/JSON | Query Param |
|---------------------------|----------------|
| --viewer-feature-review | ?review=true |
Runtime config
When launched, the viewer will check for the existence of
ixbrlviewer.config.json in the same directory as ixbrlviewer.js. If found,
this will be loaded and used to configure the viewer.
The file supports the following keys:
features- a JSON object containing defaults for features. These will be overridden by features defined at generation time, and then by query parameters, as defined above.skin- a JSON object supporting the following keys:stylesheetUrl- a URL to additional CSS definitions.faviconUrl- a URL to an icon file to be used as the favicon for the viewer.footerLogoHtml- a fragment of HTML that will be included in place of the standard footer logo.
taxonomyNames- a JSON object where:- Keys are strings that will be treated as a regular expression to match against a namespace.
- Values are an array of (prefix, name) where "prefix" is the preferred namespace prefix for the namespace, and "name" is a short descriptive name for the taxonomy.
Relative URLs defined in the config file are resolved relative to the config file.
Disable viewer loading
Loading of the viewer can be disabled by specifying ?disable-viewer as a
query parameter. This will leave the iXBRL document loaded in the browser, but
without any viewer functionality. In the case of an iXBRL document set, or
multi-document viewer, the first document will be shown.
Running tests
Running unit tests
In order to run the javascript unit tests make sure that you have installed all of the npm requirements.
Run the following command to run javascript unit tests: npm run test
In order to run the python unit tests make sure that you have pip installed requirements-dev.txt.
Run the following command to run python unit tests: pytest tests/unit_tests
Running Puppeteer tests
All commands should be run from repository root
Install the npm requirements(instructions under Building the javascript locally).
Install Arelle
pip install .[arelle][Terminal 1] Start the puppeteer serve
npm run puppeteerServe- This command generates the
ixbrlviewer.js, uses Arelle to generate several test files, then serves the files via a nodejs http-server. - Currently changes to application code require restarting this step to take effect.
- This command generates the
Start the puppeteer tests
[Terminal 2]:
npm run test:puppeteerIDE:
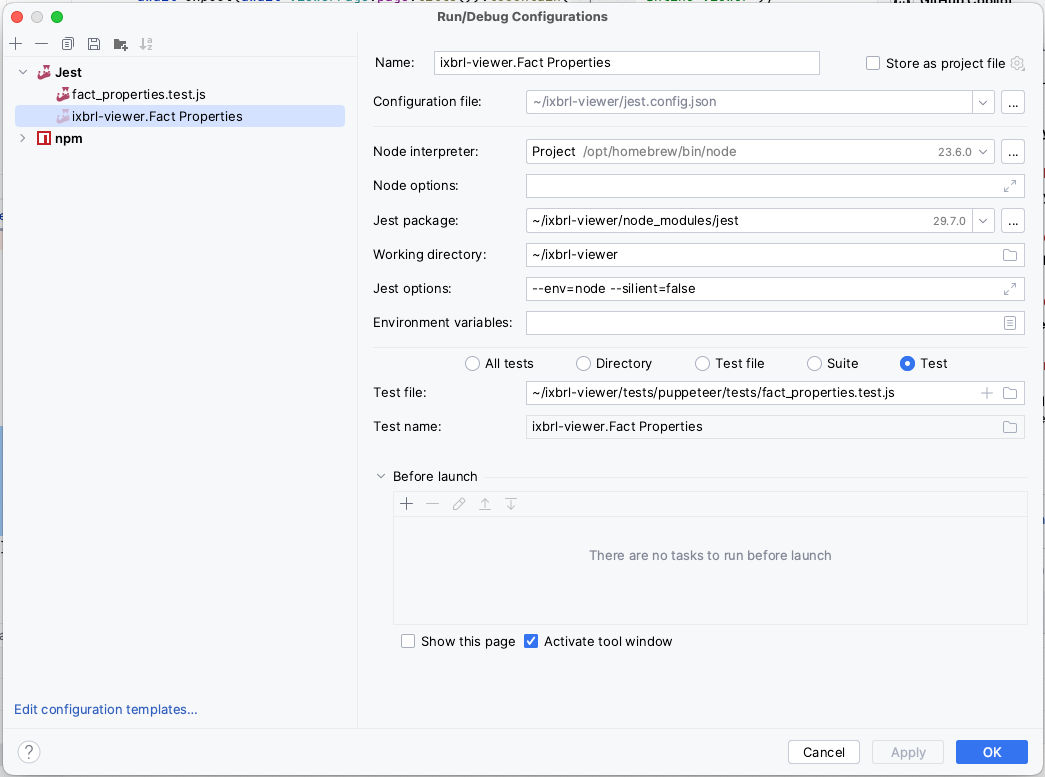
- Many of the IDE's on the market can run tests via the UI. The following is an example configuration for intellij. Once set you can right-click on the test name or file and select the run option.

- Debug runs with breakpoints are also typically supported.
- Many of the IDE's on the market can run tests via the UI. The following is an example configuration for intellij. Once set you can right-click on the test name or file and select the run option.


