gatsby-theme-graphcms-blog
v0.3.0
Published
A theme for a blog powered by Gatsby and Markdown
Downloads
3
Readme
Kick off your project with this theme four your Gatsby blog. It ships with the main Gatsby configuration files you might need to get up and running blazing fast with the blazing fast app generator for React. It leverages GraphCMS as the API for your content. They provide an intuitive way for creators to manage their content.
🚀 Quick start
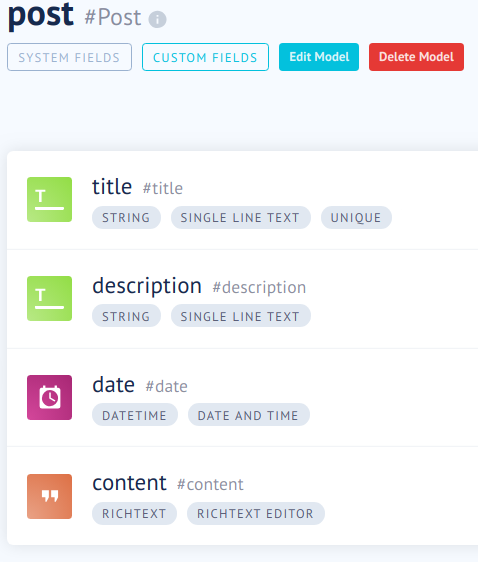
This is a theme for a Gatsby blog. In order to use it, we must create a new, gatsby site and configure it to use this theme. Also, we have to do some setup in GraphCMS, our CMS of choice.
If you get stuck along the way, have a look at a demo setup.
Create a new Gatsby site.
Use the Gatsby CLI to create a new site, specifying the basic starter. This adds the minimal needed dependencies for a Gatsby site.
# create a new Gatsby site using a starter
npx gatsby new my-blog https://github.com/gatsbyjs/gatsby-starter-hello-world
You could delete the
./srcfolder in the newly generated folder for basic setups.Setup your GraphCMS API Head over to GraphCMS, login or create an account. The free plan should be enough to begin, although the paid plans comes with some nice advanced featurey, like different access roles. This theme expect a certain data model to be existent, which you have to create via their UI. Later on, you (or another content editor of your choice) can write your content right in GraphCMS.

Finally, don't forget to allow public access to the
QUERYScope under settings. While you're there, grap your API endpoint, which we'll need in a moment.Add this theme as dependency.
Back in your terminal, add this theme as a dependecy to your newly created blog.
cd my-blog/
npm i -S gatsby-theme-graphcms-blog
Configure Gatsby.
Create a
gatsby-config.jsfile with the following content, adding the endpoint you've found in the GraphCMS settings.module.exports = { __experimentalThemes: [ { resolve: "gatsby-theme-graphcms-blog", options: { endpoint: "https://add-your-graphcms-endpoint.here", }, }, ], }Start Gatsby.
Navigate into your new site’s directory and start it up.
# develop mode
npm run develop
# production build, outputs to static files to ./public, which can be hosted nearly anywhere.
npm run build
Enjoy and start writing!
Your site is now running at
http://localhost:8000!Note: You'll also see a second link:
http://localhost:8000/___graphql. This is a tool you can use to experiment with querying your data. Learn more about using this tool in the Gatsby tutorial.
🎓 Learning Gatsby
Looking for more guidance? Full documentation for Gatsby lives on the website. Here are some places to start:
For most developers, we recommend starting with our in-depth tutorial for creating a site with Gatsby. It starts with zero assumptions about your level of ability and walks through every step of the process.
To dive straight into code samples, head to our documentation. In particular, check out the Guides, API Reference, and Advanced Tutorials sections in the sidebar.
