@pipedream/gmail
v0.2.1
Published
Pipedream Gmail Components
Downloads
271
Readme
Overview
By connecting your personal Gmail account to Pipedream, you'll be able to incorporate email into whatever you're building with any of the thousands of apps that are available on Pipedream.
Getting Started
To connect your Gmail account to Pipedream, just accept the prompt when connecting your Gmail account. To connect your account with your own OAuth client, see below.
Configuring a Gmail OAuth client in Google Cloud Platform
To get started, you'll need the following:
- A Google Cloud account
- Basic familiarity with Google Cloud Console
Quickstart
- Create a custom Gmail client in Google Cloud Console
- Enable Gmail API and Pub/Sub API
- Create OAuth credentials and a service account
- Set up a custom OAuth client in Pipedream
- Connect your Gmail account using the custom client and service account
For detailed instructions, follow the steps below.
Detailed Setup Instructions
1. Create a Gmail app
Sign in to the Google Cloud Console
Select an existing project, or create a new one

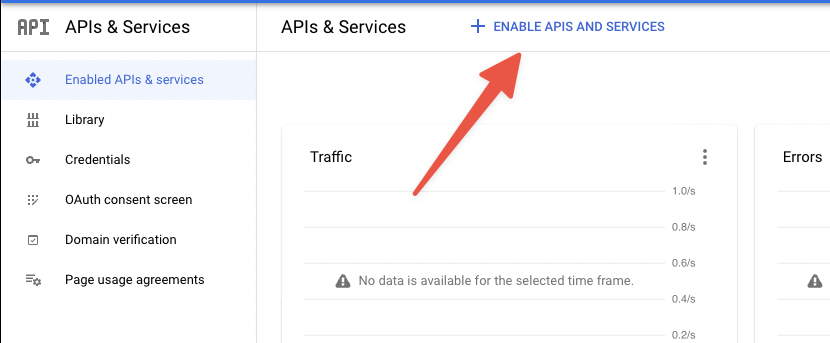
Select APIs & Services
Click Enable APIs & Services
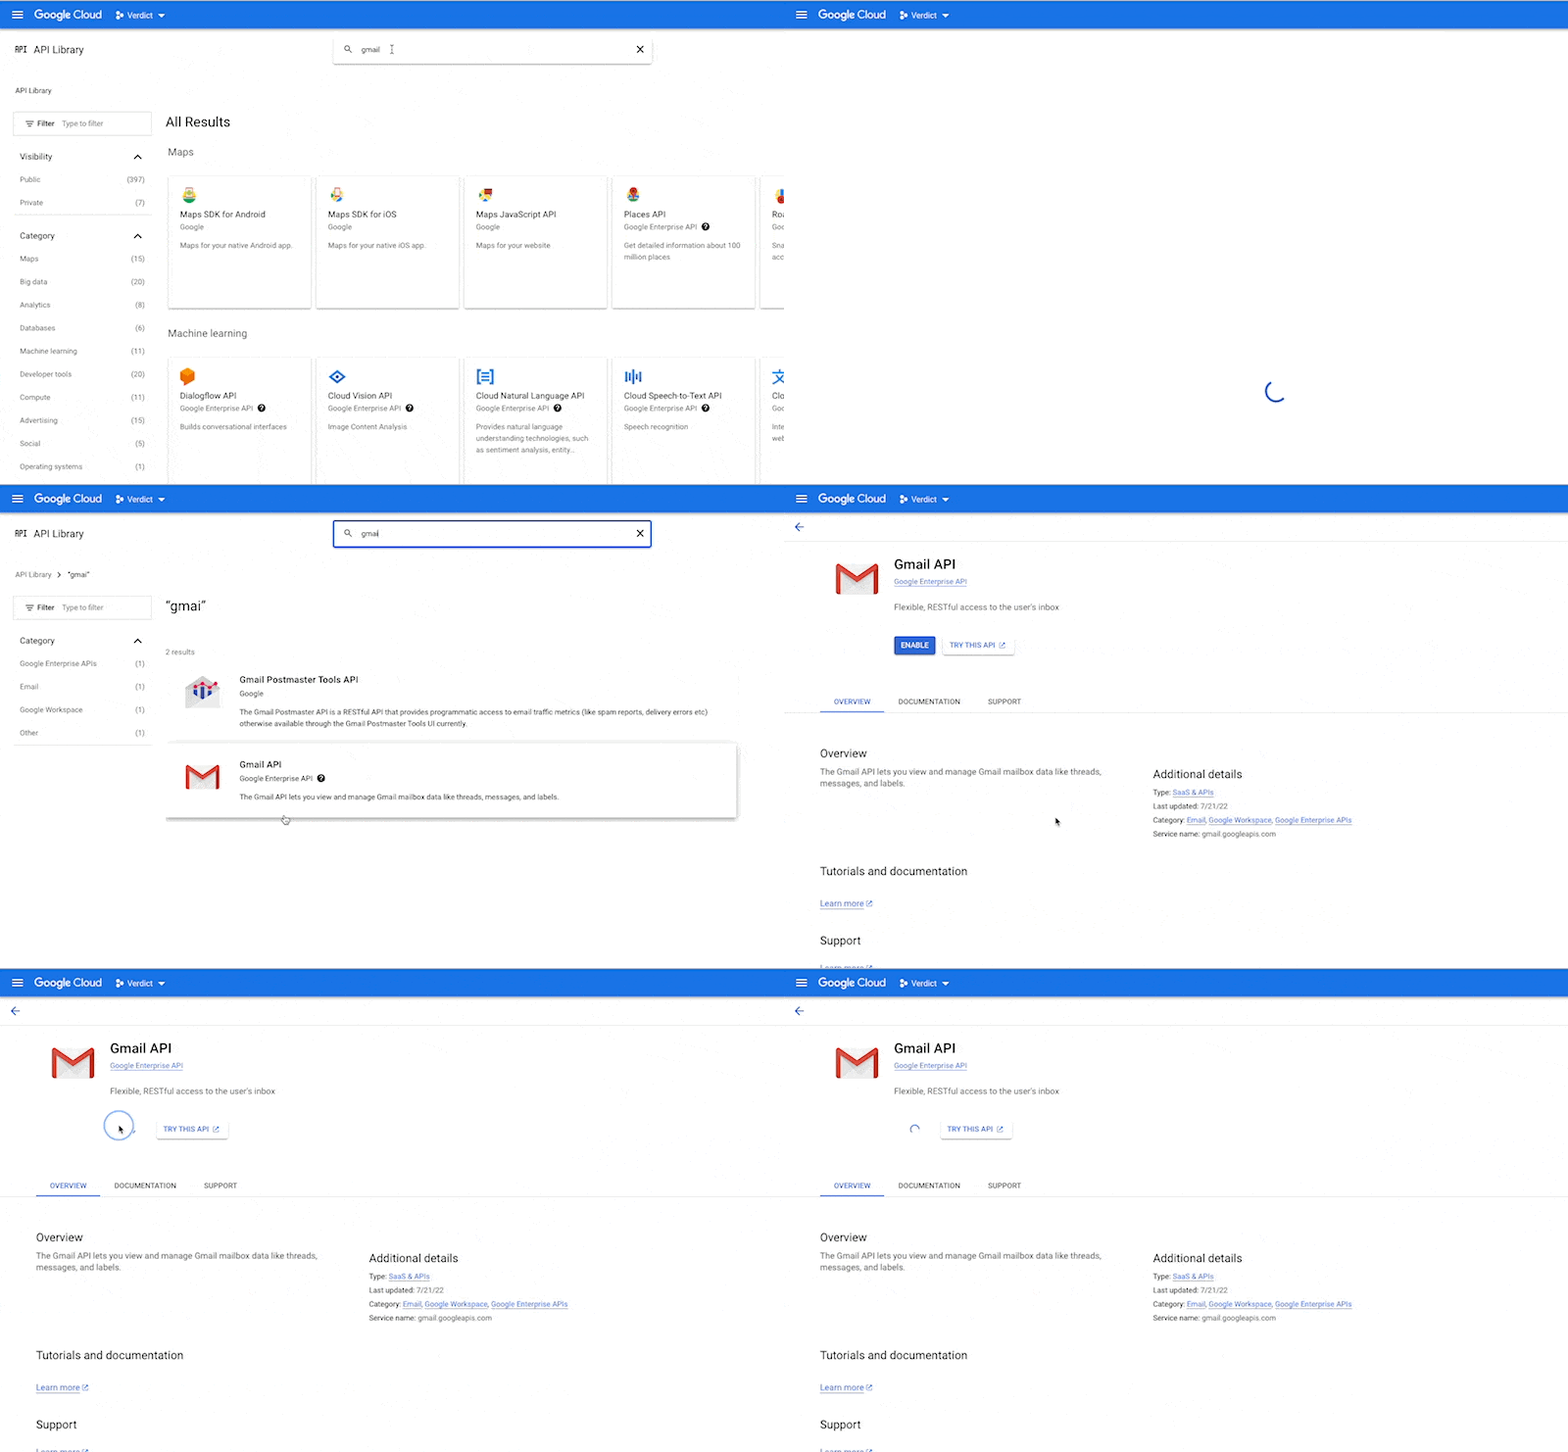
Search for and select Gmail API
Click Enable
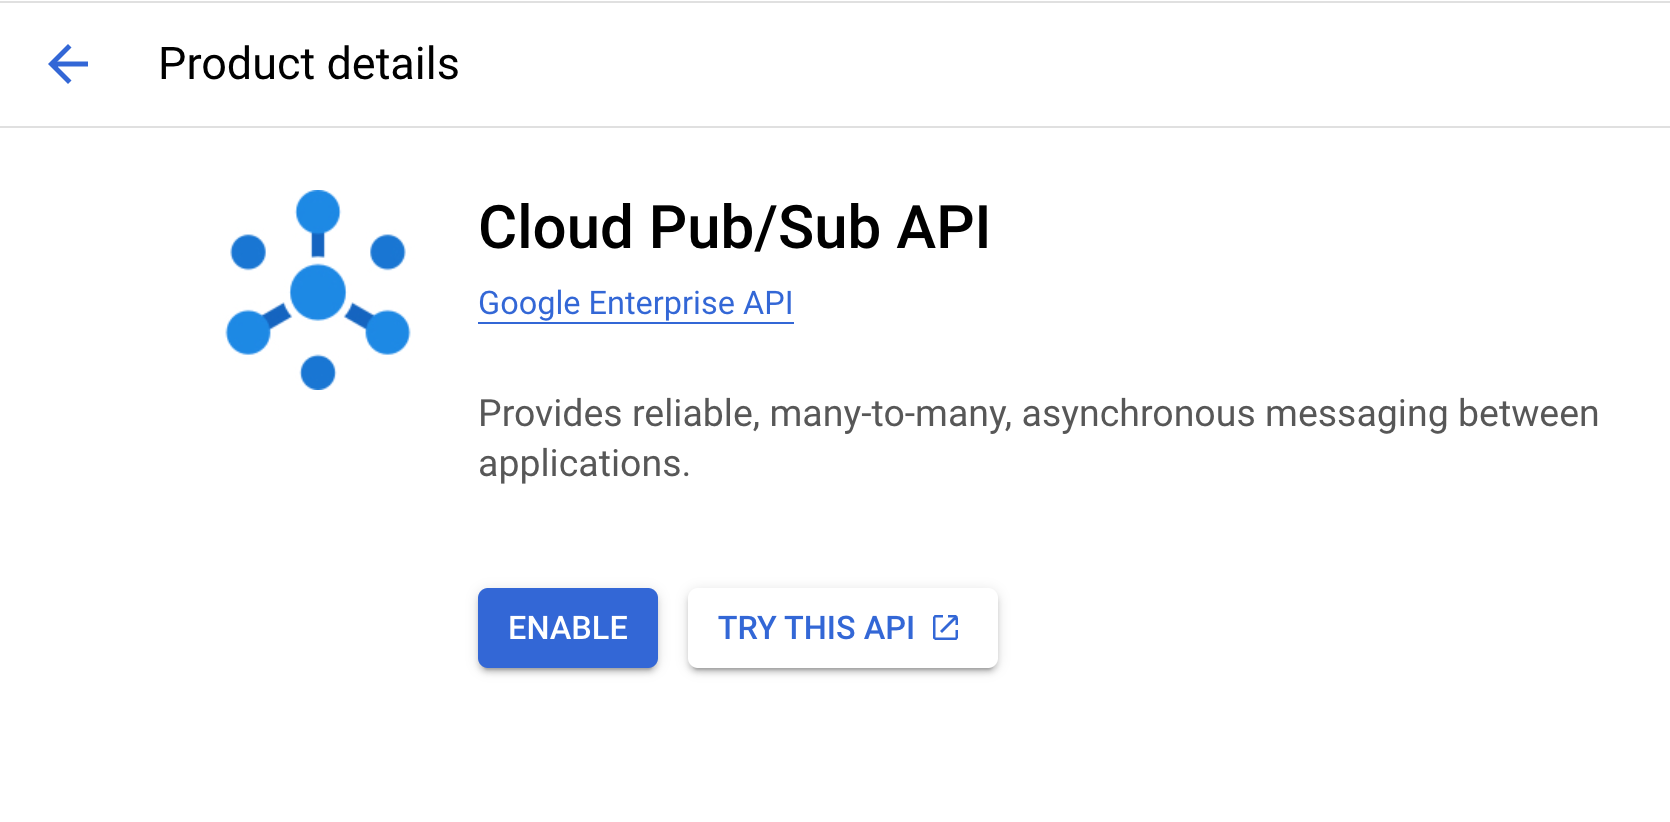
Search for and select Cloud Pub/Sub API
Click Enable
Note: If you encounter issues with API enablement, ensure you have the necessary permissions in your Google Cloud project.
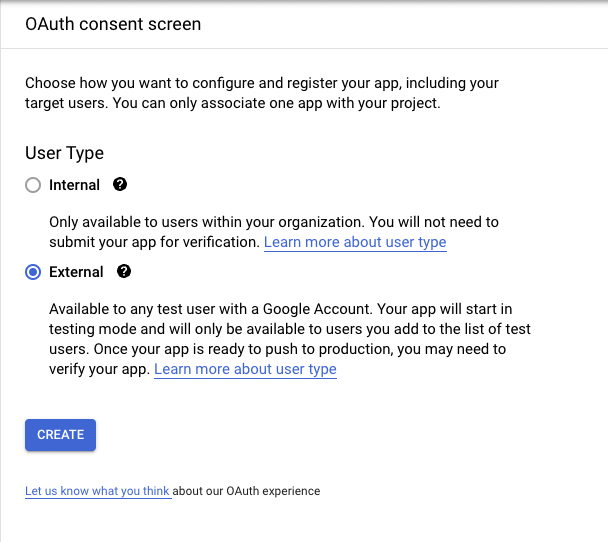
2. Set up the OAuth consent screen
Click OAuth consent screen on the left side
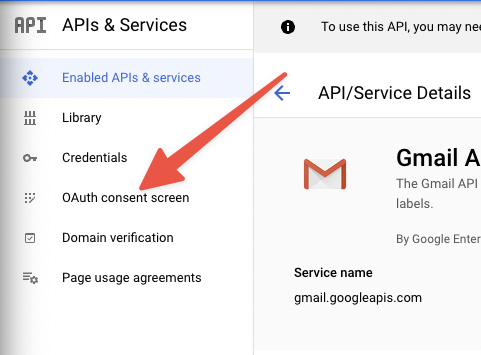
Set up the OAuth consent screen:
- Select User Type (Internal for Google Workspace users, External for others)
- Fill in required fields
- Add scopes:
email,profile,https://www.googleapis.com/auth/gmail.modify,https://www.googleapis.com/auth/gmail.settings.basic - Add your email as a test user
- Review and complete the setup
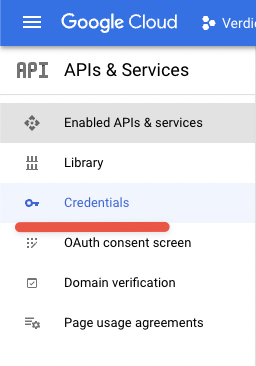
3. Create OAuth Credentials in Google and Custom OAuth Client in Pipedream
Navigate to the Credentials section on the left side.
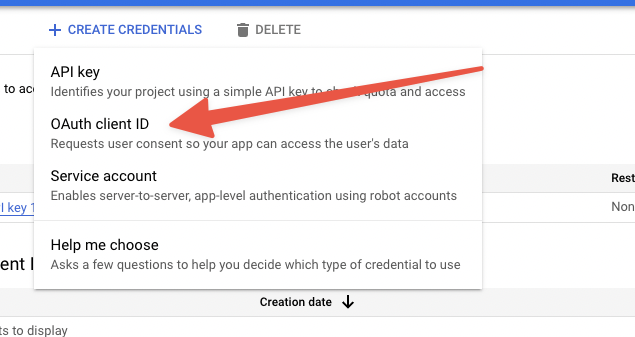
Click Create Credentials at the top and select OAuth client ID

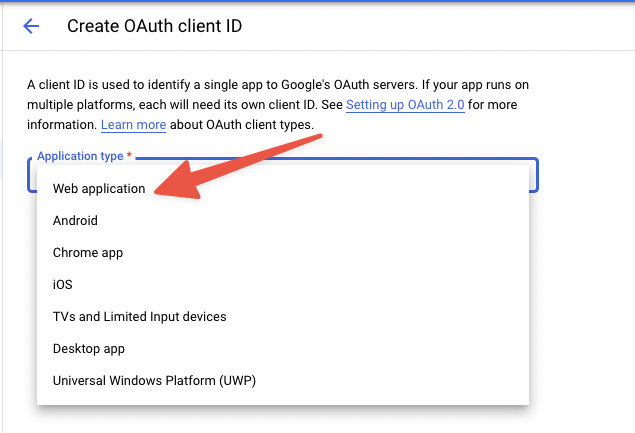
Select Web application for Application type
Name the app, e.g. "Pipedream".
In a new window, navigate to the Accounts page in Pipedream, and click OAuth Clients.
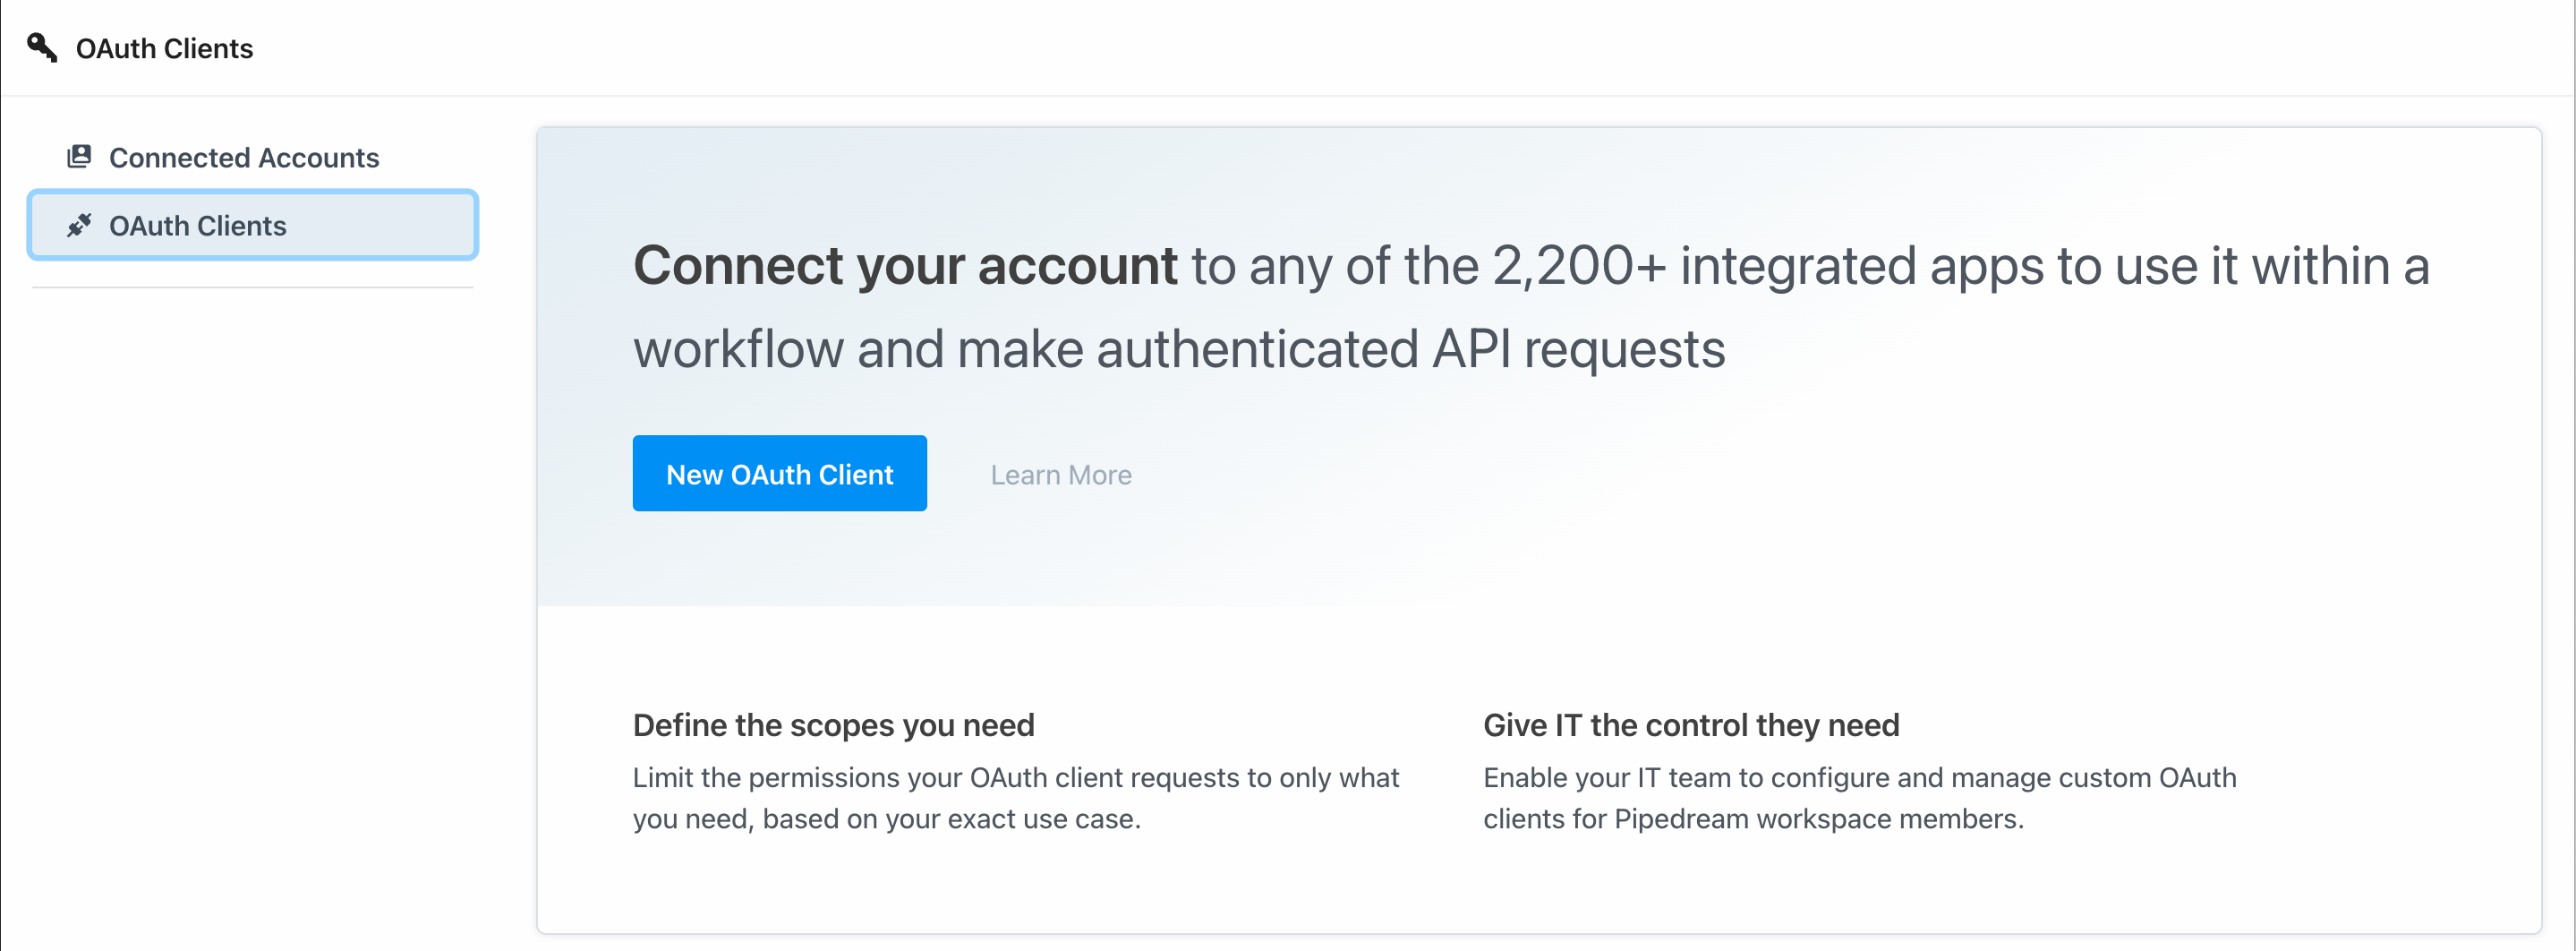
Click New OAuth Client, and search for Gmail.
Name your OAuth Client, and click Continue.
Copy the Redirect URI, and return to your previous window.
On your Google Cloud app configuration page, click Add URI and paste the Redirect URI from the previous step.
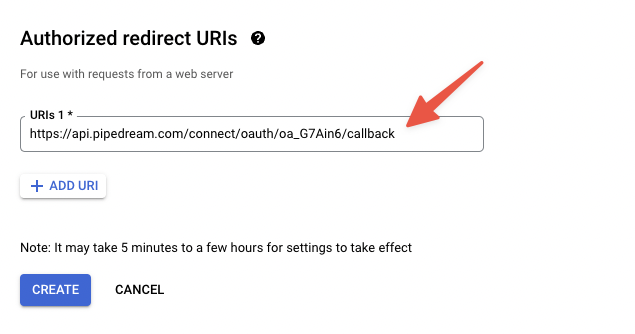
Click Create to create your new OAuth keys.
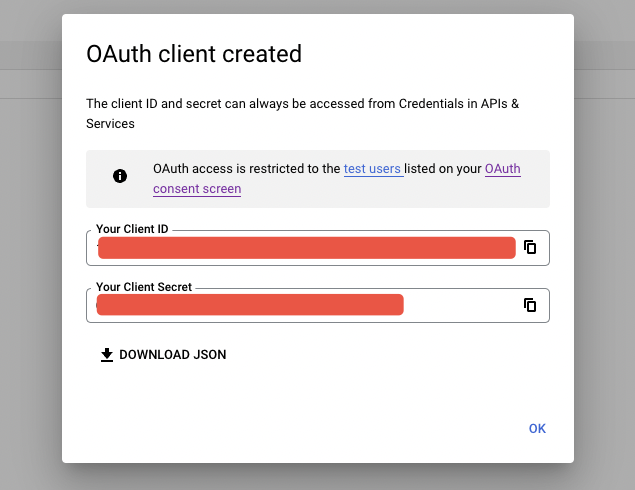
Copy the Client ID and Client Secret, and paste them in your OAuth Client configuration on Pipedream.
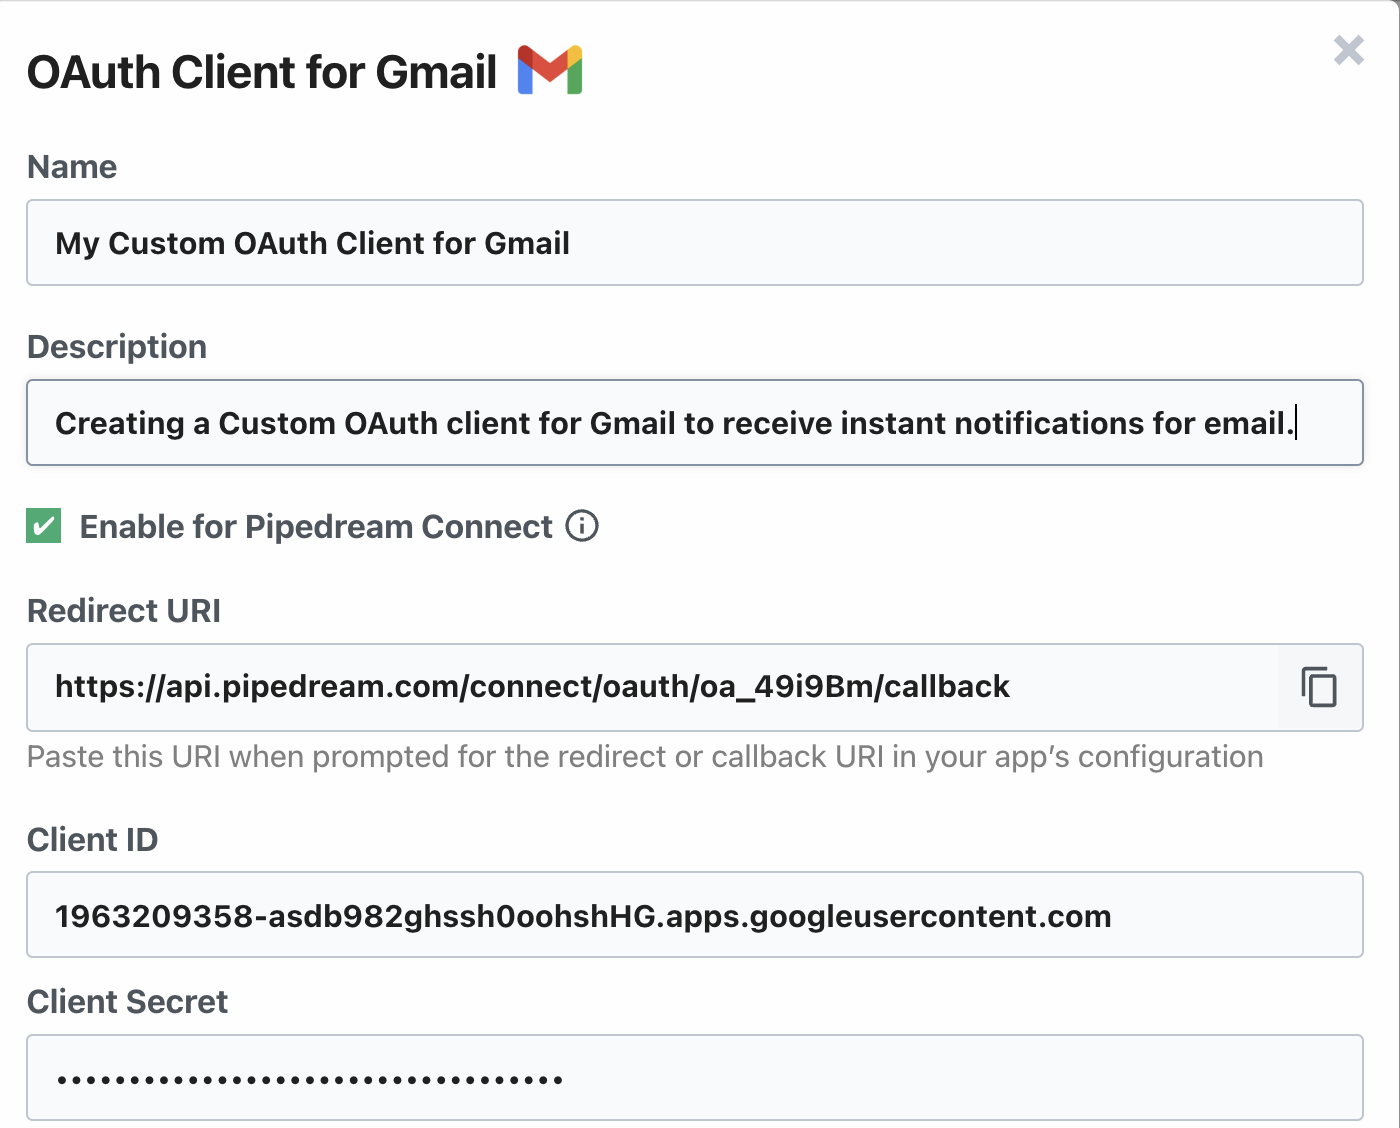
Important: When creating the OAuth client ID, make sure to copy the Redirect URI from Pipedream exactly as shown to avoid authentication errors.
4. Create service account
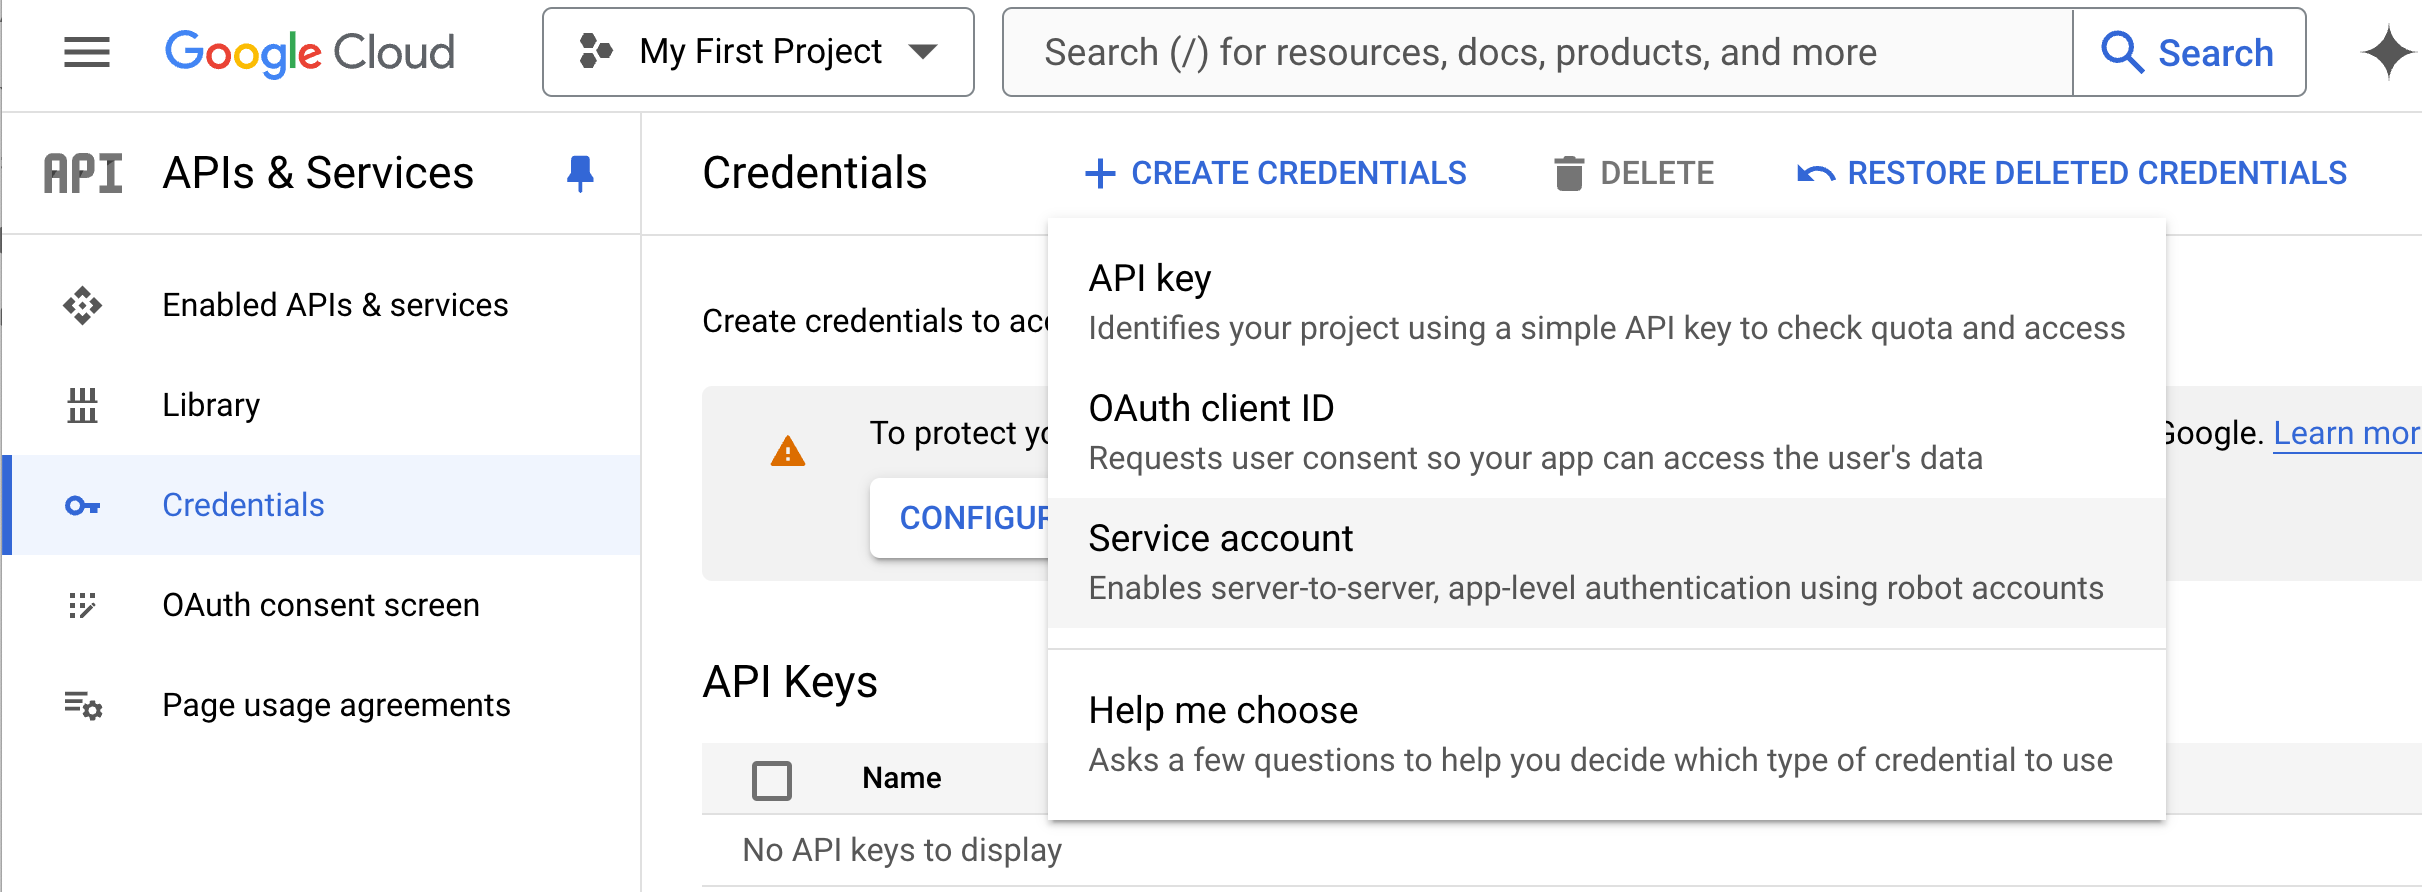
Navigate to Credentials under APIs & Services, and click Create Credentials > Service Account.
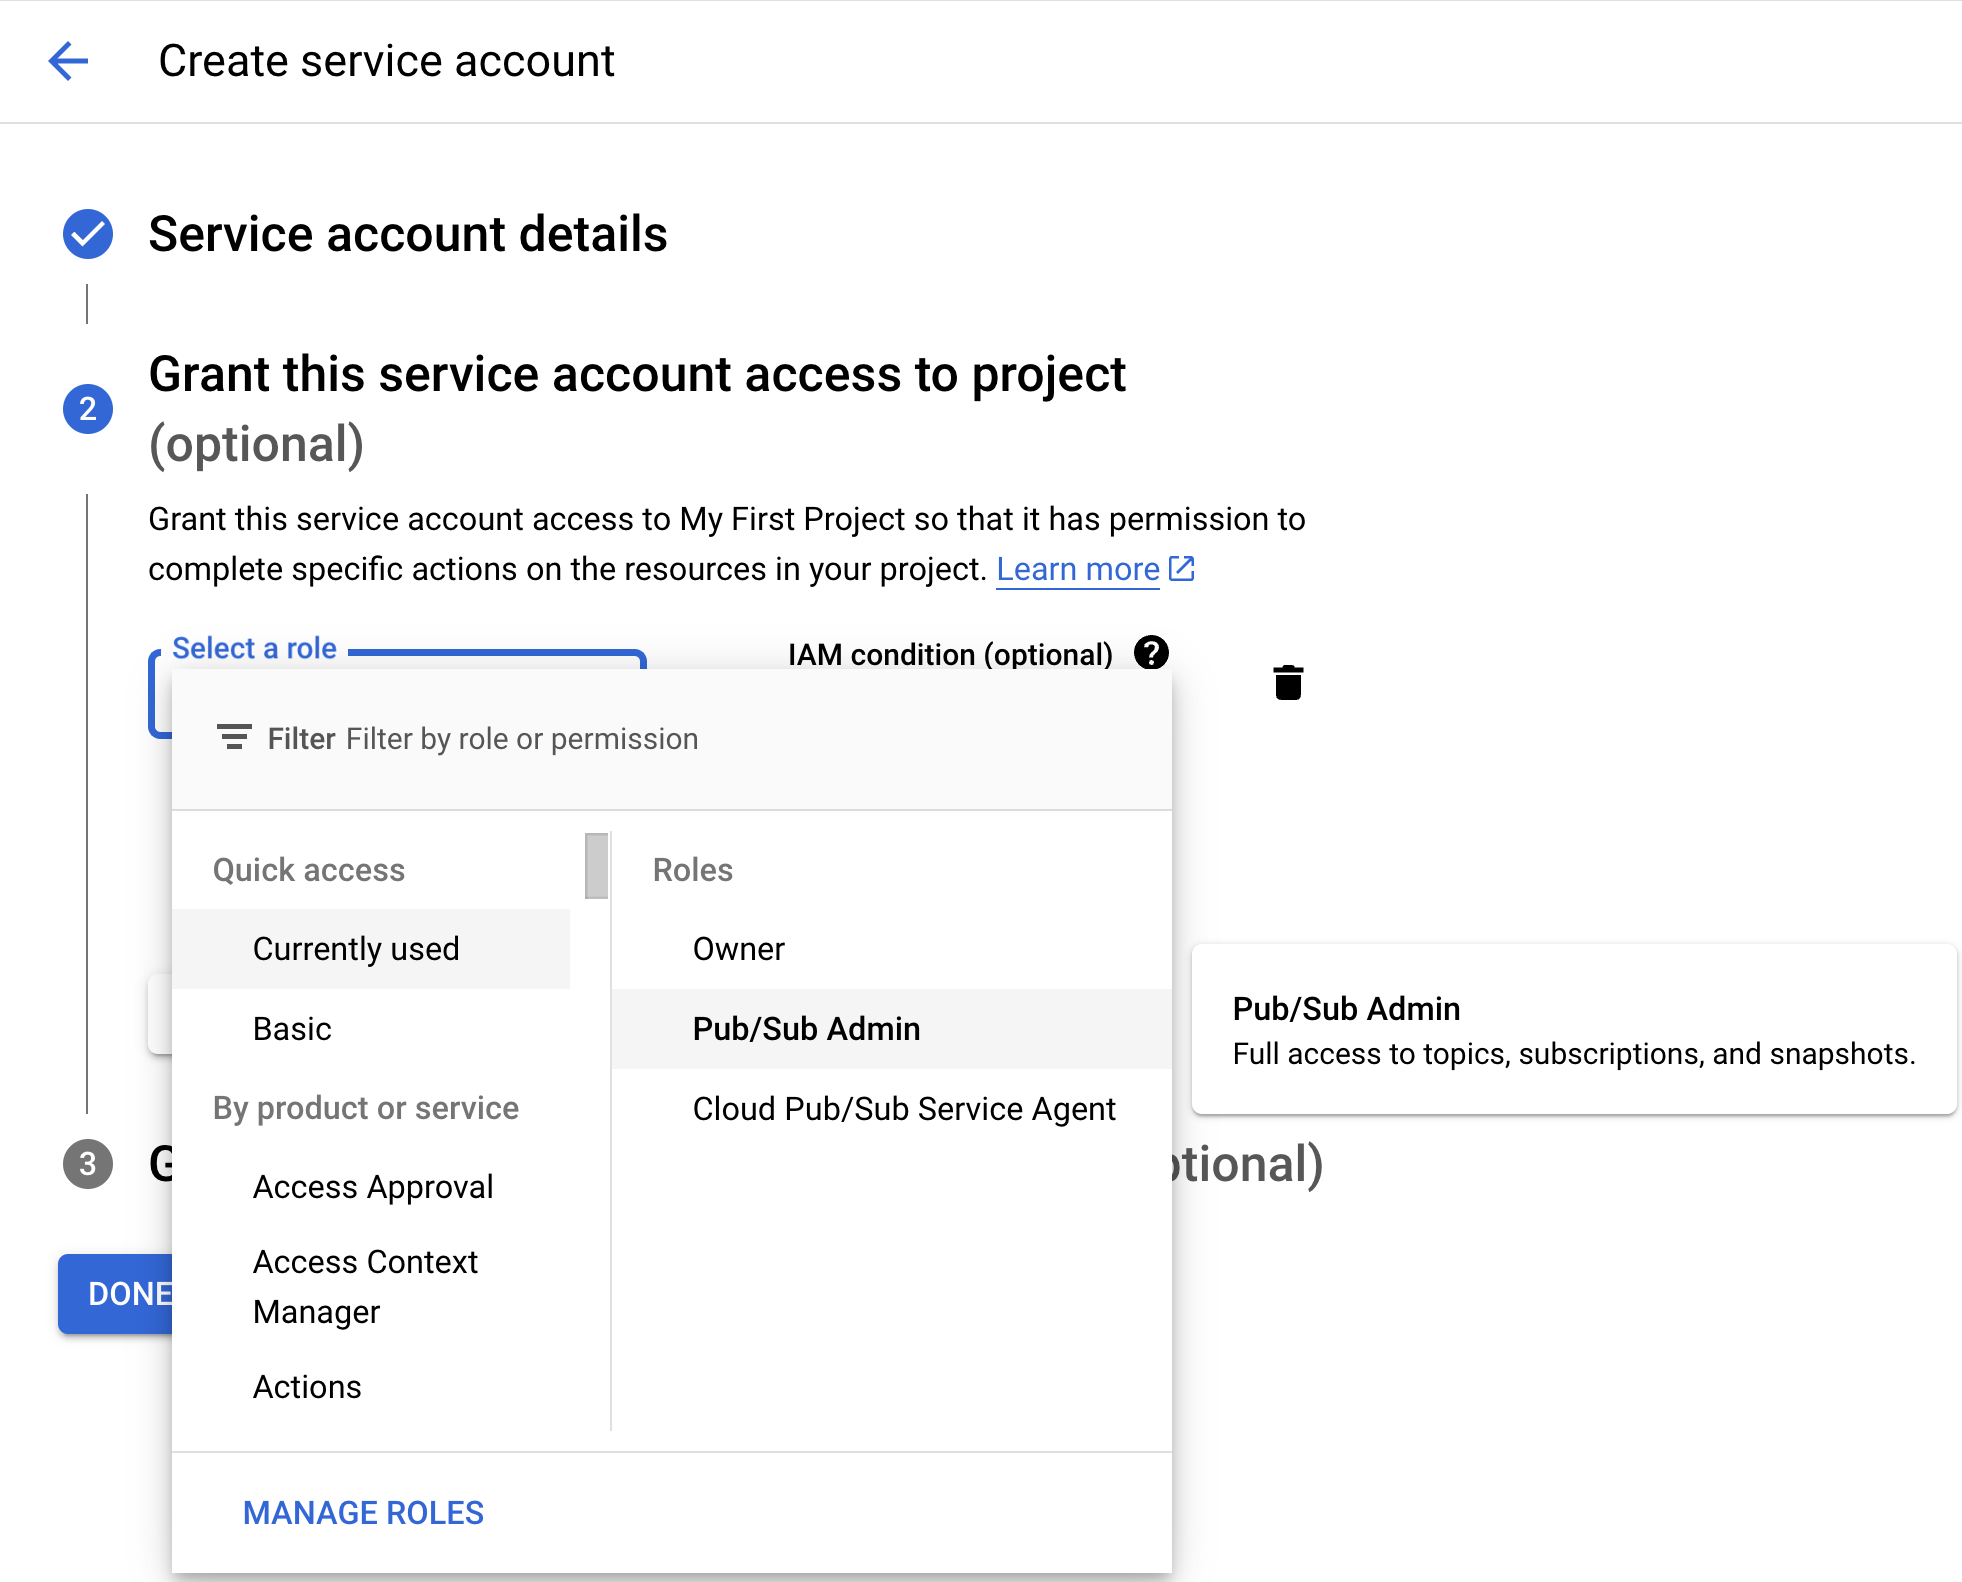
Add a name and description for your service account, and grant the service account the role Pub/Sub Admin, and click Done.
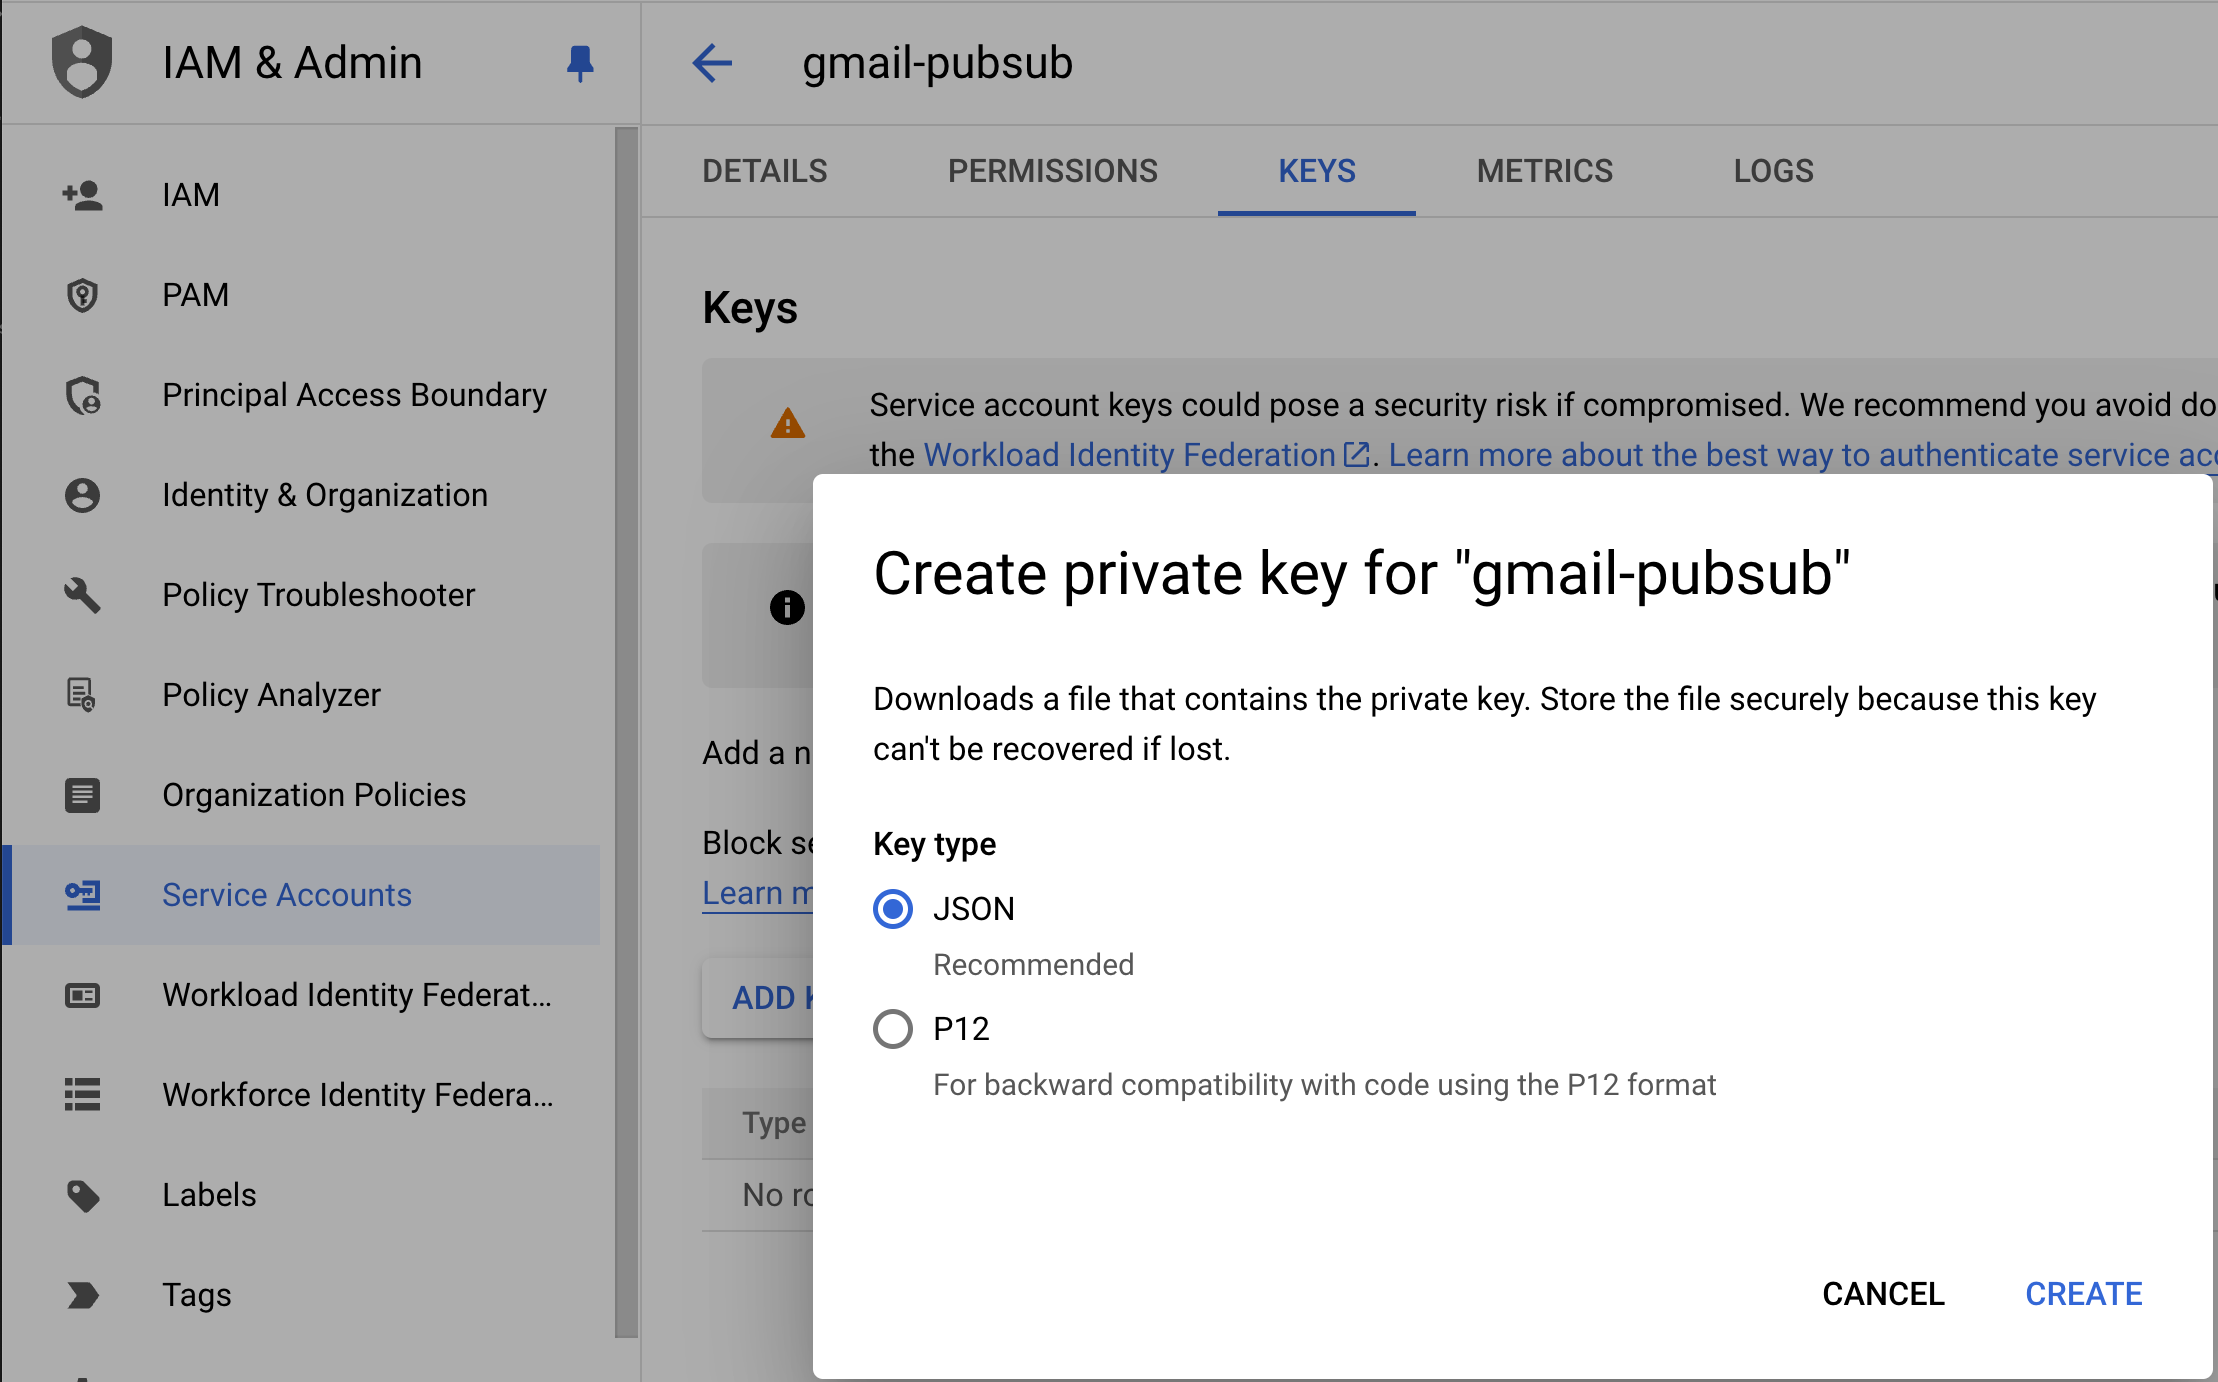
Click on the service account that you created, and click Keys > Add Key > Create New Key > JSON. This will download the service account JSON credentials to your computer. Be sure to save this securely.
5. Connect your Gmail account in Pipedream
- From the Pipedream Accounts page, click OAuth Clients. Next to your newly created Gmail client, click the three-dot menu on the righthand side and click Connect Account. Or you can also connect your account from the workflow builder, when configuring the Gmail trigger.
- While configuring the New Email Received trigger, you should be prompted to input your Service Account Key JSON.
6. Publish your custom Gmail app (required for External app type only)
Google has a 7 day expiration window on refresh tokens for External applications with a publishing status of "Testing", so you will need to Publish your application in order to maintain your account connection.
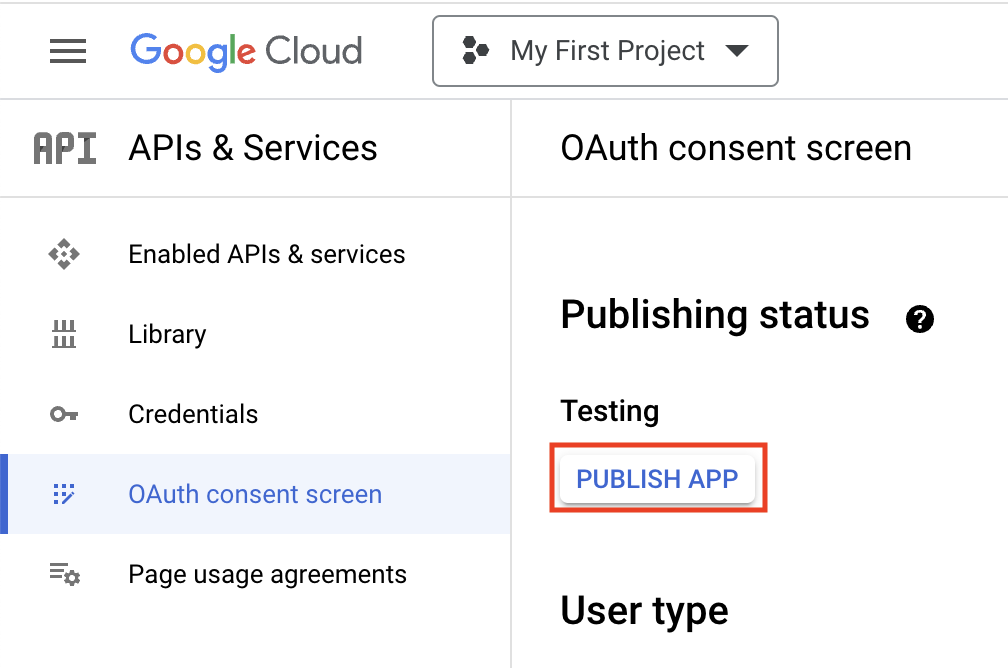
- Navigate to your application, and click OAuth Consent Screen on the lefthand sidebar.
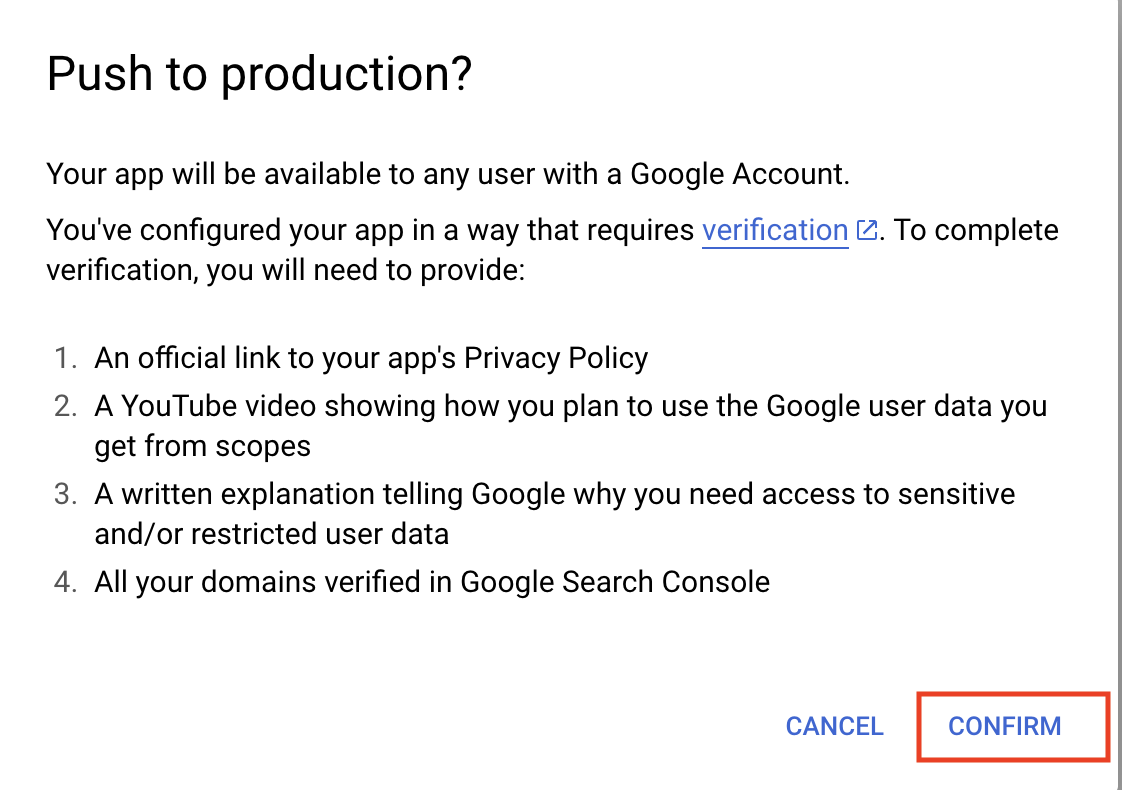
- Under Publishing status, click Publish App. If you included any sensitive or restricted scopes in your app, there will be a disclosure stating that you will need to go through the process of verification. Click Confirm.
- Your application will not be available externally unless you share your client_id with others, and you will not have to go through the verification process unless you intend to onboard over 100 users.
- The publishing status should be set to In production, and your account should maintain its connection without an expiration window.
Troubleshooting
- Authentication Failed: Double-check that your Redirect URI is correct and that you've added your email as a test user in the OAuth consent screen.
- API Not Enabled: Ensure both Gmail API and Pub/Sub API are enabled in your Google Cloud project.
- Service Account Issues: Verify that your service account has the "Pub/Sub Admin" role and that you've correctly pasted the JSON key into Pipedream.
If you continue to experience issues, please contact Pipedream support for further assistance.
