@lin-react/auto-redux
v0.1.12
Published
前言:借鉴于组内大佬的思路。 #### redux * 使用过redux的同学应该知道,redux每一个状态都需要编写特定的action和reducer,通过react-redux提供的hooks,useDispatch,useSelector去获取状态,派发aciton。比较麻烦。 * 基于需要编写action和Reducer这一点,开发一个可以根据最初的state,自动生成action,reducer,我们使用状态的时候只需要跟**useState等普通hooks一样**。
Downloads
2
Readme
前言:借鉴于组内大佬的思路。
redux
- 使用过redux的同学应该知道,redux每一个状态都需要编写特定的action和reducer,通过react-redux提供的hooks,useDispatch,useSelector去获取状态,派发aciton。比较麻烦。
- 基于需要编写action和Reducer这一点,开发一个可以根据最初的state,自动生成action,reducer,我们使用状态的时候只需要跟useState等普通hooks一样。
auto-redux介绍
yarn add @lin-react/auto-redux -Sauto-redux依赖于[email protected]以上的版本。话不多说,直接看如何使用。
store
store的生成跟我们平常使用的普通redux是一样的。如
普通的用法
import {
  createStore,
  bindActionCreators,
  combineReducers,
  applyMiddleware,
} from "/redux";


const defaultState

const reducer = ()=>{...}
const render2 = () => {....}

const rootReducer = combineReducers({
  reducer,
  reducer2,
});


const store = createStore(
  rootReducer,
  { reducer: 0, reducer: 2 },
);
使用auto-redux之后
import { createStore, applyMiddleware } from "redux";
import { initReducers } from "@lin-react/auto-redux";

import { initialState as personState } from "...";
import { initialState as homeState } from "...";
import { initialState as photoState } from "...";

const stateRoot = {
  person: personState,
  home: homeState,
  photo: photoState,
};

const defaultState = {
  profile: {
      user: 'test',
  },
  home: 'test',

  person: personState,
  home: homeState,
  photo: photoState,
};

const { autoActions, reducers } = initReducers(defaultState);

const store = createStore(reducers, defaultState);

export default store;
export { autoActions };
如上,我们只需要维护defaultState,通过模块分装,各个模块对应一个state。如home模块和Person模块等等。
那么如何获取和派发acitons呢?
- 我们选择抛弃掉繁杂的acitons和reducer编写,auto-redux已经帮助我们完成了。
- 我们只需要使用auto-redux提供的hooks即可连接react组件
连接react组件
- auto-redux提供三个hooks,借助autoActions,方便连接store和组件,
useReduxActions useReduxState useFetchAction useAutoRedux
useReduxActions用来派发修改store的值。useReduxState用来获取store的值。 他们的入参都是initReducer生成的actionuseFetchAction可以异步修改store的值,只需要传入想修改的aciton即可。useAutoRedux是useReduxActions和useReduxState的封装
import React, { useEffect } from 'react';
import { useFetchAction, useReduxActions, useReduxState, useAutoRedux} from '@lin-react/auto-redux';

import { autoActions } from './store';

function App(){
    //类似于下面两个
    const [home, setHome] = useAutoRedux(autoActions.home)
    //const [home] = useReduxState(autoActions.home)
    //const [setHome] = useReduxActions(autoActions.home)

    const [fn] = useFetchAction(autoActions.home, ()=>{return Promise.resolve('4')}, (data)=>{console.log(data)})

    useEffect(()=>{
        setTimeout(()=>{
          fn()
        },1000)
    },[])

    return <div>
        <button onClick={()=>setHome(home+1)}>{home}</button>
    </div>
}

export default App
main.tsx
import React from 'react'
import ReactDOM from 'react-dom/client'
import App from './App'
import './index.css'
import { Provider } from 'react-redux'
import store from './store'

ReactDOM.createRoot(document.getElementById('root')!).render(
  <React.StrictMode>
    <Provider store={store}>
    <App />
    </Provider>
  </React.StrictMode>
)
我们只需要跟useState一样去使用我们的store。即可派发action和获取store的值
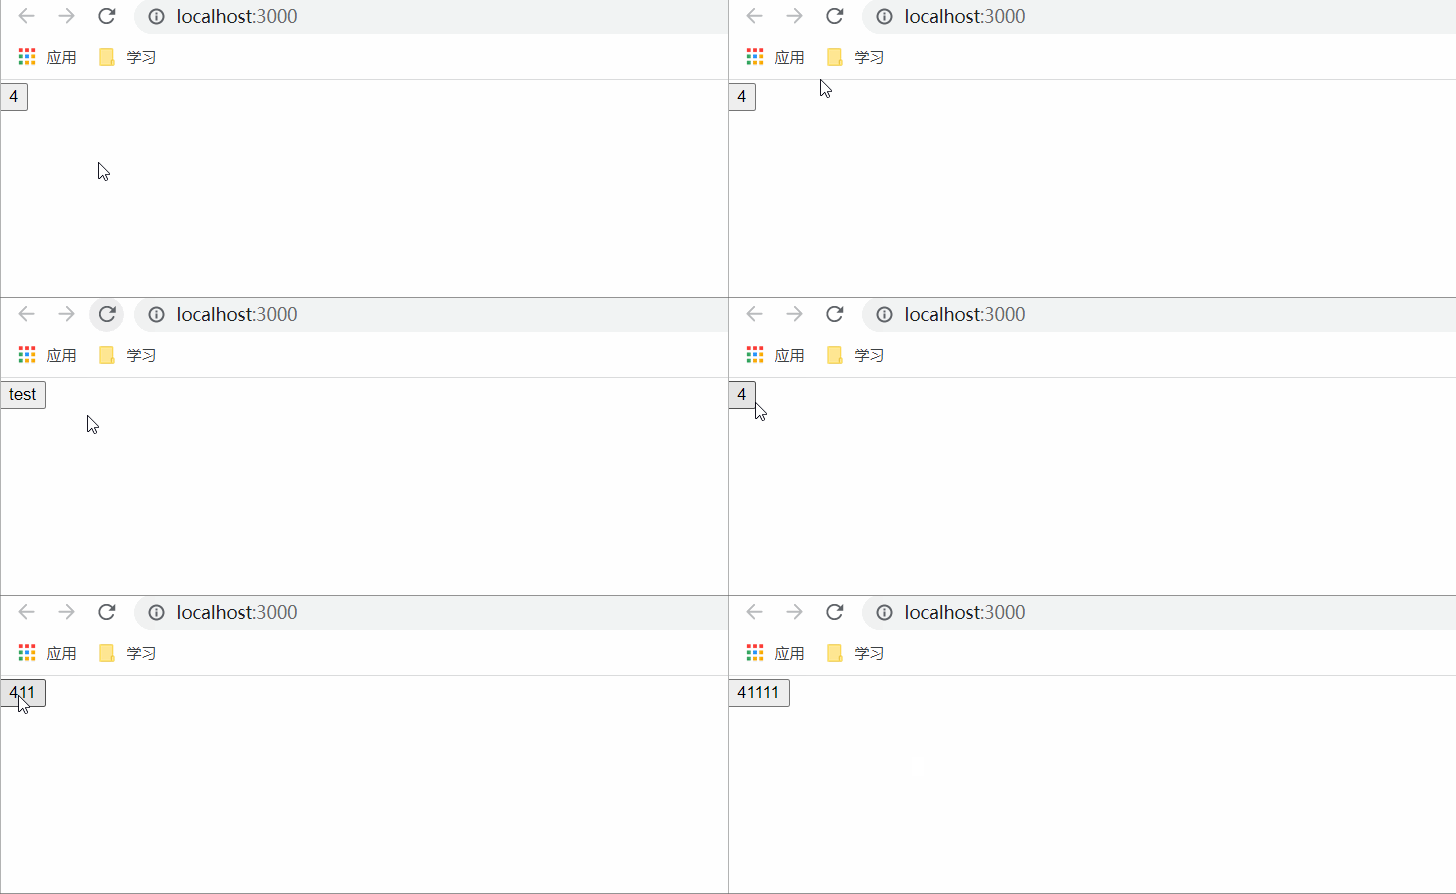
效果:
 如上,从test变成了4,点击后加字符串1。
注意事项
- 需要使用initReducers返回的autoActions去传递给auto-redux提供hooks使用。
- auto-redux支持两层数据结构,如
const defaultState = {
  profile: {
      user: 'test',
  },
  home: 'test',
  router: {
    location: {},
    match: {},
  },
};
类似于
const defaultState = {
  router: {
    location: {
        dd:123
    },
  },
};类似于这种,{dd:123}就是一个单独的action。
