@archetypeapi/portals
v0.1.3
Published
The Archetype Portals provides customer and pricing portals
Downloads
54
Keywords
Readme
Archetype Portals
The Archetype Portals provides customer and pricing portals
About Archetype
Archetype is the revenue infrastructure that make API monetization quick and painless. It works by integrating powerful, reliable purchase server with cross-platform support. Our open-source framework provides a backend and a wrapper around payment processors like Stripe to save engineers months from having to build custom billing infrastructure for their APIs.
Whether you are building a new API or already have millions of customers, you can use Archetype to:
- Fetch products, make purchases, and check subscription status with our native SDKs.
- Host add configure products remotely from our dashboard.
- Analyze the most important metrics for your app business in one place.
- See customer transaction histories, chart lifetime value, and grant promotional subscriptions.
Sign up to get started.
Documentation
If looking to use our APIs directly, the API reference is here.
With Archetype, you can keep track of all your app transactions in one place — whether your customers are charged through iOS, Android, or the web. As the single source of truth for your API business, we make sure your customers' subscription status is always up to date.
Installation
Explore the docs and view the quickstart guide
Install the package from NPM, @archetypeapi/portals
npm i @archetypeapi/portalsRequirements
react: "^18.1.0",
Usage
After installing the NPM package we can import the Customer Portal react component and then utilize it.
import { CustomerPortal } from "@archetypeapi/portals";
import "@archetypeapi/portals/dist/styles.css";
import "@archetypeapi/core/dist/styles.css";

export default function Home() {
  return (
    <div>
      <CustomerPortal
        token={"token_from_sdk"}
        stripePubKey={"stripe publishable key from stripe dashboard"}
        defaultView={"dashboard"}
      />
    </div>
  );
}
We will also need to import css files, This would be the root file in your react application or next.js application. This is important.
import "@archetypeapi/portals/dist/styles.css";
import "@archetypeapi/core/dist/styles.css";
The archetype web token is important in authentication a user and this can be genereated using the Archetype Python SDK or Archetype Node SDK on you backend servers. Please do no reveal the archetype app_id or api keys anywhere on the frontend.
The archetype web token expires every 60 minutes. After it expires the dashboard will display a session expired error.
This token needs to be reset and this can be done by creating a new token using the sdk.
Error Handling
The customer portals react component also has an error handling feature. You are able to send a useState handler as prop thought the react component and the linked state variable would get updated with the current error on customer portals. We can use this to handle error and can also be used to detect a session expired error and then regenerate the token.
const [err, errHandler] = useState < string > "";

useEffect(() => {
  // handle error here
}, [err]);

<CustomerPortal
  token={token}
  defaultView={"dashboard"}
  config={config}
  stripePubKey={stripeKey}
  errHandler={errHandler}
/>;
Custom configs
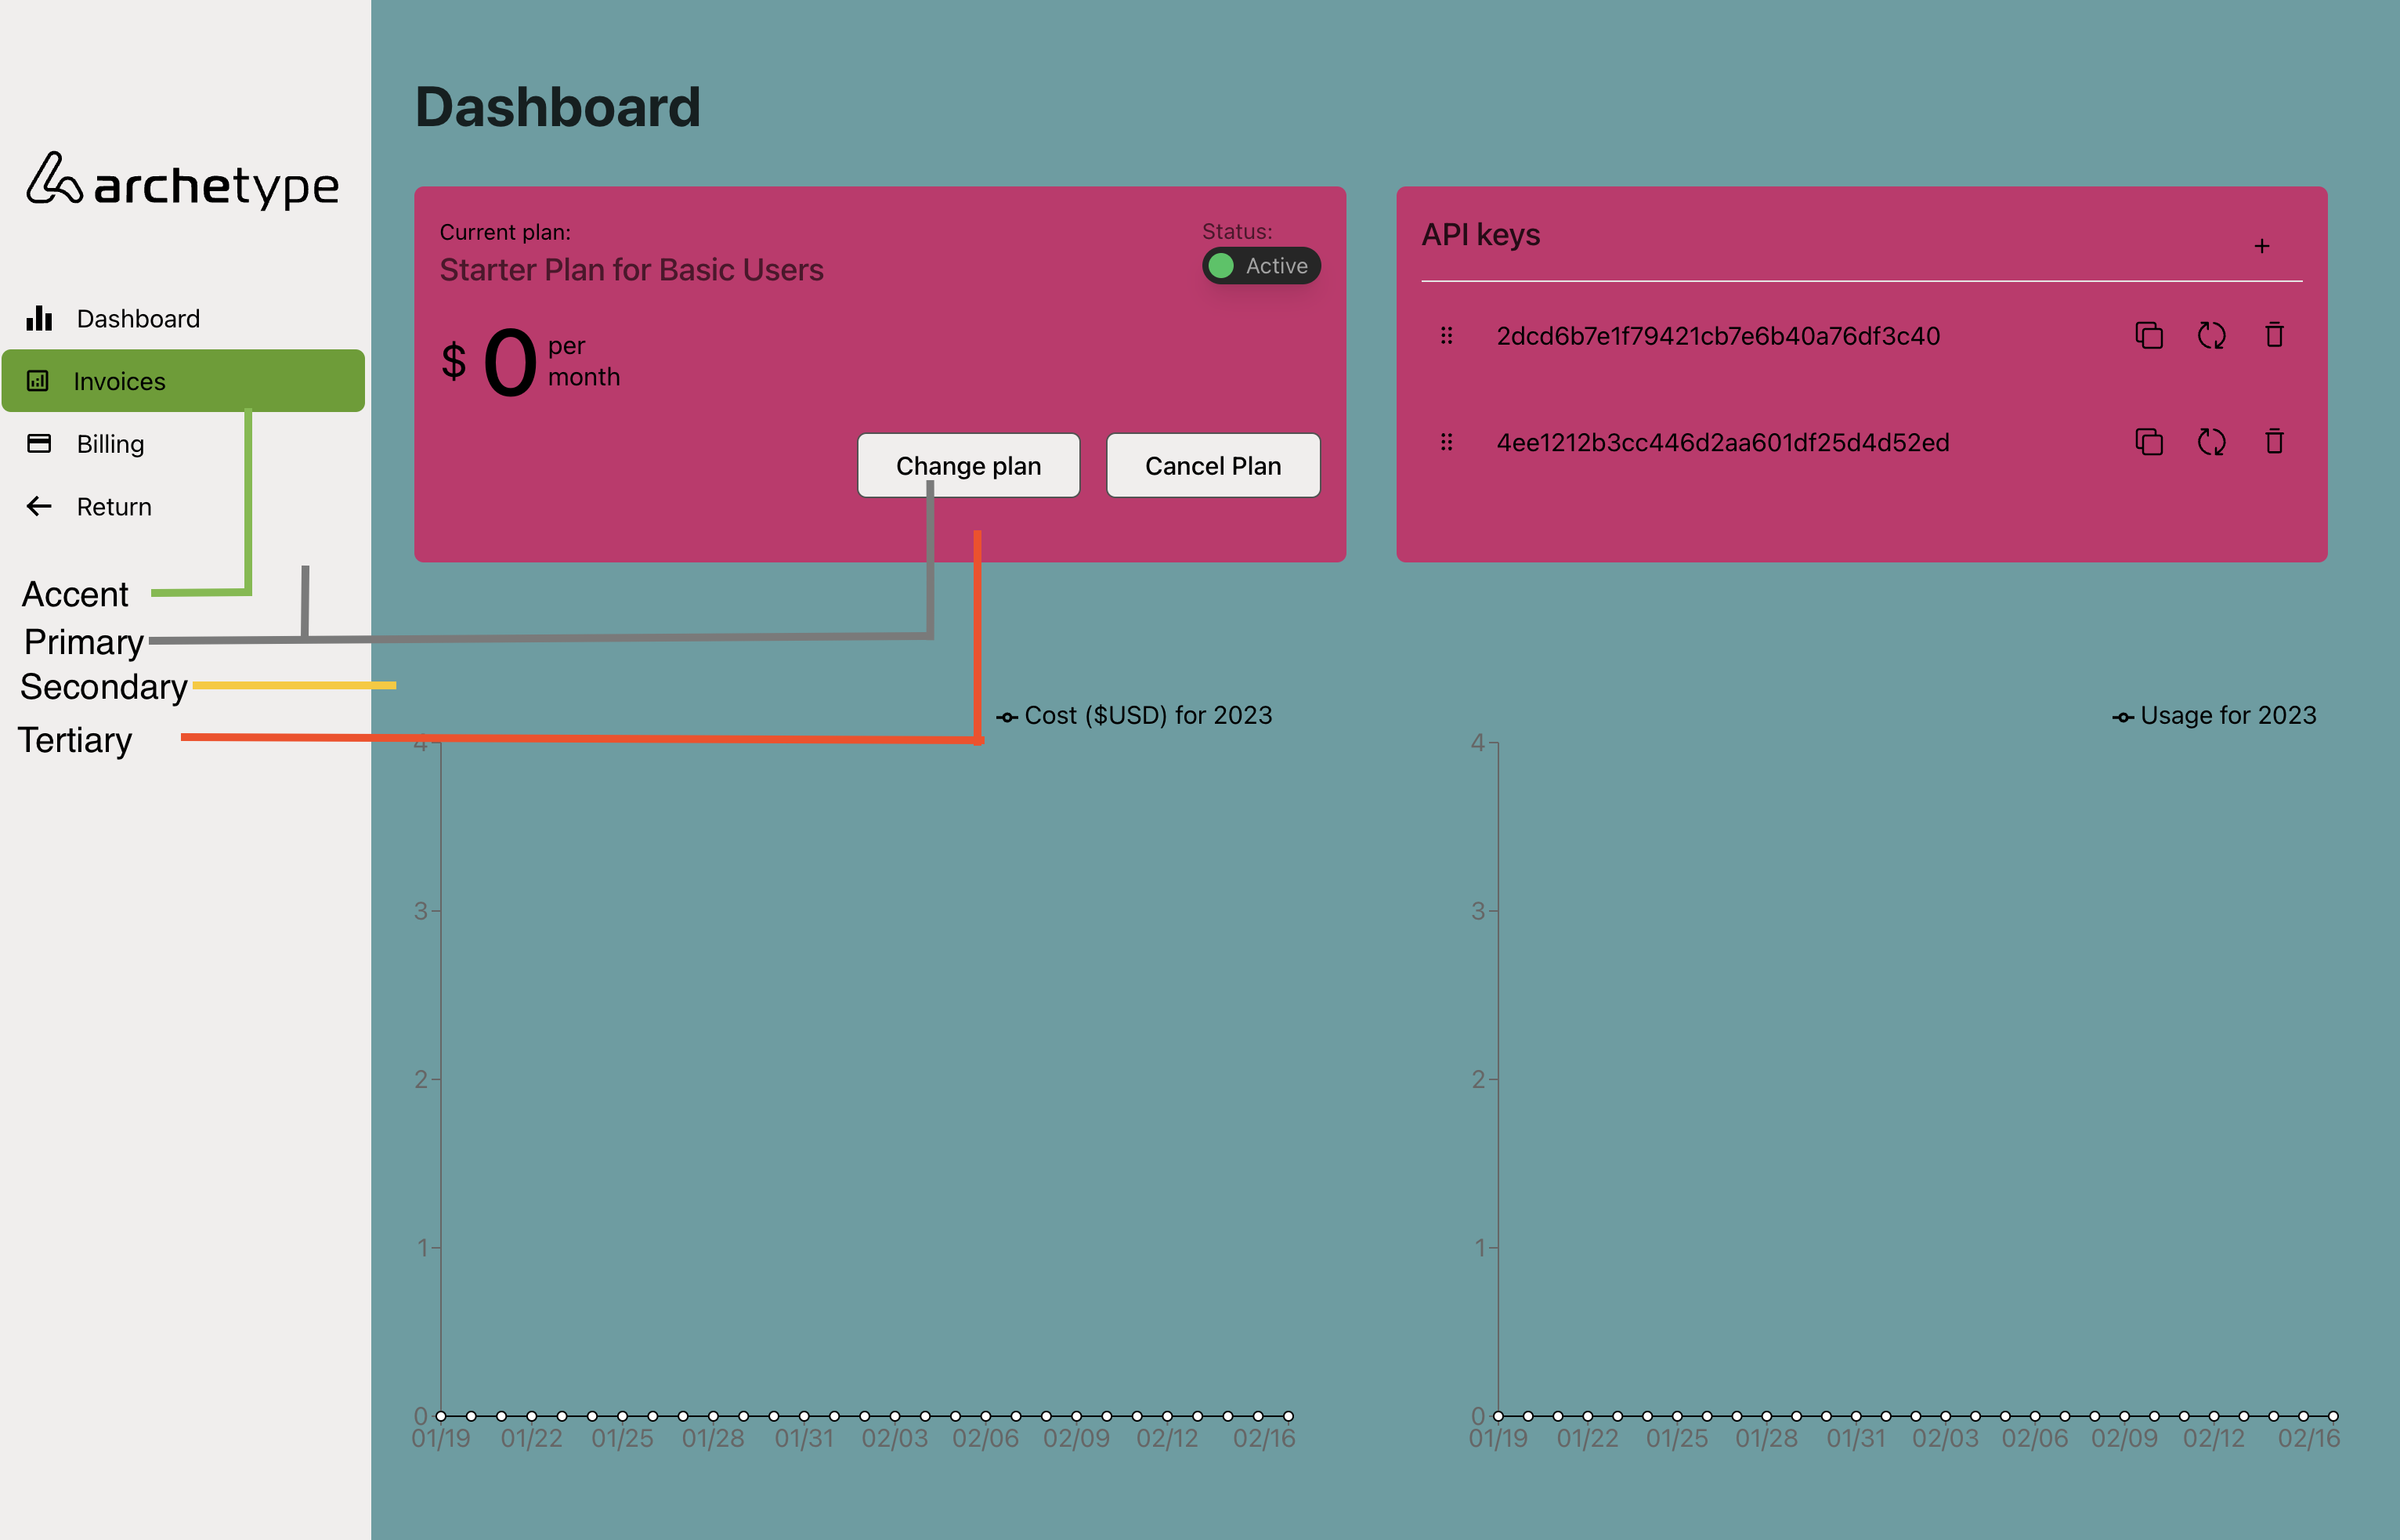
We can customize the UI and the logo on the sidebar by passing in a config object with the customer portal
eg:
const config = {
  primary: "#1c1c1c",
  secondary: "#525252",
  tertiary: "#383838",
  accent: "#05a36a",
  textDarkPrimary: false,
  textDarkSecondary: false,
  textDarkTertiary: false,
  logo: <Archetypelogo className="h-20 " />,
  returnHref: "/",
};

return (
  <CustomerPortal
    token={token}
    stripePubKey={stripeKey}
    defaultView={"dashboard"}
    config={config}
  />
);
- Primary : Main color, affects sidebar and buttons
- Secondary : Background color of the seperate tabs
- Tertiary : Background color of different cards in tabs
- textDarkPrimary : choose between black and white text color for the text on bg color primary
- textDarkSecondary : choose between black and white text color for the text on bg color secondary
- textDarkTertiary : choose between black and white text color for the text on bg color tertiary
- logo : this can be any react component, Ideally you can make an SVG of your company logo as a react component and then pass it through the config as shown above.
- returnHref : This is the return redirect href.
We can also choose what the initial view screen should be between the dashboard, invoices and the billing page. Default is dashboard.
defaultView = { defaultView }; //can choose b/w "dashboard" || "invoices" || "billing"Setting up backend server
The library needs to be configured with your account's app_id and secret key which is available in your Archetype Dashboard. Set archetype.app_id and archetype.secret_key to their values.
Please install express and node on your computer before testing the code below.
file Server.js
const express = require("express");

const tokenRouter = require("./token/Token");

const app = express();
port = 5002;

app.use("/token", tokenRouter);

app.listen(port, () => {
  console.log(`Example app listening on port ${port}`);
});
file: /token/Token.js
const express = require("express");
const router = express.Router();
const { ArchetypeApi } = require("@archetypeapi/node");

// For the application to work as expected,
// these env variables need to be available.
const appId = "{your prod token}";
const appSecret = "{your prod secret key}";

const Archetype = ArchetypeApi(appId, appSecret);

router.get("/", function (req, res, next) {
  res.send("respond with a token resource");
});

router.get("/getToken", async (req, res) => {
  // You can get this customer id dynamically through the request
  const data = await Archetype.Token.getCustomerPortalsToken("test1");
  res.send({
    message: "Success",
    data: data,
  });
});

module.exports = router;