@amaplex-software/analytics-google-tag-manager
v0.5.4
Published
Google tag manager plugin for 'analytics' module
Downloads
14
Maintainers
Readme
Google Tag Manager plugin for analytics
Integration with google tag manager for analytics
This analytics plugin will load google tag manager into your application.
For more information see the docs.
- Installation
- How to use
- Platforms Supported
- Browser usage
- Additional examples
- Configuring GTM
- Using multiple instances of GTM
- Custom name for dataLayer-object
- Tracking if JS is disabled
Installation
Install analytics and @analytics/google-tag-manager packages
npm install analytics
npm install @analytics/google-tag-manager
How to use
The @analytics/google-tag-manager package works in the browser. To use, install the package, include in your project and initialize the plugin with analytics.
Below is an example of how to use the browser plugin.
import Analytics from 'analytics'
import googleTagManager from '@analytics/google-tag-manager'

const analytics = Analytics({
  app: 'awesome-app',
  plugins: [
    googleTagManager({
      containerId: 'GTM-123xyz'
    })
  ]
})

/* Track a page view */
analytics.page()

/* Track a custom event */
analytics.track('cartCheckout', {
  item: 'pink socks',
  price: 20
})
After initializing analytics with the googleTagManager plugin, data will be sent into Google Tag Manager whenever analytics.page, or analytics.track are called.
See additional implementation examples for more details on using in your project.
Platforms Supported
The @analytics/google-tag-manager package works in the browser
Browser usage
The Google Tag Manager client side browser plugin works with these analytic api methods:
- analytics.page - Sends page views into Google Tag Manager
- analytics.track - Track custom events and send to Google Tag Manager
Browser API
import Analytics from 'analytics'
import googleTagManager from '@analytics/google-tag-manager'

const analytics = Analytics({
  app: 'awesome-app',
  plugins: [
    googleTagManager({
      containerId: 'GTM-123xyz'
    })
  ]
})
Configuration options for browser
| Option | description |
|:---------------------------|:-----------|
| containerId required - string| The Container ID uniquely identifies the GTM Container. |
| dataLayerName optional - string| The optional name for dataLayer-object. Defaults to dataLayer. |
| customScriptSrc optional - string| Load Google Tag Manager script from a custom source |
| preview optional - string| The preview-mode environment |
| auth optional - string| The preview-mode authentication credentials |
| execution optional - string| The script execution mode |
Additional examples
Below are additional implementation examples.
Below is an example of importing via the unpkg CDN. Please note this will pull in the latest version of the package.
<!DOCTYPE html>
<html>
  <head>
    <title>Using @analytics/google-tag-manager in HTML</title>
    <script src="https://unpkg.com/analytics/dist/analytics.min.js"></script>
    <script src="https://unpkg.com/@analytics/google-tag-manager/dist/@analytics/google-tag-manager.min.js"></script>
    <script type="text/javascript">
      /* Initialize analytics */
      var Analytics = _analytics.init({
        app: 'my-app-name',
        plugins: [
          analyticsGtagManager({
            containerId: 'GTM-123xyz'
          })
        ]
      })

      /* Track a page view */
      analytics.page()

      /* Track a custom event */
      analytics.track('cartCheckout', {
        item: 'pink socks',
        price: 20
      })
    </script>
  </head>
  <body>
    ....
  </body>
</html>
Using @analytics/google-tag-manager in ESM modules.
<!DOCTYPE html>
<html>
  <head>
    <title>Using @analytics/google-tag-manager in HTML via ESModules</title>
    <script>
      // Polyfill process.
      // **Note**: Because `import`s are hoisted, we need a separate, prior <script> block.
      window.process = window.process || { env: { NODE_ENV: 'production' } }
    </script>
    <script type="module">
      import analytics from 'https://unpkg.com/analytics/lib/analytics.browser.es.js?module'
      import analyticsGtagManager from 'https://unpkg.com/@analytics/google-tag-manager/lib/analytics-plugin-google-tag-manager.browser.es.js?module'
      /* Initialize analytics */
      const Analytics = analytics({
        app: 'analytics-html-demo',
        debug: true,
        plugins: [
          analyticsGtagManager({
            containerId: 'GTM-123xyz'
          })
          // ... add any other third party analytics plugins
        ]
      })

      /* Track a page view */
      analytics.page()

      /* Track a custom event */
      analytics.track('cartCheckout', {
        item: 'pink socks',
        price: 20
      })
    </script>
  </head>
  <body>
    ....
  </body>
</html>
Configuring GTM
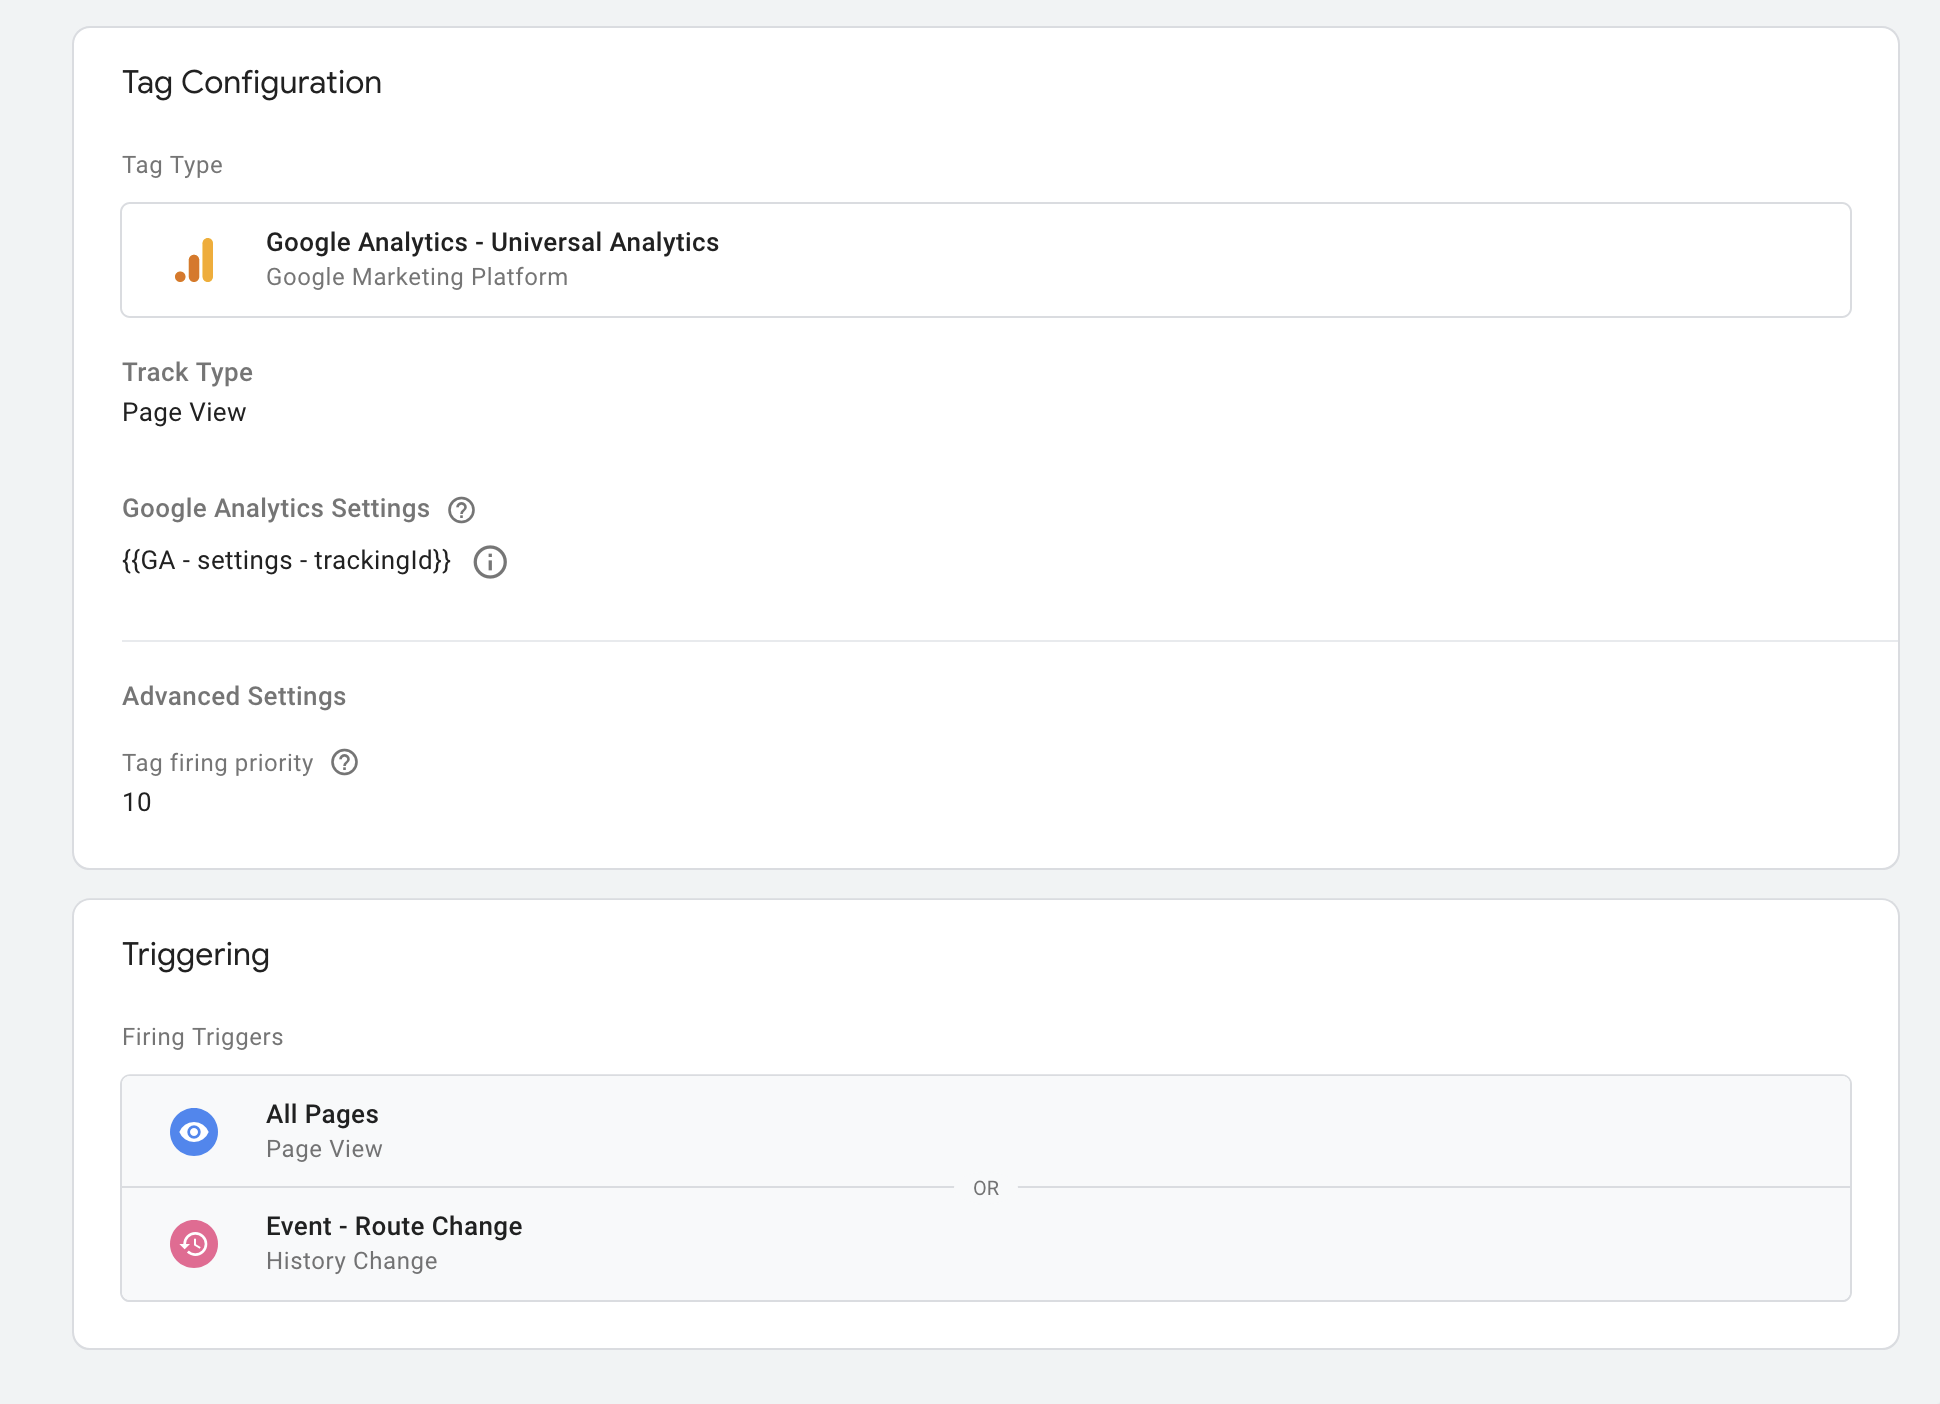
Make sure you have your google tags manager setup to fire on Page views.
Please see this example on wiring up "virtual page views" in google tag manager.
If you are using a SPA you want to listen to history changes as well.

See the full list of analytics provider plugins in the main repo.
Using multiple instances of GTM
As noted in the GTM docs, it's possible to load multiple instances of google tag manager on the page. This method is not exactly recommended by analytics experts if you can avoid it by using a single container. But if you must! You can!
import Analytics from 'analytics'
import googleTagManager from '@analytics/google-tag-manager'

const GTMOne = googleTagManager({ containerId: 'GTM-123xyz' })
// For instance 2, override the plugin 'name' and provide the 2nd GTM container ID
const GTMTwo = Object.assign({}, googleTagManager({ containerId: 'GTM-456abc'}), {
  name: 'google-tag-manager-two'
})

// Load up analytics
const analytics = Analytics({
  app: 'awesome-app',
  plugins: [
    GTMOne,
    GTMTwo
  ]
})

// Both instances will be loaded into the page
This functionality has been added by the wonderful @zobzn!
Custom name for dataLayer-object
The dataLayer is by default set to window.dataLayer. This can be changed by setting dataLayerName in plugin configuration.
import Analytics from 'analytics'
import googleTagManager from '@analytics/google-tag-manager'

const analytics = Analytics({
  app: 'awesome-app',
  plugins: [
    googleTagManager({
      containerId: 'GTM-123xyz',
      dataLayerName: 'customDataLayer',
    })
  ]
})
// dataLayer is initialized to window.customDataLayer
Tracking if JS is disabled
The analytics library will load the Google Tag manager javascript onto the page. This will work for every web site visitor that has javascript enabled.
For the small number of people who might have javascript disabled you will want to add the following <noscript> tags to the HTML of your site as outlined in GTM install docs
Add the following HTML to your site & replace GTM-XXXX with your container ID.
<!-- Google Tag Manager (noscript) -->
<noscript><iframe src="https://www.googletagmanager.com/ns.html?id=GTM-XXXX"
height="0" width="0" style="display:none;visibility:hidden"></iframe></noscript>
<!-- End Google Tag Manager (noscript) -->
If you are using multiple containers, you will want to add one <noscript> tag for each.
These days, apps typically don't even work without JS enabled & users must turn in on to use a site. So it's up to you & your use case if you want to add the additional <noscript> tags.
